Barrel Cannon Canyon: Difference between revisions
m (→Bonus Areas) |
Pifouillou (talk | contribs) m (→Enemies) Tag: Mobile edit |
||
| (33 intermediate revisions by 13 users not shown) | |||
| Line 1: | Line 1: | ||
{{distinguish|Cannon Canyon}} | {{distinguish|Cannon Canyon}} | ||
{{ | {{level infobox | ||
|image=[[File:Barrel Cannon Canyon.png]] | |||
|image=[[File:Barrel Cannon Canyon.png | |||
|code=1 - 5 | |code=1 - 5 | ||
|world=[[Kongo Jungle]] | |world=[[Kongo Jungle]] | ||
|game=''[[Donkey Kong Country]] | |game=''[[Donkey Kong Country]] | ||
|before=[[Coral Capers|<<]] | |before=[[Coral Capers|<<]] | ||
|after=[[Very Gnawty's Lair|>>]] | |after=[[Very Gnawty's Lair|>>]] | ||
| | |track=[[DK Island Swing]] | ||
}} | }} | ||
'''Barrel Cannon Canyon''' is the fifth level of ''[[Donkey Kong Country]]''. It is also the fifth and last regular level of [[Kongo Jungle]]. | '''Barrel Cannon Canyon''', also named '''Barrel Canyon''',<ref>{{cite|date=November 1994|title=''Nintendo Magazine System'' (UK) issue 26 (NMS Special)|page=12}}</ref> is the fifth level of ''[[Donkey Kong Country]]''. It is also the fifth and last regular level of [[Kongo Jungle]]. It takes place in the jungle, and is considered the hardest level of its world, which it is the penultimate and longest one of. As its name suggests, Barrel Cannon Canyon involves blasting [[Donkey Kong]] and [[Diddy Kong]] across numerous abysses via [[Barrel Cannon]]s and [[Blast Barrel]]s. This also occurs in [[Tree Top Town]] and [[Snow Barrel Blast]]. The [[Kong]]s must carefully time when to fire from some of the Barrel Cannons, or otherwise they fall down a pitfall. | ||
The Kongs can shortcut through portions of the level by blasting from a Blast Barrel on top of the level entrance, and then a few more from more Blast Barrels above treetops later in the stage. Each of these treetops are located in between two abysses with a chain of Barrel Cannons. | |||
==Layout== | ==Layout== | ||
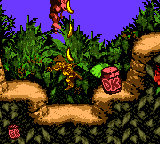
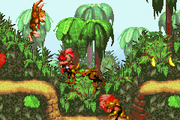
[[Donkey Kong|Donkey]] and [[Diddy Kong]] begin the level by exiting a tunnel with | {{multiframe|[[File:BarrelCannonCanyon-GBC-1.png]] [[File:BarrelCannonCanyon-GBA-1.png|180px]]|Barrel Cannon Canyon, as it appears in the Game Boy Color version (top) and the Game Boy Advance version (bottom)|align=left|size=200}} | ||
[[Donkey Kong|Donkey]] and [[Diddy Kong]] begin the level by exiting a tunnel with a Blast Barrel above it, which can blast them to a treetop farther into the level, where another Blast Barrel is located that can blast them ahead to the second [[DK Barrel]] in the level. If the Kongs continue along the main path of the level, they can find two Kritters marching ahead of a Barrel Cannon that is able to fire them into the air and into the [[KONG Letters|letter K]]. A ledge stands next to the barrel with a piece of the ground that the Kongs can land on to break it and reveal a [[DK Barrel]]. A cliff is ahead of here with a hidden area ahead of it, containing a [[Winky]] [[animal token|Token]], and a piece of land is positioned behind the area that the Kongs can walk along. They are attacked by hopping Kritters as they move across this area, soon reaching a ledge with another Barrel Cannon at the bottom of it, which can blast them over a nearby abyss and into a pair of Kritters. | |||
[[File:BarrelCannonCanyon-SNES-2.png|thumb|The characters shoot past some [[Zinger]]s.]] | [[File:BarrelCannonCanyon-SNES-2.png|thumb|The characters shoot past some [[Zinger]]s.]] | ||
More Kritters walk in a lower area on the sides of a small pit. The pit is followed by a long, straight pathway with a few more Kritters and a raised piece of land on it. A Barrel Cannon sits on the raised ground, able to be used to blast into a barrel higher in the air that can carry the heroes into some [[banana]]s. An abyss containing four Barrel Cannons that move in horizontal paths when entered is ahead, and they can use them to cross it. As they blast over the pit, they fire past the letter O. The final barrel shoots them high into the air onto a treetop with a DK Barrel on it. The heroes can find an alcove ahead of here with a trio of Kritters hopping in it. They can also find an abyss soon after it that contains a mixture of many Barrel Cannons and | More Kritters walk in a lower area on the sides of a small pit. The pit is followed by a long, straight pathway with a few more Kritters and a raised piece of land on it. A Barrel Cannon sits on the raised ground, able to be used to blast into a barrel higher in the air that can carry the heroes into some [[banana]]s. An abyss containing four Barrel Cannons that move in horizontal paths when entered is ahead, and they can use them to cross it. As they blast over the pit, they fire past the letter O. The final barrel shoots them high into the air onto a treetop with a DK Barrel on it. The heroes can find an alcove ahead of here with a trio of Kritters hopping in it. They can also find an abyss soon after it that contains a mixture of many Barrel Cannons and Blast Barrels, which move in either horizontal or vertical paths. The final barrel in this area blast the heroes over a long pathway and into the level's [[Star Barrel|Continue Barrel]]. | ||
The primates can find an alcove with a Kritter hopping in it ahead of here. A DK Barrel wobbles on a slightly higher piece of ground next to it. Two smaller alcoves are ahead, with two Kritters jumping around them. The second alcove contains a [[TNT Barrel]] that can be used to blast open the hidden entrance to a [[Bonus Level]]. A lower area consisting of a lone Kritter can be found nearby with a small pit after it. This pit is followed by a large area of land with a raised piece of ground in the center of it. Two Kritters jump on top of it, surrounding a barrel that can blast the heroes to | The primates can find an alcove with a Kritter hopping in it ahead of here. A DK Barrel wobbles on a slightly higher piece of ground next to it. Two smaller alcoves are ahead, with two Kritters jumping around them. The second alcove contains a [[TNT Barrel|TNT Drum]] that can be used to blast open the hidden entrance to a [[Bonus room|Bonus Level]]. A lower area consisting of a lone Kritter can be found nearby with a small pit after it. This pit is followed by a large area of land with a raised piece of ground in the center of it. Two Kritters jump on top of it, surrounding a barrel that can blast the heroes to a Blast Barrel, which then sends them to a second Blast Barrel. This barrel then blasts them onto a platform nearby, which contains the letter N that they can break out of it. If the primates do not shoot through these barrels, they come up to a pair of platforms in an abyss, the second platform being the one containing the letter N. A larger piece of land with a Kritter on it follows this area. If the Kongs manage to pass it, they can reach a wide abyss containing many Barrel Cannons and Blast Barrels that move in horizontal and vertical directions. As they shoot over the abyss with these barrels, several Zingers fly in their way. Once they pass the foes and cross the abyss, they find themselves on a long piece of land with a few Kritters hopping along it. A sign indicating that the level is almost done also can be found on the edge of this area. The final Kritter in the level front of a tunnel nearby, located immediately after an exit sign. The letter G can be found on the treetops above here. If the primates enter the tunnel, they complete the level, unlocking [[Very Gnawty's Lair|the boss battle]] against [[Very Gnawty]]. | ||
==Enemies== | ==Enemies== | ||
The following enemies appear in the following quantities: | |||
<gallery> | |||
Kritter DKC green.png|[[Kritter]] (8) | |||
Kritter-blue-DKC.png|Kritter (blue) (7) | |||
Kritter-red-DKC.png|Kritter (brown) (13) | |||
Zinger DKC.png|[[Zinger]] (5) | |||
Zinger-orange-DKC.png|Zinger (orange) (2) | |||
</gallery> | |||
| | |||
| | |||
== | ==Items and objects== | ||
The following items and objects appear in the following quantities: | |||
<gallery> | |||
DK Barrel DKC.png|[[DK Barrel]] (4) | |||
Enguarde Token Sprite SNES.png|[[Enguarde]] [[Animal token|token]] (1)<br>In the second Bonus Level, accessible by blasting up the far left. | |||
| | Red Balloon DKC SNES.png|[[Red Balloon|Life Balloon]] (2, in Bonus Levels) | ||
Rambi Token Sprite SNES.png|[[Rambi]] [[Animal token|token]] (1)<br>In the area with three jumping Kritters, jump on top of one to reach the tree above and proceed to the upper right to find the token. | |||
TNT Barrel DKC.png|[[TNT Barrel|TNT Drum]] (1) | |||
| | Winky Token Sprite SNES.png|[[Winky]] [[Animal token|token]] (1)<br>Early in the level, after the first DK Barrel, Donkey Kong and Diddy Kong can walk to the right to find a cliff, then roll over it and jump to reach a secret area with the token. | ||
| | </gallery> | ||
| | |||
===K-O-N-G Letters=== | ===K-O-N-G Letters=== | ||
{| | {{multiframe|[[File:BarrelCannonCanyon-O1.png|200px]] [[File:BarrelCannonCanyon-O2.png|200px]]|size=420|The location of the two letter O's in Barrel Cannon Canyon}} | ||
*'''K:''' The Kongs must blast upwards in the first Barrel Cannon down the trail. The letter K is located at the very top of their blast. | |||
*'''O:''' There are two letter O's, and only one is obtained based on which path the Kongs take. One of them is found by taking the Barrel Cannon shortcuts above the level, specifically located after the Rambi Token. The other one is located at the end of the first abyss to have both Barrel Cannons and Blast Barrels. | |||
*'''N:''' Shortly after the Continue Barrel, the Kongs can find a Barrel Cannon that blasts upward in the direction of a moving Blast Barrel. It is surrounded by two brown Kritters. If they blast into the Blast Barrel, they automatically blast to another one, which then fires them down onto an item cache revealing the letter N. | |||
*'''G:''' The letter G is located on two treetops right before the exit. | |||
{{br}} | |||
==Bonus Levels== | |||
{{multiframe|[[File:BarrelCannonCanyon-Bonus1.png|200px]] [[File:BarrelCannonCanyon-Bonus2.png|200px]]|size=420|The first and second Bonus Levels, respectively}} | |||
Reptile Rumble has two Bonus Levels, listed by their type in the Game Boy Advance version: | |||
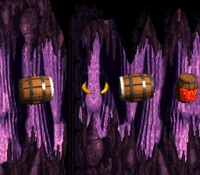
*'''''Find the Exit!''''': Right after the letter O, the Kongs must hop in a Barrel Cannon facing a wall while avoiding a nearby barrel across from them. The Kongs must shoot out of their barrel and slam into the wall. The wall breaks open and the Kongs enter the first Bonus Level. Here the Kongs must blast through several [[Barrel Cannon]]s to the end. Items such as [[banana]]s, [[Red Balloon|Life Balloon]]s, and an [[Expresso]] [[animal token|Token]] are located between the Barrel Cannons. | |||
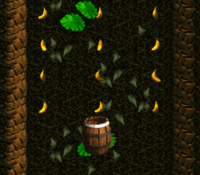
*'''''Collect the Prizes!''''': Shortly after the Continue Barrel, the Kongs must find a [[TNT Barrel|TNT Drum]]. They should pick it up and carry it to the nearest wall to the left while passing a Kritter They must break open one of the walls and enter a Bonus Level, where they begin in a barrel. As it moves them back and forth through the area, they must shoot out of it and grab some items in the three rows of collectibles. After claiming their prizes, the Kongs can miss the Barrel Cannon and fall below it to exit the Bonus Level. | |||
|The letter | |||
| | |||
==Warp Barrel== | |||
Barrel Cannon Canyon has a [[Warp Barrel]] exclusively in the Game Boy Advance version. At the beginning of the level, the Kongs should pass the first two Kritters and shoot out of a Barrel Cannon to reach a higher ledge. If they roll jump off of the bottom-end of this ledge, they can reach a hidden platform holding a Blast Barrel and a [[Winky]] [[animal token|Token]]. They should jump over the barrel to reach the hidden [[Warp Barrel]], which takes them to a sign near the end of the level that indicates that it is almost over. | |||
==Gallery== | ==Gallery== | ||
<gallery> | <gallery> | ||
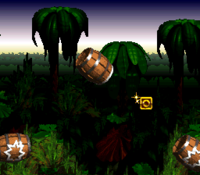
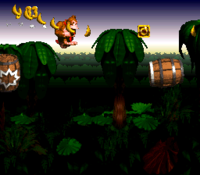
BarrelCannonCanyon-SNES-1.png|Donkey Kong skipping a majority of the level from a secret Barrel Cannon | |||
BarrelCannonCanyon-K.png|The letter K | |||
Barrel Cannon Canyon 4.png|Donkey and Diddy encounter Kritters. | Barrel Cannon Canyon 4.png|Donkey and Diddy encounter Kritters. | ||
BarrelCannonCanyon-N.png|The letter N | |||
BarrelCannonCanyon-G.png|The letter G | |||
Barrel Cannon Canyon 2.png|The primates stand near three Bouncing Kritters. | Barrel Cannon Canyon 2.png|The primates stand near three Bouncing Kritters. | ||
Barrel Cannon Canyon 3.png|The Kongs reach the end of the level. | Barrel Cannon Canyon 3.png|The Kongs reach the end of the level. | ||
BarrelCannonCanyon-GBC-2.png|Diddy blasting out of a Blast Barrel in the Game Boy Color version | |||
</gallery> | </gallery> | ||
==Names in other languages== | ==Names in other languages== | ||
{{foreign names | {{foreign names | ||
|Jap=タルたいほうの谷 | |Jap=タルたいほうの谷 | ||
|JapR=Taru taihō no tani | |JapR=Taru taihō no tani | ||
|JapM=Barrel Cannon Valley | |JapM=Barrel Cannon Valley | ||
|Spa=Cañón Barril Cañón | |Spa=Cañón Barril Cañón | ||
|SpaM= | |SpaM=Barrel Cannon Canyon | ||
|Fre=Canyon du Tonneau à Canon | |||
|FreM=Barrel Cannon Canyon | |||
|Ger=Knaller Tal | |||
|Ger2=Kanonen-Canyon (GBA) | |||
|GerM=Bangers Valley | |||
|Ger2M=Canon Canyon | |||
|Ita=Canyon di Cannoni | |||
|ItaM=Cannon Canyon | |||
|Por=Canhões de Barril | |Por=Canhões de Barril | ||
|PorM=Barrel Cannons | |PorM=Barrel Cannons | ||
}} | }} | ||
== | ==References== | ||
<references/> | |||
{{DKC | {{DKC levels}} | ||
[[Category:Donkey Kong Island]] | [[Category:Donkey Kong Island]] | ||
[[Category: | [[Category:Jungles]] | ||
[[Category:Donkey Kong Country | [[Category:Donkey Kong Country levels]] | ||
[[de:Kanonen-Canyon]] | [[de:Kanonen-Canyon]] | ||
Latest revision as of 04:42, July 14, 2024
- Not to be confused with Cannon Canyon.
| Level | |
|---|---|
| Barrel Cannon Canyon | |
| |
| Level code | 1 - 5 |
| World | Kongo Jungle |
| Game | Donkey Kong Country |
| Music track | DK Island Swing |
| << Directory of levels >> | |
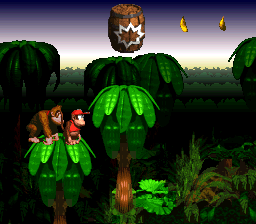
Barrel Cannon Canyon, also named Barrel Canyon,[1] is the fifth level of Donkey Kong Country. It is also the fifth and last regular level of Kongo Jungle. It takes place in the jungle, and is considered the hardest level of its world, which it is the penultimate and longest one of. As its name suggests, Barrel Cannon Canyon involves blasting Donkey Kong and Diddy Kong across numerous abysses via Barrel Cannons and Blast Barrels. This also occurs in Tree Top Town and Snow Barrel Blast. The Kongs must carefully time when to fire from some of the Barrel Cannons, or otherwise they fall down a pitfall.
The Kongs can shortcut through portions of the level by blasting from a Blast Barrel on top of the level entrance, and then a few more from more Blast Barrels above treetops later in the stage. Each of these treetops are located in between two abysses with a chain of Barrel Cannons.
Layout[edit]
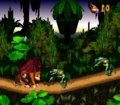
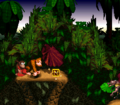
Donkey and Diddy Kong begin the level by exiting a tunnel with a Blast Barrel above it, which can blast them to a treetop farther into the level, where another Blast Barrel is located that can blast them ahead to the second DK Barrel in the level. If the Kongs continue along the main path of the level, they can find two Kritters marching ahead of a Barrel Cannon that is able to fire them into the air and into the letter K. A ledge stands next to the barrel with a piece of the ground that the Kongs can land on to break it and reveal a DK Barrel. A cliff is ahead of here with a hidden area ahead of it, containing a Winky Token, and a piece of land is positioned behind the area that the Kongs can walk along. They are attacked by hopping Kritters as they move across this area, soon reaching a ledge with another Barrel Cannon at the bottom of it, which can blast them over a nearby abyss and into a pair of Kritters.
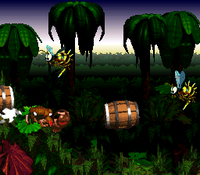
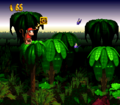
More Kritters walk in a lower area on the sides of a small pit. The pit is followed by a long, straight pathway with a few more Kritters and a raised piece of land on it. A Barrel Cannon sits on the raised ground, able to be used to blast into a barrel higher in the air that can carry the heroes into some bananas. An abyss containing four Barrel Cannons that move in horizontal paths when entered is ahead, and they can use them to cross it. As they blast over the pit, they fire past the letter O. The final barrel shoots them high into the air onto a treetop with a DK Barrel on it. The heroes can find an alcove ahead of here with a trio of Kritters hopping in it. They can also find an abyss soon after it that contains a mixture of many Barrel Cannons and Blast Barrels, which move in either horizontal or vertical paths. The final barrel in this area blast the heroes over a long pathway and into the level's Continue Barrel.
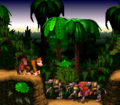
The primates can find an alcove with a Kritter hopping in it ahead of here. A DK Barrel wobbles on a slightly higher piece of ground next to it. Two smaller alcoves are ahead, with two Kritters jumping around them. The second alcove contains a TNT Drum that can be used to blast open the hidden entrance to a Bonus Level. A lower area consisting of a lone Kritter can be found nearby with a small pit after it. This pit is followed by a large area of land with a raised piece of ground in the center of it. Two Kritters jump on top of it, surrounding a barrel that can blast the heroes to a Blast Barrel, which then sends them to a second Blast Barrel. This barrel then blasts them onto a platform nearby, which contains the letter N that they can break out of it. If the primates do not shoot through these barrels, they come up to a pair of platforms in an abyss, the second platform being the one containing the letter N. A larger piece of land with a Kritter on it follows this area. If the Kongs manage to pass it, they can reach a wide abyss containing many Barrel Cannons and Blast Barrels that move in horizontal and vertical directions. As they shoot over the abyss with these barrels, several Zingers fly in their way. Once they pass the foes and cross the abyss, they find themselves on a long piece of land with a few Kritters hopping along it. A sign indicating that the level is almost done also can be found on the edge of this area. The final Kritter in the level front of a tunnel nearby, located immediately after an exit sign. The letter G can be found on the treetops above here. If the primates enter the tunnel, they complete the level, unlocking the boss battle against Very Gnawty.
Enemies[edit]
The following enemies appear in the following quantities:
Items and objects[edit]
The following items and objects appear in the following quantities:
DK Barrel (4)
Life Balloon (2, in Bonus Levels)
TNT Drum (1)
K-O-N-G Letters[edit]
- K: The Kongs must blast upwards in the first Barrel Cannon down the trail. The letter K is located at the very top of their blast.
- O: There are two letter O's, and only one is obtained based on which path the Kongs take. One of them is found by taking the Barrel Cannon shortcuts above the level, specifically located after the Rambi Token. The other one is located at the end of the first abyss to have both Barrel Cannons and Blast Barrels.
- N: Shortly after the Continue Barrel, the Kongs can find a Barrel Cannon that blasts upward in the direction of a moving Blast Barrel. It is surrounded by two brown Kritters. If they blast into the Blast Barrel, they automatically blast to another one, which then fires them down onto an item cache revealing the letter N.
- G: The letter G is located on two treetops right before the exit.
Bonus Levels[edit]
Reptile Rumble has two Bonus Levels, listed by their type in the Game Boy Advance version:
- Find the Exit!: Right after the letter O, the Kongs must hop in a Barrel Cannon facing a wall while avoiding a nearby barrel across from them. The Kongs must shoot out of their barrel and slam into the wall. The wall breaks open and the Kongs enter the first Bonus Level. Here the Kongs must blast through several Barrel Cannons to the end. Items such as bananas, Life Balloons, and an Expresso Token are located between the Barrel Cannons.
- Collect the Prizes!: Shortly after the Continue Barrel, the Kongs must find a TNT Drum. They should pick it up and carry it to the nearest wall to the left while passing a Kritter They must break open one of the walls and enter a Bonus Level, where they begin in a barrel. As it moves them back and forth through the area, they must shoot out of it and grab some items in the three rows of collectibles. After claiming their prizes, the Kongs can miss the Barrel Cannon and fall below it to exit the Bonus Level.
Warp Barrel[edit]
Barrel Cannon Canyon has a Warp Barrel exclusively in the Game Boy Advance version. At the beginning of the level, the Kongs should pass the first two Kritters and shoot out of a Barrel Cannon to reach a higher ledge. If they roll jump off of the bottom-end of this ledge, they can reach a hidden platform holding a Blast Barrel and a Winky Token. They should jump over the barrel to reach the hidden Warp Barrel, which takes them to a sign near the end of the level that indicates that it is almost over.
Gallery[edit]
Names in other languages[edit]
| Language | Name | Meaning | Notes |
|---|---|---|---|
| Japanese | タルたいほうの谷[?] Taru taihō no tani |
Barrel Cannon Valley | |
| French | Canyon du Tonneau à Canon[?] | Barrel Cannon Canyon | |
| German | Knaller Tal[?] | Bangers Valley | |
| Kanonen-Canyon (GBA)[?] | Canon Canyon | ||
| Italian | Canyon di Cannoni[?] | Cannon Canyon | |
| Portuguese | Canhões de Barril[?] | Barrel Cannons | |
| Spanish | Cañón Barril Cañón[?] | Barrel Cannon Canyon |
References[edit]
- ^ November 1994. Nintendo Magazine System (UK) issue 26 (NMS Special). Page 12.
