Mushrise Park: Difference between revisions
mNo edit summary |
m (Text replacement - "(\| *)Jap([RMCN\d]* *=)" to "$1Jpn$2") |
||
| (43 intermediate revisions by 25 users not shown) | |||
| Line 1: | Line 1: | ||
{{ | {{location infobox | ||
| | |title=Mushrise Park | ||
|image=Mushrise Park.jpg | |image=[[File:Mushrise Park.jpg|250px]] | ||
| | |greater_location=[[Pi'illo Island]] | ||
| | |ruler=[[Brickle]] | ||
|inhabitants=[[Capnap]]s, [[Thorb]]s, [[Flibbee]]s, [[Goomba]]s, [[Shy Guy Airtub]], [[Shy Guy]], [[Virus]], [[Fly Guy R]], [[Goomba R]], [[Grobot]] | |inhabitants=[[Capnap]]s, [[Thorb]]s, [[Flibbee]]s, [[Goomba]]s, [[Shy Guy Airtub]], [[Shy Guy]], [[Virus]], [[Fly Guy R]], [[Goomba R]], [[Grobot]] | ||
|first_appearance=''[[Mario & Luigi: Dream Team]]'' ([[List of | |first_appearance=''[[Mario & Luigi: Dream Team]]'' ([[List of games by date#2013|2013]]) | ||
}}{{M& | }}{{M&LDT map}} | ||
'''Mushrise Park''' ( | '''Mushrise Park''' (formerly known as '''Mushrise Fields''' under the [[Pi'illo Island|Pi'illo Kingdom]] era) is a grassland area found in ''[[Mario & Luigi: Dream Team]]''. As the name suggests, it is a local park just south of [[Pi'illo Castle]]. It has rare plants, and is known for its fountains and strong winds. Its name is a portmanteau of "mushroom" and "sunrise". | ||
Mushrise Park has two special attractions only seen here: [[Slingshroom]]s and [[Seesaw Mushroom]]s. On the first visit, the Bros. receive their [[Hammer]]s, and are introduced to breakable rocks. On the second visit, this area introduces tubes that [[Side Drill]] can launch out of. | |||
==History== | ==History== | ||
[[Mario]] and [[Luigi]] come to the park to free [[Eldream]], a Pi'illo elder who knows how to reach | [[Mario]] and [[Luigi]] come to the park to free [[Eldream]], a Pi'illo elder who knows how to reach [[Dream's Deep]] where [[Princess Peach]] is being held captive by [[Antasma]]. They meet up with [[Brickle]], the Manager of the park, who reveals he has Eldream but refuses to give it up unless the Bros. can catch him. After discovering their hammers, they find Brickle stuck on top of a fountain. The Bros. immediately go underground and raise the water pressure, spraying Brickle off the fountain and causing the fountain itself to explode. In the meanwhile, at Brickle's Maintenance hut, a piece of the fountain ends up hitting [[Grobot]], the park's hydrozation robot, damaging it and making it go on a frenzy. During that time, Brickle thanks the Mario Bros. for getting him down and gives them the Eldream Pillow, saying they can use it on his bed inside his hut. Unfortunately, Grobot has gone absolutely berserk at this point and attacks Brickle, forcing Mario and Luigi to fight the haywire robot. The Bros. beat it and Grobot gets destroyed, leaving Brickle heartbroken, but he gets over it quickly and allows the Bros. to use the Eldream pillow. | ||
Inside the Dream World, in [[Dreamy Mushrise Park]], Mario and [[Dreamy Luigi]] encounter [[Dreambunny]], Eldream's pet rabbit, who has the nightmare chunk containing Eldream. Before they can go on a full pursue, | Inside the Dream World, in [[Dreamy Mushrise Park]], Mario and [[Dreamy Luigi]] encounter [[Dreambunny]], Eldream's pet rabbit, who has the nightmare chunk containing Eldream. Before they can go on a full pursue, Dreamy Brickle appears trying to catch the rabbit as well, thinking it will be what will attract people to his park. The Bros. and Brickle run after the rabbit (with the latter wearing bunny ears, attempting to lure it with a carrot), but they eventually decide to call it a truce and the Bros. catch the rabbit, who gives up the Nightmare Chunk containing Eldream. Eldream is set free and opens a portal to the Dream Deep, where they corner Antasma (but are kept back by his screeching). Meanwhile, in the real world, Starlow encounters [[Kamek]], [[Private Goomp]], [[Corporal Paraplonk]], [[Sergeant Guy]], with the latter three being promoted to royal guard. Not long after, Bowser appears, and, after demanding the location of Peach, picks up her scent, and jumps into the [[Dream Portal]]. He ends up in Dream Deep where the Mario Bros. are with Antasma and Peach. Bowser shows dislike to Antasma (who is currently in bat form) at first for stealing Peach instead of him, but after Antasma convinces that he can give Bowser new moves and all, the two form a team that the Bros. battle. The two get defeated, and Antasma increases the power inside Bowser, as well as flooring the Bros. and Peach. The villainous pair leave the portal and say they have work to do and are too busy to kidnap Peach, and Eldream pulls the other three back into the Real World. | ||
Everyone learns that Antasma is after the Dream Stone, which resides in [[Dozing Sands]]. Thus the Bros. leave the park to go and find the Dream Stone. | Everyone learns that Antasma is after the Dream Stone, which resides in [[Dozing Sands]]. Thus the Bros. leave the park to go and find the Dream Stone. | ||
Later on during the Bros.' hunt for the Zee Parts, Brickle is found by the broken fountain, seemingly troubled by the sheer mass of rocks in areas of the park. Upon spotting Mario and Luigi and being asked if he | Later on during the Bros.' hunt for the Zee Parts, Brickle is found by the broken fountain, seemingly troubled by the sheer mass of rocks in areas of the park. Upon spotting Mario and Luigi and being asked if he has seen the Mushrise Tree Board anywhere in the park, he reveals that he has it in his hands at the moment, but only agrees to give them information as long as they smash some rocks throughout the park. Upon the Bros.' quick success at this, they return to a pleased Brickle and follow him through the Maintenance Hut and into an area that was not previously accessible due to a Brock standing guard. Brickle stops before a large wooden chair-like stump, where what is soon proven to be the Mushrise Tree Board sits. Once it's confirmed to be the Mushrise Tree Board, Brickle then returns to work, and the Bros. continue the hunt for the Zee Parts. | ||
==Enemies== | ==Enemies== | ||
===First visit=== | |||
<gallery> | |||
Capnap.png|[[Capnap]]s | |||
Thorb.png|[[Thorb]]s | |||
MLDT-FlibbeeUpright.png|[[Flibbee]]s | |||
Grobot.png|[[Grobot]] (boss) | |||
</gallery> | |||
===Mushrise Tree Board rock clearing areas=== | |||
<gallery> | |||
Fly Guy R.png|[[Fly Guy R|Fly Guys R]] | |||
M&LDT Goomba.png|[[Goomba R|Goombas R]] | |||
MLDT Virus.png|[[Virus]]es | |||
Shy guy airtub.png|[[Shy Guy Airtub]]s (background enemy) | |||
M&LDT Shy Guy.png|[[Shy Guy]]s | |||
</gallery> | |||
==Pi'illo locations== | |||
{|border=1 cellpadding=2 style="text-align: center; border-collapse: collapse; border: 1px solid black; width:100%" | |||
! colspan="4" style="background:rgb(73,255,51); height:2em" | [[Mushrise Park]] – 5 Pi'illos (3 Pink Pi'illos, 1 Blue Pi'illo, Eldream) | |||
|-style="background:rgb(73,255,51); height:2em" | |||
!Location | |||
!Necessity | |||
!Type | |||
!Screenshot | |||
|- | |||
|This Pi'illo is found in the area with the bridge near the northeast exit, with its aid allowing Mario and Luigi to get up to the higher ground in order to acquire hammers. | |||
|Required | |||
|[[File:BluePi'illo.png]]<br>Blue Pi'illo | |||
|[[File:M&LDT Mushrise Park Pi'illo 1.png|512px]] | |||
|- | |||
|[[Eldream]] is found by [[Brickle]], whom the Bros. chase down through the park and at one point save, Brickle then lets them free Eldream on his bed in the Maintenance Hut. | |||
|Required | |||
|[[File:EldreamSprite.png]]<br>Eldream | |||
|[[File:M&LDT Mushrise Park Pi'illo 2.png|512px]] | |||
|- | |||
|This Pi'illo is found in the area to the west of the lookout point on some higher ground accessible from going through the area with the lookout point and heading to the west on the higher ground there. | |||
|Optional | |||
|[[File:Pi'illoSprite.png]]<br>Pink Pi'illo | |||
|[[File:M&LDT Mushrise Park Pi'illo 3.png|512px]] | |||
|- | |||
|This Pi'illo is found in the area to the west of the area with the fountain, on the smaller secluded south-east side at the end of the path by the darker grass. (Spin Jump required) | |||
|Optional | |||
|[[File:Pi'illoSprite.png]]<br>Pink Pi'illo | |||
|[[File:M&LDT Mushrise Park Pi'illo 4.png|512px]] | |||
|- | |||
|This Pi'illo is found in the area to the east of the area with the park's southern exit, in the northwest on the large blue hill. (Spin Jump and Ball Hop required) | |||
|Optional | |||
|[[File:Pi'illoSprite.png]]<br>Pink Pi'illo | |||
|[[File:M&LDT Mushrise Park Pi'illo 5.png|512px]] | |||
|} | |||
==Beanhole locations== | |||
{|border=1 cellpadding=2 style="text-align: center; border-collapse: collapse; border: 1px solid black; width:100%" | |||
!colspan="3"style="background:rgb(73,255,51); height:2em"|[[Mushrise Park]] – 22 Beans (3 Heart Beans, 5 Bros. Beans, 3 Power Beans, 4 Defense Beans, 3 Speed Beans, 4 Stache Beans) | |||
|-style="background:rgb(73,255,51); height:2em" | |||
!Location | |||
!Type | |||
!Screenshot | |||
|- | |||
|In the area leading to Dozing Sands/Driftwood Shore, this Bean is found by the dark grass in the far south-east, just by the south exit. | |||
|Power | |||
|[[File:M&LDT Mushrise Park 1.png|512px]] | |||
|- | |||
|In the area leading to Dozing Sands/Driftwood Shore, this Bean is found to the south of the Mushrise Management sign. | |||
|Power | |||
|[[File:M&LDT Mushrise Park 2.png|512px]] | |||
|- | |||
|In the area leading to Dozing Sands/Driftwood Shore, this Bean is found in the north-east, near a rock. | |||
|Bros. | |||
|[[File:M&LDT Mushrise Park 3.png|512px]] | |||
|- | |||
|In the area with the bridge, this Bean is found on some higher ground in the north-west first accessed to the west of said area in the area with the lookout point. | |||
|Defense | |||
|[[File:M&LDT Mushrise Park 4.png|512px]] | |||
|- | |||
|In the area with the bridge, this Bean is found by a Red Yoshi in the south-east. | |||
|Power | |||
|[[File:M&LDT Mushrise Park 5.png|512px]] | |||
|- | |||
|In the area with the bridge, this Bean is found right next to the north-east exit. | |||
|Bros. | |||
|[[File:M&LDT Mushrise Park 6.png|512px]] | |||
|- | |||
|In the area with the bridge, this Bean is found by the south-east exit. | |||
|Bros. | |||
|[[File:M&LDT Mushrise Park 7.png|512px]] | |||
|- | |||
|In the area with the fountain, this Bean is found in a patch of dirt in the south-east. | |||
|Defense | |||
|[[File:M&LDT Mushrise Park 8.png|512px]] | |||
|- | |||
|In the area with the fountain, this Bean is found in the south-west on ground level. | |||
|Heart | |||
|[[File:M&LDT Mushrise Park 9.png|512px]] | |||
|- | |||
|In the area with the fountain, this Bean is found on some grass in the center of a spiral pattern in the north. | |||
|Stache | |||
|[[File:M&LDT Mushrise Park 10.png|512px]] | |||
|- | |||
|In the area with the fountain, this Bean is found on some higher ground in the west, the specific position being inside a circular-patterned patch of grass. ([[Spin Jump (Mario & Luigi series)|Spin Jump]] required)<!--NOTE TO EDITORS: The ability required is NOT a typo, it is possible to reach this bean with Spin Jump alone by spin jumping off the nearest flower. Do not change this to Ball Hop.--> | |||
|Heart | |||
|[[File:M&LDT Mushrise Park 11.png|512px]] | |||
|- | |||
|In the area with the Maintainence Hut Warp Pipe and Brickle, these 4 Beans are found on a spot of light in the far east. The southern one is Heart Bean, the western one is Bros. Bean, the northern one is Defense Bean and the eastern one is Stache Bean. | |||
|Heart, Bros., Defense and Stache | |||
|[[File:M&LDT Mushrise Park 12.png|512px]] | |||
|- | |||
|In the area to the east of the area with the park's southern exit, this Bean is found in the north-east on ground level, right next to the small blue hill there. | |||
|Defense | |||
|[[File:M&LDT Mushrise Park 13.png|512px]] | |||
|- | |||
|In the area to the west of the area with the fountain, this Bean is found on the south-east side of the area, the specific position being inside a circular-patterened patch of grass. | |||
|Speed | |||
|[[File:M&LDT Mushrise Park 14.png|512px]] | |||
|- | |||
|In the area to the east of the Maintainence Hut area (on the map), this Bean is found in the south-west, in a patch of dirt in the middle of some darker grass. | |||
|Bros. | |||
|[[File:M&LDT Mushrise Park 15.png|512px]] | |||
|- | |||
|In the area to the east of the Maintainence Hut area (on the map), this Bean is found in the north, on some dark green ground. | |||
|Speed | |||
|[[File:M&LDT Mushrise Park 16.png|512px]] | |||
|- | |||
|In the area to the east of the Maintainence Hut area (on the map), these 2 Stache Beans are found in the north at the highest possible level, before two blocks. | |||
|Stache | |||
|[[File:M&LDT Mushrise Park 17.png|512px]] | |||
|- | |||
|In the area leading to Somnom Woods/Neo Bowser Castle, this Bean is found by the northern exit, on higher ground. ([[Ball Hop]] required) | |||
|Speed | |||
|[[File:M&LDT Mushrise Park 18.png|512px]] | |||
|} | |||
==Block locations== | |||
{|border=1 cellpadding=2 style="text-align: center; border-collapse: collapse; border: 1px solid black; width:100%" | |||
!colspan="3"style="background:lime; height:2em"|[[Mushrise Park]] - 59 Blocks (40 ?, 3 M, 3 L, 2 Bros., 2 Random, 8 Attack Piece, 1 Camera) | |||
|-style="background:lime; height:2em" | |||
!Item/s | |||
!Location | |||
!Screenshot | |||
|- | |||
|[[File:DreamTeam1up.png]]<br>1-Up Mushroom | |||
|In the second scene, in the southeast. | |||
|[[File:Mushrise Park Block 1.png]] | |||
|- | |||
|[[File:Dream Team Coin.png]][[File:Dream Team Coin.png]][[File:Dream Team Coin.png]][[File:Dream Team Coin.png]][[File:Dream Team Coin.png]][[File:Dream Team Coin.png]][[File:Dream Team Coin.png]][[File:Dream Team Coin.png]][[File:Dream Team Coin.png]][[File:Dream Team Coin.png]] [[File:MLPJ5Coin.png]][[File:MLPJ5Coin.png]][[File:MLPJ5Coin.png]][[File:MLPJ5Coin.png]][[File:MLPJ5Coin.png]][[File:MLPJ5Coin.png]][[File:MLPJ5Coin.png]][[File:MLPJ5Coin.png]][[File:MLPJ5Coin.png]][[File:MLPJ5Coin.png]]<br>10 Coins, 10 Five Coins | |||
|'''NOTE''': Following 41 blocks are available only after returning from [[Dreamy Mushrise Park]] accessed by the Blue Pi'illo.<br>Same scene, in the southwest. | |||
|[[File:Mushrise Park Blocks 2-3.png]] | |||
|- | |||
|[[File:Dream Team Coin.png]]<br>Coin | |||
|In the scene south of the second scene (eight scene), in the northwest. | |||
|[[File:Mushrise Park Block 4.png]] | |||
|- | |||
|[[File:Dream Team Coin.png]]<br>Coin | |||
|In the third scene, in the south. | |||
|[[File:Mushrise Park Block 5.png]] | |||
|- | |||
|[[File:M&LDT Mushroom.png]]<br>Mushroom | |||
|Same scene, in the northwest. | |||
|[[File:Mushrise Park Block 6.png]] | |||
|- | |||
|[[File:Dream Team Coin.png]][[File:Dream Team Coin.png]][[File:Dream Team Coin.png]][[File:Dream Team Coin.png]][[File:Dream Team Coin.png]][[File:Dream Team Coin.png]][[File:Dream Team Coin.png]][[File:Dream Team Coin.png]][[File:Dream Team Coin.png]][[File:Dream Team Coin.png]]<br>10 Coins | |||
|In the second scene, in the northwest. | |||
|[[File:Mushrise Park Block 7.png]] | |||
|- | |||
|[[File:MLPJ5Coin.png]][[File:MLPJ5Coin.png]][[File:MLPJ5Coin.png]][[File:MLPJ5Coin.png]][[File:MLPJ5Coin.png]][[File:MLPJ5Coin.png]][[File:MLPJ5Coin.png]][[File:MLPJ5Coin.png]][[File:MLPJ5Coin.png]][[File:MLPJ5Coin.png]] [[File:Dream Team Boots.png]]<br>10 Five Coins, So-So Boots | |||
|In the scene west of the third scene, in the west. | |||
|[[File:Mushrise Park Blocks 8-9.png]] | |||
|- | |||
|[[File:MLDTAttackPiece.png]]<br>[[Red_Shell#Mario_.26_Luigi:_Dream_Team|3D Red Shell]] [[Attack_Piece#Mario_.26_Luigi:_Dream_Team|Attack Piece]] | |||
|In the fourth scene, near the entrance. | |||
|[[File:Mushrise Park Block 10.png]] | |||
|- | |||
|[[File:MLDTAttackPiece.png]]<br>3D Red Shell Attack Piece | |||
|Same scene, in the middle. | |||
|[[File:Mushrise Park Block 11.png]] | |||
|- | |||
|[[File:MLDTAttackPiece.png]]<br>3D Red Shell Attack Piece | |||
|Same scene, in the southwest. | |||
|[[File:Mushrise Park Block 12.png]] | |||
|- | |||
|[[File:MLDTAttackPiece.png]]<br>3D Red Shell Attack Piece | |||
|In the fifth scene, near the entrance. | |||
|[[File:Mushrise Park Block 13.png]] | |||
|- | |||
|[[File:Dream Team Coin.png]]<br>Coin | |||
|Same scene, in the northeast. | |||
|[[File:Mushrise Park Block 14.png]] | |||
|- | |||
|[[File:Dream Team Coin.png]]<br>Coin | |||
|Same scene, in the west. | |||
|[[File:Mushrise Park Block 15.png]] | |||
|- | |||
|[[File:MLPJ5Coin.png]]<br>Five Coin | |||
|Same scene, in the southwest. | |||
|[[File:Mushrise Park Block 16.png]] | |||
|- | |||
|[[File:MLDTAttackPiece.png]]<br>3D Red Shell Attack Piece | |||
|Same scene, in the middle, on the west island. | |||
|[[File:Mushrise Park Block 17.png]] | |||
|- | |||
|[[File:MLDTAttackPiece.png]]<br>3D Red Shell Attack Piece | |||
|Same scene, in the southeast. | |||
|[[File:Mushrise Park Block 18.png]] | |||
|- | |||
|[[File:MLDTAttackPiece.png]] [[File:Dream Team Coin.png]][[File:Dream Team Coin.png]][[File:Dream Team Coin.png]][[File:Dream Team Coin.png]][[File:Dream Team Coin.png]][[File:Dream Team Coin.png]][[File:Dream Team Coin.png]][[File:Dream Team Coin.png]][[File:Dream Team Coin.png]][[File:Dream Team Coin.png]]<br>3D Red Shell Attack Piece, 10 Coins | |||
|Same scene, in the middle, on the middle islands. | |||
|[[File:Mushrise Park Blocks 19-20.png]] | |||
|- | |||
|[[File:Dream Team Coin.png]][[File:Dream Team Coin.png]][[File:Dream Team Coin.png]][[File:Dream Team Coin.png]][[File:Dream Team Coin.png]][[File:Dream Team Coin.png]][[File:Dream Team Coin.png]][[File:Dream Team Coin.png]][[File:Dream Team Coin.png]][[File:Dream Team Coin.png]]<br>10 Coins | |||
|Same scene, in the middle, on the north island. | |||
|[[File:Mushrise Park Block 21.png]] | |||
|- | |||
|[[File:MLDTAttackPiece.png]]<br>3D Red Shell Attack Piece | |||
|In the fourth scene, in the northeast. Accessible after destroying the rocks by using the rainbow Slingshroom in the fifth scene. | |||
|[[File:Mushrise Park Block 22.png]] | |||
|- | |||
|[[File:Dream Team Coin.png]][[File:Dream Team Coin.png]][[File:Dream Team Coin.png]][[File:Dream Team Coin.png]][[File:Dream Team Coin.png]][[File:Dream Team Coin.png]][[File:Dream Team Coin.png]][[File:Dream Team Coin.png]][[File:Dream Team Coin.png]][[File:Dream Team Coin.png]]<br>10 Coins | |||
|Same scene, right of the rainbow Slingshroom. | |||
|[[File:Mushrise Park Block 23.png]] | |||
|- | |||
|[[File:M&LDT Candy.png]]<br>Candy | |||
|In the sixth scene, in the south. | |||
|[[File:Mushrise Park Block 24.png]] | |||
|- | |||
|[[File:M&LDT Syrup.png]]<br>[[Syrup_Jar#Mario_.26_Luigi:_Dream_Team|Syrup Jar]] | |||
|Same scene, left of the Seesaw Mushrooms. | |||
|[[File:Mushrise Park Block 25.png]] | |||
|- | |||
|[[File:MLPJ5Coin.png]]<br>Five Coin | |||
|Same scene, right of the Seesaw Mushrooms. | |||
|[[File:Mushrise Park Block 26.png]] | |||
|- | |||
|[[File:Dream Team Coin.png]]<br>Coin | |||
|In the seventh scene, near the entrance. | |||
|[[File:Mushrise Park Block 27.png]] | |||
|- | |||
|[[File:Dream Team Coin.png]]<br>Coin | |||
|Same scene, near the northern exit. | |||
|[[File:Mushrise Park Block 28.png]] | |||
|- | |||
|[[File:Dream Team Coin.png]][[File:Dream Team Coin.png]][[File:Dream Team Coin.png]][[File:Dream Team Coin.png]][[File:Dream Team Coin.png]][[File:Dream Team Coin.png]][[File:Dream Team Coin.png]][[File:Dream Team Coin.png]][[File:Dream Team Coin.png]][[File:Dream Team Coin.png]]<br>10 Coins | |||
|In the eighth scene, in the west. | |||
|[[File:Mushrise Park Block 29.png]] | |||
|- | |||
|[[File:Dream Team Coin.png]]<br>Coin | |||
|Same scene, in the north. | |||
|[[File:Mushrise Park Block 30.png]] | |||
|- | |||
|[[File:M&LDT Mushroom.png]]<br>Mushroom | |||
|Same scene, in the northeast. | |||
|[[File:Mushrise Park Block 31.png]] | |||
|- | |||
|[[File:Dream Team Coin.png]][[File:Dream Team Coin.png]][[File:Dream Team Coin.png]][[File:Dream Team Coin.png]][[File:Dream Team Coin.png]][[File:Dream Team Coin.png]][[File:Dream Team Coin.png]][[File:Dream Team Coin.png]][[File:Dream Team Coin.png]][[File:Dream Team Coin.png]] [[File:Dream Team Coin.png]]<br>10 Coins, Coin | |||
|In the scene east of the second scene, in the southwest. | |||
|[[File:Mushrise Park Blocks 32-33.png]] | |||
|- | |||
|[[File:M&LDT Candy.png]]<br>[[Super Candy]] | |||
|In the second scene, in the northeast. | |||
|[[File:Mushrise Park Block 34.png]] | |||
|- | |||
|[[File:Dream Team Coin.png]][[File:Dream Team Coin.png]][[File:Dream Team Coin.png]][[File:Dream Team Coin.png]][[File:Dream Team Coin.png]][[File:Dream Team Coin.png]][[File:Dream Team Coin.png]][[File:Dream Team Coin.png]][[File:Dream Team Coin.png]][[File:Dream Team Coin.png]]<br>10 Coins | |||
|In the underground scene, in the north. | |||
|[[File:Mushrise Park Block 35.png]] | |||
|- | |||
|[[File:Dream Team Coin.png]][[File:Dream Team Coin.png]][[File:Dream Team Coin.png]][[File:Dream Team Coin.png]][[File:Dream Team Coin.png]][[File:Dream Team Coin.png]][[File:Dream Team Coin.png]][[File:Dream Team Coin.png]][[File:Dream Team Coin.png]][[File:Dream Team Coin.png]]<br>10 Coins | |||
|Same scene, in the south. | |||
|[[File:Mushrise Park Block 36.png]] | |||
|- | |||
|[[File:Dream Team Wear.png]]<br>So-So Wear | |||
|Same scene, in the middle. | |||
|[[File:Mushrise Park Block 37.png]] | |||
|- | |||
|[[File:Dream Team Hammer.png]] [[File:Dream Team Coin.png]]<br>Discount Hammer, Coin | |||
|In the Maintanance Hut scene, in the southwest. | |||
|[[File:Mushrise Park Blocks 38-39.png]] | |||
|- | |||
|[[File:M&LDT Syrup.png]]<br>Syrup Jar | |||
|Same scene, in the north. | |||
|[[File:Mushrise Park Block 40.png]] | |||
|- | |||
|[[File:Dream Team Coin.png]][[File:Dream Team Coin.png]][[File:Dream Team Coin.png]][[File:Dream Team Coin.png]][[File:Dream Team Coin.png]][[File:Dream Team Coin.png]][[File:Dream Team Coin.png]][[File:Dream Team Coin.png]][[File:Dream Team Coin.png]][[File:Dream Team Coin.png]] [[File:MLPJ5Coin.png]][[File:MLPJ5Coin.png]][[File:MLPJ5Coin.png]][[File:MLPJ5Coin.png]][[File:MLPJ5Coin.png]][[File:MLPJ5Coin.png]][[File:MLPJ5Coin.png]][[File:MLPJ5Coin.png]][[File:MLPJ5Coin.png]][[File:MLPJ5Coin.png]]<br>10 Coins, 10 Five Coins | |||
|Same scene, in the southeast. | |||
|[[File:Mushrise Park Blocks 41-42.png]] | |||
|- | |||
|[[File:M&LDT Candy.png]]<br>Super Candy | |||
|'''NOTE''': Following 2 blocks are available only after learning [[Mini-Mario_(form)#Mario_.26_Luigi:_Dream_Team|Mini-Mario]] in [[Dozing Sands]].<br>In the seventh scene, in the southwest. | |||
|[[File:Mushrise Park Block 43.png]] | |||
|- | |||
|[[File:MLSS+BM10Coin.png]][[File:MLSS+BM10Coin.png]][[File:MLSS+BM10Coin.png]][[File:MLSS+BM10Coin.png]][[File:MLSS+BM10Coin.png]][[File:MLSS+BM10Coin.png]][[File:MLSS+BM10Coin.png]][[File:MLSS+BM10Coin.png]][[File:MLSS+BM10Coin.png]][[File:MLSS+BM10Coin.png]]<br>10 [[10-Coin#Mario_.26_Luigi_series|10-Coin]]s | |||
|In the scene east of the first scene, in the northwest. | |||
|[[File:Mushrise Park Block 44.png]] | |||
|- | |||
|[[File:M&LDT Shot.png]]<br>Mushrise Park Shot | |||
|'''NOTE''': Following block is available only after learning Spin Jump on Mount Pajamaja.<br>In the eighth scene, on the elevated ground reachable by a Spin Jump from the flowers right of it. | |||
|[[File:Mushrise Park Block 45.png]] | |||
|- | |||
|[[File:MLSS+BM10Coin.png]]<br>10-Coin | |||
|'''NOTE''': Following 4 blocks are available only after returning from [[Dream's Deep]] accessed by the Dreamy Pi'illo Castle accessed by the Dreampoint.<br>In the scene east of the seventh scene, in the southeast. | |||
|[[File:Mushrise Park Block 46.png]] | |||
|- | |||
|[[File:M&LDT Mushroom.png]]<br>[[Ultra_Mushroom#Mario_.26_Luigi_series|Ultra Mushroom]] | |||
|Same scene, in the southwest. | |||
|[[File:Mushrise Park Block 47.png]] | |||
|- | |||
|[[File:MLPJ50Coin.png]][[File:MLPJ50Coin.png]][[File:MLPJ50Coin.png]][[File:MLPJ50Coin.png]][[File:MLPJ50Coin.png]][[File:MLPJ50Coin.png]][[File:MLPJ50Coin.png]][[File:MLPJ50Coin.png]][[File:MLPJ50Coin.png]][[File:MLPJ50Coin.png]]<br>10 50-Coins | |||
|Same scene, in the northeast. | |||
|[[File:Mushrise Park Block 48.png]] | |||
|- | |||
|[[File:M&LDT Candy.png]]<br>[[Max Candy]] | |||
|Same scene, in the north. | |||
|[[File:Mushrise Park Block 49.png]] | |||
|- | |||
|[[File:MLPJ50Coin.png]][[File:MLPJ50Coin.png]][[File:MLPJ50Coin.png]][[File:MLPJ50Coin.png]][[File:MLPJ50Coin.png]][[File:MLPJ50Coin.png]][[File:MLPJ50Coin.png]][[File:MLPJ50Coin.png]][[File:MLPJ50Coin.png]][[File:MLPJ50Coin.png]]<br>10 50-Coins | |||
|'''NOTE''': Following 10 blocks are available only after learning the Ball Hop during second Mount Pajamaja visit.<br>In the first scene, in the northeast. | |||
|[[File:Mushrise Park Block 50.png]] | |||
|- | |||
|[[File:DreamTeam1up.png]]<br>1-Up Deluxe | |||
|Same scene, in the northwest. | |||
|[[File:Mushrise Park Block 51.png]] | |||
|- | |||
|[[File:MLPJ50Coin.png]]<br>50-Coin | |||
|In the scene east of the second scene, in the northeast. | |||
|[[File:Mushrise Park Block 52.png]] | |||
|- | |||
|[[File:MLPJ50Coin.png]]<br>50-Coin | |||
|In the scene south of the previous one, in the west. | |||
|[[File:Mushrise Park Block 53.png]] | |||
|- | |||
|[[File:MLSS+BM10Coin.png]]<br>10-Coin | |||
|Same scene, in the southwest. | |||
|[[File:Mushrise Park Block 54.png]] | |||
|- | |||
|[[File:Dream Team Hammer.png]]<br>Glass Hammer | |||
|Same scene, in the northwest. | |||
|[[File:Mushrise Park Block 55.png]] | |||
|- | |||
|[[File:MLSS+BM10Coin.png]][[File:MLSS+BM10Coin.png]][[File:MLSS+BM10Coin.png]][[File:MLSS+BM10Coin.png]][[File:MLSS+BM10Coin.png]][[File:MLSS+BM10Coin.png]][[File:MLSS+BM10Coin.png]][[File:MLSS+BM10Coin.png]][[File:MLSS+BM10Coin.png]][[File:MLSS+BM10Coin.png]] [[File:MLSSBMRefreshingHerb.png]]<br>10 10-Coins, [[Refreshing_Herb#Mario_.26_Luigi:_Dream_Team|Refreshing Herb]] | |||
|Same scene, in the north. | |||
|[[File:Mushrise Park Blocks 56-57.png]] | |||
|- | |||
|[[File:M&LDT Syrup.png]]<br>[[Ultrasyrup_Jar#Mario_.26_Luigi:_Dream_Team|Ultrasyrup Jar]] | |||
|Same scene, in the northeast. | |||
|[[File:Mushrise Park Block 58.png]] | |||
|- | |||
|[[File:M&LDT Candy.png]]<br>Max Candy | |||
|In the underground scene, in the northwest. | |||
|[[File:Mushrise Park Block 59.png]] | |||
|} | |||
==Names in other languages== | ==Names in other languages== | ||
{{ | {{foreign names | ||
|Jpn=オハパーク | |||
|JpnR=Oha Pāku | |||
|JpnM=Possibly from the shortened form of「お{{ruby|早|は}}よう」(''ohayō'', good morning) and "park" | |||
|SpaA=Parque Despabile | |SpaA=Parque Despabile | ||
|SpaAM=Snuff Park | |SpaAM=Snuff Park | ||
|SpaE=Parque Aurora | |SpaE=Parque Aurora | ||
|SpaEM= | |SpaEM=Sunlight Park | ||
|Dut=Dauwpark | |Dut=Dauwpark | ||
|DutM=Dew Park | |DutM=Dew Park | ||
|FreA=Parc Lève-Champi | |FreA=Parc Lève-Champi | ||
|FreAM=Arise-Shroom Park | |FreAM=Arise-Shroom Park | ||
| | |FreE=Parc de l'éveil | ||
| | |FreEM=Awakening park | ||
|Ita=Buonparco | |||
|ItaM=From "buono" (good) and "parco" (park) | |||
|Kor=굿모닝 파크 | |Kor=굿모닝 파크 | ||
|KorR=Gutmoning Pakeu | |KorR=Gutmoning Pakeu | ||
|KorM=Good-Morning Park | |KorM=Good-Morning Park | ||
|Ger=Pilzwald Park | |||
|GerM=Mushroom-Forest Park | |||
|PorE=Parque Cogumelo Nascente | |||
|PorEM=Rising Mushroom Park | |||
}} | }} | ||
{{ | {{M&LDT}} | ||
[[Category:Grasslands]] | [[Category:Grasslands]] | ||
[[Category:Mario & Luigi: Dream Team locations]] | |||
[[it:Buonparco]] | |||
Latest revision as of 14:49, January 7, 2025
| Mushrise Park | |
|---|---|
| |
| First appearance | Mario & Luigi: Dream Team (2013) |
| Greater location | Pi'illo Island |
| Ruler | Brickle |
| Inhabitants | Capnaps, Thorbs, Flibbees, Goombas, Shy Guy Airtub, Shy Guy, Virus, Fly Guy R, Goomba R, Grobot |
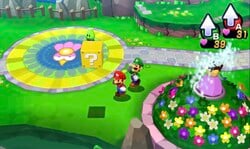
Mushrise Park (formerly known as Mushrise Fields under the Pi'illo Kingdom era) is a grassland area found in Mario & Luigi: Dream Team. As the name suggests, it is a local park just south of Pi'illo Castle. It has rare plants, and is known for its fountains and strong winds. Its name is a portmanteau of "mushroom" and "sunrise".
Mushrise Park has two special attractions only seen here: Slingshrooms and Seesaw Mushrooms. On the first visit, the Bros. receive their Hammers, and are introduced to breakable rocks. On the second visit, this area introduces tubes that Side Drill can launch out of.
History[edit]
Mario and Luigi come to the park to free Eldream, a Pi'illo elder who knows how to reach Dream's Deep where Princess Peach is being held captive by Antasma. They meet up with Brickle, the Manager of the park, who reveals he has Eldream but refuses to give it up unless the Bros. can catch him. After discovering their hammers, they find Brickle stuck on top of a fountain. The Bros. immediately go underground and raise the water pressure, spraying Brickle off the fountain and causing the fountain itself to explode. In the meanwhile, at Brickle's Maintenance hut, a piece of the fountain ends up hitting Grobot, the park's hydrozation robot, damaging it and making it go on a frenzy. During that time, Brickle thanks the Mario Bros. for getting him down and gives them the Eldream Pillow, saying they can use it on his bed inside his hut. Unfortunately, Grobot has gone absolutely berserk at this point and attacks Brickle, forcing Mario and Luigi to fight the haywire robot. The Bros. beat it and Grobot gets destroyed, leaving Brickle heartbroken, but he gets over it quickly and allows the Bros. to use the Eldream pillow.
Inside the Dream World, in Dreamy Mushrise Park, Mario and Dreamy Luigi encounter Dreambunny, Eldream's pet rabbit, who has the nightmare chunk containing Eldream. Before they can go on a full pursue, Dreamy Brickle appears trying to catch the rabbit as well, thinking it will be what will attract people to his park. The Bros. and Brickle run after the rabbit (with the latter wearing bunny ears, attempting to lure it with a carrot), but they eventually decide to call it a truce and the Bros. catch the rabbit, who gives up the Nightmare Chunk containing Eldream. Eldream is set free and opens a portal to the Dream Deep, where they corner Antasma (but are kept back by his screeching). Meanwhile, in the real world, Starlow encounters Kamek, Private Goomp, Corporal Paraplonk, Sergeant Guy, with the latter three being promoted to royal guard. Not long after, Bowser appears, and, after demanding the location of Peach, picks up her scent, and jumps into the Dream Portal. He ends up in Dream Deep where the Mario Bros. are with Antasma and Peach. Bowser shows dislike to Antasma (who is currently in bat form) at first for stealing Peach instead of him, but after Antasma convinces that he can give Bowser new moves and all, the two form a team that the Bros. battle. The two get defeated, and Antasma increases the power inside Bowser, as well as flooring the Bros. and Peach. The villainous pair leave the portal and say they have work to do and are too busy to kidnap Peach, and Eldream pulls the other three back into the Real World.
Everyone learns that Antasma is after the Dream Stone, which resides in Dozing Sands. Thus the Bros. leave the park to go and find the Dream Stone.
Later on during the Bros.' hunt for the Zee Parts, Brickle is found by the broken fountain, seemingly troubled by the sheer mass of rocks in areas of the park. Upon spotting Mario and Luigi and being asked if he has seen the Mushrise Tree Board anywhere in the park, he reveals that he has it in his hands at the moment, but only agrees to give them information as long as they smash some rocks throughout the park. Upon the Bros.' quick success at this, they return to a pleased Brickle and follow him through the Maintenance Hut and into an area that was not previously accessible due to a Brock standing guard. Brickle stops before a large wooden chair-like stump, where what is soon proven to be the Mushrise Tree Board sits. Once it's confirmed to be the Mushrise Tree Board, Brickle then returns to work, and the Bros. continue the hunt for the Zee Parts.
Enemies[edit]
First visit[edit]
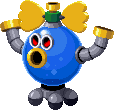
Grobot (boss)
Mushrise Tree Board rock clearing areas[edit]
Shy Guy Airtubs (background enemy)
Pi'illo locations[edit]
| Mushrise Park – 5 Pi'illos (3 Pink Pi'illos, 1 Blue Pi'illo, Eldream) | |||
|---|---|---|---|
| Location | Necessity | Type | Screenshot |
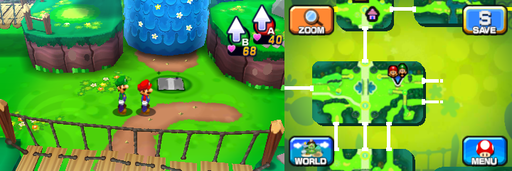
| This Pi'illo is found in the area with the bridge near the northeast exit, with its aid allowing Mario and Luigi to get up to the higher ground in order to acquire hammers. | Required | Blue Pi'illo |
|
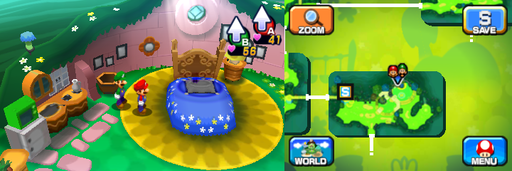
| Eldream is found by Brickle, whom the Bros. chase down through the park and at one point save, Brickle then lets them free Eldream on his bed in the Maintenance Hut. | Required | Eldream |
|
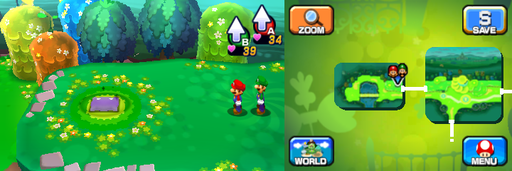
| This Pi'illo is found in the area to the west of the lookout point on some higher ground accessible from going through the area with the lookout point and heading to the west on the higher ground there. | Optional | Pink Pi'illo |
|
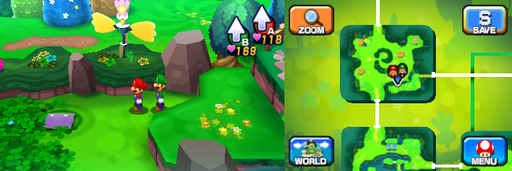
| This Pi'illo is found in the area to the west of the area with the fountain, on the smaller secluded south-east side at the end of the path by the darker grass. (Spin Jump required) | Optional | Pink Pi'illo |
|
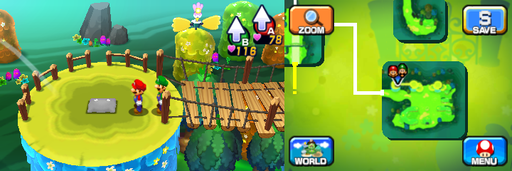
| This Pi'illo is found in the area to the east of the area with the park's southern exit, in the northwest on the large blue hill. (Spin Jump and Ball Hop required) | Optional | Pink Pi'illo |
|
Beanhole locations[edit]
| Mushrise Park – 22 Beans (3 Heart Beans, 5 Bros. Beans, 3 Power Beans, 4 Defense Beans, 3 Speed Beans, 4 Stache Beans) | ||
|---|---|---|
| Location | Type | Screenshot |
| In the area leading to Dozing Sands/Driftwood Shore, this Bean is found by the dark grass in the far south-east, just by the south exit. | Power | 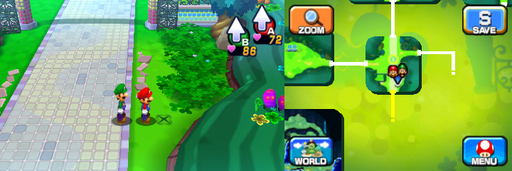
|
| In the area leading to Dozing Sands/Driftwood Shore, this Bean is found to the south of the Mushrise Management sign. | Power | 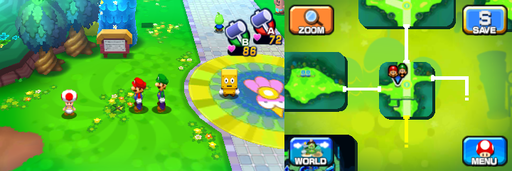
|
| In the area leading to Dozing Sands/Driftwood Shore, this Bean is found in the north-east, near a rock. | Bros. | 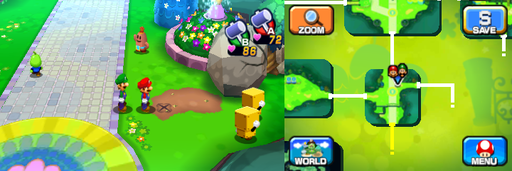
|
| In the area with the bridge, this Bean is found on some higher ground in the north-west first accessed to the west of said area in the area with the lookout point. | Defense | 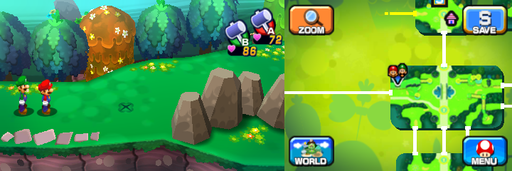
|
| In the area with the bridge, this Bean is found by a Red Yoshi in the south-east. | Power | 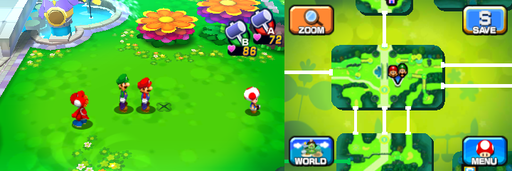
|
| In the area with the bridge, this Bean is found right next to the north-east exit. | Bros. | 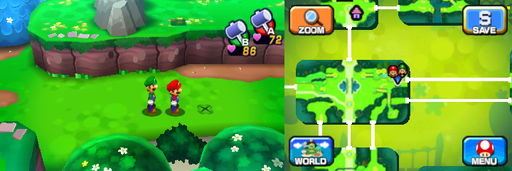
|
| In the area with the bridge, this Bean is found by the south-east exit. | Bros. | 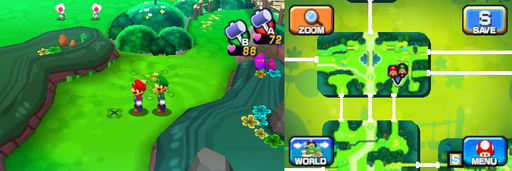
|
| In the area with the fountain, this Bean is found in a patch of dirt in the south-east. | Defense | 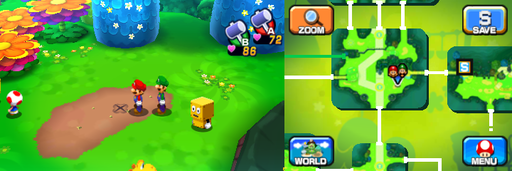
|
| In the area with the fountain, this Bean is found in the south-west on ground level. | Heart | 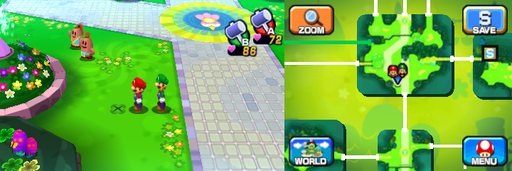
|
| In the area with the fountain, this Bean is found on some grass in the center of a spiral pattern in the north. | Stache | 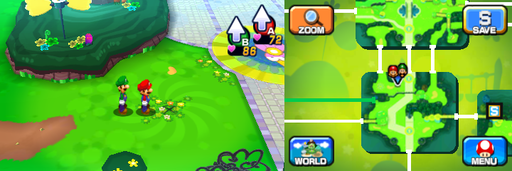
|
| In the area with the fountain, this Bean is found on some higher ground in the west, the specific position being inside a circular-patterned patch of grass. (Spin Jump required) | Heart | 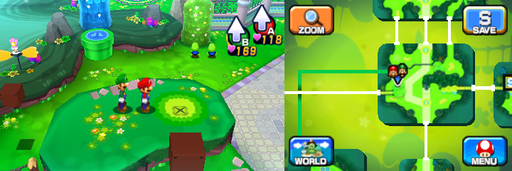
|
| In the area with the Maintainence Hut Warp Pipe and Brickle, these 4 Beans are found on a spot of light in the far east. The southern one is Heart Bean, the western one is Bros. Bean, the northern one is Defense Bean and the eastern one is Stache Bean. | Heart, Bros., Defense and Stache | 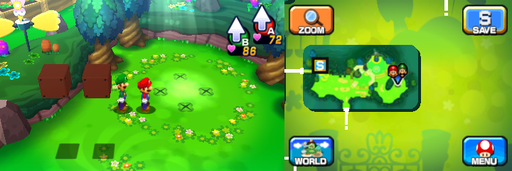
|
| In the area to the east of the area with the park's southern exit, this Bean is found in the north-east on ground level, right next to the small blue hill there. | Defense | 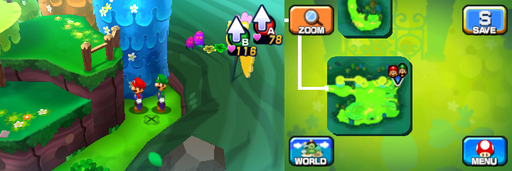
|
| In the area to the west of the area with the fountain, this Bean is found on the south-east side of the area, the specific position being inside a circular-patterened patch of grass. | Speed | 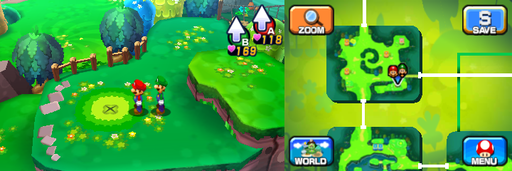
|
| In the area to the east of the Maintainence Hut area (on the map), this Bean is found in the south-west, in a patch of dirt in the middle of some darker grass. | Bros. | 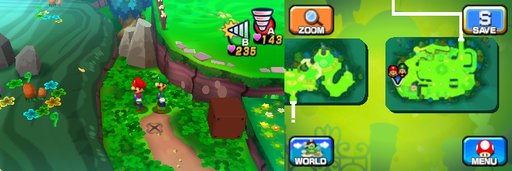
|
| In the area to the east of the Maintainence Hut area (on the map), this Bean is found in the north, on some dark green ground. | Speed | 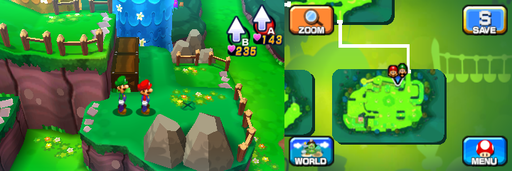
|
| In the area to the east of the Maintainence Hut area (on the map), these 2 Stache Beans are found in the north at the highest possible level, before two blocks. | Stache | 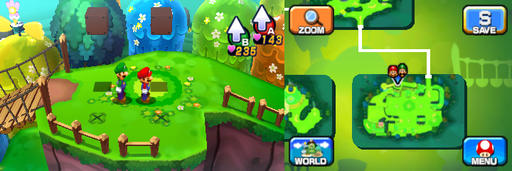
|
| In the area leading to Somnom Woods/Neo Bowser Castle, this Bean is found by the northern exit, on higher ground. (Ball Hop required) | Speed | 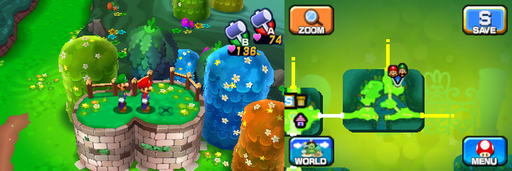
|
Block locations[edit]
| Mushrise Park - 59 Blocks (40 ?, 3 M, 3 L, 2 Bros., 2 Random, 8 Attack Piece, 1 Camera) | ||
|---|---|---|
| Item/s | Location | Screenshot |
1-Up Mushroom |
In the second scene, in the southeast. | 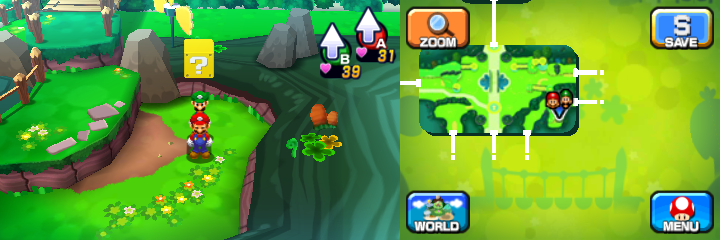
|
10 Coins, 10 Five Coins |
NOTE: Following 41 blocks are available only after returning from Dreamy Mushrise Park accessed by the Blue Pi'illo. Same scene, in the southwest. |
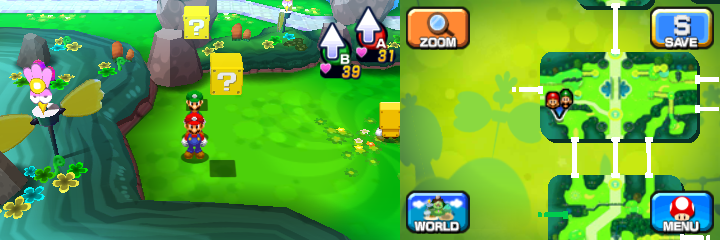
|
Coin |
In the scene south of the second scene (eight scene), in the northwest. | 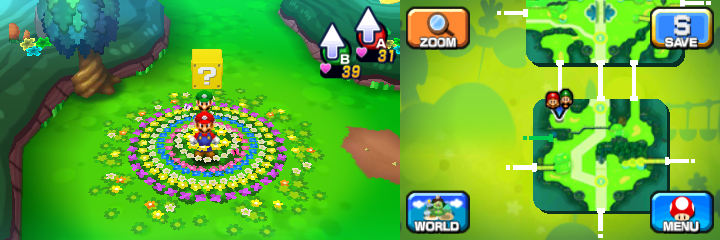
|
Coin |
In the third scene, in the south. | 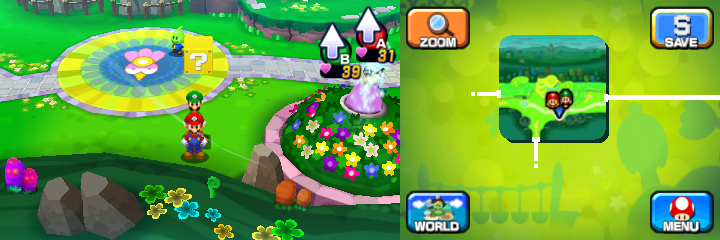
|
Mushroom |
Same scene, in the northwest. | 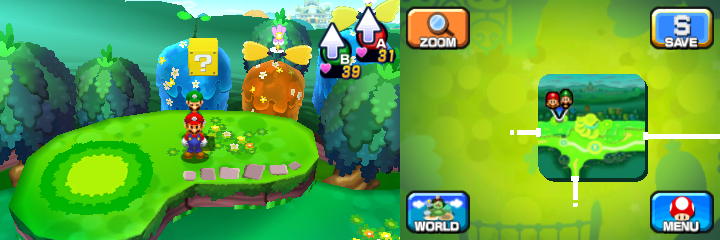
|
10 Coins |
In the second scene, in the northwest. | 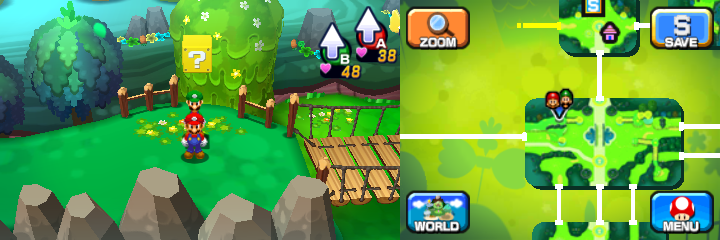
|
10 Five Coins, So-So Boots |
In the scene west of the third scene, in the west. | 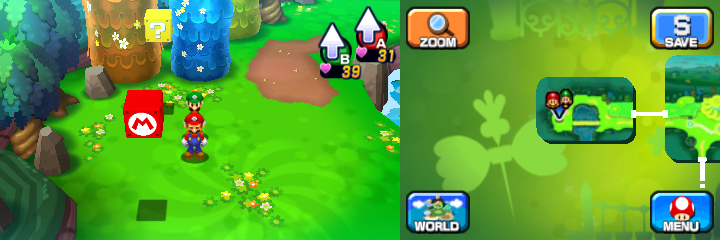
|
3D Red Shell Attack Piece |
In the fourth scene, near the entrance. | 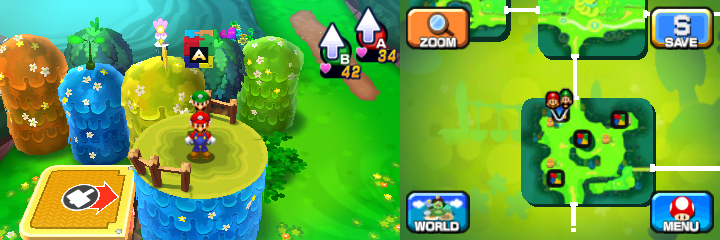
|
3D Red Shell Attack Piece |
Same scene, in the middle. | 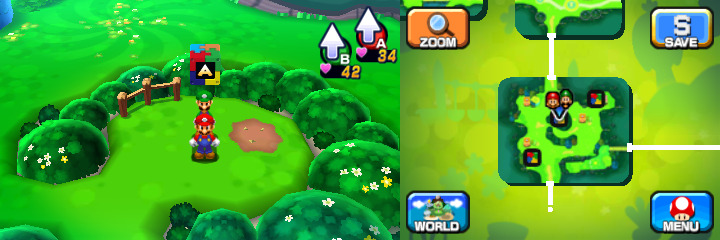
|
3D Red Shell Attack Piece |
Same scene, in the southwest. | 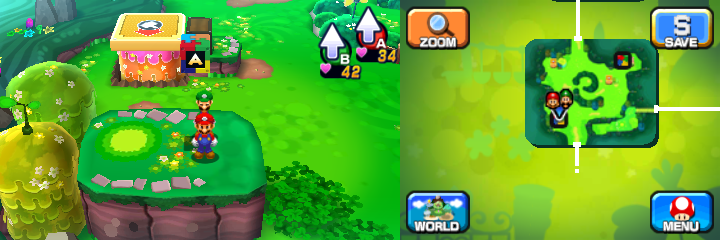
|
3D Red Shell Attack Piece |
In the fifth scene, near the entrance. | 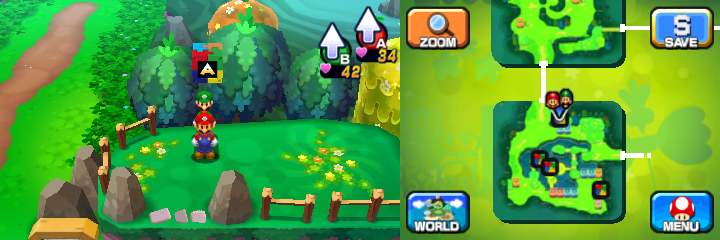
|
Coin |
Same scene, in the northeast. | 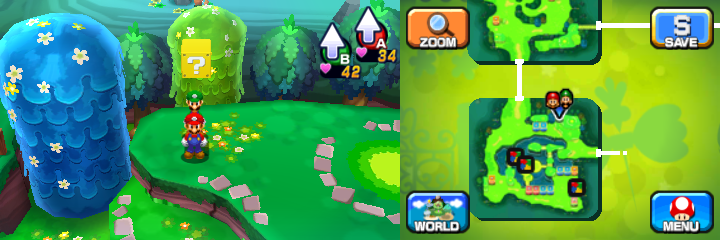
|
Coin |
Same scene, in the west. | 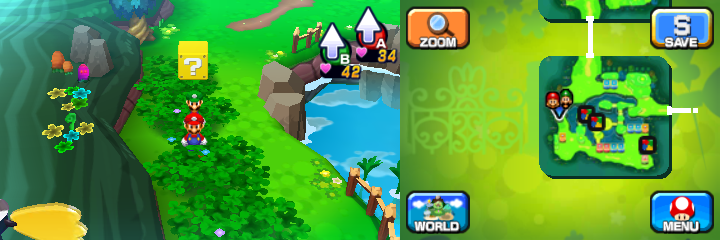
|
Five Coin |
Same scene, in the southwest. | 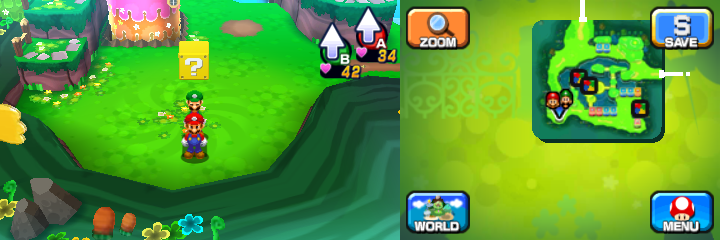
|
3D Red Shell Attack Piece |
Same scene, in the middle, on the west island. | 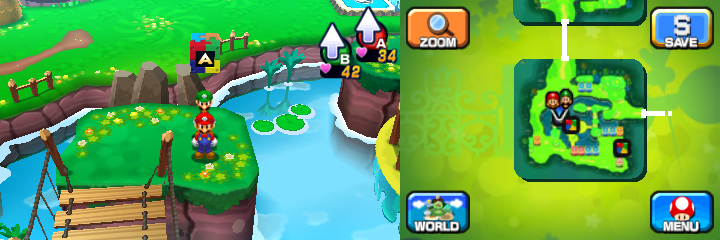
|
3D Red Shell Attack Piece |
Same scene, in the southeast. | 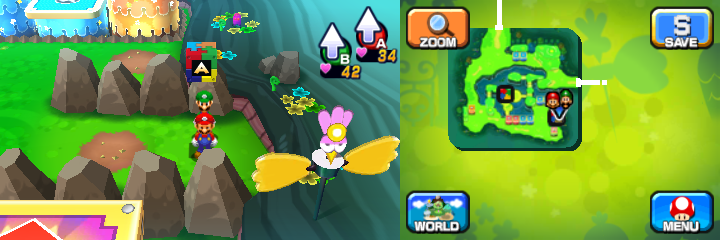
|
3D Red Shell Attack Piece, 10 Coins |
Same scene, in the middle, on the middle islands. | 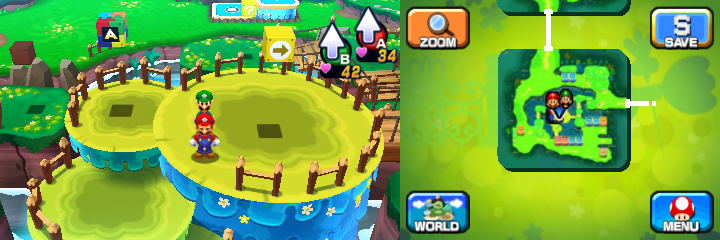
|
10 Coins |
Same scene, in the middle, on the north island. | 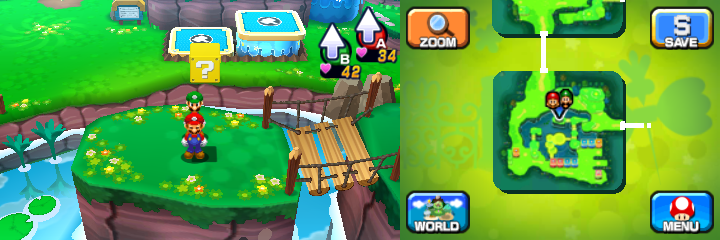
|
3D Red Shell Attack Piece |
In the fourth scene, in the northeast. Accessible after destroying the rocks by using the rainbow Slingshroom in the fifth scene. | 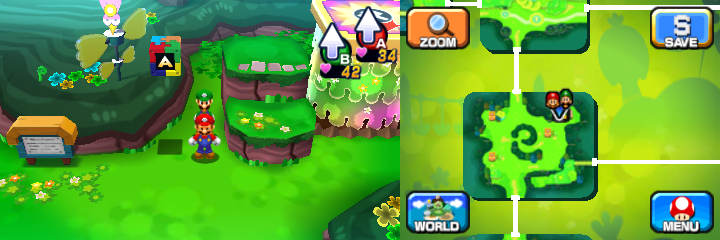
|
10 Coins |
Same scene, right of the rainbow Slingshroom. | 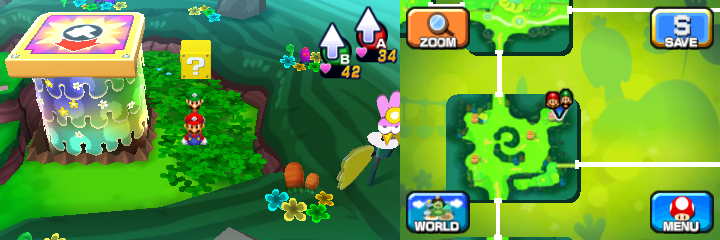
|
Candy |
In the sixth scene, in the south. | 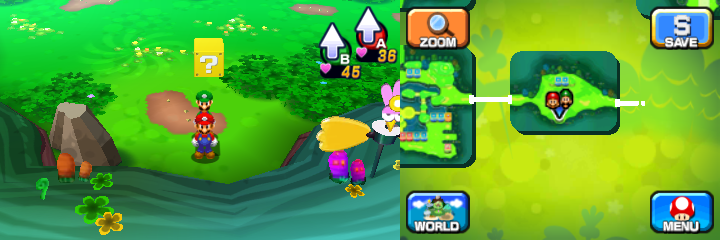
|
Syrup Jar |
Same scene, left of the Seesaw Mushrooms. | 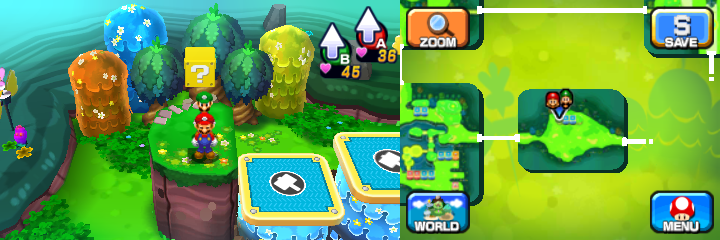
|
Five Coin |
Same scene, right of the Seesaw Mushrooms. | 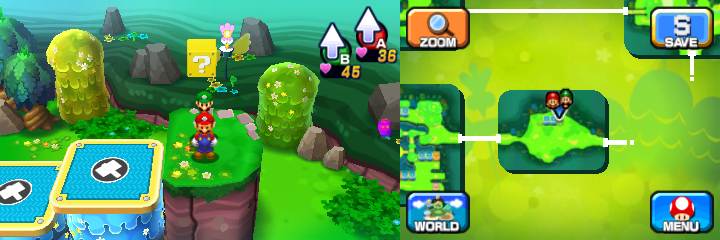
|
Coin |
In the seventh scene, near the entrance. | 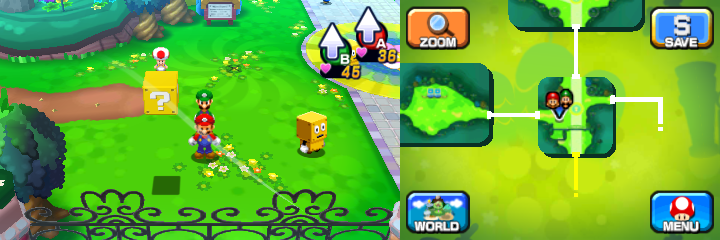
|
Coin |
Same scene, near the northern exit. | 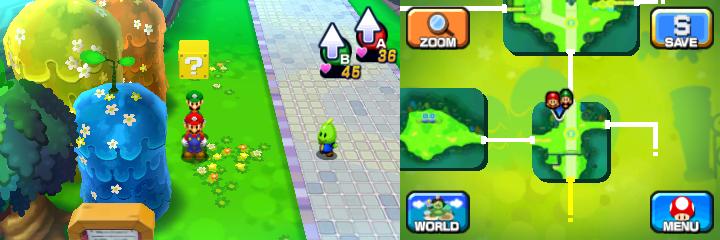
|
10 Coins |
In the eighth scene, in the west. | 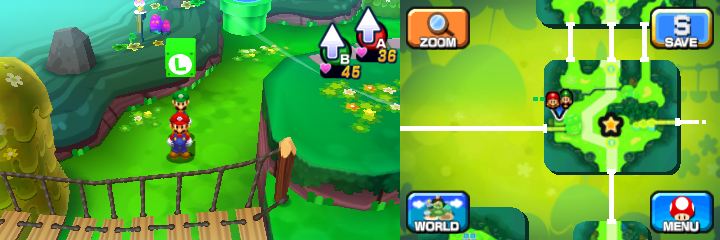
|
Coin |
Same scene, in the north. | 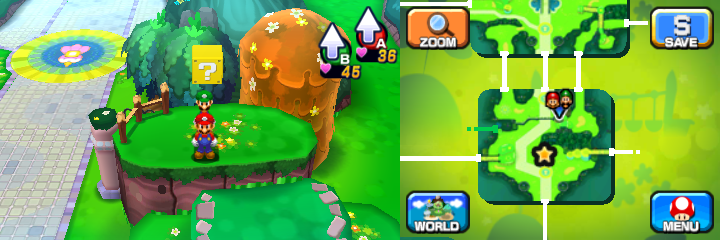
|
Mushroom |
Same scene, in the northeast. | 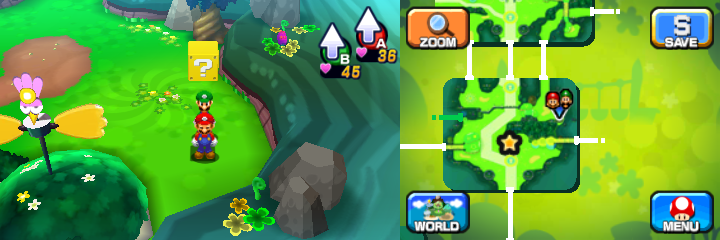
|
10 Coins, Coin |
In the scene east of the second scene, in the southwest. | 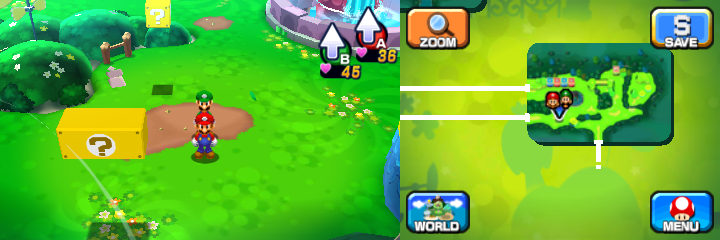
|
Super Candy |
In the second scene, in the northeast. | 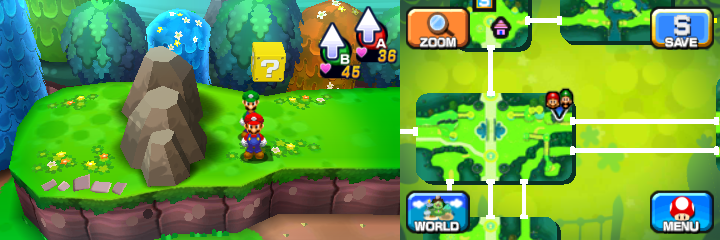
|
10 Coins |
In the underground scene, in the north. | 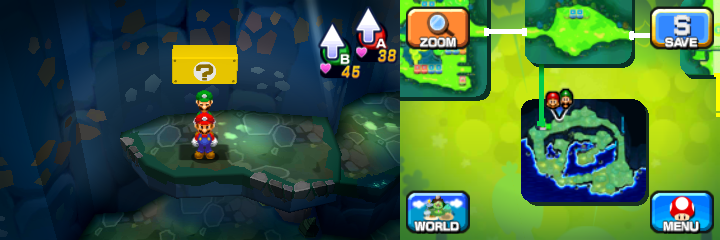
|
10 Coins |
Same scene, in the south. | 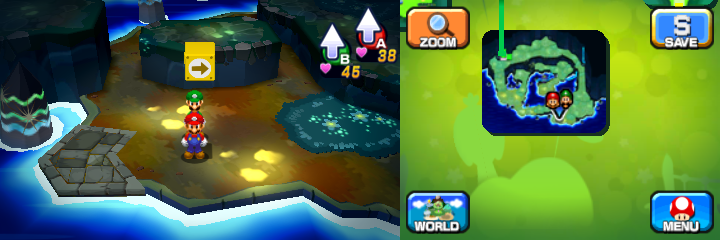
|
So-So Wear |
Same scene, in the middle. | 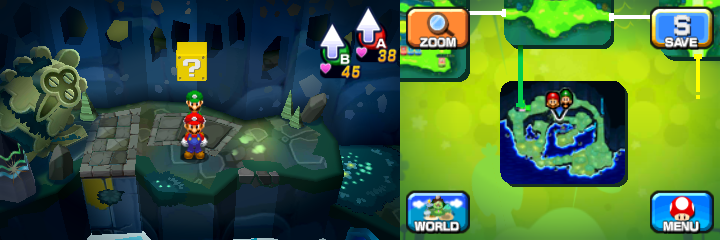
|
Discount Hammer, Coin |
In the Maintanance Hut scene, in the southwest. | 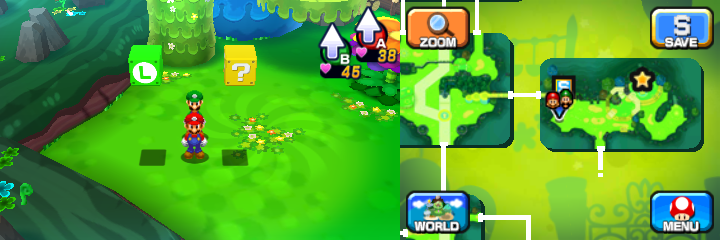
|
Syrup Jar |
Same scene, in the north. | 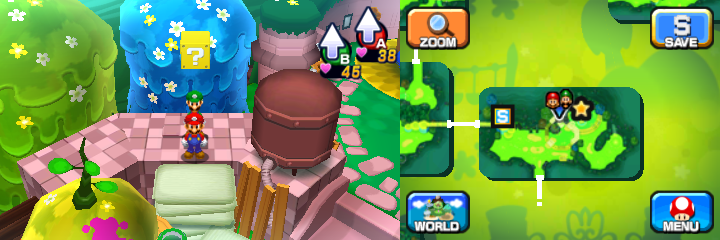
|
10 Coins, 10 Five Coins |
Same scene, in the southeast. | 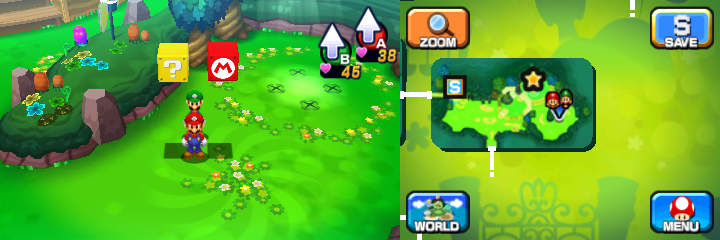
|
Super Candy |
NOTE: Following 2 blocks are available only after learning Mini-Mario in Dozing Sands. In the seventh scene, in the southwest. |
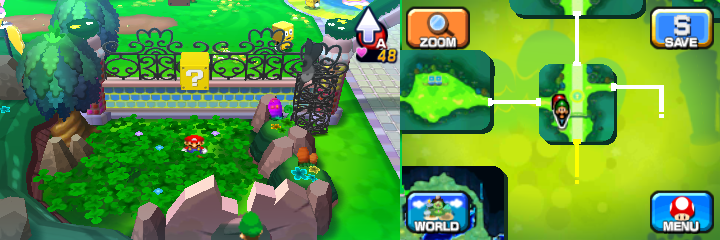
|
10 10-Coins |
In the scene east of the first scene, in the northwest. | 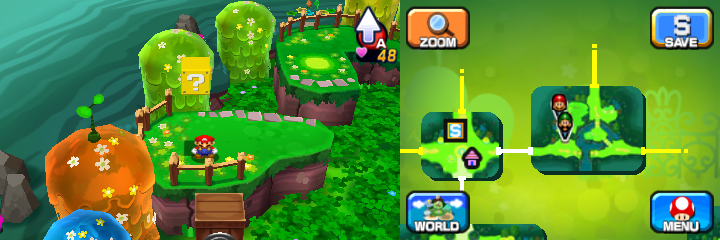
|
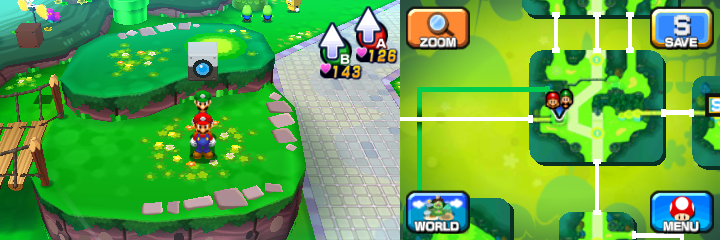
Mushrise Park Shot |
NOTE: Following block is available only after learning Spin Jump on Mount Pajamaja. In the eighth scene, on the elevated ground reachable by a Spin Jump from the flowers right of it. |
|
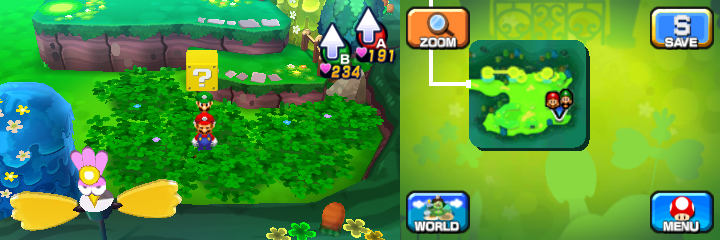
10-Coin |
NOTE: Following 4 blocks are available only after returning from Dream's Deep accessed by the Dreamy Pi'illo Castle accessed by the Dreampoint. In the scene east of the seventh scene, in the southeast. |
|
Ultra Mushroom |
Same scene, in the southwest. | 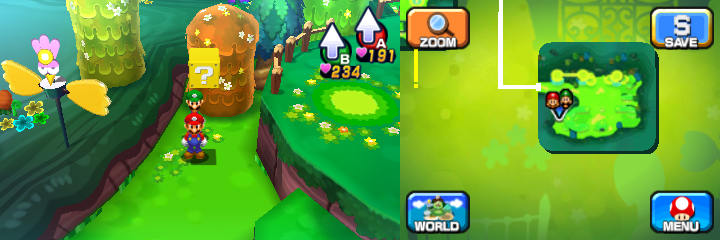
|
10 50-Coins |
Same scene, in the northeast. | 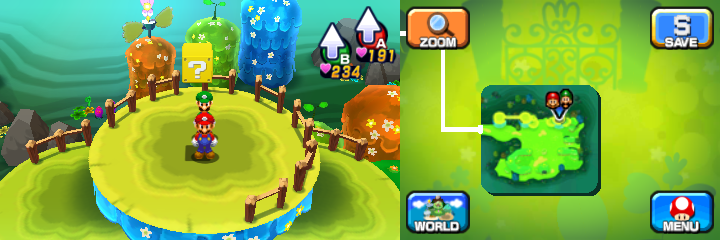
|
Max Candy |
Same scene, in the north. | 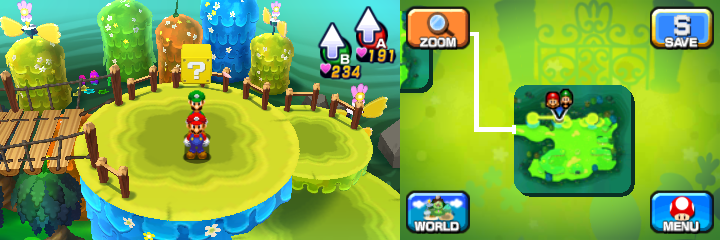
|
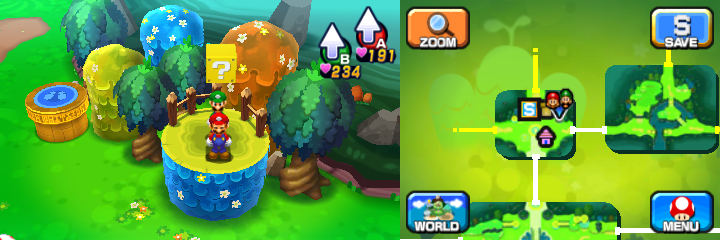
10 50-Coins |
NOTE: Following 10 blocks are available only after learning the Ball Hop during second Mount Pajamaja visit. In the first scene, in the northeast. |
|
1-Up Deluxe |
Same scene, in the northwest. | 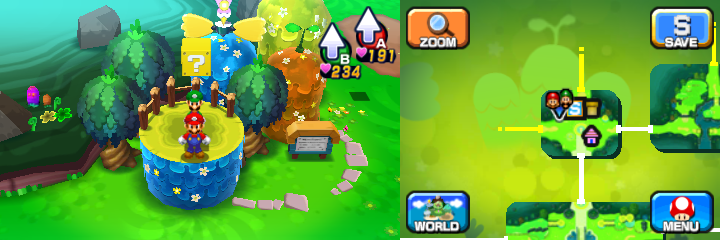
|
50-Coin |
In the scene east of the second scene, in the northeast. | 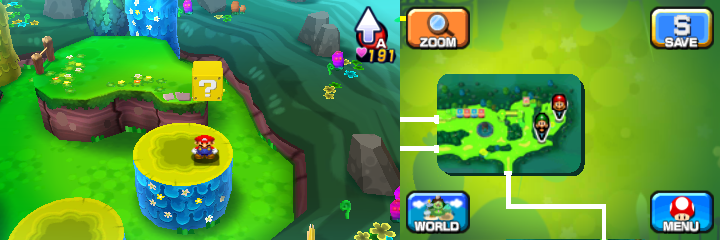
|
50-Coin |
In the scene south of the previous one, in the west. | 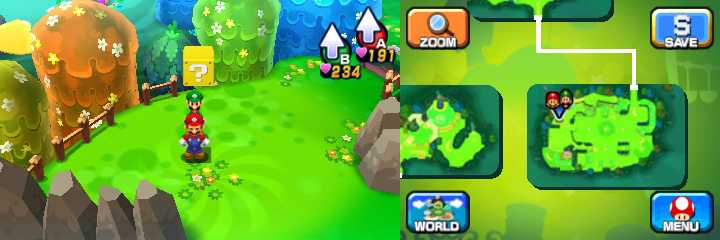
|
10-Coin |
Same scene, in the southwest. | 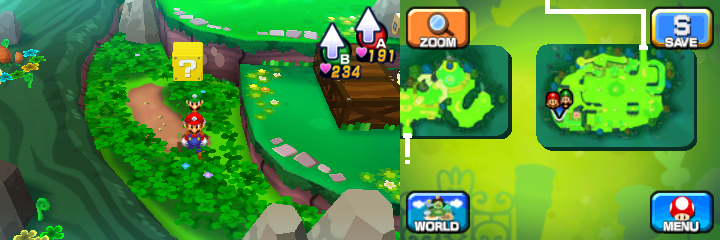
|
Glass Hammer |
Same scene, in the northwest. | 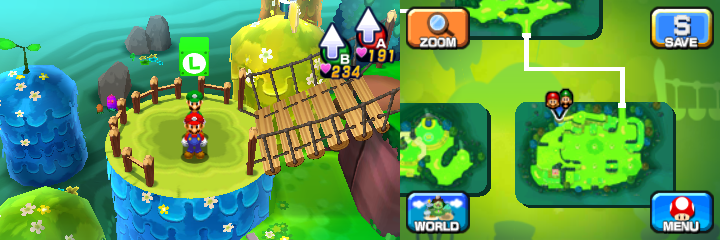
|
10 10-Coins, Refreshing Herb |
Same scene, in the north. | 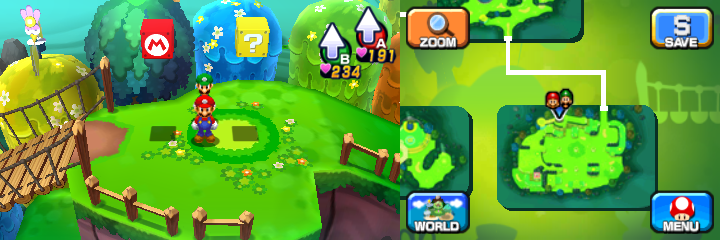
|
Ultrasyrup Jar |
Same scene, in the northeast. | 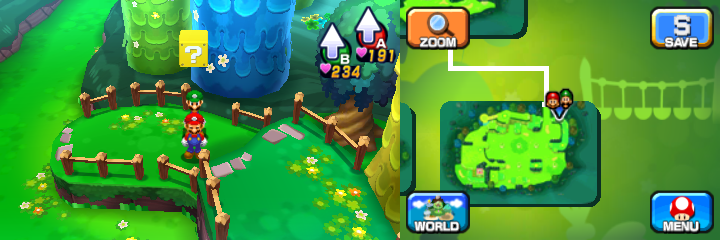
|
Max Candy |
In the underground scene, in the northwest. | 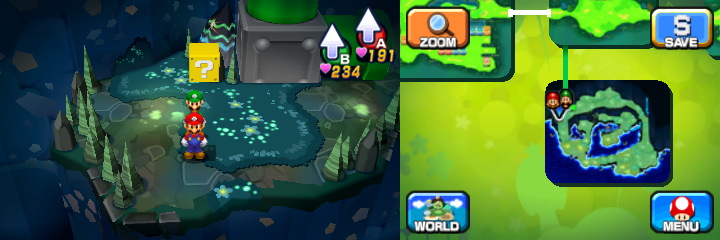
|
Names in other languages[edit]
| Language | Name | Meaning | Notes |
|---|---|---|---|
| Japanese | オハパーク[?] Oha Pāku |
Possibly from the shortened form of「お |
|
| Dutch | Dauwpark[?] | Dew Park | |
| French (NOA) | Parc Lève-Champi[?] | Arise-Shroom Park | |
| French (NOE) | Parc de l'éveil[?] | Awakening park | |
| German | Pilzwald Park[?] | Mushroom-Forest Park | |
| Italian | Buonparco[?] | From "buono" (good) and "parco" (park) | |
| Korean | 굿모닝 파크[?] Gutmoning Pakeu |
Good-Morning Park | |
| Portuguese (NOE) | Parque Cogumelo Nascente[?] | Rising Mushroom Park | |
| Spanish (NOA) | Parque Despabile[?] | Snuff Park | |
| Spanish (NOE) | Parque Aurora[?] | Sunlight Park |
