Bamboozle Village: Difference between revisions
mNo edit summary |
No edit summary Tags: Mobile edit Advanced mobile edit |
||
| (45 intermediate revisions by 27 users not shown) | |||
| Line 1: | Line 1: | ||
{{level | {{level infobox | ||
|title=Bamboozle Village | |title=Bamboozle Village | ||
|image=[[ | |image=[[File:Bamboozle Village.jpg|275px]] | ||
|code=5-S1 | |code=5-S1 | ||
|game=''[[Wario Land: Shake It!]]'' | |game=''[[Wario Land: Shake It!]]'' | ||
|track=Mount Bighill (before freeing Merfle)<br>Bamboozle Village (after freeing Merfle) | |||
|before=[[Slipshod Slopes|<<]] | |before=[[Slipshod Slopes|<<]] | ||
|after=[[Freezing Fields|>>]] | |after=[[Freezing Fields|>>]] | ||
}} | }} | ||
'''Bamboozle Village''' is a secret level in | {{quote|This is Bamboozle Village. They don't get any tougher. Oh, and there's a secret map here!|[[Merfle|Yellow Merfle]]|Wario Land: Shake It!}} | ||
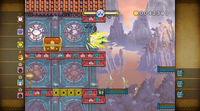
'''Bamboozle Village''' (known as '''Bamboo Village''' in the British English version) is a secret level in [[Quiver Cliffs]] in ''[[Wario Land: Shake It!]]'' It is unlocked after finding a [[List of Secret Maps in Wario Land: Shake It!|Secret Map]] in [[Slipshod Slopes]], and it also has a Secret Map to [[Freezing Fields]]. | |||
==Layout== | |||
This level is another East Asian-themed one like [[Mount Bighill]]. However, the bamboo stalks are purple and both the sky and the river are colored red. The mountain formations in the background are also colored purple. Inside the bamboos, countless enemies of various types inhabit here, along with great amounts of [[coin]]s. At first, Wario enters the village where [[Peek-a-boom]]s, [[Pitchfork]]s, [[Nosedozer]]s and [[Shortfuse]]s stand on each floor. Afterwards, Wario enters a place with several wooden posts whose [[spike]]s block Wario's way. Wario needs to walk frequently between this and the next section to dash down the posts and pave way for the treasure above. In the following section, Wario jumps on a long spring and reach the platforms above, where a Peek-a-boom turns up and throws him [[bomb]]s. Wario should use the bombs to destroy the metallic block and clear his way. After that, he encounters long wooden posts attached with spikes. Wario can make them vertical, jump on them and reach the diamond above. Next, Wario should jump on several short springs with great care since spikes are right above his head. When he falls down gently, he can collect more coins and seize the golden enemy, which is a [[Bandinero]]. If he pounds down, he will lose them all. Once Wario finds the [[Merfle Barrel|caged]] [[Merfle]], he will have to use the [[Max Fastosity Dasherator]] to jump on springs and dash back to the start of the level before time runs out. | |||
==Secret Map location== | |||
[[File:WLSI Bamboozle Village Secret Map.png|thumb|275px|Wario finds the level's Secret Map.]] | |||
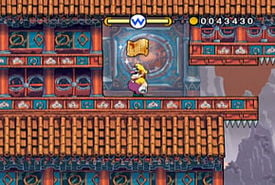
This level has a Secret Map to Freezing Fields. Wario needs to reach the section where he jumps on several short springs with spikes on them. At the third short spring, the player should simply press jump button rather than pound down to help Wario jump to the left without getting hurt. There is a small coin bag behind the stone block. Standing beside the coin bag and performing an [[Earthshake Punch]] reveals the map. | |||
{{br}} | |||
==Missions== | ==Missions== | ||
{{image|more=yes|section=yes|Each mission has an icon associated. They should be uploaded and added to this section.}} | |||
[[File:WLSI Bamboozle Village golden enemy.png|thumb|275px|Wario next to the level's golden enemy]] | |||
{{WLSI missions table | |||
|icon1=[[File:No image.png|18px]] | |||
|mission1=''Finish before the clock hits 1:30:00'' | |||
|icon2=[[File:No image.png|18px]] | |||
|mission2=''Beat the stage without taking damage'' | |||
|icon3=[[File:No image.png|18px]] | |||
|mission3=''Collect 70,000 [[coin]]s'' | |||
|icon4=[[File:No image.png|18px]] | |||
|mission4=''Defeat the golden enemy'' | |||
|icon5=[[File:No image.png|18px]] | |||
|mission5=''Defeat 3 enemies with [[bomb]]s'' | |||
|icon6=[[File:No image.png|18px]] | |||
|mission6=''Shake a [[Peek-a-boom]]'' | |||
|icon7=[[File:No image.png|18px]] | |||
|mission7=''Detonate 5 [[bomb]]s simultaneously'' | |||
}} | |||
{{br}} | |||
==Enemies== | |||
*[[Bandinero]] (red, yellow, white and gold) | |||
*[[Boomdinero]] (red and silver) | |||
*[[Nosedozer]] | |||
*[[Peek-a-boom]] | |||
*[[Pitchfork]] (blue) | |||
*[[Shortfuse]] | |||
*[[Spike Trap]] | |||
==Treasures== | |||
{|class="wikitable"style="text-align:center" | |||
|- | |||
!width="5%"|Chest location | |||
!width="5%"|Treasure | |||
!width="15%"|NTSC-U description | |||
!width="15%"|PAL description | |||
|- | |||
|[[File:WLSI Bamboozle Village chest1.png|200px]] | |||
|[[File:WLSItreasure91.png|55px]]<br>Collapsible Telescope | |||
|''Pirates never need binoculars. | |||
|''Pirates never need binoculars. Think about it. | |||
|- | |||
|[[File:WLSI Bamboozle Village chest2.png|200px]] | |||
|[[File:WLSItreasure92.png|55px]]<br>Nice Cup of Green Tea<br><small>Cup of Green Tea</small> | |||
|''For a quick pick-me-up, there's no better treasure. It also makes you look classy. | |||
|''Oh! A tea stalk is standing up straight! They say that brings you luck for the rest of the day! | |||
|- | |||
|[[File:WLSI Bamboozle Village chest3.png|200px]] | |||
|[[File:WLSItreasure93.png|55px]]<br>Tiger-Eye | |||
|''A rare jewel shaped like an eerie eyeball. All-seeing and all-creepy. | |||
|''A rare jewel shaped like an eerie eyeball. All-seeing and altogether disturbing. | |||
|} | |||
==Data== | |||
{{WLSI level data | |||
|time=2:30:00 | |||
|coins=76,630 | |||
}} | |||
==Names in other languages== | |||
{{foreign names | |||
|Jap=ホイコーロード | |||
|JapR=Hoikō Rōdo | |||
|JapM=Pun on「回鍋肉」(''hoikōrō'', "{{wp|twice-cooked pork}}", a Chinese dish) and "road" | |||
|Ger=She-Tse-Tempel | |||
|GerM=She Tse Temple | |||
|Ita=Borgo Rimbambù | |||
|ItaM=Rumble-bamboo Village | |||
|SpaA=Villa Trampa | |||
|SpaAM=Booby Trap Village | |||
|Fre=Bambou Maboul | |||
|FreM=Crazy Bamboo | |||
}} | |||
{{WLSI}} | {{WLSI}} | ||
[[Category: | [[Category:Villages]] | ||
[[Category: | [[Category:Secret levels]] | ||
[[Category:Wario | [[Category:Wario Land: Shake It! levels]] | ||
Latest revision as of 20:47, December 21, 2024
| Level | |
|---|---|
| Bamboozle Village | |
| |
| Level code | 5-S1 |
| Game | Wario Land: Shake It! |
| Music track | Mount Bighill (before freeing Merfle) Bamboozle Village (after freeing Merfle) |
| << Directory of levels >> | |
- “This is Bamboozle Village. They don't get any tougher. Oh, and there's a secret map here!”
- —Yellow Merfle, Wario Land: Shake It!
Bamboozle Village (known as Bamboo Village in the British English version) is a secret level in Quiver Cliffs in Wario Land: Shake It! It is unlocked after finding a Secret Map in Slipshod Slopes, and it also has a Secret Map to Freezing Fields.
Layout[edit]
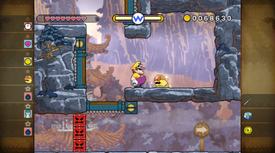
This level is another East Asian-themed one like Mount Bighill. However, the bamboo stalks are purple and both the sky and the river are colored red. The mountain formations in the background are also colored purple. Inside the bamboos, countless enemies of various types inhabit here, along with great amounts of coins. At first, Wario enters the village where Peek-a-booms, Pitchforks, Nosedozers and Shortfuses stand on each floor. Afterwards, Wario enters a place with several wooden posts whose spikes block Wario's way. Wario needs to walk frequently between this and the next section to dash down the posts and pave way for the treasure above. In the following section, Wario jumps on a long spring and reach the platforms above, where a Peek-a-boom turns up and throws him bombs. Wario should use the bombs to destroy the metallic block and clear his way. After that, he encounters long wooden posts attached with spikes. Wario can make them vertical, jump on them and reach the diamond above. Next, Wario should jump on several short springs with great care since spikes are right above his head. When he falls down gently, he can collect more coins and seize the golden enemy, which is a Bandinero. If he pounds down, he will lose them all. Once Wario finds the caged Merfle, he will have to use the Max Fastosity Dasherator to jump on springs and dash back to the start of the level before time runs out.
Secret Map location[edit]
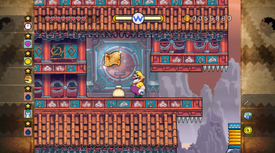
This level has a Secret Map to Freezing Fields. Wario needs to reach the section where he jumps on several short springs with spikes on them. At the third short spring, the player should simply press jump button rather than pound down to help Wario jump to the left without getting hurt. There is a small coin bag behind the stone block. Standing beside the coin bag and performing an Earthshake Punch reveals the map.
Missions[edit]
It has been requested that more images be uploaded for this section. Remove this notice only after the additional images have been added. Specific(s): Each mission has an icon associated. They should be uploaded and added to this section.
| Icon | Mission
|
|---|---|
| Finish before the clock hits 1:30:00 | |
| Beat the stage without taking damage | |
| Collect 70,000 coins | |
| Defeat the golden enemy | |
| Defeat 3 enemies with bombs | |
| Shake a Peek-a-boom | |
| Detonate 5 bombs simultaneously |
Enemies[edit]
- Bandinero (red, yellow, white and gold)
- Boomdinero (red and silver)
- Nosedozer
- Peek-a-boom
- Pitchfork (blue)
- Shortfuse
- Spike Trap
Treasures[edit]
Data[edit]
| Given time | Sum of coins |
|---|---|
| 2:30:00 | 76,630 |
Names in other languages[edit]
| Language | Name | Meaning | Notes |
|---|---|---|---|
| Japanese | ホイコーロード[?] Hoikō Rōdo |
Pun on「回鍋肉」(hoikōrō, "twice-cooked pork", a Chinese dish) and "road" | |
| French | Bambou Maboul[?] | Crazy Bamboo | |
| German | She-Tse-Tempel[?] | She Tse Temple | |
| Italian | Borgo Rimbambù[?] | Rumble-bamboo Village | |
| Spanish (NOA) | Villa Trampa[?] | Booby Trap Village |
