Gallery:Super Mario All-Stars: Difference between revisions
MatiasNTRM (talk | contribs) |
LinkTheLefty (talk | contribs) mNo edit summary |
||
| (82 intermediate revisions by 33 users not shown) | |||
| Line 1: | Line 1: | ||
{{Italic title}} | |||
This is a gallery of images for the game ''[[Super Mario All-Stars]]''. | This is a gallery of images for the game ''[[Super Mario All-Stars]]''. | ||
==Logos== | ==Logos== | ||
<gallery widths= | <gallery widths=230px> | ||
Super Mario All-Stars logo.jpg|International logo | Super Mario All-Stars logo.jpg|International logo | ||
SMC logo.png|Japanese logo | SMC logo.png|Japanese logo | ||
SMAS SMB logo.png|''[[Super Mario Bros.]]'' logo | |||
SMAS SMBTLL Logo.png|''[[Super Mario Bros.: The Lost Levels]]'' logo | |||
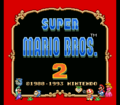
SMAS SMB2 Logo.png|''[[Super Mario Bros. 2]]'' logo | |||
SMAS SMB3 Logo.png|''[[Super Mario Bros. 3]]'' logo | |||
SMBTLL SMAS cover logo.png|''[[Super Mario Bros.: The Lost Levels]]'' "cover" logo | SMBTLL SMAS cover logo.png|''[[Super Mario Bros.: The Lost Levels]]'' "cover" logo | ||
</gallery> | </gallery> | ||
<gallery widths=170px perrow=4 caption="In-game"> | |||
<gallery widths= | |||
SMAS in-game logo.png|International in-game logo | SMAS in-game logo.png|International in-game logo | ||
SMC in-game logo.png|Japanese in-game logo | SMC in-game logo.png|Japanese in-game logo | ||
SMAS SMB Logo.png|The in-game logo | SMAS SMB Logo.png|The in-game logo for ''Super Mario Bros.'' | ||
SMAS LL Logo.png|The in-game logo | SMAS LL Logo.png|The in-game logo for ''Super Mario Bros.: The Lost Levels'' | ||
SMAS SMB2 JP Logo.png|The in-game logo | SMAS SMB2 JP Logo.png|The in-game logo for ''Super Mario Bros.: The Lost Levels'' (Japanese) | ||
SMAS SMB2 - in-game logo.png|The in-game logo | SMAS SMB2 - in-game logo.png|The in-game logo for ''Super Mario Bros. 2'' | ||
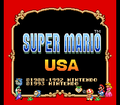
SMAS SMUSA in-game logo.png|The in-game logo | SMAS SMUSA in-game logo.png|The in-game logo for ''Super Mario USA'' (Japanese) | ||
SMB3 Logo.png|The in-game logo | SMB3 Logo.png|The in-game logo for ''Super Mario Bros. 3'' | ||
</gallery> | </gallery> | ||
| Line 30: | Line 33: | ||
===''Super Mario Bros. 2''=== | ===''Super Mario Bros. 2''=== | ||
<gallery> | <gallery> | ||
SMW Mario V-sign Artwork.png|Mario | |||
AllStarsArt2.png|Mario | AllStarsArt2.png|Mario | ||
SMAS SMB2 Mario Picking Up Mushroom.png|Mario | SMAS SMB2 Mario Picking Up Mushroom.png|Mario | ||
| Line 35: | Line 39: | ||
AllStarsArt4.png|Mario | AllStarsArt4.png|Mario | ||
SMAS SMB2 Mario Throwing Mushroom.png|Mario | SMAS SMB2 Mario Throwing Mushroom.png|Mario | ||
SMAS Luigi 2.png|Luigi | |||
SMAS-Coin.png|[[Coin]] | SMAS-Coin.png|[[Coin]] | ||
SMAS SMB2 Mushroom Artwork.png|[[Mushroom]] | SMAS SMB2 Mushroom Artwork.png|[[Mushroom]] | ||
| Line 55: | Line 60: | ||
SMAS Luigi 1.png|Luigi | SMAS Luigi 1.png|Luigi | ||
Mario swimming SMAS SMB3 artwork.jpg|Mario swimming | Mario swimming SMAS SMB3 artwork.jpg|Mario swimming | ||
Smb3 p switch.png|[[P Switch|Switch Block]] | |||
Smas+smw p-wing.png|[[P-Wing]] | |||
Frogsuit.png|[[Frog Suit]] | |||
Tanookisuit.png|[[Tanooki Suit]] | |||
SMC NOG Lemmy.png|[[Lemmy|Lemmy Koopa]] | |||
</gallery> | </gallery> | ||
==Sprites== | ==Sprites== | ||
===''Super Mario Bros.''=== | ===''Super Mario Bros.'' / ''Super Mario Bros.: The Lost Levels''=== | ||
====Characters==== | ====Characters==== | ||
<gallery> | <gallery> | ||
| Line 65: | Line 75: | ||
SMAS SMB Mario Death Sprite.png|Mario's death sprite | SMAS SMB Mario Death Sprite.png|Mario's death sprite | ||
SMAS SMB Small Mario Doing V-Sign.png|Small Mario doing a V-sign | SMAS SMB Small Mario Doing V-Sign.png|Small Mario doing a V-sign | ||
SMAS SMB Invincible Small Mario.gif|Small [[Invincible Mario]] | |||
SMAS SMB Super Mario.png|[[Super Mario (form)|Super Mario]] | SMAS SMB Super Mario.png|[[Super Mario (form)|Super Mario]] | ||
SMAS SMB Super Mario Running Sprite.gif|Super Mario walking | SMAS SMB Super Mario Running Sprite.gif|Super Mario walking | ||
| Line 71: | Line 82: | ||
SMAS SMB Mario V-sign sprite.png|Super Mario doing a V-sign (when going into pipes) | SMAS SMB Mario V-sign sprite.png|Super Mario doing a V-sign (when going into pipes) | ||
SMAS SMB Mario V-sign alt sprite.png|Super Mario doing a V-sign (when completing a level) | SMAS SMB Mario V-sign alt sprite.png|Super Mario doing a V-sign (when completing a level) | ||
SMAS SMB Invincible Mario.gif|Super Invincible Mario | |||
SMAS SMB Small Luigi Sprite.png|[[Small Mario|Small Luigi]] | SMAS SMB Small Luigi Sprite.png|[[Small Mario|Small Luigi]] | ||
SMAS SMB Small Luigi Jumping.png|Small Luigi jumping | SMAS SMB Small Luigi Jumping.png|Small Luigi jumping | ||
SMAS SMB Luigi Death Sprite.png|Luigi's death sprite | SMAS SMB Luigi Death Sprite.png|Luigi's death sprite | ||
SMAS SMB Small Luigi Doing V-Sign.png|Small Luigi doing the V sign | SMAS SMB Small Luigi Doing V-Sign.png|Small Luigi doing the V sign | ||
SMAS SMB Invincible Small Luigi.gif|Small Invincible Luigi | |||
SMAS SMB Super Luigi Sprite.png|[[Super Mario (form)|Super Luigi]] | SMAS SMB Super Luigi Sprite.png|[[Super Mario (form)|Super Luigi]] | ||
SMAS SMB Super Luigi Running Sprite.gif|Super Luigi walking | SMAS SMB Super Luigi Running Sprite.gif|Super Luigi walking | ||
| Line 81: | Line 94: | ||
SMAS SMB Luigi V-sign sprite.png|Super Luigi doing a V-sign (when going into pipes) | SMAS SMB Luigi V-sign sprite.png|Super Luigi doing a V-sign (when going into pipes) | ||
SMAS SMB Luigi V-sign alt sprite.png|Super Luigi doing a V-sign (when completing a level) | SMAS SMB Luigi V-sign alt sprite.png|Super Luigi doing a V-sign (when completing a level) | ||
SMAS SMB Invincible Luigi.gif|Super Invincible Luigi | |||
SMAS SMB Fire Mario Idle Sprite.png|[[Fire Mario|Fiery Mario]] | SMAS SMB Fire Mario Idle Sprite.png|[[Fire Mario|Fiery Mario]] | ||
SMAS SMB Fire Mario jump sprite.png|Fiery Mario jumping | SMAS SMB Fire Mario jump sprite.png|Fiery Mario jumping | ||
| Line 92: | Line 106: | ||
SMAS SMB Fire Luigi V-sign sprite.png|Fiery Luigi doing a V-sign (when going into pipes) | SMAS SMB Fire Luigi V-sign sprite.png|Fiery Luigi doing a V-sign (when going into pipes) | ||
SMAS SMB Fire Luigi V-sign alt sprite.png|Fiery Luigi doing a V-sign (when completing a level) | SMAS SMB Fire Luigi V-sign alt sprite.png|Fiery Luigi doing a V-sign (when completing a level) | ||
SMASBag.gif|A bag containing a [[Toad (species)| | SMASBag.gif|A bag containing a [[Toad (species)|mushroom retainer]] | ||
SMAS SMB Mushroom Retainer sprite.png|Mushroom | SMAS SMB Mushroom Retainer sprite.png|Mushroom retainer | ||
3toads.gif|3 | 3toads.gif|3 mushroom retainers | ||
SMAS SMB Peach Sprite.png|[[Princess Peach|Princess Toadstool]] | SMAS SMB Peach Sprite.png|[[Princess Peach|Princess Toadstool]] | ||
</gallery> | </gallery> | ||
| Line 134: | Line 148: | ||
SMAS SMB Spiny Egg.gif|Spiny Egg | SMAS SMB Spiny Egg.gif|Spiny Egg | ||
SMAS SMB Bill Blaster.png|[[Bill Blaster|Turtle Cannon]] | SMAS SMB Bill Blaster.png|[[Bill Blaster|Turtle Cannon]] | ||
SMAS TLL Red Piranha Plant Sprite.png|Red Piranha Plant (''Lost Levels'' only) | |||
</gallery> | </gallery> | ||
| Line 142: | Line 157: | ||
SMAS Axe.gif|[[Axe]] | SMAS Axe.gif|[[Axe]] | ||
SMAS Beanstalk.png|[[Beanstalk]] | SMAS Beanstalk.png|[[Beanstalk]] | ||
SMAS SMB Bowser's Portrait.png|[[Bowser]]'s portrait | |||
LargeFortress SMAS.png|[[Castle]] | LargeFortress SMAS.png|[[Castle]] | ||
SMAS Snow Castle.png|Castle (Snow) | SMAS Snow Castle.png|Castle (Snow) | ||
| Line 150: | Line 166: | ||
SMAS SMB Castle Empty Block.png|Empty Block (Castle) | SMAS SMB Castle Empty Block.png|Empty Block (Castle) | ||
SMAS SMB Fire Flower.gif|[[Fire Flower]] | SMAS SMB Fire Flower.gif|[[Fire Flower]] | ||
SMASSMBFlagpoleSprite.png|[[Goal Pole|Flagpole]] | |||
Fortress SMAS.png|[[Fortress]] | Fortress SMAS.png|[[Fortress]] | ||
SMAS Snow Fort.png|Fortress (Snow) | SMAS Snow Fort.png|Fortress (Snow) | ||
SMAS SMB Hard Block.png|[[Hard Block]] | SMAS SMB Hard Block.png|[[Hard Block]] | ||
SMAS SMB Underground Hard Block.png|Hard Block (Underground) | SMAS SMB Underground Hard Block.png|Hard Block (Underground) | ||
| Line 159: | Line 175: | ||
SMAS SMB White Horsetail Short.png|Horsehair plant (short) (snow) | SMAS SMB White Horsetail Short.png|Horsehair plant (short) (snow) | ||
SMAS SMB White Horsetail Tall.png|Horsehair plant (tall) (snow) | SMAS SMB White Horsetail Tall.png|Horsehair plant (tall) (snow) | ||
File:SMB All-Stars Sprite Island.png|[[Island]] | |||
SMAS Girder.png|[[Lift]] | SMAS Girder.png|[[Lift]] | ||
SMAS Mushroom Platform.png|[[Mushroom Platform]] | SMAS Mushroom Platform.png|[[Mushroom Platform]] | ||
| Line 170: | Line 187: | ||
SMAS SMB Warp Pipe alt sprite.png|Warp Pipe (Castle/Snow) | SMAS SMB Warp Pipe alt sprite.png|Warp Pipe (Castle/Snow) | ||
SMASBlock.png|[[? Block]] | SMASBlock.png|[[? Block]] | ||
SMAS SMBLL Poison Mushroom.png|[[Poison Mushroom]] | SMAS SMBLL Poison Mushroom.png|[[Poison Mushroom]] | ||
SMAS Green Springboard.png|[[Super Spring]] | SMAS Green Springboard.png|[[Super Spring]] | ||
</gallery> | </gallery> | ||
| Line 190: | Line 202: | ||
SMAS SMB2 Small Mario Crouching.png|Small Mario crouching | SMAS SMB2 Small Mario Crouching.png|Small Mario crouching | ||
SMAS SMB2 Small Mario Climbing.png|Small Mario climbing | SMAS SMB2 Small Mario Climbing.png|Small Mario climbing | ||
SMAS SMB2 Mario Character Select sprite.png|Mario as he appears on the character select screen | |||
SMAS SMB2 Luigi.png|Luigi | SMAS SMB2 Luigi.png|Luigi | ||
SMAS SMB2 Luigi Walking.gif|Luigi walking | SMAS SMB2 Luigi Walking.gif|Luigi walking | ||
SMAS SMB2 Small Luigi Sprite.png|Small Luigi | SMAS SMB2 Small Luigi Sprite.png|Small Luigi | ||
SMAS SMB2 Luigi Character Select sprite.png|Luigi as he appears on the character select screen | |||
SMAS SMB2 Toad Sprite.png|[[Toad]] | SMAS SMB2 Toad Sprite.png|[[Toad]] | ||
SMAS SMB2 Toad Walking Sprite.gif|Toad walking | SMAS SMB2 Toad Walking Sprite.gif|Toad walking | ||
SMAS SMB2 Small Toad Sprite.png|Small Toad | SMAS SMB2 Small Toad Sprite.png|Small Toad | ||
SMAS SMB2 Toad Character Select sprite.png|Toad as he appears on the character select screen | |||
SMAS SMB2 Princess Toadstool.png|Princess Toadstool | SMAS SMB2 Princess Toadstool.png|Princess Toadstool | ||
SMAS SMB2 Princess Toadstool Walking.gif|Princess Toadstool walking | SMAS SMB2 Princess Toadstool Walking.gif|Princess Toadstool walking | ||
SMAS SMB2 Small Princess Toadstool Sprite.png|Small Princess Toadstool | SMAS SMB2 Small Princess Toadstool Sprite.png|Small Princess Toadstool | ||
SMAS SMB2 Princess Toadstool Character Select sprite.png|Princess Toadstool as she appears on the character select screen | |||
Subcon SMB2 All-Stars.png|[[Subcon (species)|Subcon]] | Subcon SMB2 All-Stars.png|[[Subcon (species)|Subcon]] | ||
</gallery> | </gallery> | ||
| Line 240: | Line 256: | ||
All-Stars SMB2 Birdo.png|Pink [[Birdo]] | All-Stars SMB2 Birdo.png|Pink [[Birdo]] | ||
SMAS SMB2 Birdo Shooting Eggs Sprite.gif|Pink Birdo | SMAS SMB2 Birdo Shooting Eggs Sprite.gif|Pink Birdo | ||
Red Birdo SMB2 All-Stars.png | Red Birdo SMB2 All-Stars.png|Red Birdo | ||
Green Birdo SMB2 All-Stars.png | Green Birdo SMB2 All-Stars.png|Green Birdo | ||
SMAS SMB2 Green Birdo Shooting Fireballs Sprite.gif|Green Birdo | SMAS SMB2 Green Birdo Shooting Fireballs Sprite.gif|Green Birdo | ||
SMAS SMB2 Mouser.png|[[Mouser]] | SMAS SMB2 Mouser.png|[[Mouser]] | ||
Tryclyde SMAS SMB2 sprite.png|[[Tryclyde]] | Tryclyde SMAS SMB2 sprite.png|[[Tryclyde]] | ||
SMAS SMB2 Fryguy.png|[[Fryguy]] | SMAS SMB2 Fryguy.png|[[Fryguy]] | ||
Mini Fry Guy.png|Small Fry Guy | Mini Fry Guy.png|[[Small Fry Guy]] | ||
SMAS SMB2 Clawgrip.png|[[Clawgrip]] | SMAS SMB2 Clawgrip.png|[[Clawgrip]] | ||
SMAS SMB2 Mask Gate Enemy.png|[[Mask Gate]] | SMAS SMB2 Mask Gate Enemy.png|[[Mask Gate]] | ||
| Line 257: | Line 273: | ||
SMB2 1up.png|1-Up Mushroom | SMB2 1up.png|1-Up Mushroom | ||
Bomb SMB2 All-Stars.png|Bomb | Bomb SMB2 All-Stars.png|Bomb | ||
Brick wall SMAS.png|[[Brick wall]] | |||
SMAS SMB2 Cherry sprite.png|Cherry | SMAS SMB2 Cherry sprite.png|Cherry | ||
Super Mario Bros 2 All Stars Chain.png|Chain | |||
Coin SMASSMB2.gif|Coin | Coin SMASSMB2.gif|Coin | ||
Crystal Ball SMAS SMB2 sprite.png|[[Crystal Ball]] | Crystal Ball SMAS SMB2 sprite.png|[[Crystal Ball]] | ||
| Line 278: | Line 296: | ||
SMAS Stopwatch Toad.png|Stop Watch | SMAS Stopwatch Toad.png|Stop Watch | ||
SMAS Stopwatch Peach.png|Stop Watch | SMAS Stopwatch Peach.png|Stop Watch | ||
Vegetable | SMAS Sprout 1.png|[[Vegetable]] | ||
SMAS Veggie 1.png|Vegetable | |||
SMAS Sprout 2.png|Vegetable | |||
SMAS Veggie 2.png|Vegetable | |||
SMAS Sprout 3.png|Vegetable | |||
SMAS Veggie 3.png|Vegetable | |||
SMAS Sprout 4.png|Vegetable | |||
SMAS Veggie 4.png|Vegetable | |||
SMAS Veggie 5 (Unused).png|Vegetable (Unused) | |||
SMAS Veggie 6.png|Vegetable | |||
</gallery> | </gallery> | ||
| Line 285: | Line 312: | ||
<gallery caption="In-play sprites"> | <gallery caption="In-play sprites"> | ||
SMAS-SMB3-SmallMarioSprite.png|Small Mario | SMAS-SMB3-SmallMarioSprite.png|Small Mario | ||
SMAS SMB3 Small Mario V-Sign.png|Small Mario ([[ | SMAS SMB3 Small Mario V-Sign.png|Small Mario (2-player battle mode and [[Battle Game (Super Mario All-Stars)|Battle Game]]) | ||
SMAS-SMB3-SuperMarioSprite.png|Super Mario | SMAS-SMB3-SuperMarioSprite.png|Super Mario | ||
SMAS SMB3 Mario V-Sign.png|Super Mario (Battle Game) | SMAS SMB3 Mario V-Sign.png|Super Mario (Battle Game) | ||
| Line 296: | Line 323: | ||
SMAS SMB3 Hammer Mario Sliding.png|Sliding Hammer Mario | SMAS SMB3 Hammer Mario Sliding.png|Sliding Hammer Mario | ||
SMAS SMB3 Small Luigi.png|Small Luigi | SMAS SMB3 Small Luigi.png|Small Luigi | ||
SMAS SMB3 Small Luigi V-Sign.png|Small Luigi (Battle Game) | SMAS SMB3 Small Luigi V-Sign.png|Small Luigi (2-player battle mode and Battle Game) | ||
SMAS-SMB3-SuperLuigiSprite.png|Super Luigi | SMAS-SMB3-SuperLuigiSprite.png|Super Luigi | ||
SMAS SMB3 Luigi V-Sign.png|Super Luigi (Battle Game) | SMAS SMB3 Luigi V-Sign.png|Super Luigi (Battle Game) | ||
| Line 302: | Line 329: | ||
SMAS SMB3 Raccoon Luigi Sprite.png|[[Raccoon Mario|Raccoon Luigi]] | SMAS SMB3 Raccoon Luigi Sprite.png|[[Raccoon Mario|Raccoon Luigi]] | ||
SMAS SMB3 Frog Luigi Sprite.png|[[Frog Mario|Frog Luigi]] | SMAS SMB3 Frog Luigi Sprite.png|[[Frog Mario|Frog Luigi]] | ||
SMAS SMB3 Tanooki Luigi Sprite.png|[[Tanooki|Tanooki Luigi]] | SMAS SMB3 Tanooki Luigi Sprite.png|[[Tanooki Mario|Tanooki Luigi]] | ||
SMAS SMB3 Hammer Luigi Sprite.png|[[Hammer Mario|Hammer Luigi]] | SMAS SMB3 Hammer Luigi Sprite.png|[[Hammer Mario|Hammer Luigi]] | ||
</gallery> | </gallery> | ||
<gallery caption="Map sprites"> | <gallery caption="Map sprites"> | ||
SMAS-SMB3-SmallMarioMap.png|Small Mario | SMAS-SMB3-SmallMarioMap.png|Small Mario | ||
| Line 311: | Line 337: | ||
SMAS-SMB3-FireMarioMap.png|Fire Mario | SMAS-SMB3-FireMarioMap.png|Fire Mario | ||
SMAS-SMB3-RaccoonMarioMap.png|Raccoon Mario | SMAS-SMB3-RaccoonMarioMap.png|Raccoon Mario | ||
SMAS-SMB3-PWingMarioMap.png| | SMAS-SMB3-PWingMarioMap.png|Raccoon Mario with P-Wing | ||
SMAS-SMB3-FrogMarioMap.png|Frog Mario | SMAS-SMB3-FrogMarioMap.png|Frog Mario | ||
Tanooki Mario Map SMASSMB3.gif|Tanooki Mario | Tanooki Mario Map SMASSMB3.gif|Tanooki Mario | ||
| Line 318: | Line 344: | ||
SMAS-SMB3-SuperLuigiMap.png|Super Luigi | SMAS-SMB3-SuperLuigiMap.png|Super Luigi | ||
</gallery> | </gallery> | ||
<gallery caption="Minigame sprites"> | <gallery caption="Minigame sprites"> | ||
SMAS-SMB3-SmallMarioGame.png|Small Mario | SMAS-SMB3-SmallMarioGame.png|Small Mario | ||
SMAS-SMB3-SuperMarioGame.png|Super Mario | SMAS-SMB3-SuperMarioGame.png|Super Mario | ||
SMAS-SMB3-RaccoonMarioGame.png|Raccoon Mario | SMAS-SMB3-RaccoonMarioGame.png|Raccoon Mario | ||
SMAS-SMB3-SmallLuigiGame.png|Small Luigi | |||
SMAS-SMB3-SuperLuigiGame.png|Super Luigi | SMAS-SMB3-SuperLuigiGame.png|Super Luigi | ||
SMAS-SMB3-RaccoonLuigiGame.png|Super Luigi | |||
</gallery> | </gallery> | ||
| Line 354: | Line 381: | ||
Boss bass smb3.png|[[Big Cheep Cheep|Big Bertha/Boss Bass]] | Boss bass smb3.png|[[Big Cheep Cheep|Big Bertha/Boss Bass]] | ||
Blooper SMB3 All-Stars.png|Bloober | Blooper SMB3 All-Stars.png|Bloober | ||
SMAS SMB3 Blooper Baby.png|[[Blooper Baby|Bloober Baby]] | |||
Bob-omb SMB3 All-Stars.png|Bob-omb | Bob-omb SMB3 All-Stars.png|Bob-omb | ||
SMAS SMB3 BobOmb NoKey.png|Bob-omb | SMAS SMB3 BobOmb NoKey.png|Bob-omb | ||
SMASSMB3BooSprite.png|[[Boo|"Boo" Diddly]] | SMASSMB3BooSprite.png|[[Boo|"Boo" Diddly]] | ||
MBSNES Boo.png|Boo ( | MBSNES Boo.png|Boo ([[Battle Game (Super Mario All-Stars)|Battle Game]]) | ||
Boomerang Bro SMB3 All-Stars.png|[[Boomerang Bro]]ther | Boomerang Bro SMB3 All-Stars.png|[[Boomerang Bro]]ther | ||
Gray Bowser Statue SMB3 All-Stars.png|[[Bowser Statue]] | Gray Bowser Statue SMB3 All-Stars.png|[[Bowser Statue]] | ||
| Line 363: | Line 391: | ||
SMAS SMB3 Buzzy Beetle Sprite.gif|Buzzy Beetle | SMAS SMB3 Buzzy Beetle Sprite.gif|Buzzy Beetle | ||
SMAS SMB3 Buster Beetle Sprite.png|[[Buster Beetle]] | SMAS SMB3 Buster Beetle Sprite.png|[[Buster Beetle]] | ||
SMAS Cannon diagonal.png|[[Cannon]] | |||
SMAS Cannon horizontal.png|Cannon | |||
Chain Chomp SMB3 All-Stars.png|[[Chain Chomp]] | Chain Chomp SMB3 All-Stars.png|[[Chain Chomp]] | ||
SMAS SMB3 Cheep Cheep green.png|Green Cheep-Cheep | SMAS SMB3 Cheep Cheep green.png|Green Cheep-Cheep | ||
| Line 368: | Line 398: | ||
GiantParakoopas SMB3.png|[[Big Koopa Paratroopa|Colossal Koopa Paratroopa]] | GiantParakoopas SMB3.png|[[Big Koopa Paratroopa|Colossal Koopa Paratroopa]] | ||
MBSNES Sidestepper.png|[[Sidestepper|Crab]] | MBSNES Sidestepper.png|[[Sidestepper|Crab]] | ||
SMAS Cannon double NE-SW.png|[[Diagonal cannon]] | |||
SMAS Cannon double NW-SE.png|Diagonal cannon | |||
Dry Bones SMB3 All-Stars.png|[[Dry Bones]] | Dry Bones SMB3 All-Stars.png|[[Dry Bones]] | ||
MBSNES Fighter Fly.png|[[Fighter Fly]] | MBSNES Fighter Fly.png|[[Fighter Fly]] | ||
| Line 375: | Line 407: | ||
Big Koopa Troopa.png|[[Big Koopa Troopa|Green Gargantua Koopa Troopa]] | Big Koopa Troopa.png|[[Big Koopa Troopa|Green Gargantua Koopa Troopa]] | ||
Red Big Koopa Troopa SMB3 All-Stars.png|[[Big Koopa Troopa|Red Giant Koopa Troopa]] | Red Big Koopa Troopa SMB3 All-Stars.png|[[Big Koopa Troopa|Red Giant Koopa Troopa]] | ||
SMAS Cannon big.png|[[Giant cannon]] | |||
SMAS SMB3 Goomba.gif|Brown Goomba | SMAS SMB3 Goomba.gif|Brown Goomba | ||
SMAS SMB3 Squashed Goomba.png|Squashed Goomba | SMAS SMB3 Squashed Goomba.png|Squashed Goomba | ||
| Line 386: | Line 419: | ||
Green Koopa Paratroopa SMB3 All-Stars.png|Green Koopa Paratroopa | Green Koopa Paratroopa SMB3 All-Stars.png|Green Koopa Paratroopa | ||
Red Koopa Paratroopa SMB3 All-Stars.gif|Red Koopa Paratroopa | Red Koopa Paratroopa SMB3 All-Stars.gif|Red Koopa Paratroopa | ||
MBSNES Troopa.png|Koopa Troopa ( | MBSNES Troopa.png|Koopa Troopa (Battle Game) | ||
SMAS SMB3 Shoe Goomba.png|[[Shoe Goomba|Kuribo's Goomba]] | SMAS SMB3 Shoe Goomba.png|[[Shoe Goomba|Kuribo's Goomba]] | ||
SMASSMB3LakituSprite.png|Lakitu | SMASSMB3LakituSprite.png|Lakitu | ||
| Line 393: | Line 426: | ||
SMASMissileBill.gif|Missile Bill | SMASMissileBill.gif|Missile Bill | ||
MicroGoomba SMB3.png|[[Mini Goomba|Micro-Goomba]] | MicroGoomba SMB3.png|[[Mini Goomba|Micro-Goomba]] | ||
Muncher SMB3 All-Stars.png|[[Muncher]] | Muncher SMB3 All-Stars.png|[[Muncher]] (red) | ||
SMAS SMB3 Frozen Muncher.png|Muncher (frozen) | |||
Parabeetle SMB3 All-Stars.png|[[Para-Beetle]] | Parabeetle SMB3 All-Stars.png|[[Para-Beetle]] | ||
Red Paragoomba SMB3 All-Stars.png|Red [[Paragoomba|Para-Goomba]] | Red Paragoomba SMB3 All-Stars.png|Red [[Paragoomba|Para-Goomba]] | ||
| Line 400: | Line 434: | ||
Piranha Plant SMB3 All-Stars.png|Red Piranha Plant | Piranha Plant SMB3 All-Stars.png|Red Piranha Plant | ||
SMAS SMB3 Piranhacus Giganticus.png|[[Big Piranha Plant|Piranhacus Giganticus]] | SMAS SMB3 Piranhacus Giganticus.png|[[Big Piranha Plant|Piranhacus Giganticus]] | ||
SMAS SMB3 Podoboo Sprite.png|[[Lava Bubble|Podoboo]] | |||
Ptooie SMB3 All-Stars.png|[[Ptooie]] | Ptooie SMB3 All-Stars.png|[[Ptooie]] | ||
SMAS Cannon spinning cardinal.png|[[Quartet-cannon]] | |||
SMAS Cannon spinning ordinal.png|Quartet-cannon | |||
Rocky Wrench SMB3 All-Stars.png|[[Rocky Wrench]] | Rocky Wrench SMB3 All-Stars.png|[[Rocky Wrench]] | ||
Roto-Disc SMB3 All-Stars.png|[[Roto- | Roto-Disc SMB3 All-Stars.png|[[Roto-Disc]] | ||
SMAS SMB3-SledgeBro sprite.png|[[Sledge Bro]]ther | SMAS SMB3-SledgeBro sprite.png|[[Sledge Bro]]ther | ||
Spike SMAS.png|[[Spike]] | Spike SMAS.png|[[Spike]] | ||
| Line 420: | Line 456: | ||
SMAS SMB3 Boom Boom.png|[[Boom Boom]] | SMAS SMB3 Boom Boom.png|[[Boom Boom]] | ||
Winged Boom Boom SMB3 All-Stars.png|Winged Boom Boom | Winged Boom Boom SMB3 All-Stars.png|Winged Boom Boom | ||
LarrySprite-SMAS.png|[[Larry Koopa]] | LarrySprite-SMAS.png|[[Larry|Larry Koopa]] | ||
SMASMortonKoopaJr.Sprite.png|[[Morton Koopa Jr.]] | SMASMortonKoopaJr.Sprite.png|[[Morton|Morton Koopa Jr.]] | ||
SMASWendyO.KoopaSprite.png|[[Wendy O. Koopa]] | SMASWendyO.KoopaSprite.png|[[Wendy|Wendy O. Koopa]] | ||
SMASSMB3IggyKoopaSprite.png|[[Iggy Koopa]] | SMASSMB3IggyKoopaSprite.png|[[Iggy|Iggy Koopa]] | ||
SMASRoyKoopaSprite.png|[[Roy Koopa]] | SMASRoyKoopaSprite.png|[[Roy|Roy Koopa]] | ||
SMASLemmyKoopaSprite.png|[[Lemmy Koopa]] | SMASLemmyKoopaSprite.png|[[Lemmy|Lemmy Koopa]] | ||
LudwigSprite-SMAllStars.png|[[Ludwig von Koopa]] | LudwigSprite-SMAllStars.png|[[Ludwig|Ludwig von Koopa]] | ||
SMAS Bowser Jumping.gif|Bowser | SMAS Bowser Jumping.gif|Bowser | ||
</gallery> | </gallery> | ||
| Line 435: | Line 471: | ||
AnchorSMB3.png|[[Anchor]] | AnchorSMB3.png|[[Anchor]] | ||
SMAS SMB3 Big Block.png|[[Big Block]] | SMAS SMB3 Big Block.png|[[Big Block]] | ||
SMAS SMB3 Bowser's Portrait.png|[[Bowser]]'s portrait | |||
SMAS-SMB3-MegaCloudBlock.png|Big [[Cloud Block]] | SMAS-SMB3-MegaCloudBlock.png|Big [[Cloud Block]] | ||
SMAS SMB3 Big Empty Block.png|Big Empty Block | SMAS SMB3 Big Empty Block.png|Big Empty Block | ||
| Line 454: | Line 491: | ||
Hammer SMB3 All-Stars.png|[[Hammer]] | Hammer SMB3 All-Stars.png|[[Hammer]] | ||
HammerSuitSMB3.png|[[Hammer Suit]] | HammerSuitSMB3.png|[[Hammer Suit]] | ||
SMAS SMB3 Ice.png|[[Ice Block]] | |||
SMAS SMB3 Ice Large.png|Ice Block (large) | |||
SMAS SMB3 Island 1.png|[[Island]] | |||
SMAS SMB3 Island 2.png|Island (thick) | |||
SMAS SMB3 Island 3.png|Island ([[Ice Land|Iced Land]]) | |||
Jugems Cloud SMB3 All-Stars.png|[[Lakitu's Cloud|Jugem's Cloud]] | Jugems Cloud SMB3 All-Stars.png|[[Lakitu's Cloud|Jugem's Cloud]] | ||
Note Block SMB3 All-Stars.png|[[Note Block|Jump Block]] | Note Block SMB3 All-Stars.png|[[Note Block|Jump Block]] | ||
Kuribos Shoe SMB3 All-Stars.png|[[Goomba's Shoe|Kuribo's Shoe]] | Kuribos Shoe SMB3 All-Stars.png|[[Goomba's Shoe|Kuribo's Shoe]] | ||
Magic Ball SMAS SMB3 sprite.png|[[Magic | Magic Ball SMAS SMB3 sprite.png|[[Magic ball]] | ||
SMAS SMB3 Magic Note Block.png|[[Magic Note Block]] | SMAS SMB3 Magic Note Block.png|[[Magic Note Block]] | ||
SMAS SMB3 Magic Wand.png|[[Magic Wand]] | |||
Warp Whistle.png|[[Recorder|Magic Whistle]] | |||
Giant Block.png|[[Mega ? Block]] | Giant Block.png|[[Mega ? Block]] | ||
MusicBox SMB3.png|[[Music Box]] | MusicBox SMB3.png|[[Music Box]] | ||
PWingSMB3.png|[[P-Wing]] | |||
SMAS SMB3 Red Shell sprite.png|Red Shell | SMAS SMB3 Red Shell sprite.png|Red Shell | ||
SMAS SMB3 Rotary Lift.png|[[Rotary Lift]] | |||
SMASSpinyShellSMB3.png|[[Spiny Shell]] | SMASSpinyShellSMB3.png|[[Spiny Shell]] | ||
Super_Star_SMASSMB3.gif|Starman | Super_Star_SMASSMB3.gif|Starman | ||
| Line 473: | Line 517: | ||
P-Switch SMB3 All-Stars.png|[[Switch Block]] | P-Switch SMB3 All-Stars.png|[[Switch Block]] | ||
TanookiSuitSMB3.png|[[Tanooki Suit]] | TanookiSuitSMB3.png|[[Tanooki Suit]] | ||
SMAS SMB3 Treasure Chest.png|[[Treasure chest| | SMAS SMB3 Treasure Chest.png|[[Treasure chest|Treasure box]] | ||
SMAS SMB3 Warp Pipe sprite.png|Warp Pipe | SMAS SMB3 Warp Pipe sprite.png|Warp Pipe | ||
Iceblock.png|[[White Block]] | |||
SMAS SMB3 Wood Block.png|[[Hard Block|Wood Block]] | SMAS SMB3 Wood Block.png|[[Hard Block|Wood Block]] | ||
Question Block.gif|? Block | Question Block.gif|? Block | ||
QuestionMushroomMB.png|[[? | QuestionMushroomMB.png|[[? Kinoko]] | ||
SMAS SMB3 Bill Blaster.png|[[Bill Blaster|Turtle Cannon]] | SMAS SMB3 Bill Blaster.png|[[Bill Blaster|Turtle Cannon]] | ||
</gallery> | </gallery> | ||
| Line 493: | Line 537: | ||
FireBro-Map-SMB3.png|Fire Brother | FireBro-Map-SMB3.png|Fire Brother | ||
SledgeBro-Map-SMAS SMB3.png|Sledge Brother | SledgeBro-Map-SMAS SMB3.png|Sledge Brother | ||
SMAS SMB3 Locked Door.png|[[Locked Door]] | |||
Fortress1-SMB3.png|[[Fortress]] | Fortress1-SMB3.png|[[Fortress]] | ||
Fortress2-SMB3.png|Fortress (Sky Land) | Fortress2-SMB3.png|Fortress (Sky Land) | ||
Navy.gif|Navy map icon | Navy.gif|Navy map icon | ||
Allstarspyramid.png|Pyramid | |||
SMB3ToadHouses.png|[[Toad House]] | SMB3ToadHouses.png|[[Toad House|Toad's House]] | ||
Towersmb3.png|Tower | Towersmb3.png|Tower | ||
SMAS SMB3 Treasure Ship Sprite.png|[[Treasure Ship]] | SMAS SMB3 Treasure Ship Sprite.png|[[Treasure Ship]] | ||
| Line 514: | Line 559: | ||
</gallery> | </gallery> | ||
===''Super Mario World''=== | ===''Super Mario World'' (''Super Mario All-Stars + Super Mario World'')=== | ||
<gallery> | <gallery> | ||
Small Luigi SMAS SMW.png|Small Luigi | Small Luigi SMAS SMW.png|Small Luigi | ||
Luigi SMAS SMW.png|Super Luigi | Luigi SMAS SMW.png|Super Luigi | ||
Luigi Running SMAS SMW.gif|Super Luigi running | Luigi Running SMAS SMW.gif|Super Luigi running | ||
SMAS SMW Cross Arms Luigi.png|Super Luigi after clearing a level | |||
SMAS SMW Fire Luigi.png|Fire Luigi | SMAS SMW Fire Luigi.png|Fire Luigi | ||
SMAS + SMW Cape Luigi.png|[[Cape Mario|Caped Luigi]] | SMAS + SMW Cape Luigi.png|[[Cape Mario|Caped Luigi]] | ||
| Line 530: | Line 576: | ||
SMAS title screen.png|Title screen | SMAS title screen.png|Title screen | ||
SMAS Title Screen JP.png|Title screen (Japanese) | SMAS Title Screen JP.png|Title screen (Japanese) | ||
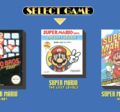
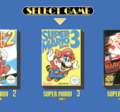
SMAS Game selection menu screen.png|Game selection menu screen (''Super Mario Bros.'') | |||
SMAS Game selection menu screen2.png|Game selection menu screen (''Super Mario Bros.: The Lost Levels'') | |||
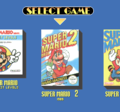
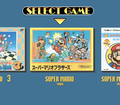
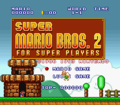
SMAS Game selection menu screen3.png|Game selection menu screen (''Super Mario Bros. 2'') | |||
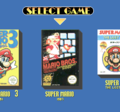
SMAS Game selection menu screen4.png|Game selection menu screen (''Super Mario Bros. 3'') | |||
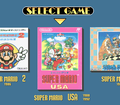
SMAS Game selection menu screen EU.png|Game selection menu screen (European, ''Super Mario Bros.'') | |||
SMAS Game selection menu screen EU2.png|Game selection menu screen (European, ''Super Mario Bros.: The Lost Levels'') | |||
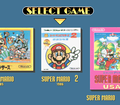
SMAS Game selection menu screen EU3.png|Game selection menu screen (European, ''Super Mario Bros. 2'') | |||
SMAS Game selection menu screen EU4.png|Game selection menu screen (European, ''Super Mario Bros. 3'') | |||
SMAS game selection menu screen JP1.png|Game selection menu screen (Japanese, ''Super Mario Bros.'') | SMAS game selection menu screen JP1.png|Game selection menu screen (Japanese, ''Super Mario Bros.'') | ||
SMAS game selection menu screen JPLL.png|Game selection menu screen (Japanese, ''Super Mario Bros.: The Lost Levels'') | SMAS game selection menu screen JPLL.png|Game selection menu screen (Japanese, ''Super Mario Bros.: The Lost Levels'') | ||
| Line 535: | Line 589: | ||
SMAS game selection menu screen JP3.png|Game selection menu screen (Japanese, ''Super Mario Bros. 3'') | SMAS game selection menu screen JP3.png|Game selection menu screen (Japanese, ''Super Mario Bros. 3'') | ||
</gallery> | </gallery> | ||
===''Super Mario Bros.''=== | ===''Super Mario Bros.''=== | ||
<gallery> | <gallery> | ||
| Line 542: | Line 595: | ||
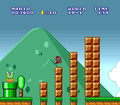
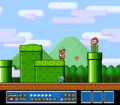
StompThatGoomba.png|[[World 1-1 (Super Mario Bros.)|World 1-1]] | StompThatGoomba.png|[[World 1-1 (Super Mario Bros.)|World 1-1]] | ||
SMAS SMB Bonus Room.png|World 1-1 (Bonus area) | SMAS SMB Bonus Room.png|World 1-1 (Bonus area) | ||
SMAS SMB Luigi Bonus Area.png|World 1-1 (Bonus area) | |||
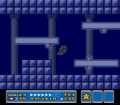
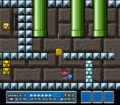
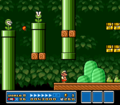
SMAS SMB Warp Zone.png|[[World 1-2 (Super Mario Bros.)|World 1-2]] ([[Warp Zone]]) | |||
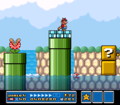
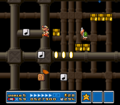
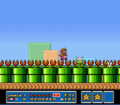
Bowser Impostor All-Stars Version.png|[[World 1-4 (Super Mario Bros.)|World 1-4]] | |||
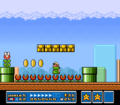
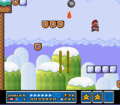
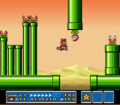
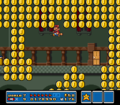
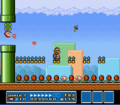
SMAS SMB World 2-1 Coin Heaven.png|[[World 2-1 (Super Mario Bros.)|World 2-1]] ([[Coin Heaven]]) | SMAS SMB World 2-1 Coin Heaven.png|[[World 2-1 (Super Mario Bros.)|World 2-1]] ([[Coin Heaven]]) | ||
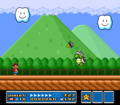
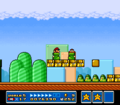
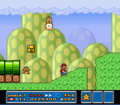
SMBWorld4-1.png|[[World 4-1 (Super Mario Bros.)|World 4-1]] | SMBWorld4-1.png|[[World 4-1 (Super Mario Bros.)|World 4-1]] | ||
| Line 551: | Line 607: | ||
SMAS SMB World 8-3 Screenshot.png|[[World 8-3 (Super Mario Bros.)|World 8-3]] | SMAS SMB World 8-3 Screenshot.png|[[World 8-3 (Super Mario Bros.)|World 8-3]] | ||
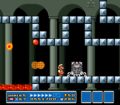
SMAS SMB World 8-4 Screenshot.png|[[World 8-4 (Super Mario Bros.)|World 8-4]] | SMAS SMB World 8-4 Screenshot.png|[[World 8-4 (Super Mario Bros.)|World 8-4]] | ||
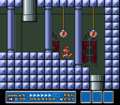
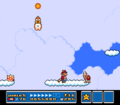
SMASMB1difficultworld8. | SMASMB1difficultworld8.png|World 8-1 on hard mode, indicated by the star next to the world-level number | ||
SMAS SMB Game Over.png|[[Game Over]] | SMAS SMB Game Over.png|[[Game Over]] | ||
</gallery> | </gallery> | ||
| Line 559: | Line 615: | ||
SMAS LL Title Screen.png|Title screen | SMAS LL Title Screen.png|Title screen | ||
Smassmb2titlejp.png|Title screen (Japanese) | Smassmb2titlejp.png|Title screen (Japanese) | ||
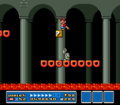
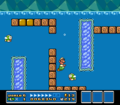
SMAS LL World 1-1 Screenshot.png|[[World 1-1 (Super Mario Bros.: The Lost Levels)|World 1-1]] | |||
SMAS LL World 1-2 Screenshot.png|[[World 1-2 (Super Mario Bros.: The Lost Levels)|World 1-2]] | |||
SMAS LL World 1-3 Screenshot.png|[[World 1-3 (Super Mario Bros.: The Lost Levels)|World 1-3]] | |||
SMAS LL World 1-4 Screenshot.png|[[World 1-4 (Super Mario Bros.: The Lost Levels)|World 1-4]] | |||
SMAS LL World 2-1 Screenshot.png|[[World 2-1 (Super Mario Bros.: The Lost Levels)|World 2-1]] | |||
SMAS LL World 2-2 Screenshot.png|[[World 2-2 (Super Mario Bros.: The Lost Levels)|World 2-2]] | |||
SMAS LL World 2-4 Screenshot.png|[[World 2-4 (Super Mario Bros.: The Lost Levels)|World 2-4]] | |||
SMAS LL World 3-1 Screenshot.png|[[World 3-1 (Super Mario Bros.: The Lost Levels)|World 3-1]] | |||
SMAS LL World 3-2 Screenshot.png|[[World 3-2 (Super Mario Bros.: The Lost Levels)|World 3-2]] | |||
SMAS LL World 3-3 Screenshot.png|[[World 3-3 (Super Mario Bros.: The Lost Levels)|World 3-3]] | |||
SMAS LL World 3-4 Screenshot.png|[[World 3-4 (Super Mario Bros.: The Lost Levels)|World 3-4]] | |||
SMAS LL World 4-1 Screenshot.png|[[World 4-1 (Super Mario Bros.: The Lost Levels)|World 4-1]] | |||
SMAS LL World 4-2 Screenshot.png|[[World 4-2 (Super Mario Bros.: The Lost Levels)|World 4-2]] | |||
SMAS LL World 4-3 Screenshot.png|[[World 4-3 (Super Mario Bros.: The Lost Levels)|World 4-3]] | |||
SMAS LL World 4-4 Screenshot.png|[[World 4-4 (Super Mario Bros.: The Lost Levels)|World 4-4]] | |||
SMAS LL World 5-1 Screenshot.png|[[World 5-1 (Super Mario Bros.: The Lost Levels)|World 5-1]] | |||
SMAS LL World 5-2 Screenshot.png|[[World 5-2 (Super Mario Bros.: The Lost Levels)|World 5-2]] | |||
SMAS LL World 5-3 Screenshot.png|[[World 5-3 (Super Mario Bros.: The Lost Levels)|World 5-3]] | |||
SMAS LL World 5-4 Screenshot.png|[[World 5-4 (Super Mario Bros.: The Lost Levels)|World 5-4]] | |||
SMAS LL World 6-1 Screenshot.png|[[World 6-1 (Super Mario Bros.: The Lost Levels)|World 6-1]] | |||
SMAS LL World 6-2 Screenshot.png|[[World 6-2 (Super Mario Bros.: The Lost Levels)|World 6-2]] | |||
SMAS LL World 6-3 Screenshot.png|[[World 6-3 (Super Mario Bros.: The Lost Levels)|World 6-3]] | |||
SMAS LL World 6-4 Screenshot.png|[[World 6-4 (Super Mario Bros.: The Lost Levels)|World 6-4]] | |||
SMAS LL World 7-1 Screenshot.png|[[World 7-1 (Super Mario Bros.: The Lost Levels)|World 7-1]] | |||
SMAS LL World 7-2 Screenshot.png|[[World 7-2 (Super Mario Bros.: The Lost Levels)|World 7-2]] | |||
SMAS LL World 7-3 Screenshot.png|[[World 7-3 (Super Mario Bros.: The Lost Levels)|World 7-3]] | |||
SMAS LL World 7-4 Screenshot.png|[[World 7-4 (Super Mario Bros.: The Lost Levels)|World 7-4]] | |||
SMAS LL World 8-1 Screenshot.png|[[World 8-1 (Super Mario Bros.: The Lost Levels)|World 8-1]] | |||
SMAS LL World 8-2 Screenshot.png|[[World 8-2 (Super Mario Bros.: The Lost Levels)|World 8-2]] | |||
SMAS LL World 8-3 Screenshot.png|[[World 8-3 (Super Mario Bros.: The Lost Levels)|World 8-3]] | |||
SMAS LL World 8-4 Screenshot.png|[[World 8-4 (Super Mario Bros.: The Lost Levels)|World 8-4]] | |||
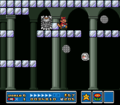
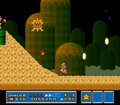
SMAS LL Bowser Battle Screenshot.png|[[Bowser]] at the end of World 8-4 | |||
</gallery> | </gallery> | ||
| Line 580: | Line 668: | ||
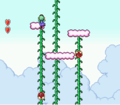
World3-3SMB2.png|[[World 3-3 (Super Mario Bros. 2)|World 3-3]] | World3-3SMB2.png|[[World 3-3 (Super Mario Bros. 2)|World 3-3]] | ||
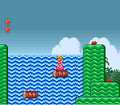
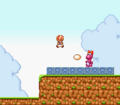
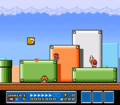
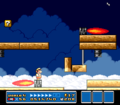
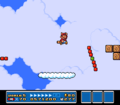
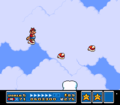
Super Mario All-Stars Rocket.png|Rocket in [[World 4-1 (Super Mario Bros. 2)|World 4-1]] | Super Mario All-Stars Rocket.png|Rocket in [[World 4-1 (Super Mario Bros. 2)|World 4-1]] | ||
Whale.png|[[World 4-2 (Super Mario Bros. 2)|World 4-2]] | |||
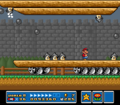
World4-3SMB2.png|[[World 4-3 (Super Mario Bros. 2)|World 4-3]] (boss fight) | World4-3SMB2.png|[[World 4-3 (Super Mario Bros. 2)|World 4-3]] (boss fight) | ||
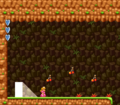
World5-2SMB2.png|[[World 5-2 (Super Mario Bros. 2)|World 5-2]] | World5-2SMB2.png|[[World 5-2 (Super Mario Bros. 2)|World 5-2]] | ||
| Line 596: | Line 685: | ||
<gallery> | <gallery> | ||
Smassmb3title.png|Title screen | Smassmb3title.png|Title screen | ||
SMAS SMB3 Warp Zone.png|World 9 (Warp Zone) | |||
ToadhouseSMB3.png|Toad's House | |||
SMAS SMB3 Game Over.png|Game Over | |||
SMAS Battle Game.png|Battle Game | |||
</gallery> | |||
<gallery caption="World 1 - Grass Land"> | |||
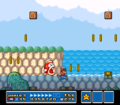
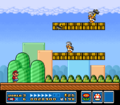
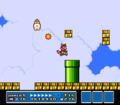
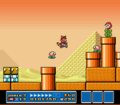
SMAS SMB3 World 1-1 Screenshot.png|World 1-1 | SMAS SMB3 World 1-1 Screenshot.png|World 1-1 | ||
MarioSMAS.png|World 1-1 (Bonus Room) | MarioSMAS.png|World 1-1 (Bonus Room) | ||
| Line 608: | Line 703: | ||
SMAS SMB3 World 1-A Larry Battle.png|World 1 Boss (Larry) | SMAS SMB3 World 1-A Larry Battle.png|World 1 Boss (Larry) | ||
SMAS SMB3 Grass Land King Screenshot.png|Grass Land King rescued | SMAS SMB3 Grass Land King Screenshot.png|Grass Land King rescued | ||
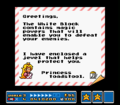
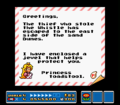
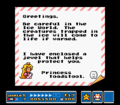
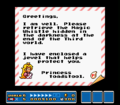
World 1 Letter SMB3 SMAS.png|Princess Toadstool's letter | World 1 Letter SMB3 SMAS.png|Princess Toadstool's letter upon completing Grass Land | ||
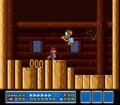
SMAS SMB3 World 1-E Screenshot.png|World 1-Hammer Brother battle | SMAS SMB3 World 1-E Screenshot.png|World 1-Hammer Brother battle | ||
</gallery> | |||
<gallery caption="World 2 - Desert Land"> | |||
SMAS SMB3 World 2-1 Screenshot.png|World 2-1 | SMAS SMB3 World 2-1 Screenshot.png|World 2-1 | ||
SMAS SMB3 World 2-2 Screenshot.png|World 2-2 | SMAS SMB3 World 2-2 Screenshot.png|World 2-2 | ||
| Line 621: | Line 718: | ||
SMAS SMB3 World 2-A Morton Battle.png|World 2 Boss (Morton) | SMAS SMB3 World 2-A Morton Battle.png|World 2 Boss (Morton) | ||
SMAS SMB3 Desert Hill King Screenshot.png|Desert Land King rescued | SMAS SMB3 Desert Hill King Screenshot.png|Desert Land King rescued | ||
SMAS SMB3 World 2 Letter.png|Princess Toadstool's letter upon completing Desert Land | |||
SMAS SMB3 World 2-E1 Screenshot.png|World 2-Boomerang Brother battle | SMAS SMB3 World 2-E1 Screenshot.png|World 2-Boomerang Brother battle | ||
SMAS SMB3 World 2-E2 Screenshot.png|World 2-Fire Brothers battle | SMAS SMB3 World 2-E2 Screenshot.png|World 2-Fire Brothers battle | ||
</gallery> | |||
<gallery caption="World 3 - Water Land"> | |||
SMAS SMB3 World 3-1 Screenshot.png|World 3-1 | SMAS SMB3 World 3-1 Screenshot.png|World 3-1 | ||
SMAS SMB3 World 3-2 Screenshot.png|World 3-2 | SMAS SMB3 World 3-2 Screenshot.png|World 3-2 | ||
| Line 638: | Line 738: | ||
SMAS SMB3 World 3-A Wendy Battle.png|World 3 Boss (Wendy) | SMAS SMB3 World 3-A Wendy Battle.png|World 3 Boss (Wendy) | ||
SMAS SMB3 Water Land King Screenshot.png|Water Land King rescued | SMAS SMB3 Water Land King Screenshot.png|Water Land King rescued | ||
SMAS SMB3 World 3 Letter.png|Princess Toadstool's letter upon completing Water Land | |||
SMAS SMB3 World 3-E1 Screenshot.png|World 3-Hammer Brothers battle (Ground) | SMAS SMB3 World 3-E1 Screenshot.png|World 3-Hammer Brothers battle (Ground) | ||
SMAS SMB3 World 3-E2 Screenshot.png|World 3-Hammer Brothers battle (Water) | SMAS SMB3 World 3-E2 Screenshot.png|World 3-Hammer Brothers battle (Water) | ||
</gallery> | |||
<gallery caption="World 4 - Giant Land"> | |||
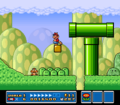
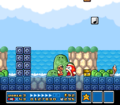
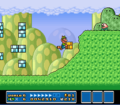
SMAS SMB3 World 4-1 Screenshot.png|World 4-1 | SMAS SMB3 World 4-1 Screenshot.png|World 4-1 | ||
SMAS SMB3 World 4-2 Screenshot.png|World 4-2 | SMAS SMB3 World 4-2 Screenshot.png|World 4-2 | ||
| Line 650: | Line 753: | ||
SMAS SMB3 World 4-A Screenshot.png|World 4-Airship | SMAS SMB3 World 4-A Screenshot.png|World 4-Airship | ||
SMAS SMB3 World 4-A Iggy Battle.png|World 4 Boss (Iggy) | SMAS SMB3 World 4-A Iggy Battle.png|World 4 Boss (Iggy) | ||
SMAS SMB3 World 4 Letter.png|Princess Toadstool's letter upon completing Giant Land | |||
SMAS SMB3 World 4-E Screenshot.png|World 4-Sledge Brother battle | SMAS SMB3 World 4-E Screenshot.png|World 4-Sledge Brother battle | ||
</gallery> | |||
<gallery caption="World 5 - Sky Land"> | |||
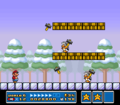
SMAS SMB3 World 5-1 Screenshot.png|World 5-1 | SMAS SMB3 World 5-1 Screenshot.png|World 5-1 | ||
SMAS SMB3 World 5-2 Screenshot.png|World 5-2 | SMAS SMB3 World 5-2 Screenshot.png|World 5-2 | ||
SMAS SMB3 World 5-2 Secret Room.png|World 5-2 (Secret area) | SMAS SMB3 World 5-2 Secret Room.png|World 5-2 (Secret area) | ||
SMAS SMB3 World 5-3 Screenshot.png|World 5-3 | SMAS SMB3 World 5-3 Screenshot.png|World 5-3 | ||
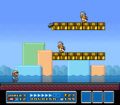
SMAS_SMB3_Shoe_Goomba_Screenshot.png|World 5-3 | |||
SMAS SMB3 World 5-F1 Screenshot.png|World 5-Fortress | SMAS SMB3 World 5-F1 Screenshot.png|World 5-Fortress | ||
SMAS SMB3 World 5-T Screenshot.png|World 5-Tower | SMAS SMB3 World 5-T Screenshot.png|World 5-Tower | ||
| Line 666: | Line 773: | ||
SMAS SMB3 World 5-A Screenshot.png|World 5-Airship | SMAS SMB3 World 5-A Screenshot.png|World 5-Airship | ||
SMAS SMB3 World 5-A Roy Battle.png|World 5 Boss (Roy) | SMAS SMB3 World 5-A Roy Battle.png|World 5 Boss (Roy) | ||
SMAS SMB3 World 5 Letter.png|Princess Toadstool's letter upon completing Sky Land | |||
SMAS SMB3 World 5-E1 Screenshot.png|World 5-Hammer Brothers battle (Ground) | SMAS SMB3 World 5-E1 Screenshot.png|World 5-Hammer Brothers battle (Ground) | ||
SMAS SMB3 World 5-E2 Screenshot.png|World 5-Hammer Brothers battle (Sky) | SMAS SMB3 World 5-E2 Screenshot.png|World 5-Hammer Brothers battle (Sky) | ||
</gallery> | |||
<gallery caption="World 6 - Ice Land"> | |||
SMAS SMB3 World 6-1 Screenshot.png|World 6-1 | SMAS SMB3 World 6-1 Screenshot.png|World 6-1 | ||
SMAS SMB3 World 6-2 Screenshot.png|World 6-2 | SMAS SMB3 World 6-2 Screenshot.png|World 6-2 | ||
| Line 682: | Line 792: | ||
SMAS SMB3 World 6-F3 Screenshot.png|World 6-Fortress 3 | SMAS SMB3 World 6-F3 Screenshot.png|World 6-Fortress 3 | ||
SMAS SMB3 World 6-A Screenshot.png|World 6-Airship | SMAS SMB3 World 6-A Screenshot.png|World 6-Airship | ||
SMAS SMB3 World 6 Letter.png|Princess Toadstool's letter upon completing Ice Land | |||
SMAS SMB3 World 6-E1 Screenshot.png|World 6-Hammer Brothers | SMAS SMB3 World 6-E1 Screenshot.png|World 6-Hammer Brothers | ||
</gallery> | |||
<gallery caption="World 7 - Pipe Land"> | |||
SMAS SMB3 World 7-1 Screenshot.png|World 7-1 | SMAS SMB3 World 7-1 Screenshot.png|World 7-1 | ||
SMAS SMB3 World 7-2 Screenshot.png|World 7-2 | SMAS SMB3 World 7-2 Screenshot.png|World 7-2 | ||
| Line 697: | Line 810: | ||
SMAS SMB3 World 7-PP2 Screenshot.png|World 7-Piranha Plant 2 | SMAS SMB3 World 7-PP2 Screenshot.png|World 7-Piranha Plant 2 | ||
SMAS SMB3 World 7-A Screenshot.png|World 7-Airship | SMAS SMB3 World 7-A Screenshot.png|World 7-Airship | ||
SMAS SMB3 World 7 Letter.png|Bowser's letter upon completing Pipe Land | |||
</gallery> | |||
<gallery caption="World 8 - Dark Land"> | |||
SMB3 SNES Tank Screenshot.png|World 8-Big Tanks | SMB3 SNES Tank Screenshot.png|World 8-Big Tanks | ||
SMAS SMB3 World 8-B Screenshot.png|World 8-Battleships | SMAS SMB3 World 8-B Screenshot.png|World 8-Battleships | ||
| Line 705: | Line 821: | ||
SMAS SMB3 World 8-F Screenshot.png|World 8-Fortress | SMAS SMB3 World 8-F Screenshot.png|World 8-Fortress | ||
SMAS SMB3 World 8-ST Screenshot.png|World 8-Super Tank | SMAS SMB3 World 8-ST Screenshot.png|World 8-Super Tank | ||
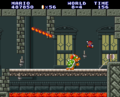
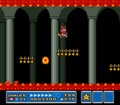
Bowser_Ground_Pound_SMAS.png|[[Tanooki Mario]] fighting [[Bowser]] in [[World 8-Bowser's Castle (Super Mario Bros. 3)|World 8-Bowser's Castle]] | |||
</gallery> | </gallery> | ||
| Line 714: | Line 827: | ||
<gallery> | <gallery> | ||
SMW SMAS title screen.png|Title screen | SMW SMAS title screen.png|Title screen | ||
</gallery> | |||
===Commercials=== | |||
<gallery> | |||
SMAS JP Peach and Toad.jpg|Japanese commercial | |||
File:SMAS JP Peach.gif | |||
SMASCMBowserIggyLudwigRoy.png|Japanese commercial | |||
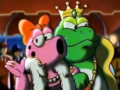
SMASCMWartBirdo.png|Japanese commercial | |||
SMASCMMarioLuigi.png|Japanese commercial | |||
SMASCMAudience.png|Japanese commercial | |||
BowserSMASUSCommercial.png|North American commercial | |||
SuperMarioAllStars TheLaughingMario.jpg|North American commercial | |||
Mario Vsign AllStars Commercial.jpg|North American commercial | |||
</gallery> | </gallery> | ||
==Box art== | ==Box art== | ||
===''Super Mario All-Stars''=== | |||
<gallery> | <gallery> | ||
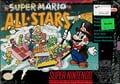
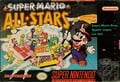
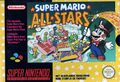
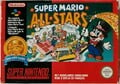
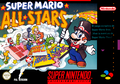
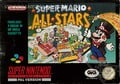
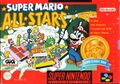
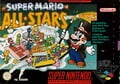
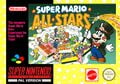
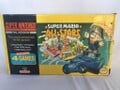
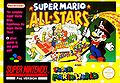
SMAS.jpg|North American box art | SMAS.jpg|North American box art | ||
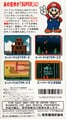
SMAS Back Cover.jpg|North American box art (back) | |||
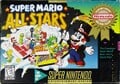
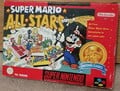
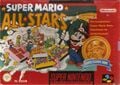
SMAS PC Cover.jpg|North American box art ([[Player's Choice]]) | SMAS PC Cover.jpg|North American box art ([[Player's Choice]]) | ||
SMAS - Box UK.jpg| | SMAS Box Players Choice Alt.jpg|North American box art (Player's Choice, "E" rating) | ||
SMAS Box CAN.jpg|Canadian box art | |||
SMAS Box BRA.jpg|Brazilian box art | |||
SMAS - Box UK.jpg|European box art | |||
SMAS EU Nintendo Classics.jpg|European box art ([[Nintendo Classics]]) | |||
SMAS Box SCN.jpg|Scandinavian box art | |||
SMAS - Box FRA.jpg|French and Dutch box art | SMAS - Box FRA.jpg|French and Dutch box art | ||
Super Classic Series SMAS Box FR.jpg|French and Dutch box art (Nintendo Classics) | |||
SMAS - Box ESP.png|Spanish box art | SMAS - Box ESP.png|Spanish box art | ||
SMAS Box ITA.jpg|Italian box art | |||
SMAS - Box ITA Classic Series.jpg|Italian box art (Nintendo Classics) | |||
SMAS - Box DE.jpg|German box art | SMAS - Box DE.jpg|German box art | ||
SMAS - Box DE Classic Series.jpg|German box art ( | SMAS - Box DE Classic Series.jpg|German box art (Nintendo Classics) | ||
SMAS | SMAS Box DE.jpg|German box art (Alternate) | ||
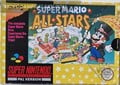
SMAS - Box AU.jpg| | SMAS - Box AU.jpg|Australasian box art | ||
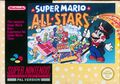
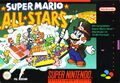
SMAS - Box JP.png|Japanese box art | SMAS - Box JP.png|Japanese box art | ||
SMAS JP Back.jpg|Japanese box art (back) | |||
SMAS Box KOR.jpg|Korean box art | |||
SMAS LL Box Art.png|''Super Mario Bros.: The Lost Levels'' faux Western "box art" | SMAS LL Box Art.png|''Super Mario Bros.: The Lost Levels'' faux Western "box art" | ||
SNES Mario Bundle Box FR.jpg|French SNES bundle pack with ''Super Mario All-Stars'' and ''[[Super Mario World]]'' | |||
SMAS Bundle Box AU.jpg|Australian bundle pack | |||
</gallery> | |||
===''Super Mario All-Stars + Super Mario World''=== | |||
<gallery> | |||
SMAS SMW.jpg|European box art | |||
SMAS+SMWBrazilBox.jpg|Brazilian box art | |||
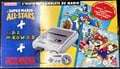
SNES Box SMAS.jpg|North American SNES bundle pack with ''Super Mario All-Stars + Super Mario World'' | |||
SNES Super Mario 5 Stars Pack bundle.jpg|European SNES bundle pack with ''Super Mario All-Stars + Super Mario World'' | |||
</gallery> | |||
===''Super Mario All-Stars Limited Edition''=== | |||
<gallery> | |||
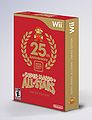
Cover SMA25A.jpg|North American box art | |||
SMAS25.jpg|North American package | |||
SMAS 25th EUR contents.jpg|All contents of the European release | |||
SMAS25AU.png|Australian package | |||
SMAS Limited Edition Japan package.jpg|Japanese package | |||
Mariocollection_sp_01.jpg|Chinese package | |||
SMAS 25th Package KOR.jpg|Korean package | |||
Cover SMA25A.jpg|North American box art | |||
SMAS Limited Edition Nintendo Selects NA box art.jpg|North American box art ([[Nintendo Selects]]) | |||
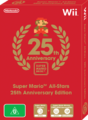
SMAS 25th EUR cover.jpg|European box art | |||
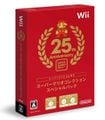
SMCSP Japan Cover.jpg|Japanese box art | |||
Mariocollection_sp_04.jpg|Chinese box art | |||
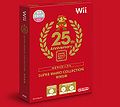
SMAS 25th Box KOR.jpg|Korean box art | |||
Box US - Super Mario All-Stars Limited Edition.jpg|North American keep case containing the booklet and soundtrack CD | |||
Box JP - Super Mario All-Stars Limited Edition.png|Japanese keep case containing the booklet and soundtrack CD | |||
</gallery> | </gallery> | ||
| Line 737: | Line 903: | ||
SMAS - print ad ESP.png|Spanish print ad for a SNES bundle with the game | SMAS - print ad ESP.png|Spanish print ad for a SNES bundle with the game | ||
</gallery> | </gallery> | ||
{{Galleries}} | {{Galleries}} | ||
[[Category:Galleries]] | [[Category:Galleries]] | ||
[[Category:Super Mario All-Stars|*]] | [[Category:Super Mario All-Stars|*]] | ||
Revision as of 10:50, March 29, 2025
This is a gallery of images for the game Super Mario All-Stars.
Logos

International logo

Japanese logo
Super Mario Bros. logo
Super Mario Bros. 2 logo
Super Mario Bros. 3 logo

Super Mario Bros.: The Lost Levels "cover" logo
- In-game

International in-game logo

Japanese in-game logo

The in-game logo for Super Mario Bros.

The in-game logo for Super Mario Bros.: The Lost Levels

The in-game logo for Super Mario Bros.: The Lost Levels (Japanese)

The in-game logo for Super Mario Bros. 2

The in-game logo for Super Mario USA (Japanese)

The in-game logo for Super Mario Bros. 3
Artwork
Super Mario Bros.: The Lost Levels

Promotional Group Artwork
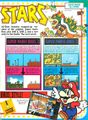
A page of Nintendo Power regarding Super Mario All-Stars


Super Mario Bros. 2
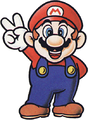
Mario

Mario
Mario
Mario
Mario

Mario
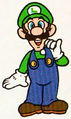
Luigi

Tiny Vegetable

Magical Potion


Super Mario Bros. 3
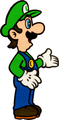
Luigi
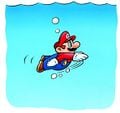
Mario swimming


Sprites
Super Mario Bros. / Super Mario Bros.: The Lost Levels
Characters

Small Mario jumping

Mario's death sprite

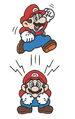
Small Mario doing a V-sign

Small Invincible Mario

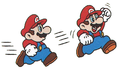
Super Mario walking

Super Mario jumping

Super Mario crouching

Super Mario doing a V-sign (when going into pipes)

Super Mario doing a V-sign (when completing a level)

Super Invincible Mario

Small Luigi jumping

Luigi's death sprite

Small Luigi doing the V sign

Small Invincible Luigi

Super Luigi walking

Super Luigi jumping

Super Luigi crouching

Super Luigi doing a V-sign (when going into pipes)

Super Luigi doing a V-sign (when completing a level)

Super Invincible Luigi

Fiery Mario jumping

Fiery Mario crouching

Fiery Mario doing a V-sign (when going into pipes)

Fiery Mario doing a V-sign (when completing a level)

Fiery Mario

Fiery Luigi jumping

Fiery Luigi crouching

Fiery Luigi doing a V-sign (when going into pipes)

Fiery Luigi doing a V-sign (when completing a level)

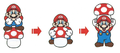
A bag containing a mushroom retainer

Mushroom retainer

3 mushroom retainers


Enemies and bosses

Bloober (Water-filtered palette)

Bowser

Bullet Bill (Land palette)

Buzzy Beetle

Buzzy Shell

Cheep-Cheep (Red palette)

Cheep-Cheep (Water-filtered red palette)

Cheep-Cheep (Green palette)

Cheep-Cheep (Water-filtered green palette)

Goomba (Land palette)

Squished Goomba (Land palette)

Goomba (Cave palette)

Goomba (Cave palette)

Squished Goomba (Cave palette)

Goomba (Castle palette)

Goomba (Castle palette)

Squished Goomba (Castle palette)

Hammer Brother (Land palette)

Koopa Paratroopa (Land green palette)

Koopa Paratroopa (Red palette)

Koopa Troopa (Land green palette)

Koopa Troopa (Red palette)

Piranha Plant (Land palette)

Piranha Plant (Underground/Castle palette)

Spiny Egg

Spiny Egg

Red Piranha Plant (Lost Levels only)


Items and objects

1-Up Mushroom (Underground)

Bowser's portrait
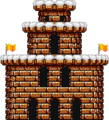
Castle (Snow)

Coin

Empty Block (Underground)

Empty Block (Castle)

Fortress (Snow)

Hard Block (Underground)

Horsehair plant (short)

Horsehair plant (tall)

Horsehair plant (short) (snow)

Horsehair plant (tall) (snow)

Normal Block (Underground)

Normal Block (Castle)

Warp Pipe (Castle/Snow)


Super Mario Bros. 2
Characters

Mario

Mario walking

Mario crouching

Mario climbing

Small Mario

Small Mario walking

Small Mario crouching

Small Mario climbing

Mario as he appears on the character select screen

Luigi

Luigi walking

Small Luigi

Luigi as he appears on the character select screen

Toad walking

Small Toad

Toad as he appears on the character select screen

Princess Toadstool

Princess Toadstool walking

Small Princess Toadstool

Princess Toadstool as she appears on the character select screen


Enemies

Autobomb

Autobomb with a Shyguy riding it

Yellow Beezo

Yellow Beezo

Red Beezo

Pidgit

Red Panser

Green Panser

Blue Panser

Red Shyguy

Blue Shyguy

Blue Snifit

Gray Snifit

Red Snifit


Bosses

Pink Birdo

Pink Birdo

Red Birdo

Green Birdo

Green Birdo

Wart


Items and objects

1-Up Mushroom

Bomb

Cherry

Chain

Coin

Key

Magical Potion

Mushroom

Mushroom Block

Mushroom Block

Mushroom Block

Mushroom Block

POW Block

Shell

Small heart

Starman

Stop Watch

Stop Watch

Stop Watch

Vegetable

Vegetable

Vegetable

Vegetable

Vegetable

Vegetable

Vegetable

Vegetable (Unused)

Vegetable


.png)

Super Mario Bros. 3
Mario and Luigi
- In-play sprites

Small Mario

Small Mario (2-player battle mode and Battle Game)

Super Mario

Super Mario (Battle Game)

Fire Mario

Sliding Hammer Mario

Small Luigi

Small Luigi (2-player battle mode and Battle Game)

Super Luigi

Super Luigi (Battle Game)

Fire Luigi


- Map sprites

Small Mario

Super Mario

Fire Mario

Raccoon Mario

Raccoon Mario with P-Wing

Frog Mario

Tanooki Mario

Tanooki Mario

Hammer Mario

Super Luigi


- Minigame sprites

Small Mario

Super Mario

Raccoon Mario

Small Luigi

Super Luigi

Super Luigi


Other characters

Princess Toadstool

Princess Toadstool (letter)

Toad

Toad (game entry)

Transformed Grass Land King as a Cobrat

Desert Hill King

Transformed Desert Hill King as a Hoopster

Sea Side King

Transformed Sea Side King as a Dino Rhino

Big Island King

Transformed Big Island King as Donkey Kong Jr.

The Sky King

Transformed The Sky King as an Albatoss

Iced Land King

Transformed Iced Land King as a Monty Mole

Pipe Land King

Transformed Pipe Land King as a Green Yoshi


Enemies

Bloober

Bob-omb

Bob-omb

Boo (Battle Game)

Bullet Bill

Buzzy Beetle

Cannon

Green Cheep-Cheep

Red Cheep-Cheep

Diagonal cannon

Brown Goomba

Squashed Goomba

Red Goomba

Hammer Brother

Green Koopa Troopa

Red Koopa Troopa

Green Koopa Paratroopa

Red Koopa Paratroopa

Koopa Troopa (Battle Game)

Lakitu

Missile Bill

Muncher (red)

Muncher (frozen)

Red Para-Goomba

Brown Para-Goomba

Red Piranha Plant

Quartet-cannon

Spiny

Spiny (Mario Bros.)

Orange Spiny Egg


Bosses

Winged Boom Boom

Bowser


Items and objects

1-Up Mushroom

Bowser's portrait

Big Cloud Block

Big Empty Block

Big Wood Block

Buzzy Shell

Cloud Block

Coin

Empty Block

Fire Flower

Fire Flower (Spade Panel)

Giant Green Shell

Giant Red Shell

Giant Warp Pipe

Green Shell

Ice Block (large)

Island (thick)

Island (Iced Land)

Red Shell

Starman

Starman (Spade Panel)

Super Leaf (levels only)

Super Mushroom

Super Mushroom (Spade Panel)

Warp Pipe

? Block


Map screen icons

Air Force

Desert

Hammer Brother

Boomerang Brother

Fire Brother

Sledge Brother

Fortress (Sky Land)

Navy map icon

Pyramid

Tower

Spade Panel

N-Mark Spade Panel

Entry to the first level

Entry to the second level

Entry to the third level

Entry to the fourth level

Entry to the fifth level

Entry to the sixth level

Entry to the seventh level

Entry to the eighth level

Entry to the ninth level

Entry to the tenth level


Super Mario World (Super Mario All-Stars + Super Mario World)

Small Luigi

Super Luigi

Super Luigi running

Super Luigi after clearing a level

Fire Luigi

Super Balloon Luigi

Fire Balloon Luigi

Caped Balloon Luigi


Screenshots
Title screen
Title screen (Japanese)
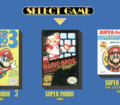
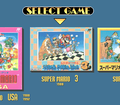
Game selection menu screen (Super Mario Bros.)

Game selection menu screen (Super Mario Bros.: The Lost Levels)
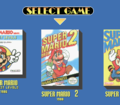
Game selection menu screen (Super Mario Bros. 2)
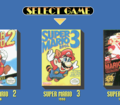
Game selection menu screen (Super Mario Bros. 3)
Game selection menu screen (European, Super Mario Bros.)
Game selection menu screen (European, Super Mario Bros.: The Lost Levels)
Game selection menu screen (European, Super Mario Bros. 2)
Game selection menu screen (European, Super Mario Bros. 3)
Game selection menu screen (Japanese, Super Mario Bros.)
Game selection menu screen (Japanese, Super Mario Bros.: The Lost Levels)
Game selection menu screen (Japanese, Super Mario Bros. 2)
Game selection menu screen (Japanese, Super Mario Bros. 3)


Super Mario Bros.
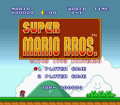
Title screen

Title screen (Japanese)
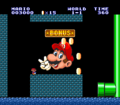
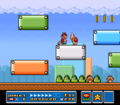
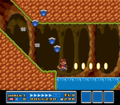
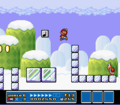
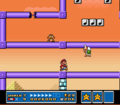
World 1-1 (Bonus area)
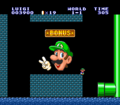
World 1-1 (Bonus area)
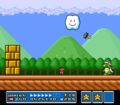
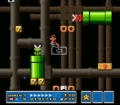
World 8-1 on hard mode, indicated by the star next to the world-level number


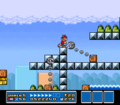
Super Mario Bros.: The Lost Levels
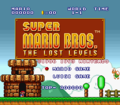
Title screen
Title screen (Japanese)
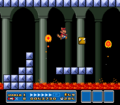
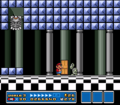
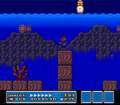
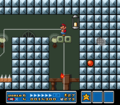
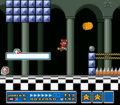
Bowser at the end of World 8-4


Super Mario Bros. 2
Title screen
Title screen (Japanese)
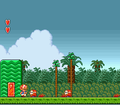
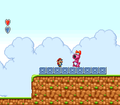
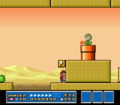
World 1-1
World 1-1
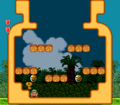
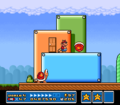
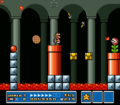
World 1-1 (boss fight)
World 1-1 (goal)
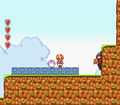
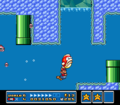
World 1-2
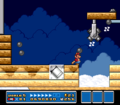
World 1-3 (boss fight)
World 2-3 (boss fight)

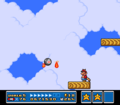
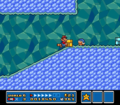
Rocket in World 4-1
World 4-3 (boss fight)
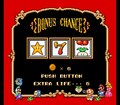
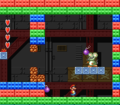
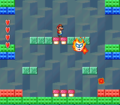
Bonus Chance minigame
Game Over
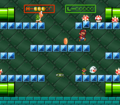
Toad battling Birdo
Vine glitch
Empty Health Meter glitch


Super Mario Bros. 3
Title screen
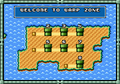
World 9 (Warp Zone)
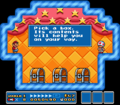
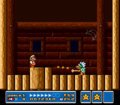
Toad's House
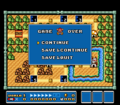
Game Over
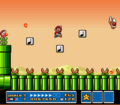
Battle Game


- World 1 - Grass Land
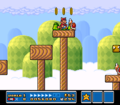
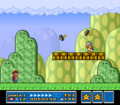
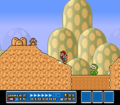
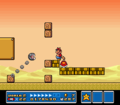
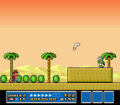
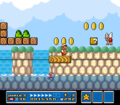
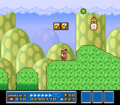
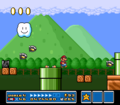
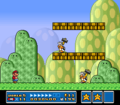
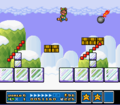
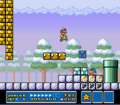
World 1-1
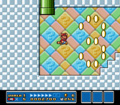
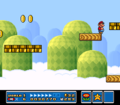
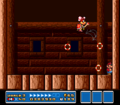
World 1-1 (Bonus Room)
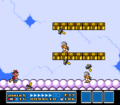
World 1-2
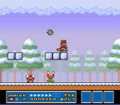
World 1-3
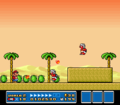
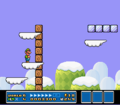
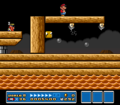
World 1-4
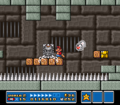
World 1-Fortress
World 1-5
World 1-5
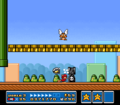
World 1-6
World 1-Airship
World 1 Boss (Larry)
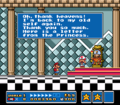
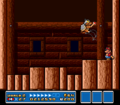
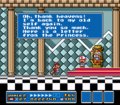
Grass Land King rescued
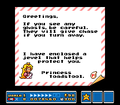
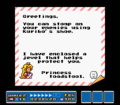
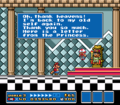
Princess Toadstool's letter upon completing Grass Land
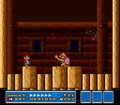
World 1-Hammer Brother battle


- World 2 - Desert Land
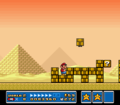
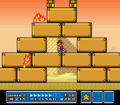
World 2-1
World 2-2
World 2-Fortress
World 2-3
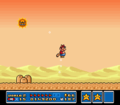
World 2-Desert
World 2-4
World 2-5
World 2-Pyramid
World 2-Airship
World 2 Boss (Morton)
Desert Land King rescued
Princess Toadstool's letter upon completing Desert Land
World 2-Boomerang Brother battle
World 2-Fire Brothers battle


- World 3 - Water Land
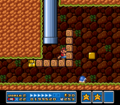
World 3-1
World 3-2
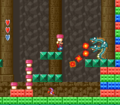
World 3-3
World 3-Fortress
World 3-4
world 3-5
World 3-6
World 3-7
World 3-Fortress 2
World 3-8
World 3-8
World 3-9
World 3-Airship
World 3 Boss (Wendy)
Water Land King rescued
Princess Toadstool's letter upon completing Water Land
World 3-Hammer Brothers battle (Ground)
World 3-Hammer Brothers battle (Water)


- World 4 - Giant Land

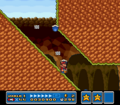
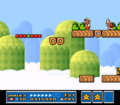
World 4-1
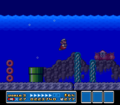
World 4-2
World 4-3

World 4-Fortress
World 4-4
World 4-5
World 4-6
World 4-Fortress 2
World 4-Airship
World 4 Boss (Iggy)
Princess Toadstool's letter upon completing Giant Land
World 4-Sledge Brother battle


- World 5 - Sky Land
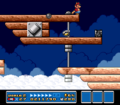
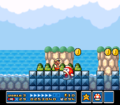
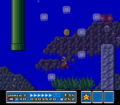
World 5-1
World 5-2

World 5-2 (Secret area)
World 5-3
World 5-3
World 5-Fortress
World 5-Tower
World 5-4

World 5-5
World 5-6
World 5-7
World 5-Fortress 2
World 5-8
World 5-9
World 5-Airship
World 5 Boss (Roy)
Princess Toadstool's letter upon completing Sky Land
World 5-Hammer Brothers battle (Ground)
World 5-Hammer Brothers battle (Sky)


- World 6 - Ice Land
World 6-1
World 6-2
World 6-3
World 6-Fortress
World 6-4
World 6-5
World 6-6
World 6-7
World 6-Fortress 2
World 6-8
World 6-9
World 6-10
World 6-Fortress 3
World 6-Airship
Princess Toadstool's letter upon completing Ice Land
World 6-Hammer Brothers


- World 7 - Pipe Land
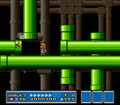
World 7-1
World 7-2
World 7-3

World 7-4
World 7-5
World 7-Piranha Plant
World 7-Fortress
World 7-6
World 7-7
World 7-8
World 7-9
World 7-Fortress 2
World 7-Piranha Plant 2
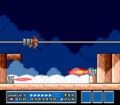
World 7-Airship
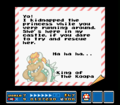
Bowser's letter upon completing Pipe Land


- World 8 - Dark Land
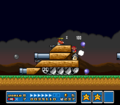
World 8-Big Tanks
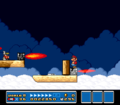
World 8-Battleships
World 8-Hand Traps
World 8-Airships
World 8-1
World 8-2

World 8-Fortress
World 8-Super Tank
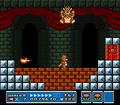
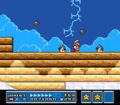
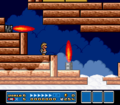
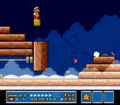
Tanooki Mario fighting Bowser in World 8-Bowser's Castle


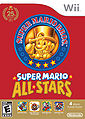
Super Mario World
Title screen

Commercials
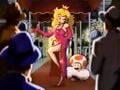
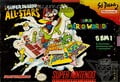
Japanese commercial

Japanese commercial
Japanese commercial
Japanese commercial
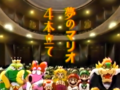
Japanese commercial

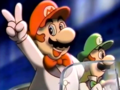
North American commercial
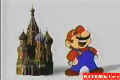
North American commercial
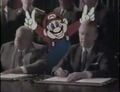
North American commercial


Box art
Super Mario All-Stars
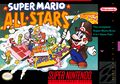
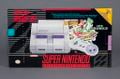
North American box art
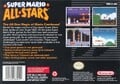
North American box art (back)

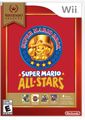
North American box art (Player's Choice)
North American box art (Player's Choice, "E" rating)
Canadian box art
Brazilian box art
European box art
European box art (Nintendo Classics)
Scandinavian box art
French and Dutch box art
French and Dutch box art (Nintendo Classics)
Spanish box art
Italian box art
Italian box art (Nintendo Classics)
German box art
German box art (Nintendo Classics)
German box art (Alternate)
Australasian box art
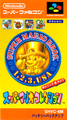
Japanese box art
Japanese box art (back)
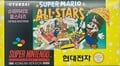
Korean box art
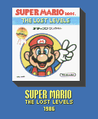
Super Mario Bros.: The Lost Levels faux Western "box art"
French SNES bundle pack with Super Mario All-Stars and Super Mario World
Australian bundle pack


Super Mario All-Stars + Super Mario World
European box art
Brazilian box art
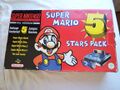
North American SNES bundle pack with Super Mario All-Stars + Super Mario World
European SNES bundle pack with Super Mario All-Stars + Super Mario World


Super Mario All-Stars Limited Edition
North American box art
North American package

All contents of the European release
Australian package
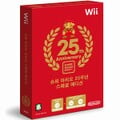
Japanese package
Chinese package
Korean package
North American box art
North American box art (Nintendo Selects)
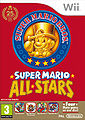
European box art
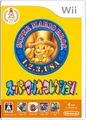
Japanese box art
Chinese box art

Korean box art
North American keep case containing the booklet and soundtrack CD

Japanese keep case containing the booklet and soundtrack CD


Miscellaneous
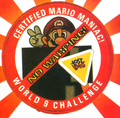
A patch awarded for players who beat Super Mario Bros.: The Lost Levels without using shortcuts
Spanish print ad for a SNES bundle with the game


