User:Mid188/Sandbox: Difference between revisions
mNo edit summary |
(Added existing images.) |
||
| (90 intermediate revisions by the same user not shown) | |||
| Line 1: | Line 1: | ||
{ | =Mario Bros. House= | ||
[[File: | {|class=wikitable style="text-align:center" | ||
!Item | |||
!Image | |||
!Location | |||
|- | |||
|[[Autograph]] | |||
|[[File:Luigi's Autograph.png]] | |||
|style="text-align:left"|Given by [[Luigi]] while doing [[Koopa Koot]]'s fifth favor in ''Paper Mario''. | |||
|} | |||
=Toad Town= | |||
{{RPG item locations | |||
|item1=[[Star Piece (Paper Mario series)|Star Piece]] (x12) | |||
|image1=[[File:PM StarPiece.gif]] | |||
|location1=<nowiki/> | |||
*Inside a tree near the Toad Town notice board. | |||
*Under a hidden panel near the Dojo and by the Three Beautiful Sisters. | |||
*Under a hidden panel near where [[Fice T.]] guards [[Forever Forest]]. | |||
*Under a hidden panel near the [[Dry Dry Railroad]], in the southeastern corner. | |||
*Under a hidden panel in front of [[Club 64]]. | |||
*On ledge near the gate to Goomba Village (Requires [[Sushie]]). | |||
*Two given by [[Russ T.]] after returning his [[Dictionary]] and a letter from [[Jade Jungle]]. | |||
*Given by the [[postmaster]] after giving him the [[Mailbag]]. | |||
*Given by [[Minh T.]] after giving her a letter from [[Flower Fields]]. | |||
*Given by [[Merlon]] after giving him a letter from [[Mt. Rugged]]. | |||
*Given by [[Fice T.]] after giving him a letter in [[Gusty Gulch]]. | |||
|locationimage1=[[File:PM Star Piece ToadTownTree.png|250px]][[File:PM Star Piece ToadTownSisters.png|250px]][[File:PM Star Piece ToadTownFicePanel.png|250px]][[File:PM Star Piece ToadTownRailroad.png|250px]][[File:PM Star Piece ToadTownDock.png|250px]][[File:PM Star Piece ToadTownPond.png|250px]][[File:PM Star Piece RussT.png|250px]][[File:PM Star Piece Postmaster.png|250px]][[File:PM Star Piece MinhT.png|250px]][[File:PM Star Piece Merlon.png|250px]][[File:PM Star Piece FiceT.png|250px]] | |||
|item2=[[Letter]] (x5) | |||
|image2=[[File:PM Letter Sprite.png]] | |||
|location2=<nowiki/> | |||
*Given by [[Fishmael]] after giving him a letter from [[Koover]]. | |||
*Given by [[Miss T.]] after giving her a letter from [[Mr. E (Paper Mario)|Mr. E]]. | |||
*Given by [[Dane T.]] after giving him a letter from [[Franky]]. | |||
*Given by [[Dane T.]] after giving him a letter from the red Yoshi kid in [[Yoshi Village]]. | |||
*Given by [[Muss T.]] after giving him a letter from [[Goompapa]]. | |||
|item3=[[Magical Seed]] | |||
|image3=[[File:PM Magical Seed pink.png]] | |||
|location3=Given by the [[Bub-ulb]]. | |||
|locationimage3=[[File:Magical Seed 1 Shot.png|250px]] | |||
|item4=[[Maple Syrup]] | |||
|image4=[[File:PaperMario Items MapleSyrup.png]] | |||
|location4=Given by the [[Trading Event Toad]] for participating in the first contest. | |||
|item5=[[Yummy Meal]] | |||
|image5={{PM item|Yummy Meal|text=}} | |||
|location5=Given by the Trading Event Toad for participating in the third contest. | |||
|item6=[[Quick Change]] | |||
|image6=[[File:Quick Change Badge.png]] | |||
|location6=Inside [[Merlon]]'s place. Mario must [[Spin Jump]] three times to get this badge. | |||
|item7=[[Attack FX D]] | |||
|image7=[[File:Attack FX D Badge.png]] | |||
|location7=Given by [[Pop Diva]] after finishing her errand. | |||
|item8=[[I Spy]] | |||
|image8=[[File:I-Spy Badge.png]] | |||
|location8=Given by [[Rowf]] after returning his [[Calculator]]. | |||
|item9=[[Odd Key]] | |||
|image9=[[File:OddKey PM.png]] | |||
|location9=Found inside the house. Opens the other end of Toad Town Tunnels. | |||
|item10=[[Snowman Doll]] | |||
|image10={{PM item|Snowman Doll|text=}} | |||
|location10=Found in [[Harry (Paper Mario)|Harry]]'s storeroom. | |||
|item11=[[Volt Mushroom|Volt Shroom]] | |||
|image11={{PM item|Volt Shroom|text=}} | |||
|location11=Found in [[Harry (Paper Mario)|Harry]]'s storeroom. | |||
|item12=[[Toy Train]] | |||
|image12=[[File:ToyTrain PM.png]] | |||
|location12=Found in [[Harry (Paper Mario)|Harry]]'s storeroom. | |||
|item13=[[Dizzy Dial]] | |||
|image13={{PM item|Dizzy Dial|text=}} | |||
|location13=Found in [[Harry (Paper Mario)|Harry]]'s storeroom. | |||
|item14=[[Lyrics]] | |||
|image14=[[File:Lyrics PM.png]] | |||
|location14=Given by [[Master Poet]] after taking Pop Diva's errand. | |||
|item15=[[First-Degree Card]] | |||
|image15=[[File:First-DegreeCard PM.png]] | |||
|location15=Given by [[The Master]] at [[Toad Town Dojo]] after defeating [[Chan]]. | |||
|item16=[[Second-Degree Card]] | |||
|image16=[[File:Second-DegreeCard PM.png]] | |||
|location16=Given by The Master at Toad Town Dojo after defeating [[Lee]]. | |||
|item17=[[Third-Degree Card]] | |||
|image17=[[File:Third-DegreeCard PM.png]] | |||
|location17=Given by The Master at Toad Town Dojo after defeating him the first time. | |||
|item18=[[Fourth-Degree Card]] | |||
|image18=[[File:Fourth-DegreeCard PM.png]] | |||
|location18=Given by The Master at Toad Town Dojo after defeating him the second time. | |||
|item19=[[Diploma]] | |||
|image19=[[File:Diploma.png]] | |||
|location19=Given by The Master at Toad Town Dojo after defeating him the third time. | |||
}} | |||
Additionally, [[Rowf and Rhuff]] have 16 badges to sell. Other items can be obtained from [[Shroom Grocery]], [[Harry (Paper Mario)|Harry]], [[Tayce T.]], and [[Li'l Oink]]s. Star Pieces can be obtained from [[Kolorado]] and [[Chuck Quizmo]] who have a chance to appear here. | |||
=Peach's Castle= | |||
{{RPG item locations | |||
|item1=[[Ultra Mushroom|Ultra Shroom]] | |||
|image1={{PM item|Ultra Shroom|text=}} | |||
|location1=In a hidden block in the symmetrical position (with regard to the [[Save Block]]) outside Peach's Castle | |||
|locationimage1=[[File:PMHiddenBlock42.png|250px]] | |||
|item2=[[Life Mushroom (Paper Mario series)|Life Shroom]] | |||
|image2={{PM item|Life Mushroom (Paper Mario series)|Life Shroom|text=}} | |||
|location2=At the end of the corridor on the wall in the southwestern book room on the second floor (get it with Mario, using a pile of books to climb that high) | |||
|locationimage2=[[File:Life Shroom Peach's Castle.png|250px]] | |||
|item3=[[Last Stand]] | |||
|image3=[[File:Last Stand Badge.png]] | |||
|location3=In a [[treasure chest]] in the room in the east room in the first floor. | |||
|locationimage3=[[File:Princess Peach's Castle Treasure Chest.png|250px]] | |||
|item4=[[Deep Focus]] | |||
|image4=[[File:Deep Focus Badge.png]] | |||
|location4=Next to the big treasure chest in the east room on the second floor. | |||
|item5=[[Power Rush]] | |||
|image5=[[File:Power Rush Badge.png]] | |||
|location5=In a corner in the southwestern book room on the second floor | |||
}} | |||
In addition, the following items are available only to Princess Peach. | |||
{{RPG item locations | |||
|item1=[[Castle Key (Peach's Castle)|Castle Key]] | |||
|image1=[[File:PM Peach Castle Key.png]] | |||
|location1=<nowiki/> | |||
*Given by [[Gourmet Guy]] to Peach in Chapter 4. | |||
*Given by a [[Koopatrol]] to Peach as another in Chapter 6. | |||
|locationimage1=[[File:Castle Key 1 Peach's Castle PM.png|250px]][[File:Castle Key 2 Peach's Castle PM.png|250px]] | |||
|item2=[[Jammin' Jelly]] | |||
|image2={{PM item|Jammin' Jelly|text=}} | |||
|location2=Given by [[Mr. Hammer]] to Peach if she wins in the [[64th Trivia Quiz-Off]] in Chapter 5. | |||
|locationimage2=[[File:Jammin' Jelly Peach's Castle.png|250px]] | |||
|item3=[[Butter]] | |||
|image3=[[File:Butter PM.png]] | |||
|location3=In the kitchen, accessible in Chapter 4. | |||
|item4=[[Cleanser]] | |||
|image4=[[File:PMCleanser.png]] | |||
|location4=In the kitchen, accessible in Chapter 4. | |||
|item5=[[Cream]] | |||
|image5=[[File:PM Cream.png]] | |||
|location5=In the kitchen, accessible in Chapter 4. | |||
|item6=[[Egg]] | |||
|image6={{PM item|Egg|text=}} | |||
|location6=In the kitchen, accessible in Chapter 4. | |||
|item7=[[Flour]] | |||
|image7=[[File:PM Flour.png]] | |||
|location7=In the kitchen, accessible in Chapter 4. | |||
|item8=[[Milk]] | |||
|image8=[[File:PM Milk.png]] | |||
|location8=In the kitchen, accessible in Chapter 4. | |||
|item9=[[Salt]] | |||
|image9=[[File:PM Salt.png]] | |||
|location9=In the kitchen, accessible in Chapter 4. | |||
|item10=[[Strawberry]] | |||
|image10=[[File:Strawberry.png]] | |||
|location10=In the kitchen, accessible in Chapter 4. | |||
|item11=[[Sugar (item)|Sugar]] | |||
|image11=[[File:PM Sugar.png]] | |||
|location11=In the kitchen, accessible in Chapter 4. | |||
|item12=[[Water]] | |||
|image12=[[File:PMWater.png]] | |||
|location12=In the kitchen, accessible in Chapter 4. | |||
|item13=[[Sneaky Parasol]] | |||
|image13=[[File:PM Sneaky Parasol.png]] | |||
|location13=Given by Mr. Hammer to Peach for participating in the 64th Trivia Quiz-Off in Chapter 5. | |||
|locationimage13=[[File:Sneaky Parasol Sixth Peach Interlude.png|250px]] | |||
|item14=[[Shooting Star (item)|Shooting Star]] | |||
|image14={{PM item|Shooting Star (item)|Shooting Star|text=}} | |||
|location14=Given by a Hammer Bro in the far western side of the library in Chapter 6 by talking to him repeatedly. | |||
}} | |||
=Goomba Village= | |||
{{RPG item locations | |||
|image1=[[File:PeachDoll PM.png]] | |||
|item1=[[Dolly]] | |||
|location1=In the tree near the exit of Jr. Troopa's playground. Originally belongs to [[Goombaria]] and probably stolen by Jr. Troopa. | |||
|item2=[[Mushroom]] | |||
|image2={{PM item|Mushroom|text=}} | |||
|location2=In the tree near the fence in the area behind Goomba Village. | |||
|item3=[[Fire Flower]] | |||
|image3={{PM item|Fire Flower|text=}} | |||
|location3=High above the trampoline in the area behind Goomba Village. | |||
|item4=[[Star Piece (Paper Mario series)|Star Piece]] | |||
|image4=[[File:PM StarPiece.gif]] | |||
|location4=<nowiki/> | |||
*At the end of the fork north of the path to the northwest of Goomba Village. | |||
*Given by [[Goombaria]] after Mario gives her [[Dolly]] back. | |||
*Given by [[Goompa]] as a reward for delivering his letter from [[Dry Dry Desert (Paper Mario)|Dry Dry Desert]]. | |||
*Under a hidden panel in the peaceful clearing to the southwest of Goomba Village. | |||
*Under a hidden panel near the Stone Block in the area behind Goomba Village. | |||
|locationimage4=[[File:PM Star Piece GoombaVillagePlatform.png|250px]][[File:PM Star Piece Goombaria.png|250px]][[File:PM Star Piece Goompa.png|250px]][[File:PM Star Piece GoombaVillageGrassland.png|250px]][[File:PM Star Piece GoombaVillagePanel.png|250px]] | |||
|item5=[[Power Jump]] | |||
|image5=[[File:Power Jump Badge.png]] | |||
|location5=In the prologue of ''Paper Mario'', [[Goompa]] will give this badge to Mario at Goomba Village. | |||
|locationimage5=[[File:Paper Mario Goompa Power Jump Badge.png|250px]] | |||
|item6=[[Goomnut]] | |||
|image6={{PM item|Goomnut|text=}} | |||
|location6=<font color=green>Produced by the Goomnut tree in the northeast corner of Goomba Village, can be collected infinitely by leaving the scene and returning.</font> | |||
|locationimage6=[[File:PM Goomba Village Goomnut Tree.png|250px]] | |||
|item7=[[Shooting Star (item)|Shooting Star]] | |||
|image7={{PM item|Shooting Star (item)|Shooting Star|text=}} | |||
|location7=On the veranda of the Goombas' house; can be obtained after visiting the Shooting Star Summit. | |||
|item8=[[Tape (Paper Mario)|Tape]] | |||
|image8=[[File:Tape PM.png]] | |||
|location8=Given by Goompa while doing [[Koopa Koot]]'s 3rd favor. | |||
|item9=[[Letter]] | |||
|image9=[[File:PM Letter Sprite.png]] | |||
|location9=From [[Goompapa]] after delivering his letter found in [[Mt. Rugged]]. This is the second letter in the long chain. | |||
|item10=[[Lucky Day]] | |||
|image10=[[File:Lucky Day Badge.png]] | |||
|location10=From Goompapa after delivering his letter from [[Frost T.]] This is the final reward for delivering the long chain of letters. | |||
}} | |||
Additional items include [[Mushroom]]s which can be dropped by [[Goomba]]-based enemies on the northwestern path, and [[Star Piece (Paper Mario series)|Star Piece]]s from [[Chuck Quizmo]] who has a chance to appear in the village. | |||
There | There is one [[List of hidden blocks in Paper Mario|Hidden ? block]] in Goomba Village: | ||
{{RPG item locations | |||
|item1={{PM item|Repel Gel}} | |||
|image1=[[File:PMHiddenBlock1.png|250px]] | |||
|location1=In the area immediately east of [[Jr. Troopa]]'s playground, Mario will find a gray block that can only be broken with the [[Super Hammer|Super]] or [[Ultra Hammer]]. Jumping in the center where the block once was will reveal the hidden ? Block. | |||
}} | |||
==Block locations== | =Goomba Road= | ||
===Peach's | {{RPG item locations | ||
{| | |item1=[[Close Call (badge)|Close Call]] | ||
|image1=[[File:Close Call Badge.png]] | |||
|- | |location1=In the red badge block on the second part of the path. | ||
|locationimage1=[[File:Goomba Road Block 3.png|250px]] | |||
|item2=[[Hammer Throw (badge)|Hammer Throw]] | |||
|image2=[[File:Hammer Throw Badge.png]] | |||
|location2=In a chest box on the roof of Toad Town entrance; get it by hitting the tree for a trampoline. | |||
| | |locationimage2=[[File:Goomba Road Treasure Chest.png|250px]] | ||
| | |item3=[[Mushroom]] | ||
|[[File: | |image3=[[File:PaperMario Items Mushroom.png]] | ||
| | |location3=Jumps off the notice board near the second part of the path when Mario finishes reading it. | ||
|[[File: | |item4=[[Star Piece (Paper Mario series)|Star Piece]] (x2) | ||
|- | |image4=[[File:PM StarPiece.gif]] | ||
| | |location4=<nowiki/> | ||
|[[File: | *In the tree before Goomba King's Fortress. | ||
| | *Under the hidden panel in the north of the opening after Goomba King's Fortress. | ||
|[[File: | |locationimage4=[[File:PM Star Piece GoombaKingTree.png|250px]][[File:PM Star Piece GoombaKingPanel.png|250px]] | ||
|} | |item5=[[Super Mushroom|Super Shroom]] | ||
|image5=[[File:PaperMario Items SuperShroom.png]] | |||
|location5=To the south of the opening after Goomba King's Fortress, there is a brick hitting which will reveal a ? Block with this item. | |||
|locationimage5=[[File:Goomba Road Block 4.png|250px]] | |||
|item6=[[Sleepy Sheep]] | |||
|image6=[[File:PaperMario Items SleepySheep.png]] | |||
|location6=In the ? Block near the descending stairs between Goomba King's Fortress and Toad Town. | |||
|locationimage6=[[File:Goomba Road Block 5.png|250px]] | |||
}} | |||
=Shooting Star Summit= | |||
{{RPG item locations | |||
|item1=[[Star Piece (Paper Mario series)|Star Piece]] (x5) | |||
|image1=[[File:PM StarPiece.gif]] | |||
|location1=<nowiki/> | |||
*Upon entering the Shooting Star Summit scene, go direct north to find this Star Piece. | |||
*Under a hidden panel to the right of the bridge before Shooting Star Summit. | |||
*Under a hidden panel to the south of [[Merluvlee]]'s house. | |||
*Under a hidden panel on the first step of the Shooting Star Summit. | |||
*Given by [[Merlow]] after giving him a letter from [[Shiver Snowfield]]. | |||
|locationimage1=[[File:PM Star Piece ShootingStarSummitSideway.png|250px]][[File:PM Star Piece ShootingStarSummitBridge.png|250px]][[File:PM Star Piece ShootingStarSummitHouse.png|250px]][[File:PM Star Piece ShootingStarSummitFloor.png|250px]][[File:PM Star Piece Merlow.png|250px]] | |||
|item2=[[Lucky Star (Paper Mario)|Lucky Star]] | |||
|image2=[[File:LuckyStar PM.png]] | |||
|location2=Given by [[Twink]] after visiting Shooting Star Summit. | |||
|item3=[[Autograph (Paper Mario)|Autograph]] | |||
|image3=[[File:Merluvlee's Autograph.png]] | |||
|location3=Given by [[Merluvlee]] while doing [[Koopa Koot]]'s 8th favor. | |||
}} | |||
In addition to the items listed above, [[Merlow]] has 15 Badges to sell, and [[Mario]] can get items from Princess Peach's [[Mysterious Treasure Chest]]. | |||
=Pleasant Path= | |||
Note: The scenes are numbered from west to east. | |||
{{RPG item locations | |||
|item1=[[Dizzy Attack]] | |||
|image1=[[File:Dizzy Attack Badge.png]] | |||
|location1=In the Badge Block at the first scene. | |||
|locationimage1=[[File:Pleasant Path Blocks 1-2.png|250px]] | |||
|item2=[[Fright Mask|Fright Jar]] | |||
|image2={{PM item|Fright Jar|link=Fright Mask|text=}} | |||
|location2=In the rightmost block at the first scene. | |||
|locationimage2=[[File:Pleasant Path Block 3.png|250px]] | |||
|item3=[[POW Block]] | |||
|image3={{PM item|POW Block|text=}} | |||
|location3=In the ? Block at the second scene. | |||
|locationimage3=[[File:Pleasant Path Block 4.png|250px]] | |||
|item4=[[Sleepy Sheep]] | |||
|image4={{PM item|Sleepy Sheep|text=}} | |||
|location4=Behind a fence in the second scene. | |||
|item5=[[Honey Syrup]] | |||
|image5={{PM item|Honey Syrup|text=}} | |||
|location5=Behind the rightmost [[Candy Pop|Candy Cane]] in the third scene. | |||
|image6=[[File:Attack FX B Badge.png]] | |||
|item6=[[Attack FX B (Paper Mario)|Attack FX B]] | |||
|location6=Smashing the blocks near the entrance of [[Koopa Village]] in the order "left, right, middle" will reveal a red ? Badge block with this badge inside. | |||
|locationimage6=[[File:Pleasant Path Block 6.png|250px]] | |||
|image7=[[File:PaperMario Items ThunderBolt.png]] | |||
|item7=[[Thunder Bolt (item)|Thunder Bolt]] | |||
|location7=On the first block in the fourth scene (requires [[Kooper]] or [[Tornado Jump (move)|Tornado Jump]]) | |||
|image8=[[File:PM StarPiece.gif]] | |||
|item8=[[Star Piece (Paper Mario series)|Star Piece]] | |||
|location8=<nowiki/> | |||
*On the southern small island in the second scene (requires [[Kooper]]) | |||
*Under a hidden panel between the three [[Candy Pop|Candy Cane]]s in the third scene. | |||
*Under a hidden panel at the coin trap in the fourth scene. | |||
*In the tree at the fifth scene. | |||
|locationimage8=[[File:PM Star Piece PleasantPathIsland.png|250px]][[File:PM Star Piece PleasantPathCandyCane.png|250px]][[File:PM Star Piece PleasantPathTrap.png|250px]][[File:PM Star Piece PleasantPathTree.png|250px]] | |||
|image9=[[File:FP Plus Badge.png]] | |||
|item9=[[FP Plus]] | |||
|location9=On a high platform near [[Koopa Bros. Fortress]], accessed through a pipe by blasting the wall near the Heart Block first. | |||
|locationimage9=[[File:Koopa Bros. Fortress Treasure Chest 1.png|250px]] | |||
}} | |||
Pleasant Path also has one [[list of hidden blocks in Paper Mario|hidden ? block]]: | |||
{{RPG item locations | |||
|item1={{PM item|Fire Flower}} | |||
|image1=[[File:PMHiddenBlock2.png|250px]] | |||
|location1=In the area two screens west of the [[Koopa Bros. Fortress]], the hidden ? Block is between the two [[Brick Block]]s. | |||
}} | |||
=Koopa Village= | |||
In addition to the items listed below, [[Koopa's Shop]] has several items on sale. [[Koopa Koot]] has 15 Star Pieces and gives them in threes if Mario does favors for him. [[Kolorado]] also has two Star Pieces that can be given to Mario if a letter for him and the [[Artifact]] are delivered by [[Parakarry]] outside [[Dry Dry Desert (Paper Mario)|Dry Dry Desert]] or [[Mt. Lavalava]]. | |||
{{RPG item locations | |||
|item1=[[Dried Mushroom|Dried Shroom]] | |||
|image1=[[File:PaperMario Items DriedShroom.png]] | |||
|location1=In the southest bush at the southwestern corner of the first scene. | |||
|item2=[[Turtley Leaf|Koopa Leaf]] (x2) | |||
|image2=[[File:PaperMario Items KoopaLeaf.png]] | |||
|location2=<nowiki/> | |||
*<font color=green>In the southeast bush at the southeastern corner of the first scene (replenish-able resource).</font> | |||
*In the bush nearest to the entrance in the second scene (non-replenishable). | |||
|item3=[[Kooper's Shell]] | |||
|image3=[[File:Kooper'sShell PM.png]] | |||
|location3=Returned by the [[Fuzzy|Fuzzies]] after winning their minigame. | |||
|item4=[[HP Plus (badge)|HP Plus]] | |||
|image4=[[File:HP Plus Badge.png]] | |||
|location4=On a trunk in the scene behind [[Kooper]]'s house, by getting it with Kooper. | |||
|locationimage4=[[File:PM Kooper HP Plus.png|250px]] | |||
|item5=[[Koopa Legends]] | |||
|image5=[[File:KoopaLegends PM.png]] | |||
|location5=Given by [[Kolorado's wife]] for [[Koopa Koot]]'s 1st favor. | |||
|item6=[[Silver Card|Silver Credit]] | |||
|image6=[[File:PM Silver Credit.png]] | |||
|location6=Given by Koopa Koot after finishing his 2nd favor. | |||
|item7=[[Letter]] (x2) | |||
|image7=[[File:PM Letter Sprite.png]] | |||
|location7=<nowiki/> | |||
*Given by [[Koover]] after giving him a letter from [[Muss T.]] | |||
*Given by Koover after giving him a letter from [[Fishmael]]. | |||
|item8=[[Star Piece (Paper Mario series)|Star Piece]] (x3) | |||
|image8=[[File:PM StarPiece.gif]] | |||
|location8=<nowiki/> | |||
*On a block after Fuzzies flee the second scene (requires puzzle-solving with the blue block or Tornado Jump). | |||
*Given by [[Mort T.]] after giving him a letter from Dry Dry Desert. | |||
*Under a hidden panel near the [[Bob-omb]]s in the first scene. | |||
|locationimage8=[[File:PM Star Piece KoopaVillageBrick.png|250px]][[File:PM Star Piece MortT.png|250px]][[File:PM Star Piece KoopaVillagePanel.png|250px]] | |||
|item9=[[Empty Wallet]] | |||
|image9=[[File:PM Empty Wallet.png]] | |||
|location9=Appears in the northeast bush in the southeastern corner of the first scene after taking Koopa Koot's 6th favor. | |||
|item10=[[Golden Card|Gold Credit]] | |||
|image10=[[File:GoldCredit PM.png]] | |||
|location10=Given by Koopa Koot after finishing his 10th favor. | |||
|item11=[[Glasses]] | |||
|image11=[[File:Glasses PM.png]] | |||
|location11=Appears in the bush with a white flower in the southwestern corner of the first scene after taking Koopa Koot's 15th favor. | |||
}} | |||
=Koopa Bros. Fortress= | |||
{{RPG item locations | |||
|item1=[[Fortress Key]] (x4) | |||
|image1=[[File:FortressKey PM.png]] | |||
|location1=<nowiki/> | |||
*Held by the [[Koopa Troopa]] in the first room. | |||
*On the west end of the basement, which can be accessed by lowering the stairs in the east. | |||
*Locked behind bars on the first floor. Mario can get it by blasting the wall with [[Bombette]]. | |||
*Locked behind bars on the first floor. Mario can get it by lowering the stairs on the second floor. | |||
|locationimage1=[[File:PM Fortress Key 1.png|250px]][[File:PM Fortress Key 2.png|250px]][[File:PM Fortress Key 3.png|250px]][[File:PM Fortress Key 4.png|250px]] | |||
|item2=[[Power Bounce]] | |||
|image2=[[File:Power Bounce Badge.png]] | |||
|location2=Locked behind bars on the first floor. Mario can get it by blasting the wall or enter from the back side. | |||
|locationimage2=[[File:PM Power Bounce obtained.png|250px]] | |||
|item3=[[Refund]] | |||
|image3=[[File:Refund Badge.png]] | |||
|location3=In a small area outside the fortress that can be accessed by blasting the wall on the east end. | |||
|locationimage3=[[File:Koopa Bros. Fortress Treasure Chest 2.png|250px]] | |||
|item4=[[Smash Charge]] | |||
|image4=[[File:Smash Charge Badge.png]] | |||
|location4=Guarded by a [[Bob-omb]] at the end of the slope stair on the third floor. | |||
|locationimage4=[[File:PM Smash Charge.png|250px]] | |||
|item5=[[Maple Syrup]] | |||
|image5=[[File:PaperMario Items MapleSyrup.png]] | |||
|location5=At the [[Bullet Bill]] dodging scene, in a question block at the southwestern corner. | |||
|locationimage5=[[File:Koopa Bros. Fortress Block 2.png|250px]] | |||
}} | |||
=Mt. Rugged= | |||
{{RPG item locations | |||
|item1=[[Egg]] | |||
|image1=[[File:PaperMario Items Egg.png]] | |||
|location1=<font color=green>In a bush near the Dry Dry Railroad station (can be collected indefinitely by reloading the area).</font> | |||
|item2=[[Sleepy Sheep]] | |||
|image2=[[File:PaperMario Items SleepySheep.png]] | |||
|location2=In a [[? Block]] at the southeastern corner of the second scene. | |||
|locationimage2=[[File:Mt. Rugged Block 1.png|250px]] | |||
|item3=[[Whacka Bump|Whacka's Bump]] (x8) | |||
|image3=[[File:PaperMario Items WhackasBump.png]] | |||
|location3=Dropped by hitting [[Whacka]]. | |||
|item4=[[Letter]] (x3) | |||
|image4=[[File:PM Letter Sprite.png]] | |||
|location4=<nowiki/> | |||
*On a big stone in the third scene (requires Kooper). | |||
*In the room to the north of the second room, accessible after sliding the slope. | |||
*Down the cliff in the fifth scene. | |||
|locationimage4=[[File:Mt. Rugged First Letter.png|250px]][[File:Mt. Rugged Second Letter.png|250px]][[File:Mt. Rugged Third Letter.png|250px]] | |||
|item5=[[Mushroom]] | |||
|image5=[[File:PaperMario Items Mushroom.png]] | |||
|location5=In a ? Block at the scene to the north of the second room. | |||
|locationimage5=[[File:Mt. Rugged Block 2.png|250px]] | |||
|item6=[[Damage Dodge]] | |||
|image6=[[File:Damage Dodge Badge.png]] | |||
|location6=In the scene to the north of the second room, by going in the cave for a chest box. | |||
|locationimage6=[[File:Mt. Rugged Treasure Chest.png|250px]] | |||
|item7=[[Honey Syrup]] | |||
|image7=[[File:PaperMario Items HoneySyrup.png]] | |||
|location7=In a ? Block at the scene to the north of the second room. | |||
|locationimage7=[[File:Mt. Rugged Block 4.png|250px]] | |||
|item8=[[Quake Hammer]] | |||
|image8=[[File:Quake Hammer Badge.png]] | |||
|location8=On a big stone in the third scene (requires Parakarry). | |||
|item9=[[Magical Seed]] | |||
|image9=[[File:PM Magical Seed purple.png]] | |||
|locationimage9=[[File:Magical Seed 2 Shot.png|250px]] | |||
|location9=Given by the [[Bub-ulb]] (requires Parakarry). | |||
|item10=[[Star Piece (Paper Mario series)|Star Piece]] (x3) | |||
|image10=[[File:PM StarPiece.gif]] | |||
|location10=<nowiki/> | |||
*On a ledge in the fourth scene. | |||
*Under a hidden panel in the corner by the slope in the third scene. | |||
*In the southwestern corner of the room to the north of the second room (requires Parakarry). | |||
|locationimage10=[[File:PM Star Piece MtRuggedWood.png|250px]][[File:PM Star Piece MtRuggedCliff.png|250px]][[File:PM Star Piece MtRuggedGap.png|250px]] | |||
}} | |||
=Dry Dry Desert= | |||
In addition to the items listed below, others such as [[Dried Fruit]]s may be dropped by enemies. | |||
{{RPG item locations | |||
|item1=[[Spin Attack (Badge)|Spin Attack]] | |||
|image1=[[File:Spin Attack Badge.png]] | |||
|location1=On a big stone at scene E6, get it with the help from the tornado at F5 (2 screens south of [[Nomadimouse (character)|Nomadimouse]], obtainable via the whirlwind in area with blue cacti). | |||
|item2=[[Stop Watch]] | |||
|image2={{PM item|Stop Watch|text=}} | |||
|location2=On a block at scene E6 (requires Kooper or Tornado Jump). | |||
|item3=[[Tasty Tonic]] | |||
|image3={{PM item|Tasty Tonic|text=}} | |||
|location3=Behind a bush at the southeastern corner of scene F6. | |||
|item4=[[Lemon]] | |||
|image4={{PM item|Lemon|text=}} | |||
|location4=<font color=green>Endlessly harvestable from the west tree in the oasis (F7)</font> - can be given to [[Moustafa]] in [[Dry Dry Outpost]] to get a hint about progressing (non-mandatory). | |||
|item5=[[Lime]] | |||
|image5={{PM item|Lime|text=}} | |||
|location5=<font color=green>Endlessly harvestable from the east tree in the oasis (F7).</font> | |||
|item6=[[Letter]] | |||
|image6=[[File:PM Letter Sprite.png]] | |||
|location6=<nowiki/> | |||
*In the most southeastern tree at the final scene (D7). | |||
*In the tree at the first scene (D1). Obtainable after [[Kolorado]] removes his camp. | |||
|locationimage6=[[File:Letter Eastern Dry Dry Desert.png|250px]][[File:Letter in Dry Dry Desert PM.png|250px]] | |||
|item7=[[Fire Flower]] | |||
|image7={{PM item|Fire Flower|text=}} | |||
|location7=<nowiki/> | |||
*Behind the northeast cactus at scene A6. | |||
*In the question block at the center of scene C3. | |||
|locationimage7=[[File:Dry Dry Desert Blocks 10-14.png|250px]] | |||
|item8=[[Honey Syrup]] | |||
|image8={{PM item|Honey Syrup|text=}} | |||
|location8=In the east question block at scene B5. | |||
|locationimage8=[[File:Dry Dry Desert Blocks 4-6.png|250px]] | |||
|item9=[[Star Piece (Paper Mario series)|Star Piece]] | |||
|image9=[[File:PM StarPiece.gif]] | |||
|location9=<nowiki/> | |||
*Two given by Kolorado at his camp: When delivering his letter and in exchange for the [[Artifact]] found in [[Dry Dry Ruins (Paper Mario)|Dry Dry Ruins]]. | |||
*Given by the Nomadimouse at scene D5 after giving him a letter from Dry Dry Outpost. | |||
*Under a hidden panel near the stone cactus in the most center scene (D4). | |||
|locationimage9=[[File:PM Star Piece Kolorado Mail.png|250px]][[File:PM Star Piece Nomadimouse.png|250px]][[File:PM Star Piece DryDryDesert.png|250px]] | |||
|item10=[[Fright Mask|Fright Jar]] | |||
|image10={{PM item|Fright Jar|link=Fright Mask|text=}} | |||
|location10=In the west ? block at scene A1. | |||
|locationimage10=[[File:Dry Dry Desert Blocks 1-2.png|250px]] | |||
|item11=[[Mushroom]], [[Super Mushroom|Super Shroom]] and [[Ultra Mushroom|Ultra Shroom]] | |||
|image11={{PM item|Mushroom|text=}} {{PM item|Super Shroom|text=}} {{PM item|Ultra Shroom|text=}} | |||
|location11=At scene C1, in the ? block that appears after hitting the block 1 time (Mushroom)/10 times (Super Shroom)/100 times (Ultra Shroom). | |||
|locationimage11=[[File:Dry Dry Desert Blocks 7-9.png|250px]] | |||
|item12=[[Maple Super]] | |||
|image12={{PM item|Maple Super|text=}} | |||
|location12=Given by the [[Trading Event Toad]] at scene A3 when participating in the second contest. | |||
}} | |||
Additionally, there are four [[List of hidden blocks in Paper Mario|Hidden ? blocks]]: | |||
{{RPG item locations | |||
|item1=[[File:Attack FX C Badge.png]]<br>[[Attack FX C]] Badge | |||
|image1=[[File:PMHiddenBlock4.png|250px]] | |||
|location1=In the area one screen east and three south from Kolorado's camp, the hidden ? Block is above the lone rock. | |||
|item2={{PM item|Life Shroom|link=Life Mushroom (Paper Mario series)}} | |||
|image2=[[File:PMHiddenBlock6.png|250px]] | |||
|location2=In the area one screen north of the oasis, the hidden ? Block is above the ? Block on the ground. | |||
|item3=[[File:Runaway Pay Badge.png]]<br>[[Runaway Pay]] Badge | |||
|image3=[[File:PMHiddenBlock5.png|250px]] | |||
|location3=In the area one screen north and four east from Kolorado's camp, the hidden ? Block is in the center of the triangle of trees. | |||
|item4={{PM item|Thunder Rage}} | |||
|image4=[[File:PMHiddenBlock3.png|250px]] | |||
|location4=In the area two screens north of [[Kolorado]]'s camp, the hidden ? Block is above the easternmost rock. | |||
}} | |||
=Dry Dry Outpost= | |||
In addition to the items listed below, [[Little Mouser's Shop]] has several items on sale. 64 [[Star Piece (Paper Mario series)|Star Pieces]] in total can be obtained from [[Chuck Quizmo]]. | |||
{{RPG item locations | |||
|item1=[[Letter]] | |||
|image1=[[File:PM Letter Sprite.png]] | |||
|location1=<nowiki/> | |||
*On the roof of the [[Toad House]]. | |||
*Given by [[Mr. E (Paper Mario)|Mr. E]] after giving him a letter from [[Koover]]. | |||
*Given by the owner of Little Mouser's Shop after giving him a letter from [[Miss T.]] | |||
|locationimage1=[[File:Letter Dry Dry Outpost PM.png|250px]] | |||
|item2=[[Star Piece (Paper Mario series)|Star Piece]] | |||
|image2=[[File:PM StarPiece.gif]] | |||
|location2=Under a hidden panel on the roof of the most eastern house. | |||
|locationimage2=[[File:PM Star Piece DryDryOutpost.png|250px]] | |||
|item3=[[Red Jar]] | |||
|image3=[[File:PM Red Jar.png]] | |||
|location3=Given by the owner of [[Little Mouser's Shop]] after purchasing a Dusty Hammer, a Dried Pasta, another Dusty Hammer, and a Dried Shroom in order. | |||
|item4=[[Crystal Ball]] | |||
|image4=[[File:Crystal Ball PM.png]] | |||
|location4=Given by [[Merlee]] while doing Koopa Koot's 8th favor. | |||
|item5=[[Melody (item)|Melody]] | |||
|image5=[[File:PM Melody.png]] | |||
|location5=Given by the composer in the pink house after bringing him [[Lyrics]]. | |||
|item6=[[Pulse Stone]] | |||
|image6=[[File:PulseStone PM.png]] | |||
|location6=Given by [[Moustafa]] after he reveals his true identity. | |||
}} | |||
=Dry Dry Ruins= | |||
In addition to the ones listed below, enemies found in this area can also drop items. | |||
{{RPG item locations | |||
|item1=[[Ruins Key (Paper Mario)|Ruins Key]] (x4) | |||
|image1=[[File:RuinsKey PM.png]] | |||
|location1=<nowiki/> | |||
*In the lower room right of the first coffin area. | |||
*In the rooms to the upper-east of the first hub room. | |||
*Falls down after Mario defeats the [[Pokey Mummy|Pokey Mummies]] in the corridor between the two hub rooms. | |||
*In the east of the area beneath the second hub room. | |||
|item2=[[Spike Shield]] | |||
|image2=[[File:Spike Shield Badge PM.png]] | |||
|location2=In the first area with three coffins, the badge can be found in the second coffin. | |||
|item3=[[Artifact]] | |||
|image3=[[File:Artifact PM.png]] | |||
|location3=On a ledge by the corridor between the two hub rooms. | |||
|item4=[[Slow Go]] | |||
|image4=[[File:Slow Go Badge.png]] | |||
|location4=In the area with the [[Super Hammer]], falling on the ledges above the chest and following them will lead to the badge. | |||
|locationimage4=[[File:Dry Dry Ruins Treasure Chest 1.png|250px]] | |||
|item5=[[Star Piece (Paper Mario series)|Star Piece]] | |||
|image5=[[File:PM StarPiece.gif]] | |||
|location5=In the room by blasting the wall to the upper-east of the first hub room. Exposed after draining the sand. | |||
|locationimage5=[[File:PM Star Piece DryDryRuins.png|250px]] | |||
|item6=[[Pyramid Stone]] | |||
|image6=[[File:PyramidStone PM.png]] | |||
|location6=To the lower-east of the first hub room. | |||
|item7=[[Diamond Stone]] | |||
|image7=[[File:DiamondStone PM.png]] | |||
|location7=At the west end of the area beneath the second hub room. | |||
|item8=[[Lunar Stone]] | |||
|image8=[[File:LunarStone PM.png]] | |||
|location8=At the east end of the area beneath the second hub room. | |||
}} | |||
=Forever Forest= | |||
{{RPG item locations | |||
|item1=[[Magical Seed]] | |||
|image1=[[File:PM Magical Seed cyan.png]] | |||
|location1=In the middle of a clearing in the fourth area. | |||
|locationimage1=[[File:Magical Seed 3 Shot.png|250px]] | |||
|item2=[[HP Plus (badge)|HP Plus]] | |||
|image2=[[File:HP Plus Badge.png]] | |||
|location2=In the middle of a clearing found on a detour from the fifth area, inside a badge box. | |||
|locationimage2=[[File:Forever Forest Block 1.png|250px]] | |||
|item3=[[FP Plus]] | |||
|image3=[[File:FP Plus Badge.png]] | |||
|location3=In the middle of a clearing found on a detour from the seventh area, inside a badge box. | |||
|locationimage3=[[File:Forever Forest Block 2.png|250px]] | |||
}} | |||
=Boo's Mansion= | |||
Several items can be purchased from [[Boo's Shop]] run by [[Igor]]. Other items found in this area include: | |||
{{RPG item locations | |||
|item1=[[Volt Mushroom|Volt Shroom]] | |||
|image1={{PM item|Volt Shroom|text=}} | |||
|location1=In a question block in front of the gate. | |||
|locationimage1=[[File:Boo Mansion Block.png|250px]] | |||
|item2=[[Strange Leaf]] | |||
|image2={{PM item|Strange Leaf|text=}} | |||
|location2=<font color=green>In a bush near the backyard gate (replenish-able resource).</font> | |||
|item3=[[Record (Paper Mario)|Record]] | |||
|image3=[[File:Record PM.png]] | |||
|location3=Held by the Boos in the cabinet in the right room on the second floor. | |||
|item4=[[Weight]] | |||
|image4=[[File:Weight PM.png]] | |||
|location4=In a chest box guarded by a Boo in the left room on the second floor (play the Record to lure the Boo away). | |||
|locationimage4=[[File:Boo's Mansion Treasure Chest 1.png|250px]] | |||
|item5=[[Maple Syrup]] | |||
|image5={{PM item|Maple Syrup|text=}} | |||
|location5=In the underneath crate within the room with Super Boots. | |||
|item6=[[Letter]] | |||
|image6=[[File:PM Letter Sprite.png]] | |||
|location6=Given by [[Franky]] after giving him a letter from [[Little Mouser (character)|Little Mouser]]. | |||
|item7=[[Super Mushroom|Super Shroom]] | |||
|image7={{PM item|Super Shroom|text=}} | |||
|location7=In the middle crate of the room next to the room with Super Boots. | |||
|item8=[[Apple]] | |||
|image8={{PM item|Apple|text=}} | |||
|location8=<nowiki/> | |||
*<font color=green>In the middle crate of the right room on the first floor (replenishable resource).</font> | |||
*<font color=green>In the underneath crate of the right room on the first floor (also a replenishable resource).</font> | |||
|item9=[[Boo's Portrait]] | |||
|image9=[[File:Boo'sPortrait PM.png]] | |||
|location9=At the northeastern corner of the room below the right room on the first floor (requires Super Boots and Parakarry). | |||
|item10=[[Star Piece (Paper Mario series)|Star Piece]] | |||
|image10=[[File:PM StarPiece.gif]] | |||
|location10=<nowiki/> | |||
*Under a hidden panel in the west of the room with Super Boots. | |||
*Under a hidden panel near the sofa on the first floor. | |||
*In the underneath crate in the room below the right room on the first floor. | |||
*Under a hidden panel in front of a clock, basement level of the left room on the first floor. It is a level below where the jumpscare chest box is located. | |||
*Under a hidden panel in the center of the right room on the second floor. | |||
*|Given by [[Igor]] after giving him a letter from Lavalava Island. | |||
|locationimage10=[[File:PM Star Piece BoosMansionBoo.png|250px]][[File:PM Star Piece BoosMansionSofa.png|250px]][[File:PM Star Piece BoosMansionLibrary.png|250px]][[File:PM Star Piece BoosMansionClock.png|250px]][[File:PM Star Piece BoosMansionRecord.png|250px]] | |||
|item11=[[Old Photo]] | |||
|image11=[[File:OldPhoto PM.png]] | |||
|location11=Given by Franky while doing Koopa Koot's 13th favor. | |||
}} | |||
=Gusty Gulch= | |||
{{RPG item locations | |||
|item1=[[Star Piece (Paper Mario series)|Star Piece]] (x2) | |||
|image1=[[File:PM StarPiece.gif]] | |||
|location1=<nowiki/> | |||
*Under a hidden panel near the back gate of [[Boo's Mansion]] | |||
*Obscured behind a rock and between another rock and a tree near the end of the scene before the entrance to [[Tubba Blubba's Castle]]. | |||
|locationimage1=[[File:PM Star Piece GustyGulchPanel.png|250px]][[File:PM Star Piece GustyGulchStone.png|250px]] | |||
|item2=[[Package (Paper Mario)|Package]] | |||
|image2=[[File:PM Package.png]] | |||
|location2=Given by a Boo while doing [[Koopa Koot]]'s favors. | |||
|item3=[[Dizzy Dial]] | |||
|image3=[[File:PaperMario Items DizzyDial.png]] | |||
|location3=On a big stone one scene to the east of the Boo's area (requires [[Kooper]]). | |||
|item4=[[Repel Gel]] | |||
|image4=[[File:PaperMario Items RepelGel.png]] | |||
|location4=In a question block one scene to the east of the Boo's area. | |||
|locationimage4=[[File:Gusty Gulch Blocks 3-4.png|250px]] | |||
|item5=[[Letter]] | |||
|image5=[[File:PM Letter Sprite.png]] | |||
|location5=Behind a branch one scene to the east of the Boo's area. | |||
|locationimage5=[[File:Letter Gusty Gulch PM.png|250px]] | |||
|item6=[[Super Mushroom|Super Shroom]] | |||
|image6=[[File:PaperMario Items SuperShroom.png]] | |||
|location6=In a question block one scene before Tubba Blubba's Castle. | |||
|locationimage6=[[File:Gusty Gulch Blocks 5-7.png|250px]] | |||
}} | |||
=Tubba Blubba's Castle= | |||
{{RPG item locations | |||
|item1=[[Star Piece (Paper Mario series)|Star Piece]] (x2) | |||
|image1=[[File:PM StarPiece.gif]] | |||
|location1=<nowiki/> | |||
*On the desk in the second room north of the first-floor corridor. | |||
*On a big desk on the first-floor corridor. Mario can fall down from the room above to reach it. | |||
|locationimage1=[[File:PM Star Piece TubbaBlubbasCastleRoom.png|250px]][[File:PM Star Piece TubbaBlubbasCastleHighTable.png|250px]] | |||
|item2=[[Castle Key (Tubba Blubba's Castle)|Castle Key]] (x3) | |||
|image2=[[File:Tubba Blubba Castle Key.png]] | |||
|location2=<nowiki/> | |||
*In the basement. Mario can get it by falling down from the final room to the north of the first-floor corridor. | |||
*In the spike room on the second floor (requires Bow). | |||
*In the room full of Clubbas to the north of the third-floor corridor. | |||
|locationimage2=[[File:Tubba Blubba's Castle Treasure Chest 1.png|250px]][[File:Tubba Blubba's Castle Treasure Chest 2.png|250px]] | |||
|item3=[[D-Down Jump]] | |||
|image3=[[File:D-Down Jump Badge.png]] | |||
|location3=In the first room to the north of the first-floor corridor. Mario can get it from the room above. | |||
|item4=[[Mega Rush]] | |||
|image4=[[File:Mega Rush Badge.png]] | |||
|location4=Down the ledge above the bed in the room behind the clock on the second floor. | |||
|item5=[[Maple Syrup]] | |||
|image5=[[File:PaperMario Items MapleSyrup.png]] | |||
|location5=In a question block by the stair that leads to the third floor. | |||
|locationimage5=[[File:Tubba Blubba's Castle Block.png|250px]] | |||
|item6=[[Yakkey|Mystical Key]] | |||
|image6=[[File:PM Mystical Key.png]] | |||
|location6=In a chest box in the east corner of Tubba Blubba's room on the third floor. | |||
|locationimage6=[[File:Tubba Blubba's Castle Treasure Chest 3.png|250px]] | |||
}} | |||
=Shy Guy's Toy Box= | |||
{{RPG item locations | |||
|item1=[[Star Piece (Paper Mario series)|Star Piece]] (x7) | |||
|image1=[[File:PM StarPiece.gif]] | |||
|location1=<nowiki/> | |||
*'''Under a hidden panel in front of the Blue Station.''' | |||
*Behind a regular hexagonal prism one scene east of the Blue Station. | |||
*On the roof of the first "building" one scene east of the Blue Station. | |||
*'''Under a hidden panel in front of the Pink Station.''' | |||
*'''Under a hidden panel in front of the Green Station.''' | |||
*Below the platform at the east end of the Green Station area. | |||
*'''Under a hidden panel in front of the Red Station.''' | |||
|locationimage1=[[File:PM Star Piece ShyGuysToyBoxBlue.png|250px]][[File:PM Star Piece ShyGuysToyBoxPrism.png|250px]][[File:PM Star Piece ShyGuysToyBoxRoof.png|250px]][[File:PM Star Piece ShyGuysToyBoxPink.png|250px]][[File:PM Star Piece ShyGuysToyBoxGreen.png|250px]][[File:PM Star Piece ShyGuysToyBoxLow.png|250px]][[File:PM Star Piece ShyGuysToyBoxRed.png|250px]] | |||
|item2=[[Thunder Bolt (item)|Thunder Bolt]] | |||
|image2=[[File:PaperMario Items ThunderBolt.png]] | |||
|location2=In a ? block at the east end of the Blue Station area. | |||
|locationimage2=[[File:Shy Guy's Toy Box Blocks 3-4.png|250px]] | |||
|item3=[[Storeroom Key]] | |||
|image3=[[File:OddKey PM.png]] | |||
|location3=In a treasure chest at the east end of the Blue Station area. | |||
|locationimage3=[[File:Shy Guy's Toy Box Treasure Chest 2.png|250px]] | |||
|item4=[[Maple Syrup]] | |||
|image4=[[File:PaperMario Items MapleSyrup.png]] | |||
|location4=<font color=green>Held by the red Shy Guy in the playground west of the Blue Station area, only in subsequent revisits after recovering the Calculator.</font> | |||
|item5=[[Power Plus (badge)|Power Plus]] | |||
|image5=[[File:Power Plus Badge.png]] | |||
|location5=In a treasure chest guarded by an [[Black Shy Guy#Paper Mario|Anti Guy]] in the Blue Station area. Mario can fight him or bribe him with a [[Lemon Candy]] to get it. | |||
|locationimage5=[[File:Shy Guy's Toy Box Treasure Chest 1.png|250px]] | |||
|item6=[[Calculator]] | |||
|image6=[[File:Calculator PM.png]] | |||
|location6=Held by a Shy Guy in the playground in the west of the Blue Station area. | |||
|item7=[[Cake Mix]] (x2) | |||
|image7=[[File:PaperMario Items CakeMix.png]] | |||
|location7=<nowiki/> | |||
*<font color=green>Held by a yellow Shy Guy in the playground west of the Blue Station area.</font> | |||
*<font color=green>Held by another yellow Shy Guy in the playground west of the Blue Station area.</font> | |||
|item8=[[Fire Flower]] | |||
|image8=[[File:PaperMario Items FireFlower.png]] | |||
|location8=<font color=green>Held by the green Shy Guy in the playground west of the Blue Station area.</font> | |||
|item9=[[Mushroom]] | |||
|image9=[[File:PaperMario Items Mushroom.png]] | |||
|location9=<nowiki/> | |||
*<font color=green>Held by the blue Shy Guy in the playground west of the Blue Station area.</font> | |||
*<font color=green>Exactly 10 or just 1 at a time, can be obtained from the slot machine in the Green Station area.</font> | |||
|item10=[[Mailbag]] | |||
|image10=[[File:Mailbag PM.png]] | |||
|location10=In the treasure chest to the east of the Pink Station. | |||
|locationimage10=[[File:Shy Guy's Toy Box Treasure Chest 3.png|250px]] | |||
|item11=[[Defend Plus]] | |||
|image11=[[File:Defend Plus Badge.png]] | |||
|location11=In a treasure chest on the high platform in the northwestern corner of the east scene in the Pink Station area. | |||
|locationimage11=[[File:Shy Guy's Toy Box Treasure Chest 4.png|250px]] | |||
|item12=[[Ice Power]] | |||
|image12=[[File:Ice Power Badge.png]] | |||
|location12=In a treasure chest at the east of the Pink Station area. | |||
|locationimage12=[[File:Shy Guy's Toy Box Block 5 and Treasure Chest 5.png|250px]] | |||
|item13=[[Frying Pan]] | |||
|image13=[[File:PM Frying Pan.png]] | |||
|location13=In a treasure chest in the east corner of the Pink Station area. | |||
|locationimage13=[[File:Shy Guy's Toy Box Treasure Chest 6.png|250px]] | |||
|item14=[[Cookbook]] | |||
|image14=[[File:Cook Book Paper Mario.png]] | |||
|location14=Dropped by [[Gourmet Guy]] after giving him a [[Cake]] in the Pink Station area. | |||
|item15=[[Mystery Note]] | |||
|image15=[[File:MysteryNote.png]] | |||
|location15=Held by a Shy Guy in the Green Station area. | |||
|item16=[[Dictionary]] | |||
|image16=[[File:PM Dictionary.png]] | |||
|location16=In a treasure chest on the platform at the east end of the Green Station area. | |||
|locationimage16=[[File:Shy Guy's Toy Box Treasure Chest 7.png|250px]] | |||
|item17=[[Shooting Star (item)|Shooting Star]] | |||
|image17=[[File:PaperMario Items ShootingStar.png]] | |||
|location17=On a high brick one scene east to the Red Station area (can be gotten by hitting a hidden coin block then tossing Kooper on it, or executing a Tornado Jump). | |||
|item18=[[Sleepy Sheep]] | |||
|image18=[[File:PaperMario Items SleepySheep.png]] | |||
|location18=In a ? Block in the northwestern area of the scene to the east of the Red Station scene. | |||
|locationimage18=[[File:Shy Guy's Toy Box Block 16.png|250px]] | |||
}} | |||
In addition, the following items are available as Peach's choices: | |||
{{RPG item locations | |||
|item1=[[Mushroom]] | |||
|image1=[[File:PaperMario Items Mushroom.png]] | |||
|location1=Will appear in front of the Storeroom Key chest in the Blue Station area, if chosen instead of a [[Goomba]] or the [[Clubba]] option. | |||
|item2=[[Thunder Rage]] | |||
|image2=[[File:PaperMario Items ThunderRage.png]] | |||
|location2=Will appear in front of the Frying Pan chest in the Pink Station area, if chosen instead of a [[Fuzzy]] or the [[Hammer Bro]] option. | |||
|item3=[[Fresh Juice|Super Soda]] | |||
|image3=[[File:PaperMario Items SuperSoda.png]] | |||
|location3=Will appear in front of the Dictionary chest in the Green Station area, if chosen instead of a [[Pokey]] or the [[Koopatrol]] option. | |||
}} | |||
===Hidden ? blocks=== | |||
There are thirteen [[List of hidden blocks in Paper Mario|hidden ? blocks]] in Shy Guy's Toy Box. | |||
{{RPG item locations | |||
|item1={{PM item|Stone Cap}} | |||
|location1=By the Blue Station, the hidden ? Block is slightly east of the station itself. | |||
|image1=[[File:PMHiddenBlock14.png|250px]] | |||
|item2={{PM item|Maple Syrup}} | |||
|location2=One screen west of the Blue Station, the hidden ? Block is three tiles east of the large toy block. | |||
|image2=[[File:PMHiddenBlock15.png|250px]] | |||
|item3={{PM item|Mystery}} | |||
|location3=Two screens west of the Blue Station, at the Shy Guy Playground, the hidden ? Block is two beige tiles southwest of the large jack-in-the-box in the north. | |||
|image3=[[File:PMHiddenBlock16.png|250px]] | |||
|item4={{PM item|Fright Jar}} | |||
|image4=[[File:PMHiddenBlock17.png|250px]] | |||
|location4=In the same area, the hidden ? Block is two tiles south of the large jack-in-the-box, slightly east of the last hidden block. | |||
|item5={{PM item|Super Soda}} | |||
|location5=Two screens west of the Pink Station, past the gate where [[Gourmet Guy]] sits going northwest, the hidden ? Block is at the beige tile west of the large toy block. | |||
|image5=[[File:PMHiddenBlock18.png|250px]] | |||
|item6={{PM item|Dizzy Dial}} | |||
|image6=[[File:PMHiddenBlock19.png|250px]] | |||
|location6=In the same area, in the northern path going east, the hidden ? Block in the center of the gap between the two visible ? Blocks, at the beige tile. | |||
|item7={{PM item|Thunder Rage}} | |||
|location7=From the same area, going two screens east to the northwestern region of the Pink Station, the hidden ? Block is at the beige tile northeast of the pink switch. | |||
|image7=[[File:PMHiddenBlock20.png|250px]] | |||
|item8={{PM item|Fire Flower}} | |||
|location8=By the Green Station, the hidden ? Block is three tiles north of the eastern passageway, on the northern corners. | |||
|image8=[[File:PMHiddenBlock21.png|250px]] | |||
|item9={{PM item|Super Shroom}} | |||
|location9=By the Red Station, the hidden ? Block is five tiles west of the Red Station itself, in line with the [[Save Block|Save]] and [[Heart Block]]s in the east. | |||
|image9=[[File:PMHiddenBlock22.png|250px]] | |||
|item10={{PM item|Volt Shroom}} | |||
|location10=One screen west of the Red Station, the hidden ? Block is to the east of the first brown block near the passageway. | |||
|image10=[[File:PMHiddenBlock23.png|250px]] | |||
|item11=[[File:Deep Focus Badge.png]] [[Deep Focus]] Badge | |||
|location11=In the same area, going west by taking the elevator and Ferris wheel into the shaded region, the hidden ? Block is in the gap between to the two visible blocks. | |||
|image11=[[File:PMHiddenBlock24.png|250px]] | |||
|item12={{PM item|Snowman Doll}} | |||
|location12=Also in the same area, the hidden ? Block is all the way to the west, between the last brown block and the passageway to [[Big Lantern Ghost]]'s room. | |||
|image12=[[File:PMHiddenBlock25.png|250px]] | |||
|item13=1 Coin | |||
|location13=In the area east of the Red Station, past the block wall, this hidden ? Block is two blocks east of the large green block. | |||
|image13=[[File:PMHiddenBlock26.png|250px]] | |||
}} | |||
=Lavalava Island= | |||
{{RPG item locations | |||
|item1=[[Stop Watch]] | |||
|image1=[[File:PaperMario Items StopWatch.png]] | |||
|location1=Behind a bush in the whale scene. | |||
|item2=[[Coconut]] (x7) | |||
|image2=[[File:PaperMario Items Coconut.png]] | |||
|location2=<font color=green>From several trees near the shore.</font> | |||
|item3=[[Letter]] | |||
|image3=[[File:PM Letter Sprite.png]] | |||
|location3=On a big stone on the beach. For [[Igor]]. | |||
|locationimage3=[[File:Letter Lavalava Island PM.png|250px]] | |||
|item4=[[Star Piece (Paper Mario series)|Star Piece]] | |||
|image4=[[File:PM StarPiece.gif]] | |||
|location4=In the rightmost tree in the beach scene. | |||
|locationimage4=[[File:PM Star Piece LavalavaIsland.png|250px]] | |||
}} | |||
There are two [[List of hidden blocks in Paper Mario|Hidden ? Blocks]]: | |||
{{RPG item locations | |||
|item1={{PM item|Repel Gel}} | |||
|location1=Going one screen southeast from the island's westernmost shore with the [[Whale (character)|whale]], the hidden ? Block is directly southeast of the first [[Bellbell Plant]]. | |||
|image1=[[File:PMHiddenBlock27.png|250px]] | |||
|item2={{PM item|Mystery}} | |||
|location2=In the same area, going east, a second hidden ? Block is directly southwest of the second Bellbell Plant. | |||
|image2=[[File:PMHiddenBlock28.png|250px]] | |||
}} | |||
=Yoshi's Village= | |||
In addition to the items listed below, several items can be purchased from [[Yoshi's Cabana]], and two [[Star Piece (Paper Mario series)|Star Pieces]] can be obtained from [[Kolorado]] here. [[Chuck Quizmo]] also has a chance to appear here and 64 Star Pieces in total can be obtained from him. | |||
{{RPG item locations | |||
|item1=[[Coconut]] (x3) | |||
|image1=[[File:PaperMario Items Coconut.png]] | |||
|location1=<font color=green>On the leftmost and the rightmost trees of the first scene and the rightmost tree on the second (replenish-able resource, as with every Coconut's harvest point).</font> | |||
|item2=[[Star Piece (Paper Mario series)|Star Piece]] | |||
|image2=[[File:PM StarPiece.gif]] | |||
|location2=Under a hidden panel in front of the [[Raphael]] statue. | |||
|locationimage2=[[File:PM Star Piece YoshisVillage.png|250px]] | |||
|item3=[[Letter]] | |||
|image3=[[File:PM Letter Sprite.png]] | |||
|location3=Given by the red Yoshi kid after giving him a letter from Dane T. | |||
|item4=[[Melon]] | |||
|image4=[[File:PaperMario Items Melon.png]] | |||
|location4=Can be traded with [[Tayce T.]]'s recipes with the adult yellow Yoshi. <font color=red>Temporarily unavailable between Yoshi kids going missing and Mario defeating Lava Piranha.</font> | |||
|item5=[[Jade Raven]] | |||
|image5=[[File:JadeRaven PM.png]] | |||
|location5=Given by the [[Village Leader]] after finding all the Yoshi kids. | |||
|locationimage5=[[File:Yoshi's Village Jade Raven.png|250px]] | |||
|item6=[[Magical Seed]] | |||
|image6=[[File:PM Magical Seed brown.png]] | |||
|location6=Given by Kolorado after exchanging the [[Volcano Vase]]. | |||
|locationimage6=[[File:PM Magical Seed screenshot.png|250px]] | |||
}} | |||
=Jade Jungle= | |||
{{RPG item locations | |||
|item1=[[Jammin' Jelly]] | |||
|image1=[[File:PaperMario Items JamminJelly.png]] | |||
|location1=Behind the tree near the entrance to [[Mt. Lavalava]]. | |||
|item2=[[Star Piece (Paper Mario series)|Star Piece]] (x3) | |||
|image2=[[File:PM StarPiece.gif]] | |||
|location2=<nowiki/> | |||
*On an island at the northeastern corner of the scene where [[Sushie]] was trapped. | |||
*Underwater in the westernmost scene (where the blue Yoshi kid has been). | |||
*Under a hidden panel in the fourth scene after the Raphael statue. | |||
|locationimage2=[[File:PM Star Piece JadeJungleIsland.png|250px]][[File:PM Star Piece JadeJungleUnderwater.png|250px]][[File:PM Star Piece JadeJunglePanel.png|250px]] | |||
|item3=[[Letter]] | |||
|image3=[[File:PM Letter Sprite.png]] | |||
|location3=In the tree on the island at the northeastern corner of the Sushie scene. For [[Russ T.]] | |||
|locationimage3=[[File:Letter Jade Jungle PM.png|250px]] | |||
|item4=[[Power Quake]] | |||
|image4=[[File:Power Quake Badge.png]] | |||
|location4=In a badge block on an island at the center of the Yoshi Village entrance scene. | |||
|locationimage4=[[File:Jade Jungle Block.png|250px]] | |||
|item5=[[Fright Mask|Fright Jar]] | |||
|image5=[[File:PaperMario Items FrightJar.png]] | |||
|location5=In the tree at the east of the scene to the north of the Lavalava Island scene. | |||
|item6=[[Egg]] | |||
|image6=[[File:PaperMario Items Egg.png]] | |||
|location6=In a tree in the first scene after the Raphael statue (can be collected by pulling the vine). | |||
|item7=[[Fire Flower]] | |||
|image7=[[File:PaperMario Items FireFlower.png]] | |||
|location7=In the second tree in the third scene after the Raphael statue (can be obtained by pulling the vine). | |||
|item8=[[Mushroom]] | |||
|image8=[[File:PaperMario Items Mushroom.png]] | |||
|location8=In the last tree in the third scene after the Raphael statue (can be obtained by pulling the vine). | |||
|item9=[[Happy Heart]] | |||
|image9=[[File:Happy Heart Badge.png]] | |||
|location9=At the end of the big branch of the tree. | |||
|item10=[[Ultra Stone]] | |||
|image10=[[File:UltraStone PM.png]] | |||
|location10=Given by [[Raphael the Raven]] after construction of transportation is completed. | |||
|item11=[[Volcano Vase]] | |||
|image11=[[File:VolcanoVase PM.png]] | |||
|location11=In a treasure chest from [[Mt. Lavalava]] after its eruption, one scene to the east of the Yoshi Village entrance scene. | |||
|locationimage11=[[File:Jade Jungle Treasure Chest.png|250px]] | |||
}} | |||
===[[List of hidden blocks in Paper Mario|Hidden ? Blocks]]=== | |||
{{RPG item locations | |||
|image1=[[File:PMHiddenBlock29.png|250px]] | |||
|item1={{PM item|Thunder Rage}} | |||
|location1=Going one screen northeast from the island's westernmost shore with the [[Whale (character)|Whale]], Mario should use [[Sushie]]'s field ability to swim from the southern dock to the one northwest of it. Then, he should follow the path east then north to find a Bellbell Plant and jump directly northwest of it to reveal the hidden ? Block. | |||
|image2=[[File:PMHiddenBlock30.png|250px]] | |||
|item2={{PM item|Stone Cap}} | |||
|location2=In the area one screen north of the [[Raven]] statue, Mario should go to the high elevated ground and jump directly southeast of the Bellbell Plant to reveal another hidden ? Block. | |||
|item3={{PM item|Volt Shroom}} | |||
|location3=In the next area, Mario should use the westernmost blue movable block and push it east once and north once, then jump from it to reveal the hidden ? Block. Alternatively, Mario can also hit the hidden block from the ground with a Tornado Jump if he's equipped with the Ultra Boots. | |||
|image3=[[File:PMHiddenBlock31.png|250px]] | |||
}} | |||
=Mt. Lavalava= | |||
In addition to the items listed below, two [[Star Piece (Paper Mario series)|Star Piece]]s can be obtained from [[Kolorado]] here. | |||
{{RPG item locations | |||
|item1=[[Star Piece (Paper Mario series)|Star Piece]] (x2) | |||
|image1=[[File:PM StarPiece.gif]] | |||
| | |location1=<nowiki/> | ||
*Under a hidden panel on the ground of the scene to the east of the stair scene. | |||
*Under a hidden panel in the scene with a Heart Block. | |||
|item2=[[Fire Shield]] | |||
|image2=[[File:Fire Shield Badge.png]] | |||
|location2=On a pillar in the stair scene (can be gotten by falling down halfway in the second rope sliding). | |||
|item3=[[Dizzy Stomp]] | |||
|image3=[[File:Dizzy Stomp Badge.png]] | |||
| | |location3=In a treasure chest at the northeastern corner of the scene to the south of the Ultra Hammer area. | ||
|item4=[[POW Block]] | |||
|image4={{PM item|POW Block|text=}} | |||
|location4=On a high brick on the top of the stair scene (can be gotten by tossing [[Kooper]]). | |||
|image5={{PM item|Super Shroom|text=}} | |||
|location5=In a question block in the room above the Lava Piranha room. | |||
|item6=[[Maple Syrup]] | |||
|image6={{PM item|Maple Syrup|text=}} | |||
|location6=In a question block in the room above the Lava Piranha room. | |||
}} | |||
|[[ | |||
| | |||
| | |||
|[[ | |||
| | |||
| | |||
|[[ | |||
| | |||
| | |||
| | |||
| | |||
| | |||
| | |||
| | |||
| | |||
|[[ | |||
| | |||
| | |||
| | |||
| | |||
=== | ===[[List of hidden blocks in Paper Mario|Hidden ? block]]=== | ||
{{content description | |||
|name1={{PM item|Life Shroom}} | |||
| | |description1=In the area one screen east of where the player obtains the [[Ultra Hammer]], Mario should climb up all the way to the highest elevated ground in the northeast. Then, he should jump near the center close to the edge to reveal the hidden ? Block. | ||
|image1=[[File:PMHiddenBlock32.png|250px]] | |||
}} | |||
| | |||
| | |||
|In the | |||
|[[File: | |||
| | |||
= | =Flover Fields= | ||
In addition to the items dropped by enemies, overworld items found in this area include: | |||
{{RPG item locations | |||
| | |item1=[[Stinky Herb]] (x5) | ||
|image1=[[File:PaperMario Items StinkyHerb.png]] | |||
|location1=<font color=green>From five bushes on the walls of every first scene except the western road, usually near central area (replenish-able resources).</font> | |||
|item2=[[Happy Flower (badge)|Happy Flower]] | |||
|image2=[[File:Happy Flower Badge.png]] | |||
|location2=Dropped after hitting the middle tree, the right tree and the left tree on the eastern road. | |||
|item3=[[Magical Bean]] | |||
|image3=[[File:MagicBean PM.png]] | |||
|location3=Given by [[Petunia]] after defeating the [[Monty Mole (green)|Monty Mole]]s. | |||
|item4=[[Red Berry]] | |||
| | |image4=[[File:PaperMario Items RedBerry.png]] | ||
|location4=On the tree in the northwestern corner of the [[Petunia]] scene. | |||
|item5=[[Star Piece (Paper Mario series)|Star Piece]] (x6) | |||
| | |image5=[[File:PM StarPiece.gif]] | ||
|location5=<nowiki/> | |||
*Under a hidden panel in the southwestern corner of the [[Petunia]] scene. | |||
*Under a hidden panel in front of the Yellow Berry tree on the southwestern road. | |||
*In the flowers near the Blue Berry tree in the northeastern corner of the first scene on the southeastern road. | |||
*Under a hidden panel under the hidden block in the second scene on the southeastern road. | |||
*On a high platform at the northeastern corner of the first scene on the northwestern road. | |||
*On the rightmost arch in the first scene on the northeastern road, the player should Spin or Tornado Jump on the bridge to reveal it. | |||
|item6=[[Yellow Berry]] | |||
|image6=[[File:PaperMario Items YellowBerry.png]] | |||
|location6=On the tree in the first scene on the southwestern road. | |||
|[[ | |item7=[[Blue Berry]] | ||
| | |image7=[[File:PaperMario Items BlueBerry.png]] | ||
|location7=On the left tree in the first scene on the southeastern road. | |||
|item8=[[Dizzy Dial]] | |||
| | |image8=[[File:PaperMario Items DizzyDial.png]] | ||
|[[ | |location8=In a question block in the second scene on the southeastern road. | ||
| | |item9=[[Jammin' Jelly]] | ||
|image9=[[File:PaperMario Items JamminJelly.png]] | |||
|location9=In the tree at the northeastern corner at the end of the southeastern road. | |||
|item10=[[Flower Saver]] | |||
|image10=[[File:Flower Saver Badge.png]] | |||
| | |location10=Thrown out of a well after throwing a [[Blue Berry]] in at the end of the eastern road. | ||
|item11=[[Shooting Star (item)|Shooting Star]] | |||
|image11=[[File:PaperMario Items ShootingStar.png]] | |||
|location11=In a bunch of flowers in the second scene on the northwestern road. | |||
|[[ | |item12=[[Fertile Soil]] | ||
| | |image12=[[File:Fertilesoil.png]] | ||
|location12=Given by [[Posie]] when talked to. | |||
|item13=[[Crystal Berry]] | |||
| | |image13=[[File:CrystalBerry PM.png]] | ||
|location13=Given by Posie at the end of the southwestern road when doing Rosie's favor. | |||
|item14=[[Water Stone]] | |||
|image14=[[File:WaterStone PM.png]] | |||
|location14=Given by [[Rosie]] after giving her the [[Crystal Berry]]. | |||
|item15=[[Miracle Water]] | |||
|[[ | |image15=[[File:MiracleWater PM.png]] | ||
| | |location15=Given by [[Lily (Paper Mario)|Lily]] after using the Water Stone. | ||
|item16=[[Bubble Berry]] | |||
|image16=[[File:PaperMario Items BubbleBerry.png]] | |||
|location16=On the tree at the center of the second scene on the southwestern road (accessible after using the [[Water Stone]]). | |||
|[[File: | |item17=[[Mega Smash]] | ||
| | |image17=[[File:Mega Smash Badge.png]] | ||
|location17=Inside a stair platform in the second scene on the northwestern road, the player should blast the rock and fall down to get it. | |||
|item18=[[Letter]] | |||
|image18=[[File:PM Letter Sprite.png]] | |||
|location18=In a bunch of flowers in the second scene on the northeastern road. | |||
}} | |||
|[[ | |||
| | |||
| | |||
|[[ | |||
| | |||
| | |||
|[[ | |||
| | |||
|In the | |||
|[[ | |||
| | |||
|In the | |||
|[[ | |||
| | |||
| | |||
|[[ | |||
| | |||
|In | |||
|[[ | |||
| | |||
| | |||
|[[ | |||
| | |||
| | |||
|[[ | |||
| | |||
| | |||
|[[ | |||
| | |||
|[[ | |||
| | |||
|[[ | |||
| | |||
| | |||
|[[ | |||
|[[File: | |||
| | |||
|[[ | |||
| | |||
|In the | |||
=== | ===[[List of hidden blocks in Paper Mario|Hidden ? block]]=== | ||
{| | {{RPG item locations | ||
|item1={{PM item|Maple Syrup}} | |||
| | |location1=In the area with the Bubble Tree on the eastern grassy area, Mario should jump slightly northwest of the first patch of yellow flowers -- directly in the opposite spot from the visible block in the west -- to reveal the hidden ? Block. | ||
|image1=[[File:PMHiddenBlock33.png|250px]] | |||
|item2=1 Coin | |||
|location2=In the area one screen west of the [[Wise Wisterwood]], with the blue flower guard, Mario should jump at the spot between the [[Springboard]] and the Brick Block to reveal the hidden ? Block. | |||
|image2=[[File:PMHiddenBlock34.png|250px]] | |||
|item3={{PM item|Shooting Star}} | |||
|location3=In the same area, Mario should jump from the same Springboard onto the revealed ? Block, then to the Brick Block and jump again to reveal another hidden ? Block. | |||
|image3=[[File:PMHiddenBlock35.png|250px]] | |||
|item4={{PM item|Thunder Rage}} | |||
|location4=One screen west of the area with the [[Puff Puff Machine]], in the northeastern corner, is another hidden ? Block. Jumping in the area between the two patches of yellow flowers will reveal it. | |||
|image4=[[File:PMHiddenBlock36.png|250px]] | |||
}} | |||
|[[File: | |||
| | |||
| | |||
| | |||
|[[File: | |||
| | |||
| | |||
| | |||
|[[File: | |||
| | |||
| | |||
| | |||
| | |||
|[[File: | |||
| | |||
= | =Cloudy Climb= | ||
{ | {{RPG item locations | ||
|item1=[[S. Jump Charge]] | |||
| | |image1=[[File:S-Jump Charge Badge.png]] | ||
|location1=In a cloud at the northwestern corner of the first scene (get it by climbing on the "elevator" cloud first) | |||
}} | |||
|[[File: | |||
| | |||
== | =Shiver City= | ||
In addition to the items listed below, several items can be purchased from [[Shiver Shop]], and 64 [[Star Piece (Paper Mario series)|Star Pieces]] can be obtained from [[Chuck Quizmo]] here. | |||
{{RPG item locations | |||
|item1=[[Attack FX E]] | |||
|image1=[[File:Attack FX E Badge.png]] | |||
|location1=In a treasure chest in the middle house in the west scene (obtainable from the east house). | |||
|item2=[[Star Piece (Paper Mario series)|Star Piece]] (x2) | |||
|image2=[[File:PM StarPiece.gif]] | |||
|location2=<nowiki/> | |||
*Under a hidden panel to the east of the [[Mayor Penguin]]'s room at the very west (has four Bumpties standing on it sometime). | |||
*Given by Mayor Penguin after giving him a letter from [[Shiver Snowfield]]. | |||
|item3=[[Warehouse Key]] | |||
|image3=[[File:OddKey PM.png]] | |||
|location3=In the ice in the east scene (by performing several Tornado Jumps over the ice after "murdering" the Mayor). | |||
|item4=[[Bucket (Paper Mario)|Bucket]] | |||
|image4=[[File:Bucket PM.png]] | |||
|location4=Given by Mayor Penguin after visiting [[Merle]] and getting the [[Scarf]]. | |||
|item5=[[Iced Potato]] | |||
| | |image5=[[File:PaperMario Items IcedPotato.png]] | ||
|location5=<font color=green>Appears every time Mario sleeps in the Toad House after opening the passage to [[Shiver Mountain]] (replenish-able resource).</font> | |||
|item6=[[Mushroom]] x 4, [[Ultra Mushroom|Ultra Shroom]] | |||
|image6=[[File:PaperMario Items Mushroom.png]]x4 [[File:PaperMario Items UltraShroom.png]] | |||
|location6=Appears the first time Mario sleeps in the Toad House after opening the passage to Shiver Mountain. | |||
}} | |||
|[[ | |||
| | |||
|In | |||
| | |||
| | |||
| | |||
| | |||
|[[ | |||
| | |||
|In the | |||
|[[ | |||
| | |||
|[[File: | |||
| | |||
|[[ | |||
|[[File: | |||
| | |||
|[[ | |||
| | |||
|[[File: | |||
| | |||
= | =Shiver Snowfield= | ||
{ | {{RPG item locations | ||
|item1=[[Star Piece (Paper Mario series)|Star Piece]] | |||
| | |image1=[[File:PM StarPiece.gif]] | ||
|location1=Under a hidden panel in the south corner of the snowman scene. | |||
|item2=[[Letter]] (x2) | |||
|image2=[[File:PM Letter Sprite.png]] | |||
|location2=<nowiki/> | |||
*Can be gotten by hammering a tree in the snowman scene four times. | |||
*Behind an ice rock before the stairs to the Monstar fight. | |||
|item3=[[Repel Gel]] | |||
|image3={{PM item|Repel Gel|text=}} | |||
|location3=Behind a tree in the northeastern corner of the snowman scene. | |||
}} | |||
| | |||
|[[File: | |||
| | |||
|[[ | |||
|[[File: | |||
| | |||
|[[ | |||
| | |||
| | |||
| | |||
| | |||
=== | ===[[List of hidden blocks in Paper Mario|Hidden ? block]]=== | ||
{{RPG item locations | |||
|item1={{PM item|Stop Watch}} | |||
|location1=In the area where Mario fights [[Monstar]], going up the steps in the east to the high platform, the hidden ? Block is on the north-central area. | |||
|image1=[[File:PMHiddenBlock37.png|250px]] | |||
}} | |||
| | |||
| | |||
| | |||
| | |||
|[[File: | |||
| | |||
= | =Starborn Valley= | ||
{| | {{RPG item locations | ||
|item1=[[Scarf]] | |||
| | |image1=[[File:PM Scarf.png]] | ||
|location1=Given by Merle after talking to him. | |||
|item2=[[Letter]] | |||
|image2=[[File:PM Letter Sprite.png]] | |||
|location2=Given by [[Frost T.]] after giving him [[Dane T.|Dane T.'s]] letter. | |||
}} | |||
| | |||
|[[ | |||
|[[File: | |||
| | |||
| | |||
=== | =Shiver Mountain= | ||
{| | {{RPG item locations | ||
|item1=[[Star Piece (Paper Mario series)|Star Piece]] | |||
| | |image1=[[File:PM StarPiece.gif]] | ||
|location1=On a platform to the west of the ice stairs in the fourth scene (can be gotten by falling off the corner on the third floor). | |||
|item2=[[Pebble]] | |||
|image2={{PM item|Pebble|text=}} | |||
|location2=At the end of the south fork road in the second scene. | |||
| | |item3=[[Shooting Star (item)|Shooting Star]] | ||
| | |image3={{PM item|Shooting Star|text=}} | ||
|[[ | |location3=In the first stone cavern in the third scene. | ||
| | |item4=[[Snowman Doll]] | ||
|[[ | |image4={{PM item|Snowman Doll|text=}} | ||
| | |location4=In the second stone cavern in the third scene. | ||
|item5=[[Thunder Rage]] | |||
|image5={{PM item|Thunder Rage|text=}} | |||
| | |location5=In the third stone cavern in the third scene. | ||
|item6=[[Mega Jump]] | |||
|image6=[[File:Mega Jump Badge.png]] | |||
|location6=In a badge block on the second floor in the fourth room. | |||
|item7=[[Star Stone]] | |||
|image7=[[File:StarStone PM.png]] | |||
|location7=Given by [[Merlumina|Madam Merlar]] in the room to the east of the stair room (by blasting the wall with Bombette and going straight east to see her). | |||
}} | |||
=== | ===[[List of hidden blocks in Paper Mario|Hidden ? block]]=== | ||
{{RPG item locations | |||
|item1={{PM item|Ultra Shroom}} | |||
| | |location1=In the first area, going all the way east to the Brick Block, Mario should Tornado Jump underneath it to destroy it, then Tornado Jump again in the same spot to reveal the hidden ? Block. | ||
|image1=[[File:PMHiddenBlock38.png|250px]] | |||
}} | |||
| | |||
|In the | |||
|[[File: | |||
| | |||
= | =Crystal Palace= | ||
{| | {{RPG item locations | ||
|item1=[[Star Piece (Paper Mario series)|Star Piece]] x3 | |||
| | |image1=[[File:PM StarPiece.gif]] | ||
|location1=<nowiki/> | |||
*In a cave at the very west of the area behind the outside mirror. | |||
*Under a hidden panel below the question block in the big Albino Dino room. | |||
*Under a hidden panel at the symmetrical position in the small Albino Dino room. | |||
|item2=[[Super Mushroom|Super Shroom]] | |||
|image2={{PM item|Super Shroom|text=}} | |||
|location2=In a question block near the door in the room to the north of the first room. | |||
|item3=[[Shooting Star (item)|Shooting Star]] | |||
|[[File: | |image3={{PM item|Shooting Star (item)|Shooting Star|text=}} | ||
| | |location3=At the very east of the area to the north of the first room. | ||
|item4=[[Maple Syrup]] | |||
|image4={{PM item|Maple Syrup|text=}} | |||
|location4=In the question block near the door in the big Albino Dino statue room. | |||
|item5=[[P-Down, D-Up]] | |||
|image5=[[File:P-Down D-Up Badge.png]] | |||
|location5=At the very east of the area below the room to the north of the first room. | |||
|item6=[[P-Up, D-Down]] | |||
|image6=[[File:P-Up D-Down Badge.png]] | |||
|location6=In a treasure chest at the very east of the area below the small Albino Dino statue room. | |||
| | |item7=[[Triple Dip]] | ||
|image7=[[File:Triple Dip Badge.png]] | |||
|location7=In a treasure box in the fourth room after the red key (requires using Bombette on the wall behind the mirror one scene earlier). | |||
| | |item8=[[Blue Key (Paper Mario)|Blue Key]] | ||
|image8=[[File:PM BlueKey.png]] | |||
| | |location8=In a treasure chest at the very east of the area to the south of the first room. | ||
| | |item9=[[Red Key (Paper Mario)|Red Key]] | ||
| | |image9=[[File:PM Red Key.png]] | ||
|In the | |location9=In a treasure chest at the very east of the area below the room to the south of the first room (requires Spin Jump breaking the north room first). | ||
|item10=[[Palace Key (Paper Mario)|Palace Key]] | |||
|image10=[[File:PM Palace Key.png]] | |||
|location10=In a treasure chest at the very east of the area below the big Albino Dino room. | |||
}} | |||
|[[ | |||
| | |||
| | |||
| | |||
| | |||
| | |||
| | |||
|[[ | |||
| | |||
| | |||
| | |||
|In the | |||
|[[ | |||
|[[File: | |||
| | |||
|[[ | |||
|[[File: | |||
|In the | |||
|[[ | |||
| | |||
|In the | |||
|[[ | |||
| | |||
|In the | |||
|[[ | |||
| | |||
|In the | |||
|[[ | |||
| | |||
|In the | |||
=== | ===[[List of hidden blocks in Paper Mario|Hidden ? block]]=== | ||
{| | {|class=wikitable width=100% style="text-align:center" | ||
! | !width=10%|Item | ||
!Description | |||
!width=20%|Image | |||
! | |||
! | |||
| | |||
|- | |- | ||
|[[File: | |[[File:PaperMario Items JamminJelly.png]]<br>[[Jammin' Jelly]] | ||
|On the mirror side, in the western area with the small [[Albino Dino]] statue, Mario should Tornado Jump northwest from the door, above the Spin Panel, to reveal the hidden ? Block. | |||
|[[File:PMHiddenBlock39.png|250px]] | |||
| | |||
| | |||
|} | |} | ||
= | =Toad Town Tunnels= | ||
In addition to the items listed below, several kinds of items can be purchased from [[Rip Cheato]]. | |||
== | {{RPG item locations | ||
|item1=[[Shrink Stomp]] | |||
|image1=[[File:Shrink Stomp Badge.png]] | |||
|location1=In the treasure chest at the end of the area to the east of the entrance. | |||
|locationimage1=[[File:Toad Town Tunnels Treasure Chest 1.png|250px]] | |||
|item2=[[Snowman Doll]] | |||
|image2=[[File:PaperMario Items SnowmanDoll.png]] | |||
|location2=In a ? Block to the west of the entrance but before the pipe leading to the new area. | |||
|locationimage2=[[File:Toad Town Tunnels Blocks 2-4.png|250px]] | |||
|item3=[[Power Smash]] | |||
|image3=[[File:Power Smash Badge.png]] | |||
|location3=To the west of the entrance is a pipe leading to a new area. This item is in the treasure chest to the west of that. | |||
|locationimage3=[[File:Toad Town Tunnels Treasure Chest 2.png|250px]] | |||
|item4=[[Star Piece (Paper Mario series)|Star Piece]] | |||
|image4=[[File:PM StarPiece.gif]] | |||
|location4=To the west of the entrance is a pipe leading to a new area. This item is in the high place in the area to the east of that. | |||
|locationimage4=[[File:PM Star Piece ToadTownTunnels.png|250px]] | |||
|item5=[[Shooting Star (item)|Shooting Star]] | |||
|image5=[[File:PaperMario Items ShootingStar.png]] | |||
|location5=Beneath the entrance room, the item is in a high ? Block on the path to the right. [[Ultra Boots]] required. | |||
|locationimage5=[[File:Toad Town Tunnels Block 8.png|250px]] | |||
}} | |||
Toad Town Tunnels has the following [[List of hidden blocks in Paper Mario|Hidden ? blocks]]: | |||
{{ | {{RPG item locations | ||
|item1={{PM item|Super Shroom}} | |||
|location1=In the area one screen east from the entrance, the hidden ? Block is in the middle of the gap in the row of blocks. | |||
|image1=[[File:PMHiddenBlock7.png|250px]] | |||
|item2=1 Coin each | |||
|location2=In the area one screen west of the blue Warp Pipe to [[Boo's Mansion]] is a gap between the two high platforms with the [[Super Block]] on the western one. There are three hidden ? Blocks in this area. Using the blue movable block, Mario should move it to the middle of the left side, the center, and the middle of the right side and jump from the movable block at those spots to reveal them. Alternatively, Mario can also hit the invisible blocks from the tiles without using the movable block using the Tornado Jump if he's equipped with the [[Ultra Boots]]. | |||
|image2=[[File:PMHiddenBlock8.png|250px]] | |||
|item3={{PM item|Maple Syrup}} | |||
|location3=In the area two screens east of where the player obtains the [[Ultra Boots]], near the starting pipe, Mario should jump at the center of the pathway sticking out to reveal the hidden ? Block. | |||
|image3=[[File:PMHiddenBlock9.png|250px]] | |||
|item4={{PM item|Stop Watch}} | |||
|location4=In the same area, from the pipe, Mario should follow the central path going east. The hidden ? Block is located just before the path splits north and south. | |||
|image4=[[File:PMHiddenBlock10.png|250px]] | |||
|item5={{PM item|Volt Shroom}} | |||
|location5=Also in the same area, near the doorway, the hidden ? Block is west of the visible one. | |||
|image5=[[File:PMHiddenBlock11.png|250px]] | |||
|item6={{PM item|Life Shroom}} | |||
|location6=In the next area, the hidden ? Block is between the two sets of three blocks. The Ultra Boots is needed to hit the block. | |||
|image6=[[File:PMHiddenBlock12.png|250px]] | |||
|item7=1 Coin each | |||
|location7=In the area two screens east of the blue Warp Pipe to [[Yoshi's Village]] is a gap between two high platforms, with a doorway leading to [[Shiver City]] in the east. There are four hidden ? Blocks in this area. From the visible ? Block touching the western platform, Mario should move three block lengths from it and Tornado Jump to reveal the first hidden ? Block, then continue to use the same method for the next blocks to reveal them all. | |||
|image7=[[File:PMHiddenBlock13.png|250px]] | |||
}} | |||
[[ | =Bowser's Castle= | ||
[[ | A "main area" refers to a four-way intersection with a [[Save Block]]. Enemies can drop items and several items can be purchased from the [[Storehouse]]. Other items include: | ||
{{RPG item locations | |||
|item1=[[Castle Key (Bowser's Castle)|Castle Key]] | |||
|image1=[[File:PM Bowser Castle Key.png]] | |||
|location1=<nowiki/> | |||
*Held by the [[Koopatrol]] on the sideway near the entrance. | |||
*In a treasure chest to the north in the second lava/moving platform area. | |||
*On a high platform at the northwestern corner of the first water room. | |||
*At the end of the fork road in the third Dry Bones room. | |||
*At the end of the north fork road of the northeastern road of the second main area. | |||
|item2=[[Prison Key]] | |||
|image2=[[File:OddKey PM.png]] | |||
|location2=<nowiki/> | |||
*Held by the Koopatrol guarding the prison to the east in the first main area. | |||
*Held by the Koopatrol guarding the prison to the west in the second main area. | |||
|item3=[[Super Mushroom|Super Shroom]] | |||
|image3={{PM item|Super Shroom|text=}} | |||
|location3=<nowiki/> | |||
*In a question block in the first Dry Bones room. | |||
*In the first question block after the quiz room. | |||
*In the third question block after the quiz room. | |||
|item4=[[Life Mushroom (Paper Mario series)|Life Shroom]] | |||
|image4={{PM item|Life Mushroom (Paper Mario series)|Life Shroom|text=}} | |||
|location4=<nowiki/> | |||
*In a crate in the prison under the first [[Guard Door]] room. | |||
*In a question block on a platform in the lava area next to the front door scene. | |||
|item5=[[Maple Syrup]] | |||
|image5={{PM item|Maple Syrup|text=}} | |||
|location5=<nowiki/> | |||
*In a hidden block in the middle of the high platform in the second water room. | |||
*In a hidden block in the symmetrical position of the first [[Dry Bones]] room. | |||
|item6=[[Honey Syrup]] | |||
|image6={{PM item|Honey Syrup|text=}} | |||
|location6=In the second question block after the quiz room. | |||
|item7=[[Deep Focus]] | |||
|image7=[[File:Deep Focus Badge.png]] | |||
|location7=In a badge block on a platform in the lava area, near the entrance. | |||
|item8=[[Tasty Tonic]] | |||
|image8={{PM item|Tasty Tonic|text=}} | |||
|location8=In a crate in the prison under the first Guard Door room. | |||
|item9=[[Thunder Rage]] | |||
|image9={{PM item|Thunder Rage|text=}} | |||
|location9=On another platform in the third lava/moving platform area. | |||
|item10=[[Shooting Star (item)|Shooting Star]] | |||
|image10={{PM item|Shooting Star (item)|Shooting Star|text=}} | |||
|location10=In a question block at the end of the north fork road in the second grotto scene. | |||
|item11=[[Mystery Box (item)|Mystery?]] | |||
|image11={{PM item|Mystery|text=}} | |||
|location11=On a platform in the third lava/moving platform area. | |||
|item12=[[POW Block]] | |||
|image12={{PM item|POW Block|text=}} | |||
|location12=In a question block at the end of the north fork road in the first grotto scene. | |||
|item13=[[Jammin' Jelly]] | |||
|image13={{PM item|Jammin' Jelly|text=}} | |||
|location13=Fall off the stairs in the room after the quiz. | |||
|item14=[[Ultra Mushroom|Ultra Shroom]] | |||
|image14={{PM item|Ultra Shroom|text=}} | |||
|location14=At the end of the northwestern road from the second main area. | |||
}} | |||
:''For a list of hidden blocks in Bowser's Castle, see [[List of hidden blocks in Paper Mario#Bowser's Castle|here]].'' | |||
Revision as of 16:22, January 7, 2025
Mario Bros. House
| Item | Image | Location |
|---|---|---|
| Autograph | Given by Luigi while doing Koopa Koot's fifth favor in Paper Mario. |
Toad Town
| Item | Image | Location | Location image
|
|---|---|---|---|
| Star Piece (x12) |
|
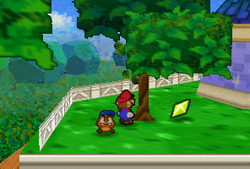 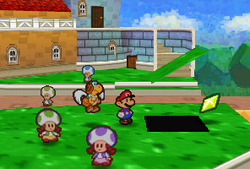 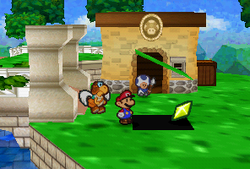 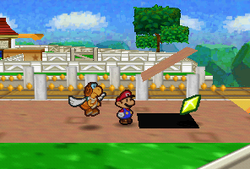 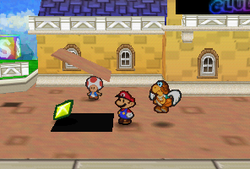 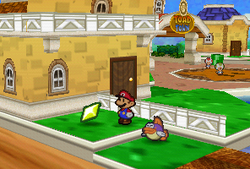 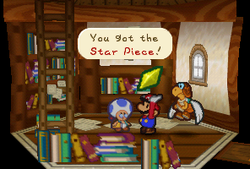 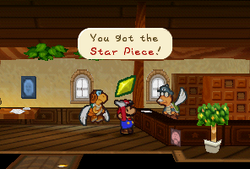 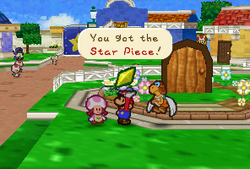 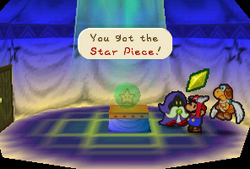 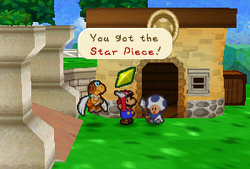
| |
| Letter (x5) |
| ||
| Magical Seed | Given by the Bub-ulb. | 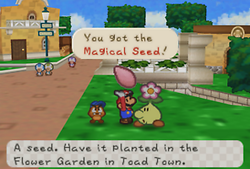
| |
| Maple Syrup | Given by the Trading Event Toad for participating in the first contest.
| ||
| Yummy Meal | Given by the Trading Event Toad for participating in the third contest.
| ||
| Quick Change | Inside Merlon's place. Mario must Spin Jump three times to get this badge.
| ||
| Attack FX D | Given by Pop Diva after finishing her errand.
| ||
| I Spy | Given by Rowf after returning his Calculator.
| ||
| Odd Key | Found inside the house. Opens the other end of Toad Town Tunnels.
| ||
| Snowman Doll | Found in Harry's storeroom.
| ||
| Volt Shroom | Found in Harry's storeroom.
| ||
| Toy Train | Found in Harry's storeroom.
| ||
| Dizzy Dial | Found in Harry's storeroom.
| ||
| Lyrics | Given by Master Poet after taking Pop Diva's errand.
| ||
| First-Degree Card | Given by The Master at Toad Town Dojo after defeating Chan.
| ||
| Second-Degree Card | Given by The Master at Toad Town Dojo after defeating Lee.
| ||
| Third-Degree Card | Given by The Master at Toad Town Dojo after defeating him the first time.
| ||
| Fourth-Degree Card | Given by The Master at Toad Town Dojo after defeating him the second time.
| ||
| Diploma | Given by The Master at Toad Town Dojo after defeating him the third time.
|
Additionally, Rowf and Rhuff have 16 badges to sell. Other items can be obtained from Shroom Grocery, Harry, Tayce T., and Li'l Oinks. Star Pieces can be obtained from Kolorado and Chuck Quizmo who have a chance to appear here.
Peach's Castle
| Item | Image | Location | Location image
|
|---|---|---|---|
| Ultra Shroom | In a hidden block in the symmetrical position (with regard to the Save Block) outside Peach's Castle | 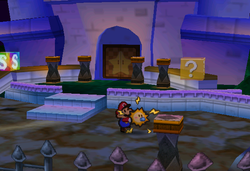
| |
| Life Shroom | At the end of the corridor on the wall in the southwestern book room on the second floor (get it with Mario, using a pile of books to climb that high) | 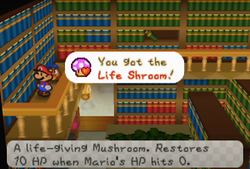
| |
| Last Stand | In a treasure chest in the room in the east room in the first floor. | 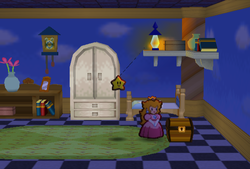
| |
| Deep Focus | Next to the big treasure chest in the east room on the second floor.
| ||
| Power Rush | In a corner in the southwestern book room on the second floor
|
In addition, the following items are available only to Princess Peach.
| Item | Image | Location | Location image
|
|---|---|---|---|
| Castle Key |
|
 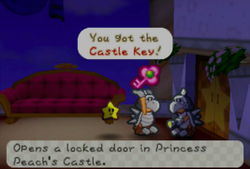
| |
| Jammin' Jelly | Given by Mr. Hammer to Peach if she wins in the 64th Trivia Quiz-Off in Chapter 5. | 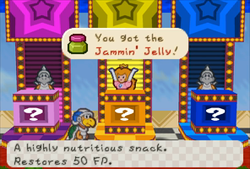
| |
| Butter | In the kitchen, accessible in Chapter 4.
| ||
| Cleanser | In the kitchen, accessible in Chapter 4.
| ||
| Cream | In the kitchen, accessible in Chapter 4.
| ||
| Egg | In the kitchen, accessible in Chapter 4.
| ||
| Flour | In the kitchen, accessible in Chapter 4.
| ||
| Milk | In the kitchen, accessible in Chapter 4.
| ||
| Salt | In the kitchen, accessible in Chapter 4.
| ||
| Strawberry | In the kitchen, accessible in Chapter 4.
| ||
| Sugar | In the kitchen, accessible in Chapter 4.
| ||
| Water | In the kitchen, accessible in Chapter 4.
| ||
| Sneaky Parasol | Given by Mr. Hammer to Peach for participating in the 64th Trivia Quiz-Off in Chapter 5. | 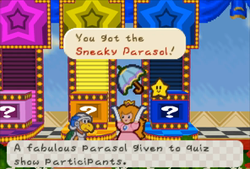
| |
| Shooting Star | Given by a Hammer Bro in the far western side of the library in Chapter 6 by talking to him repeatedly.
|
Goomba Village
| Item | Image | Location
| |
|---|---|---|---|
| Dolly | In the tree near the exit of Jr. Troopa's playground. Originally belongs to Goombaria and probably stolen by Jr. Troopa.
| ||
| Mushroom | In the tree near the fence in the area behind Goomba Village.
| ||
| Fire Flower | High above the trampoline in the area behind Goomba Village.
| ||
| Star Piece |
|
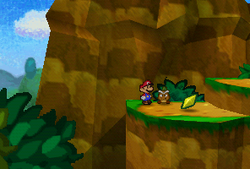 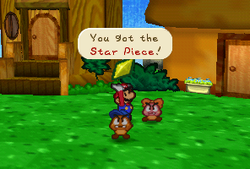 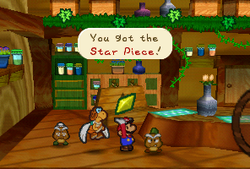 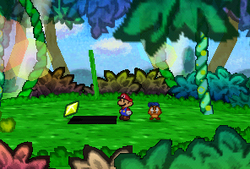 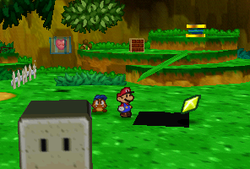
| |
| Power Jump | In the prologue of Paper Mario, Goompa will give this badge to Mario at Goomba Village. | 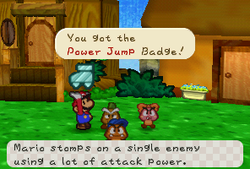
| |
| Goomnut | Produced by the Goomnut tree in the northeast corner of Goomba Village, can be collected infinitely by leaving the scene and returning. | 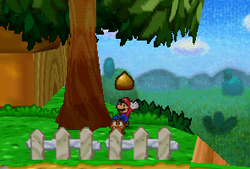
| |
| Shooting Star | On the veranda of the Goombas' house; can be obtained after visiting the Shooting Star Summit.
| ||
| Tape | Given by Goompa while doing Koopa Koot's 3rd favor.
| ||
| Letter | From Goompapa after delivering his letter found in Mt. Rugged. This is the second letter in the long chain.
| ||
| Lucky Day | From Goompapa after delivering his letter from Frost T. This is the final reward for delivering the long chain of letters.
|
Additional items include Mushrooms which can be dropped by Goomba-based enemies on the northwestern path, and Star Pieces from Chuck Quizmo who has a chance to appear in the village.
There is one Hidden ? block in Goomba Village:
| Item | Image | Location
|
|---|---|---|
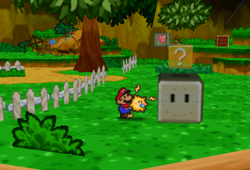 |
In the area immediately east of Jr. Troopa's playground, Mario will find a gray block that can only be broken with the Super or Ultra Hammer. Jumping in the center where the block once was will reveal the hidden ? Block.
|
Goomba Road
| Item | Image | Location | Location image
|
|---|---|---|---|
| Close Call | In the red badge block on the second part of the path. | 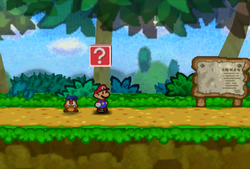
| |
| Hammer Throw | In a chest box on the roof of Toad Town entrance; get it by hitting the tree for a trampoline. | 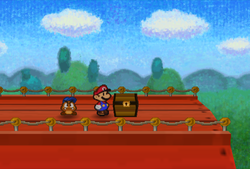
| |
| Mushroom | Jumps off the notice board near the second part of the path when Mario finishes reading it.
| ||
| Star Piece (x2) |
|
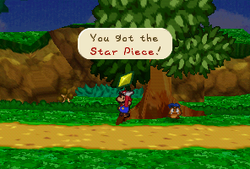 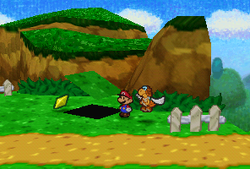
| |
| Super Shroom | To the south of the opening after Goomba King's Fortress, there is a brick hitting which will reveal a ? Block with this item. | 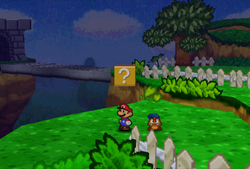
| |
| Sleepy Sheep | In the ? Block near the descending stairs between Goomba King's Fortress and Toad Town. | 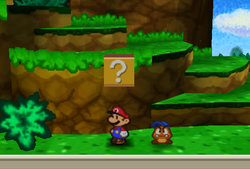
|
Shooting Star Summit
| Item | Image | Location | Location image
|
|---|---|---|---|
| Star Piece (x5) |
|
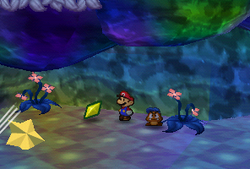 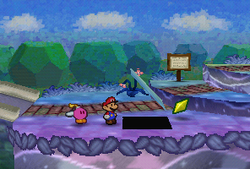 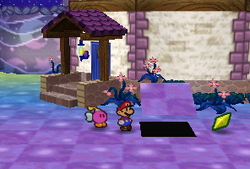 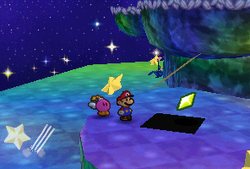 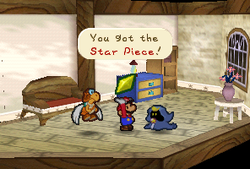
| |
| Lucky Star | Given by Twink after visiting Shooting Star Summit.
| ||
| Autograph | Given by Merluvlee while doing Koopa Koot's 8th favor.
|
In addition to the items listed above, Merlow has 15 Badges to sell, and Mario can get items from Princess Peach's Mysterious Treasure Chest.
Pleasant Path
Note: The scenes are numbered from west to east.
| Item | Image | Location | Location image
|
|---|---|---|---|
| Dizzy Attack | In the Badge Block at the first scene. | 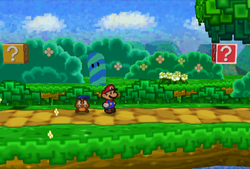
| |
| Fright Jar | In the rightmost block at the first scene. | 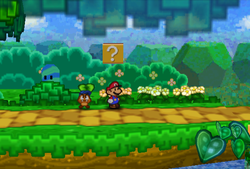
| |
| POW Block | In the ? Block at the second scene. | 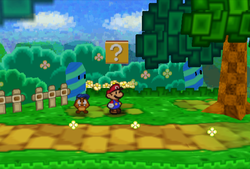
| |
| Sleepy Sheep | Behind a fence in the second scene.
| ||
| Honey Syrup | Behind the rightmost Candy Cane in the third scene.
| ||
| Attack FX B | Smashing the blocks near the entrance of Koopa Village in the order "left, right, middle" will reveal a red ? Badge block with this badge inside. | 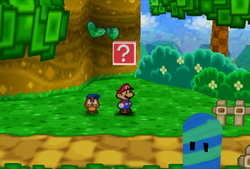
| |
| Thunder Bolt | On the first block in the fourth scene (requires Kooper or Tornado Jump)
| ||
| Star Piece |
|
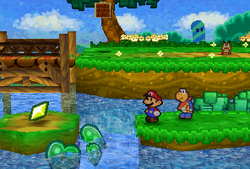 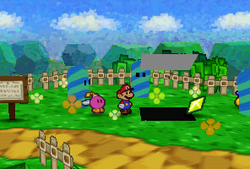 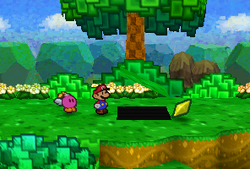 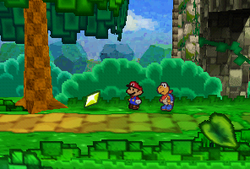
| |
| FP Plus | On a high platform near Koopa Bros. Fortress, accessed through a pipe by blasting the wall near the Heart Block first. | 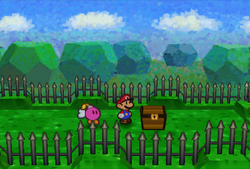
|
Pleasant Path also has one hidden ? block:
| Item | Image | Location
|
|---|---|---|
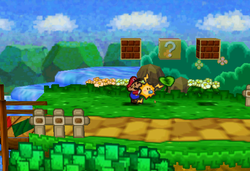 |
In the area two screens west of the Koopa Bros. Fortress, the hidden ? Block is between the two Brick Blocks.
|
Koopa Village
In addition to the items listed below, Koopa's Shop has several items on sale. Koopa Koot has 15 Star Pieces and gives them in threes if Mario does favors for him. Kolorado also has two Star Pieces that can be given to Mario if a letter for him and the Artifact are delivered by Parakarry outside Dry Dry Desert or Mt. Lavalava.
| Item | Image | Location
| |
|---|---|---|---|
| Dried Shroom | In the southest bush at the southwestern corner of the first scene.
| ||
| Koopa Leaf (x2) |
| ||
| Kooper's Shell | Returned by the Fuzzies after winning their minigame.
| ||
| HP Plus | On a trunk in the scene behind Kooper's house, by getting it with Kooper. | 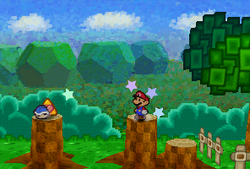
| |
| Koopa Legends | Given by Kolorado's wife for Koopa Koot's 1st favor.
| ||
| Silver Credit | Given by Koopa Koot after finishing his 2nd favor.
| ||
| Letter (x2) |
| ||
| Star Piece (x3) | 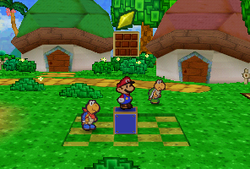 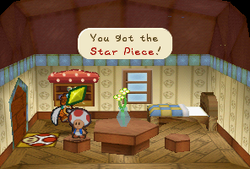 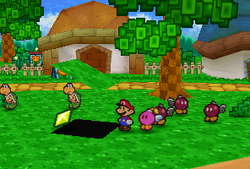
| ||
| Empty Wallet | Appears in the northeast bush in the southeastern corner of the first scene after taking Koopa Koot's 6th favor.
| ||
| Gold Credit | Given by Koopa Koot after finishing his 10th favor.
| ||
| Glasses | Appears in the bush with a white flower in the southwestern corner of the first scene after taking Koopa Koot's 15th favor.
|
Koopa Bros. Fortress
| Item | Image | Location | Location image
|
|---|---|---|---|
| Fortress Key (x4) |
|
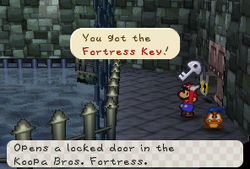 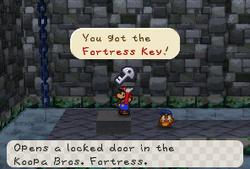 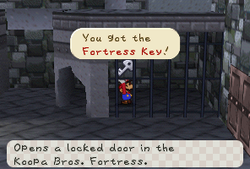 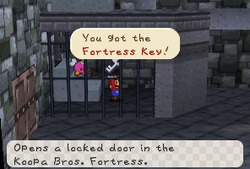
| |
| Power Bounce | Locked behind bars on the first floor. Mario can get it by blasting the wall or enter from the back side. | 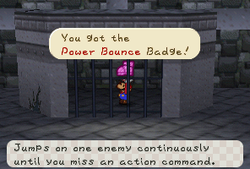
| |
| Refund | In a small area outside the fortress that can be accessed by blasting the wall on the east end. | 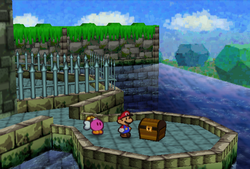
| |
| Smash Charge | Guarded by a Bob-omb at the end of the slope stair on the third floor. | 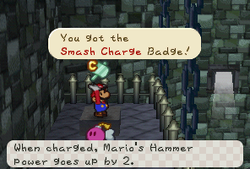
| |
| Maple Syrup | At the Bullet Bill dodging scene, in a question block at the southwestern corner. | 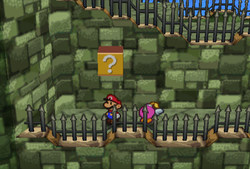
|
Mt. Rugged
| Item | Image | Location
| |
|---|---|---|---|
| Egg | In a bush near the Dry Dry Railroad station (can be collected indefinitely by reloading the area).
| ||
| Sleepy Sheep | In a ? Block at the southeastern corner of the second scene. | 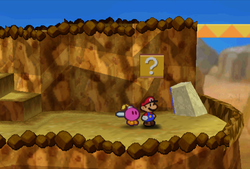
| |
| Whacka's Bump (x8) | Dropped by hitting Whacka.
| ||
| Letter (x3) |
|
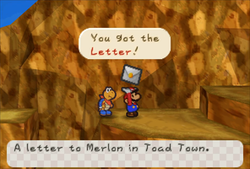 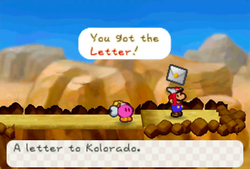 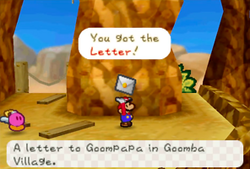
| |
| Mushroom | In a ? Block at the scene to the north of the second room. | 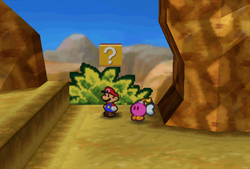
| |
| Damage Dodge | In the scene to the north of the second room, by going in the cave for a chest box. | 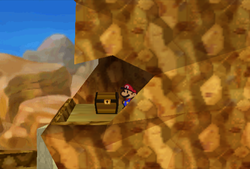
| |
| Honey Syrup | In a ? Block at the scene to the north of the second room. | 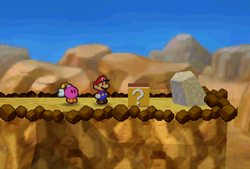
| |
| Quake Hammer | On a big stone in the third scene (requires Parakarry).
| ||
| Magical Seed | Given by the Bub-ulb (requires Parakarry). | 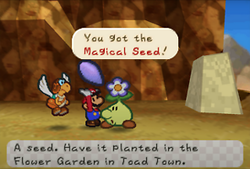
| |
| Star Piece (x3) |
|
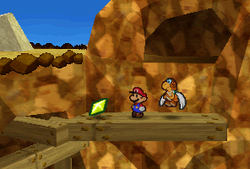 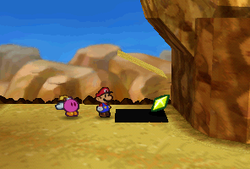 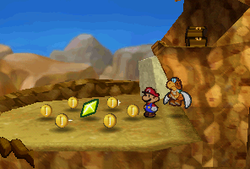
|
Dry Dry Desert
In addition to the items listed below, others such as Dried Fruits may be dropped by enemies.
| Item | Image | Location
| |
|---|---|---|---|
| Spin Attack | On a big stone at scene E6, get it with the help from the tornado at F5 (2 screens south of Nomadimouse, obtainable via the whirlwind in area with blue cacti).
| ||
| Stop Watch | On a block at scene E6 (requires Kooper or Tornado Jump).
| ||
| Tasty Tonic | Behind a bush at the southeastern corner of scene F6.
| ||
| Lemon | Endlessly harvestable from the west tree in the oasis (F7) - can be given to Moustafa in Dry Dry Outpost to get a hint about progressing (non-mandatory).
| ||
| Lime | Endlessly harvestable from the east tree in the oasis (F7).
| ||
| Letter |
|
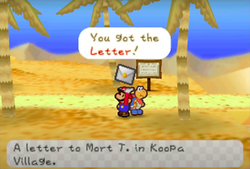 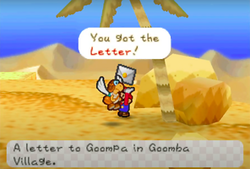
| |
| Fire Flower |
|
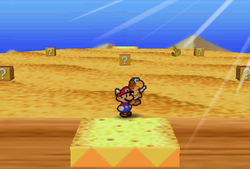
| |
| Honey Syrup | In the east question block at scene B5. | 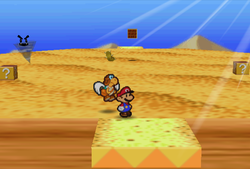
| |
| Star Piece |
|
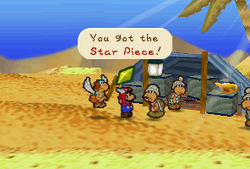 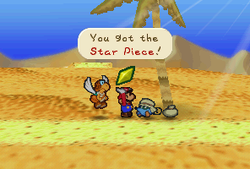 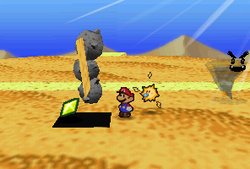
| |
| Fright Jar | In the west ? block at scene A1. | 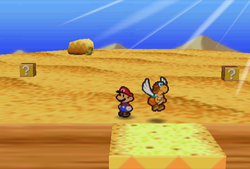
| |
| Mushroom, Super Shroom and Ultra Shroom | At scene C1, in the ? block that appears after hitting the block 1 time (Mushroom)/10 times (Super Shroom)/100 times (Ultra Shroom). | 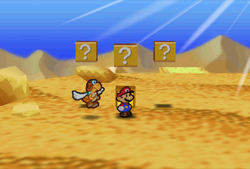
| |
| Maple Super | Given by the Trading Event Toad at scene A3 when participating in the second contest.
|
Additionally, there are four Hidden ? blocks:
| Item | Image | Location
|
|---|---|---|
Attack FX C Badge |
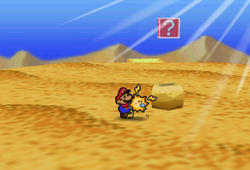 |
In the area one screen east and three south from Kolorado's camp, the hidden ? Block is above the lone rock.
|
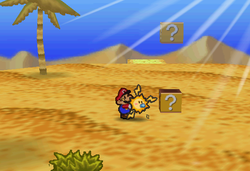 |
In the area one screen north of the oasis, the hidden ? Block is above the ? Block on the ground.
| |
Runaway Pay Badge |
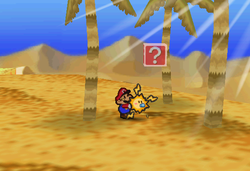 |
In the area one screen north and four east from Kolorado's camp, the hidden ? Block is in the center of the triangle of trees.
|
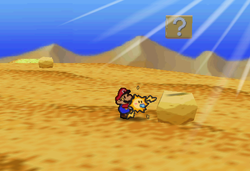 |
In the area two screens north of Kolorado's camp, the hidden ? Block is above the easternmost rock.
|
Dry Dry Outpost
In addition to the items listed below, Little Mouser's Shop has several items on sale. 64 Star Pieces in total can be obtained from Chuck Quizmo.
| Item | Image | Location | Location image
|
|---|---|---|---|
| Letter |
|
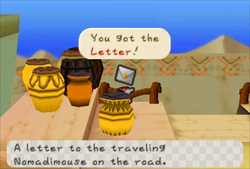
| |
| Star Piece | Under a hidden panel on the roof of the most eastern house. | 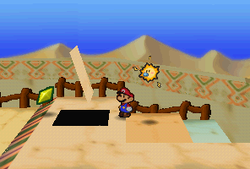
| |
| Red Jar | Given by the owner of Little Mouser's Shop after purchasing a Dusty Hammer, a Dried Pasta, another Dusty Hammer, and a Dried Shroom in order.
| ||
| Crystal Ball | Given by Merlee while doing Koopa Koot's 8th favor.
| ||
| Melody | Given by the composer in the pink house after bringing him Lyrics.
| ||
| Pulse Stone | Given by Moustafa after he reveals his true identity.
|
Dry Dry Ruins
In addition to the ones listed below, enemies found in this area can also drop items.
| Item | Image | Location
| |
|---|---|---|---|
| Ruins Key (x4) |
| ||
| Spike Shield | In the first area with three coffins, the badge can be found in the second coffin.
| ||
| Artifact | On a ledge by the corridor between the two hub rooms.
| ||
| Slow Go | In the area with the Super Hammer, falling on the ledges above the chest and following them will lead to the badge. | 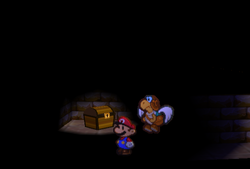
| |
| Star Piece | In the room by blasting the wall to the upper-east of the first hub room. Exposed after draining the sand. | 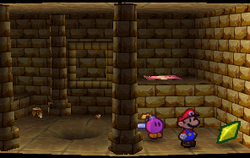
| |
| Pyramid Stone | To the lower-east of the first hub room.
| ||
| Diamond Stone | At the west end of the area beneath the second hub room.
| ||
| Lunar Stone | At the east end of the area beneath the second hub room.
|
Forever Forest
| Item | Image | Location | Location image
|
|---|---|---|---|
| Magical Seed | In the middle of a clearing in the fourth area. | 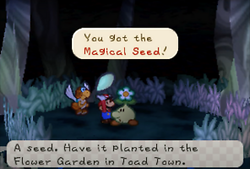
| |
| HP Plus | In the middle of a clearing found on a detour from the fifth area, inside a badge box. | 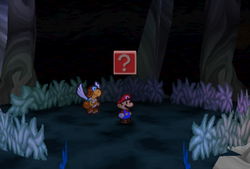
| |
| FP Plus | In the middle of a clearing found on a detour from the seventh area, inside a badge box. | 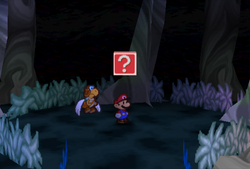
|
Boo's Mansion
Several items can be purchased from Boo's Shop run by Igor. Other items found in this area include:
| Item | Image | Location | Location image
|
|---|---|---|---|
| Volt Shroom | In a question block in front of the gate. | 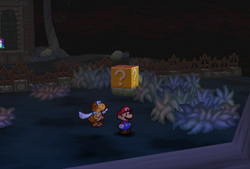
| |
| Strange Leaf | In a bush near the backyard gate (replenish-able resource).
| ||
| Record | Held by the Boos in the cabinet in the right room on the second floor.
| ||
| Weight | In a chest box guarded by a Boo in the left room on the second floor (play the Record to lure the Boo away). | 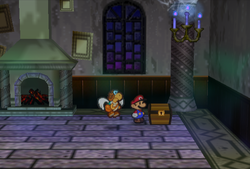
| |
| Maple Syrup | In the underneath crate within the room with Super Boots.
| ||
| Letter | Given by Franky after giving him a letter from Little Mouser.
| ||
| Super Shroom | In the middle crate of the room next to the room with Super Boots.
| ||
| Apple |
| ||
| Boo's Portrait | At the northeastern corner of the room below the right room on the first floor (requires Super Boots and Parakarry).
| ||
| Star Piece |
|
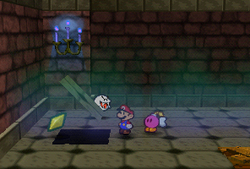 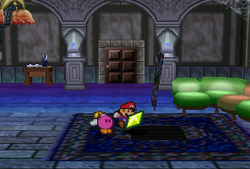 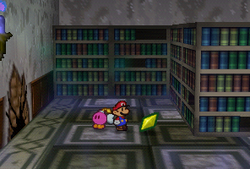 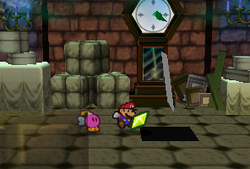 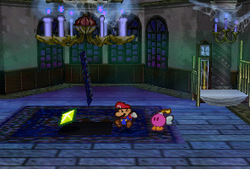
| |
| Old Photo | Given by Franky while doing Koopa Koot's 13th favor.
|
Gusty Gulch
| Item | Image | Location | Location image
|
|---|---|---|---|
| Star Piece (x2) |
|
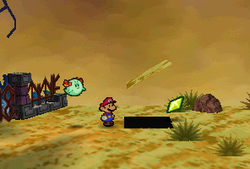 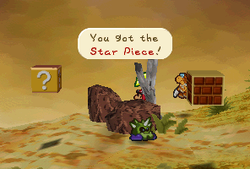
| |
| Package | Given by a Boo while doing Koopa Koot's favors.
| ||
| Dizzy Dial | On a big stone one scene to the east of the Boo's area (requires Kooper).
| ||
| Repel Gel | In a question block one scene to the east of the Boo's area. | 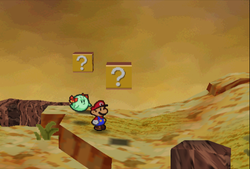
| |
| Letter | Behind a branch one scene to the east of the Boo's area. | 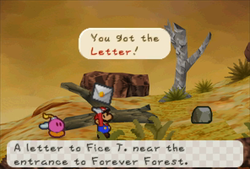
| |
| Super Shroom | In a question block one scene before Tubba Blubba's Castle. | 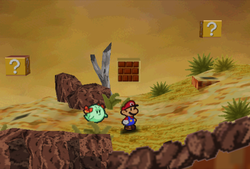
|
Tubba Blubba's Castle
| Item | Image | Location | Location image
|
|---|---|---|---|
| Star Piece (x2) |
|
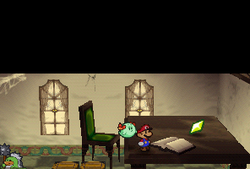 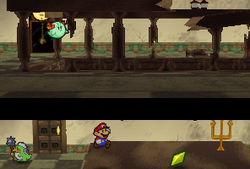
| |
| Castle Key (x3) |
|
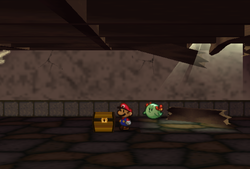 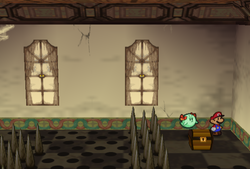
| |
| D-Down Jump | In the first room to the north of the first-floor corridor. Mario can get it from the room above.
| ||
| Mega Rush | Down the ledge above the bed in the room behind the clock on the second floor.
| ||
| Maple Syrup | In a question block by the stair that leads to the third floor. | 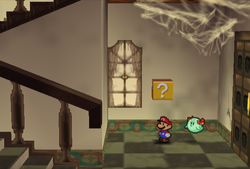
| |
| Mystical Key | In a chest box in the east corner of Tubba Blubba's room on the third floor. | 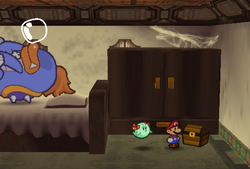
|
Shy Guy's Toy Box
| Item | Image | Location | Location image
|
|---|---|---|---|
| Star Piece (x7) |
|
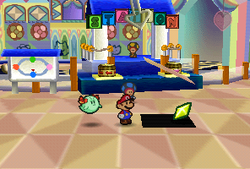 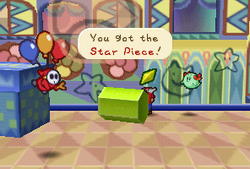 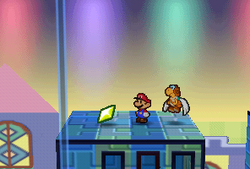 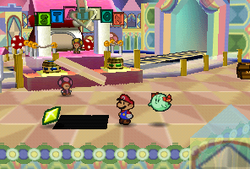 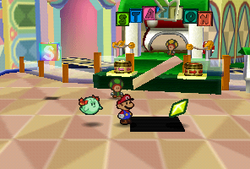 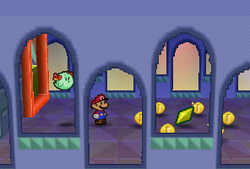 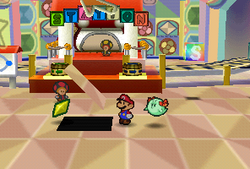
| |
| Thunder Bolt | In a ? block at the east end of the Blue Station area. | 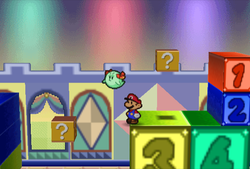
| |
| Storeroom Key | In a treasure chest at the east end of the Blue Station area. | 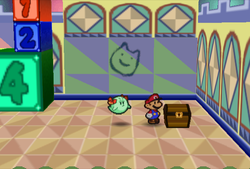
| |
| Maple Syrup | Held by the red Shy Guy in the playground west of the Blue Station area, only in subsequent revisits after recovering the Calculator.
| ||
| Power Plus | In a treasure chest guarded by an Anti Guy in the Blue Station area. Mario can fight him or bribe him with a Lemon Candy to get it. | 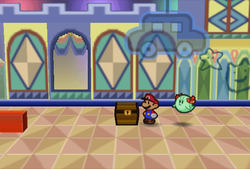
| |
| Calculator | Held by a Shy Guy in the playground in the west of the Blue Station area.
| ||
| Cake Mix (x2) |
| ||
| Fire Flower | Held by the green Shy Guy in the playground west of the Blue Station area.
| ||
| Mushroom |
| ||
| Mailbag | In the treasure chest to the east of the Pink Station. | 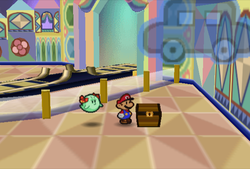
| |
| Defend Plus | In a treasure chest on the high platform in the northwestern corner of the east scene in the Pink Station area. | 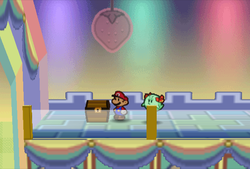
| |
| Ice Power | In a treasure chest at the east of the Pink Station area. | 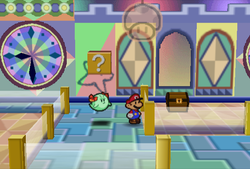
| |
| Frying Pan | In a treasure chest in the east corner of the Pink Station area. | 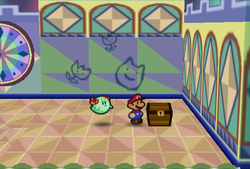
| |
| Cookbook | Dropped by Gourmet Guy after giving him a Cake in the Pink Station area.
| ||
| Mystery Note | Held by a Shy Guy in the Green Station area.
| ||
| Dictionary | In a treasure chest on the platform at the east end of the Green Station area. | 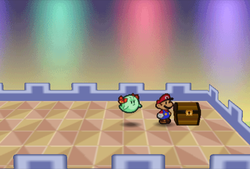
| |
| Shooting Star | On a high brick one scene east to the Red Station area (can be gotten by hitting a hidden coin block then tossing Kooper on it, or executing a Tornado Jump).
| ||
| Sleepy Sheep | In a ? Block in the northwestern area of the scene to the east of the Red Station scene. | 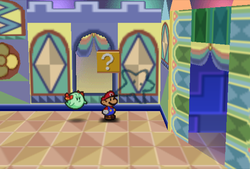
|
In addition, the following items are available as Peach's choices:
| Item | Image | Location
|
|---|---|---|
| Mushroom | Will appear in front of the Storeroom Key chest in the Blue Station area, if chosen instead of a Goomba or the Clubba option.
| |
| Thunder Rage | Will appear in front of the Frying Pan chest in the Pink Station area, if chosen instead of a Fuzzy or the Hammer Bro option.
| |
| Super Soda | Will appear in front of the Dictionary chest in the Green Station area, if chosen instead of a Pokey or the Koopatrol option.
|
Hidden ? blocks
There are thirteen hidden ? blocks in Shy Guy's Toy Box.
| Item | Image | Location
|
|---|---|---|
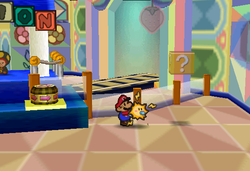 |
By the Blue Station, the hidden ? Block is slightly east of the station itself.
| |
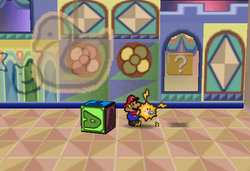 |
One screen west of the Blue Station, the hidden ? Block is three tiles east of the large toy block.
| |
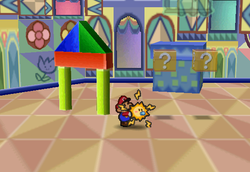 |
Two screens west of the Blue Station, at the Shy Guy Playground, the hidden ? Block is two beige tiles southwest of the large jack-in-the-box in the north.
| |
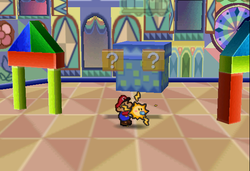 |
In the same area, the hidden ? Block is two tiles south of the large jack-in-the-box, slightly east of the last hidden block.
| |
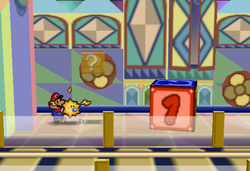 |
Two screens west of the Pink Station, past the gate where Gourmet Guy sits going northwest, the hidden ? Block is at the beige tile west of the large toy block.
| |
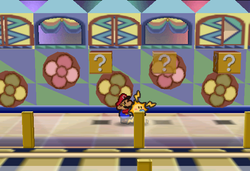 |
In the same area, in the northern path going east, the hidden ? Block in the center of the gap between the two visible ? Blocks, at the beige tile.
| |
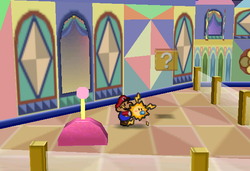 |
From the same area, going two screens east to the northwestern region of the Pink Station, the hidden ? Block is at the beige tile northeast of the pink switch.
| |
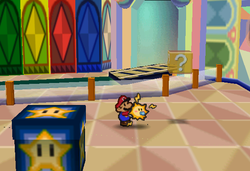 |
By the Green Station, the hidden ? Block is three tiles north of the eastern passageway, on the northern corners.
| |
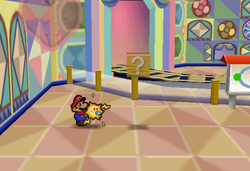 |
By the Red Station, the hidden ? Block is five tiles west of the Red Station itself, in line with the Save and Heart Blocks in the east.
| |
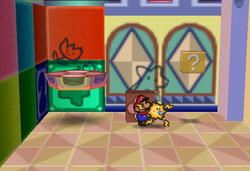 |
One screen west of the Red Station, the hidden ? Block is to the east of the first brown block near the passageway.
| |
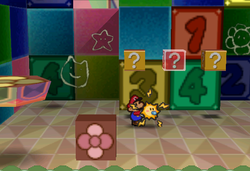 |
In the same area, going west by taking the elevator and Ferris wheel into the shaded region, the hidden ? Block is in the gap between to the two visible blocks.
| |
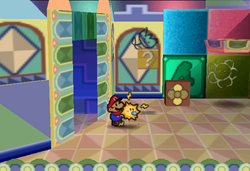 |
Also in the same area, the hidden ? Block is all the way to the west, between the last brown block and the passageway to Big Lantern Ghost's room.
| |
| 1 Coin | 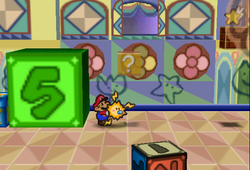 |
In the area east of the Red Station, past the block wall, this hidden ? Block is two blocks east of the large green block.
|
Lavalava Island
| Item | Image | Location
| |
|---|---|---|---|
| Stop Watch | Behind a bush in the whale scene.
| ||
| Coconut (x7) | From several trees near the shore.
| ||
| Letter | On a big stone on the beach. For Igor. | 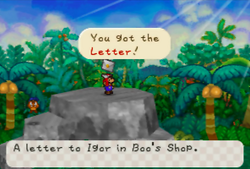
| |
| Star Piece | In the rightmost tree in the beach scene. | 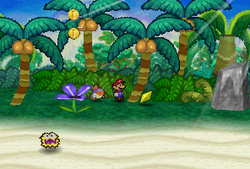
|
There are two Hidden ? Blocks:
| Item | Image | Location
|
|---|---|---|
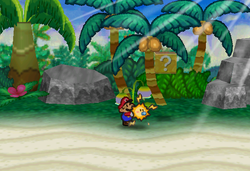 |
Going one screen southeast from the island's westernmost shore with the whale, the hidden ? Block is directly southeast of the first Bellbell Plant.
| |
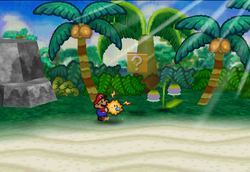 |
In the same area, going east, a second hidden ? Block is directly southwest of the second Bellbell Plant.
|
Yoshi's Village
In addition to the items listed below, several items can be purchased from Yoshi's Cabana, and two Star Pieces can be obtained from Kolorado here. Chuck Quizmo also has a chance to appear here and 64 Star Pieces in total can be obtained from him.
| Item | Image | Location
| |
|---|---|---|---|
| Coconut (x3) | On the leftmost and the rightmost trees of the first scene and the rightmost tree on the second (replenish-able resource, as with every Coconut's harvest point).
| ||
| Star Piece | Under a hidden panel in front of the Raphael statue. | 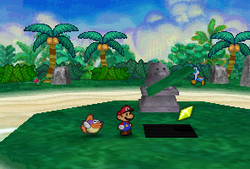
| |
| Letter | Given by the red Yoshi kid after giving him a letter from Dane T.
| ||
| Melon | Can be traded with Tayce T.'s recipes with the adult yellow Yoshi. Temporarily unavailable between Yoshi kids going missing and Mario defeating Lava Piranha.
| ||
| Jade Raven | Given by the Village Leader after finding all the Yoshi kids. | 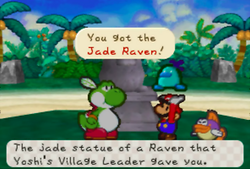
| |
| Magical Seed | Given by Kolorado after exchanging the Volcano Vase. | 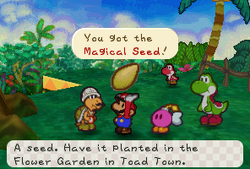
|
Jade Jungle
| Item | Image | Location
| |
|---|---|---|---|
| Jammin' Jelly | Behind the tree near the entrance to Mt. Lavalava.
| ||
| Star Piece (x3) |
|
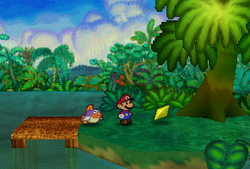 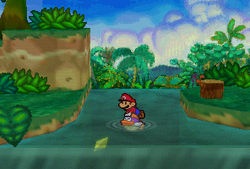 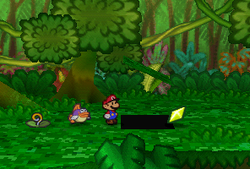
| |
| Letter | In the tree on the island at the northeastern corner of the Sushie scene. For Russ T. | 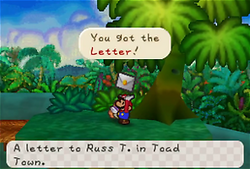
| |
| Power Quake | In a badge block on an island at the center of the Yoshi Village entrance scene. | 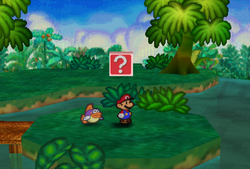
| |
| Fright Jar | In the tree at the east of the scene to the north of the Lavalava Island scene.
| ||
| Egg | In a tree in the first scene after the Raphael statue (can be collected by pulling the vine).
| ||
| Fire Flower | In the second tree in the third scene after the Raphael statue (can be obtained by pulling the vine).
| ||
| Mushroom | In the last tree in the third scene after the Raphael statue (can be obtained by pulling the vine).
| ||
| Happy Heart | At the end of the big branch of the tree.
| ||
| Ultra Stone | Given by Raphael the Raven after construction of transportation is completed.
| ||
| Volcano Vase | In a treasure chest from Mt. Lavalava after its eruption, one scene to the east of the Yoshi Village entrance scene. | 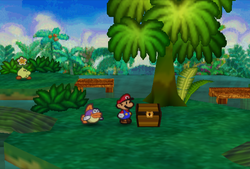
|
Hidden ? Blocks
| Item | Image | Location
|
|---|---|---|
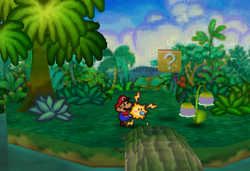 |
Going one screen northeast from the island's westernmost shore with the Whale, Mario should use Sushie's field ability to swim from the southern dock to the one northwest of it. Then, he should follow the path east then north to find a Bellbell Plant and jump directly northwest of it to reveal the hidden ? Block.
| |
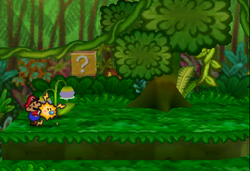 |
In the area one screen north of the Raven statue, Mario should go to the high elevated ground and jump directly southeast of the Bellbell Plant to reveal another hidden ? Block.
| |
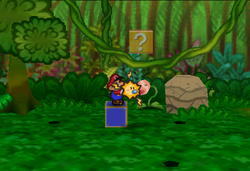 |
In the next area, Mario should use the westernmost blue movable block and push it east once and north once, then jump from it to reveal the hidden ? Block. Alternatively, Mario can also hit the hidden block from the ground with a Tornado Jump if he's equipped with the Ultra Boots.
|
Mt. Lavalava
In addition to the items listed below, two Star Pieces can be obtained from Kolorado here.
| Item | Image | Location
|
|---|---|---|
| Star Piece (x2) |
| |
| Fire Shield | On a pillar in the stair scene (can be gotten by falling down halfway in the second rope sliding).
| |
| Dizzy Stomp | In a treasure chest at the northeastern corner of the scene to the south of the Ultra Hammer area.
| |
| POW Block | On a high brick on the top of the stair scene (can be gotten by tossing Kooper).
| |
| Maple Syrup | In a question block in the room above the Lava Piranha room.
|
Hidden ? block
| Image | Name | Description
|
|---|---|---|
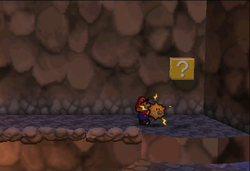 |
In the area one screen east of where the player obtains the Ultra Hammer, Mario should climb up all the way to the highest elevated ground in the northeast. Then, he should jump near the center close to the edge to reveal the hidden ? Block. |
Flover Fields
In addition to the items dropped by enemies, overworld items found in this area include:
| Item | Image | Location
|
|---|---|---|
| Stinky Herb (x5) | From five bushes on the walls of every first scene except the western road, usually near central area (replenish-able resources).
| |
| Happy Flower | Dropped after hitting the middle tree, the right tree and the left tree on the eastern road.
| |
| Magical Bean | Given by Petunia after defeating the Monty Moles.
| |
| Red Berry | On the tree in the northwestern corner of the Petunia scene.
| |
| Star Piece (x6) |
| |
| Yellow Berry | On the tree in the first scene on the southwestern road.
| |
| Blue Berry | On the left tree in the first scene on the southeastern road.
| |
| Dizzy Dial | In a question block in the second scene on the southeastern road.
| |
| Jammin' Jelly | In the tree at the northeastern corner at the end of the southeastern road.
| |
| Flower Saver | Thrown out of a well after throwing a Blue Berry in at the end of the eastern road.
| |
| Shooting Star | In a bunch of flowers in the second scene on the northwestern road.
| |
| Fertile Soil | Given by Posie when talked to.
| |
| Crystal Berry | Given by Posie at the end of the southwestern road when doing Rosie's favor.
| |
| Water Stone | Given by Rosie after giving her the Crystal Berry.
| |
| Miracle Water | Given by Lily after using the Water Stone.
| |
| Bubble Berry | On the tree at the center of the second scene on the southwestern road (accessible after using the Water Stone).
| |
| Mega Smash | Inside a stair platform in the second scene on the northwestern road, the player should blast the rock and fall down to get it.
| |
| Letter | In a bunch of flowers in the second scene on the northeastern road.
|
Hidden ? block
| Item | Image | Location
|
|---|---|---|
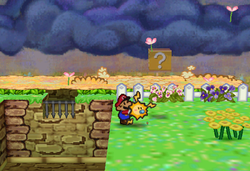 |
In the area with the Bubble Tree on the eastern grassy area, Mario should jump slightly northwest of the first patch of yellow flowers -- directly in the opposite spot from the visible block in the west -- to reveal the hidden ? Block.
| |
| 1 Coin | 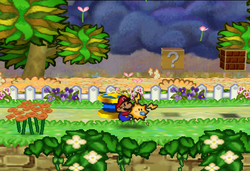 |
In the area one screen west of the Wise Wisterwood, with the blue flower guard, Mario should jump at the spot between the Springboard and the Brick Block to reveal the hidden ? Block.
|
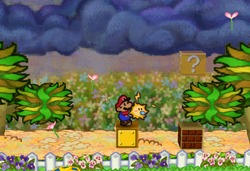 |
In the same area, Mario should jump from the same Springboard onto the revealed ? Block, then to the Brick Block and jump again to reveal another hidden ? Block.
| |
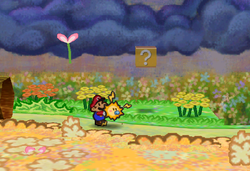 |
One screen west of the area with the Puff Puff Machine, in the northeastern corner, is another hidden ? Block. Jumping in the area between the two patches of yellow flowers will reveal it.
|
Cloudy Climb
| Item | Image | Location
|
|---|---|---|
| S. Jump Charge | In a cloud at the northwestern corner of the first scene (get it by climbing on the "elevator" cloud first)
|
Shiver City
In addition to the items listed below, several items can be purchased from Shiver Shop, and 64 Star Pieces can be obtained from Chuck Quizmo here.
| Item | Image | Location
|
|---|---|---|
| Attack FX E | In a treasure chest in the middle house in the west scene (obtainable from the east house).
| |
| Star Piece (x2) |
| |
| Warehouse Key | In the ice in the east scene (by performing several Tornado Jumps over the ice after "murdering" the Mayor).
| |
| Bucket | Given by Mayor Penguin after visiting Merle and getting the Scarf.
| |
| Iced Potato | Appears every time Mario sleeps in the Toad House after opening the passage to Shiver Mountain (replenish-able resource).
| |
| Mushroom x 4, Ultra Shroom | Appears the first time Mario sleeps in the Toad House after opening the passage to Shiver Mountain.
|
Shiver Snowfield
| Item | Image | Location
|
|---|---|---|
| Star Piece | Under a hidden panel in the south corner of the snowman scene.
| |
| Letter (x2) |
| |
| Repel Gel | Behind a tree in the northeastern corner of the snowman scene.
|
Hidden ? block
| Item | Image | Location
|
|---|---|---|
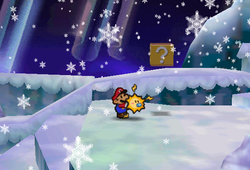 |
In the area where Mario fights Monstar, going up the steps in the east to the high platform, the hidden ? Block is on the north-central area.
|
Starborn Valley
| Item | Image | Location
|
|---|---|---|
| Scarf | Given by Merle after talking to him.
| |
| Letter | Given by Frost T. after giving him Dane T.'s letter.
|
Shiver Mountain
| Item | Image | Location
|
|---|---|---|
| Star Piece | On a platform to the west of the ice stairs in the fourth scene (can be gotten by falling off the corner on the third floor).
| |
| Pebble | At the end of the south fork road in the second scene.
| |
| Shooting Star | In the first stone cavern in the third scene.
| |
| Snowman Doll | In the second stone cavern in the third scene.
| |
| Thunder Rage | In the third stone cavern in the third scene.
| |
| Mega Jump | In a badge block on the second floor in the fourth room.
| |
| Star Stone | Given by Madam Merlar in the room to the east of the stair room (by blasting the wall with Bombette and going straight east to see her).
|
Hidden ? block
| Item | Image | Location
|
|---|---|---|
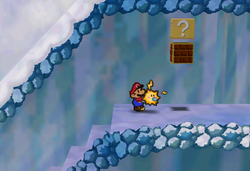 |
In the first area, going all the way east to the Brick Block, Mario should Tornado Jump underneath it to destroy it, then Tornado Jump again in the same spot to reveal the hidden ? Block.
|
Crystal Palace
| Item | Image | Location
|
|---|---|---|
| Star Piece x3 |
| |
| Super Shroom | In a question block near the door in the room to the north of the first room.
| |
| Shooting Star | At the very east of the area to the north of the first room.
| |
| Maple Syrup | In the question block near the door in the big Albino Dino statue room.
| |
| P-Down, D-Up | At the very east of the area below the room to the north of the first room.
| |
| P-Up, D-Down | In a treasure chest at the very east of the area below the small Albino Dino statue room.
| |
| Triple Dip | In a treasure box in the fourth room after the red key (requires using Bombette on the wall behind the mirror one scene earlier).
| |
| Blue Key | In a treasure chest at the very east of the area to the south of the first room.
| |
| Red Key | In a treasure chest at the very east of the area below the room to the south of the first room (requires Spin Jump breaking the north room first).
| |
| Palace Key | In a treasure chest at the very east of the area below the big Albino Dino room.
|
Hidden ? block
| Item | Description | Image |
|---|---|---|
Jammin' Jelly |
On the mirror side, in the western area with the small Albino Dino statue, Mario should Tornado Jump northwest from the door, above the Spin Panel, to reveal the hidden ? Block. | 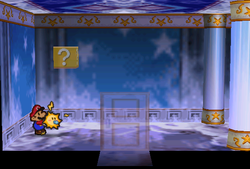
|
Toad Town Tunnels
In addition to the items listed below, several kinds of items can be purchased from Rip Cheato.
| Item | Image | Location | Location image
|
|---|---|---|---|
| Shrink Stomp | In the treasure chest at the end of the area to the east of the entrance. | 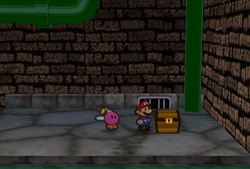
| |
| Snowman Doll | In a ? Block to the west of the entrance but before the pipe leading to the new area. | 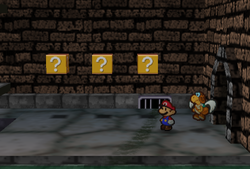
| |
| Power Smash | To the west of the entrance is a pipe leading to a new area. This item is in the treasure chest to the west of that. | 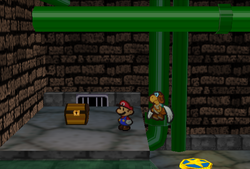
| |
| Star Piece | To the west of the entrance is a pipe leading to a new area. This item is in the high place in the area to the east of that. | 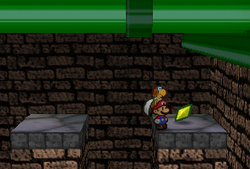
| |
| Shooting Star | Beneath the entrance room, the item is in a high ? Block on the path to the right. Ultra Boots required. | 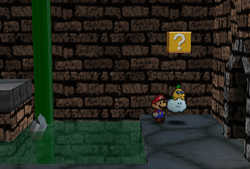
|
Toad Town Tunnels has the following Hidden ? blocks:
| Item | Image | Location
|
|---|---|---|
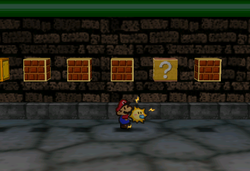 |
In the area one screen east from the entrance, the hidden ? Block is in the middle of the gap in the row of blocks.
| |
| 1 Coin each | 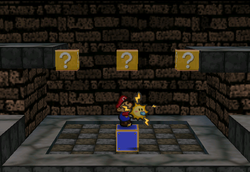 |
In the area one screen west of the blue Warp Pipe to Boo's Mansion is a gap between the two high platforms with the Super Block on the western one. There are three hidden ? Blocks in this area. Using the blue movable block, Mario should move it to the middle of the left side, the center, and the middle of the right side and jump from the movable block at those spots to reveal them. Alternatively, Mario can also hit the invisible blocks from the tiles without using the movable block using the Tornado Jump if he's equipped with the Ultra Boots.
|
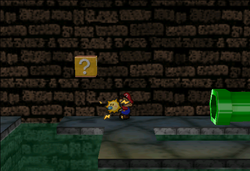 |
In the area two screens east of where the player obtains the Ultra Boots, near the starting pipe, Mario should jump at the center of the pathway sticking out to reveal the hidden ? Block.
| |
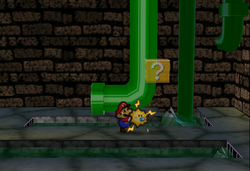 |
In the same area, from the pipe, Mario should follow the central path going east. The hidden ? Block is located just before the path splits north and south.
| |
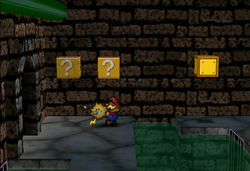 |
Also in the same area, near the doorway, the hidden ? Block is west of the visible one.
| |
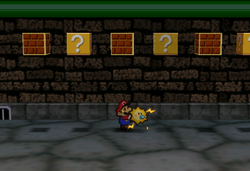 |
In the next area, the hidden ? Block is between the two sets of three blocks. The Ultra Boots is needed to hit the block.
| |
| 1 Coin each | 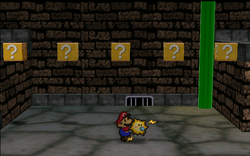 |
In the area two screens east of the blue Warp Pipe to Yoshi's Village is a gap between two high platforms, with a doorway leading to Shiver City in the east. There are four hidden ? Blocks in this area. From the visible ? Block touching the western platform, Mario should move three block lengths from it and Tornado Jump to reveal the first hidden ? Block, then continue to use the same method for the next blocks to reveal them all.
|
Bowser's Castle
A "main area" refers to a four-way intersection with a Save Block. Enemies can drop items and several items can be purchased from the Storehouse. Other items include:
| Item | Image | Location
|
|---|---|---|
| Castle Key |
| |
| Prison Key |
| |
| Super Shroom |
| |
| Life Shroom |
| |
| Maple Syrup |
| |
| Honey Syrup | In the second question block after the quiz room.
| |
| Deep Focus | In a badge block on a platform in the lava area, near the entrance.
| |
| Tasty Tonic | In a crate in the prison under the first Guard Door room.
| |
| Thunder Rage | On another platform in the third lava/moving platform area.
| |
| Shooting Star | In a question block at the end of the north fork road in the second grotto scene.
| |
| Mystery? | On a platform in the third lava/moving platform area.
| |
| POW Block | In a question block at the end of the north fork road in the first grotto scene.
| |
| Jammin' Jelly | Fall off the stairs in the room after the quiz.
| |
| Ultra Shroom | At the end of the northwestern road from the second main area.
|
- For a list of hidden blocks in Bowser's Castle, see here.