Wario Colosseum: Difference between revisions
No edit summary Tag: Reverted |
|||
| (81 intermediate revisions by 44 users not shown) | |||
| Line 1: | Line 1: | ||
{{ | {{race course infobox | ||
|title=Wario Colosseum | |title=Wario Colosseum | ||
|image=[[File:Mkddtrack13.jpg|center| | |image=[[File:Mkddtrack13.jpg|center|300px]] | ||
| | |appears_in=''[[Mario Kart: Double Dash!!]]'' ([[List of games by date#2003|2003]]) | ||
|cups=[[Special Cup]] | |cups=[[Special Cup]] | ||
| | |sample=[[Shinobu Nagata]]<br>[[File:MKDD-Music-WaluigiStadium-WarioColosseum.oga]] | ||
| | |map=[[File:WarioColosseumMap-MKDD.png]] | ||
| | |ghost={{ghost|DD|XYZ<ref>[[tcrf:Mario_Kart:_Double_Dash!!#Staff_Ghost_Initials|Mario Kart: Double Dash!! § Staff Ghost Initials]]. ''The Cutting Room Floor''. Retrieved November 3, 2024.</ref>|2:21.106|[[File:MKDD Wario.png|32px|link=Wario]][[File:MKDD Waluigi.png|32px|link=Waluigi]][[File:WarioCarIcon-MKDD.png|32px|link=Wario Car]]}} | ||
}} | }} | ||
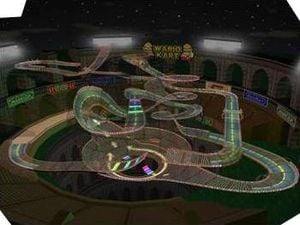
'''Wario Colosseum''' | '''Wario Colosseum''' is the first course of the [[Special Cup]] in ''[[Mario Kart: Double Dash!!]]''. As the name implies, it is a racing track based on the [[Colosseum]] that belongs to [[Wario]], making it his home track of the game. It is the longest course in the game, having it reduced to two laps in [[Mario Kart: Double Dash!!#Grand Prix|Grand Prix]] mode and in the "Recommended" option of laps in VS mode; it is one of the only two courses in ''Mario Kart: Double Dash!!'' to not, by default, have three laps, with the other being [[GCN Baby Park|Baby Park]] with seven laps. Outside of the colosseum, [[Mushroom City]] can be seen in the distance. It shares its music with [[GCN Waluigi Stadium|Waluigi Stadium]]. | ||
Wario Colosseum is one of four courses from ''Mario Kart: Double Dash!!'' that is yet to reappear as a [[classic course]] in a later game, the others being [[Mushroom City]], [[Bowser's Castle (Mario Kart: Double Dash!!)|Bowser's Castle]] and [[Rainbow Road (Mario Kart: Double Dash!!)|Rainbow Road]]. | |||
==Course layout== | ==Course layout== | ||
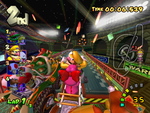
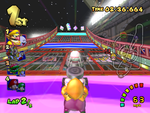
[[File:WarioColosseum2-GP-MKDD.png| | [[File:WarioColosseum2-GP-MKDD.png|220px|thumb|left|A screenshot from the course depicting one of the larger jumps]] | ||
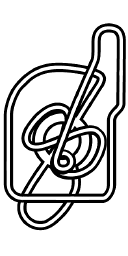
The course first starts at a straight road, which leads to a curve to the left. Past that curve is a ramp with [[Dash Panel]]s on it and an [[Item Box]] to grab. After the ramp is a small, twisty road with an overhang that leads into another ramp, with another Item Box in it. After the ramp is a curve to the left, which leads to a straight road with a set of Item Boxes. After the Item Boxes is a large ramp with Dash Panels on it that leads the player into the dome-shaped area, that leads the player in a corkscrew for the next moment. Past the corkscrew curving to the right is a downhill road that turns left, leads into a straight road, and curves left again, | The course first starts at a straight road, which leads to a curve to the left. Past that curve is a ramp with [[Dash Panel]]s on it and an [[Item Box]] to grab (surrounded by a [[Fire Chain]]). After the ramp is a small, twisty road with an overhang that leads into another ramp with a Fire Chain, with another Item Box in it. After the ramp is a curve to the left, which leads to a straight road with a set of Item Boxes. After the Item Boxes is a large ramp with Dash Panels on it that leads the player into the dome-shaped area, that leads the player in a corkscrew for the next moment. Past the corkscrew curving to the right is a downhill road that turns left, leads into a straight road, and curves left again, leading into a hill with Dash Panels that will send the player flying. Past the hill is a curve right that leads the player into a U-turn, and after the U-turn is a steep downhill road that makes the player fly instead of driving downwards. After the downhill road is a set of Item Boxes in a curve to the right. Past the curve is a huge dome arena where the player can have a choice of taking two paths. One is the ramp in the middle, which leads the player to fly across a pit underneath them. This way is quicker than the way around the pit, but more dangerous as the player is prone to falling off if not angled correctly. The other path, which leads the player around the pit, is safer, but a longer route. It is the route that the AI prefers, as they never take the ramp in the center. After that giant pit is an ascent of the road that leads into a 90° turn left, underneath an overhang. The road underneath the overhang slightly curves to the left. After the overhang, the road still curves to the left, until it is straight again and then leads to a ramp with Dash Panels on it and the last set of Item Boxes. After the ramp is a curve to the left, which leads into the straight road into the [[Finish line (object)|finish line]]. | ||
Past the hill is a curve right that leads the player into a U-turn, and after the U-turn is a steep downhill road that makes the player fly instead of driving downwards. After the downhill road is a set of Item Boxes in a curve to the right. | |||
Past the curve is a huge dome arena | |||
After that giant pit is an ascent of the road that leads into a | |||
There are no hidden shortcuts in this course. The only route that acts the most like a shortcut is the ramp over the pit. | There are no hidden shortcuts in this course. The only route that acts the most like a shortcut is the ramp over the pit towards the end of the course. | ||
==Sponsors== | ==Sponsors== | ||
*[[List of | *[[List of sponsors debuting in Mario Kart: Double Dash!!#Koopa Sport|Koopa Sport]] (Trackside banners) | ||
*[[List of | *[[List of sponsors debuting in Mario Kart: Double Dash!!#Super Wario|Super Wario]] (Trackside banners) | ||
*[[List of | *[[List of sponsors debuting in Mario Kart: Double Dash!!#Wario GP|Wario GP]] (Trackside banners) | ||
*[[List of | *[[List of sponsors debuting in Mario Kart: Double Dash!!#Wario Kart|Wario Kart]] (Signs, trackside banners) | ||
==Profiles== | ==Profiles== | ||
| Line 45: | Line 41: | ||
</gallery> | </gallery> | ||
==Names in other languages== | ==Additional names== | ||
===Internal names=== | |||
{{internal names | |||
|game1=''[[Mario Kart: Double Dash!!]]'' | |||
|name1=<tt>Wario.arc</tt> | |||
|meaning1=Wario course | |||
}} | |||
===Names in other languages=== | |||
{{foreign names | {{foreign names | ||
|Jap=ワリオコロシアム | |Jap=ワリオコロシアム | ||
|JapR=Wario Koroshiamu | |JapR=Wario Koroshiamu | ||
|JapM=Wario Colosseum | |JapM=Wario Colosseum | ||
| | |Fre=Arène Wario | ||
| | |FreM=Wario Arena | ||
|Ger=Wario-Kolosseum | |||
|GerM=Wario Colosseum | |||
|Ita=Colosseo di Wario | |||
|ItaM=Wario's Colosseum | |||
|Spa=Coliseo Wario | |Spa=Coliseo Wario | ||
|SpaM=Wario Colosseum | |SpaM=Wario Colosseum | ||
}} | }} | ||
==References== | |||
<references/> | |||
{{MKDD}} | {{MKDD}} | ||
{{ | {{MK race courses}} | ||
[[Category:Stadiums]] | [[Category:Stadiums]] | ||
[[Category:Mario Kart: Double Dash!! race courses]] | |||
[[Category:Mario Kart: Double Dash!! | |||
[[it:Colosseo di Wario]] | [[it:Colosseo di Wario]] | ||
[[de:Wario-Kolosseum]] | [[de:Wario-Kolosseum]] | ||
Revision as of 13:16, December 29, 2024
| Wario Colosseum | |||||||
|---|---|---|---|---|---|---|---|
| Information | |||||||
| Appears in | Mario Kart: Double Dash!! (2003) | ||||||
| Cup(s) | Special Cup | ||||||
| |||||||
| |||||||
| |||||||
Wario Colosseum is the first course of the Special Cup in Mario Kart: Double Dash!!. As the name implies, it is a racing track based on the Colosseum that belongs to Wario, making it his home track of the game. It is the longest course in the game, having it reduced to two laps in Grand Prix mode and in the "Recommended" option of laps in VS mode; it is one of the only two courses in Mario Kart: Double Dash!! to not, by default, have three laps, with the other being Baby Park with seven laps. Outside of the colosseum, Mushroom City can be seen in the distance. It shares its music with Waluigi Stadium.
Wario Colosseum is one of four courses from Mario Kart: Double Dash!! that is yet to reappear as a classic course in a later game, the others being Mushroom City, Bowser's Castle and Rainbow Road.
Course layout
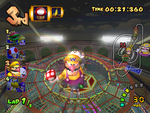
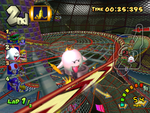
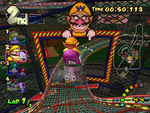
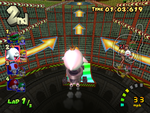
The course first starts at a straight road, which leads to a curve to the left. Past that curve is a ramp with Dash Panels on it and an Item Box to grab (surrounded by a Fire Chain). After the ramp is a small, twisty road with an overhang that leads into another ramp with a Fire Chain, with another Item Box in it. After the ramp is a curve to the left, which leads to a straight road with a set of Item Boxes. After the Item Boxes is a large ramp with Dash Panels on it that leads the player into the dome-shaped area, that leads the player in a corkscrew for the next moment. Past the corkscrew curving to the right is a downhill road that turns left, leads into a straight road, and curves left again, leading into a hill with Dash Panels that will send the player flying. Past the hill is a curve right that leads the player into a U-turn, and after the U-turn is a steep downhill road that makes the player fly instead of driving downwards. After the downhill road is a set of Item Boxes in a curve to the right. Past the curve is a huge dome arena where the player can have a choice of taking two paths. One is the ramp in the middle, which leads the player to fly across a pit underneath them. This way is quicker than the way around the pit, but more dangerous as the player is prone to falling off if not angled correctly. The other path, which leads the player around the pit, is safer, but a longer route. It is the route that the AI prefers, as they never take the ramp in the center. After that giant pit is an ascent of the road that leads into a 90° turn left, underneath an overhang. The road underneath the overhang slightly curves to the left. After the overhang, the road still curves to the left, until it is straight again and then leads to a ramp with Dash Panels on it and the last set of Item Boxes. After the ramp is a curve to the left, which leads into the straight road into the finish line.
There are no hidden shortcuts in this course. The only route that acts the most like a shortcut is the ramp over the pit towards the end of the course.
Sponsors
- Koopa Sport (Trackside banners)
- Super Wario (Trackside banners)
- Wario GP (Trackside banners)
- Wario Kart (Signs, trackside banners)
Profiles
Mario Kart: Double Dash!!
- North American website bio: "Wario Colosseum is a twisting, turning, spiraling maze of steel and concrete. If you can survive two laps of the massive dash-panel jumps and the numerous sick curves, you‘re ready for the big time."
Gallery
Additional names
Internal names
| Game | File | Name | Meaning
|
|---|---|---|---|
| Mario Kart: Double Dash!! | Wario.arc | Wario course |
Names in other languages
| Language | Name | Meaning | Notes |
|---|---|---|---|
| Japanese | ワリオコロシアム[?] Wario Koroshiamu |
Wario Colosseum | |
| French | Arène Wario[?] | Wario Arena | |
| German | Wario-Kolosseum[?] | Wario Colosseum | |
| Italian | Colosseo di Wario[?] | Wario's Colosseum | |
| Spanish | Coliseo Wario[?] | Wario Colosseum |
References
- ^ Mario Kart: Double Dash!! § Staff Ghost Initials. The Cutting Room Floor. Retrieved November 3, 2024.
