Gallery:Wario World: Difference between revisions
(Had this image laying around, so, uh, here you go.) |
(→Screenshots: What do you think?) |
||
| (107 intermediate revisions by 25 users not shown) | |||
| Line 4: | Line 4: | ||
==Logos== | ==Logos== | ||
<gallery widths="300"> | <gallery widths="300"> | ||
Logo EN | Logo EN Wario World.png|Logo (without castle backing) | ||
Wario World | Wario World Castles Logo.jpg|Logo (with castle backing) | ||
Wario World logo JPN.png| | WWorld JP Logo.jpg|Japanese logo | ||
Wario World logo JPN.png|Japanese logo as seen on the package | |||
WarioWorldIngameLogo.png|In-game logo | |||
</gallery> | </gallery> | ||
==Artwork== | ==Artwork== | ||
===[[Wario]]=== | ===[[Wario]]=== | ||
<gallery> | <gallery> | ||
Wario World Wario Posing Artwork.jpg|Wario | |||
Wario Flex Artwork | Wario Flex Artwork Wario World.png|Flexing | ||
Wario Lifts WarioWorld.png|Lifting | |||
Wario Poses WarioWorld.png|Posing | |||
Wario Body WarioWorld.png|Drawing of his body | |||
Wario Cractyl WarioWorld.png|Fighting a Cractyl | |||
Wario | Wario Throne WarioWorld.png|Wario on his throne | ||
Wario | Wario Treasure WarioWorld.png|[[List of treasures in Wario World|Wario's Treasures]] | ||
Wario Dash Attack WarioWorld.png|[[Dash Attack]] | |||
</gallery> | </gallery> | ||
===Enemies=== | ===Enemies and Bosses=== | ||
<gallery> | <gallery> | ||
Cractyl.png|[[Cractyl]] | |||
Magon. | Magon.png|[[Magon]] | ||
Ankiron.png|[[Ankiron]] | |||
Red-Brief J Artwork.png|[[Red-Brief J]] | |||
</gallery> | </gallery> | ||
===Other=== | ===Other=== | ||
<gallery> | <gallery> | ||
Spriteling.png|[[Spriteling]] | |||
DinoMighty WarioWorld Art.png|[[DinoMighty]] boss battle | |||
WW Wario Gold Statue.png|[[Gold Statue]] | |||
WarioWorld Art.png|Art from box cover | |||
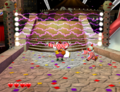
Wario Defeats Enemies WarioWorld.png|Wario and his defeated enemies | |||
Wario World Wallpaper 1.jpg|Wallpaper featuring [[Wario]] | Wario World Wallpaper 1.jpg|Wallpaper featuring [[Wario]] | ||
Wario World Wallpaper 2.jpg|Wallpaper featuring [[Wario]] | Wario World Wallpaper 2.jpg|Wallpaper featuring [[Wario]] | ||
| Line 50: | Line 53: | ||
<gallery> | <gallery> | ||
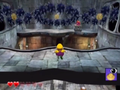
Wario World Title Screen.png|Title screen | Wario World Title Screen.png|Title screen | ||
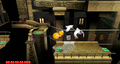
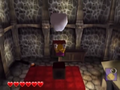
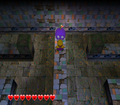
Black Jewel Prologue.png | |||
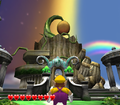
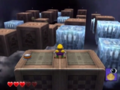
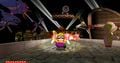
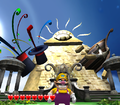
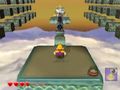
Wario's Castle in Wario World angle 1.png | |||
Wario's Castle in Wario World angle 2.png | |||
Wario's Castle in Wario World angle 3.png | |||
Wario's Castle in Wario World angle 4.png | |||
Black Jewel Screenshot.png | |||
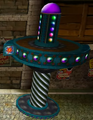
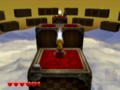
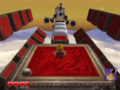
Treasure Square.png | |||
Excitement Central WW exterior.png | |||
Excitement Central.png | |||
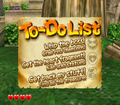
WW To Do List.png | |||
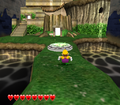
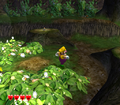
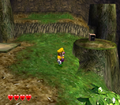
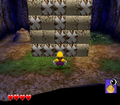
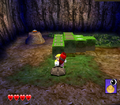
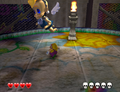
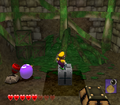
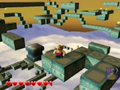
Greenhorn Forest WarioWorld.png | |||
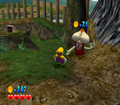
First Spriteling.png | |||
GoldStatueGF.png | |||
GarlicDispenser.png | |||
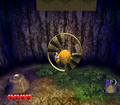
BunnySpring.png | |||
Rockblock_WarioWorld.png | |||
GreenhornForestUnithornsLair.png | |||
GreenhornForestSub1.png | |||
GreenhornForestSub2.png | |||
GreenhornForestSub3.png | |||
GreenhornForestSub4.png | |||
GreenhornForestSub5.png | |||
GreenhornForestSub6.png | |||
GreenhornForestSub7.png | |||
GreenhornForestSub8.png | |||
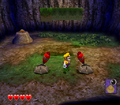
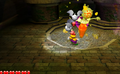
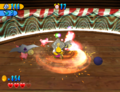
Greenfist Wario World screenshot.png | |||
Greenfist Wario World battle.png | |||
Greenhorn Ruins WarioWorld.png | |||
GemBodiedCreature.png | |||
Wario World Greenhorn Ruins Glue Globes.png | |||
SwirlySpinnerGate.png | |||
OldRedMug.png | |||
GreenhornRuinsBattleRing.png | |||
GreenhornRuinsUnithornsLair.png | |||
GreenhornRuinsSub1.png | |||
GreenhornRuinsSub2.png | |||
GreenhornRuinsSub3.png | |||
GreenhornRuinsSub4.png | |||
GreenhornRuinsSub5.png | |||
GreenhornRuinsSub6.png | |||
GreenhornRuinsSub7.png | |||
GreenhornRuinsSub8.png | |||
DinoMighty WW confrontation.png | |||
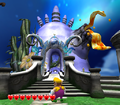
Spooktastic World Exterior.png | |||
Spooktastic World.png | |||
HorrorManorChainClimb.png | |||
Big Bone-Fist.png | |||
YellowGemBodiedCreature.png | |||
HorrorManorUnithornsLair.png | |||
SwirlySlab.png | |||
Wario World Red Horror Gem Bodied.png | |||
DoorSpirit.png | |||
MegaToss.png | |||
HorrorManorBattleRing.png | |||
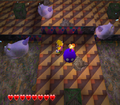
Horror Manor WW basement.png | |||
HorrorManorSub1.png | |||
HorrorManorSub2.png | |||
HorrorManorSub3.png | |||
HorrorManorSub4.png | |||
HorrorManorSub5.png | |||
HorrorManorSub6.png | |||
HorrorManorSub7.png | |||
HorrorManorSub8.png | |||
Brawl Doll WW battle.png | |||
WonkyCircus.png | |||
Wario World Electric Clown Fence.png | |||
Elephant Chase Wonky Circus.jpg | |||
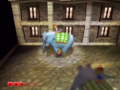
Wario World Blue Wonky Gem Bodied.png | |||
CageBeasts.png | |||
Wario World RedWonky-GemBodied.png | |||
Wonky Circus Underground Town.png | |||
WonkyCircusBattleRing.png | |||
WonkyCircusElephants.png | |||
WonkyCircusUnithornsLair.png | |||
WonkyCircusCogs.png | |||
WonkyCircusSub1.png | |||
WonkyCircusSub2.png | |||
WonkyCircusSub3.png | |||
WonkyCircusSub4.png | |||
WonkyCircusSub5.png | |||
WonkyCircusSub6.png | |||
WonkyCircusSub7.png | |||
WonkyCircusSub8.png | |||
Clown a Round Entrance.png | |||
Dual Dragon Glue Globes.png | |||
Thrillsville Exterior.png | |||
Thrillsville.png | |||
ShiveringMountains.png | |||
Angler Mangler.png | |||
FreezeCannon.png | |||
Wario World Yellow Gem Bodied Creature.png | |||
ShiveringMountainsBattleRing1.png | |||
Icicle Mite.png | |||
Fattington.png|A Fattington | |||
Shivering Mountains Slide.jpg | |||
ShiveringMountainsBattleRing2.png | |||
ShiveringMountainsUnithornsLair.png | |||
ShiveringMountainsSub1.png | |||
ShiveringMountainsSub2.png | |||
ShiveringMountainsSub3.png | |||
ShiveringMountainsSub4.png | |||
ShiveringMountainsSub5.png | |||
ShiveringMountainsSub6.png | |||
ShiveringMountainsSub7.png | |||
ShiveringMountainsSub8.png | |||
Winter Windster Entrance.png | |||
Winter Windster Wario Inflation.png | |||
BeanstalkWay.png | |||
Tulipatooie.png | |||
Wario World Wind Winder Beanstalk Way.png | |||
MonstrousMagnet.png | |||
BeanstalkWayBattleRing2.png | |||
RamWarioWorld.png | |||
BlueGemBodiedCreature.png | |||
Tree Freak.png | |||
BeanstalkWayUnithornsLair.png | |||
BeanstalkWaySub1.png | |||
BeanstalkWaySub2.png | |||
BeanstalkWaySub3.png | |||
BeanstalkWaySub4.png | |||
BeanstalkWaySub5.png | |||
BeanstalkWaySub6.png | |||
BeanstalkWaySub7.png | |||
BeanstalkWaySub8.png | |||
Spideraticus Entrance.png | |||
Red Brief J Flame.png | |||
Sparkle Land Exterior.png | |||
Sparkle Land Interior.png | |||
MirrorMansion.png | |||
Terrible Portrait.png | |||
WheelMice.png | |||
NinjaCrow.png | |||
MirrorMansionUnithornsLair.png | |||
MirrorMansionSub1.png | |||
MirrorMansionSub2.png | |||
MirrorMansionSub3.png | |||
MirrorMansionSub4.png | |||
MirrorMansionSub5.png | |||
MirrorMansionSub6.png | |||
MirrorMansionSub7.png | |||
MirrorMansionSub8.png | |||
Mean Emcee Entrance.png | |||
PecanSands.png | |||
PecanSandsTreasure.png | |||
WeathervaneWarioWorld.png | |||
Wario World OrangePecan-GemBodied.png | |||
Wario World Blue Pecan Gem Bodied.png | |||
StoneColdStatue.png | |||
PecanSandsBattleRing.png | |||
FlyingShovels.png | |||
PecanSandsUnithornsLair.png | |||
PecanSandsSub1.png | |||
PecanSandsSub2.png | |||
PecanSandsSub3.png | |||
PecanSandsSub4.png | |||
PecanSandsSub5.png | |||
PecanSandsSub6.png | |||
PecanSandsSub7.png | |||
PecanSandsSub8.png | |||
IronsiderBattle.png | |||
Captain Skull Intro.png | |||
Black Chest.png | |||
Treasure Square Destroyed.png | |||
Black Jewel Treasure Square.png | |||
Spriteling Wario.png | |||
Spritelings Bad Ending.png | |||
File:Spritelings Good Ending.png | |||
Wario World Spriteling Dance.png | |||
</gallery> | |||
===Endings=== | |||
<gallery> | |||
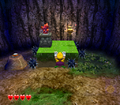
Tent Ending.png|Worst ending: Wario is shown sitting on his throne in a dark forest in front of a campfire next to a tent. | |||
Wooden Ending.png|Bad ending: Wario is shown sitting on his throne inside a wooden fort. | |||
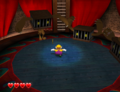
Stone Ending.png|Mediocre ending: Wario is shown sitting on his throne in a stone castle. | |||
Silver Ending.png|Okay ending: Wario is shown sitting on his throne in a silver castle. | |||
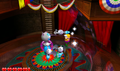
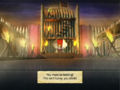
Golden Ending.png|Good ending: Wario is shown sitting on his throne in a golden castle. | |||
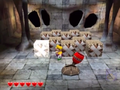
Best Ending.png|Best ending: Wario is shown sitting on his throne in a golden castle surrounded by lots of treasure. | |||
</gallery> | </gallery> | ||
== | ==In-game models== | ||
<gallery> | <gallery> | ||
Magon Model.png|[[Magon]] from [[Excitement Central]] | |||
Ninja Crow Model.png|[[Ninja Crow]] | |||
Terrible Portrait Model.png|[[Terrible Portrait]] | |||
Greenfist.png|[[Greenfist]] | Greenfist.png|[[Greenfist]] | ||
Scythe-armed Monster Model.png|[[Sandworm]] | |||
Dinomighty.png|[[DinoMighty]] | Dinomighty.png|[[DinoMighty]] | ||
Brawl Doll.png|[[Brawl Doll]] | Brawl Doll.png|[[Brawl Doll]] | ||
| Line 61: | Line 245: | ||
Dual Dragons.png|[[Dual Dragon]] | Dual Dragons.png|[[Dual Dragon]] | ||
Winter Windster.png|[[Winter Windster]] | Winter Windster.png|[[Winter Windster]] | ||
Spideraticus | Spideraticus Model.png|[[Spideraticus]] | ||
Mean Emcee.png|[[Mean Emcee]] | Mean Emcee.png|[[Mean Emcee]] | ||
Ironsider.png|[[Ironsider]] | Ironsider.png|[[Ironsider]] | ||
Captain Skull.png|[[Captain Skull]] | Captain Skull.png|[[Captain Skull]] | ||
</gallery> | |||
==Data-rendered models== | |||
<gallery> | |||
WarioWorldWarioModel.png|[[Wario]] | |||
WarioWorldFattingtonModel.png|[[Fattington]] | |||
</gallery> | </gallery> | ||
| Line 70: | Line 260: | ||
<gallery heights="170"> | <gallery heights="170"> | ||
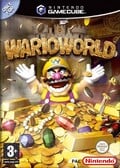
Wario World game cover.jpg|North American box art | Wario World game cover.jpg|North American box art | ||
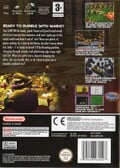
Wario World Players Choice game cover.jpg|[[Player's Choice]] | Wario World box art back.jpg|North American box art (back) | ||
Wario World Players Choice game cover.jpg|North American box art ([[Player's Choice]]) | |||
Wario World Box CAN.jpg|Canadian box art | |||
Player's Choice Wario World Box CAN.jpg|Canadian box art (Player's Choice) | |||
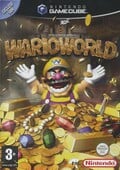
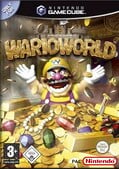
Wario World Box EU.jpg|European box art | |||
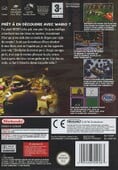
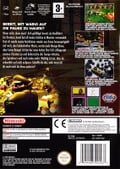
Wario World Box EU (back).jpg|European box art (back) | |||
Wario World Box FR.jpg|French box art | |||
Wario World Box FR (back).jpg|French box art (back) | |||
Wario World Box DE.jpg|German box art | |||
Wario World Box DE (back).jpg|German box art (back) | |||
Wario World Box AU.jpg|Australian box art | |||
Wario World Back AU.jpg|Australian box art (back) | |||
Wario World JP game cover.png|Japanese box art | Wario World JP game cover.png|Japanese box art | ||
Wario World Japan box art back.jpg|Japanese box art (back) | |||
Wario World Preliminary Box NA.jpg|Preliminary North American box art | |||
</gallery> | </gallery> | ||
== | ==Miscellaneous== | ||
<gallery> | <gallery widths=180> | ||
Prima Guide | Wario World print ad.jpg|North American print ad | ||
Wario World Print ad BR.jpg|Brazilian print ad | |||
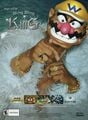
Wario World Player's Guide.jpg|[[Nintendo Power]] Player's Guide | |||
Prima Guide Wario World.jpg|[[Prima Games]] official guide | |||
Powerful Wario Game 2004.jpg|"Powerful Wario Game 2004" sticker | |||
</gallery> | </gallery> | ||
{{Galleries}} | {{Galleries}} | ||
{{Wario World}} | |||
[[Category:Galleries]] | |||
[[Category:Wario World|*]] | [[Category:Wario World|*]] | ||
[[de:Wario World/Galerie]] | |||
Latest revision as of 23:58, November 22, 2024
This is a gallery of images for the game Wario World.
Logos[edit]
Logo (without castle backing)
Logo (with castle backing)
Japanese logo
Japanese logo as seen on the package
In-game logo


Artwork[edit]
Wario[edit]
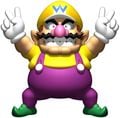
Wario
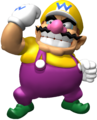
Flexing

Lifting
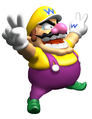
Posing
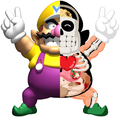
Drawing of his body
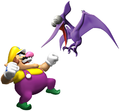
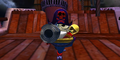
Fighting a Cractyl
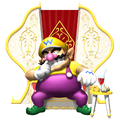
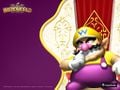
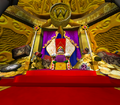
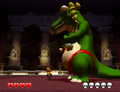
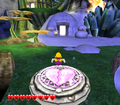
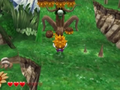
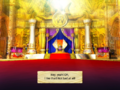
Wario on his throne


Enemies and Bosses[edit]


Other[edit]
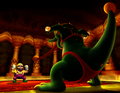
DinoMighty boss battle
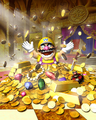
Art from box cover
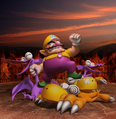
Wario and his defeated enemies
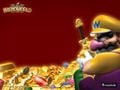
Wallpaper featuring Wario
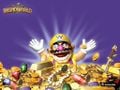
Wallpaper featuring Wario
Wallpaper featuring Wario
Wallpaper featuring Wario

Wallpaper featuring a Spriteling
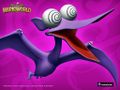
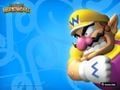
Wallpaper featuring a Cractyl
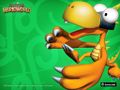
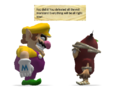
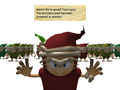
Wallpaper featuring a Magon
Wallpaper featuring Wario


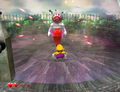
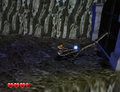
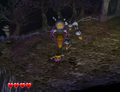
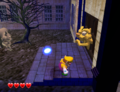
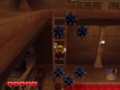
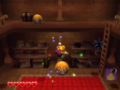
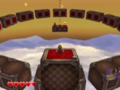
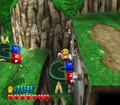
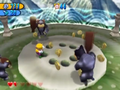
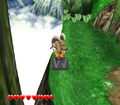
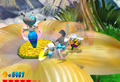
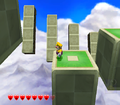
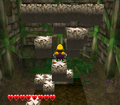
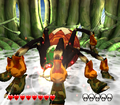
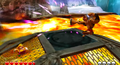
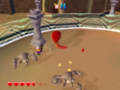
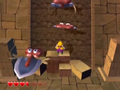
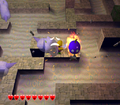
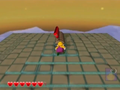
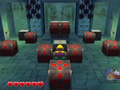
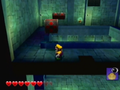
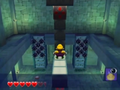
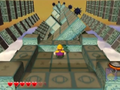
Screenshots[edit]
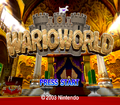
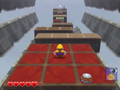
Title screen


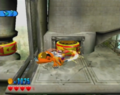


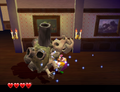

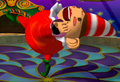
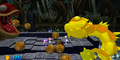
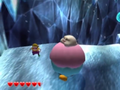
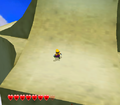
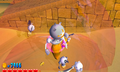
A Fattington


Endings[edit]
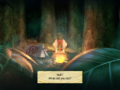
Worst ending: Wario is shown sitting on his throne in a dark forest in front of a campfire next to a tent.
Bad ending: Wario is shown sitting on his throne inside a wooden fort.
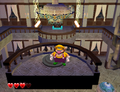
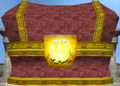
Mediocre ending: Wario is shown sitting on his throne in a stone castle.
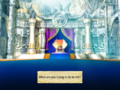
Okay ending: Wario is shown sitting on his throne in a silver castle.
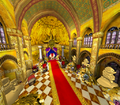
Good ending: Wario is shown sitting on his throne in a golden castle.
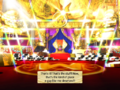
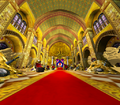
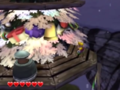
Best ending: Wario is shown sitting on his throne in a golden castle surrounded by lots of treasure.


In-game models[edit]
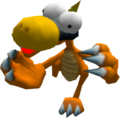
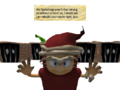
Magon from Excitement Central


Data-rendered models[edit]


Box art[edit]
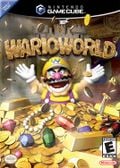
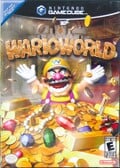
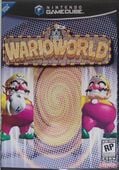
North American box art
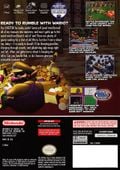
North American box art (back)
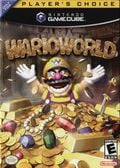
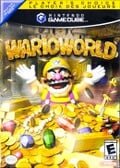
North American box art (Player's Choice)
Canadian box art
Canadian box art (Player's Choice)
European box art
European box art (back)
French box art
French box art (back)
German box art
German box art (back)
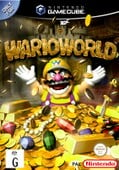
Australian box art
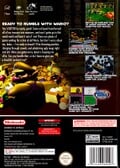
Australian box art (back)
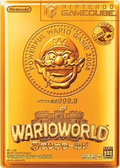
Japanese box art
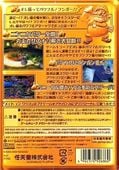
Japanese box art (back)
Preliminary North American box art


.jpg)

.jpg)

.jpg)


Miscellaneous[edit]
North American print ad
Brazilian print ad
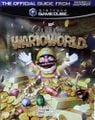
Nintendo Power Player's Guide
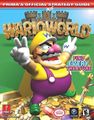
Prima Games official guide
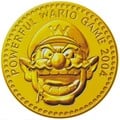
"Powerful Wario Game 2004" sticker


| Wario World | ||
|---|---|---|
| Major characters | Wario • Black Jewel | |
| Moves | Corkscrew Conk • Dash Attack • Ground Pound • Hyper Suction • Jump • Mega Toss • Piledriver • Punch • Wild Swing-Ding | |
| Bosses | Level bosses | Greenfist • Sandworm • Brawl Doll • Clown-a-Round • Winter Windster • Spideraticus • Mean Emcee • Ironsider |
| World bosses | DinoMighty • Dual Dragon • Red-Brief J • Captain Skull | |
| Treasure Square | Excitement Central | Greenhorn Forest • Greenhorn Ruins • DinoMighty's Showdown |
| Spooktastic World | Horror Manor • Wonky Circus • Dual Dragon's Showdown | |
| Thrillsville | Shivering Mountains • Beanstalk Way • Red-Brief J's Showdown | |
| Sparkle Land | Mirror Mansion • Pecan Sands • Captain Skull's Showdown | |
| Other locations | Unithorn's Lair • Wario Castle | |
| Objects | Collectibles | Coin • Garlic • Gold Statue • Huge Treasure Chest Key • Red diamond • Spriteling • Treasure |
| Obstacles | Clown missile • Cog • Cyclone Generator • Drop Block • Missile cannon | |
| Miscellaneous | Arrow Block • Barrel • Battle Ring • Bomb • Bunny Spring • ByeBye Balloon • Chain • Chain-Link • Column • Crate • Escape Spring • Garlic Dispenser • Glue Globe • Marshmallow Block • Rock Block • Spiked ball • Statue • Stone Doohickey • Swirly Slab • Swirly Spinner • Trapdoor • Treasure button • Treasure chest • Wooden chest | |
| Enemies | Angler Mangler • Ankiron • Barrel Buster • Big Bone-Fist • Big Scorper • Bone Cractyl • Cage Beast • Circus Ankiron • Clown • Club Mummy • Clubosaur • Cobra • Cractyl • Crystal Creature • Crystal Entity • Door Spirit • Electric Clown Fence • Elephant • Enemy generator • Fattington • Flying Spade • Freeze Cannon • Gatorbaby • Grizzly • Hawk • Haipō • Hōhō • Ice Ankiron • Icicle Mite • Jokey Ship • Laser Jigglefish • Magician • Magon • Masked Clubber • Monster doll • Monstrous Magnet • Mouse • Mummy • Mummy Ankiron • Ninja Crow • Old Red-Mug • Pigeon • Polar Bear • Ram • Rhino Ankiron • Silver Door Spirit • Skeletal Ankiron • Skelosaur • Sled Creature • Snake charmer • Snow Bomber • Snowman • Stingray • Stone-Cold Statue • Stuffed Ankiron • Swordfish • Terrible Portrait • Tree Freak • Tulipatooie • Turtle • Unithorn • Wind Winder • Witch • Wolf • Zombie Magon | |