Dozing Sands: Difference between revisions
m (Robot: Removing template: BoxTop) |
Technetium (talk | contribs) mNo edit summary |
||
| (27 intermediate revisions by 16 users not shown) | |||
| Line 1: | Line 1: | ||
{{ | {{location infobox | ||
| | |title=Dozing Sands | ||
|image=MLDT - DozingSands.png | |image=[[File:MLDT - DozingSands.png|250px]] | ||
| | |greater_location=[[Pi'illo Island]] | ||
| | |||
|inhabitants=[[Brock]]s, [[Shelltop]]s, [[Flounderflage]]s, [[Sandoon]]s, [[Caccac]]s, [[Torkscrew]], [[Virus]]es, [[Bandit]]s | |inhabitants=[[Brock]]s, [[Shelltop]]s, [[Flounderflage]]s, [[Sandoon]]s, [[Caccac]]s, [[Torkscrew]], [[Virus]]es, [[Bandit]]s | ||
|first_appearance=''[[Mario & Luigi: Dream Team]]'' ([[List of games by date#2013|2013]]) | |first_appearance=''[[Mario & Luigi: Dream Team]]'' ([[List of games by date#2013|2013]]) | ||
}}{{M& | }}{{M&LDT map}} | ||
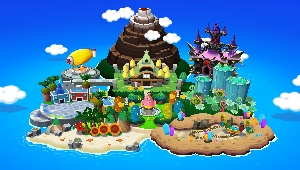
'''Dozing Sands''' is the desert area that appears in ''[[Mario & Luigi: Dream Team]]''. On [[Pi'illo Island]], it is on the bottom right corner. Many [[Shelltop]]s here mine with their boss, [[Britta]], in order to turn the area into a tourist attraction. The name is a pun on dozing off to sleep and the bulldozer (the area is a construction site). | '''Dozing Sands''' is the desert area that appears in ''[[Mario & Luigi: Dream Team]]''. On [[Pi'illo Island]], it is on the bottom right corner. Many [[Shelltop]]s here mine with their boss, [[Britta]], in order to turn the area into a tourist attraction. The name is a pun on "dozing off to sleep" and the "bulldozer" (the area is a construction site). | ||
==Story== | ==Story== | ||
[[Mario]] and [[Luigi]] head here after [[Antasma]] and [[Bowser]] say they will take the [[Dream Stone]] and make it grant their wishes. The Dream Stone is supposedly held here in Dozing Sands. Mario and Luigi learn that they must free the [[Pi'illo|Deco Pi'illos]] from their respective dream worlds in order to progress up the large sand-flow where the Dream Stone may possibly be. After making their way up there, Mario and Luigi save Britta when she | [[Mario]] and [[Luigi]] head here after [[Antasma]] and [[Bowser]] say they will take the [[Dream Stone]] and make it grant their wishes. The Dream Stone is supposedly held here in Dozing Sands. Mario and Luigi learn that they must free the [[Pi'illo|Deco Pi'illos]] from their respective dream worlds in order to progress up the large sand-flow where the Dream Stone may possibly be. After making their way up there, Mario and Luigi save Britta when she is attacked by [[Torkscrew]] by defeating him. Afterwards, they find out that the Dream Stone was already stolen. The Bros. use the [[Dreampoint]] where the Dream Stone was and enter [[Dreamy Dozing Sands]] to ask the [[Dream Stone's spirit]] about the location of the Dream Stone. | ||
==Enemies== | ==Enemies== | ||
===First visit=== | |||
<gallery> | |||
Flounderflage.png|[[Flounderflage]]s | |||
SandoonMLDT.png|[[Sandoon]]s | |||
CalmCaccac.png|[[Caccac]]s | |||
Torkscrew.png|[[Torkscrew]] (boss) | |||
</gallery> | |||
===Path to the Dozing Matress=== | |||
<gallery> | |||
MLDT Virus.png|[[Virus]]es | |||
M&L4Bandit.png|[[Bandit]]s | |||
Shy guy airtub.png|[[Shy Guy Airtub]]s (background enemy) | |||
M&LDT Shy Guy.png|[[Shy Guy]]s | |||
</gallery> | |||
==Pi'illo locations== | |||
{|border=1 cellpadding=2 style="text-align: center; border-collapse: collapse; border: 1px solid black; width:100%" | |||
! colspan="4" style="background:rgb(249,255,51); height:2em" | [[Dozing Sands]] – 11 Pi'illos (5 Deco Pi'illos, 6 Pink Pi'illos) | |||
|-style="background:rgb(249,255,51); height:2em" | |||
!Location | |||
!Necessity | |||
!Type | |||
!Screenshot | |||
|- | |||
|This Pi'illo is found in the area where Mario and Luigi learn the Mini Mario and Mole Mario techniques, near the workers who teach the Bros. said techniques. | |||
|Required | |||
|[[File:DecoPi'illo.png]]<br>Deco Pi'illo | |||
|[[File:M&LDT Dozing Sands Pi'illo 1.png|512px]] | |||
|- | |||
|This Pi'illo is found automatically (to the point its Dream World is entered) in the entrance to the second Drilldigger section, under a rock beside the north-western reverse switch. | |||
|Required | |||
|[[File:DecoPi'illo.png]]<br>Deco Pi'illo | |||
|[[File:M&LDT Dozing Sands Pi'illo 2.png|512px]] | |||
|- | |||
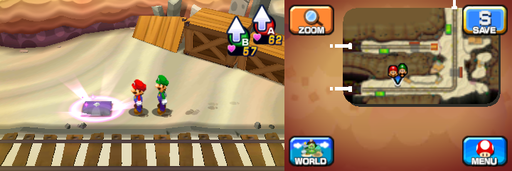
|This Pi'illo is found on the larger side of the area with the red panel in the second Drilldigger section, to the slight east of the south-west reverse switch under a rock. | |||
|Required | |||
|[[File:DecoPi'illo.png]]<br>Deco Pi'illo | |||
|[[File:M&LDT Dozing Sands Pi'illo 3.png|512px]] | |||
|- | |||
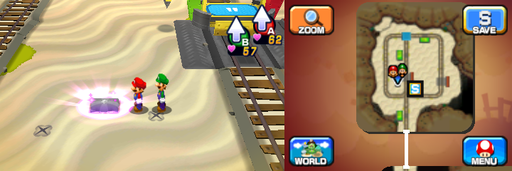
|This Pi'illo is found in the area with the square-shaped track, near the south-west corner under a rock. | |||
|Required | |||
|[[File:DecoPi'illo.png]]<br>Deco Pi'illo | |||
|[[File:M&LDT Dozing Sands Pi'illo 4.png|512px]] | |||
|- | |||
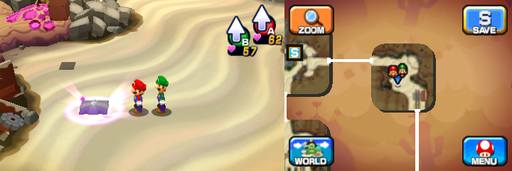
|This Pi'illo is found (after being dropped by Torkscrew) in the area to the east of the large sand flow, in the south-west by a block. | |||
|Required | |||
|[[File:DecoPi'illo.png]]<br>Deco Pi'illo | |||
|[[File:M&LDT Dozing Sands Pi'illo 5.png|512px]] | |||
|- | |||
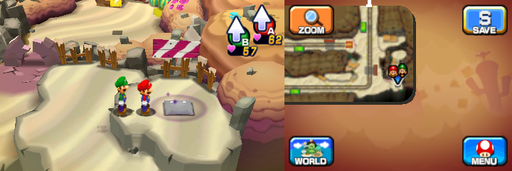
|This Pi'illo is found on the larger side of the area with the red panel in the second Drilldigger section, to the far south-east. | |||
|Optional | |||
|[[File:Pi'illoSprite.png]]<br>Pink Pi'illo | |||
|[[File:M&LDT Dozing Sands Pi'illo 6.png|512px]] | |||
|- | |||
|This Pi'illo is found in the area to the west of the one with the red panel in the second Drilldigger section, in the far south-west. | |||
|Optional | |||
|[[File:Pi'illoSprite.png]]<br>Pink Pi'illo | |||
|[[File:M&LDT Dozing Sands Pi'illo 7.png|512px]] | |||
|- | |||
|This Pi'illo is found to the east of the entrance to the second Drilldigger section, in the far north-east. | |||
|Optional | |||
|[[File:Pi'illoSprite.png]]<br>Pink Pi'illo | |||
|[[File:M&LDT Dozing Sands Pi'illo 8.png|512px]] | |||
|- | |||
|This Pi'illo is found on the eastern half of the area with the Badge Shop, right in the south-east. | |||
|Optional | |||
|[[File:Pi'illoSprite.png]]<br>Pink Pi'illo | |||
|[[File:M&LDT Dozing Sands Pi'illo 9.png|512px]] | |||
|- | |||
|This Pi'illo is found in the first cave area, in the north-east on the higher ground. | |||
|Optional | |||
|[[File:Pi'illoSprite.png]]<br>Pink Pi'illo | |||
|[[File:M&LDT Dozing Sands Pi'illo 10.png|512px]] | |||
|- | |||
|This Pi'illo is found in the area to the west of the area with the Hinterland Warp Pipe, in the north-east on the highest level of ground there. | |||
|Optional | |||
|[[File:Pi'illoSprite.png]]<br>Pink Pi'illo | |||
|[[File:M&LDT Dozing Sands Pi'illo 11.png|512px]] | |||
|} | |||
==Beanhole locations== | |||
{|border=1 cellpadding=2 style="text-align: center; border-collapse: collapse; border: 1px solid black; width:100%" | |||
!colspan="3"style="background:rgb(249,255,51); height:2em"|[[Dozing Sands]] – 32 Beans (5 Heart Beans, 6 Bros. Beans, 4 Power Beans, 4 Defense Beans, 6 Speed Beans, 7 Stache Beans) | |||
|-style="background:rgb(249,255,51); height:2em" | |||
!Location | |||
!Type | |||
!Screenshot | |||
|- | |||
|As the only Bean mandatory to complete the game, this Bean is found near the workers who teach the Bros. the Mole Mario and Small Mario techniques. | |||
|Heart | |||
|[[File:M&LDT Dozing Sands 1.png|512px]] | |||
|- | |||
|In the area where the player learns the Mole Mario and Small Mario techniques, this Bean is found to the slight south of the ''Days without a sand-flow accident'' sign. | |||
|Defense | |||
|[[File:M&LDT Dozing Sands 2.png|512px]] | |||
|- | |||
|In the area with the Badge Shop, this Bean is found in the far north-east in a small pit. | |||
|Speed | |||
|[[File:M&LDT Dozing Sands 3.png|512px]] | |||
|- | |||
|In the area west of the area with the Badge Shop, this Bean is found in a brown container of sand near the eastern exit. | |||
|Stache | |||
|[[File:M&LDT Dozing Sands 4.png|512px]] | |||
|- | |||
|In the area with the Item & Gear Shop and where a Warp Pipe is, this Bean is found to the direct south of the shop, surrounded by some darker grass. | |||
|Power | |||
|[[File:M&LDT Dozing Sands 5.png|512px]] | |||
|- | |||
|In the area with the large sand-flow, this Bean is found in the far south-east, first accessible by going around and entering the area from the east. | |||
|Heart | |||
|[[File:M&LDT Dozing Sands 6.png|512px]] | |||
|- | |||
|In the first Drilldigger section, this Bean is found to the west of the track. | |||
|Bros. | |||
|[[File:M&LDT Dozing Sands 7.png|512px]] | |||
|- | |||
|In the first Drilldigger section, this Bean is found to the east of the track. | |||
|Speed | |||
|[[File:M&LDT Dozing Sands 8.png|512px]] | |||
|- | |||
|In the bordered up half of the Drilldigger area with the red panel, this Bean is found to the slight west of the nearby station. | |||
|Defense | |||
|[[File:M&LDT Dozing Sands 9.png|512px]] | |||
|- | |||
|In the area with a square-shaped track accessed through use of the red panel, these 2 Beans are found next to the Deco Pi'illo. Power Bean is to the very slight south-west of it, Bros. Bean is to the very slight east of it. | |||
|Power and Bros. | |||
|[[File:M&LDT Dozing Sands 10.png|512px]] | |||
|- | |||
|In the area with a square-shaped track accessed through use of the red panel, this Bean is found in the far southwest of the area, near some rubble. | |||
|Defense | |||
|[[File:M&LDT Dozing Sands 11.png|512px]] | |||
|- | |||
|In the area with a square-shaped track accessed through use of the red panel, this Bean is found to the far east of the area, near some rubble. | |||
|Stache | |||
|[[File:M&LDT Dozing Sands 12.png|512px]] | |||
|- | |||
|In the area with a square-shaped track accessed through use of the red panel, this Bean is found on a slightly higher platform to the far northwest. | |||
|Stache | |||
|[[File:M&LDT Dozing Sands 13.png|512px]] | |||
|- | |||
|In the area with a square-shaped track accessed through use of the red panel, this Bean is found on the inner side of the south-east corner of the track. | |||
|Bros. | |||
|[[File:M&LDT Dozing Sands 14.png|512px]] | |||
|- | |||
|In the area with the L-shaped track accessed through use of the red panel, this Bean is found near the south-eastern exit. | |||
|Speed | |||
|[[File:M&LDT Dozing Sands 15.png|512px]] | |||
|- | |||
|In the area with the L-shaped track accessed through use of the red panel, this Bean is found obscured by some red rubble (broken cart) in the north-east of the area. | |||
|Stache | |||
|[[File:M&LDT Dozing Sands 16.png|512px]] | |||
|- | |||
|In the area to the west of the one with the red panel, this Bean is found by the south-east exit. | |||
|Power | |||
|[[File:M&LDT Dozing Sands 17.png|512px]] | |||
|- | |||
|In the area to the west of the one with the red panel, this Bean is found near the northern exit, close to a reverse switch. | |||
|Speed | |||
|[[File:M&LDT Dozing Sands 18.png|512px]] | |||
|- | |||
|In the area to the west of the main entrance to the second Drilldiggger area, this Bean is found in the far north-west on ground level. | |||
|Bros. | |||
|[[File:M&LDT Dozing Sands 19.png|512px]] | |||
|- | |||
|In the area to the west of the main entrance to the second Drilldiggger area, this Bean is found by a cactus near a reverse switch on some higher ground. | |||
|Heart | |||
|[[File:M&LDT Dozing Sands 20.png|512px]] | |||
|- | |||
|In the area to the west of the main entrance to the second Drilldiggger area, these 2 Beans are found near the north-east exit. The western of the two is Speed Bean and the eastern is Power Bean. | |||
|Speed and Power | |||
|[[File:M&LDT Dozing Sands 21.png|512px]] | |||
|- | |||
|In the entrance area of the second Drilldigger section where Britta usually is, this Bean is found to the slight south of a Pi'illo near the north-west exit. | |||
|Stache | |||
|[[File:M&LDT Dozing Sands 22.png|512px]] | |||
|- | |||
|In the entrance area of the second Drilldigger section where Britta usually is, this Bean is found near the southern reverse switch, on the side it is not on, by some plants. | |||
|Heart | |||
|[[File:M&LDT Dozing Sands 23.png|512px]] | |||
|- | |||
|In the entrance area of the second Drilldigger section where Britta usually is, this Bean is found by a Bros. Block in the north-east, on some raised ground. | |||
|Defense | |||
|[[File:M&LDT Dozing Sands 24.png|512px]] | |||
|- | |||
|In the area to the east of the main entrance to the second Drilldiggger area, this Bean is found in the far south-east. | |||
|Bros. | |||
|[[File:M&LDT Dozing Sands 25.png|512px]] | |||
|- | |||
|In the area where the Dream Point is, this Bean is found in the north, to the left of the structure. | |||
|Stache | |||
|[[File:M&LDT Dozing Sands 26.png|512px]] | |||
|- | |||
|In the first cave area, this Bean is found in the north, at the bottom of one of the gaps between the higher ground. | |||
|Bros. | |||
|[[File:M&LDT Dozing Sands 27.png|512px]] | |||
|- | |||
|In the area with the Hinterland Warp Pipe, this Bean is found in the north, on the easternmost of the three bits of higher ground. | |||
|Stache | |||
|[[File:M&LDT Dozing Sands 28.png|512px]] | |||
|- | |||
|In the area to the west of the area with the Hinterland Warp Pipe, this Bean is found in the north, to the south of a block on ground higher than any adjacent to it. | |||
|Speed | |||
|[[File:M&LDT Dozing Sands 29.png|512px]] | |||
|- | |||
|In the area to the west of the area with the Hinterland Warp Pipe, this Bean is found in the center of the area, in the western half of the ditch. | |||
|Heart | |||
|[[File:M&LDT Dozing Sands 30.png|512px]] | |||
|} | |||
==Block locations== | |||
{|border=1 cellpadding=2 style="text-align: center; border-collapse: collapse; border: 1px solid black; width:100%" | |||
!colspan="3"style="background:khaki; height:2em"|[[Dozing Sands]] - 72 Blocks (52 ?, 4 M, 2 L, 2 Bros., 1 Random, 10 Attack Piece, 1 Camera) | |||
|-style="background:khaki; height:2em" | |||
!Item/s | |||
!Location | |||
!Screenshot | |||
|- | |||
|[[File:MLPJ5Coin.png]][[File:MLPJ5Coin.png]][[File:MLPJ5Coin.png]][[File:MLPJ5Coin.png]][[File:MLPJ5Coin.png]][[File:MLPJ5Coin.png]][[File:MLPJ5Coin.png]][[File:MLPJ5Coin.png]][[File:MLPJ5Coin.png]][[File:MLPJ5Coin.png]]<br>10 Five Coins | |||
|In the first scene, at the start of the sand part. | |||
|[[File:Dozing Sands Block 1.png]] | |||
|- | |||
|[[File:M&LDT Shock Bomb.png]]<br>[[Shock Bomb]] | |||
|In the second scene, in the southeast. | |||
|[[File:Dozing Sands Block 2.png]] | |||
|- | |||
|[[File:MLDTAttackPiece.png]]<br>[[Fire_Flower#Mario_.26_Luigi:_Dream_Team|Fire Flower]] Attack Piece | |||
|Same scene, in the northwest. | |||
|[[File:Dozing Sands Block 3.png]] | |||
|- | |||
|[[File:MLPJ5Coin.png]]<br>Five Coin | |||
|Same scene, in the north. | |||
|[[File:Dozing Sands Block 4.png]] | |||
|- | |||
|[[File:MLPJ5Coin.png]]<br>Five Coin | |||
|In the third scene, in the southwest. | |||
|[[File:Dozing Sands Block 5.png]] | |||
|- | |||
|[[File:MLSS+BM10Coin.png]]<br>10-Coin | |||
|Same scene, in the northwest. | |||
|[[File:Dozing Sands Block 6.png]] | |||
|- | |||
|[[File:MLPJ5Coin.png]]<br>Five Coin | |||
|Same scene, in the northeast. | |||
|[[File:Dozing Sands Block 7.png]] | |||
|- | |||
|[[File:M&LDT Syrup.png]] [[File:MLDTAttackPiece.png]]<br>Supersyrup Jar, Fire Flower Attack Piece | |||
|In the fourth scene, in the southeast. | |||
|[[File:Dozing Sands Blocks 8-9.png]] | |||
|- | |||
|[[File:M&LDT Nut.png]]<br>[[Super_Nut#Mario_.26_Luigi:_Dream_Team|Super Nut]] | |||
|Same scene, near the entrance in the right part accessible only in Mini-Mario form. | |||
|[[File:Dozing Sands Block 10.png]] | |||
|- | |||
|[[File:MLSS+BM10Coin.png]]<br>10-Coin | |||
|Same scene, in the north, in the left part accessible only in Mini-Mario form. Required to progress. | |||
|[[File:Dozing Sands Block 11.png]] | |||
|- | |||
|[[File:MLSS+BM10Coin.png]]<br>10-Coin | |||
|Same scene, in the northwest, in the part accesible only by [[Dunk Hammer|Mole Mario]] technique. Required to progress. | |||
|[[File:Dozing Sands Block 12.png]] | |||
|- | |||
|[[File:MLPJ5Coin.png]][[File:MLPJ5Coin.png]][[File:MLPJ5Coin.png]][[File:MLPJ5Coin.png]][[File:MLPJ5Coin.png]][[File:MLPJ5Coin.png]][[File:MLPJ5Coin.png]][[File:MLPJ5Coin.png]][[File:MLPJ5Coin.png]][[File:MLPJ5Coin.png]]<br>10 Five Coins | |||
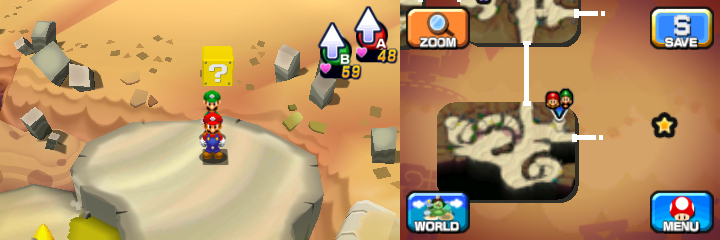
|'''NOTE''': Following 5 blocks are available only after returning from [[Dreamy Dozing Sands]] accessed by the first Deco Pi'illo.<br>Same scene, in the northeast. | |||
|[[File:Dozing Sands Block 13.png]] | |||
|- | |||
|[[File:MLPJ5Coin.png]]<br>Five Coin | |||
|In the fifth scene, in the south. | |||
|[[File:Dozing Sands Block 14.png]] | |||
|- | |||
|[[File:MLSSBMRefreshingHerb.png]]<br>Refreshing Herb | |||
|In the sixth scene, in the northwest. | |||
|[[File:Dozing Sands Block 15.png]] | |||
|- | |||
|[[File:DreamTeam1up.png]] [[File:MLDTAttackPiece.png]]<br>1-Up Mushroom, Fire Flower Attack Piece | |||
|Same scene, in the northeast. | |||
|[[File:Dozing Sands Blocks 16-17.png]] | |||
|- | |||
|[[File:M&LDT Shock Bomb.png]]<br>Shock Bomb | |||
|'''NOTE''': Following 33 blocks are available only after returning from Dreamy Dozing Sands accessed by the second Deco Pi'illo.<br>In the seventh scene, in the northwest. | |||
|[[File:Dozing Sands Block 18.png]] | |||
|- | |||
|[[File:MLSS+BM10Coin.png]]<br>10-Coin | |||
|Same scene, in the southeast. | |||
|[[File:Dozing Sands Block 19.png]] | |||
|- | |||
|[[File:MLDTAttackPiece.png]]<br>Fire Flower Attack Piece | |||
|In the eighth scene, in the middle-west. | |||
|[[File:Dozing Sands Block 20.png]] | |||
|- | |||
|[[File:M&LDT Candy.png]]<br>Candy | |||
|Same scene, in the south. | |||
|[[File:Dozing Sands Block 21.png]] | |||
|- | |||
|[[File:MLSS+BM10Coin.png]]<br>10-Coin | |||
|Same scene, in the southwest. | |||
|[[File:Dozing Sands Block 22.png]] | |||
|- | |||
|[[File:MLPJ5Coin.png]]<br>Five Coin | |||
|Same scene, at the bottom of the Mini-Mario section. | |||
|[[File:Dozing Sands Block 23.png]] | |||
|- | |||
|[[File:MLDTAttackPiece.png]]<br>Fire Flower Attack Piece | |||
|Same scene, at the top of the Mini-Mario section. | |||
|[[File:Dozing Sands Block 24.png]] | |||
|- | |||
|[[File:MLPJ5Coin.png]]<br>Five Coin | |||
|In the ninth scene, in the southeast. | |||
|[[File:Dozing Sands Block 25.png]] | |||
|- | |||
|[[File:MLDTAttackPiece.png]]<br>Fire Flower Attack Piece | |||
|Same scene, in the south. | |||
|[[File:Dozing Sands Block 26.png]] | |||
|- | |||
|[[File:MLSS+BM10Coin.png]]<br>10-Coin | |||
|Same scene, in the southwest. | |||
|[[File:Dozing Sands Block 27.png]] | |||
|- | |||
|[[File:MLSSBMRefreshingHerb.png]]<br>Refreshing Herb | |||
|Same scene, in the middle-west. | |||
|[[File:Dozing Sands Block 28.png]] | |||
|- | |||
|[[File:MLPJ5Coin.png]] [[File:M&LDT Syrup.png]]<br>Five Coin, Syrup Jar | |||
|Same scene, in the northeast. | |||
|[[File:Dozing Sands Blocks 29-30.png]] | |||
|- | |||
|[[File:Dream Team Hammer.png]]<br>Steady Hammer | |||
|In the eighth scene, in the part accesible only from the ninth scene, at the end. | |||
|[[File:Dozing Sands Block 31.png]] | |||
|- | |||
|[[File:MLPJ5Coin.png]]<br>Five Coin | |||
|In the tenth scene, in the northwest. | |||
|[[File:Dozing Sands Block 32.png]] | |||
|- | |||
|[[File:MLDTAttackPiece.png]]<br>Fire Flower Attack Piece | |||
|Same scene, right of the previous one. | |||
|[[File:Dozing Sands Block 33.png]] | |||
|- | |||
|[[File:MLPJ5Coin.png]][[File:MLPJ5Coin.png]][[File:MLPJ5Coin.png]][[File:MLPJ5Coin.png]][[File:MLPJ5Coin.png]][[File:MLPJ5Coin.png]][[File:MLPJ5Coin.png]][[File:MLPJ5Coin.png]][[File:MLPJ5Coin.png]][[File:MLPJ5Coin.png]]<br>10 Five Coins | |||
|Same scene, in the southeast. | |||
|[[File:Dozing Sands Block 34.png]] | |||
|- | |||
|[[File:MLPJ5Coin.png]][[File:MLPJ5Coin.png]][[File:MLPJ5Coin.png]][[File:MLPJ5Coin.png]][[File:MLPJ5Coin.png]][[File:MLPJ5Coin.png]][[File:MLPJ5Coin.png]][[File:MLPJ5Coin.png]][[File:MLPJ5Coin.png]][[File:MLPJ5Coin.png]]<br>10 Five Coins | |||
|In the scene southwest of the seventh scene accessible only by Mini-Mario, in the northwest. | |||
|[[File:Dozing Sands Block 35.png]] | |||
|- | |||
|[[File:MLSS+BM10Coin.png]]<br>10-Coin | |||
|Same scene, in the middle. | |||
|[[File:Dozing Sands Block 36.png]] | |||
|- | |||
|[[File:MLDTAttackPiece.png]]<br>Fire Flower Attack Piece | |||
|Same scene, in the southeast. | |||
|[[File:Dozing Sands Block 37.png]] | |||
|- | |||
|[[File:MLDTAttackPiece.png]]<br>Fire Flower Attack Piece | |||
|Same scene, in the west on the upper part. | |||
|[[File:Dozing Sands Block 38.png]] | |||
|- | |||
|[[File:M&LDT Shock Bomb.png]] [[File:M&LDT Boo Biscuit.png]]<br>Shock Bomb, [[Boo Biscuit]] | |||
|Same scene, in the southwest. | |||
|[[File:Dozing Sands Blocks 39-40.png]] | |||
|- | |||
|[[File:M&LDT Candy.png]]<br>Ultra Candy | |||
|In the seventh scene, in the Mini-Mario part, accessible from the previous scene. | |||
|[[File:Dozing Sands Block 41.png]] | |||
|- | |||
|[[File:M&LDT Nut.png]]<br>Super Nut | |||
|In the eleventh scene (west of the ninth scene), in the south. | |||
|[[File:Dozing Sands Block 42.png]] | |||
|- | |||
|[[File:MLPJ5Coin.png]] [[File:MLDTAttackPiece.png]]<br>Five Coin, Fire Flower Attack Piece | |||
|Same scene, in the north. | |||
|[[File:Dozing Sands Blocks 43-44.png]] | |||
|- | |||
|[[File:MLSS+BM10Coin.png]]<br>10-Coin | |||
|Same scene, in the southwest. | |||
|[[File:Dozing Sands Block 45.png]] | |||
|- | |||
|[[File:MLSS+BM10Coin.png]]<br>10-Coin | |||
|In the twelfth scene, in the northwest. | |||
|[[File:Dozing Sands Block 46.png]] | |||
|- | |||
|[[File:Dream Team Boots.png]]<br>Iron-Ball Boots | |||
|Same scene, in the north. | |||
|[[File:Dozing Sands Block 47.png]] | |||
|- | |||
|[[File:MLSS+BM10Coin.png]]<br>10-Coin | |||
|Same scene, in the middle. | |||
|[[File:Dozing Sands Block 48.png]] | |||
|- | |||
|[[File:DreamTeam1up.png]]<br>1-Up Mushroom | |||
|Same scene, in the northeast. | |||
|[[File:Dozing Sands Block 49.png]] | |||
|- | |||
|[[File:MLSSBMRefreshingHerb.png]]<br>Refreshing Herb | |||
|Same scene, in the southeast. | |||
|[[File:Dozing Sands Block 50.png]] | |||
|- | |||
|[[File:M&LDT Candy.png]]<br>Super Candy | |||
|'''NOTE''': Following 7 blocks are available only after returning from Dreamy Dozing Sands accessed by the fourth Deco Pi'illo.<br>In the thirteenth scene (east of the seventh scene), in the northwest. | |||
|[[File:Dozing Sands Block 51.png]] | |||
|- | |||
|[[File:MLPJ5Coin.png]][[File:MLPJ5Coin.png]][[File:MLPJ5Coin.png]][[File:MLPJ5Coin.png]][[File:MLPJ5Coin.png]][[File:MLPJ5Coin.png]][[File:MLPJ5Coin.png]][[File:MLPJ5Coin.png]][[File:MLPJ5Coin.png]][[File:MLPJ5Coin.png]]<br>10 Five Coins | |||
|Same scene, in the northwest. | |||
|[[File:Dozing Sands Block 52.png]] | |||
|- | |||
|[[File:MLPJ5Coin.png]][[File:MLPJ5Coin.png]][[File:MLPJ5Coin.png]][[File:MLPJ5Coin.png]][[File:MLPJ5Coin.png]][[File:MLPJ5Coin.png]][[File:MLPJ5Coin.png]][[File:MLPJ5Coin.png]][[File:MLPJ5Coin.png]][[File:MLPJ5Coin.png]]<br>10 Five Coins | |||
|In the seventh scene, in the northeast, accessible from the previous scene. | |||
|[[File:Dozing Sands Block 53.png]] | |||
|- | |||
|[[File:MLPJ5Coin.png]]<br>Five Coin | |||
|In the fourteenth scene, in the middle-west. | |||
|[[File:Dozing Sands Block 54.png]] | |||
|- | |||
|[[File:MLSS+BM10Coin.png]]<br>10-Coin | |||
|Same scene, in the northeast. | |||
|[[File:Dozing Sands Block 55.png]] | |||
|- | |||
|[[File:Dream Team Accessory.png]]<br>DEF Mush Jam | |||
|In the fifth scene, in the northeast, accessible from the previous scene. | |||
|[[File:Dozing Sands Block 56.png]] | |||
|- | |||
|[[File:M&LDT Syrup.png]]<br>Syrup Jar | |||
|In the third scene, in the southeast, accessible from fifteenth scene (the one with the first Dreampoint). | |||
|[[File:Dozing Sands Block 57.png]] | |||
|- | |||
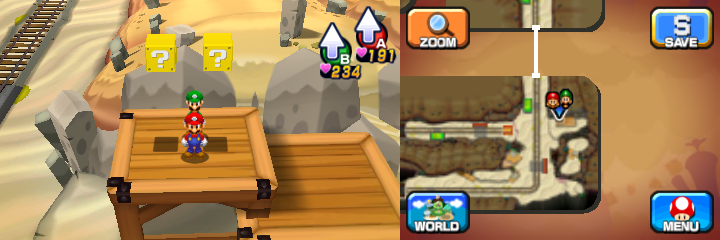
|[[File:MLSS+BM10Coin.png]][[File:MLSS+BM10Coin.png]][[File:MLSS+BM10Coin.png]][[File:MLSS+BM10Coin.png]][[File:MLSS+BM10Coin.png]][[File:MLSS+BM10Coin.png]][[File:MLSS+BM10Coin.png]][[File:MLSS+BM10Coin.png]][[File:MLSS+BM10Coin.png]][[File:MLSS+BM10Coin.png]] [[File:M&LDT Syrup.png]]<br>10 10-Coins, Ultrasyrup Jar | |||
|'''NOTE''': Following 15 blocks are available only after learning the Ball Hop during second Mount Pajamaja visit.<br>In the eighth scene, in the northeast. | |||
|[[File:Dozing Sands Blocks 58-59.png]] | |||
|- | |||
|[[File:M&LDT Candy.png]]<br>Ultra Candy | |||
|In the fifteenth scene, in the northeast. | |||
|[[File:Dozing Sands Block 60.png]] | |||
|- | |||
|[[File:M&LDT Candy.png]]<br>Ultra Candy | |||
|In the sixteenth scene, in the northwest. | |||
|[[File:Dozing Sands Block 61.png]] | |||
|- | |||
|[[File:MLPJ50Coin.png]][[File:MLPJ50Coin.png]][[File:MLPJ50Coin.png]][[File:MLPJ50Coin.png]][[File:MLPJ50Coin.png]][[File:MLPJ50Coin.png]][[File:MLPJ50Coin.png]][[File:MLPJ50Coin.png]][[File:MLPJ50Coin.png]][[File:MLPJ50Coin.png]]<br>10 50-Coins | |||
|Same scene, in the middle-east. | |||
|[[File:Dozing Sands Block 62.png]] | |||
|- | |||
|[[File:M&LDT Shot.png]]<br>Dozing Sands Shot | |||
|Same scene, in the northeast. | |||
|[[File:Dozing Sands Block 63.png]] | |||
|- | |||
|[[File:MLPJ50Coin.png]]<br>50-Coin | |||
|In the seventeenth scene, in the north. | |||
|[[File:Dozing Sands Block 64.png]] | |||
|- | |||
|[[File:M&LDT Mushroom.png]]<br>Ultra Mushroom | |||
|Same scene, in the southeast. | |||
|[[File:Dozing Sands Block 65.png]] | |||
|- | |||
|[[File:MLPJ50Coin.png]]<br>50-Coin | |||
|In the eighteenth scene, in the northwest. | |||
|[[File:Dozing Sands Block 66.png]] | |||
|- | |||
|[[File:MLPJ50Coin.png]]<br>50-Coin | |||
|Same scene, in the southeast. | |||
|[[File:Dozing Sands Block 67.png]] | |||
|- | |||
|[[File:DreamTeam1up.png]]<br>1-Up Deluxe | |||
|In the nineteenth scene (first underground scene), in the southeast. | |||
|[[File:Dozing Sands Block 68.png]] | |||
|- | |||
|[[File:M&LDT Nut.png]]<br>Ultra Nut | |||
|Same scene, in the middle. | |||
|[[File:Dozing Sands Block 69.png]] | |||
|- | |||
|[[File:MLPJ50Coin.png]][[File:MLPJ50Coin.png]][[File:MLPJ50Coin.png]][[File:MLPJ50Coin.png]][[File:MLPJ50Coin.png]][[File:MLPJ50Coin.png]][[File:MLPJ50Coin.png]][[File:MLPJ50Coin.png]][[File:MLPJ50Coin.png]][[File:MLPJ50Coin.png]]<br>10 50-Coins | |||
|Same scene, in the northeast. | |||
|[[File:Dozing Sands Block 70.png]] | |||
|- | |||
|[[File:MLSS+BM10Coin.png]] [[File:Dream Team Accessory.png]]<br>10-Coin, Bros. Ring | |||
|In the twentieth scene (second underground scene), at the end, left of the [[Dozing Mattress]] Dreampoint. | |||
|[[File:Dozing Sands Blocks 71-72.png]] | |||
|} | |||
==Names in other languages== | ==Names in other languages== | ||
{{ | {{foreign names | ||
|Jap=マドロミ砂漠 | |||
|JapR=Madoromi Sabaku | |||
|JapM=Doze Desert | |||
|SpaA=Desierto Sopor | |SpaA=Desierto Sopor | ||
|SpaAM=Doze Desert | |SpaAM=Doze Desert | ||
| Line 32: | Line 507: | ||
|GerM=Nap Desert | |GerM=Nap Desert | ||
|Ita=Sonnosabbie | |Ita=Sonnosabbie | ||
|ItaM=From " | |ItaM=From "sonno" (sleep) and "sabbia" (sand) | ||
|Kor=나르내 사막 | |Kor=나르내 사막 | ||
|KorR= | |KorR=Nareu'nae Samak | ||
|KorM=Drowsy Desert; | |KorM=Drowsy Desert; homophone of "나른해" (''nareunhae'', the phrase "I'm drowsy") | ||
|PorE=Deserto da Sonolência | |||
|PorEM=Sleepiness Desert | |||
}} | }} | ||
== | ==Trivia== | ||
*If the player returns to the area where the four Zeekeeper statues are, one of the workers will sing about working and his final words are 'down from [[Donut Plains]] to [[Jolly Roger Bay]]', referencing ''[[Super Mario World]]'' and ''[[Super Mario 64]]''. | *If the player returns to the area where the four Zeekeeper statues are, one of the workers will sing about working and his final words are 'down from [[Donut Plains]] to [[Jolly Roger Bay]]', referencing ''[[Super Mario World]]'' and ''[[Super Mario 64]]''. | ||
{{ | {{M&LDT}} | ||
[[Category:Mario & Luigi: Dream Team | [[Category:Mario & Luigi: Dream Team locations]] | ||
[[Category:Deserts]] | [[Category:Deserts]] | ||
[[it:Sonnosabbie]] | |||
Revision as of 13:55, November 19, 2024
| Dozing Sands | |
|---|---|
| |
| First appearance | Mario & Luigi: Dream Team (2013) |
| Greater location | Pi'illo Island |
| Inhabitants | Brocks, Shelltops, Flounderflages, Sandoons, Caccacs, Torkscrew, Viruses, Bandits |
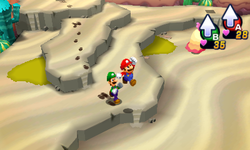
Dozing Sands is the desert area that appears in Mario & Luigi: Dream Team. On Pi'illo Island, it is on the bottom right corner. Many Shelltops here mine with their boss, Britta, in order to turn the area into a tourist attraction. The name is a pun on "dozing off to sleep" and the "bulldozer" (the area is a construction site).
Story
Mario and Luigi head here after Antasma and Bowser say they will take the Dream Stone and make it grant their wishes. The Dream Stone is supposedly held here in Dozing Sands. Mario and Luigi learn that they must free the Deco Pi'illos from their respective dream worlds in order to progress up the large sand-flow where the Dream Stone may possibly be. After making their way up there, Mario and Luigi save Britta when she is attacked by Torkscrew by defeating him. Afterwards, they find out that the Dream Stone was already stolen. The Bros. use the Dreampoint where the Dream Stone was and enter Dreamy Dozing Sands to ask the Dream Stone's spirit about the location of the Dream Stone.
Enemies
First visit
Torkscrew (boss)
Path to the Dozing Matress
Shy Guy Airtubs (background enemy)
Pi'illo locations
| Dozing Sands – 11 Pi'illos (5 Deco Pi'illos, 6 Pink Pi'illos) | |||
|---|---|---|---|
| Location | Necessity | Type | Screenshot |
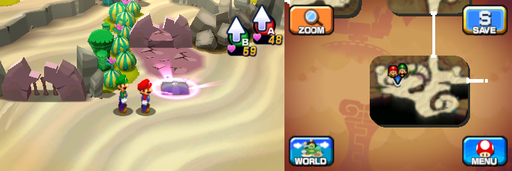
| This Pi'illo is found in the area where Mario and Luigi learn the Mini Mario and Mole Mario techniques, near the workers who teach the Bros. said techniques. | Required | Deco Pi'illo |
|
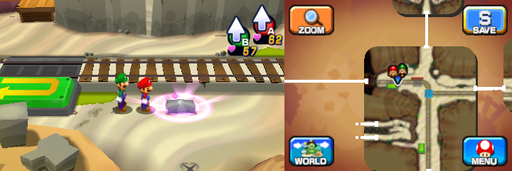
| This Pi'illo is found automatically (to the point its Dream World is entered) in the entrance to the second Drilldigger section, under a rock beside the north-western reverse switch. | Required | Deco Pi'illo |
|
| This Pi'illo is found on the larger side of the area with the red panel in the second Drilldigger section, to the slight east of the south-west reverse switch under a rock. | Required | Deco Pi'illo |
|
| This Pi'illo is found in the area with the square-shaped track, near the south-west corner under a rock. | Required | Deco Pi'illo |
|
| This Pi'illo is found (after being dropped by Torkscrew) in the area to the east of the large sand flow, in the south-west by a block. | Required | Deco Pi'illo |
|
| This Pi'illo is found on the larger side of the area with the red panel in the second Drilldigger section, to the far south-east. | Optional | Pink Pi'illo |
|
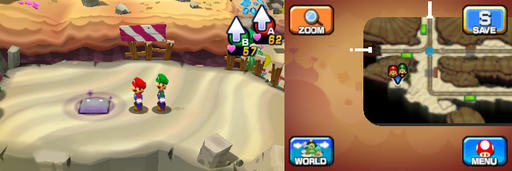
| This Pi'illo is found in the area to the west of the one with the red panel in the second Drilldigger section, in the far south-west. | Optional | Pink Pi'illo |
|
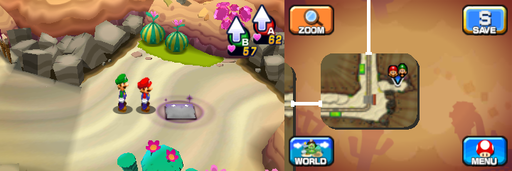
| This Pi'illo is found to the east of the entrance to the second Drilldigger section, in the far north-east. | Optional | Pink Pi'illo |
|
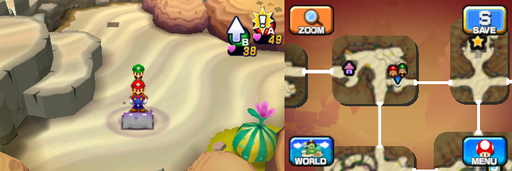
| This Pi'illo is found on the eastern half of the area with the Badge Shop, right in the south-east. | Optional | Pink Pi'illo |
|
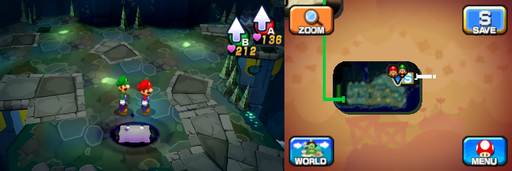
| This Pi'illo is found in the first cave area, in the north-east on the higher ground. | Optional | Pink Pi'illo |
|
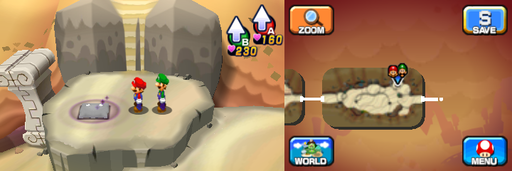
| This Pi'illo is found in the area to the west of the area with the Hinterland Warp Pipe, in the north-east on the highest level of ground there. | Optional | Pink Pi'illo |
|
Beanhole locations
| Dozing Sands – 32 Beans (5 Heart Beans, 6 Bros. Beans, 4 Power Beans, 4 Defense Beans, 6 Speed Beans, 7 Stache Beans) | ||
|---|---|---|
| Location | Type | Screenshot |
| As the only Bean mandatory to complete the game, this Bean is found near the workers who teach the Bros. the Mole Mario and Small Mario techniques. | Heart | 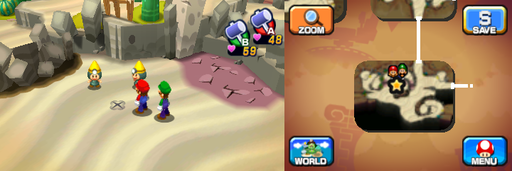
|
| In the area where the player learns the Mole Mario and Small Mario techniques, this Bean is found to the slight south of the Days without a sand-flow accident sign. | Defense | 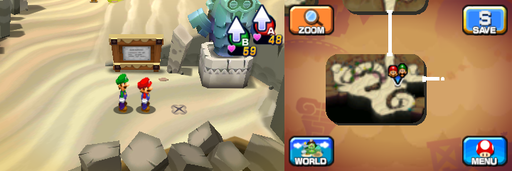
|
| In the area with the Badge Shop, this Bean is found in the far north-east in a small pit. | Speed | 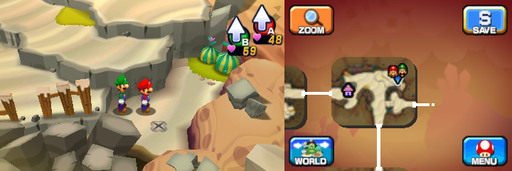
|
| In the area west of the area with the Badge Shop, this Bean is found in a brown container of sand near the eastern exit. | Stache | 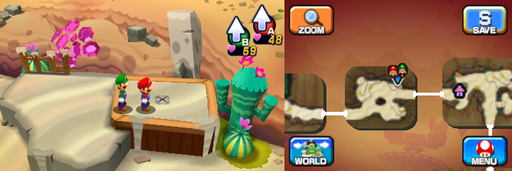
|
| In the area with the Item & Gear Shop and where a Warp Pipe is, this Bean is found to the direct south of the shop, surrounded by some darker grass. | Power | 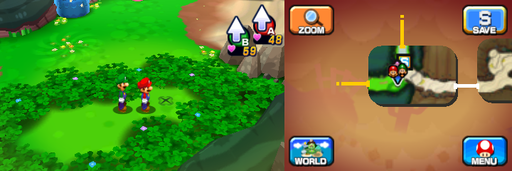
|
| In the area with the large sand-flow, this Bean is found in the far south-east, first accessible by going around and entering the area from the east. | Heart | 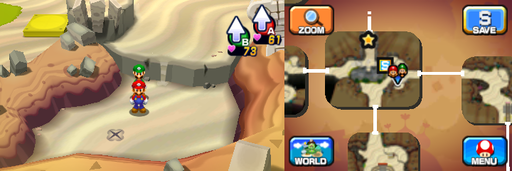
|
| In the first Drilldigger section, this Bean is found to the west of the track. | Bros. | 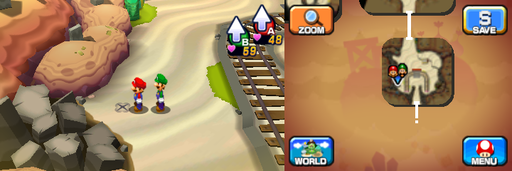
|
| In the first Drilldigger section, this Bean is found to the east of the track. | Speed | 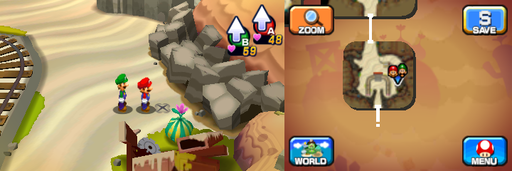
|
| In the bordered up half of the Drilldigger area with the red panel, this Bean is found to the slight west of the nearby station. | Defense | 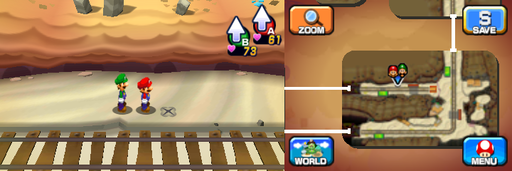
|
| In the area with a square-shaped track accessed through use of the red panel, these 2 Beans are found next to the Deco Pi'illo. Power Bean is to the very slight south-west of it, Bros. Bean is to the very slight east of it. | Power and Bros. | 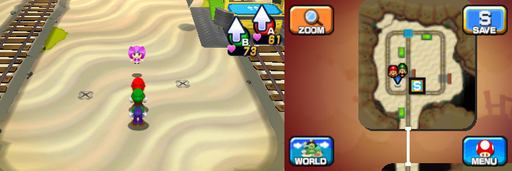
|
| In the area with a square-shaped track accessed through use of the red panel, this Bean is found in the far southwest of the area, near some rubble. | Defense | 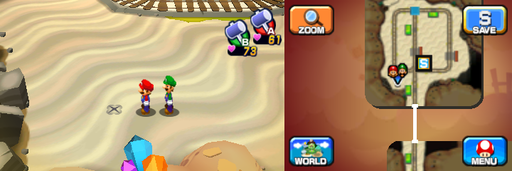
|
| In the area with a square-shaped track accessed through use of the red panel, this Bean is found to the far east of the area, near some rubble. | Stache | 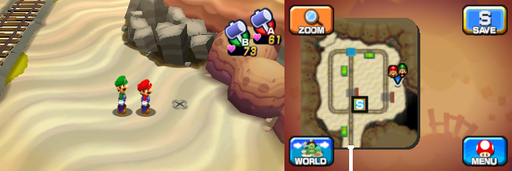
|
| In the area with a square-shaped track accessed through use of the red panel, this Bean is found on a slightly higher platform to the far northwest. | Stache | 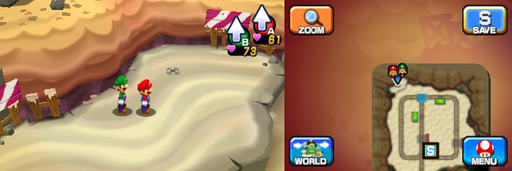
|
| In the area with a square-shaped track accessed through use of the red panel, this Bean is found on the inner side of the south-east corner of the track. | Bros. | 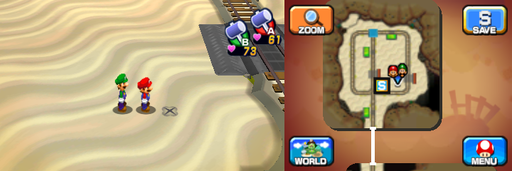
|
| In the area with the L-shaped track accessed through use of the red panel, this Bean is found near the south-eastern exit. | Speed | 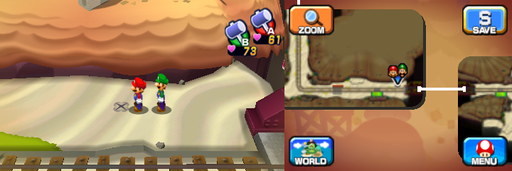
|
| In the area with the L-shaped track accessed through use of the red panel, this Bean is found obscured by some red rubble (broken cart) in the north-east of the area. | Stache | 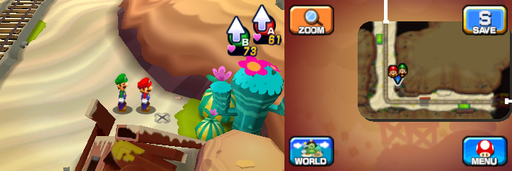
|
| In the area to the west of the one with the red panel, this Bean is found by the south-east exit. | Power | 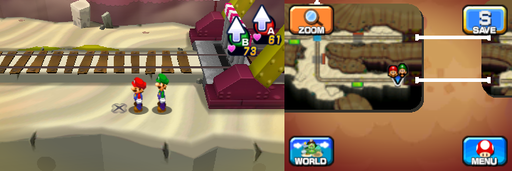
|
| In the area to the west of the one with the red panel, this Bean is found near the northern exit, close to a reverse switch. | Speed | 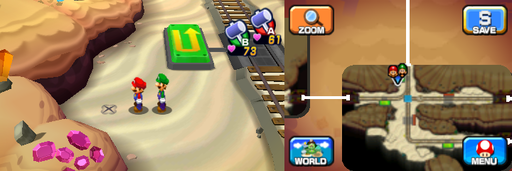
|
| In the area to the west of the main entrance to the second Drilldiggger area, this Bean is found in the far north-west on ground level. | Bros. | 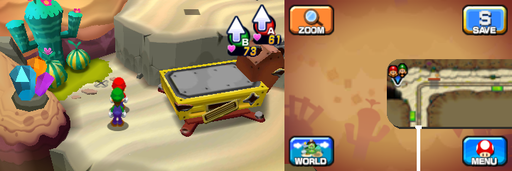
|
| In the area to the west of the main entrance to the second Drilldiggger area, this Bean is found by a cactus near a reverse switch on some higher ground. | Heart | 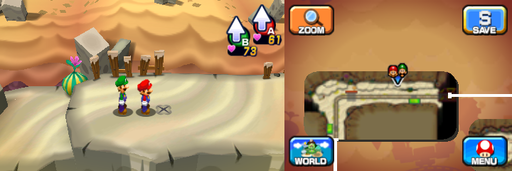
|
| In the area to the west of the main entrance to the second Drilldiggger area, these 2 Beans are found near the north-east exit. The western of the two is Speed Bean and the eastern is Power Bean. | Speed and Power | 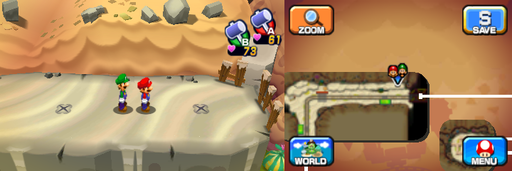
|
| In the entrance area of the second Drilldigger section where Britta usually is, this Bean is found to the slight south of a Pi'illo near the north-west exit. | Stache | 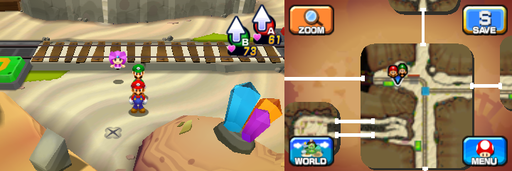
|
| In the entrance area of the second Drilldigger section where Britta usually is, this Bean is found near the southern reverse switch, on the side it is not on, by some plants. | Heart | 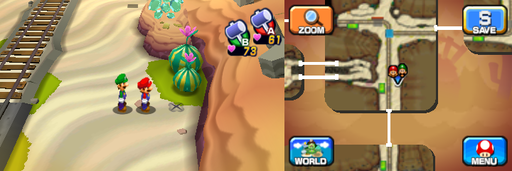
|
| In the entrance area of the second Drilldigger section where Britta usually is, this Bean is found by a Bros. Block in the north-east, on some raised ground. | Defense | 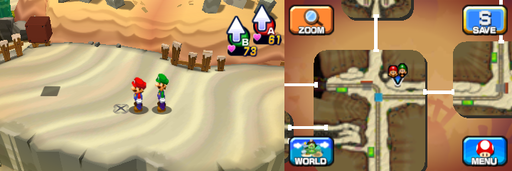
|
| In the area to the east of the main entrance to the second Drilldiggger area, this Bean is found in the far south-east. | Bros. | 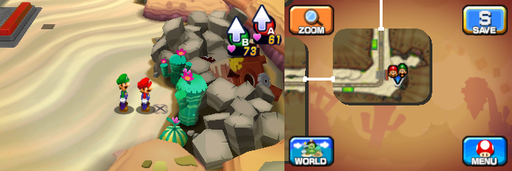
|
| In the area where the Dream Point is, this Bean is found in the north, to the left of the structure. | Stache | 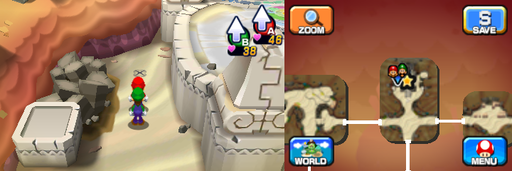
|
| In the first cave area, this Bean is found in the north, at the bottom of one of the gaps between the higher ground. | Bros. | 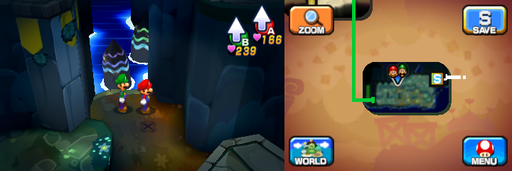
|
| In the area with the Hinterland Warp Pipe, this Bean is found in the north, on the easternmost of the three bits of higher ground. | Stache | 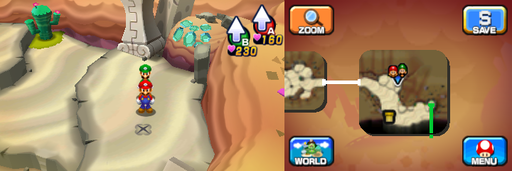
|
| In the area to the west of the area with the Hinterland Warp Pipe, this Bean is found in the north, to the south of a block on ground higher than any adjacent to it. | Speed | 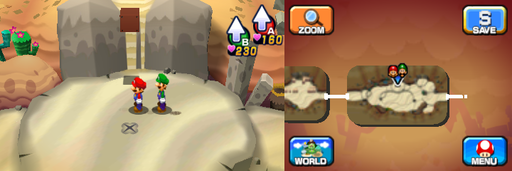
|
| In the area to the west of the area with the Hinterland Warp Pipe, this Bean is found in the center of the area, in the western half of the ditch. | Heart | 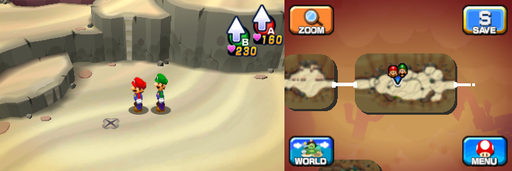
|
Block locations
| Dozing Sands - 72 Blocks (52 ?, 4 M, 2 L, 2 Bros., 1 Random, 10 Attack Piece, 1 Camera) | ||
|---|---|---|
| Item/s | Location | Screenshot |
10 Five Coins |
In the first scene, at the start of the sand part. | 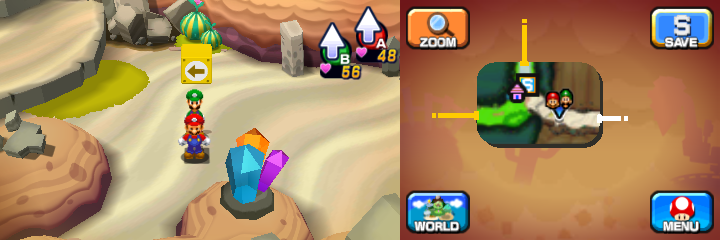
|
Shock Bomb |
In the second scene, in the southeast. | 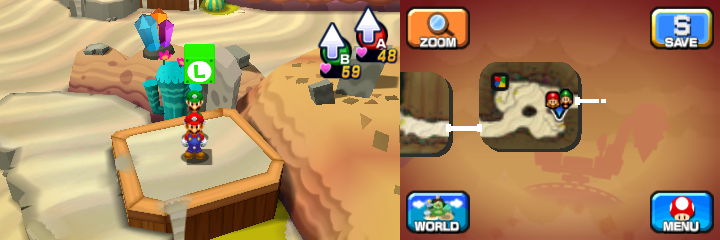
|
Fire Flower Attack Piece |
Same scene, in the northwest. | 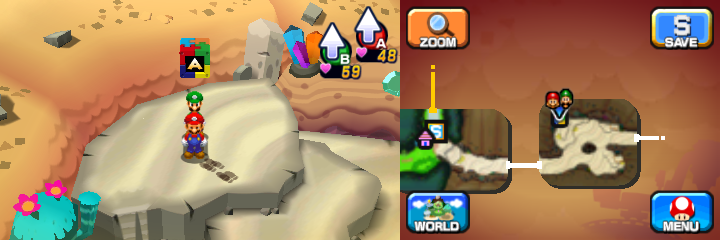
|
Five Coin |
Same scene, in the north. | 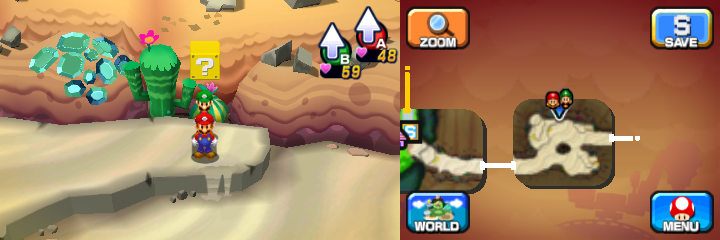
|
Five Coin |
In the third scene, in the southwest. | 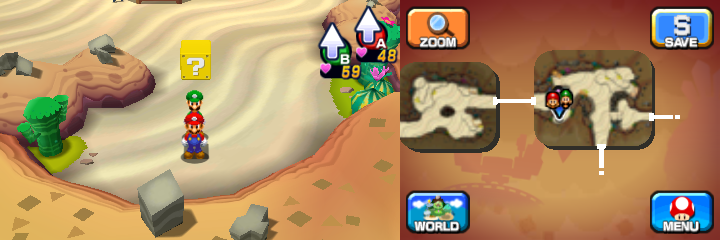
|
10-Coin |
Same scene, in the northwest. | 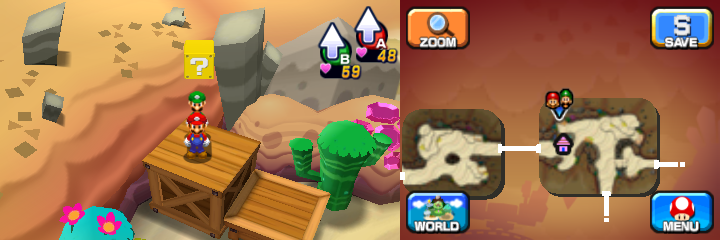
|
Five Coin |
Same scene, in the northeast. | 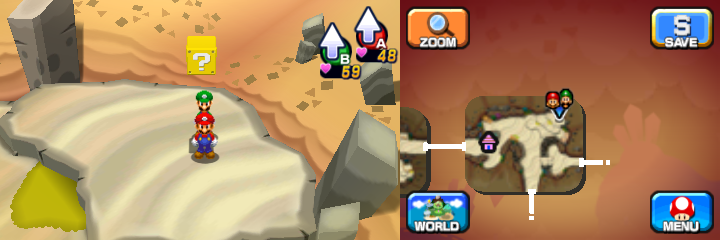
|
Supersyrup Jar, Fire Flower Attack Piece |
In the fourth scene, in the southeast. | 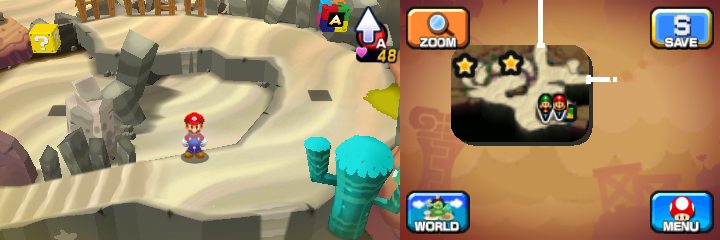
|
Super Nut |
Same scene, near the entrance in the right part accessible only in Mini-Mario form. | 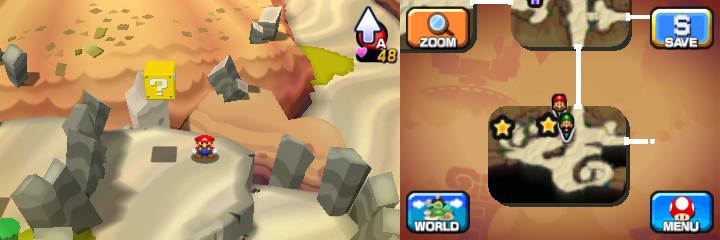
|
10-Coin |
Same scene, in the north, in the left part accessible only in Mini-Mario form. Required to progress. | 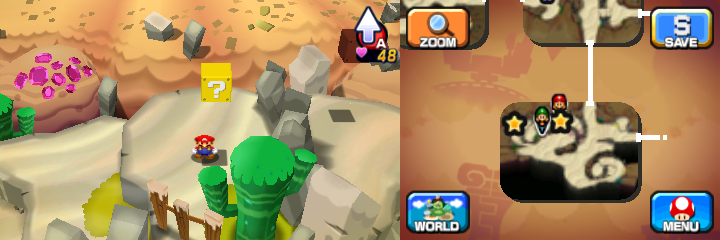
|
10-Coin |
Same scene, in the northwest, in the part accesible only by Mole Mario technique. Required to progress. | 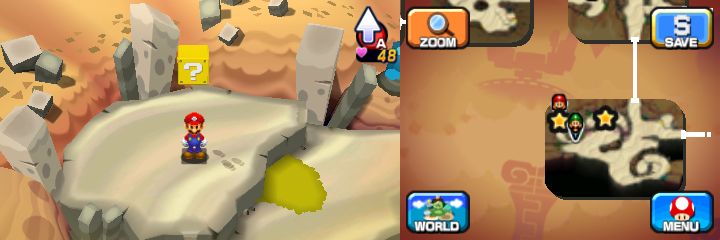
|
10 Five Coins |
NOTE: Following 5 blocks are available only after returning from Dreamy Dozing Sands accessed by the first Deco Pi'illo. Same scene, in the northeast. |
|
Five Coin |
In the fifth scene, in the south. | 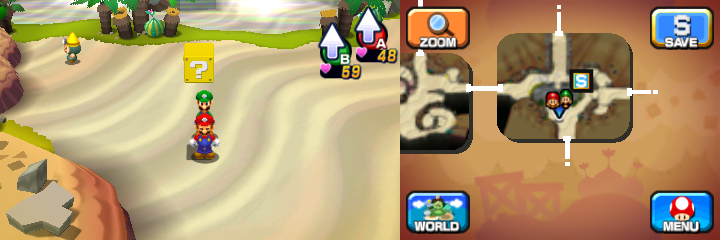
|
Refreshing Herb |
In the sixth scene, in the northwest. | 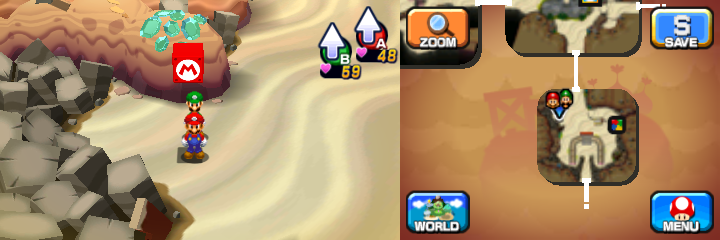
|
1-Up Mushroom, Fire Flower Attack Piece |
Same scene, in the northeast. | 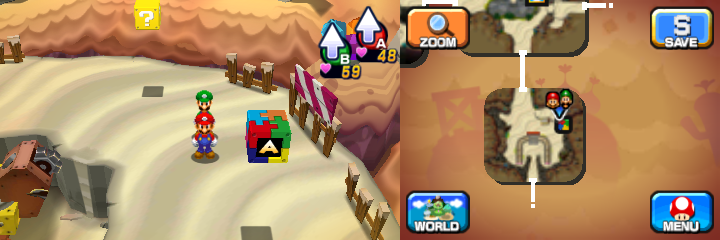
|
Shock Bomb |
NOTE: Following 33 blocks are available only after returning from Dreamy Dozing Sands accessed by the second Deco Pi'illo. In the seventh scene, in the northwest. |
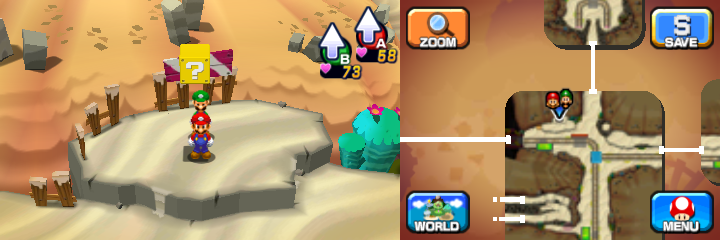
|
10-Coin |
Same scene, in the southeast. | 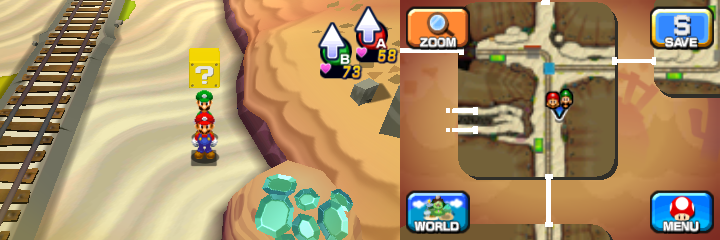
|
Fire Flower Attack Piece |
In the eighth scene, in the middle-west. | 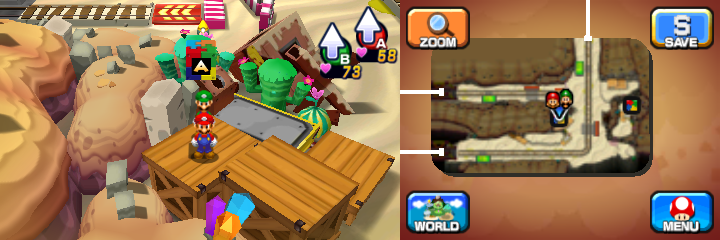
|
Candy |
Same scene, in the south. | 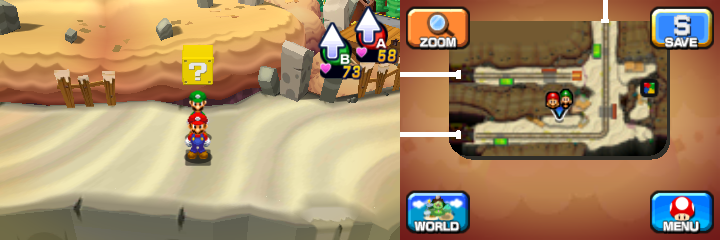
|
10-Coin |
Same scene, in the southwest. | 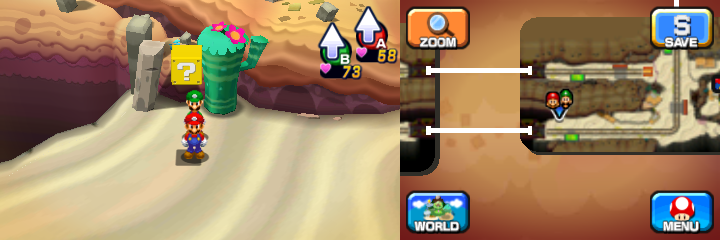
|
Five Coin |
Same scene, at the bottom of the Mini-Mario section. | 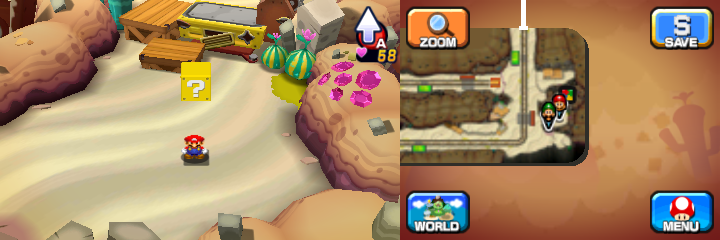
|
Fire Flower Attack Piece |
Same scene, at the top of the Mini-Mario section. | 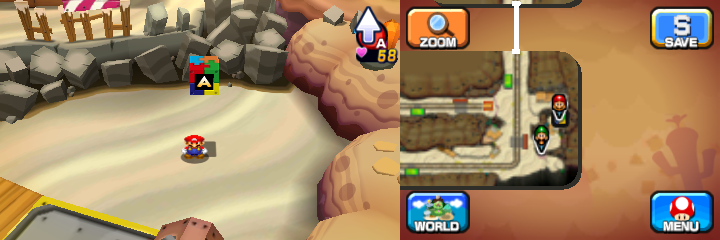
|
Five Coin |
In the ninth scene, in the southeast. | 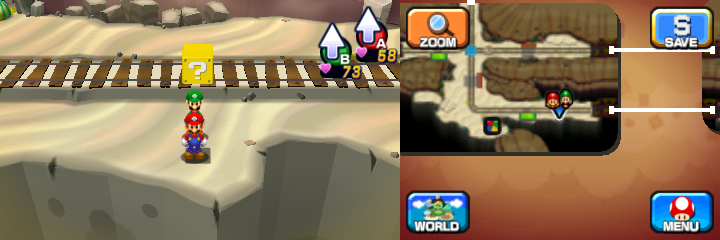
|
Fire Flower Attack Piece |
Same scene, in the south. | 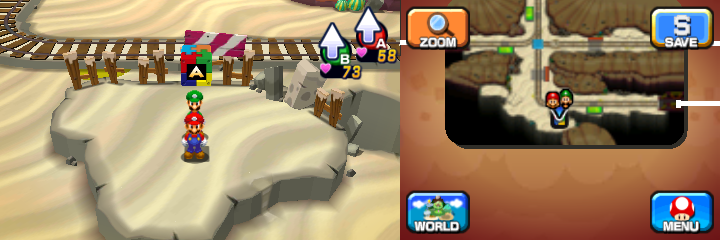
|
10-Coin |
Same scene, in the southwest. | 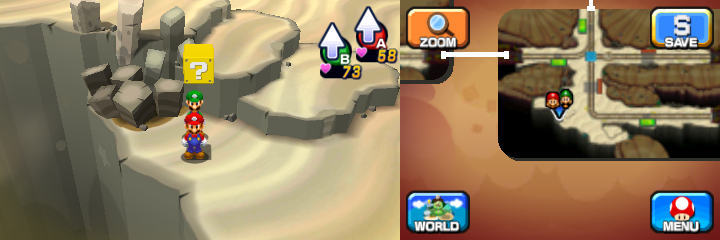
|
Refreshing Herb |
Same scene, in the middle-west. | 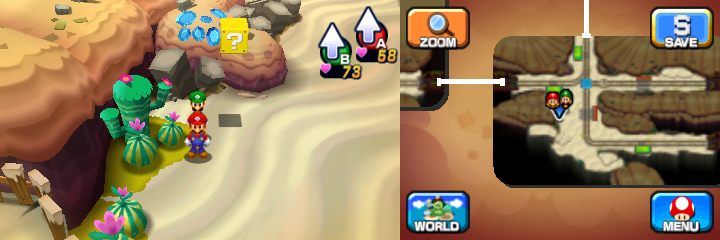
|
Five Coin, Syrup Jar |
Same scene, in the northeast. | 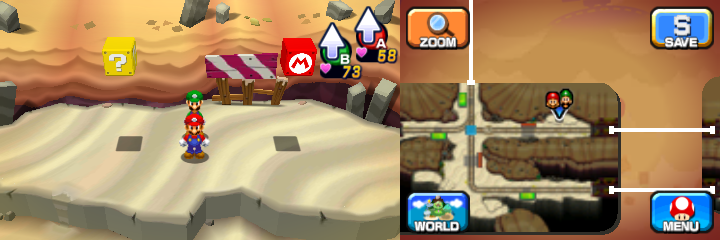
|
Steady Hammer |
In the eighth scene, in the part accesible only from the ninth scene, at the end. | 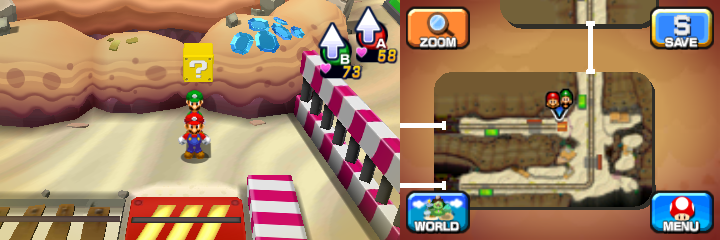
|
Five Coin |
In the tenth scene, in the northwest. | 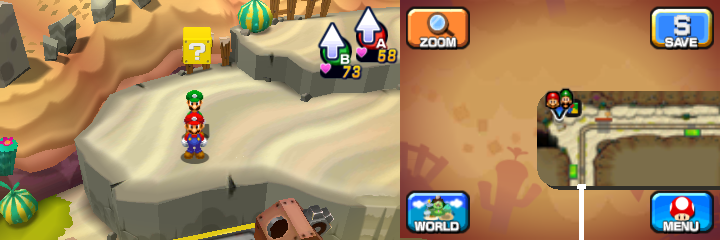
|
Fire Flower Attack Piece |
Same scene, right of the previous one. | 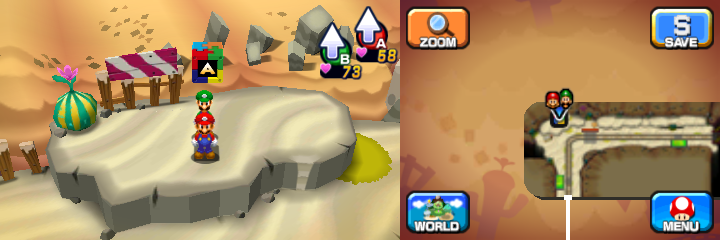
|
10 Five Coins |
Same scene, in the southeast. | 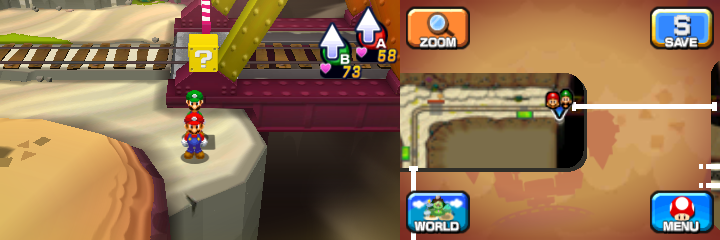
|
10 Five Coins |
In the scene southwest of the seventh scene accessible only by Mini-Mario, in the northwest. | 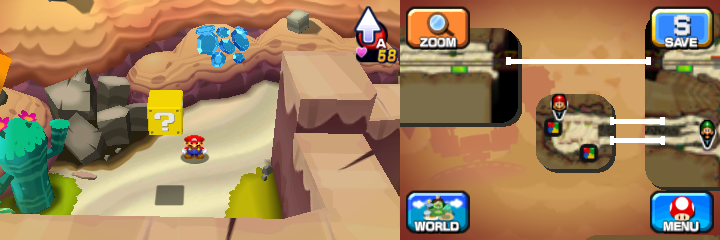
|
10-Coin |
Same scene, in the middle. | 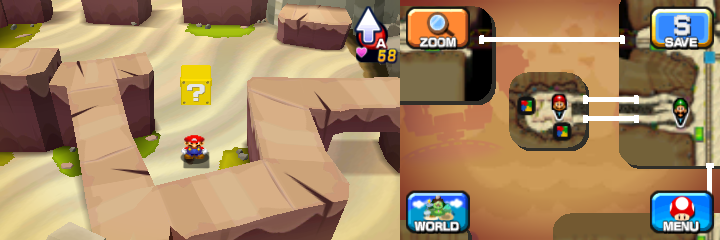
|
Fire Flower Attack Piece |
Same scene, in the southeast. | 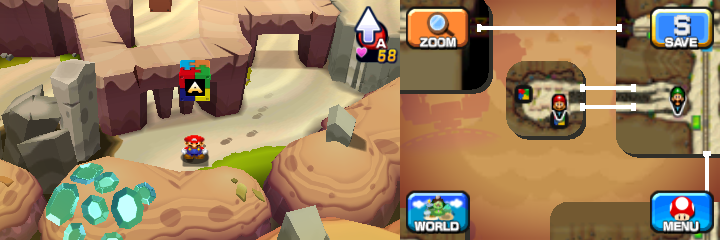
|
Fire Flower Attack Piece |
Same scene, in the west on the upper part. | 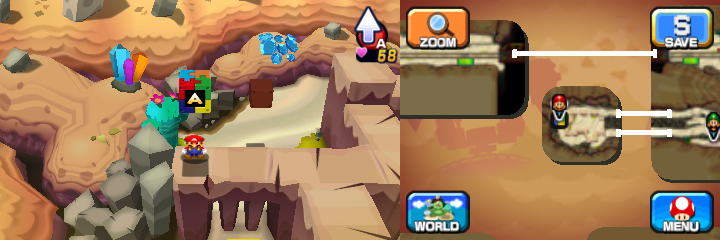
|
Shock Bomb, Boo Biscuit |
Same scene, in the southwest. | 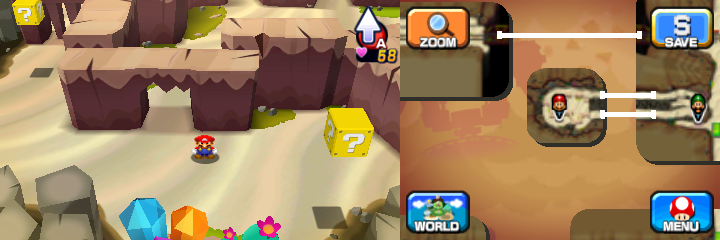
|
Ultra Candy |
In the seventh scene, in the Mini-Mario part, accessible from the previous scene. | 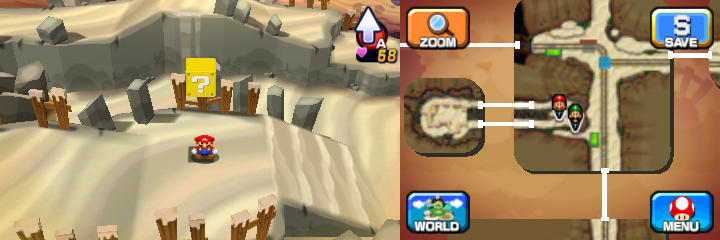
|
Super Nut |
In the eleventh scene (west of the ninth scene), in the south. | 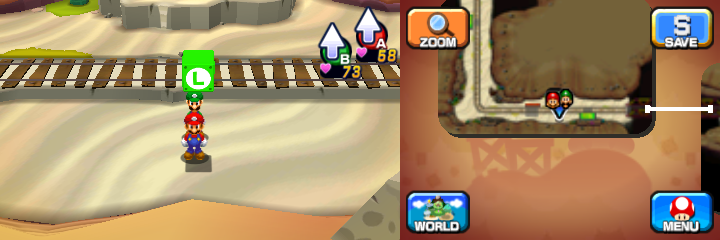
|
Five Coin, Fire Flower Attack Piece |
Same scene, in the north. | 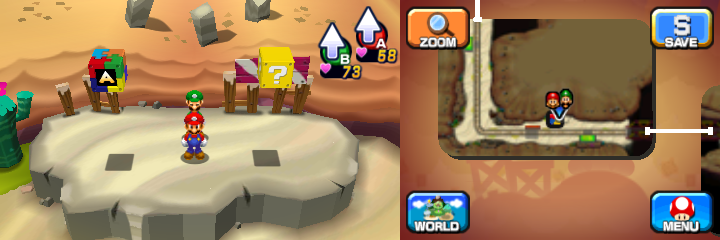
|
10-Coin |
Same scene, in the southwest. | 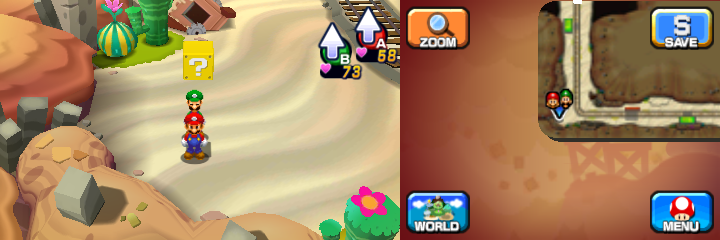
|
10-Coin |
In the twelfth scene, in the northwest. | 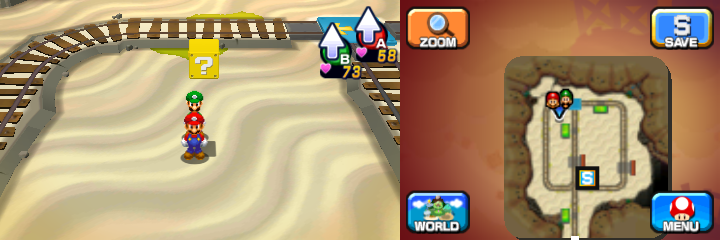
|
Iron-Ball Boots |
Same scene, in the north. | 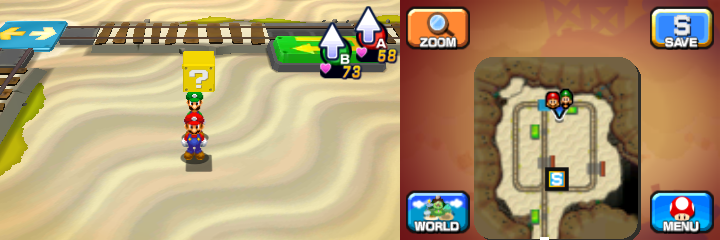
|
10-Coin |
Same scene, in the middle. | 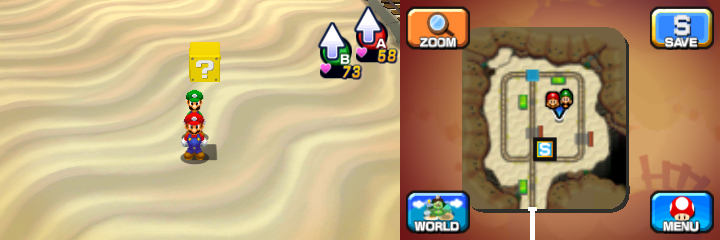
|
1-Up Mushroom |
Same scene, in the northeast. | 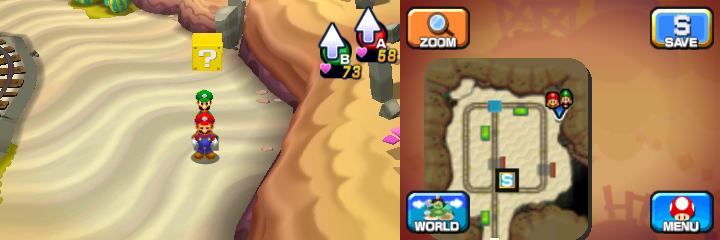
|
Refreshing Herb |
Same scene, in the southeast. | 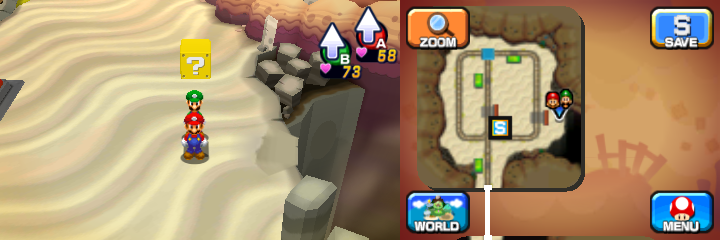
|
Super Candy |
NOTE: Following 7 blocks are available only after returning from Dreamy Dozing Sands accessed by the fourth Deco Pi'illo. In the thirteenth scene (east of the seventh scene), in the northwest. |
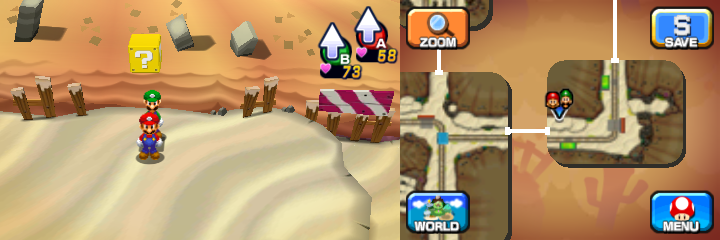
|
10 Five Coins |
Same scene, in the northwest. | 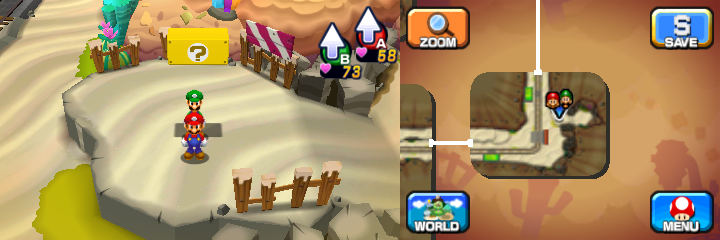
|
10 Five Coins |
In the seventh scene, in the northeast, accessible from the previous scene. | 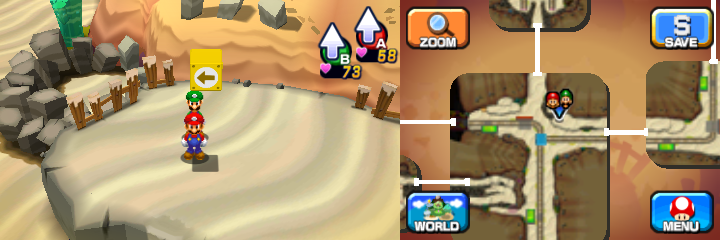
|
Five Coin |
In the fourteenth scene, in the middle-west. | 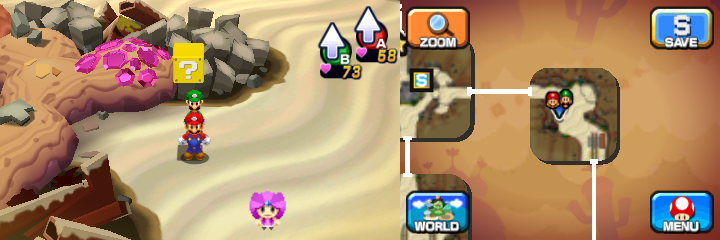
|
10-Coin |
Same scene, in the northeast. | 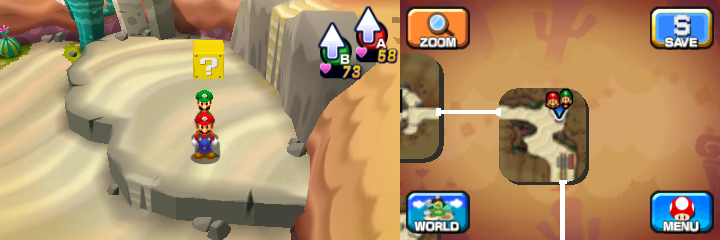
|
DEF Mush Jam |
In the fifth scene, in the northeast, accessible from the previous scene. | 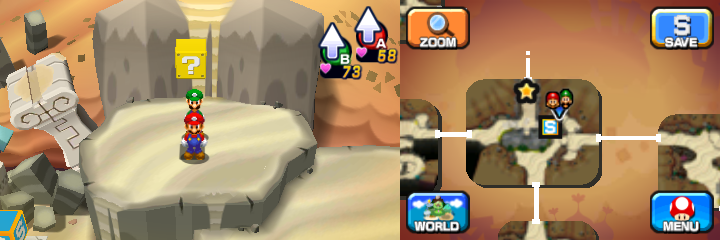
|
Syrup Jar |
In the third scene, in the southeast, accessible from fifteenth scene (the one with the first Dreampoint). | 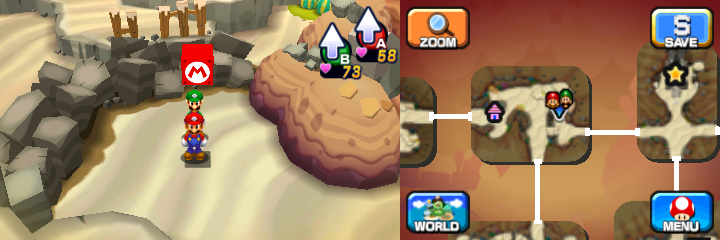
|
10 10-Coins, Ultrasyrup Jar |
NOTE: Following 15 blocks are available only after learning the Ball Hop during second Mount Pajamaja visit. In the eighth scene, in the northeast. |
|
Ultra Candy |
In the fifteenth scene, in the northeast. | 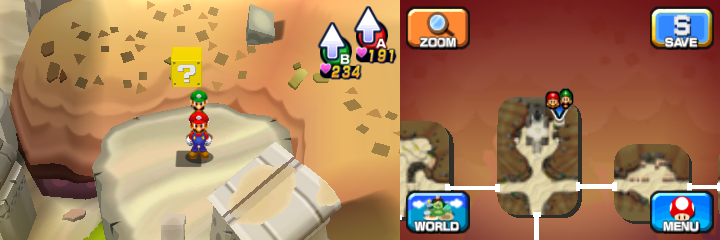
|
Ultra Candy |
In the sixteenth scene, in the northwest. | 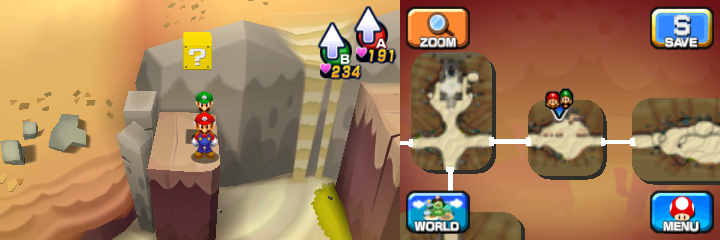
|
10 50-Coins |
Same scene, in the middle-east. | 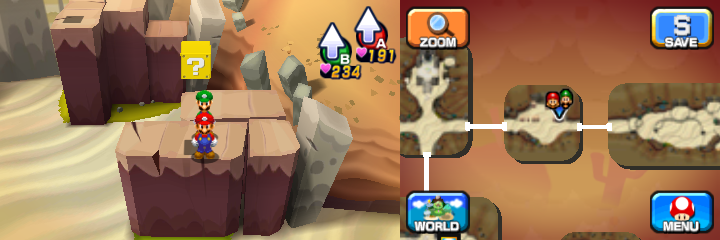
|
Dozing Sands Shot |
Same scene, in the northeast. | 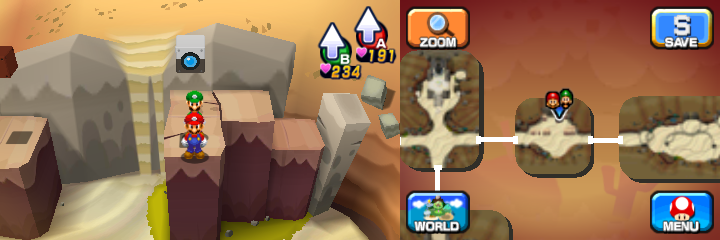
|
50-Coin |
In the seventeenth scene, in the north. | 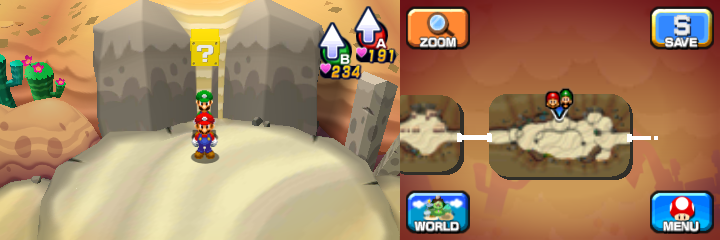
|
Ultra Mushroom |
Same scene, in the southeast. | 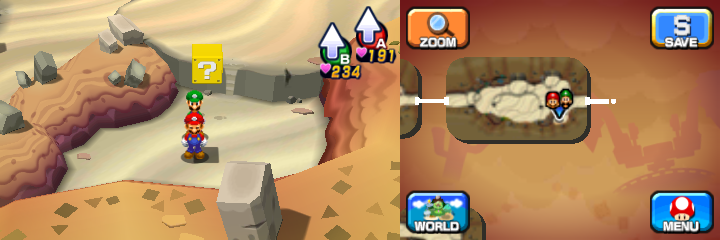
|
50-Coin |
In the eighteenth scene, in the northwest. | 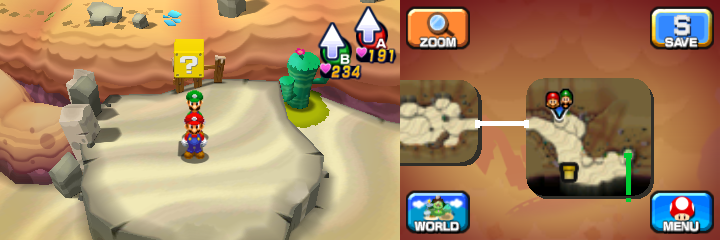
|
50-Coin |
Same scene, in the southeast. | 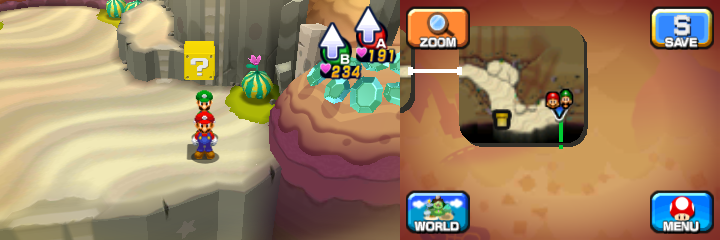
|
1-Up Deluxe |
In the nineteenth scene (first underground scene), in the southeast. | 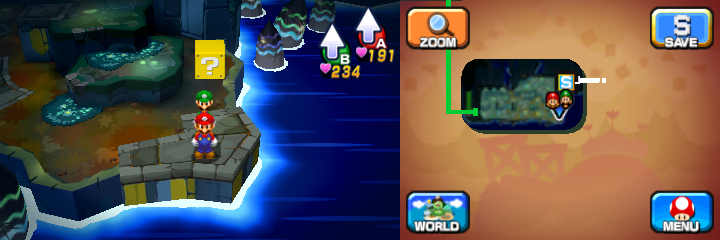
|
Ultra Nut |
Same scene, in the middle. | 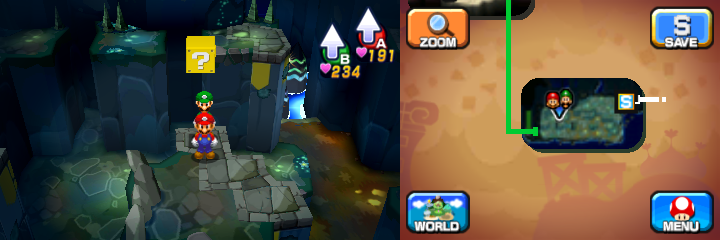
|
10 50-Coins |
Same scene, in the northeast. | 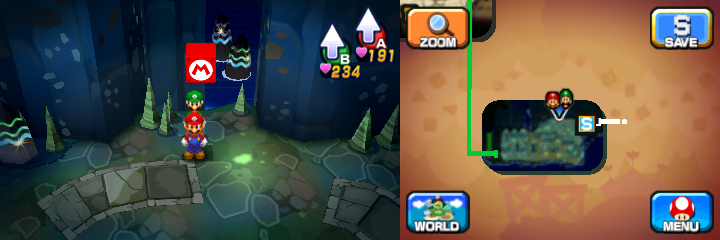
|
10-Coin, Bros. Ring |
In the twentieth scene (second underground scene), at the end, left of the Dozing Mattress Dreampoint. | 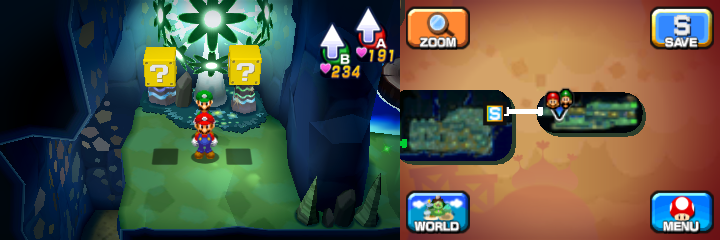
|
Names in other languages
| Language | Name | Meaning | Notes |
|---|---|---|---|
| Dutch | Doezelduinen[?] | Dozing Dunes | |
| French | Désert du sommeil[?] | Sleep desert | |
| German | Nickerwüste[?] | Nap Desert | |
| Italian | Sonnosabbie[?] | From "sonno" (sleep) and "sabbia" (sand) | |
| Korean | 나르내 사막[?] Nareu'nae Samak |
Drowsy Desert; homophone of "나른해" (nareunhae, the phrase "I'm drowsy") | |
| Portuguese (NOE) | Deserto da Sonolência[?] | Sleepiness Desert | |
| Spanish (NOA) | Desierto Sopor[?] | Doze Desert | |
| Spanish (NOE) | Desierto Cabezada[?] | Nap Desert |
Trivia
- If the player returns to the area where the four Zeekeeper statues are, one of the workers will sing about working and his final words are 'down from Donut Plains to Jolly Roger Bay', referencing Super Mario World and Super Mario 64.
