Dreamy Mount Pajamaja: Difference between revisions
mNo edit summary |
|||
| (25 intermediate revisions by 12 users not shown) | |||
| Line 1: | Line 1: | ||
{{ | {{location infobox | ||
| | |title=Dreamy Mount Pajamaja | ||
|image=MLDT - MountPajamaja Dream.png | |image=[[File:MLDT - MountPajamaja Dream.png|256px]] | ||
| | |greater_location=[[Pi'illo Island]] | ||
|inhabitants=[[Icead]], [[Lob-omb R]], [[Magmad]], [[Chizzle]] | |inhabitants=[[Icead]]s, [[Lob-omb R|Lob-ombs R]], [[Magmad]]s, [[Chizzle]]s | ||
|first_appearance=''[[Mario & Luigi: Dream Team]]'' ([[List of games by date#2013|2013]]) | |first_appearance=''[[Mario & Luigi: Dream Team]]'' ([[List of games by date#2013|2013]]) | ||
}} | }} | ||
| Line 10: | Line 10: | ||
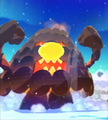
[[Mario]] comes here to escape the [[Dreambeats]]. He eventually comes upon the [[Mount Pajamaja (boss)|Mount Pajamaja boss]] and irritates it by repeatedly whacking its nose. The angry mountain does battle with [[Giant Luigi]] after a short cutscene, and is eventually defeated. Mario and co. return to the real world and discuss their next plan of action. This is also the location where the Bros. learn the [[Luiginary Hammer]]. | [[Mario]] comes here to escape the [[Dreambeats]]. He eventually comes upon the [[Mount Pajamaja (boss)|Mount Pajamaja boss]] and irritates it by repeatedly whacking its nose. The angry mountain does battle with [[Giant Luigi]] after a short cutscene, and is eventually defeated. Mario and co. return to the real world and discuss their next plan of action. This is also the location where the Bros. learn the [[Luiginary Hammer]]. | ||
The main [[Luiginary Work]] of this area is | The main [[Luiginary Work]] of this area is the [[Luiginary Ice]] that changes to a hot sun when a button is pressed in the real world. When the Luiginary Ice is cold, everything in the Dream World is frozen, making the platforms icy and slippery and causing water to be frozen pillars. Everything is melted when the sun turns hot. The water pillars raise and lower at regular intervals, though they will remain at the lowest point when Mario stands on them. The concept of freezing and warming the area up is similar to the [[Airway (Mario & Luigi: Bowser's Inside Story)|Airway]] area from ''[[Mario & Luigi: Bowser's Inside Story]]''. | ||
==Enemies== | ==Enemies== | ||
<gallery> | |||
Magmad.png|[[Magmad]]s | |||
Icead.png|[[Icead]]s | |||
Lob-omb R.png|[[Lob-omb R|Lob-ombs R]] | |||
M&L-DT - Chizzle.png|[[Chizzle]]s | |||
Mount Pajamaja boss.png|[[Mount Pajamaja (boss)|Mount Pajamaja]] (giant boss) | |||
</gallery> | |||
==Block locations== | |||
===Mega Pi'illo Phil=== | |||
{|border=1 cellpadding=2 style="text-align: center; border-collapse: collapse; border: 1px solid black; width:100%" | |||
!colspan="3"style="background:gold; height:2em"|[[Dreamy Mount Pajamaja]] (Mega Pi'illo Phil) - 2 Blocks (1 ?, 1 M) | |||
|-style="background:gold; height:2em" | |||
!Item/s | |||
!Location | |||
!Screenshot | |||
|- | |||
|[[File:MLPJ5Coin.png]]<br>Five Coin | |||
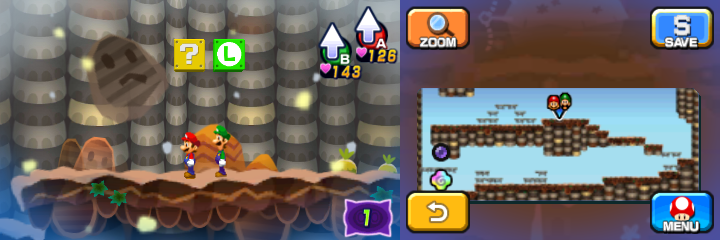
|In the first scene, above the left-most platform. | |||
|[[File:Dreamy Mount Pajamaja (Mega Pi'illo Phil) Block 1.png]] | |||
|- | |||
|[[File:M&LDT Mushroom.png]]<br>Super Mushroom | |||
|Same scene, above the upper right-most platform. | |||
|[[File:Dreamy Mount Pajamaja (Mega Pi'illo Phil) Block 2.png]] | |||
|} | |||
===Mega Pi'illo Lowe=== | |||
{|border=1 cellpadding=2 style="text-align: center; border-collapse: collapse; border: 1px solid black; width:100%" | |||
!colspan="3"style="background:gold; height:2em"|Dreamy Mount Pajamaja (Mega Pi'illo Lowe) - 5 Blocks (3 ?, 1 M, 1 L) | |||
|-style="background:gold; height:2em" | |||
!Item/s | |||
!Location | |||
!Screenshot | |||
|- | |||
|[[File:MLPJ5Coin.png]]<br>Five Coin | |||
|Near the end of the lower part. | |||
|[[File:Dreamy Mount Pajamaja (Mega Pi'illo Lowe) Block 1.png]] | |||
|- | |||
|[[File:MLPJ5Coin.png]][[File:MLPJ5Coin.png]][[File:MLPJ5Coin.png]][[File:MLPJ5Coin.png]][[File:MLPJ5Coin.png]][[File:MLPJ5Coin.png]][[File:MLPJ5Coin.png]][[File:MLPJ5Coin.png]][[File:MLPJ5Coin.png]][[File:MLPJ5Coin.png]]<br>10 Five Coins | |||
|End of the lower part. | |||
|[[File:Dreamy Mount Pajamaja (Mega Pi'illo Lowe) Block 2.png]] | |||
|- | |||
|[[File:MLPJ5Coin.png]]<br>Five Coin | |||
|Near the start of the upper part. | |||
|[[File:Dreamy Mount Pajamaja (Mega Pi'illo Lowe) Block 3.png]] | |||
|- | |||
|[[File:M&LDT Syrup.png]] [[File:MLSS+BM10Coin.png]]<br>Supersyrup Jar, 10-Coin | |||
|Middle of the upper part. | |||
|[[File:Dreamy Mount Pajamaja (Mega Pi'illo Lowe) Blocks 4-5.png]] | |||
|} | |||
===Mega Pi'illo Cush=== | |||
{|border=1 cellpadding=2 style="text-align: center; border-collapse: collapse; border: 1px solid black; width:100%" | |||
!colspan="3"style="background:gold; height:2em"|Dreamy Mount Pajamaja (Mega Pi'illo Cush) - 2 ? Blocks | |||
|-style="background:gold; height:2em" | |||
!Item/s | |||
!Location | |||
!Screenshot | |||
|- | |||
|[[File:M&LDT Taunt Ball.png]]<br>[[Taunt Ball]] | |||
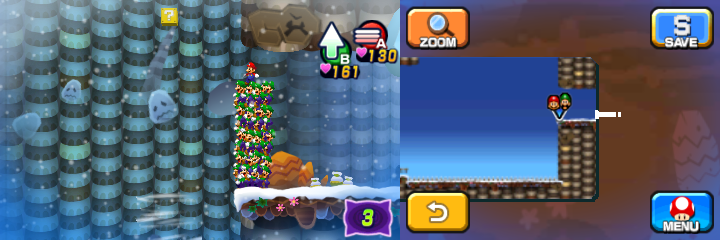
|In the first scene, in the middle of the upper part. | |||
|[[File:Dreamy Mount Pajamaja (Mega Pi'illo Cush) Block 1.png]] | |||
|- | |||
|[[File:M&LDT Candy.png]]<br>[[Ultra Candy]] | |||
|Same scene, at the end of the middle part. | |||
|[[File:Dreamy Mount Pajamaja (Mega Pi'illo Cush) Block 2.png]] | |||
|} | |||
===Mega Pi'illo Shawn=== | |||
{|border=1 cellpadding=2 style="text-align: center; border-collapse: collapse; border: 1px solid black; width:100%" | |||
!colspan="3"style="background:gold; height:2em"|Dreamy Mount Pajamaja (Mega Pi'illo Shawn) - 2 ? Blocks | |||
|-style="background:gold; height:2em" | |||
!Item/s | |||
!Location | |||
!Screenshot | |||
|- | |||
|[[File:MLSS+BM10Coin.png]]<br>10-Coin | |||
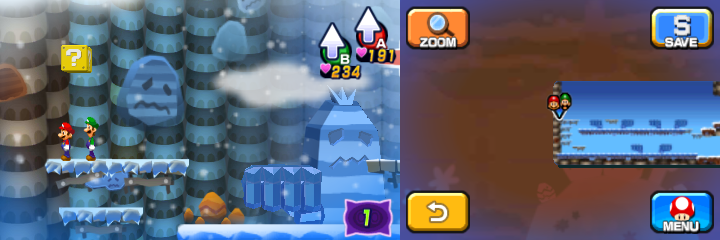
|In the second scene, near the exit, high in the air. | |||
|[[File:Dreamy Mount Pajamaja (Mega Pi'illo Shawn) Block 1.png]] | |||
|- | |||
|[[File:Dream Team Boots.png]]<br>Hiking Boots | |||
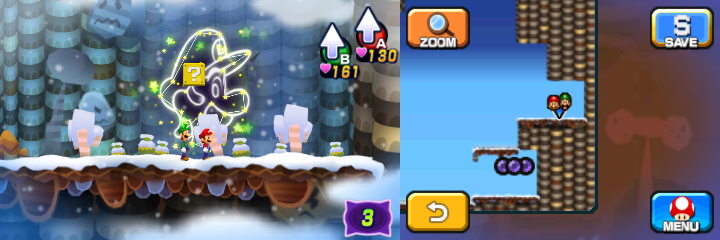
|In the third scene, in the upper-east part. | |||
|[[File:Dreamy Mount Pajamaja (Mega Pi'illo Shawn) Block 2.png]] | |||
|} | |||
===Peak Dreampoint=== | |||
{|border=1 cellpadding=2 style="text-align: center; border-collapse: collapse; border: 1px solid black; width:100%" | |||
!colspan="3"style="background:orange; height:2em"|Dreamy Mount Pajamaja (Peak Dreampoint) - 53 Blocks (35 ?, 3 M, 5 L, 10 Attack Piece) | |||
|-style="background:orange; height:2em" | |||
!Item/s | |||
!Location | |||
!Screenshot | |||
|- | |||
|[[File:M&LDT Syrup.png]]<br>[[Ultrasyrup_Jar#Mario_.26_Luigi:_Dream_Team|Ultrasyrup Jar]] | |||
|In the second scene, above the shop. | |||
|[[File:Dreamy Mount Pajamaja (Peak Dreampoint) Block 1.png]] | |||
|- | |||
|[[File:MLSS+BM10Coin.png]]<br>10-Coin | |||
|In the third scene, in the middle, above the highest platform. | |||
|[[File:Dreamy Mount Pajamaja (Peak Dreampoint) Block 2.png]] | |||
|- | |||
|[[File:MLDTAttackPiece.png]]<br>[[Luiginary Hammer]] Attack Piece | |||
|Same scene, in the southeast. | |||
|[[File:Dreamy Mount Pajamaja (Peak Dreampoint) Block 3.png]] | |||
|- | |||
|[[File:M&LDT Candy.png]]<br>Super Candy | |||
|In the fourth scene, near the entrance. | |||
|[[File:Dreamy Mount Pajamaja (Peak Dreampoint) Block 4.png]] | |||
|- | |||
|[[File:MLPJ5Coin.png]]<br>Five Coin | |||
|Same scene, in the middle, above the only platform. | |||
|[[File:Dreamy Mount Pajamaja (Peak Dreampoint) Block 5.png]] | |||
|- | |||
|[[File:MLSS+BM10Coin.png]] [[File:MLPJ5Coin.png]][[File:MLPJ5Coin.png]][[File:MLPJ5Coin.png]][[File:MLPJ5Coin.png]][[File:MLPJ5Coin.png]][[File:MLPJ5Coin.png]][[File:MLPJ5Coin.png]][[File:MLPJ5Coin.png]][[File:MLPJ5Coin.png]][[File:MLPJ5Coin.png]] [[File:MLDTAttackPiece.png]]<br>10-Coin, 10 Five Coins, Luiginary Hammer Attack Piece | |||
|Same scene, in the lower east. | |||
|[[File:Dreamy Mount Pajamaja (Peak Dreampoint) Blocks 6-8.png]] | |||
|- | |||
|[[File:M&LDT Taunt Ball.png]] [[File:MLPJ5Coin.png]]<br>Taunt Ball, Five Coin | |||
|Same scene, in the upper east. | |||
|[[File:Dreamy Mount Pajamaja (Peak Dreampoint) Blocks 9-10.png]] | |||
|- | |||
|[[File:MLSS+BM10Coin.png]]<br>10-Coin | |||
|In the fifth scene, at the end of the lower part. | |||
|[[File:Dreamy Mount Pajamaja (Peak Dreampoint) Block 11.png]] | |||
|- | |||
|[[File:M&LDT Nut.png]]<br>[[Super_Nut#Mario_.26_Luigi:_Dream_Team|Super Nut]] | |||
|Same scene, above the upper leftmost platform. | |||
|[[File:Dreamy Mount Pajamaja (Peak Dreampoint) Block 12.png]] | |||
|- | |||
|[[File:MLDTAttackPiece.png]]<br>Luiginary Hammer Attack Piece | |||
|Same scene, above the highest platform before the upper part of the scene. | |||
|[[File:Dreamy Mount Pajamaja (Peak Dreampoint) Block 13.png]] | |||
|- | |||
|[[File:MLPJ5Coin.png]]<br>Five Coin | |||
|Same scene, start of the upper part. | |||
|[[File:Dreamy Mount Pajamaja (Peak Dreampoint) Block 14.png]] | |||
|- | |||
|[[File:MLDTAttackPiece.png]]<br>Luiginary Hammer Attack Piece | |||
|Same scene, above the middle platform above the upper part. | |||
|[[File:Dreamy Mount Pajamaja (Peak Dreampoint) Block 15.png]] | |||
|- | |||
|[[File:MLSS+BM10Coin.png]]<br>10-Coin | |||
|In the sixth scene, above the second fist. | |||
|[[File:Dreamy Mount Pajamaja (Peak Dreampoint) Block 16.png]] | |||
|- | |||
|[[File:MLPJ5Coin.png]][[File:MLPJ5Coin.png]][[File:MLPJ5Coin.png]][[File:MLPJ5Coin.png]][[File:MLPJ5Coin.png]][[File:MLPJ5Coin.png]][[File:MLPJ5Coin.png]][[File:MLPJ5Coin.png]][[File:MLPJ5Coin.png]][[File:MLPJ5Coin.png]]<br>10 Five Coins | |||
|Same scene, above the fourth fist. | |||
|[[File:Dreamy Mount Pajamaja (Peak Dreampoint) Block 17.png]] | |||
|- | |||
|[[File:MLDTAttackPiece.png]]<br>Luiginary Hammer Attack Piece | |||
|Same scene, above the first bridge. | |||
|[[File:Dreamy Mount Pajamaja (Peak Dreampoint) Block 18.png]] | |||
|- | |||
|[[File:M&LDT Syrup.png]] [[File:MLPJ5Coin.png]]<br>Supersyrup Jar, Five Coin | |||
|Same scene, above the second bridge. | |||
|[[File:Dreamy Mount Pajamaja (Peak Dreampoint) Blocks 19-20.png]] | |||
|- | |||
|[[File:M&LDT Syrup.png]]<br>Supersyrup Jar | |||
|In the seventh scene, before the last platform in the upper part. | |||
|[[File:Dreamy Mount Pajamaja (Peak Dreampoint) Block 21.png]] | |||
|- | |||
|[[File:M&LDT Nut.png]]<br>Super Nut | |||
|Same scene, after the same platform. | |||
|[[File:Dreamy Mount Pajamaja (Peak Dreampoint) Block 22.png]] | |||
|- | |||
|[[File:MLPJ5Coin.png]]<br>Five Coin | |||
|In the eighth scene, near the eastern exit. | |||
|[[File:Dreamy Mount Pajamaja (Peak Dreampoint) Block 23.png]] | |||
|- | |||
|[[File:MLPJ5Coin.png]][[File:MLPJ5Coin.png]][[File:MLPJ5Coin.png]][[File:MLPJ5Coin.png]][[File:MLPJ5Coin.png]][[File:MLPJ5Coin.png]][[File:MLPJ5Coin.png]][[File:MLPJ5Coin.png]][[File:MLPJ5Coin.png]][[File:MLPJ5Coin.png]]<br>10 Five Coins | |||
|Same scene, above the platform near the northwestern exit. | |||
|[[File:Dreamy Mount Pajamaja (Peak Dreampoint) Block 24.png]] | |||
|- | |||
|[[File:MLSSBMRefreshingHerb.png]]<br>Refreshing Herb | |||
|Same scene, above the rightmost platform. | |||
|[[File:Dreamy Mount Pajamaja (Peak Dreampoint) Block 25.png]] | |||
|- | |||
|[[File:MLDTAttackPiece.png]]<br>Luiginary Hammer Attack Piece | |||
|Same scene, above the highest platform. | |||
|[[File:Dreamy Mount Pajamaja (Peak Dreampoint) Block 26.png]] | |||
|- | |||
|[[File:M&LDT Mushroom.png]] [[File:M&LDT Nut.png]]<br>[[Ultra_Mushroom#Mario_.26_Luigi_series|Ultra Mushroom]], [[Ultra Nut]] | |||
|In the scene east of the eighth scene, at the end. | |||
|[[File:Dreamy Mount Pajamaja (Peak Dreampoint) Blocks 27-28.png]] | |||
|- | |||
|[[File:MLDTAttackPiece.png]]<br>Luiginary Hammer Attack Piece | |||
|In the ninth scene, in the west of the middle part. | |||
|[[File:Dreamy Mount Pajamaja (Peak Dreampoint) Block 29.png]] | |||
|- | |||
|[[File:MLSS+BM10Coin.png]][[File:MLSS+BM10Coin.png]][[File:MLSS+BM10Coin.png]][[File:MLSS+BM10Coin.png]][[File:MLSS+BM10Coin.png]][[File:MLSS+BM10Coin.png]][[File:MLSS+BM10Coin.png]][[File:MLSS+BM10Coin.png]][[File:MLSS+BM10Coin.png]][[File:MLSS+BM10Coin.png]] [[File:MLPJ5Coin.png]]<br>10 10-Coins, Five Coin | |||
|In the scene east of the ninth scene, near the entrance. | |||
|[[File:Dreamy Mount Pajamaja (Peak Dreampoint) Blocks 30-31.png]] | |||
|- | |||
|[[File:Dream Team Wear.png]] [[File:MLDTAttackPiece.png]]<br>Koopa Troopa Wear, Luiginary Hammer Attack Piece | |||
|Same scene, above the second and third platforms. | |||
|[[File:Dreamy Mount Pajamaja (Peak Dreampoint) Blocks 32-33.png]] | |||
|- | |||
|[[File:M&LDT Syrup.png]]<br>Ultrasyrup Jar | |||
|Same scene, above the fifth platform. | |||
|[[File:Dreamy Mount Pajamaja (Peak Dreampoint) Block 34.png]] | |||
|- | |||
|[[File:MLDTAttackPiece.png]]<br>Luiginary Hammer Attack Piece | |||
|In the eleventh scene, in the east of the middle part. | |||
|[[File:Dreamy Mount Pajamaja (Peak Dreampoint) Block 35.png]] | |||
|- | |||
|[[File:M&LDT Candy.png]]<br>Super Candy | |||
|Same scene, in the west of the upper part. | |||
|[[File:Dreamy Mount Pajamaja (Peak Dreampoint) Block 36.png]] | |||
|- | |||
|[[File:MLDTAttackPiece.png]]<br>Luiginary Hammer Attack Piece | |||
|In the scene west of the eleventh scene, above the first platform. | |||
|[[File:Dreamy Mount Pajamaja (Peak Dreampoint) Block 37.png]] | |||
|- | |||
|[[File:MLSS+BM10Coin.png]]<br>10-Coin | |||
|Same scene, near the exit. | |||
|[[File:Dreamy Mount Pajamaja (Peak Dreampoint) Block 38.png]] | |||
|- | |||
|[[File:M&LDT Boo Biscuit.png]]<br>Boo Biscuit | |||
|In the twelfth scene, above the second platform. | |||
|[[File:Dreamy Mount Pajamaja (Peak Dreampoint) Block 39.png]] | |||
|- | |||
|[[File:MLSS+BM10Coin.png]]<br>10-Coin | |||
|Same scene, above the fourth platform. | |||
|[[File:Dreamy Mount Pajamaja (Peak Dreampoint) Block 40.png]] | |||
|- | |||
|[[File:MLSS+BM10Coin.png]] [[File:MLPJ5Coin.png]] [[File:M&LDT Syrup.png]]<br>10-Coin, 10 Five Coin, Supersyrup Jar | |||
|In the fourteenth scene, in the east of the lower part. | |||
|[[File:Dreamy Mount Pajamaja (Peak Dreampoint) Blocks 41-43.png]] | |||
|- | |||
|[[File:MLPJ5Coin.png]]<br>Five Coin | |||
|Same scene, in the west of the middle part. | |||
|[[File:Dreamy Mount Pajamaja (Peak Dreampoint) Block 44.png]] | |||
|- | |||
|[[File:MLSS+BM10Coin.png]][[File:MLSS+BM10Coin.png]][[File:MLSS+BM10Coin.png]][[File:MLSS+BM10Coin.png]][[File:MLSS+BM10Coin.png]][[File:MLSS+BM10Coin.png]][[File:MLSS+BM10Coin.png]][[File:MLSS+BM10Coin.png]][[File:MLSS+BM10Coin.png]][[File:MLSS+BM10Coin.png]]<br>10 10-Coins | |||
|Same scene, in the upper east of the upper part. | |||
|[[File:Dreamy Mount Pajamaja (Peak Dreampoint) Block 45.png]] | |||
|- | |||
|[[File:MLPJ5Coin.png]] [[File:MLSS+BM10Coin.png]]<br>Five Coin, 10-Coin | |||
|In the scene east of the fourteenth scene, above the ground before the gorund with the warp pipe. | |||
|[[File:Dreamy Mount Pajamaja (Peak Dreampoint) Blocks 46-47.png]] | |||
|- | |||
|[[File:M&LDT Candy.png]]<br>Ultra Candy | |||
|Same scene, above the ground with the warp pipe, left of the said pipe. | |||
|[[File:Dreamy Mount Pajamaja (Peak Dreampoint) Block 48.png]] | |||
|- | |||
|[[File:M&LDT Nut.png]]<br>Super Nut | |||
|In the fifteenth scene, in the upper east part. | |||
|[[File:Dreamy Mount Pajamaja (Peak Dreampoint) Block 49.png]] | |||
|- | |||
|[[File:M&LDT Candy.png]]<br>Super Candy | |||
|Same scene, in the upper west part. | |||
|[[File:Dreamy Mount Pajamaja (Peak Dreampoint) Block 50.png]] | |||
|- | |||
|[[File:MLPJ5Coin.png]]<br>Five Coin | |||
|In the seventeenth scene, above the icy platform. | |||
|[[File:Dreamy Mount Pajamaja (Peak Dreampoint) Block 51.png]] | |||
|- | |||
|[[File:MLPJ5Coin.png]]<br>Five Coin | |||
|Same scene, above the last platform. | |||
|[[File:Dreamy Mount Pajamaja (Peak Dreampoint) Block 52.png]] | |||
|- | |||
|[[File:M&LDT Candy.png]]<br>Super Candy | |||
|In the last scene, above the platform. | |||
|[[File:Dreamy Mount Pajamaja (Peak Dreampoint) Block 53.png]] | |||
|} | |||
===Pink Pi'illo 2=== | |||
{|border=1 cellpadding=2 style="text-align: center; border-collapse: collapse; border: 1px solid black; width:100%" | |||
!colspan="3"style="background:pink; height:2em"|Dreamy Mount Pajamaja (Pink Pi'illo 2) - 2 ? Blocks | |||
|-style="background:pink; height:2em" | |||
!Item/s | |||
!Location | |||
!Screenshot | |||
|- | |||
|[[File:MLPJ5Coin.png]][[File:MLPJ5Coin.png]][[File:MLPJ5Coin.png]][[File:MLPJ5Coin.png]][[File:MLPJ5Coin.png]][[File:MLPJ5Coin.png]][[File:MLPJ5Coin.png]][[File:MLPJ5Coin.png]][[File:MLPJ5Coin.png]][[File:MLPJ5Coin.png]]<br>10 Five Coins | |||
|In the east of the upper part. | |||
|[[File:Dreamy Mount Pajamaja (Pink Pi'illo 2) Block 1.png]] | |||
|- | |||
|[[File:M&LDT Secret Box.png]]<br>[[Secret Box]] | |||
|In the east of the lower part. | |||
|[[File:Dreamy Mount Pajamaja (Pink Pi'illo 2) Block 2.png]] | |||
|} | |||
===Pink Pi'illo 4=== | |||
{|border=1 cellpadding=2 style="text-align: center; border-collapse: collapse; border: 1px solid black; width:100%" | |||
!colspan="3"style="background:pink; height:2em"|Dreamy Mount Pajamaja (Pink Pi'illo 4) - 3 ? Blocks | |||
|-style="background:pink; height:2em" | |||
!Item/s | |||
!Location | |||
!Screenshot | |||
|- | |||
|[[File:M&LDT Syrup.png]] [[File:MLSS+BM10Coin.png]]<br>Supersyrup Jar, 10-Coin | |||
|In the northeast. | |||
|[[File:Dreamy Mount Pajamaja (Pink Pi'illo 4) Blocks 1-2.png]] | |||
|- | |||
|[[File:M&LDT Mushroom.png]]<br>Super Mushroom | |||
|In the southeast. | |||
|[[File:Dreamy Mount Pajamaja (Pink Pi'illo 4) Block 3.png]] | |||
|} | |||
===Pajamaja Rock Frame Dreampoint=== | |||
{|border=1 cellpadding=2 style="text-align: center; border-collapse: collapse; border: 1px solid black; width:100%" | |||
!colspan="3"style="background:orange; height:2em"|Dreamy Mount Pajamaja (Pajamaja Rock Frame Dreampoint) - 2 ? Blocks | |||
|-style="background:orange; height:2em" | |||
!Item/s | |||
!Location | |||
!Screenshot | |||
|- | |||
|[[File:MLSS+BM10Coin.png]][[File:MLSS+BM10Coin.png]][[File:MLSS+BM10Coin.png]][[File:MLSS+BM10Coin.png]][[File:MLSS+BM10Coin.png]][[File:MLSS+BM10Coin.png]][[File:MLSS+BM10Coin.png]][[File:MLSS+BM10Coin.png]][[File:MLSS+BM10Coin.png]][[File:MLSS+BM10Coin.png]]<br>10 10-Coins | |||
|In the second scene, above the fourth platform. | |||
|[[File:Dreamy Mount Pajamaja (Pajamaja Rock Frame Dreampoint) Block 1.png]] | |||
|- | |||
|[[File:MLPJ50Coin.png]][[File:MLPJ50Coin.png]][[File:MLPJ50Coin.png]][[File:MLPJ50Coin.png]][[File:MLPJ50Coin.png]][[File:MLPJ50Coin.png]][[File:MLPJ50Coin.png]][[File:MLPJ50Coin.png]][[File:MLPJ50Coin.png]][[File:MLPJ50Coin.png]]<br>10 50-Coins | |||
|In the first scene, in the part reachable from the second scene, near the end. | |||
|[[File:Dreamy Mount Pajamaja (Pajamaja Rock Frame Dreampoint) Block 2.png]] | |||
|} | |||
==Names in other languages== | ==Names in other languages== | ||
{{foreign names | {{foreign names | ||
| | |Jap=夢のパジャマウンテン | ||
| | |JapR=Yume no Pajamaunten | ||
|JapM=Mount Pajamaja of Dreams | |||
|Dut= | |||
|FreA= | |||
|FreE=Mont Pyjama onirique | |||
|FreEM=Oneiric Pajamaja Mount | |||
|Ger= | |||
|Ita=Pigiamonte onirico | |||
|ItaM=Dreamy Mount Pajamaja | |||
|Kor= | |||
|Por=Monte Pijama onírico | |||
|PorM=Oneiric Mount Pajamaja | |||
|Rus= | |||
|SpaA=Monte Pimayama onírico | |||
|SpaAM=Dreamy Mount Pajamaja | |||
|SpaE=Monte Pijama en sueños | |||
|SpaEM=Mount Pajamaja in dreams | |||
}} | }} | ||
{{ | {{M&LDT}} | ||
[[Category:Dreamy]] | [[Category:Dreamy]] | ||
[[Category:Mario & Luigi: Dream Team locations]] | |||
[[it:Pigiamonte onirico]] | |||
Revision as of 12:10, July 31, 2024
| Dreamy Mount Pajamaja | |
|---|---|
| |
| First appearance | Mario & Luigi: Dream Team (2013) |
| Greater location | Pi'illo Island |
| Inhabitants | Iceads, Lob-ombs R, Magmads, Chizzles |
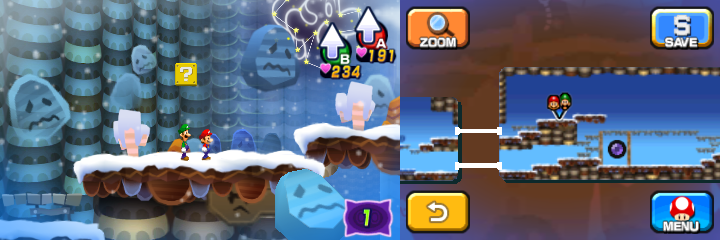
Dreamy Mount Pajamaja is the Dream World's version of Mount Pajamaja and location in Mario & Luigi: Dream Team. It is the fifth location visited in the Dream World.
Mario comes here to escape the Dreambeats. He eventually comes upon the Mount Pajamaja boss and irritates it by repeatedly whacking its nose. The angry mountain does battle with Giant Luigi after a short cutscene, and is eventually defeated. Mario and co. return to the real world and discuss their next plan of action. This is also the location where the Bros. learn the Luiginary Hammer.
The main Luiginary Work of this area is the Luiginary Ice that changes to a hot sun when a button is pressed in the real world. When the Luiginary Ice is cold, everything in the Dream World is frozen, making the platforms icy and slippery and causing water to be frozen pillars. Everything is melted when the sun turns hot. The water pillars raise and lower at regular intervals, though they will remain at the lowest point when Mario stands on them. The concept of freezing and warming the area up is similar to the Airway area from Mario & Luigi: Bowser's Inside Story.
Enemies
Mount Pajamaja (giant boss)
Block locations
Mega Pi'illo Phil
| Dreamy Mount Pajamaja (Mega Pi'illo Phil) - 2 Blocks (1 ?, 1 M) | ||
|---|---|---|
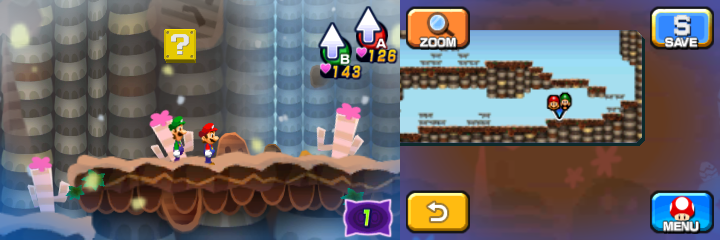
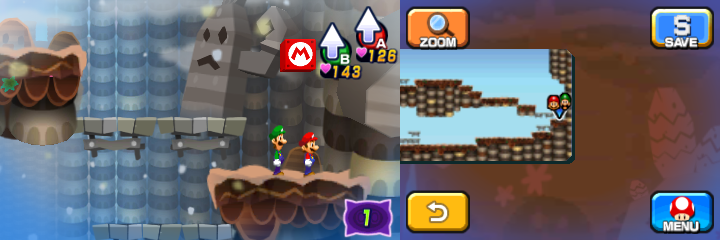
| Item/s | Location | Screenshot |
Five Coin |
In the first scene, above the left-most platform. | 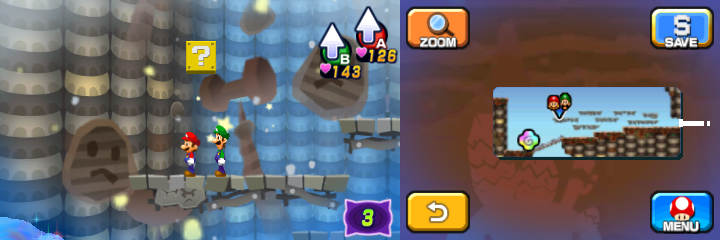
|
Super Mushroom |
Same scene, above the upper right-most platform. | 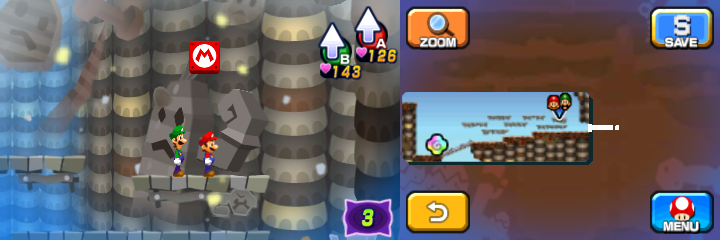
|
Mega Pi'illo Lowe
Mega Pi'illo Cush
| Dreamy Mount Pajamaja (Mega Pi'illo Cush) - 2 ? Blocks | ||
|---|---|---|
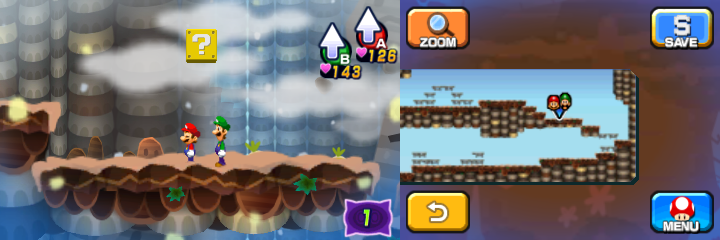
| Item/s | Location | Screenshot |
Taunt Ball |
In the first scene, in the middle of the upper part. | 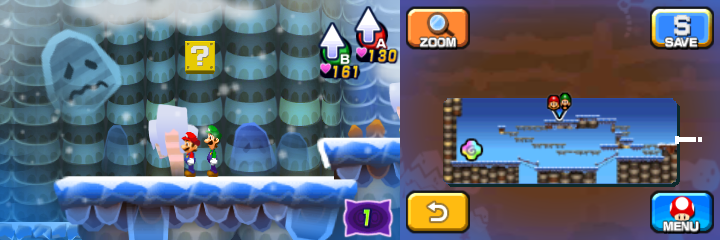
|
Ultra Candy |
Same scene, at the end of the middle part. | 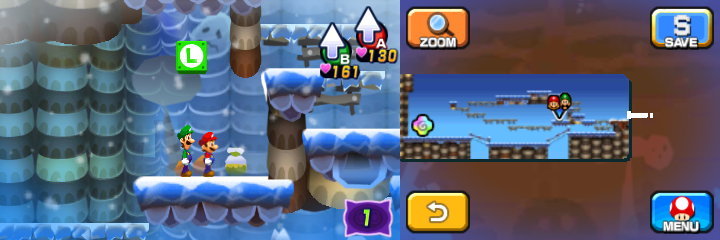
|
Mega Pi'illo Shawn
Peak Dreampoint
| Dreamy Mount Pajamaja (Peak Dreampoint) - 53 Blocks (35 ?, 3 M, 5 L, 10 Attack Piece) | ||
|---|---|---|
| Item/s | Location | Screenshot |
Ultrasyrup Jar |
In the second scene, above the shop. | 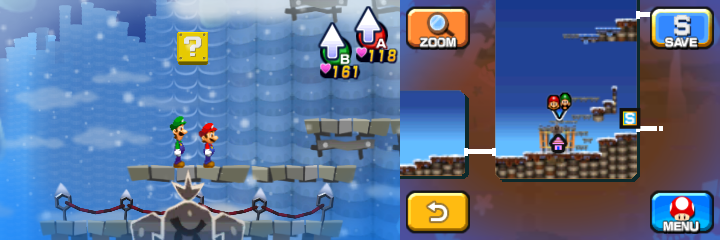
|
10-Coin |
In the third scene, in the middle, above the highest platform. | 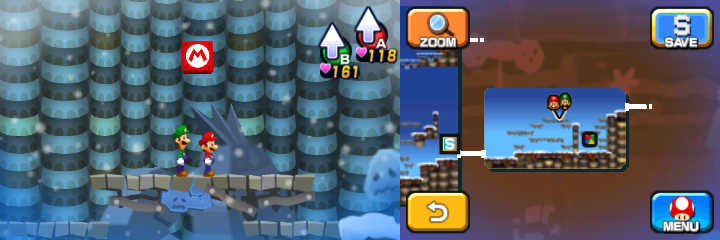
|
Luiginary Hammer Attack Piece |
Same scene, in the southeast. | 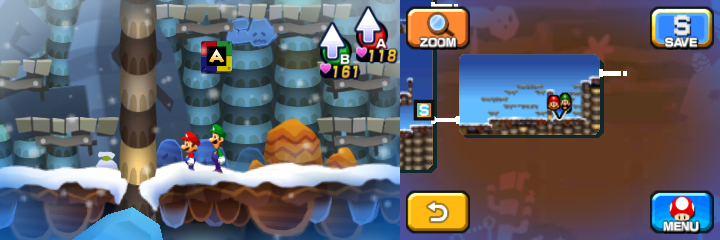
|
Super Candy |
In the fourth scene, near the entrance. | 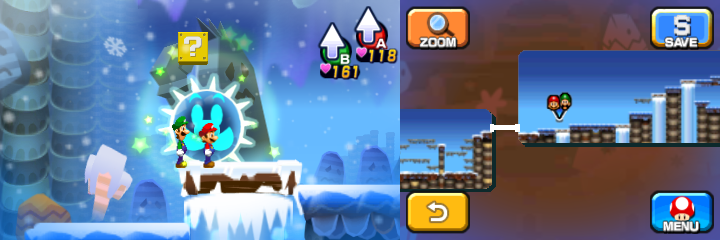
|
Five Coin |
Same scene, in the middle, above the only platform. | 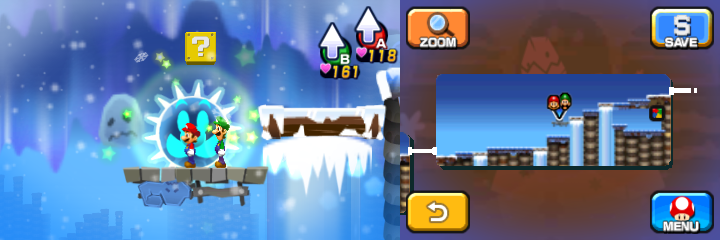
|
10-Coin, 10 Five Coins, Luiginary Hammer Attack Piece |
Same scene, in the lower east. | 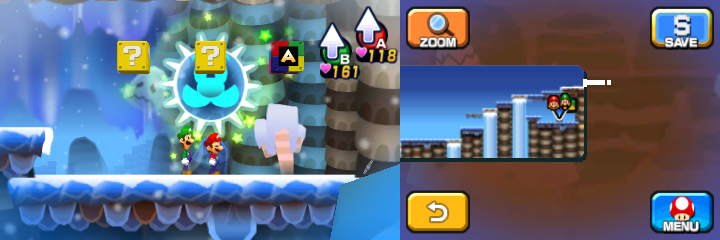
|
Taunt Ball, Five Coin |
Same scene, in the upper east. | 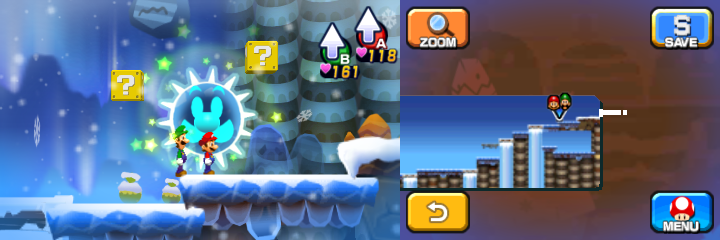
|
10-Coin |
In the fifth scene, at the end of the lower part. | 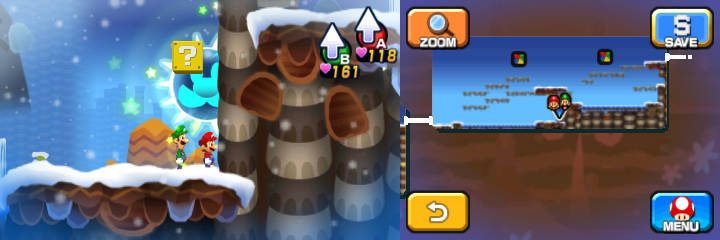
|
Super Nut |
Same scene, above the upper leftmost platform. | 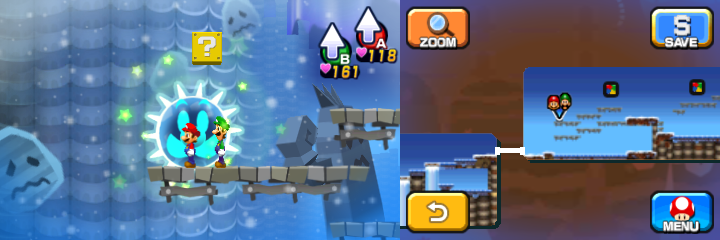
|
Luiginary Hammer Attack Piece |
Same scene, above the highest platform before the upper part of the scene. | 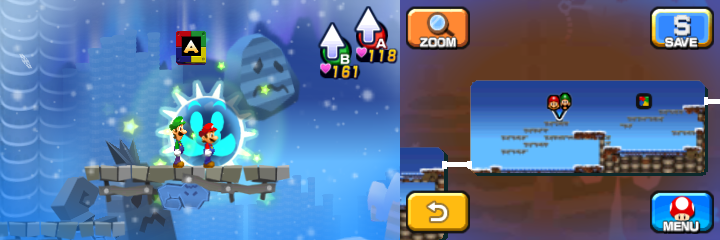
|
Five Coin |
Same scene, start of the upper part. | 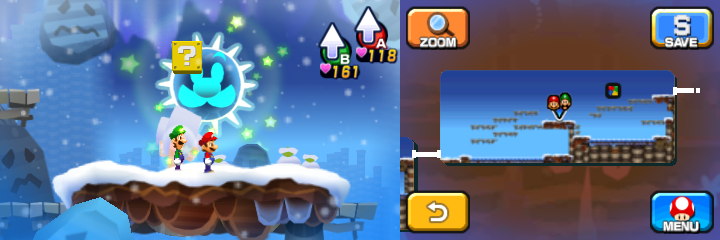
|
Luiginary Hammer Attack Piece |
Same scene, above the middle platform above the upper part. | 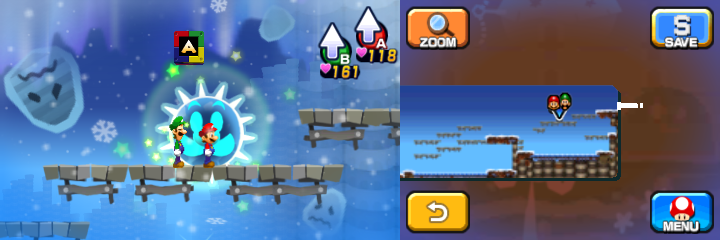
|
10-Coin |
In the sixth scene, above the second fist. | 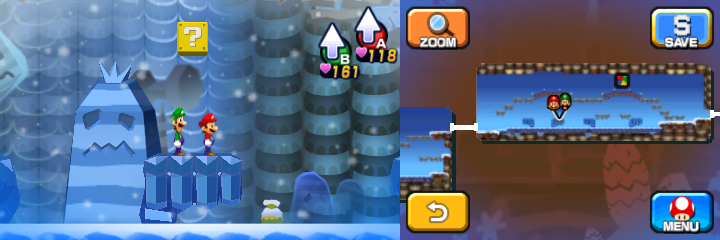
|
10 Five Coins |
Same scene, above the fourth fist. | 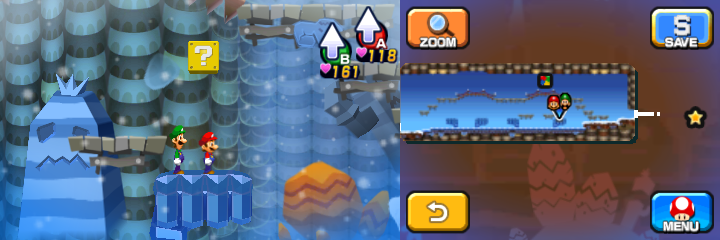
|
Luiginary Hammer Attack Piece |
Same scene, above the first bridge. | 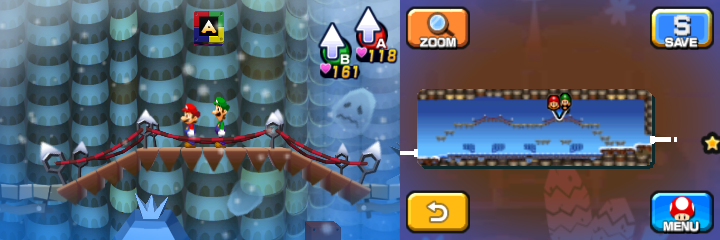
|
Supersyrup Jar, Five Coin |
Same scene, above the second bridge. | 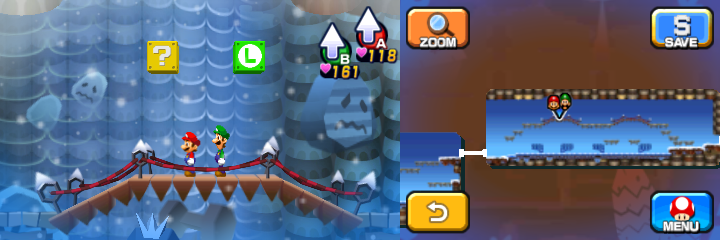
|
Supersyrup Jar |
In the seventh scene, before the last platform in the upper part. | 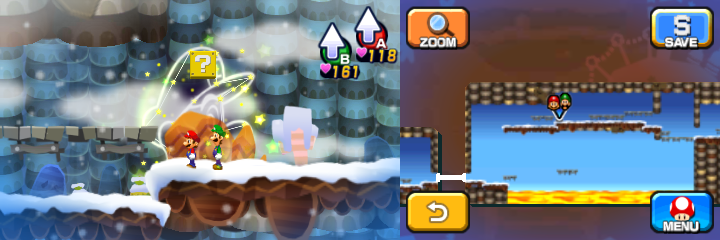
|
Super Nut |
Same scene, after the same platform. | 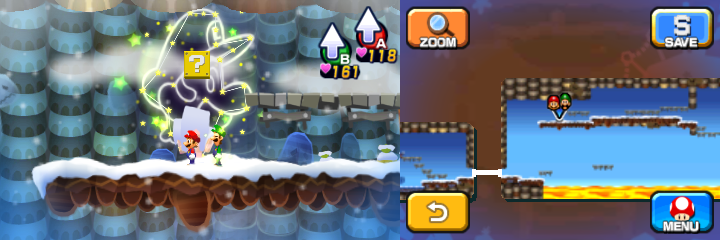
|
Five Coin |
In the eighth scene, near the eastern exit. | 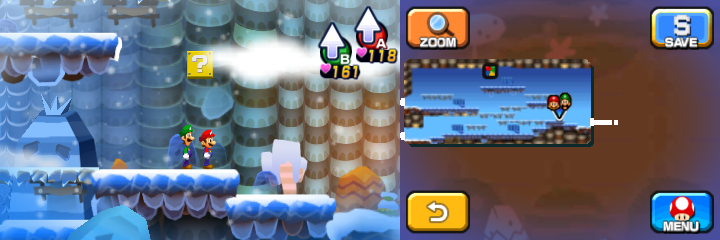
|
10 Five Coins |
Same scene, above the platform near the northwestern exit. | 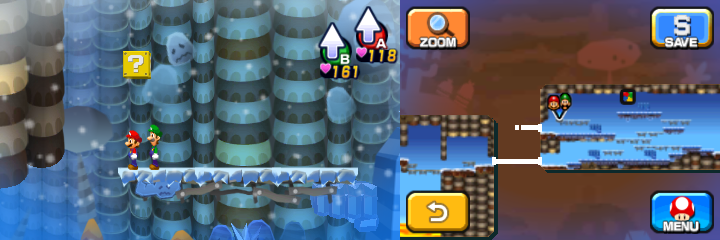
|
Refreshing Herb |
Same scene, above the rightmost platform. | 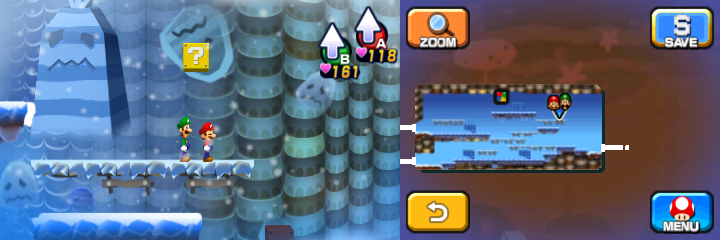
|
Luiginary Hammer Attack Piece |
Same scene, above the highest platform. | 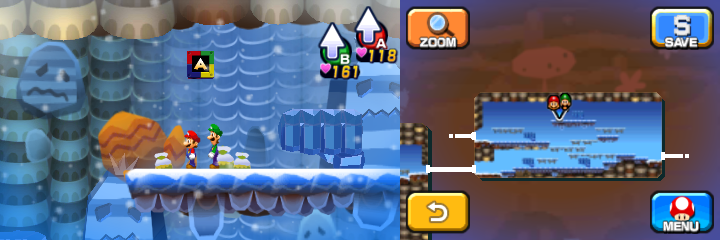
|
Ultra Mushroom, Ultra Nut |
In the scene east of the eighth scene, at the end. | 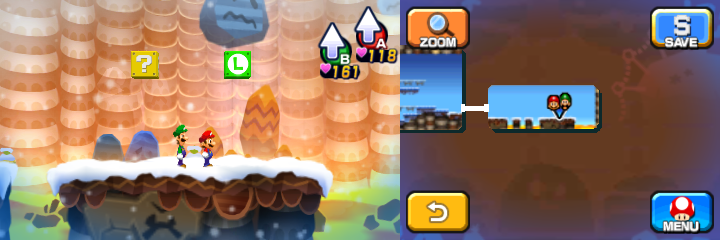
|
Luiginary Hammer Attack Piece |
In the ninth scene, in the west of the middle part. | 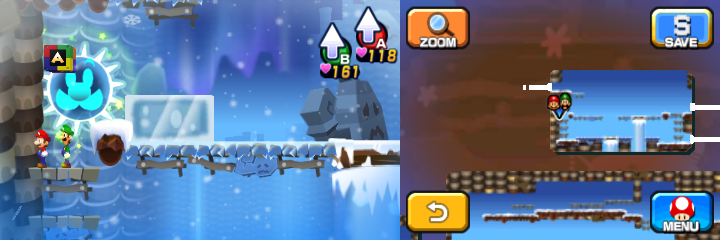
|
10 10-Coins, Five Coin |
In the scene east of the ninth scene, near the entrance. | 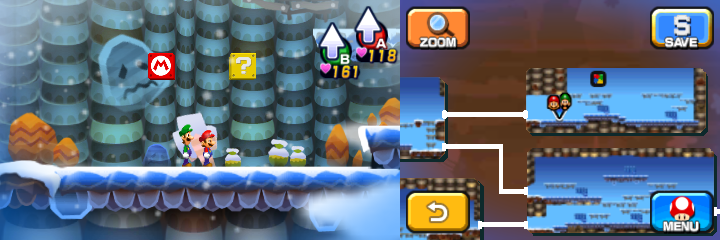
|
Koopa Troopa Wear, Luiginary Hammer Attack Piece |
Same scene, above the second and third platforms. | 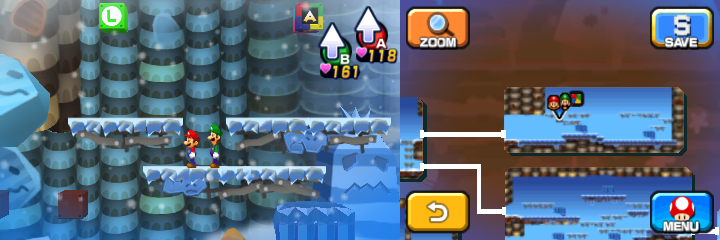
|
Ultrasyrup Jar |
Same scene, above the fifth platform. | 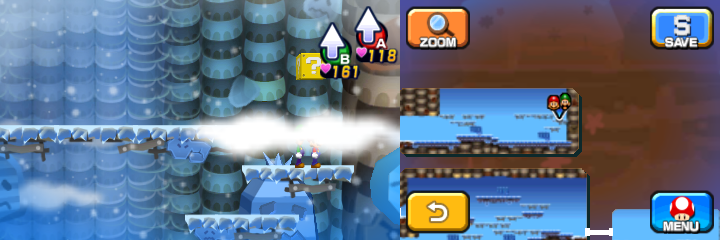
|
Luiginary Hammer Attack Piece |
In the eleventh scene, in the east of the middle part. | 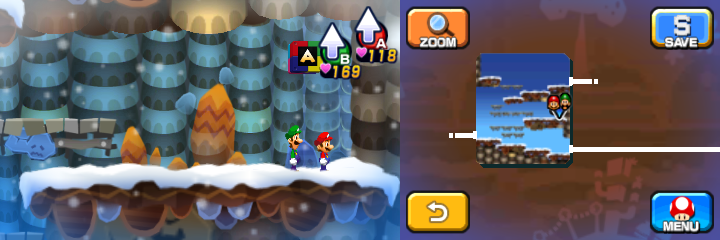
|
Super Candy |
Same scene, in the west of the upper part. | 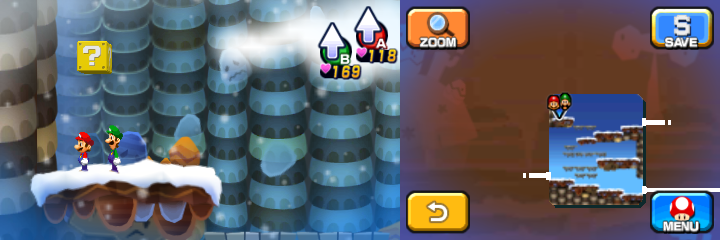
|
Luiginary Hammer Attack Piece |
In the scene west of the eleventh scene, above the first platform. | 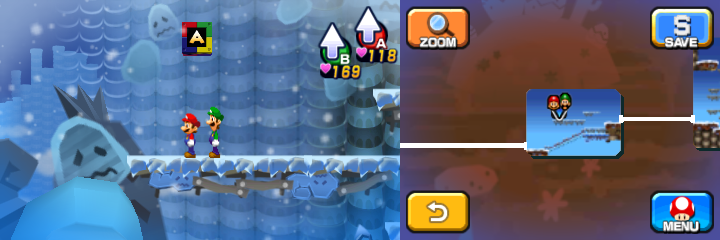
|
10-Coin |
Same scene, near the exit. | 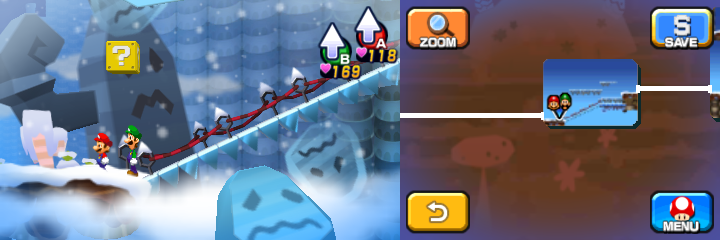
|
Boo Biscuit |
In the twelfth scene, above the second platform. | 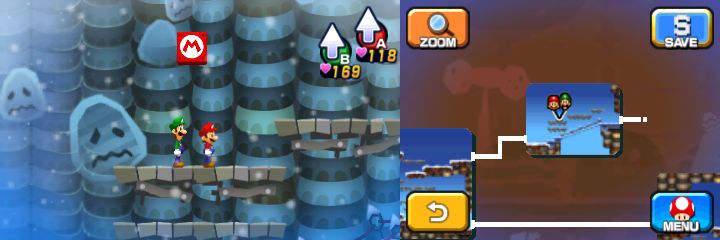
|
10-Coin |
Same scene, above the fourth platform. | 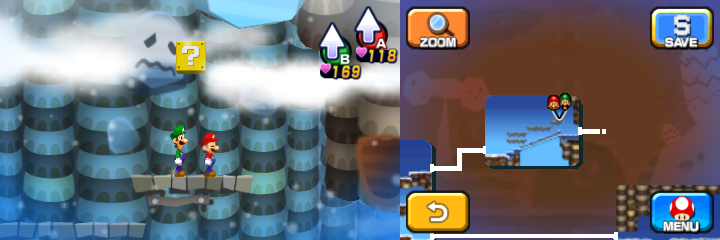
|
10-Coin, 10 Five Coin, Supersyrup Jar |
In the fourteenth scene, in the east of the lower part. | 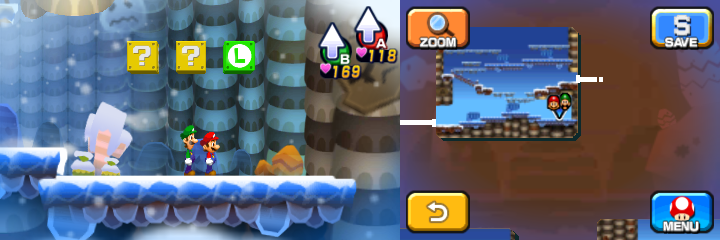
|
Five Coin |
Same scene, in the west of the middle part. | 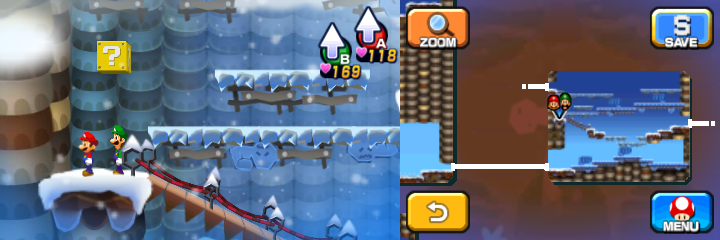
|
10 10-Coins |
Same scene, in the upper east of the upper part. | 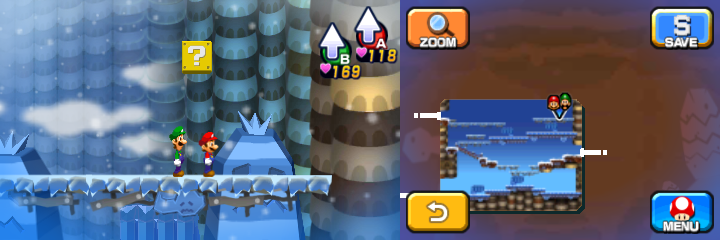
|
Five Coin, 10-Coin |
In the scene east of the fourteenth scene, above the ground before the gorund with the warp pipe. | 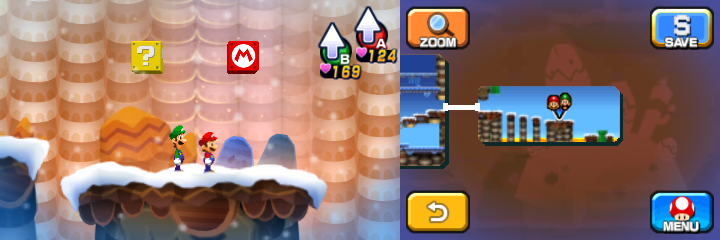
|
Ultra Candy |
Same scene, above the ground with the warp pipe, left of the said pipe. | 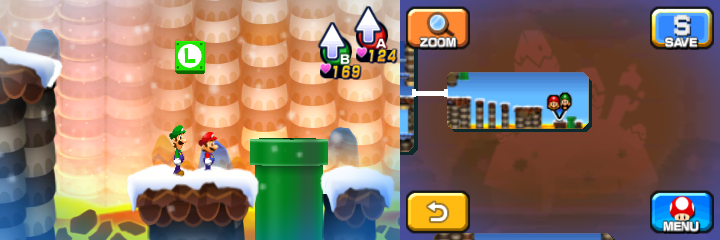
|
Super Nut |
In the fifteenth scene, in the upper east part. | 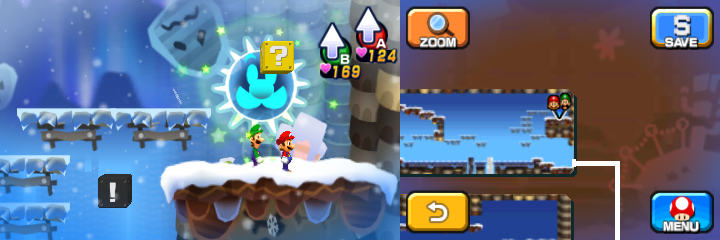
|
Super Candy |
Same scene, in the upper west part. | 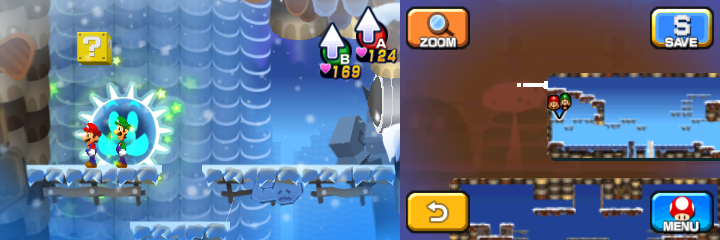
|
Five Coin |
In the seventeenth scene, above the icy platform. | 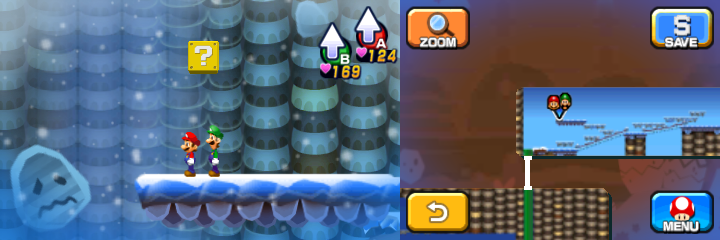
|
Five Coin |
Same scene, above the last platform. | 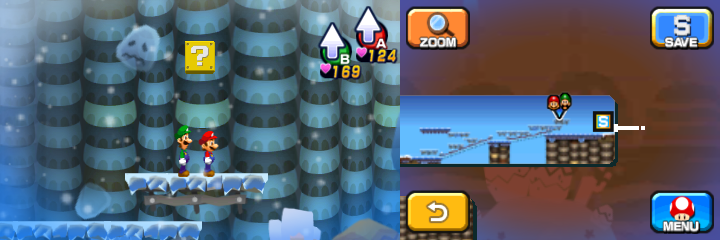
|
Super Candy |
In the last scene, above the platform. | 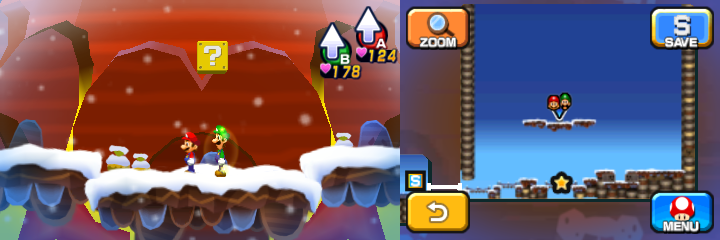
|
Pink Pi'illo 2
| Dreamy Mount Pajamaja (Pink Pi'illo 2) - 2 ? Blocks | ||
|---|---|---|
| Item/s | Location | Screenshot |
10 Five Coins |
In the east of the upper part. | 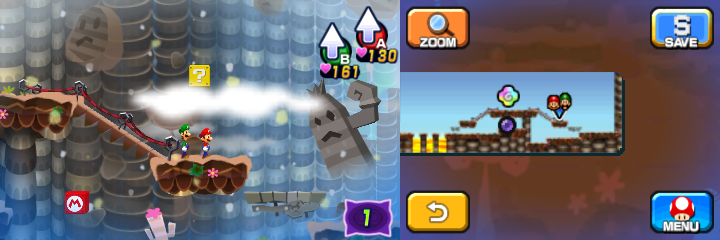
|
Secret Box |
In the east of the lower part. | 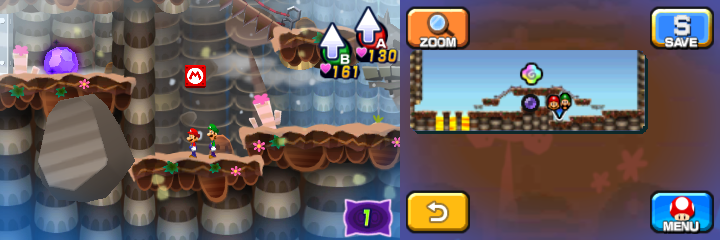
|
Pink Pi'illo 4
| Dreamy Mount Pajamaja (Pink Pi'illo 4) - 3 ? Blocks | ||
|---|---|---|
| Item/s | Location | Screenshot |
Supersyrup Jar, 10-Coin |
In the northeast. | 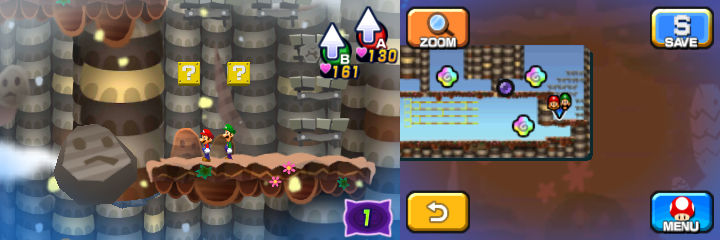
|
Super Mushroom |
In the southeast. | 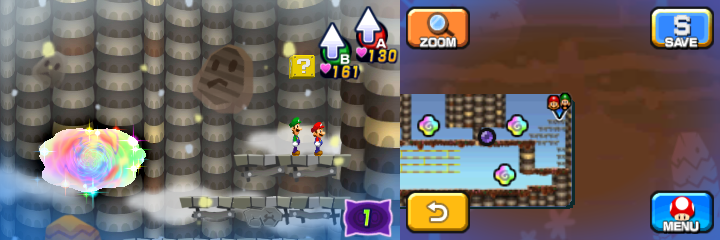
|
Pajamaja Rock Frame Dreampoint
Names in other languages
| Language | Name | Meaning | Notes |
|---|---|---|---|
| French (NOE) | Mont Pyjama onirique[?] | Oneiric Pajamaja Mount | |
| Italian | Pigiamonte onirico[?] | Dreamy Mount Pajamaja | |
| Portuguese | Monte Pijama onírico[?] | Oneiric Mount Pajamaja | |
| Spanish (NOA) | Monte Pimayama onírico[?] | Dreamy Mount Pajamaja | |
| Spanish (NOE) | Monte Pijama en sueños[?] | Mount Pajamaja in dreams |


