Pecan Sands: Difference between revisions
Doomdorm64 (talk | contribs) m (→Gallery) |
No edit summary |
||
| (38 intermediate revisions by 12 users not shown) | |||
| Line 1: | Line 1: | ||
{{ | {{WW location infobox | ||
|subject= | |subject=level | ||
|image=[[File:PecanSands.png|256px]] | |image=[[File:PecanSands.png|256px]] | ||
|world=[[Sparkle Land]] | |world=[[Sparkle Land]] | ||
|neighbor=[[Mirror Mansion]] | |neighbor=[[Mirror Mansion]] | ||
| | |diamonds_needed=6 | ||
|boss=[[Ironsider]] | |boss=[[Ironsider]] | ||
|before=[[Mirror Mansion|<<]] | |before=[[Mirror Mansion|<<]] | ||
|after=>> | |after=>> | ||
|list=[[:Category:Wario World | |list=[[:Category:Wario World levels|List of levels]] | ||
}} | }} | ||
'''Pecan Sands''' is a large, pyramid-structured, desert level in ''[[Wario World]]''. It is the eighth and final level of the game, as well as the second level of [[Sparkle Land]]. In order to reach the top and fight [[Ironsider]], the player has to climb up the pyramid. The sand around the stage is pouring out of the inside of the pyramid through several stone faces scattered throughout the stage, and the sand pouring out of them will push [[Wario]] off the stage if the player is not careful. | '''Pecan Sands''' is a large, pyramid-structured, desert level in ''[[Wario World]]''. It is the eighth and final level of the game, as well as the second level of [[Sparkle Land]]. In order to reach the top and fight the [[Ironsider]], the player has to climb up the pyramid. The sand around the stage is pouring out of the inside of the pyramid through several stone faces scattered throughout the stage, and the sand pouring out of them will push [[Wario]] off the stage if the player is not careful. | ||
Pecan Sands is likely named after the famous {{wp|Keebler Company|Keebler}} snack "Pecan Sandies", which are shortbread cookies with pecan nuts in them. | Pecan Sands is likely named after the famous {{wp|Keebler Company|Keebler}} snack "Pecan Sandies", which are shortbread cookies with pecan nuts in them. | ||
==Layout== | |||
The player starts off in a sand stream which drops into an abyss. On the way forward, [[Mummy (Wario World)|Mummies]] will spawn out of the sand. At the end of the sandstream is an [[enemy generator]] and some [[Club Mummy|Club Mummies]]. Up ahead is a stone ramp and a lower path through the sand. Going down the sand path will bring Wario into a battle with a yellow [[Crystal Entity]]. After defeating it, Wario can proceed into an area with [[Big Scorper]]s, a [[wooden chest]], and the yellow [[treasure button]]. Back by the stone ramp, the chartreuse treasure button can be found in an alcove. Up the stone ramp is a [[Mummy Ankiron]] and a stone face that blows streams of wind. To the right of the stone face is a ledge where the chartreuse [[treasure chest|treasure]] spawns. To the left are some Mummies and two more stone faces, with the yellow treasure's spawn point in front of one of them. Further to the left, there is an arena where a blue Crystal Entity will spawn, but the battle can be avoided by walking around the arena. After that is a "sandfall" with many [[Glue Globe]]s flowing down it that the player must use to get across. Below the sandfall is an area with many Big Scorpers, [[Hōhō]], the red treasure button, and [[Flying Spade]]s. The Flying Spades can be thrown into the wall behind the treasure button and used as platforms, much like the [[Monstrous Magnet]]s found in [[Beanstalk Way]]. Two small platforms away from the treasure button is a steel [[trapdoor (Wario World)|trapdoor]] housing the red [[Spriteling]]. The sand path to the right of the Flying Spades leads to a wooden trapdoor containing the yellow Spriteling. Dropping down this ledge takes Wario back to the sand stream at the beginning, where the red treasure's spawn point can be found. | |||
Past the sandfall is a platform with a few enemies, and below the platform is a sand pit with a [[Sandworm]]. Unlike the one fought in [[Greenhorn Ruins]], this one only takes four cycles to defeat instead of five, and simply drops coins when defeated. There is a trapdoor near the sand pit with a [[Gold Statue]] part inside. To the left is a Big Scorper and a [[Cyclone Generator]]. Hitting the Cyclone Generator makes it whip up a cyclone and launch Wario into the air, which is necessary to reach the platform above, which has some enemies and a wooden chest. To the right is a wind-shooting stone face on a narrow path; with a Gold Statue part at the end. To the left are several small sandfalls with Glue Globes, and above them is a trapdoor containing the green Spriteling. On a wall to the left of the sandfalls is the green treasure button; finding the chest requires backtracking to the Sandworm's sand pit. South of the sandfalls is a sandy area with [[statue]]s, [[Laser Jigglefish]], and a [[Garlic Dispenser]]. The cyan treasure button is on the far left of this area, and to the south of it is a steel trapdoor containing a Gold Statue part. A Cyclone Generator on the far right of this area can be used to get back up, though the player can simply use the Glue Globes on the sandfalls instead. Past the sandfalls is a [[Stone-Cold Statue]] blocking a ladder. It must be defeated in order to continue. At the top of the ladder is the cyan treasure's spawn point and a large sand slide leading to a [[Battle Ring (Wario World)|Battle Ring]]. On the way down is a Gold Statue part. | |||
Behind the Battle Ring are two [[column]]s, either of which can be used to reach the three platforms between them. The blue Spriteling is on the platform in the middle. To the left of the Battle Ring is the blue treasure button, and to the south of the treasure button are Big Scorpers and a steel trapdoor containing a Gold Statue part. The ladder near the Battle Ring leads to an area with some enemies and a wooden chest. South of this area are two sculptures on a narrow path with the blue treasure's spawn point at the end. To the left of the enemies are five ledges with gaps in between; the one on the far left has a trapdoor with a Gold Statue part inside. Climbing the chain-link [[Chain-Link|fence]] leads to a Garlic Dispenser and two Hōhō. Past here is a sand stream with Big Scorpers and statues in it, with the purple treasure button on the wall. Up ahead is a set of stone steps leading upward with a Gold Statue part underneath. The steps lead to a pair of wind-shooting stone faces with a wooden chest in between, as well as some Hōhō. Further ahead is a Laser Jigglefish and a steel trapdoor leading to the final [[red diamond (Wario World)|red diamond]] sub-level, which contains the purple Spriteling. | |||
Beyond the final trapdoor is another sandfall with Glue Globes where the final Gold Statue part is. In front of the sandfall on the right is a platform with the pink treasure button on it. Further ahead and past a Laser Jigglefish is a wall the player needs to use Flying Spades to get over. Three Flying Spades will spawn at a time, but only two are necessary to scale the wall. This brings Wario to the top of the pyramid, where the music becomes quiet. The [[ByeBye Balloon]]s are in between two columns. The tops of two giant stone faces are on opposing sides. A Garlic Dispenser and the purple treasure's spawn point are on one stone face, while the pink treasure's spawn point is on the other. The ladder leading up to the [[Stone Doohickey]] is guarded by a Stone-Cold Statue. Once it is defeated, Wario can access the goal. | |||
Beyond the final trapdoor is another sandfall with Glue Globes where the final Gold Statue | |||
If Wario reenters the level after defeating the boss, there will be a set of ByeBye Balloons at the beginning that will take him to the Battle Ring. | If Wario reenters the level after defeating the boss, there will be a set of ByeBye Balloons at the beginning that will take him to the Battle Ring. | ||
==Enemies== | ==Enemies== | ||
*[[ | *[[Mummy (Wario World)|Mummies]] | ||
*[[ | *[[Club Mummy|Club Mummies]] | ||
*[[ | *[[Hōhō]] | ||
*[[Ankiron | *[[Mummy Ankiron]]s | ||
*[[Enemy | *[[Enemy generator]]s | ||
*[[Big Scorper]]s | *[[Big Scorper]]s | ||
*[[Flying | *[[Flying Spade]]s | ||
*[[Laser Jigglefish]] | *[[Laser Jigglefish]] | ||
*[[ | *[[Crystal Entity|Yellow Crystal Entity]] | ||
*[[ | *[[Crystal Entity|Blue Crystal Entity]] | ||
*[[ | *[[Sandworm]] | ||
*[[Stone-Cold Statue]] | *[[Stone-Cold Statue]] | ||
*[[Ironsider]] (Boss) | *[[Ironsider]] (Boss) | ||
==Red diamond sub-levels== | ==Red diamond sub-levels== | ||
{| | {|class=wikitable style="text-align: center; width: 100%" | ||
!width="2%"|# | !width="2%"|# | ||
!width="1%"|Image | !width="1%"|Image | ||
| Line 49: | Line 48: | ||
|1 | |1 | ||
|[[File:PecanSandsSub1.png|150px]] | |[[File:PecanSandsSub1.png|150px]] | ||
|In the first area with Flying | |In the first area with Flying Spades, on a small platform near where the red treasure button is. | ||
|Hitting the levers will cause the individual squares of blocks to rise, forming a pyramid when all of them are active. The lever closest to the middle causes the central block to rise. When all other levers are active, this can be used to reach the platform above where the red diamond is. Below the central block are two very small platforms where the red Spriteling can be found. | |Hitting the levers will cause the individual squares of blocks to rise, forming a pyramid when all of them are active. The lever closest to the middle causes the central block to rise. When all other levers are active, this can be used to reach the platform above where the red diamond is. Below the central block are two very small platforms where the red Spriteling can be found. | ||
|- | |- | ||
|2 | |2 | ||
|[[File:PecanSandsSub2.png|150px]] | |[[File:PecanSandsSub2.png|150px]] | ||
|On the path of sand to the right of the first Flying | |On the path of sand to the right of the first Flying Spade wall. | ||
|Punching the [[Arrow Block]] behind Wario's starting point forward will cause the rest of the blocks to move in a way that creates a path leading up to the yellow Spriteling and red diamond. This can also be done by dashing straight directly from Wario's spawn point. | |Punching the [[Arrow Block (Wario World)|Arrow Block]] behind Wario's starting point forward will cause the rest of the blocks to move in a way that creates a path leading up to the yellow Spriteling and red diamond. This can also be done by dashing straight directly from Wario's spawn point. | ||
|- | |- | ||
|3 | |3 | ||
|[[File:PecanSandsSub3.png|150px]] | |[[File:PecanSandsSub3.png|150px]] | ||
|Near the | |Near the Sandworm's sand pit. | ||
|There are five Arrow Blocks on the second floor; two in pairs, and one by itself. They must be punched in a specific way. First, of the pair of blocks on the right side of the room (where the Gold Statue | |There are five Arrow Blocks on the second floor; two in pairs, and one by itself. They must be punched in a specific way. First, of the pair of blocks on the right side of the room (where the Gold Statue part is), Wario must punch the one lined up with the lone block so it collides with it, then go to the other pair of blocks and punch one on the left so it hits the block he just punched. He should then go back and punch the other two blocks so they collide with the ones he previously punched. If done correctly, Wario will be able to reach the red diamond. | ||
|- | |- | ||
|4 | |4 | ||
|[[File:PecanSandsSub4.png|150px]] | |[[File:PecanSandsSub4.png|150px]] | ||
|At the top of the small sandfalls that precede the large sand slide. | |At the top of the small sandfalls that precede the large sand slide. | ||
|Wario starts this sub-level with two Arrow Blocks stacked in front of him. [[Ground Pound]]ing the one on top will cause it to bounce off of the lower one and rise, bringing Wario to the second floor, though he should move out of the way to avoid being squished by the platform above. The way to the red diamond is blocked on each side by a large, moving [[ | |Wario starts this sub-level with two Arrow Blocks stacked in front of him. [[Ground Pound]]ing the one on top will cause it to bounce off of the lower one and rise, bringing Wario to the second floor, though he should move out of the way to avoid being squished by the platform above. The way to the red diamond is blocked on each side by a large, moving [[Spike Ball|spiked ball]], which Wario must jump past. The green Spriteling is on the first floor. | ||
|- | |- | ||
|5 | |5 | ||
|[[File:PecanSandsSub5.png|150px]] | |[[File:PecanSandsSub5.png|150px]] | ||
|On the bottom-left corner of the sandy area in front of the small sandfalls. | |On the bottom-left corner of the sandy area in front of the small sandfalls. | ||
|This sub-level consists of many rotating rectangular platforms that Wario needs to jump across. The narrow sides of the platforms have spiked balls moving back and forth on them. The red diamond and Gold Statue | |This sub-level consists of many rotating rectangular platforms that Wario needs to jump across. The narrow sides of the platforms have spiked balls moving back and forth on them. The red diamond and Gold Statue part are at the end. | ||
|- | |- | ||
|6 | |6 | ||
|[[File:PecanSandsSub6.png|150px]] | |[[File:PecanSandsSub6.png|150px]] | ||
|In the sandy area to the left of the Battle Ring. | |In the sandy area to the left of the Battle Ring. | ||
|To get to the red diamond, Wario must get past some [[Drop Block]]s. However, they have spiked balls on top. To circumvent this, he should cling to the sides of them until they drop low enough to jump onto, then immediately jump to the next block. Past the red diamond are two spinning block platforms, one big and one small, moving back and forth. Riding them takes Wario to a trail of [[Marshmallow Block]]s leading to a Gold Statue | |To get to the red diamond, Wario must get past some [[Drop Block]]s. However, they have spiked balls on top. To circumvent this, he should cling to the sides of them until they drop low enough to jump onto, then immediately jump to the next block. Past the red diamond are two spinning block platforms, one big and one small, moving back and forth. Riding them takes Wario to a trail of [[Marshmallow Block]]s leading to a Gold Statue part. | ||
|- | |- | ||
|7 | |7 | ||
|[[File:PecanSandsSub7.png|150px]] | |[[File:PecanSandsSub7.png|150px]] | ||
|Past a series of ledges to the left of the chain-link fence after the Battle Ring. | |Past a series of ledges to the left of the chain-link fence after the Battle Ring. | ||
|The ladders leading to the second floor are blocked by spiked balls. To make them move, Wario must jump onto the Marshmallow Block, then immediately use a [[Corkscrew Conk]] to hit the lever on the wall. On the second floor is a Gold Statue | |The ladders leading to the second floor are blocked by spiked balls. To make them move, Wario must jump onto the Marshmallow Block, then immediately use a [[Corkscrew Conk]] to hit the lever on the wall. On the second floor is a Gold Statue part; the red diamond is above it. To reach it, Wario must go to the back of the room while avoiding the falling [[Rock Block]]s, climb up the cubic platforms, then drop down to where it is. | ||
|- | |- | ||
|8 | |8 | ||
| Line 88: | Line 87: | ||
|} | |} | ||
==Gold Statue | ==Gold Statue parts== | ||
*Inside the third red diamond sub-level. | *Inside the third red diamond sub-level. | ||
*On a narrow path to the right of the area reached by using the | *On a narrow path to the right of the area reached by using the Cyclone Generator by the Sandworm's sand pit. | ||
*Inside the fifth red diamond sub-level. | *Inside the fifth red diamond sub-level. | ||
*On the sand slide that leads into the Battle Ring. | *On the sand slide that leads into the Battle Ring. | ||
| Line 96: | Line 95: | ||
*Inside the seventh red diamond sub-level. | *Inside the seventh red diamond sub-level. | ||
*In an alcove beneath the stone staircase past the sand stream with Big Scorpers and statues. | *In an alcove beneath the stone staircase past the sand stream with Big Scorpers and statues. | ||
*In front of the sandfall right before the area with Flying | *In front of the sandfall right before the area with Flying Spade wall that leads to the top of the pyramid. | ||
==Treasures== | ==Treasures== | ||
{| | {|class=wikitable style="text-align: center; width: 100%" | ||
!width="1%"|Chest color | !width="1%"|Chest color | ||
!width="4%"|Treasure | !width="4%"|Treasure | ||
!width="5%"|Image | |||
!width="20%"|Button location | !width="20%"|Button location | ||
!width="20%"|Chest location | !width="20%"|Chest location | ||
| Line 107: | Line 107: | ||
|Red | |Red | ||
|Ancient Ring | |Ancient Ring | ||
|Near the first sandfall with Glue Globes, in front of a wall that Flying | |[[File:WW Ancient Ring.png]] | ||
|Near the first sandfall with Glue Globes, in front of a wall that Flying Spades can be thrown into. | |||
|In the middle of the sand stream at the beginning. | |In the middle of the sand stream at the beginning. | ||
|- | |- | ||
|Yellow | |Yellow | ||
|Ancient Necklace | |Ancient Necklace | ||
|[[File:WW Ancient Necklace.png]] | |||
|In the area with Big Scorpers to the right of the first stone ramp. | |In the area with Big Scorpers to the right of the first stone ramp. | ||
|In front of one of the wind-shooting stone faces near the beginning. | |In front of one of the wind-shooting stone faces near the beginning. | ||
| Line 117: | Line 119: | ||
|Chartreuse | |Chartreuse | ||
|Ancient Relief | |Ancient Relief | ||
|[[File:WW Ancient Relief.png]] | |||
|In an alcove near the first stone ramp. | |In an alcove near the first stone ramp. | ||
|On a ledge to the right of the first stone face. | |On a ledge to the right of the first stone face. | ||
| Line 122: | Line 125: | ||
|Green | |Green | ||
|Small Pyramid | |Small Pyramid | ||
|[[File:WW Small Pyramid.png]] | |||
|On a wall near a trio of small sandfalls, before the sand slide that leads to the Battle Ring. | |On a wall near a trio of small sandfalls, before the sand slide that leads to the Battle Ring. | ||
|To the left of the | |To the left of the Sandworm's sand pit, near a Cyclone Generator. | ||
|- | |- | ||
|Cyan | |Cyan | ||
|Ancient Bracelet | |Ancient Bracelet | ||
|[[File:WW Ancient Bracelet.png]] | |||
|On the far left of the sandy area below the trio of small sandfalls. | |On the far left of the sandy area below the trio of small sandfalls. | ||
|At the top of the large sand slide. | |At the top of the large sand slide. | ||
| Line 132: | Line 137: | ||
|Blue | |Blue | ||
|Anubis Statue | |Anubis Statue | ||
|[[File:WW Anubis Statue.png]] | |||
|To the left of the Battle Ring. | |To the left of the Battle Ring. | ||
|After the ladder leading up from the Battle Ring, on a narrow path with some statues. | |After the ladder leading up from the Battle Ring, on a narrow path with some statues. | ||
| Line 137: | Line 143: | ||
|Purple | |Purple | ||
|Monarch Mask | |Monarch Mask | ||
|[[File:WW Monarch Mask.png]] | |||
|On a wall in the sand stream with Big Scorpers, reached after climbing a chain-link fence. | |On a wall in the sand stream with Big Scorpers, reached after climbing a chain-link fence. | ||
|On top of one of the stone faces at the top of the pyramid, in front of a Garlic Dispenser. | |On top of one of the stone faces at the top of the pyramid, in front of a Garlic Dispenser. | ||
| Line 142: | Line 149: | ||
|Pink | |Pink | ||
|[[Nintendo GameCube]] | |[[Nintendo GameCube]] | ||
|In front of the sandfall with Glue Globes before the Flying | |[[File:WW GameCube.png]] | ||
|In front of the sandfall with Glue Globes before the Flying Spade wall leading to the top of the pyramid. | |||
|On top of the other stone face at the top of the pyramid. | |On top of the other stone face at the top of the pyramid. | ||
|} | |} | ||
==Spritelings== | ==Spritelings== | ||
{| | {|class=wikitable style="text-align: center; width: 100%" | ||
!width="1%"|Color | !width="1%"|Color | ||
!width="20%"|Location | !width="20%"|Location | ||
| Line 154: | Line 162: | ||
|Red | |Red | ||
|Inside the first red diamond sub-level. | |Inside the first red diamond sub-level. | ||
|'' | |"''The [[Big Scorper]]s are so annoying when they burrow into the sand! I hate those things! Use a {{color|red|Ground Pound move to force 'em out}}!''" | ||
|- | |- | ||
|Yellow | |Yellow | ||
|Inside the second red diamond sub-level. | |Inside the second red diamond sub-level. | ||
|'' | |"''The [[Stone-Cold Statue]] in front of the ladder is made up of three blocks that contain its eyes, nose, mouth, and a weak spot. To destroy it, {{color|red|strike its weak spot}} and topple all of its blocks! Crash! Down it goes!''" | ||
|- | |- | ||
|Green | |Green | ||
|Inside the fourth red diamond sub-level. | |Inside the fourth red diamond sub-level. | ||
|'' | |"''It goes without saying that the laser used by the [[Laser Jigglefish]] is dangerous! Try circling it then {{color|red|dropping from above}}!''" | ||
|- | |- | ||
|Blue | |Blue | ||
|Behind the Battle Ring. | |Behind the Battle Ring. | ||
|'' | |"''The [[Ironsider]] at the Goal up ahead spins around while spewing flames! When the flames close in, look for some sand! Use the {{color|red|Ground Pound to go underground}}!''" | ||
|- | |- | ||
|Purple | |Purple | ||
|Inside the eighth red diamond sub-level. | |Inside the eighth red diamond sub-level. | ||
|'' | |"''I'm the last [[Spriteling]] prisoner! There are {{color|blue|forty}} of us altogether, you know! How many did you save?''" | ||
|} | |} | ||
| Line 177: | Line 185: | ||
Pecan Sands Palm Trees.png|Some palm trees. | Pecan Sands Palm Trees.png|Some palm trees. | ||
PecanSandsTreasure.png|Wario about to obtain a treasure. | PecanSandsTreasure.png|Wario about to obtain a treasure. | ||
WeathervaneWarioWorld.png|A | WeathervaneWarioWorld.png|A Cyclone Generator creating a cyclone. | ||
StoneColdStatue.png|A Stone-Cold Statue breathing fire. | StoneColdStatue.png|A Stone-Cold Statue breathing fire. | ||
PecanSandsBattleRing.png|The Battle Ring. | PecanSandsBattleRing.png|The Battle Ring. | ||
FlyingShovels.png|Flying | FlyingShovels.png|Flying Spades. | ||
Pecan Sands Scythe Monster.jpg|Wario's rematch with the [[ | Pecan Sands Scythe Monster.jpg|Wario's rematch with the [[Sandworm]] | ||
PecanSandsUnithornsLair.png|[[Unithorn's Lair]]. | PecanSandsUnithornsLair.png|[[Unithorn's Lair]]. | ||
Pecan Sands Top.png|The top of the temple. | Pecan Sands Top.png|The top of the temple. | ||
| Line 188: | Line 196: | ||
==Music== | ==Music== | ||
{{media table | {{media table | ||
| | |file1=PecanSands.oga | ||
|title1=Pecan Sands | |||
| | |||
}} | }} | ||
| Line 202: | Line 209: | ||
|Fre=Pyramides | |Fre=Pyramides | ||
|FreM=Pyramids | |FreM=Pyramids | ||
|Ita=Tempio del Deserto | |||
|ItaM=Desert Temple | |||
|Spa=Gran Pirámide | |||
|SpaM=Great Pyramid | |||
}} | }} | ||
{{Wario World}} | {{Wario World}} | ||
[[Category:Deserts]] | [[Category:Deserts]] | ||
[[Category:Wario World | [[Category:Temples]] | ||
[[Category:Wario World levels]] | |||
Latest revision as of 10:39, June 28, 2024
| Wario World level | |
|---|---|
| Pecan Sands | |
| |
| World | Sparkle Land |
| Neighbor level | Mirror Mansion |
| Red diamond requirement |
6 |
| Boss | Ironsider |
| << List of levels >> | |
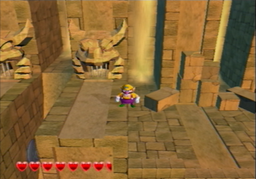
Pecan Sands is a large, pyramid-structured, desert level in Wario World. It is the eighth and final level of the game, as well as the second level of Sparkle Land. In order to reach the top and fight the Ironsider, the player has to climb up the pyramid. The sand around the stage is pouring out of the inside of the pyramid through several stone faces scattered throughout the stage, and the sand pouring out of them will push Wario off the stage if the player is not careful.
Pecan Sands is likely named after the famous Keebler snack "Pecan Sandies", which are shortbread cookies with pecan nuts in them.
Layout[edit]
The player starts off in a sand stream which drops into an abyss. On the way forward, Mummies will spawn out of the sand. At the end of the sandstream is an enemy generator and some Club Mummies. Up ahead is a stone ramp and a lower path through the sand. Going down the sand path will bring Wario into a battle with a yellow Crystal Entity. After defeating it, Wario can proceed into an area with Big Scorpers, a wooden chest, and the yellow treasure button. Back by the stone ramp, the chartreuse treasure button can be found in an alcove. Up the stone ramp is a Mummy Ankiron and a stone face that blows streams of wind. To the right of the stone face is a ledge where the chartreuse treasure spawns. To the left are some Mummies and two more stone faces, with the yellow treasure's spawn point in front of one of them. Further to the left, there is an arena where a blue Crystal Entity will spawn, but the battle can be avoided by walking around the arena. After that is a "sandfall" with many Glue Globes flowing down it that the player must use to get across. Below the sandfall is an area with many Big Scorpers, Hōhō, the red treasure button, and Flying Spades. The Flying Spades can be thrown into the wall behind the treasure button and used as platforms, much like the Monstrous Magnets found in Beanstalk Way. Two small platforms away from the treasure button is a steel trapdoor housing the red Spriteling. The sand path to the right of the Flying Spades leads to a wooden trapdoor containing the yellow Spriteling. Dropping down this ledge takes Wario back to the sand stream at the beginning, where the red treasure's spawn point can be found.
Past the sandfall is a platform with a few enemies, and below the platform is a sand pit with a Sandworm. Unlike the one fought in Greenhorn Ruins, this one only takes four cycles to defeat instead of five, and simply drops coins when defeated. There is a trapdoor near the sand pit with a Gold Statue part inside. To the left is a Big Scorper and a Cyclone Generator. Hitting the Cyclone Generator makes it whip up a cyclone and launch Wario into the air, which is necessary to reach the platform above, which has some enemies and a wooden chest. To the right is a wind-shooting stone face on a narrow path; with a Gold Statue part at the end. To the left are several small sandfalls with Glue Globes, and above them is a trapdoor containing the green Spriteling. On a wall to the left of the sandfalls is the green treasure button; finding the chest requires backtracking to the Sandworm's sand pit. South of the sandfalls is a sandy area with statues, Laser Jigglefish, and a Garlic Dispenser. The cyan treasure button is on the far left of this area, and to the south of it is a steel trapdoor containing a Gold Statue part. A Cyclone Generator on the far right of this area can be used to get back up, though the player can simply use the Glue Globes on the sandfalls instead. Past the sandfalls is a Stone-Cold Statue blocking a ladder. It must be defeated in order to continue. At the top of the ladder is the cyan treasure's spawn point and a large sand slide leading to a Battle Ring. On the way down is a Gold Statue part.
Behind the Battle Ring are two columns, either of which can be used to reach the three platforms between them. The blue Spriteling is on the platform in the middle. To the left of the Battle Ring is the blue treasure button, and to the south of the treasure button are Big Scorpers and a steel trapdoor containing a Gold Statue part. The ladder near the Battle Ring leads to an area with some enemies and a wooden chest. South of this area are two sculptures on a narrow path with the blue treasure's spawn point at the end. To the left of the enemies are five ledges with gaps in between; the one on the far left has a trapdoor with a Gold Statue part inside. Climbing the chain-link fence leads to a Garlic Dispenser and two Hōhō. Past here is a sand stream with Big Scorpers and statues in it, with the purple treasure button on the wall. Up ahead is a set of stone steps leading upward with a Gold Statue part underneath. The steps lead to a pair of wind-shooting stone faces with a wooden chest in between, as well as some Hōhō. Further ahead is a Laser Jigglefish and a steel trapdoor leading to the final red diamond sub-level, which contains the purple Spriteling.
Beyond the final trapdoor is another sandfall with Glue Globes where the final Gold Statue part is. In front of the sandfall on the right is a platform with the pink treasure button on it. Further ahead and past a Laser Jigglefish is a wall the player needs to use Flying Spades to get over. Three Flying Spades will spawn at a time, but only two are necessary to scale the wall. This brings Wario to the top of the pyramid, where the music becomes quiet. The ByeBye Balloons are in between two columns. The tops of two giant stone faces are on opposing sides. A Garlic Dispenser and the purple treasure's spawn point are on one stone face, while the pink treasure's spawn point is on the other. The ladder leading up to the Stone Doohickey is guarded by a Stone-Cold Statue. Once it is defeated, Wario can access the goal.
If Wario reenters the level after defeating the boss, there will be a set of ByeBye Balloons at the beginning that will take him to the Battle Ring.
Enemies[edit]
- Mummies
- Club Mummies
- Hōhō
- Mummy Ankirons
- Enemy generators
- Big Scorpers
- Flying Spades
- Laser Jigglefish
- Yellow Crystal Entity
- Blue Crystal Entity
- Sandworm
- Stone-Cold Statue
- Ironsider (Boss)
Red diamond sub-levels[edit]
| # | Image | Location | Description |
|---|---|---|---|
| 1 | 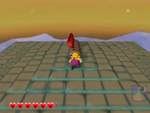
|
In the first area with Flying Spades, on a small platform near where the red treasure button is. | Hitting the levers will cause the individual squares of blocks to rise, forming a pyramid when all of them are active. The lever closest to the middle causes the central block to rise. When all other levers are active, this can be used to reach the platform above where the red diamond is. Below the central block are two very small platforms where the red Spriteling can be found. |
| 2 | 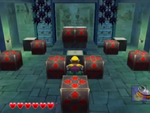
|
On the path of sand to the right of the first Flying Spade wall. | Punching the Arrow Block behind Wario's starting point forward will cause the rest of the blocks to move in a way that creates a path leading up to the yellow Spriteling and red diamond. This can also be done by dashing straight directly from Wario's spawn point. |
| 3 | 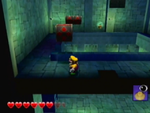
|
Near the Sandworm's sand pit. | There are five Arrow Blocks on the second floor; two in pairs, and one by itself. They must be punched in a specific way. First, of the pair of blocks on the right side of the room (where the Gold Statue part is), Wario must punch the one lined up with the lone block so it collides with it, then go to the other pair of blocks and punch one on the left so it hits the block he just punched. He should then go back and punch the other two blocks so they collide with the ones he previously punched. If done correctly, Wario will be able to reach the red diamond. |
| 4 | 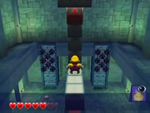
|
At the top of the small sandfalls that precede the large sand slide. | Wario starts this sub-level with two Arrow Blocks stacked in front of him. Ground Pounding the one on top will cause it to bounce off of the lower one and rise, bringing Wario to the second floor, though he should move out of the way to avoid being squished by the platform above. The way to the red diamond is blocked on each side by a large, moving spiked ball, which Wario must jump past. The green Spriteling is on the first floor. |
| 5 | 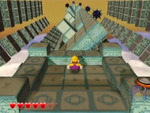
|
On the bottom-left corner of the sandy area in front of the small sandfalls. | This sub-level consists of many rotating rectangular platforms that Wario needs to jump across. The narrow sides of the platforms have spiked balls moving back and forth on them. The red diamond and Gold Statue part are at the end. |
| 6 | 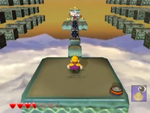
|
In the sandy area to the left of the Battle Ring. | To get to the red diamond, Wario must get past some Drop Blocks. However, they have spiked balls on top. To circumvent this, he should cling to the sides of them until they drop low enough to jump onto, then immediately jump to the next block. Past the red diamond are two spinning block platforms, one big and one small, moving back and forth. Riding them takes Wario to a trail of Marshmallow Blocks leading to a Gold Statue part. |
| 7 | 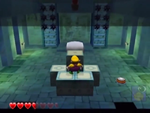
|
Past a series of ledges to the left of the chain-link fence after the Battle Ring. | The ladders leading to the second floor are blocked by spiked balls. To make them move, Wario must jump onto the Marshmallow Block, then immediately use a Corkscrew Conk to hit the lever on the wall. On the second floor is a Gold Statue part; the red diamond is above it. To reach it, Wario must go to the back of the room while avoiding the falling Rock Blocks, climb up the cubic platforms, then drop down to where it is. |
| 8 | 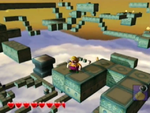
|
Before the final sandfall with Glue Globes, near a Laser Jigglefish. | The last and largest red diamond sub-level in the game; getting through it involves a very long bout of platforming. The purple Spriteling is at the end. The red diamond is on an isolated platform floating in the middle and can be reached by jumping down from where the Spriteling is. |
Gold Statue parts[edit]
- Inside the third red diamond sub-level.
- On a narrow path to the right of the area reached by using the Cyclone Generator by the Sandworm's sand pit.
- Inside the fifth red diamond sub-level.
- On the sand slide that leads into the Battle Ring.
- Inside the sixth red diamond sub-level.
- Inside the seventh red diamond sub-level.
- In an alcove beneath the stone staircase past the sand stream with Big Scorpers and statues.
- In front of the sandfall right before the area with Flying Spade wall that leads to the top of the pyramid.
Treasures[edit]
| Chest color | Treasure | Image | Button location | Chest location |
|---|---|---|---|---|
| Red | Ancient Ring | Near the first sandfall with Glue Globes, in front of a wall that Flying Spades can be thrown into. | In the middle of the sand stream at the beginning. | |
| Yellow | Ancient Necklace | 
|
In the area with Big Scorpers to the right of the first stone ramp. | In front of one of the wind-shooting stone faces near the beginning. |
| Chartreuse | Ancient Relief | 
|
In an alcove near the first stone ramp. | On a ledge to the right of the first stone face. |
| Green | Small Pyramid | 
|
On a wall near a trio of small sandfalls, before the sand slide that leads to the Battle Ring. | To the left of the Sandworm's sand pit, near a Cyclone Generator. |
| Cyan | Ancient Bracelet | On the far left of the sandy area below the trio of small sandfalls. | At the top of the large sand slide. | |
| Blue | Anubis Statue | 
|
To the left of the Battle Ring. | After the ladder leading up from the Battle Ring, on a narrow path with some statues. |
| Purple | Monarch Mask | On a wall in the sand stream with Big Scorpers, reached after climbing a chain-link fence. | On top of one of the stone faces at the top of the pyramid, in front of a Garlic Dispenser. | |
| Pink | Nintendo GameCube | 
|
In front of the sandfall with Glue Globes before the Flying Spade wall leading to the top of the pyramid. | On top of the other stone face at the top of the pyramid. |
Spritelings[edit]
| Color | Location | Dialogue |
|---|---|---|
| Red | Inside the first red diamond sub-level. | "The Big Scorpers are so annoying when they burrow into the sand! I hate those things! Use a Ground Pound move to force 'em out!" |
| Yellow | Inside the second red diamond sub-level. | "The Stone-Cold Statue in front of the ladder is made up of three blocks that contain its eyes, nose, mouth, and a weak spot. To destroy it, strike its weak spot and topple all of its blocks! Crash! Down it goes!" |
| Green | Inside the fourth red diamond sub-level. | "It goes without saying that the laser used by the Laser Jigglefish is dangerous! Try circling it then dropping from above!" |
| Blue | Behind the Battle Ring. | "The Ironsider at the Goal up ahead spins around while spewing flames! When the flames close in, look for some sand! Use the Ground Pound to go underground!" |
| Purple | Inside the eighth red diamond sub-level. | "I'm the last Spriteling prisoner! There are forty of us altogether, you know! How many did you save?" |
Gallery[edit]
Wario's rematch with the Sandworm
Music[edit]
| File info |
Names in other languages[edit]
| Language | Name | Meaning | Notes |
|---|---|---|---|
| Japanese | ピーカンさばく[?] Pīkan Sabaku |
Pecan Desert | |
| French | Pyramides[?] | Pyramids | |
| German | Pyramania[?] | from Pyramid and mania | |
| Italian | Tempio del Deserto[?] | Desert Temple | |
| Spanish | Gran Pirámide[?] | Great Pyramid |


