World 8-Ghost House 2: Difference between revisions
mNo edit summary |
m (Text replacement - "<br/>" to "<br>") |
||
| (17 intermediate revisions by 6 users not shown) | |||
| Line 1: | Line 1: | ||
{{ | {{level infobox | ||
|title={{world|8|ghosthousep2}} | |title={{world|8|ghosthousep2}} | ||
|image=[[File:PDSMBE-W8-GhostHouse2.png|250px]] | |image=[[File:PDSMBE-W8-GhostHouse2.png|250px]] | ||
|world=[[World 8 (Puzzle & Dragons: Super Mario Bros. Edition)|World 8]] | |world=[[World 8 (Puzzle & Dragons: Super Mario Bros. Edition)|World 8]] | ||
|game=''[[Puzzle & Dragons: Super Mario Bros. Edition]]'' | |game=''[[Puzzle & Dragons: Super Mario Bros. Edition]]'' | ||
|boss=[[ | |boss=[[Boo Crew]] | ||
|before=[[World 8-11 | |before=[[World 8-11|<<]] | ||
|after=[[World 8-Tower 3 | |after=[[World 8-Tower 3|>>]] | ||
}} | }} | ||
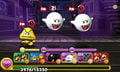
'''{{world|8|ghosthousep2}}''' is the fifteenth course of [[World 8 (Puzzle & Dragons: Super Mario Bros. Edition)|World 8]] in ''[[Puzzle & Dragons: Super Mario Bros. Edition]]''. It is a [[Ghost House|ghost house]] level with enemies consisting of [[ | '''{{world|8|ghosthousep2}}''' is the fifteenth course of [[World 8 (Puzzle & Dragons: Super Mario Bros. Edition)|World 8]] in ''[[Puzzle & Dragons: Super Mario Bros. Edition]]''. It is a [[Ghost House|ghost house]] level with enemies consisting of [[Boo]]s, Purple [[Coin Coffer]]s, and [[Big Boo]]s. This course is unlocked by taking the secret exit in [[World 8-11]]. | ||
==Layout== | ==Layout== | ||
This level starts with four | This level starts with four battles (with two [[Coin Coffer|Purple Coin Coffers]] appearing on the third battle), after which the player reaches a branching path with a sign on the left, a [[Gold Block]] in the center, and a green [[Warp Pipe]] on the right. The path on the right requires the player to clear more Fire Orbs than other Orb types, the Gold Block in the center requires more Dark Orbs to produce its [[Beanstalk]], and the green Warp Pipe on the right requires more Wood Orbs to be cleared to enter it. | ||
Taking the path on the right, the player faces three | Taking the path on the right, the player faces three battles before the boss fight with [[Boo Crew]]. | ||
Taking the green Warp Pipe down, the player faces | Taking the green Warp Pipe down, the player faces a battle with a [[King Boo]], then comes across a [[? Block]] they can open for an item. After opening (or failing to open) the ? Block, the player takes a blue Warp Pipe back to the main path and directly to the boss fight at the end. | ||
Climbing the Beanstalk produced by the Gold Block in the center, the player faces two | Climbing the Beanstalk produced by the Gold Block in the center, the player faces two battles before taking a blue Warp Pipe back to the main path and directly to the boss fight at the end. | ||
The player has Fire, Water, Wood, Dark | The player has Fire, Water, Wood, and Dark Orbs on the Orb field for this course. | ||
==Course details== | ==Course details== | ||
{|class= width=50% cellspacing=0 border=2 cellpadding=3 | {|class= width=50% cellspacing=0 border=2 cellpadding=3 colspan="6;" style="text-align: center;" | ||
|-style="background: #ABC" | |-style="background: #ABC" | ||
!Course type | !Course type | ||
| Line 30: | Line 29: | ||
!Boss(es) | !Boss(es) | ||
|- | |- | ||
|Heartless Course<br | |Heartless Course<br>[[File:PDSMBE-FireOrb.png|20px|Fire]][[File:PDSMBE-WaterOrb.png|20px|Water]][[File:PDSMBE-WoodOrb.png|20px|Wood]][[File:PDSMBE-LightOrbD.png|20px|Light]][[File:PDSMBE-DarkOrb.png|20px|Dark]][[File:PDSMBE-HeartOrbD.png|20px|Heart]] | ||
|[[File:PDSMBE-BooMushroom.png|25px|Boo Mushroom|link=Boo Mushroom]] [[File:PDSMBE-1UpMushroom.png|25px|1-Up Mushroom|link=1-Up Mushroom]] [[File:PDSMBE-Coin.png|25px|Coin|link=Coin]] | |[[File:PDSMBE-BooMushroom.png|25px|Boo Mushroom|link=Boo Mushroom]] [[File:PDSMBE-1UpMushroom.png|25px|1-Up Mushroom|link=1-Up Mushroom]] [[File:PDSMBE-Coin.png|25px|Coin|link=Coin]] | ||
|[[File:PDSMBE-BooCard.png|Boo|link=Boo]] [[File:PDSMBE-BigBooCard.png|Big Boo|link=Big Boo]] [[File:PDSMBE-KingPurpleCoinCofferCard.png|King Purple Coin Coffer|link=Coin Coffer]] [[File:PDSMBE-BooCrewCard.png|Boo Crew|link=Boo Crew]] | |[[File:PDSMBE-BooCard.png|Boo|link=Boo]] [[File:PDSMBE-BigBooCard.png|Big Boo|link=Big Boo]] [[File:PDSMBE-KingPurpleCoinCofferCard.png|King Purple Coin Coffer|link=Coin Coffer]] [[File:PDSMBE-BooCrewCard.png|Boo Crew|link=Boo Crew]] | ||
| Line 37: | Line 36: | ||
===Enemy XP/Coin stats=== | ===Enemy XP/Coin stats=== | ||
{|class= "sortable" width=25% cellspacing=0 border=2 cellpadding=3 | {|class= "sortable" width=25% cellspacing=0 border=2 cellpadding=3 colspan="6;" style="text-align: center;" | ||
|-style="background: #ABC" | |-style="background: #ABC" | ||
!data-sort-type="alphabetical"|Enemy/Boss | !data-sort-type="alphabetical"|Enemy/Boss | ||
| Line 51: | Line 50: | ||
|14 | |14 | ||
|- | |- | ||
|[[File:PDSMBE-PurpleCoinCofferCard.png|Purple Coin Coffer|link=Coin Coffer]]<br> | |[[File:PDSMBE-PurpleCoinCofferCard.png|Purple Coin Coffer|link=Coin Coffer]]<br>[[Purple Coin Coffer]] | ||
|1944 | |1944 | ||
|24 | |24 | ||
| Line 64: | Line 63: | ||
|- | |- | ||
|[[File:PDSMBE-KingPurpleCoinCofferCard.png|King Purple Coin Coffer|link=Coin Coffer]]<br>King Purple [[Coin Coffer]] | |[[File:PDSMBE-KingPurpleCoinCofferCard.png|King Purple Coin Coffer|link=Coin Coffer]]<br>King Purple [[Coin Coffer]] | ||
| | |3864 | ||
| | |48 | ||
|- | |- | ||
|[[File:PDSMBE-BooCrewCard.png|Boo Crew|link=Boo Crew]]<br>'''[[ | |[[File:PDSMBE-BooCrewCard.png|Boo Crew|link=Boo Crew]]<br>'''[[Boo Crew]]''' | ||
|7359 | |7359 | ||
|53 | |53 | ||
|} | |||
===Enemy formations=== | |||
{|width=25% cellspacing=0 border=1 cellpadding=1 style="text-align: center;" | |||
! colspan="6;" style="background:#ABC;"|Enemy formations | |||
|-style="background:#ABC" | |||
!rowspan="2;" style="background:#d5dee6;"|Enemy 1 | |||
!rowspan="2;" style="background:#d5dee6;"|Enemy 2 | |||
!rowspan="2;" style="background:#d5dee6;"|Enemy 3 | |||
!rowspan="2;" style="background:#d5dee6;"|Enemy 4 | |||
!colspan="2;" style="background:gold;"|Total XP/Coins | |||
|- | |||
!style="background:#feefcb;"|XP | |||
!style="background:#feefcb;"|Coins | |||
|- | |||
!colspan="6;" style="background:#b8c5d3;"|Battle 1 | |||
|- | |||
|[[File:PDSMBE-BooCard.png|Boo|link=Boo]] | |||
|[[File:PDSMBE-BooCard.png|Boo|link=Boo]] | |||
| -- | |||
| -- | |||
|style="background:#feefcb;"|3500 | |||
|style="background:#feefcb;"|28 | |||
|- | |||
|[[File:PDSMBE-BooCard.png|Boo|link=Boo]] | |||
| -- | |||
| -- | |||
| -- | |||
|style="background:#feefcb;"|1750 | |||
|style="background:#feefcb;"|14 | |||
|- | |||
|[[File:PDSMBE-BooCard.png|Boo|link=Boo]] | |||
|[[File:PDSMBE-BooCard.png|Boo|link=Boo]] | |||
|[[File:PDSMBE-BooCard.png|Boo|link=Boo]] | |||
| -- | |||
|style="background:#feefcb;"|5250 | |||
|style="background:#feefcb;"|42 | |||
|- | |||
|[[File:PDSMBE-BooCard.png|Boo|link=Boo]] | |||
|[[File:PDSMBE-GoldGoombaCard.png|Gold Goomba|link=Gold Goomba]] | |||
| -- | |||
| -- | |||
|style="background:#feefcb;"|6500 | |||
|style="background:#feefcb;"|28 | |||
|- | |||
|[[File:PDSMBE-BooCard.png|Boo|link=Boo]] | |||
|[[File:PDSMBE-GoldGoombaCard.png|Gold Goomba|link=Gold Goomba]] | |||
|[[File:PDSMBE-BooCard.png|Boo|link=Boo]] | |||
| -- | |||
|style="background:#feefcb;"|8250 | |||
|style="background:#feefcb;"|42 | |||
|- | |||
!colspan="6;" style="background:#b8c5d3;"|Battle 2 | |||
|- | |||
|[[File:PDSMBE-BooCard.png|Boo|link=Boo]] | |||
|[[File:PDSMBE-BooCard.png|Boo|link=Boo]] | |||
|[[File:PDSMBE-BooCard.png|Boo|link=Boo]] | |||
| -- | |||
|style="background:#feefcb;"|5250 | |||
|style="background:#feefcb;"|42 | |||
|- | |||
|[[File:PDSMBE-BigBooCard.png|Big Boo|link=Big Boo]] | |||
|[[File:PDSMBE-BooCard.png|Boo|link=Boo]] | |||
|[[File:PDSMBE-BooCard.png|Boo|link=Boo]] | |||
| -- | |||
|style="background:#feefcb;"|5850 | |||
|style="background:#feefcb;"|47 | |||
|- | |||
|[[File:PDSMBE-BigBooCard.png|Big Boo|link=Big Boo]] | |||
|[[File:PDSMBE-GoldGoombaCard.png|Gold Goomba|link=Gold Goomba]] | |||
|[[File:PDSMBE-BooCard.png|Boo|link=Boo]] | |||
| -- | |||
|style="background:#feefcb;"|8850 | |||
|style="background:#feefcb;"|57 | |||
|- | |||
!colspan="6;" style="background:#b8c5d3;"|Battle 3 | |||
|- | |||
|[[File:PDSMBE-PurpleCoinCofferCard.png|Purple Coin Coffer|link=Coin Coffer]] | |||
|[[File:PDSMBE-PurpleCoinCofferCard.png|Purple Coin Coffer|link=Coin Coffer]] | |||
| -- | |||
| -- | |||
|style="background:#feefcb;"|3888 | |||
|style="background:#feefcb;"|48 | |||
|- | |||
!colspan="6;" style="background:#b8c5d3;"|Battle 4 | |||
|- | |||
|[[File:PDSMBE-BooCard.png|Boo|link=Boo]] | |||
|[[File:PDSMBE-BooCard.png|Boo|link=Boo]] | |||
|[[File:PDSMBE-BooCard.png|Boo|link=Boo]] | |||
| -- | |||
|style="background:#feefcb;"|5250 | |||
|style="background:#feefcb;"|42 | |||
|- | |||
|[[File:PDSMBE-BigBooCard.png|Big Boo|link=Big Boo]] | |||
|[[File:PDSMBE-BooCard.png|Boo|link=Boo]] | |||
|[[File:PDSMBE-BooCard.png|Boo|link=Boo]] | |||
| -- | |||
|style="background:#feefcb;"|5850 | |||
|style="background:#feefcb;"|57 | |||
|- | |||
!colspan="6;" style="background:#b8c5d3;"|{{hover|Battle 5|First battle after branching path, if the player follows the sign.}} | |||
|- | |||
|[[File:PDSMBE-BooCard.png|Boo|link=Boo]] | |||
|[[File:PDSMBE-BooCard.png|Boo|link=Boo]] | |||
|[[File:PDSMBE-BooCard.png|Boo|link=Boo]] | |||
|[[File:PDSMBE-BooCard.png|Boo|link=Boo]] | |||
|style="background:#feefcb;"|7000 | |||
|style="background:#feefcb;"|56 | |||
|- | |||
|[[File:PDSMBE-BooCard.png|Boo|link=Boo]] | |||
|[[File:PDSMBE-BooCard.png|Boo|link=Boo]] | |||
|[[File:PDSMBE-BooCard.png|Boo|link=Boo]] | |||
| -- | |||
|style="background:#feefcb;"|5250 | |||
|style="background:#feefcb;"|42 | |||
|- | |||
|[[File:PDSMBE-BooCard.png|Boo|link=Boo]] | |||
|[[File:PDSMBE-BooCard.png|Boo|link=Boo]] | |||
|[[File:PDSMBE-GoldGoombaCard.png|Gold Goomba|link=Gold Goomba]] | |||
|[[File:PDSMBE-BooCard.png|Boo|link=Boo]] | |||
|style="background:#feefcb;"|10000 | |||
|style="background:#feefcb;"|56 | |||
|- | |||
!colspan="6;" style="background:#b8c5d3;"|{{hover|Battle 6|Second battle after branching path, if the player follows the sign.}} | |||
|- | |||
|[[File:PDSMBE-BooCard.png|Boo|link=Boo]] | |||
|[[File:PDSMBE-BooCard.png|Boo|link=Boo]] | |||
|[[File:PDSMBE-BooCard.png|Boo|link=Boo]] | |||
| -- | |||
|style="background:#feefcb;"|5250 | |||
|style="background:#feefcb;"|42 | |||
|- | |||
|[[File:PDSMBE-BigBooCard.png|Big Boo|link=Big Boo]] | |||
|[[File:PDSMBE-BooCard.png|Boo|link=Boo]] | |||
|[[File:PDSMBE-BooCard.png|Boo|link=Boo]] | |||
| -- | |||
|style="background:#feefcb;"|5850 | |||
|style="background:#feefcb;"|57 | |||
|- | |||
|[[File:PDSMBE-GoldGoombaCard.png|Gold Goomba|link=Gold Goomba]] | |||
|[[File:PDSMBE-BooCard.png|Boo|link=Boo]] | |||
|[[File:PDSMBE-BooCard.png|Boo|link=Boo]] | |||
| -- | |||
|style="background:#feefcb;"|8250 | |||
|style="background:#feefcb;"|42 | |||
|- | |||
!colspan="6;" style="background:#b8c5d3;"|{{hover|Battle 7|Third battle after branching path, if the player follows the sign.}} | |||
|- | |||
|[[File:PDSMBE-BigBooCard.png|Big Boo|link=Big Boo]] | |||
|[[File:PDSMBE-BigBooCard.png|Big Boo|link=Big Boo]] | |||
| -- | |||
| -- | |||
|style="background:#feefcb;"|4700 | |||
|style="background:#feefcb;"|58 | |||
|- | |||
!colspan="6;" style="background:#b8c5d3;"|{{hover|Battle 6 (Warp Pipe area)|First battle after branching path, if the player enters the green Warp Pipe.}} | |||
|- | |||
|[[File:PDSMBE-KingBooCard.png|King Boo|link=King Boo]] | |||
| -- | |||
| -- | |||
| -- | |||
|style="background:#feefcb;"|3885 | |||
|style="background:#feefcb;"|48 | |||
|- | |||
!colspan="6;" style="background:#b8c5d3;"|{{hover|Battle 5 (Beanstalk area)|First battle after branching path, if the player climbs the Beanstalk.}} | |||
|- | |||
|[[File:PDSMBE-BigBooCard.png|Big Boo|link=Big Boo]] | |||
| -- | |||
| -- | |||
| -- | |||
|style="background:#feefcb;"|2350 | |||
|style="background:#feefcb;"|29 | |||
|- | |||
|[[File:PDSMBE-KingPurpleCoinCofferCard.png|King Purple Coin Coffer|link=Coin Coffer]] | |||
| -- | |||
| -- | |||
| -- | |||
|style="background:#feefcb;"|3864 | |||
|style="background:#feefcb;"|48 | |||
|- | |||
|[[File:PDSMBE-PurpleCoinCofferCard.png|Purple Coin Coffer|link=Coin Coffer]] | |||
| -- | |||
| -- | |||
| -- | |||
|style="background:#feefcb;"|1944 | |||
|style="background:#feefcb;"|24 | |||
|- | |||
!colspan="6;" style="background:#b8c5d3;"|{{hover|Battle 6 (Beanstalk area)|Second battle after branching path, if the player climbs the Beanstalk.}} | |||
|- | |||
|[[File:PDSMBE-BigBooCard.png|Big Boo|link=Big Boo]] | |||
|[[File:PDSMBE-PurpleCoinCofferCard.png|Purple Coin Coffer|link=Coin Coffer]] | |||
| -- | |||
| -- | |||
|style="background:#feefcb;"|4294 | |||
|style="background:#feefcb;"|53 | |||
|- | |||
|[[File:PDSMBE-BigBooCard.png|Big Boo|link=Big Boo]] | |||
|[[File:PDSMBE-KingPurpleCoinCofferCard.png|King Purple Coin Coffer|link=Coin Coffer]] | |||
| -- | |||
| -- | |||
|style="background:#feefcb;"|6214 | |||
|style="background:#feefcb;"|77 | |||
|- | |||
!colspan="6;" style="background:#b8c5d3;"|Boss battle | |||
|- | |||
![[File:PDSMBE-BooCrewCard.png|Boo Crew|link=Boo Crew]] | |||
! -- | |||
! -- | |||
! -- | |||
!style="background:#feefcb;"|7359 | |||
!style="background:#feefcb;"|53 | |||
|} | |} | ||
| Line 76: | Line 286: | ||
=={{world|sp8|ghosthousep2}}== | =={{world|sp8|ghosthousep2}}== | ||
'''{{world|sp8|ghosthousep2}}''' is a difficult version of {{world|8|ghosthousep2}} from [[Special World 8 (Puzzle & Dragons: Super Mario Bros. Edition)|★World 8]]. The Orb configuration for this Special World course matches that of its normal world counterpart. The third | '''{{world|sp8|ghosthousep2}}''' is a difficult version of {{world|8|ghosthousep2}} from [[Special World 8 (Puzzle & Dragons: Super Mario Bros. Edition)|★World 8]]. The Orb configuration for this Special World course matches that of its normal world counterpart. The third battle contains three Purple Coin Coffers instead of two. | ||
===Course details=== | ===Course details=== | ||
{|class= width=50% cellspacing=0 border=2 cellpadding=3 | {|class= width=50% cellspacing=0 border=2 cellpadding=3 colspan="6;" style="text-align: center;" | ||
|-style="background: #ABC" | |-style="background: #ABC" | ||
!Course type | !Course type | ||
| Line 86: | Line 296: | ||
!Boss(es) | !Boss(es) | ||
|- | |- | ||
|Heartless Course<br | |Heartless Course<br>[[File:PDSMBE-FireOrb.png|20px|Fire]][[File:PDSMBE-WaterOrb.png|20px|Water]][[File:PDSMBE-WoodOrb.png|20px|Wood]][[File:PDSMBE-LightOrbD.png|20px|Light]][[File:PDSMBE-DarkOrb.png|20px|Dark]][[File:PDSMBE-HeartOrbD.png|20px|Heart]] | ||
|[[File:PDSMBE-BooMushroom.png|25px|Boo Mushroom|link=Boo Mushroom]] [[File:PDSMBE-PoisonMushroom.png|25px|Poison Mushroom|link=Poison Mushroom]] [[File:PDSMBE-BowsersShell.png|25px|Spiky Shell|link= | |[[File:PDSMBE-BooMushroom.png|25px|Boo Mushroom|link=Boo Mushroom]] [[File:PDSMBE-PoisonMushroom.png|25px|Poison Mushroom|link=Poison Mushroom]] [[File:PDSMBE-BowsersShell.png|25px|Spiky Shell|link=Spiky Shell]] [[File:PDSMBE-Coin.png|25px|Coin|link=Coin]] | ||
|[[File:PDSMBE-BooCard.png|Boo|link=Boo]] [[File:PDSMBE-BigBooCard.png|Big Boo|link=Big Boo]] [[File:PDSMBE-KingPurpleCoinCofferCard.png|King Purple Coin Coffer|link=Coin Coffer]] [[File:PDSMBE-BooCrewCard.png|Boo Crew|link=Boo Crew]] | |[[File:PDSMBE-BooCard.png|Boo|link=Boo]] [[File:PDSMBE-BigBooCard.png|Big Boo|link=Big Boo]] [[File:PDSMBE-KingPurpleCoinCofferCard.png|King Purple Coin Coffer|link=Coin Coffer]] [[File:PDSMBE-BooCrewCard.png|Boo Crew|link=Boo Crew]] | ||
|[[File:PDSMBE-BooCrewCard.png|Boo Crew|link=Boo Crew]] | |[[File:PDSMBE-BooCrewCard.png|Boo Crew|link=Boo Crew]] | ||
| Line 93: | Line 303: | ||
====Enemy XP/Coin stats==== | ====Enemy XP/Coin stats==== | ||
{|class= "sortable" width=25% cellspacing=0 border=2 cellpadding=3 | {|class= "sortable" width=25% cellspacing=0 border=2 cellpadding=3 colspan="6;" style="text-align: center;" | ||
|-style="background: #ABC" | |-style="background: #ABC" | ||
!data-sort-type="alphabetical"|Enemy/Boss | !data-sort-type="alphabetical"|Enemy/Boss | ||
| Line 107: | Line 317: | ||
|? | |? | ||
|- | |- | ||
|[[File:PDSMBE-PurpleCoinCofferCard.png|Purple Coin Coffer|link=Coin Coffer]]<br> | |[[File:PDSMBE-PurpleCoinCofferCard.png|Purple Coin Coffer|link=Coin Coffer]]<br>[[Purple Coin Coffer]] | ||
|4807 | |4807 | ||
|48 | |48 | ||
| Line 120: | Line 330: | ||
|- | |- | ||
|[[File:PDSMBE-KingPurpleCoinCofferCard.png|King Purple Coin Coffer|link=Coin Coffer]]<br>King Purple [[Coin Coffer]] | |[[File:PDSMBE-KingPurpleCoinCofferCard.png|King Purple Coin Coffer|link=Coin Coffer]]<br>King Purple [[Coin Coffer]] | ||
| | |8349 | ||
| | |88 | ||
|- | |- | ||
|[[File:PDSMBE-BooCrewCard.png|Boo Crew|link=Boo Crew]]<br>'''[[ | |[[File:PDSMBE-BooCrewCard.png|Boo Crew|link=Boo Crew]]<br>'''[[Boo Crew]]''' | ||
|16335 | |16335 | ||
|91 | |91 | ||
|} | |||
====Enemy formations==== | |||
{|width=25% cellspacing=0 border=1 cellpadding=1 style="text-align: center;" | |||
! colspan="6;" style="background:#ABC;"|Enemy formations | |||
|-style="background:#ABC" | |||
!rowspan="2;" style="background:#d5dee6;"|Enemy 1 | |||
!rowspan="2;" style="background:#d5dee6;"|Enemy 2 | |||
!rowspan="2;" style="background:#d5dee6;"|Enemy 3 | |||
!rowspan="2;" style="background:#d5dee6;"|Enemy 4 | |||
!colspan="2;" style="background:gold;"|Total XP/Coins | |||
|- | |||
!style="background:#feefcb;"|XP | |||
!style="background:#feefcb;"|Coins | |||
|- | |||
!colspan="6;" style="background:#b8c5d3;"|Battle 1 | |||
|- | |||
|[[File:PDSMBE-BooCard.png|Boo|link=Boo]] | |||
|[[File:PDSMBE-BooCard.png|Boo|link=Boo]] | |||
| -- | |||
| -- | |||
|style="background:#feefcb;"|11798 | |||
|style="background:#feefcb;"|58 | |||
|- | |||
|[[File:PDSMBE-BooCard.png|Boo|link=Boo]] | |||
| -- | |||
| -- | |||
| -- | |||
|style="background:#feefcb;"|5899 | |||
|style="background:#feefcb;"|29 | |||
|- | |||
|[[File:PDSMBE-BooCard.png|Boo|link=Boo]] | |||
|[[File:PDSMBE-BooCard.png|Boo|link=Boo]] | |||
|[[File:PDSMBE-BooCard.png|Boo|link=Boo]] | |||
| -- | |||
|style="background:#feefcb;"|17697 | |||
|style="background:#feefcb;"|87 | |||
|- | |||
!colspan="6;" style="background:#b8c5d3;"|Battle 2 | |||
|- | |||
|[[File:PDSMBE-BooCard.png|Boo|link=Boo]] | |||
|[[File:PDSMBE-BooCard.png|Boo|link=Boo]] | |||
|[[File:PDSMBE-BooCard.png|Boo|link=Boo]] | |||
| -- | |||
|style="background:#feefcb;"|17697 | |||
|style="background:#feefcb;"|87 | |||
|- | |||
|[[File:PDSMBE-BigBooCard.png|Big Boo|link=Big Boo]] | |||
|[[File:PDSMBE-BooCard.png|Boo|link=Boo]] | |||
|[[File:PDSMBE-BooCard.png|Boo|link=Boo]] | |||
| -- | |||
|style="background:#feefcb;"|18897 | |||
|style="background:#feefcb;"|116 | |||
|- | |||
!colspan="6;" style="background:#b8c5d3;"|Battle 3 | |||
|- | |||
|[[File:PDSMBE-PurpleCoinCofferCard.png|Purple Coin Coffer|link=Coin Coffer]] | |||
|[[File:PDSMBE-PurpleCoinCofferCard.png|Purple Coin Coffer|link=Coin Coffer]] | |||
|[[File:PDSMBE-PurpleCoinCofferCard.png|Purple Coin Coffer|link=Coin Coffer]] | |||
| -- | |||
|style="background:#feefcb;"|14421 | |||
|style="background:#feefcb;"|144 | |||
|- | |||
!colspan="6;" style="background:#b8c5d3;"|Battle 4 | |||
|- | |||
|[[File:PDSMBE-BooCard.png|Boo|link=Boo]] | |||
|[[File:PDSMBE-BooCard.png|Boo|link=Boo]] | |||
|[[File:PDSMBE-BooCard.png|Boo|link=Boo]] | |||
| -- | |||
|style="background:#feefcb;"|17697 | |||
|style="background:#feefcb;"|87 | |||
|- | |||
|[[File:PDSMBE-BigBooCard.png|Big Boo|link=Big Boo]] | |||
|[[File:PDSMBE-BooCard.png|Boo|link=Boo]] | |||
|[[File:PDSMBE-BooCard.png|Boo|link=Boo]] | |||
| -- | |||
|style="background:#feefcb;"|18897 | |||
|style="background:#feefcb;"|116 | |||
|- | |||
!colspan="6;" style="background:#b8c5d3;"|{{hover|Battle 5|First battle after branching path, if the player follows the sign.}} | |||
|- | |||
|[[File:PDSMBE-BooCard.png|Boo|link=Boo]] | |||
|[[File:PDSMBE-BooCard.png|Boo|link=Boo]] | |||
|[[File:PDSMBE-BooCard.png|Boo|link=Boo]] | |||
|[[File:PDSMBE-BooCard.png|Boo|link=Boo]] | |||
|style="background:#feefcb;"|23596 | |||
|style="background:#feefcb;"|116 | |||
|- | |||
|[[File:PDSMBE-BooCard.png|Boo|link=Boo]] | |||
|[[File:PDSMBE-BooCard.png|Boo|link=Boo]] | |||
|[[File:PDSMBE-BooCard.png|Boo|link=Boo]] | |||
| -- | |||
|style="background:#feefcb;"|17697 | |||
|style="background:#feefcb;"|87 | |||
|- | |||
|[[File:PDSMBE-BooCard.png|Boo|link=Boo]] | |||
|[[File:PDSMBE-BooCard.png|Boo|link=Boo]] | |||
| -- | |||
| -- | |||
|style="background:#feefcb;"|11798 | |||
|style="background:#feefcb;"|58 | |||
|- | |||
!colspan="6;" style="background:#b8c5d3;"|{{hover|Battle 6|Second battle after branching path, if the player follows the sign.}} | |||
|- | |||
|[[File:PDSMBE-BooCard.png|Boo|link=Boo]] | |||
|[[File:PDSMBE-BooCard.png|Boo|link=Boo]] | |||
|[[File:PDSMBE-BooCard.png|Boo|link=Boo]] | |||
| -- | |||
|style="background:#feefcb;"|17697 | |||
|style="background:#feefcb;"|87 | |||
|- | |||
|[[File:PDSMBE-BigBooCard.png|Big Boo|link=Big Boo]] | |||
|[[File:PDSMBE-BooCard.png|Boo|link=Boo]] | |||
|[[File:PDSMBE-BooCard.png|Boo|link=Boo]] | |||
| -- | |||
|style="background:#feefcb;"|18897 | |||
|style="background:#feefcb;"|116 | |||
|- | |||
!colspan="6;" style="background:#b8c5d3;"|{{hover|Battle 7|Third battle after branching path, if the player follows the sign.}} | |||
|- | |||
|[[File:PDSMBE-BigBooCard.png|Big Boo|link=Big Boo]] | |||
|[[File:PDSMBE-BigBooCard.png|Big Boo|link=Big Boo]] | |||
| -- | |||
| -- | |||
|style="background:#feefcb;"|14198 | |||
|style="background:#feefcb;"|116 | |||
|- | |||
!colspan="6;" style="background:#b8c5d3;"|{{hover|Battle 6 (Warp Pipe area)|First battle after branching path, if the player enters the green Warp Pipe.}} | |||
|- | |||
|[[File:PDSMBE-KingBooCard.png|King Boo|link=King Boo]] | |||
| -- | |||
| -- | |||
| -- | |||
|style="background:#feefcb;"|9871 | |||
|style="background:#feefcb;"|88 | |||
|- | |||
!colspan="6;" style="background:#b8c5d3;"|{{hover|Battle 5 (Beanstalk area)|First battle after branching path, if the player climbs the Beanstalk.}} | |||
|- | |||
|[[File:PDSMBE-BigBooCard.png|Big Boo|link=Big Boo]] | |||
| -- | |||
| -- | |||
| -- | |||
|style="background:#feefcb;"|7099 | |||
|style="background:#feefcb;"|58 | |||
|- | |||
|[[File:PDSMBE-KingPurpleCoinCofferCard.png|King Purple Coin Coffer|link=Coin Coffer]] | |||
| -- | |||
| -- | |||
| -- | |||
|style="background:#feefcb;"|8349 | |||
|style="background:#feefcb;"|88 | |||
|- | |||
|[[File:PDSMBE-PurpleCoinCofferCard.png|Purple Coin Coffer|link=Coin Coffer]] | |||
| -- | |||
| -- | |||
| -- | |||
|style="background:#feefcb;"|4196 | |||
|style="background:#feefcb;"|44 | |||
|- | |||
!colspan="6;" style="background:#b8c5d3;"|{{hover|Battle 6 (Beanstalk area)|Second battle after branching path, if the player climbs the Beanstalk.}} | |||
|- | |||
|[[File:PDSMBE-BigBooCard.png|Big Boo|link=Big Boo]] | |||
|[[File:PDSMBE-PurpleCoinCofferCard.png|Purple Coin Coffer|link=Coin Coffer]] | |||
| -- | |||
| -- | |||
|style="background:#feefcb;"|11295 | |||
|style="background:#feefcb;"|102 | |||
|- | |||
|[[File:PDSMBE-BigBooCard.png|Big Boo|link=Big Boo]] | |||
|[[File:PDSMBE-KingPurpleCoinCofferCard.png|King Purple Coin Coffer|link=Coin Coffer]] | |||
| -- | |||
| -- | |||
|style="background:#feefcb;"|15448 | |||
|style="background:#feefcb;"|146 | |||
|- | |||
!colspan="6;" style="background:#b8c5d3;"|Boss battle | |||
|- | |||
![[File:PDSMBE-BooCrewCard.png|Boo Crew|link=Boo Crew]] | |||
! -- | |||
! -- | |||
! -- | |||
!style="background:#feefcb;"|16335 | |||
!style="background:#feefcb;"|91 | |||
|} | |} | ||
==Enemies== | ==Enemies== | ||
*[[ | [[File:PDSMBE-W8-GhostHouse2GG.png|thumb|250px|A rare Gold Goomba sighting in the first battle.]] | ||
*[[Gold Goomba]] | *[[Boo]]s | ||
* | *[[Gold Goomba]]s | ||
*[[Big | *[[Purple Coin Coffer]]s | ||
*[[Big Boo]]s | |||
*[[King Boo]] (Warp Pipe area only) | *[[King Boo]] (Warp Pipe area only) | ||
*King Purple Coin | *King Purple Coin Coffers (Beanstalk area only) | ||
*[[ | *[[Boo Crew]] (Boss) | ||
==Gallery== | |||
{{P&DSMBE | <gallery> | ||
PDSMBE-W6-GhostHouseGG2.jpg|Another rare Gold Goomba sighting in the first battle. | |||
PDSMBE-W8-GhostHouse2GG2.jpg|A rare Gold Goomba sighting in the second battle. | |||
PDSMBE-W8-GhostHouse2GG4.jpg|A rare Gold Goomba sighting in the sixth battle. | |||
PDSMBE-W8-GhostHouse2GG3.jpg|A rare Gold Goomba sighting in the fifth battle. | |||
</gallery> | |||
{{P&DSMBE levels}} | |||
{{P&DSMBE}} | {{P&DSMBE}} | ||
[[Category:Ghost Houses]] | [[Category:Ghost Houses]] | ||
[[Category:Puzzle & Dragons: Super Mario Bros. Edition | [[Category:Puzzle & Dragons: Super Mario Bros. Edition levels]] | ||
Latest revision as of 12:33, April 1, 2024
| Level | |
|---|---|
| World 8- | |

| |
| World | World 8 |
| Game | Puzzle & Dragons: Super Mario Bros. Edition |
| Boss | Boo Crew |
| << Directory of levels >> | |
World 8-![]() Ghost House 2 is the fifteenth course of World 8 in Puzzle & Dragons: Super Mario Bros. Edition. It is a ghost house level with enemies consisting of Boos, Purple Coin Coffers, and Big Boos. This course is unlocked by taking the secret exit in World 8-11.
Ghost House 2 is the fifteenth course of World 8 in Puzzle & Dragons: Super Mario Bros. Edition. It is a ghost house level with enemies consisting of Boos, Purple Coin Coffers, and Big Boos. This course is unlocked by taking the secret exit in World 8-11.
Layout[edit]
This level starts with four battles (with two Purple Coin Coffers appearing on the third battle), after which the player reaches a branching path with a sign on the left, a Gold Block in the center, and a green Warp Pipe on the right. The path on the right requires the player to clear more Fire Orbs than other Orb types, the Gold Block in the center requires more Dark Orbs to produce its Beanstalk, and the green Warp Pipe on the right requires more Wood Orbs to be cleared to enter it.
Taking the path on the right, the player faces three battles before the boss fight with Boo Crew.
Taking the green Warp Pipe down, the player faces a battle with a King Boo, then comes across a ? Block they can open for an item. After opening (or failing to open) the ? Block, the player takes a blue Warp Pipe back to the main path and directly to the boss fight at the end.
Climbing the Beanstalk produced by the Gold Block in the center, the player faces two battles before taking a blue Warp Pipe back to the main path and directly to the boss fight at the end.
The player has Fire, Water, Wood, and Dark Orbs on the Orb field for this course.
Course details[edit]
| Course type | ? Block items | Enemies found here | Boss(es) |
|---|---|---|---|
| Heartless Course |
Enemy XP/Coin stats[edit]
| Enemy/Boss | XP | Coins |
|---|---|---|
Boo |
1750 | 14 |
Gold Goomba |
4750 | 14 |
Purple Coin Coffer |
1944 | 24 |
Big Boo |
2350 | 29 |
King Boo |
3885 | 48 |
King Purple Coin Coffer |
3864 | 48 |
Boo Crew |
7359 | 53 |
Enemy formations[edit]
| Enemy formations | |||||
|---|---|---|---|---|---|
| Enemy 1 | Enemy 2 | Enemy 3 | Enemy 4 | Total XP/Coins | |
| XP | Coins | ||||
| Battle 1 | |||||
| -- | -- | 3500 | 28 | ||
| -- | -- | -- | 1750 | 14 | |
| -- | 5250 | 42 | |||
| -- | -- | 6500 | 28 | ||
| -- | 8250 | 42 | |||
| Battle 2 | |||||
| -- | 5250 | 42 | |||
| -- | 5850 | 47 | |||
| -- | 8850 | 57 | |||
| Battle 3 | |||||
| -- | -- | 3888 | 48 | ||
| Battle 4 | |||||
| -- | 5250 | 42 | |||
| -- | 5850 | 57 | |||
| Battle 5 | |||||
| 7000 | 56 | ||||
| -- | 5250 | 42 | |||
| 10000 | 56 | ||||
| Battle 6 | |||||
| -- | 5250 | 42 | |||
| -- | 5850 | 57 | |||
| -- | 8250 | 42 | |||
| Battle 7 | |||||
| -- | -- | 4700 | 58 | ||
| Battle 6 (Warp Pipe area) | |||||
| -- | -- | -- | 3885 | 48 | |
| Battle 5 (Beanstalk area) | |||||
| -- | -- | -- | 2350 | 29 | |
| -- | -- | -- | 3864 | 48 | |
| -- | -- | -- | 1944 | 24 | |
| Battle 6 (Beanstalk area) | |||||
| -- | -- | 4294 | 53 | ||
| -- | -- | 6214 | 77 | ||
| Boss battle | |||||
| -- | -- | -- | 7359 | 53 |
Course map[edit]
For a map of this course, see here.
★World 8- Ghost House 2[edit]
★World 8-![]() Ghost House 2 is a difficult version of World 8-
Ghost House 2 is a difficult version of World 8-![]() Ghost House 2 from ★World 8. The Orb configuration for this Special World course matches that of its normal world counterpart. The third battle contains three Purple Coin Coffers instead of two.
Ghost House 2 from ★World 8. The Orb configuration for this Special World course matches that of its normal world counterpart. The third battle contains three Purple Coin Coffers instead of two.
Course details[edit]
| Course type | ? Block items | Enemies found here | Boss(es) |
|---|---|---|---|
| Heartless Course |
Enemy XP/Coin stats[edit]
| Enemy/Boss | XP | Coins |
|---|---|---|
Boo |
5899 | 29 |
Gold Goomba |
? | ? |
Purple Coin Coffer |
4807 | 48 |
Big Boo |
7099 | 58 |
King Boo |
9871 | 88 |
King Purple Coin Coffer |
8349 | 88 |
Boo Crew |
16335 | 91 |
Enemy formations[edit]
| Enemy formations | |||||
|---|---|---|---|---|---|
| Enemy 1 | Enemy 2 | Enemy 3 | Enemy 4 | Total XP/Coins | |
| XP | Coins | ||||
| Battle 1 | |||||
| -- | -- | 11798 | 58 | ||
| -- | -- | -- | 5899 | 29 | |
| -- | 17697 | 87 | |||
| Battle 2 | |||||
| -- | 17697 | 87 | |||
| -- | 18897 | 116 | |||
| Battle 3 | |||||
| -- | 14421 | 144 | |||
| Battle 4 | |||||
| -- | 17697 | 87 | |||
| -- | 18897 | 116 | |||
| Battle 5 | |||||
| 23596 | 116 | ||||
| -- | 17697 | 87 | |||
| -- | -- | 11798 | 58 | ||
| Battle 6 | |||||
| -- | 17697 | 87 | |||
| -- | 18897 | 116 | |||
| Battle 7 | |||||
| -- | -- | 14198 | 116 | ||
| Battle 6 (Warp Pipe area) | |||||
| -- | -- | -- | 9871 | 88 | |
| Battle 5 (Beanstalk area) | |||||
| -- | -- | -- | 7099 | 58 | |
| -- | -- | -- | 8349 | 88 | |
| -- | -- | -- | 4196 | 44 | |
| Battle 6 (Beanstalk area) | |||||
| -- | -- | 11295 | 102 | ||
| -- | -- | 15448 | 146 | ||
| Boss battle | |||||
| -- | -- | -- | 16335 | 91 |
Enemies[edit]

- Boos
- Gold Goombas
- Purple Coin Coffers
- Big Boos
- King Boo (Warp Pipe area only)
- King Purple Coin Coffers (Beanstalk area only)
- Boo Crew (Boss)
Gallery[edit]

Another rare Gold Goomba sighting in the first battle.

A rare Gold Goomba sighting in the second battle.

A rare Gold Goomba sighting in the sixth battle.
A rare Gold Goomba sighting in the fifth battle.


