The 'Shroom:Issue 116/Strategy Wing
Director Notes
Written by: Meta Knight (talk)
Hello 'Shroom readers and welcome to this month's issue of Strategy Wing! Man my plate has been pretty full this month as I'm looking to apply for colleges, and schoolwork, but fortunately this issue is still on time. Nothing special this month. RandomYoshi (talk) is still busy for personal matters, so his part is absent again. Superchao (talk) is here with Lets Play Showcase, and as a reminder he'll be good for this month's holiday issue. Be sure to read everyone's sections and vote in the poll found at the bottom of the issue, the writers on this subteam have worked very hard, and I am truly grateful for them. There's nothing else really news related though so without further ado, please enjoy this month's issue.
Section of the Month
| STRATEGY WING SECTION OF THE MONTH | ||||
|---|---|---|---|---|
| Place | Section | Votes | % | Writer |
| 1st | Party Trick! | 14 | 66.67% | Meta Knight |
| 2nd | Mario Kart: Wheel Tips Corner | 7 | 33.33% | Yoshi876 |
Superchao welcomes you to the upcoming winter by showing you a MapleLeaf.
[read more]
Meta Knight heads after a psychotic monster as he continues his Metroid 1 walkthrough.
[read more]
Meta Knight is solo again as he looks at some minigames from the Gamecube-era.
[read more]
Mario Kart: Wheel Tips Corner
Hello 'Shroom racers! And welcome to Mario Kart Wheel Tips Corner, here I plan to give you just some extra tips to help you with your racing, or just some changes in a track that might catch you off guard if you aren't prepared for them. So whilst writing this section, I discovered at the end that I'd made it entirely Donkey Kong themed, so enjoy! Lights are out, let's start racing.
Kool Karts
You can't race if you don't have a Kart to do it in, so in this section I'll give you some facts about a Kart, Bike, ATV or even tires and gliders that you can use hopefully for racing success.
This month's Kool Kart is the Rambi Rider, which is Donkey Kong's Kart in Mario Kart DS. As it's for a heavy character, one would expect that the speed and weight stats are high, while the acceleration stats are low. And you'd be correct for thinking that. The other things to notice with this Kart are that the drift and items stats are high, whilst the handling one is low. Corners will be tricky out wide with this Kart, but if you drift around them, it should be plain sailing... or should that be ramming?
What's Changed?
Retro tracks are now a huge portion of the Mario Kart games, typically amounting to half the courses in the game. But usually these courses change some things up, so in this section I'll help you find out "What's Changed" in the retro tracks.
As we're a decent amount of time into Autumn, I figured it'd be a good time to look at the autumnal course, Maple Treeway. Maple Treeway first appeared in Mario Kart Wii, before appearing as a retro course in Mario Kart 7. Not a lot has changed, but the main things are that the cannon now has a glide pad, instead of just shooting you out, and the net that used to be near the end of the course has been removed in favour of a glide pad. Graphics have been updated and the branch after the Wiggler portion has had the trick ramps removed.
Ace Shortcut
In this small section I give you a way to shave a few seconds off your time, whether you know about it or not. Be warned, most of these shortcuts will require a Mushroom.
This issue I bring you a shortcut from DK Summit (or DK Snowboard Cross for PAL regions).
This shortcut comes after the bumpy bit with all of the boost pads. If you turn right and drift, you can cross the chasm. There are some dangers with this shortcut, however. If you mess up, you will fall down into the chasm. Also you can try and cut the chasm too much and this will end up with you hitting the fence on the other side. But, it does shave a fair few seconds off your time and could give you an edge over your other competitors.
Let's Play Showcase
Hello, 'Shroom readers! It's Superchao once again, here to bring you a touching story about someone you don't know, by which I mean the latest edition of LP Showcase! This was meant to be October's Showcase, but it got pushed back a month, so expect one next month as well. For this particular showcase, I'm branching out to someone who doesn't do solely Video LPs: MapleLeaf, of the Something Awful forums! While he doesn't have the profilic output of some of the other LPers I've reviewed, what he definitely has some high quality creations which I'm happy to show to you guys. Interestingly enough, the two LPs that really stand out from him are of completely different tone, but I think they're both high-quality enough to discuss here.
First is his Let's Play of Metroid: Other M. Yes, that Other M. While the game is awful, the commentary takes it from "totally intolerable" to watchable. We all know the worst moments; Adam shooting Samus in the back for no goddamn reason, Samus freezing up against Ridley and never actually getting to kill him, basically 90% of the cutscenes in this game... but what's impressive is, this terrible, painful material is actually watchable! Yes, through the banter of MapleLeaf, and his co-host OliveBranch, they're able to carry you through the worst parts of the game. While the gameplay itself is nothing stellar, and probably the most low-key part of the game, they're still able to pull you through and keep you moving with some good commentary. Hell, the item cleanup episode is nothing but two solid hours of commentary - bringing in Slowbeef as well - but their interactions and discussion of the game, the series, and the main problems is more than enough to make it worth the watch. Overall, this is an LP that benefits greatly from the interaction between two people.
In a completely different camp is the Let's Play of Mother 3, which you might be forgiven for assuming was somehow done by a different MapleLeaf. This one is a screenshot LP, but rather than humorous commentary, it goes for the completely different take of a narrative style. The adventures of Lucas and his friends, the actions of their enemies, all of these are expanded on while still keeping largely true to the game's storyline. There's even a few cases where the story takes its own direction, such as skipping over a canon boss fight, but it's well-written and feels natural enough that I didn't even realize. It took the second half of the update, the post-update section, for me to figure out that it wasn't actually part of the game! What impresses me the most is the different style, showing his ability to go for both the comedic tone in Other M (which was the only way we could survive watching it) and the serious, dramatic tone in Mother 3, as befits that particular game.
If you'd ask me to name a flaw, I'd have to say... well, it's hard to say, because unlike my past three, I haven't seen enough of what I'd call MapleLeaf's true style. While I've seen a couple others, such as Kid Icarus Uprising, I don't feel like I've got as much knowledge here as I do the other three to give a proper critical evaluation. You'll have to be on your own for this one, sorry.
Overall, while he's not as much of a personal choice as the Men Drinkin' Coffee, Bikdip, or Gesh, this is certainly a Let's Player I'd recommend. At the time of writing, MapleLeaf's even doing a Federation Force LP. So if you want to experience that game without playing it - the same way I did with Other M - then he's your man... and if Other M's any indication, no matter how bad it gets, you'll be able to survive with his commentary!
Galactic Expedition
Written By: Meta Knight (talk)
Metroid 1 Walkthrough
Current Inventory: 1 Energy Tank, 50 Missiles, Morph Ball, Morph Ball Bombs, Long Beam, Ice Beam, High-Jump Boots, Screw Attack
Goals: Find Wave Beam, obtain more missiles, obtain more Energy Tanks, obtain Varia Suit, Kill Ridley.
Greetings everyone and welcome to this month's issue of Galactic Expedition! Last time, we got a slew of upgrades and ended our journey after obtaining the Screw Attack in Norfair. There is a lot planned for this month, we're going to get the Varia Suit, defeat Ridley, and I'll show you where the Wave Beam is. Still in the Screw Attack room from last time, head all the way to the right and bomb back down the hidden path you came up from. To the right is the door that leads back to where the High-Jump Boots were, but there's still some goodies to collect in this area.
Instead of going left or right, go down. Go right towards the door that leads to the High-Jump Boots, but go into Morph Ball mode and bomb around that area. You will find a hidden passage that will take you down. There will be another green room that looks identical to where you just were, with a door on the right and a door on the left. For now head right. You'll be in a long chamber with plenty of Multiviolas. The Screw Attack allows you to kill them by jumping into them, so that should prove to be useful. There's also lots of singular rock-shaped platforms that are spaced out, so precision is key.
You'll eventually come across what appears to be a dead end, but if you bomb towards the right on the platform, you'll drop, where you can bomb again to get past the wall. Make your way to the right, bombing when necessary. You'll have to go through another series of platforms to get to the door. You should be in a green room with lava below a bridge of some sort. Right by the door is a space that can be bombed. The lava is also fake, and won't damage you. Jump into it and head right. You can either Morph Ball or shoot the space while standing, but you want to have it so you drop below the lava. Head left through the door.
Make your way left and you'll be at what appears to be yet another dead end. By now bombing where it seems to be a dead end is instinctual. However, bombing on the ground won't do anything. Shoot the space in front of you, and then use a bomb to bump yourself through the gap. If you're teetering close to death, fear not! An Energy Tank awaits you, replenishing all of your health and giving you and extra 100 units of energy. Your max health is now 299. Go back right to the green room, then back up the fake lava.
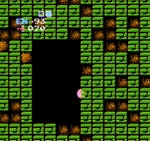
Go back left. You want to keep traveling left until you can't go left anymore. You'll know when you're in the right spot because you'll be at what appears to be the bottom of a tall green chamber, with a little bit of lava at the bottom, and space to climb up. This lava is also fake, and will not hurt you. Go into the lava, and on the left side of the pit, you can bomb the block to break it. This will open another pathway leading down. Go all the way down, and you'll see another fake lava pit. This lava pit still won't hurt you, but there's nothing of interest, so just head right into the door.
You'll be in a long corridor with cell-shaped platforms. I have no idea what they're supposed to be, but it doesn't really matter, so just keep going right to make your way to the door. There will be lots of breakable blocks, some you can shoot, and others you'll have to bomb in order to get under what looks like organic stalactites. When going through the door, you'll come across a room that looks identical to others you've seen, with a door to the right, but for now bomb down. The hidden block is toward the right door. When you've fallen down a long chamber, go into the door on the right. Make your way through the corridor and you'll be able to collect 2 Missile Tanks. Go back left. Go back up the chamber so you see the doors on the left and the right. Head right.
Proceed through the long corridor. There are several tall platforms to jump across. Be careful because if you fall in one of the cracks into the lava it is very hard to get back up. You might be able to use the bomb jump trick to get up, but there's no guarantee. When you go through the door, you'll be in a green room, with lava beneath you. This lava has a Dragon in it, but the lava is still fake. Bomb the breakable block towards the left door and head down. Go through the door on the left.
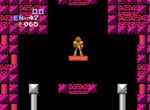
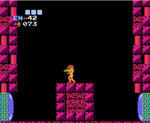
You'll hear the item tune in this corridor. What awaits you? Inside the red door lies the Wave Beam! Grabbing this will let your beam shoot in a wave-like pattern, and can also go through walls and other solid objects. This is a good time to explain a key property of Metroid 1. In Super Metroid and beyond, beams stack on each other. That is, you can have the Ice Beam and the Wave Beam at the same time. However, in Metroid 1 and Metroid II: Return of Samus, you cannot have both the Wave Beam and Ice Beam at the same time. I personally don't get the Wave Beam because you have to have the Ice Beam in order to kill Metroids. If you get the Wave Beam now, you'll have to go back to get the Ice Beam. I also like being able to freeze enemies for platforms, and getting the Wave Beam takes away that power. If you want to use the Wave Beam, go for it.
Head back up above the fake lava and go through the door on the right. Bomb your way through the corridor and there will be a Missile Tank at the end of it. This sector is done, so we're going to head back to where the High-Jump Boots are. Head all the way left until you can't go left anymore. You will be in a tall green chamber. Climb it all the way to the top until you can't anymore, and go in the door on the right. Keep going right and you will eventually get back to where the High-Jump Boots are. Keep going right from more and you will be back in the tall purple chamber you came from.
From here you have one of 2 options. You'll have to come back to this spot anyway so it doesn't really matter which path you take. You can either go up back to Brinstar to get the Varia Suit, or go down and take down Ridley. You technically don't have to get the Varia Suit at all, but it increases your defense by half so I recommend getting it at some point. If you want to get it now Ridley's area will be a bit easier, but it takes longer. If you don't want to backtrack, you can just go down to take down Ridley. You have to take down Ridley no matter what if you go after the Varia Suit first, but the order is up to you. Take note though that if you do go after Ridley without the Varia Suit, enemies do a LOT more damage, so keep that in mind.
Path A: Going to the Varia Suit
To get to the Varia Suit from this point, you want to get back to Brinstar. Head up the tall purple chamber. After going up the breakable blocks, there will be a door on the left. Climb up and as soon as you see another door on the left, take it. Head left through the corridor, and climb up to get to the elevator. Make your way left back to the tall yellow chamber. Climb your way all the way to the top and take the door on the right.
You'll be in a long green corridor, and come across a bombable block. There will be four gray tubes to choose from to Morph Ball through. Take the one on the very top, and be careful of Zoomers that scale through these tubes. When exiting the pipes, make your way through the door. You should now be in a short green room. Walk to the center of it and shoot up. A secret path will reveal itself. Head up it. There's a door way up for you to be able to jump through. Go through the red door and you'll be able to get the Varia Suit.
Go back down the hidden blocks, and go through the right door. There will be a Missile Tank for you (unless you got it already before). Keep going right, and when you get to the end, you'll be at what appears to be a dead end, and the ground cannot be broken. However, this wall still isn't a dead end! If you shoot up, you'll reveal some breakable blocks. Shoot the blocks, then jump up and right. You'll move into a small room with a single Rio. You can get past this room as well. You'll have to do some clever bomb tricks to get up. If you tap the bomb button, you should be able to propel yourself up enough to get into the passage. Keep going right and you'll get an Energy Tank.
Keep going right through the door, and you'll be in a familiar spot. It's the tall yellow chamber where the Bombs were. Head all the way down, and left. Go through the series of blue corridors, and make your way back to Norfair. When entering Norfair, head right to the tall purple chamber, and bomb your way down. Your next goal is to take down Ridley.
If you defeated Ridley first and are reading this part to get the Varia Suit, instead of going down into Norfair, go left from the tall yellow chamber, to navigate yourself back in the tall blue chamber of Brinstar.
Path B: Going After Ridley
To get to Ridley, climb down the purple chamber and head left. There's a long corridor with more cell-shaped platforms. Go through the door and you'll be in a short purple chamber. Head down and go through the door on the right. You'll see a red beastly looking design above an elevator. Head down into Ridley's Lair. Descend into the dark depths.
When you reach the bottom of the elevator, take the door on the left. This room is made of several gray blocks. Go through the door on the left and you'll enter a room that's identical. Right next to the door on the right, shoot up. You'll see a hidden path. Jump up, then you'll see a door high up. If you go to the end, you'll get a Missile Tank. Go back down the blocks where you shot up. Head left and you'll be in a green corridor. When you jump over a stack of purple breakable blocks, bomb the ground in the middle of another stack of purple blocks. There will be a hidden little nook for you go through. Enter it and head left. If you don't do this, you'll come across a dead end. Go through the red door.
You'll be in yet another room with gray blocks identical to the others, except there's an Energy Tank. This room is a cruel joke. You cannot just simply walk to it because you will fall through a fake floor, and down a long pit. The pit is two blocks wide. The block on the ground to the right of the Energy Tank is safe, but the two blocks to the right of that are fake. You could just jump across, but I've found this is unreliable. What I usually do, is go into Morph Ball mode, and go to the edge of the pit. Then, I place a bomb and move left just a little bit before the bomb goes off. When it goes off, you will be propelled over to the Energy Tank. The reason I get across this way is because the ceiling is low, and I do not want my jump to get cut off.
If you fell through the floor and missed the Energy Tank, you can try to head left to get it again. You'll come to a tall pink chamber. You can try to jump up across the platforms and enter the door on the right. However, if you fall here, the only way to get the Energy Tank is to go all the way around Ridley's Lair again. Getting there is simple, just go all the way down, then all the way right, passing a Missile Tank. Keep heading right until you can't anymore. You should be in a tall pink chamber. If you head all the way up and take the top door on the left you can get back to where the elevator is, and navigate your way to try again.
If you got the Energy Tank, you actually still want to head down the fake floor. When you drop down head right. Go through the long green corridor, and you'll come across a room with a door in an awkward position. This is a tricky jump, because of the low ceiling and the small entry space. Bombing across won't work in the traditional sense. It's more reliable to just try to jump across. However, it still is tricky. Stand on the edge, and somersault jump up onto the platform. If you make it, there's a Missle Tank waiting for you.
If you missed, the only way to get it is to go all the way around Ridley's Lair and give it another chance. However, if you got it, you still want to fall down. You should see a door on the left and right. To the right is the tall pink chamber that eventually gets back to the elevator. However, to the left is something much more interesting. If you go through the door on the left, you'll eventually come face to face with the Space Pirate Commander himself, Ridley!
Boss Guide: Ridley
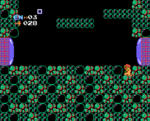
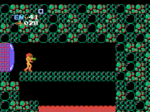
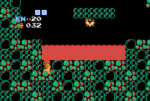
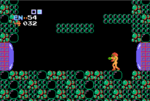
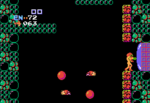
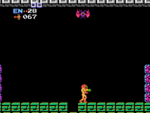
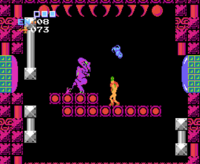
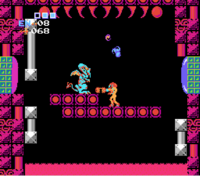
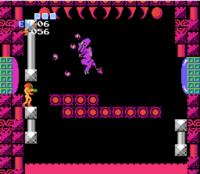
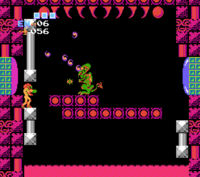
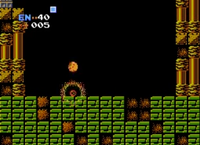
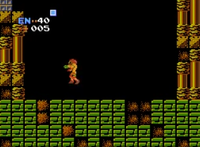
Ridley is pretty easy no matter what beam you have. His attack pattern is simple, he just jumps up and down in the same spot and throws fireballs that have a large arc. If you have the Ice Beam, you can freeze his fireballs. When his fireballs are frozen, he won't throw anymore. You can use this to your advantage. Freeze all the fireballs, then get right up next to Ridley, and start unloading your missiles. His fireballs will unthaw, so be sure to keep an eye on them. You can just simply freeze them again, and continue shooting your missiles into Ridley. If you have the Wave Beam, make your way to the platform where the purple door is. on the platform there, and just keep tapping the fire button. The Wave Beam will be able to do damage to Ridley. The fireballs can't even hit you either, so you can just wait there for Ridley to die. Be patient though, it takes a while to beat Ridley without missiles. Killing Ridley will give you a whopping 75 missiles.
| Image Guide: Fighting Ridley |
|---|
Back to Path B
With Ridley defeated, go through the purple door. You'll see what appears to be no floor, but there are parts of it that are floor. It's hard to tell where the floor is just by looking at it. Try to jump across repeatedly to the other side, and you'll be rewarded with an Energy Tank! Head back right. To get back on the platform without falling in the lava, place a Morph Ball bomb. Then, move slightly right before it goes off. It will bounce you back up. Go through Ridley's boss door, and all the way right until you get to the tall pink chamber. If you didn't already get it, go down. The door on the left has a Missile Tank for you. When you're satisfied with your goodies, navigate back to the elevator. Just as a reminder, the way to get to the elevator is in the door to the left at the very top of the tall pink chamber.
To get out of Norfair, just head back the way you came from Ridley's entrance. You'll come back to the tall purple chamber. Climb up and you'll see the door that leads to the High-Jump Boots. If you haven't gotten the Varia Suit and you want it, go ahead and take a look at Path A. If you have completed both paths, you're ready to move on. Go up the tall purple chamber, and enter the door that leads back to the elevator. Take the elevator up into Brinstar. When you're in Brinstar, head left to get to the tall yellow chamber. Climb up and take the middle door on the left. Go through the door on the left again and you should be in the tall blue chamber.
After Paths A and B
If you're reading this, hopefully you are in the tall blue chamber of Brinstar with both Ridley defeated, and the Varia Suit. With that, this is a good place to stop. We're about 3/4 the way through the game, which is pretty stunning. However, there's still one more trick I want to show.Sequence Breaking 101
Did you know you can get the Varia Suit before even going into Norfair? There are several methods such as the Door Glitch trick, and the method with the Ice Beam and a Waver, but for this method you need only Bombs and Missiles.
Last time I explained how Metroid 1 has an interesting property with bombs. To those of you just tuning in or need a refresher, basically when a bomb goes off and Samus is standing, the bomb will push her up, but then you can still jump in midair. We used it to get out of the Ice Beam chamber in Brinstar, but with some clever bomb placement we can use it to get the Varia Suit early.
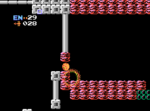
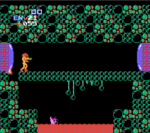
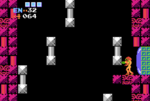
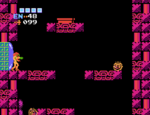
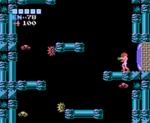
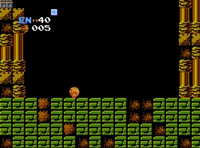
When you get into the green room where the tall door is that leads to the Varia Suit, you want to be in Morph Ball mode on the ground as left-most as you possibly can without falling lower into the floor. This jump is very precise. While in Morph Ball mode, you want to place a bomb, then keep tapping the fire button to place more bombs. What you want to have happen is you want to have a bomb that is high off the ground. When you see a bomb that is high off the ground, get out of Morph Ball mode to have Samus be standing. When the bomb in the air goes off Samus will be pushed up. Jump straight up and move left right away. You have to be quick, because a somersault jump wont reach, but if you don't move left you could miss your jump. You have to jump straight up, then left.
| Image Guide: Getting Varia Suit Early |
|---|
It takes a lot of timing and practice, but you should be able to get a feel for the rhythm of bomb placement and jumping. I recommend giving this trick a try, because you don't have to backtrack for it, and Norfair becomes way easier. That's all for this month, this section is massive enough as it is.
Party Trick!
Written By: ![]() Meta Knight (talk), and
Meta Knight (talk), and ![]() RandomYoshi (talk)
RandomYoshi (talk)
![]() Greetings everyone, and welcome to this month's Party Trick! Pi's still busy taking care of the difficult tasks known as life, so it looks like it's just me again. This month, let's take a look at some minigames from the Gamecube era of Mario Party.
Greetings everyone, and welcome to this month's Party Trick! Pi's still busy taking care of the difficult tasks known as life, so it looks like it's just me again. This month, let's take a look at some minigames from the Gamecube era of Mario Party.
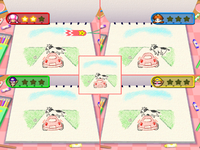
The first minigame on our list is Picture This from Mario Party 7. In this minigame, four players are trying to flip through a scrapbook to try to find the correct picture that is shown. With this minigame, players use the L and R buttons to flip through the different pages of the book and select the correct frame with the A button. One thing you can do to get good is to simply know the pictures. The thing about this minigame is that each time you play there's a different story to be told, and knowing all the stories can give you a huge advantage. For example, if you know the general area of the sequence a particular picture is, you can rapidly flip to that area, then get to the precise picture you need. Attention to detail is also important here, some of the frames may look very similar, and it's important that you don't choose the wrong one. If you make a mistake and choose the wrong one, it will cost you precious time. This minigame is pretty fun, so practicing it should be a blast.
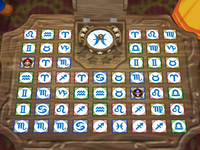
Next up is the Battle Minigame from Mario Party 5 Astro-Logical. In this game, players take control of stamps and move around a board while they try to choose the correct card that matches the symbol shown in the mirror. The mirror doesn't just start out clear, it looks blurry at first, then slightly gets clearer as there is less time. Similar to Picture This, sometimes it helps to just know all of the symbols. In this minigame, all of the cards are based off of real astrological symbols such as Aries, Leo, and Scorpio. If you know what all the symbols are, you will be able to decipher the symbol more clearly, and eliminate wrong options. Another strategy is to look at the board itself. There will always be one more player than there are of the correct symbol, so this game is similar to musical chairs in that aspect. What you could do, is to look and see what symbols are not shown very much. If you see a symbol that has more than three cards on the board, it's not going to be correct. If you can identify what you need quickly in the mirror and find it on the board, you'll be set.
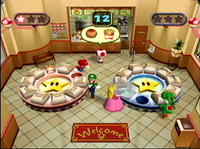
Finally, let's take a look at Order Up from Mario Party 4. In this 2v2 minigame, there is a round table with several different meals on them. Boxes will fall on them, then the table will start spinning around. When the wheel stops, players then have to find the items that the Toad asks for. This is essentially just a memory game. You'll have to try to memorize as much as you can, then keep track of where it is while it spins. But in this game you also have another person. If you're playing by yourself and you're using a computer, there isn't a whole lot you can do because if the AI is terrible, you have to do double the work. However, if you have a human on your team, one helpful strategy is to have each person memorize a side of the table. It's a lot easier for two people to memorize it than one. If you are playing by yourself and have a terrible memory, don't fret! There is one thing you can do. You could record the table spinning, pause the game, and then watch the footage to find out what you need. It's a lot more effort than what it's worth, and you'll probably get kicked out if you try to do this while playing against other humans, but you could.
Well that's it for this month's Party Trick! I'll see you next time, where hopefully Pi will be back. And remember, knowing is half the battle.
Mario Calendar
Written By: Paper Yoshi (talk)
Hello, and welcome to yet another issue of Mario Calendar! No news on the section for now, so let's see all the Mario-related games released on a November day!!
| Abb. | Console/Store |
|---|---|
| NES | Nintendo Entertainment System |
| SNES | Super Nintendo Entertainment System |
| N64 | Nintendo 64 |
| GCN | Nintendo GameCube |
| Wii | Nintendo Wii |
| Wii U | Nintendo Wii U |
| GB | Game Boy |
| GBC | Game Boy Color |
| GBA | Game Boy Advance |
| NDS | Nintendo DS |
| 3DS | Nintendo 3DS |
| WiiVC | Wii Shop - Virtual Console |
| 3DSVC | Nintendo eShop (3DS) - Virtual Console |
| WiiUVC | Nintendo eShop (Wii U) - Virtual Console |
| Abb. | Region |
|---|---|
| NA | North America |
| JP | Japan |
| EU | Europe |
| AU | Australia/New Zealand |
| KO | Republic of Korea |
| CN | People's Rep. of China |
| BR | Brazil |
| ZA | South Africa |
- November 1st
- 1992 (NA): Super Mario Land 2: 6 Golden Coins (GB)
- 2000 (JP): Mario Tennis (GBC)
- 2007:
- (JP): Super Mario Galaxy (Wii)
- (AU): DK: Jungle Climber (NDS)
- 2012 (JP):
- Super Mario 3D Land (3DS-eShop)
- Mario Kart 7 (3DS-eShop)
- Mario Tennis Open (3DS-eShop)
- 2013 (NA): New Super Mario Bros. U + New Super Luigi U (Wii U)
- November 2nd, 2010 (JP): Mario Party 2 (N64-WiiVC)
- November 3rd
- 1996 (JP): Tetris Attack (SNES)
- 2000 (EU): Mario Tennis (N64)
- 2011 (JP): Super Mario 3D Land (3DS)
- November 4th, 2005 (EU): Donkey Kong Country 3: Dixie Kong's Double Trouble! (GBA)
- November 5th
- 2007 (NA): Super Mario Bros. 3 (NES-WiiVC)
- 2009 (JP): Mario & Sonic at the Olympic Winter Games (Wii)
- November 6th
- 2000 (EU): Mario Party 2 (N64)
- 2007 (NA): Mario & Sonic at the Olympic Games (Wii)
- 2013 (JP): Donkey Kong 3 (NES-WiiUVC)
- 2014 (NA): Super Mario Advance (GBA-WiiUVC)
- November 7th
- 2003 (JP): Mario Kart: Double Dash!! (GCN)
- 2005 (NA):
- 2013:
- (AU): New Super Mario Bros. U + New Super Luigi U (Wii U)
- (NA): Wario's Woods (NES-3DSVC & WiiUVC)
- 2014 (EU): Ultimate NES Remix (3DS)
- November 8th
- 2002 (JP): Mario Party 4 (GCN)
- 2004 (NA): Mario Power Tennis (GCN)
- 2007:
- (KO): Yoshi's Island DS (NDS)
- (JP): Mario Party DS (NDS)
- 2013 (EU):
- 2014 (AU): Ultimate NES Remix (3DS)
- November 9th
- 2001 (AU): Wario Land 4 (GBA)
- 2007 (EU/AU): Super Mario Bros. 3 (NES-WiiVC)
- 2013 (AU): Mario & Sonic at the Sochi 2014 Olympic Winter Games (Wii U)
- November 10th
- 2003 (NA): Mario Party 5 (GCN)
- 2005 (JP): Mario Party 7 (GCN)
- November 11th
- 2005 (EU): Mario Superstar Baseball (GCN)
- 2012 (NA): Paper Mario: Sticker Star (3DS)
- November 12th
- 2004 (EU): Paper Mario: The Thousand-Year Door (GCN)
- 2007 (NA): Super Mario Galaxy (Wii)
- 2009 (AU): New Super Mario Bros. Wii (Wii)
- November 13th
- 2006 (NA): Yoshi's Island DS (NDS)
- 2011 (NA): Super Mario 3D Land (3DS)
- 2014
- (JP): Onward! Captain Toad (Wii U)
- (NA): Mario Kart: Super Circuit (GBA-WiiUVC)
- November 14th
- 2003 (EU): Mario Kart: Double Dash!! (GCN)
- 2005 (NA): Mario Kart DS (NDS)
- 2010 (NA): Mario vs. Donkey Kong: Mini-Land Mayhem! (NDS)
- November 15th (NA):
- 2004: Donkey Kong Country 2: Diddy's Kong Quest (GBA)
- 2009: New Super Mario Bros. Wii (Wii)
- 2011: Mario & Sonic at the London 2012 Olympic Games (Wii)
- 2013: Mario & Sonic at the Sochi 2014 Olympic Winter Games (Wii U)
- November 16th (EU):
- 2001:
- Mario Party 3 (N64)
- Wario Land 4 (GBA)
- 2007: Super Mario Galaxy (Wii)
- 2001:
- November 17th
- 2000 (EU): Donkey Kong Country (GBC)
- 2001 (NA): Luigi's Mansion (GCN)
- 2003 (NA):
- 2005 (AU): Mario Kart DS (NDS)
- 2011 (AU): Mario & Sonic at the London 2012 Olympic Games (Wii)
- November 18th
- 2004:
- (EU): Paper Mario: The Thousand-Year Door (GCN)
- (JP): Mario Party 6 (GCN)
- 2005 (EU):
- Mario Smash Football (GCN)
- Mario Power Tennis (GBA)
- 2011 (EU):
- 2012 (NA):
- New Super Mario Bros. U (Wii U)
- Nintendo Land (Wii U)
- 2004:
- November 19th
- 1996 (EU): Donkey Kong Country 3: Dixie Kong's Double Trouble! (SNES)
- 1999 (EU): Super Smash Bros. (N64)
- 2001 (NA): Wario Land 4 (GBA)
- 2003 (AU): Mario Kart: Double Dash!! (GCN)
- 2004 (EU): Mario vs. Donkey Kong (GBA)
- 2006 (NA):
- Donkey Kong (NES-WiiVC)
- Mario Bros. (NES-WiiVC)
- Super Mario 64 (N64-WiiVC)
- Wario's Woods (NES-WiiVC)
- 2007 (NA):
- Mario Party DS (NDS)
- Wrecking Crew (NES-WiiVC)
- 2009:
- (KO): Mario & Sonic at the Olympic Winter Games (Wii)
- (JP): Mario & Sonic at the Olympic Winter Games (NDS)
- 2014 (JP): DK: King of Swing (GBA-WiiUVC)
- November 20th
- 1995 (NA): Donkey Kong Country 2: Diddy's Kong Quest (SNES)
- 1998 (NA): Game & Watch Gallery 2 (GBC)
- 2000 (NA): Donkey Kong Country (GBC)
- 2009 (EU): New Super Mario Bros. Wii (Wii)
- 2014 (NA): DK: King of Swing (GBA-WiiUVC)
- 2015 (NA/EU): Mario Tennis: Ultra Smash (Wii U)
- November 21st
- 1990 (JP): Super Mario World: Super Mario Bros. 4 (SNES)
- 1992 (JP): Yoshi no Cookie (NES & GB)
- 1995 (JP): Donkey Kong Country 2: Diddy's Kong Quest (SNES)
- 1997 (JP/EU/AU): Diddy Kong Racing (N64)
- 2001 (JP): Great Melee Smash Bros. Deluxe (GCN)
- 2003:
- (JP/EU): Mario & Luigi RPG/Mario & Luigi: Superstar Saga (GBA)
- (CN): Super Mario 64 (iQue Player)
- 2004 (NA): Super Mario 64 DS (NDS)
- 2010 (NA): Donkey Kong Country Returns (Wii)
- 2013:
- (JP): Super Mario 3D World (Wii U)
- (EU/AU): Donkey Kong (NES-WiiUVC)
- 2014 (NA): Super Smash Bros. for Wii U (Wii U)
- 2015 (AU): Mario Tennis: Ultra Smash (Wii U)
- November 22nd
- 1996 (NA): Donkey Kong Country 3: Dixie Kong's Double Trouble! (SNES)
- 2007 (JP/AU): Mario & Sonic at the Olympic Games (Wii)
- 2013 (NA):
- Super Mario 3D World (Wii U)
- Mario Party: Island Tour (3DS)
- November 23rd
- 1996 (JP):
- 2006 (AU): Yoshi's Island DS (NDS)
- 2007 (EU):
- Mario & Sonic at the Olympic Games (Wii)
- Mario Party DS (NDS)
- 2009 (NA): Super Mario Kart (SNES-WiiVC)
- November 24th
- 1994 (EU): Donkey Kong Country (SNES)
- 1997 (NA): Diddy Kong Racing (N64)
- 1999 (EU): Donkey Kong 64 (N64)
- 2005 (EU): Dancing Stage: Mario Mix (GCN)
- 2011 (AU): Super Mario 3D Land (3DS)
- November 25th
- 1994 (NA): Donkey Kong Country (SNES)
- 2005 (EU):
- Dr. Mario & Puzzle League (GBA)
- Mario Kart DS (NDS)
- 2010 (JP): Mario Sports Mix (Wii)
- November 26th
- 1994 (JP): Donkey Kong Country (SNES)
- 2004 (EU): Super Mario Ball (GBA)
- 2013 (BR):
- New Super Mario Bros. U + New Super Luigi U (Wii U)
- Super Mario 3D World (Wii U)
- Game & Wario (Wii U)
- 2014 (JP):
- Donkey Kong Country (SNES-WiiUVC)
- Donkey Kong Country 2: Diddy's Kong Quest (SNES-WiiUVC)
- Donkey Kong Country 3: Dixie Kong's Double Trouble! (SNES-WiiUVC)
- November 27th
- 2010 (CN): Super Mario Collection Special Package (Wii)
- 2014 (NA): Mario Pinball Land (GBA-WiiUVC)
- November 28th
- 1996 (EU):
- Tetris Attack (SNES & GB)
- Donkey Kong Land 2 (GB)
- 2003:
- (JP): Mario Party 5 (GCN)
- (AU): Mario & Luigi: Superstar Saga (GBA)
- 2005 (NA):
- 2012 (JP): Super Mario USA (NES-3DSVC)
- 2014 (EU/ZA): Super Smash Bros. for Wii U (Wii U)
- 1996 (EU):
- November 29th
- 2002 (EU): Mario Party 4 (GCN)
- 2007 (AU): Super Mario Galaxy (Wii)
- 2013 (EU): Super Mario 3D World (Wii U)
- 2014 (AU): Super Smash Bros. for Wii U (Wii U)
- November 30th
- 2012 (EU/AU):
- New Super Mario Bros. U (Wii U)
- Nintendo Land (Wii U)
- 2013 (AU): Super Mario 3D World (Wii U)
- November 1994 (NA):
- November 2003 (CN): Dr. Mario 64 (iQue Player)
And that concludes this month's list!! See you in the next issue!!
| The 'Shroom: Issue 116 | |
|---|---|
| Staff sections | Staff Notes • The 'Shroom Spotlight |
| Features | Fake News • Fun Stuff • Palette Swap • Pipe Plaza • Critic Corner• Strategy Wing |
| Specials | Ultimate Music Battle |
