Musée Champignon
This article is under construction. Therefore, please excuse its informal appearance while it is being worked on. We hope to have it completed as soon as possible.
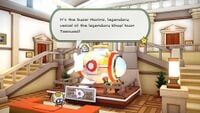
Musée Champignon (French for "Mushroom Museum") is a museum in Paper Mario: The Origami King. It is a large, white building in Toad Town, next to the Battle Lab. It is first accessible after Mario finds its curator, a yellow Toad with glasses, inside Graffiti Underground. After he is found, the curator runs back to the museum, where he stays at the front desk and tells Mario if any new pieces have been added. Mario can also collect any trophies he has earned from the Toad. Musée Champignon is similar to the Sticker Museum from Paper Mario: Sticker Star and the Prisma Museum from Paper Mario: Color Splash.
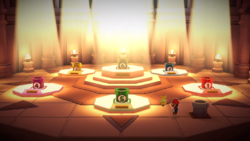
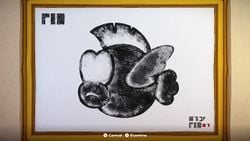
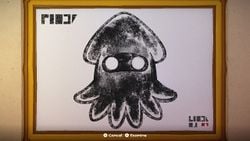
The museum's lobby contains four exhibits: an ancient submarine called the Super Marino (which is replaced with a 1/24 scale model after its owner is rescued and arrives to retrieve it), a gray Warp Pipe that leads to a fast-travel hub to other areas, and fish prints of the Cheep Cheep and Blooper, if Mario has caught any. The Art Gallery is located to the west, the Sound Gallery is to the east, and the Origami Toad Gallery, Treasure Gallery, and Origami Character Gallery are north of the entrance. If Mario has any new pieces in a gallery, the light above the door is illuminated.
After Mario has earned every trophy available (completing all of the museum's collections in the process), the curator states he is able to double the admission price (Mario exempted), and Toads can be seen visiting the lobby and galleries.
Art Gallery
The Art Gallery features a total of 150 pieces of artwork, which all require a total of 416 Toad Points to be unlocked.
Red Streamer
| Number | Image | Name | Toad Points |
|---|---|---|---|
| 1 | 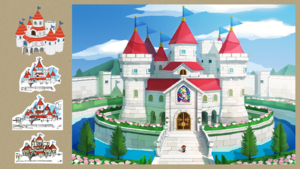
|
Peach's Castle Exterior | 5 |
| 2 | 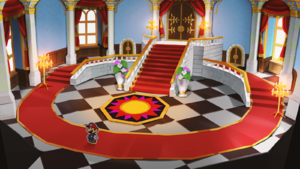
|
Peach's Castle Main Hall | 5 |
| 3 | 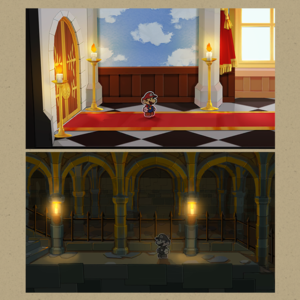
|
Peach's Castle Interior | 3 |
| 4 | 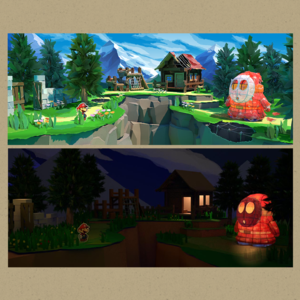
|
Goal Aesthetic | 3 |
| 5 | 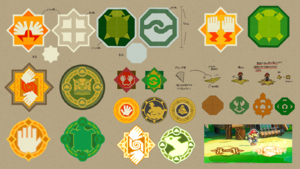
|
Magic Circle Ideas | 3 |
| 6 | 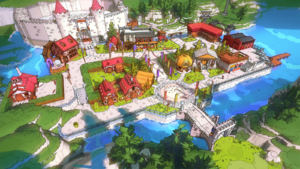
|
Toad Town | 5 |
| 7 | 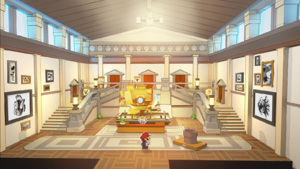
|
Musée Champignon | 5 |
| 8 | 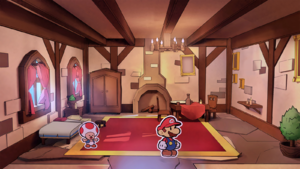
|
Toad Town Home Interior | 1 |
| 9 | 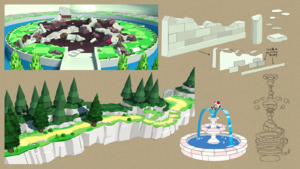
|
Toad Town Entrance | 1 |
| 10 | 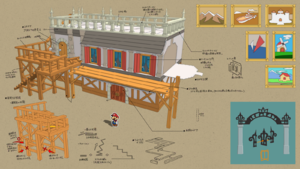
|
Toad Town Mansion | 1 |
| 11 | 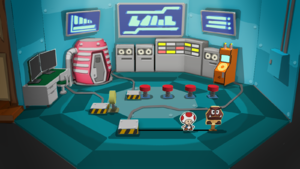
|
Battle Lab | 1 |
| 12 | 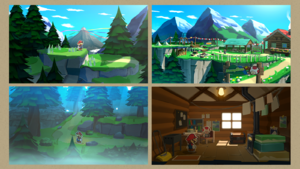
|
Whispering Woods Scenes | 1 |
| 13 | 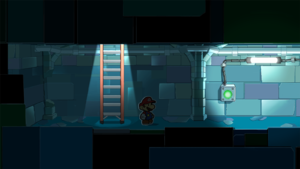
|
Graffiti Underground | 1 |
| 14 | 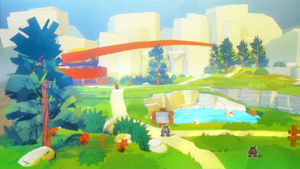
|
Picnic Road | 1 |
| 15 | 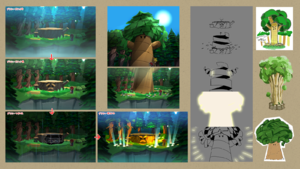
|
Ol' Grandsappy Transformation | 1 |
| 16 | 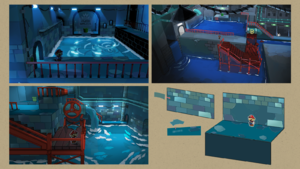
|
Graffiti Underground Misc. | 1 |
| 17 | 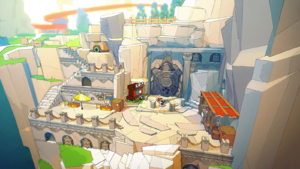
|
Earth Vellumental Temple Entrance | 1 |
| 18 | 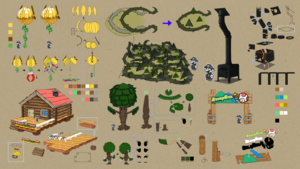
|
Whispering Woods Objects | 1 |
| 19 | 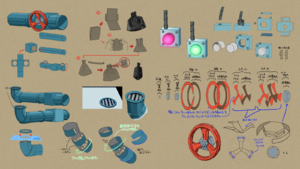
|
Graffiti Underground Objects | 1 |
| 20 | 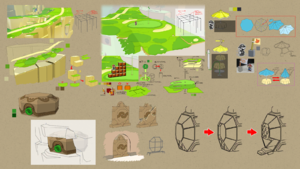
|
Picnic Road Layout | 1 |
| 21 | 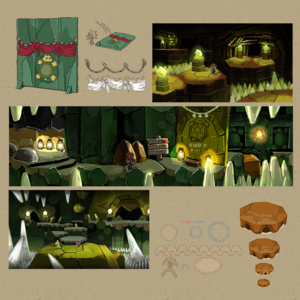
|
Earth Vellumental Temple Misc. | 5 |
| 22 | 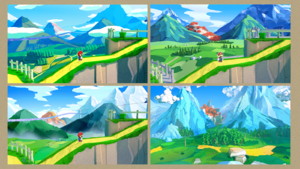
|
Overlook Mountain Themes | 5 |
| 23 | 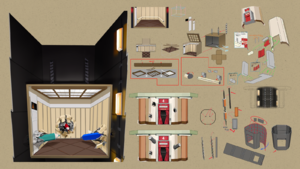
|
Overlook Tower Elevator | 5 |
| 24 | 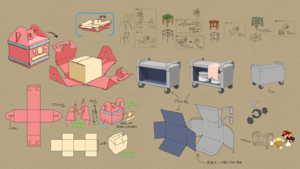
|
Overlook Tower Misc. | 5 |
Blue Streamer
| Number | Image | Name | Toad Points |
|---|---|---|---|
| 25 | 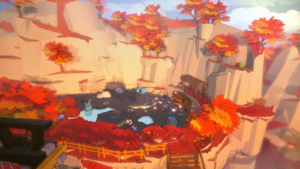
|
Dry Lake Bed | 5 |
| 26 | 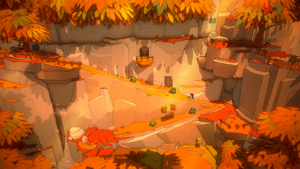
|
Chestnut Valley | 5 |
| 27 | 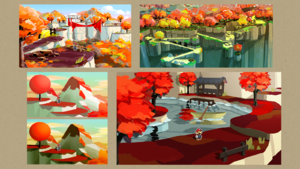
|
Autumn Mountain and Chestnut Valley | 1 |
| 28 | 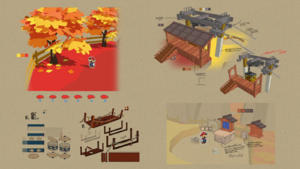
|
Autumn Mountain | 1 |
| 29 | 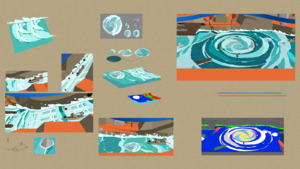
|
Rapids | 1 |
| 30 | 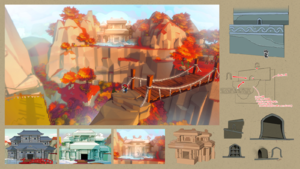
|
Water Vellumental Shrine Exterior | 5 |
| 31 | 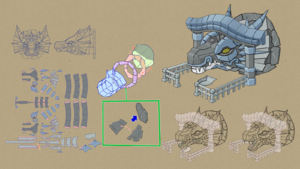
|
Water Vellumental Statue Layout | 5 |
| 32 | 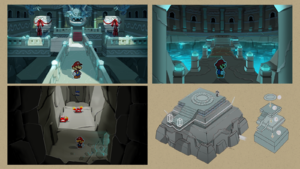
|
Water Vellumental Shrine Interior | 5 |
| 33 | 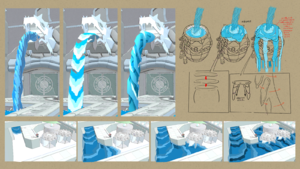
|
Water Ideas | 5 |
| 34 | 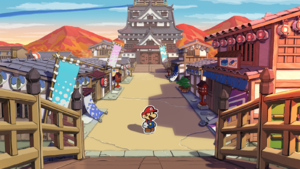
|
Shogun Studios | 1 |
| 35 | 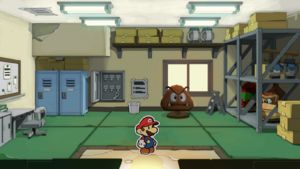
|
Shogun Studios Staff Room | 1 |
| 36 | 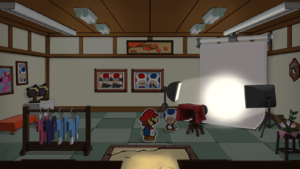
|
Dress-Up Photo Studio | 1 |
| 37 | 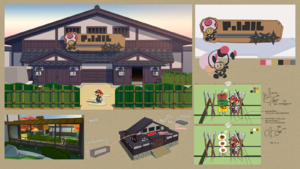
|
Ninja Attraction Exterior | 1 |
| 38 | 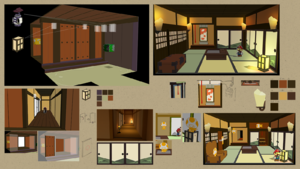
|
Ninja Attraction Interior | 1 |
| 39 | 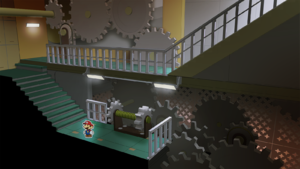
|
Maintenance Room | 1 |
| 40 | 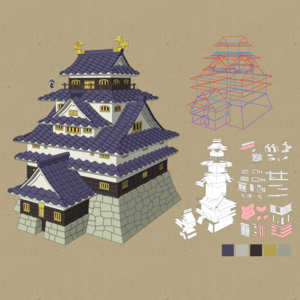
|
Big Sho' Theater Layout | 5 |
| 41 | 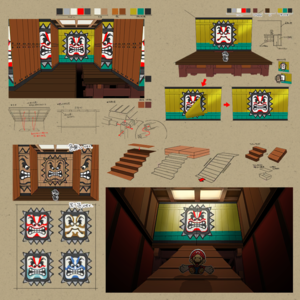
|
Kabuki Thwomp | 5 |
| 42 | 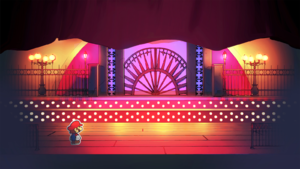
|
Ballet Performance Stage | 1 |
| 43 | 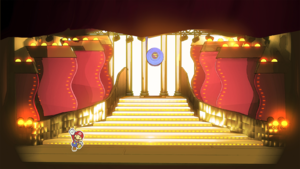
|
Grand Finale Stage | 1 |
| 44 | 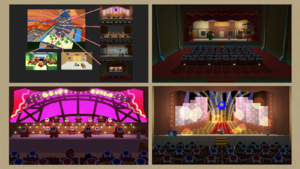
|
Big Sho' Theater Sketch | 1 |
| 45 | 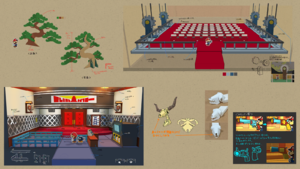
|
Big Sho' Theater Interior | 1 |
| 46 | 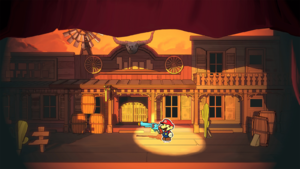
|
Prairie Town Stage | 5 |
| 47 | 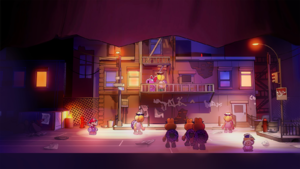
|
Back Alley Stage | 5 |
Yellow Streamer
| Number | Image | Name | Toad Points |
|---|---|---|---|
| 48 | 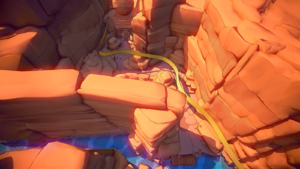
|
Sweetpaper Valley | 5 |
| 49 | 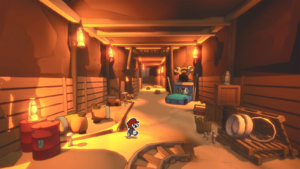
|
Breezy Tunnel | 5 |
| 50 | 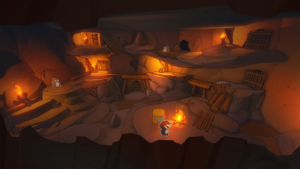
|
Monty Mole Den | 1 |
| 51 | 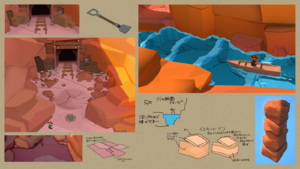
|
Sweetpaper Valley Layout | 1 |
| 52 | 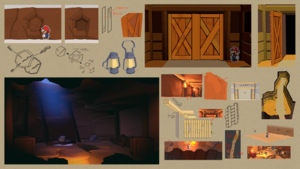
|
Breezy Tunnel Misc. | 1 |
| 53 | 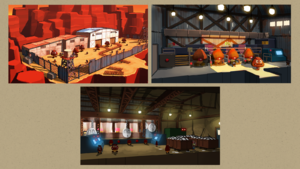
|
Breezy Tunnel Ideas | 1 |
| 54 | 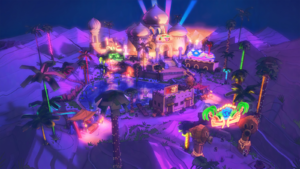
|
Shroom City | 5 |
| 55 | 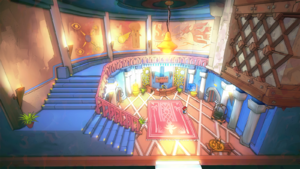
|
Hotel Lobby | 5 |
| 56 | 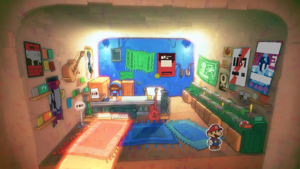
|
Sound Disc Room | 1 |
| 57 | 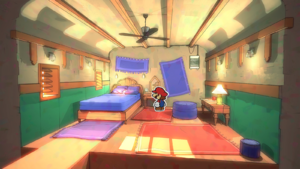
|
Desert House | 1 |
| 58 | 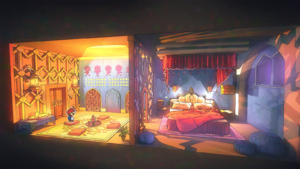
|
Snif City Royal Hotel Room | 1 |
| 59 | 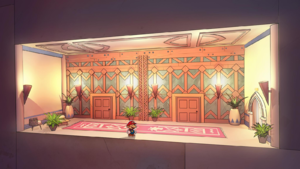
|
Hotel Hallway | 1 |
| 60 | 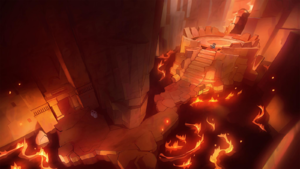
|
Fire Vellumental Hall | 1 |
| 61 | 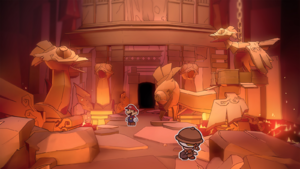
|
Fire Vellumental Cave Entrance | 1 |
| 62 | 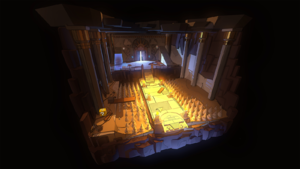
|
Trick Door | 1 |
| 63 | 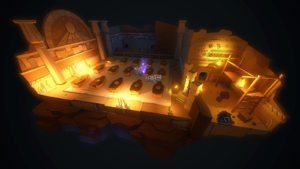
|
Sarcophagus Room | 1 |
| 64 | 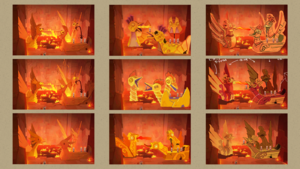
|
Fire Vellumental Statues | 1 |
| 65 | 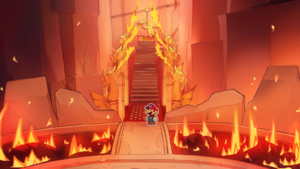
|
Fire Vellumental Gondola | 1 |
| 66 | 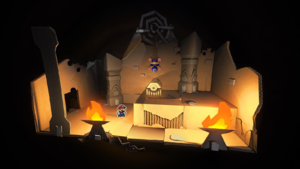
|
Temple of Shrooms Interior | 1 |
| 67 | 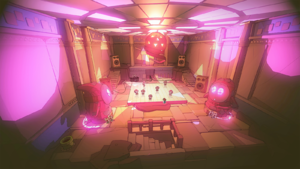
|
Disco Hall | 1 |
| 68 | 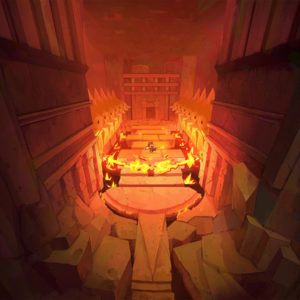
|
Light-Up Floor | 5 |
| 69 | 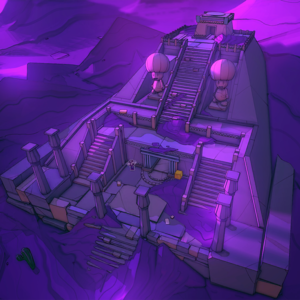
|
Temple of Shrooms Exterior | 5 |
| 70 | 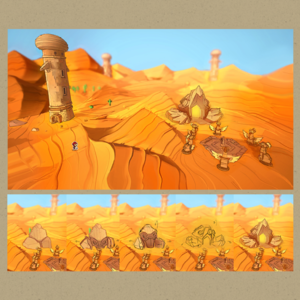
|
Desert with Fire Vellumental Statues | 3 |
| 71 | 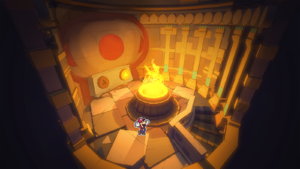
|
Desert Tower Interior | 5 |
| 72 | 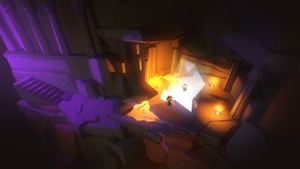
|
Frozen Toad | 3 |
| 73 | 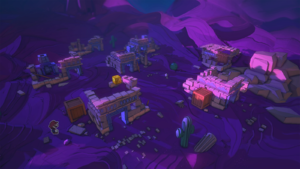
|
Ruined Houses | 3 |
Purple Streamer
| Number | Image | Name | Toad Points |
|---|---|---|---|
| 74 | 
|
The Princess Peach | 5 |
| 75 | 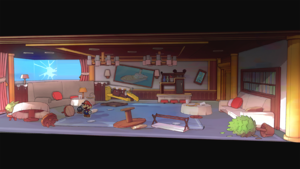
|
Wrecked Lounge | 5 |
| 76 | 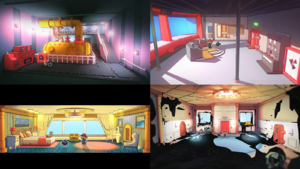
|
The Princess Peach Ship Interior | 1 |
| 77 | 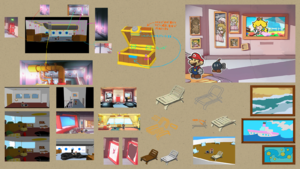
|
The Princess Peach Misc. | 1 |
| 78 | 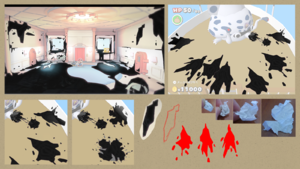
|
Inked Layout | 1 |
| 79 | 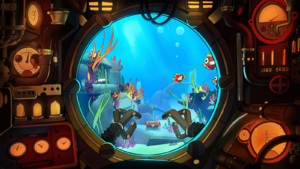
|
Submarine Cockpit | 1 |
| 80 | 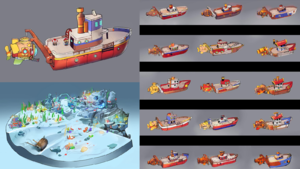
|
Ship and Ocean Depths | 1 |
| 81 | 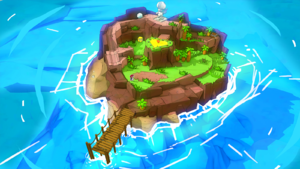
|
Heart Island | 1 |
| 82 | 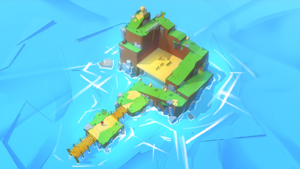
|
? Island | 1 |
| 83 | 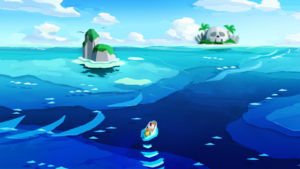
|
The Great Sea | 5 |
| 84 | 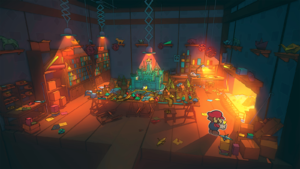
|
Origami Workshop | 5 |
| 85 | 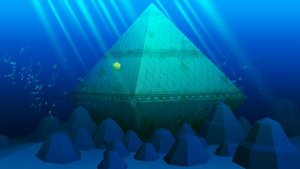
|
Diamond Island Exterior | 1 |
| 86 | 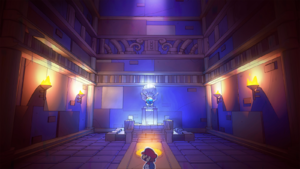
|
Trial of Wisdom | 1 |
| 87 | 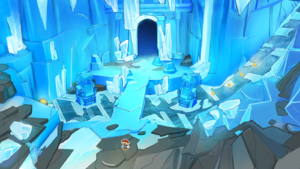
|
Ice Vellumental Mountain Entrance | 1 |
| 88 | 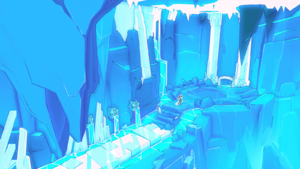
|
Ice Vellumental Hall | 1 |
| 89 | 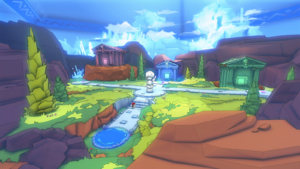
|
Diamond Island Interior | 5 |
| 90 | 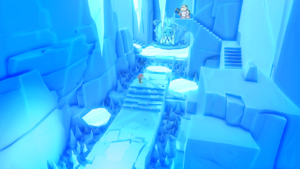
|
Ice Vellumental Mountain Interior | 5 |
| 91 | 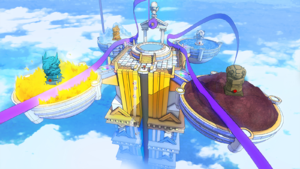
|
Top of the Sea Tower | 5 |
| 92 | 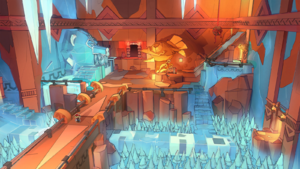
|
Fire and Ice Vellumentals | 5 |
| 93 | 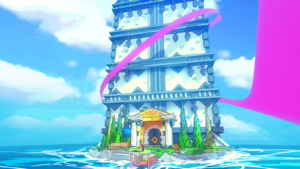
|
Sea Tower Entrance | 5 |
| 94 | 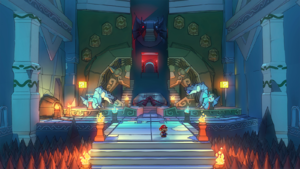
|
Earth and Water Vellumentals | 5 |
Green Streamer
| Number | Image | Name | Toad Points |
|---|---|---|---|
| 95 | 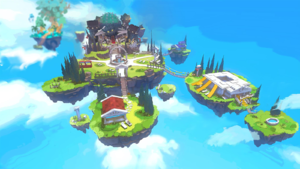
|
Shangri-Spa | 5 |
| 96 | 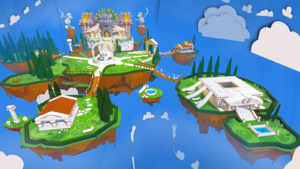
|
Shangri-Spa Early Sketch | 5 |
| 97 | 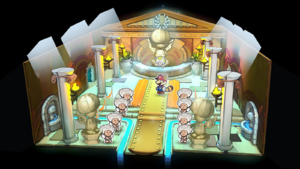
|
Shangri-Spa Entrance | 1 |
| 98 | 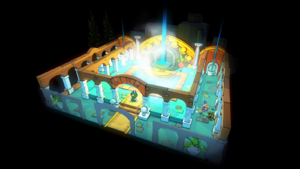
|
Shangri-Spa Early Interior | 1 |
| 99 | 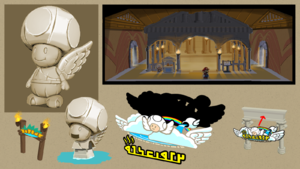
|
Shangri-Spa Misc. | 1 |
| 100 | 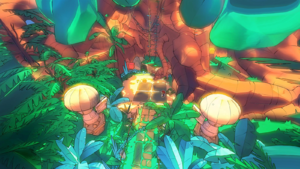
|
Base of the Giant Tree | 1 |
| 101 | 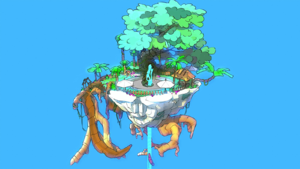
|
Spring of Jungle Mist | 1 |
| 102 | 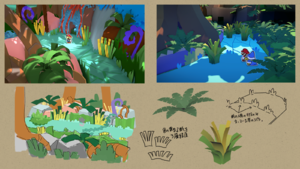
|
Jungle Ideas | 1 |
| 103 | 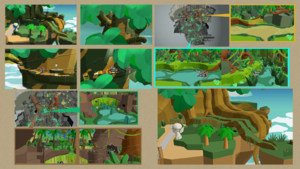
|
Jungle Misc. | 1 |
| 104 | 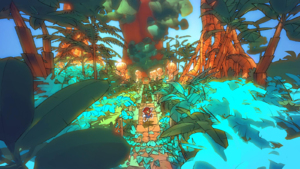
|
Jungle Entrance | 5 |
| 105 | 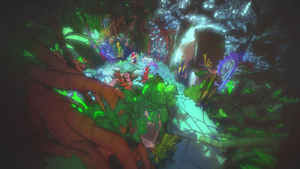
|
Jungle Interior | 5 |
| 106 | 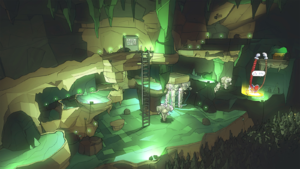
|
Spring of Rainbows Path 1 | 5 |
| 107 | 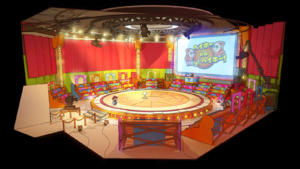
|
Shy Guys Finish Last | 5 |
| 108 | 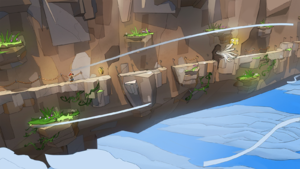
|
Spring of Rainbows Path 2 | 5 |
| 109 | 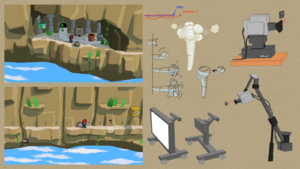
|
Spring of Rainbows Path Layout | 5 |
| 110 | 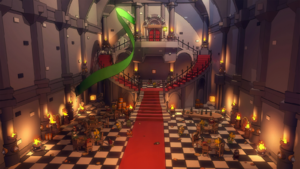
|
Bowser's Castle Great Hall | 5 |
| 111 | 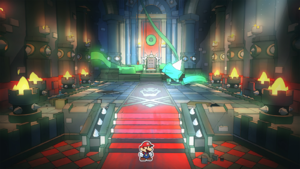
|
Bowser's Castle Throne Room | 5 |
| 112 | 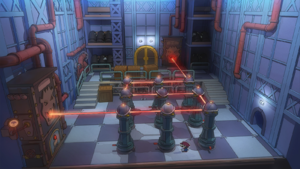
|
Buzzy Beetle Statue Room | 1 |
| 113 | 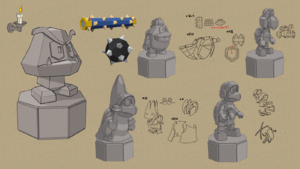
|
Bowser's Castle Statue Layout | 1 |
| 114 | 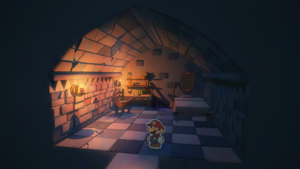
|
Bowser's Castle Rooms | 1 |
Origami Castle
| Number | Image | Name | Toad Points |
|---|---|---|---|
| 115 | 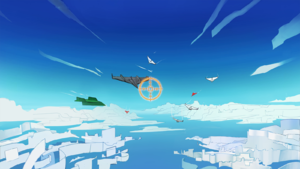
|
Battle in the Sky | 5 |
| 116 | 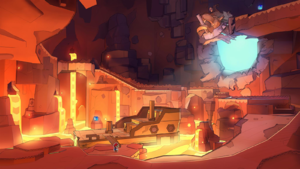
|
Hotfoot Crater | 5 |
| 117 | 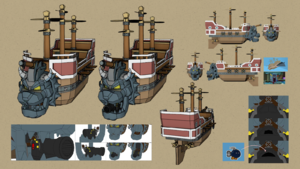
|
Bowser's Airship | 1 |
| 118 | 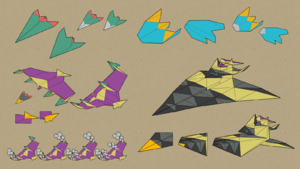
|
Paper Airplane Squadron | 1 |
| 119 | 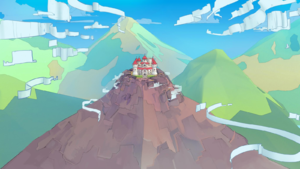
|
Volcano and Peach's Castle | 1 |
| 120 | 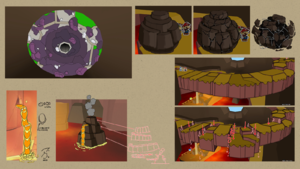
|
Hotfoot Crater Layout | 1 |
| 121 | 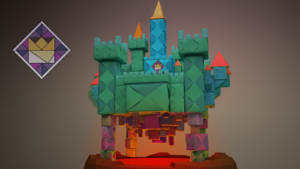
|
Origami Castle | 5 |
| 122 | 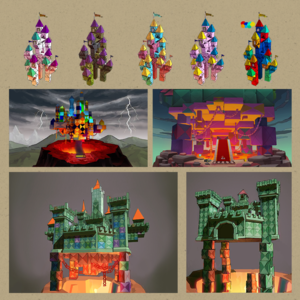
|
Origami Castle Ideas | 3 |
| 123 | 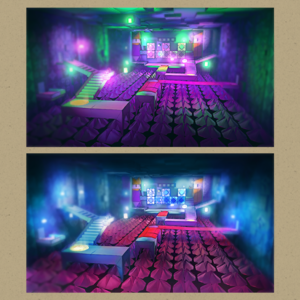
|
Origami Castle Interior | 3 |
| 124 | 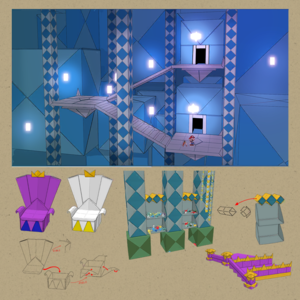
|
Origami Castle Layout 1 | 3 |
| 125 | 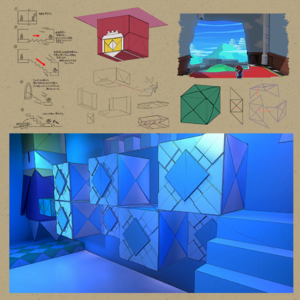
|
Origami Castle Layout 2 | 3 |
| 126 | 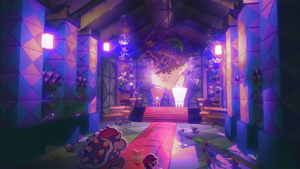
|
Origami Castle Throne Room | 5 |
Characters
| Number | Image | Name | Toad Points |
|---|---|---|---|
| 127 | 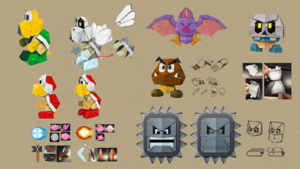
|
Origami Concepts | 5 |
| 128 | 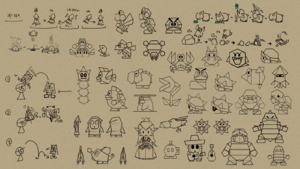
|
Origami Sketches | 5 |
| 129 | 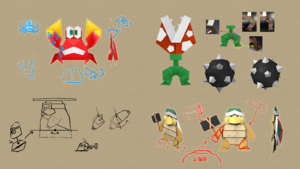
|
Origami Mechanics | 5 |
| 130 | 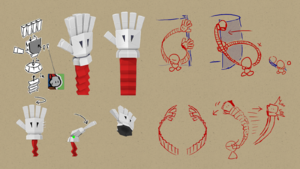
|
1,000-Fold Arms | 5 |
| 131 | 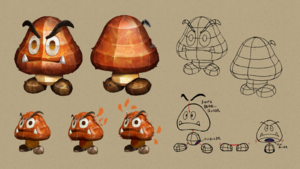
|
Paper Macho Goomba | 1 |
| 132 | 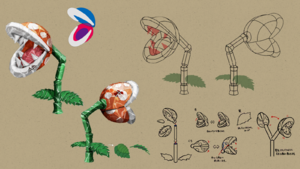
|
Paper Macho Piranha Plant | 1 |
| 133 | 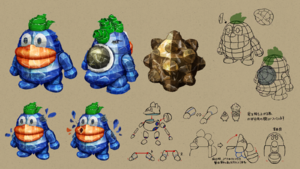
|
Paper Macho Stone Spike | 1 |
| 134 | 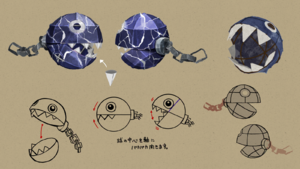
|
Paper Macho Chain Chomp | 1 |
| 135 | 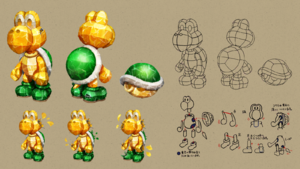
|
Paper Macho Koopa Troopa | 1 |
| 136 | 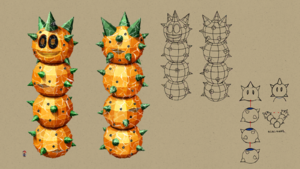
|
Mega Paper Macho Pokey | 1 |
| 137 | 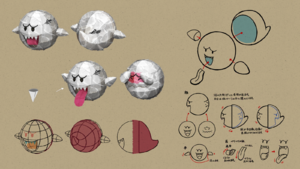
|
Paper Macho Boo | 1 |
| 138 | 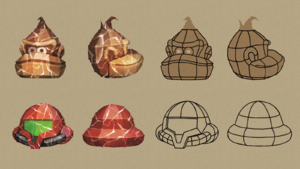
|
Jungle King and Space Warrior Masks | 1 |
| 139 | 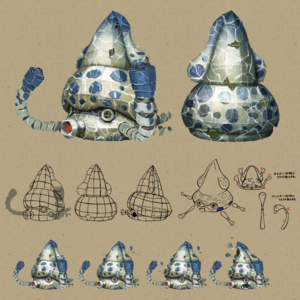
|
Paper Macho Gooper Blooper | 5 |
| 140 | 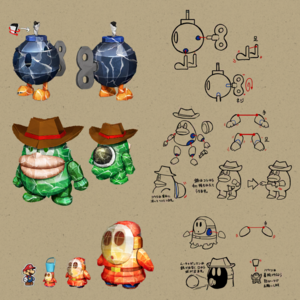
|
Paper Macho Mechanics | 5 |
| 141 | 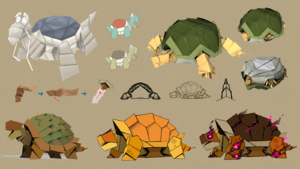
|
Earth Vellumental | 5 |
| 142 | 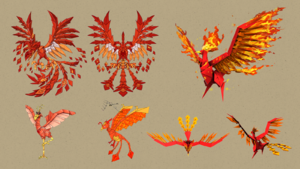
|
Fire Vellumental | 5 |
| 143 | 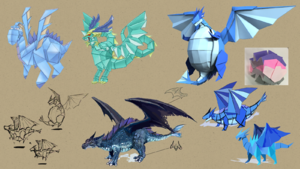
|
Water Vellumental | 5 |
| 144 | 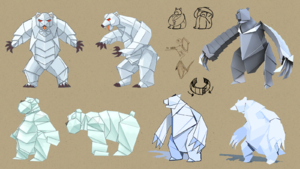
|
Ice Vellumental | 5 |
| 145 | 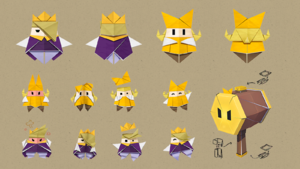
|
King Olly and Olivia | 6 |
| 146 | 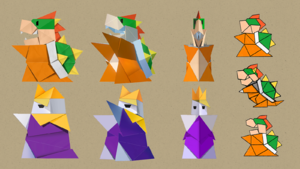
|
Paper Sumo | 6 |
| 147 | 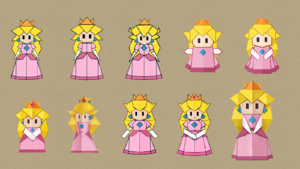
|
Origami Princess Peach | 1 |
| 148 | 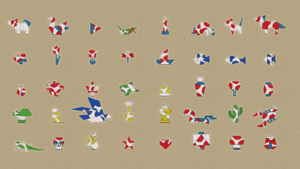
|
Folded Toads | 1 |
| 149 | 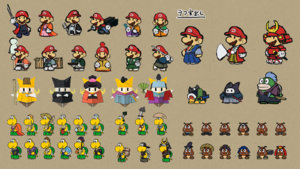
|
Character Outfits 1 | 1 |
| 150 | 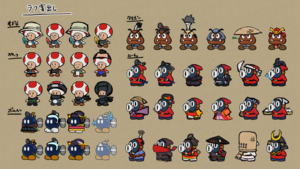
|
Character Outfits 2 | 1 |
Origami Toad Gallery
Some origami Toads appear in multiple sections under different numbers (indicated in gray), though they have the same description. There are 54 different origami Toad designs.
Red Streamer
| Number | Image | Name | Description |
|---|---|---|---|
| 1 | 
|
Cicada | This kind of cicada makes its signature sound by vibrating its wings. You can enjoy its shrill hum all year long! |
| 2 | 
|
Fried Egg | The king of breakfast. Whether they're salted, peppered, or slaughtered in hot sauce, fried eggs reign supreme. |
| 3 | 
|
Flower | A picture-perfect flower with an ideal arrangement of leaves and petals. Why does it smell like a mushroom? |
| 4 | 
|
Purple Butterfly | An elegant purple butterfly that occasionally deigns to land on a flower. |
| 5 | 
|
Yellow Tulip | A beautiful flower, perfect for picking. Each color of tulip sends a different message, so think before you pluck! |
| 6 | 
|
Swan | This graceful bird appears to glide over lakes with ease, but under the surface, its legs are paddling like mad. |
| 7 | 
|
Blue Butterfly | A flower-fluttering butterfly often found in flowering fields. |
| 8 | 
|
Red Butterfly | A butterfly that really likes flowers. Yes, moreso than other butterflies. Just the tiniest amount. |
| 9 | 
|
Flag | The sight of this flag fluttering in the breeze is enough to make you jump for joy. Time to party with a few fireworks! |
| 10 | 
|
Red Tulip | Folded Toads can make picture-perfect tulips. For instance, this red tulip came from a Red Toad. What are the odds?! |
| 11 | 
|
Yellow Butterfly | A cheery yellow butterfly that almost seems to be toying with your emotions for no good reason. |
| 12 | 
|
Red Dog | A fierce guard dog who can help you become a fierce fighter...after you unfold him. |
| 13 | 
|
Red Scarab Beetle | Some say these big beetles are "lazy" and "slow moving," but they prefer "deliberate" and "totally chill." |
| 14 | 
|
Prairie Dog | A critter that likes to burrow holes in open fields. They're not moles, but their whack-a-mole streak is fierce. |
| 15 | 
|
Red Mushroom | Most Toads can be mistaken for mushrooms. This one, even more so than usual. |
| 16 | 
|
Yellow Mushroom | A rare yellow mushroom. Found in places with plenty of sunshine and electricity. |
| 17 | 
|
Informational Sign | A helpful sign with an oddly chatty message printed on it. |
| 18 | 
|
Grasshopper | A tiny bug with an impressive hop. It's likely to flee when threatened, so try to approach it slowly. |
| 19 | 
|
Blue Roundfish | Did you know that paper folded in the shape of a fish is perfectly at home in water? Don't ask questions. |
| 20 | 
|
Green Scarab Beetle | A type of scarab common to the caves that house the Temple of the Earth Vellumental. |
| 21 | 
|
Yellow Scarab Beetle | A slightly shy version of the scarab beetle that prefers dark places. |
| 22 | 
|
Pamphlet | This looks just like an informative pamphlet for Overlook Tower, but inside... there's just the confused face of a folded Toad. |
| 23 | 
|
Pennant | A souvenir from a popular tourist attraction. Sure to liven up the spirit of any room. |
| 24 | 
|
Tower | A souvenir of Overlook Tower. Out of all the souvenirs of this particular tower, this is definitely the overlook-iest. |
| 25 | 
|
Pencil | It may look like a bright-blue colored pencil, but it's just a replica. The sharp tip can't write, so it's a bit pointless. |
Blue Streamer
Yellow Streamer
Purple Streamer
Treasure Gallery
There are 120 Collectible Treasures and 15 trophies in total to collect.
Collectible Treasures
| Number | Image | Name | Description | Location |
|---|---|---|---|---|
| 1 | 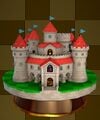
|
Peach's Castle | Princess Peach's beautiful yet tasteful castle. It's no wonder King Olly wanted it for himself. | Whispering Woods |
| 2 | 
|
Mushroom | Another valuable resource for restoring Mario's HP. A Mushroom a day keeps game overs at bay! | Whispering Woods |
| 3 | 
|
Ol' Grandsappy | The withered for of Ol' Gransappy, reduced to a mere stump. This trunk contains zero funk. | Whispering Woods |
| 4 | 
|
Torch from Peach's Castle | A common cellar torch from Peach's Castle that calmly does its job no matter what else is going on. | Toad Town |
| 5 | 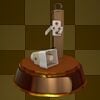
|
Camp Speaker | A camp speaker used for repetitive and annoying announcements and repetitive and annoying music. | Toad Town |
| 6 | 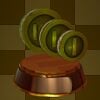
|
Coins | Shiny gold coins that help Mario on his adventure. Those trusty overalls must have deep pockets... | Toad Town |
| 7 | 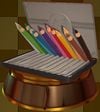
|
Colored Pencils | The first big boss of King Olly's Legion of Stationery. Talented, but not as talented as he thinks. | Toad Town |
| 8 | 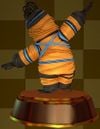
|
Rubber Band | A rising star in the Legion of Stationery. This rubbery thespian can sing, dance, and seriously stretch a death scene. | Toad Town |
| 9 | 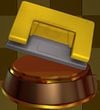
|
Hole Punch | A reclusive member of the Legion of Stationery who only does two things—party down and punch faces. | Toad Town |
| 10 | 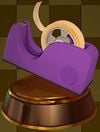
|
Tape | A captain of the Legion of Stationery shock troops. Proud of its purple dispenser. Watch out—it fights dirty! | Toad Town |
| 11 | 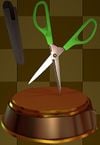
|
Scissors | The archenemy of paper everywhere and King Olly's top lieutenant in the Legion of Stationery. | Toad Town |
| 12 | 
|
Stapler | King Olly's rabid Legion of Stationery pet. Its bite is worse than...everything...but could its mouth be a weak point? | Toad Town |
| 13 | 
|
Log Cabin | Legend has it that this cabin was built partially from Ol' Grandsappy's timbers. It's oddly lifelike. | Toad Town |
| 14 | 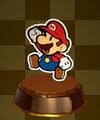
|
Mario | It's everyone's hero, Mario! With hammer in hand and friends by his side, he'll never fold. | Toad Town |
| 15 | 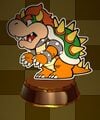
|
Bowser | King Koopa restored! You didn't think Bowser would just be a tiny face for the entire game, did you? | Toad Town |
| 16 | 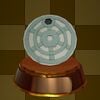
|
Manhole Cover | A barrier to keep hordes of visitors from touring the incredibly popular Grafitti Underground sewer near Peach's Castle. | Graffiti Underground |
| 17 | 
|
Lush Greenery | A large clump of green grass. Known to be a great source of confetti. | Overlook Mountain |
| 18 | 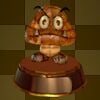
|
Paper Macho Goomba | While not strictly origami, these monsters are employed by King Olly to fold, fear, and crumple the world. | Overlook Mountain |
| 19 | 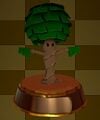
|
Sap Sister | Backup singers for Sweet Sap Loggings who actually wrote all of the songs and designed their own choreography. | Overlook Mountain |
| 20 | 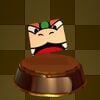
|
Folded Bowser | The great and mighty King Bowser, here in slightly diminished form. He can still shout quite loudly! | Overlook Mountain |
| 21 | 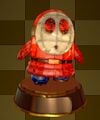
|
Paper Macho Shy Guy | Another of King Olly's massive papier-mâché enforcers. More interested in playing soccer than socking players. | Overlook Mountain |
| 22 | 
|
Shellvation Is Near | A rock that some say looks like the Earth Vellumental and others say looks like a rock. A fave insect hiding spot. | Picnic Road |
| 23 | 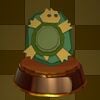
|
Vellumental Idol | A small rendering of the mighty Earth Vellumental! Somewhat less inspiring than the real thing. | Picnic Road |
| 24 | 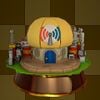
|
Sensor Lab | A laboratory famous for the invention of fax travel, Toad Radar, and many other useful technologies. | Picnic Road |
| 25 | 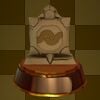
|
Earth Vellumental Relief | A relief of the ancient Earth Vellumental. Crafted with love and fear by Koopa Troopas. | Earth Vellumental Temple |
| 26 | 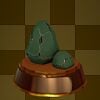
|
Rocks | A set of rocks found in a cavern. Some can be broken and some cannot. It seems like a metaphor, but it isn't. | Earth Vellumental Temple |
| 27 | 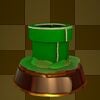
|
Pipe | Ah, the classic pipe. Where will it take us? Sometimes we know, and sometimes we don't. Such is life. | Earth Vellumental Temple |
| 28 | 
|
Chef's TRULY WILD Special | A replica of the Overlook Tower chef's special eggs. Tastes the same fresh, frozen, room temp, and reheated. | Overlook Tower |
| 29 | 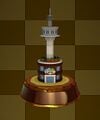
|
Overlook Tower | A tall tower on the top of Overlook Mountain, famous for its gift shoppe and "million-coin" nighttime view. | Overlook Tower |
| 30 | 
|
Fallen Leaves | A carefully pile of leaves. Smash it with a hammer to replenish your confetti and/or infuriate landscapers. | Autumn Mountain |
| 31 | 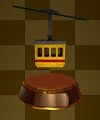
|
Toad Tram | This intimate conveyance practically forces you to talk to and forge lifelong friendships with other passengers. | Autumn Mountain |
| 32 | 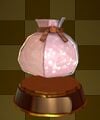
|
Confetti Bag | A common bag that's perfect for storing confetti. Its capacity increases with each streamer Mario and Olivia release. | Autumn Mountain |
| 33 | 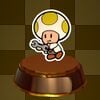
|
Toad Researcher | The inventor of Toad Radar, fax travel, and other useful inventions. Shifts paradigms like it's going out of style! | Autumn Mountain |
| 34 | 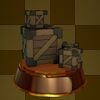
|
Sturdy Crates | A set of wooden crates, impervious to even the strongest hammer blows. Their stoic form radiates confidence. | Chestnut Valley |
| 35 | 
|
Sign | A classic wooden sign. Useful for conveying information and only occasionally snarky. | Chestnut Valley |
| 36 | 
|
Spinning Shells | A hazard found in the temple of the Earth Vellumental. Legend says it spits fire. Real life also says it, as it's true. | Chestnut Valley |
| 37 | 
|
Restaurant Fridge | A model of the refrigerator used in Overlook Tower's kitchen. Contains tiny replica vermin inside. | Water Vellumental Shrine |
| 38 | 
|
MAX UP Heart | An extremely rare and valuable item that increases Mario's maximum XP. | Water Vellumental Shrine |
| 39 | 
|
POW Block | A power-up that shakes everything on the field. Flips some enemies and disorients others. | Water Vellumental Shrine |
| 40 | 
|
Downriver Tour Boat | The boat used for Autumn Mountain's downriver tours. It has only one paddle, but it glides down Eddy River with ease. | Shogun Studios |
| 41 | 
|
Chestnuts | Giant chestnuts that give their home valley its name. Their prickly exteriors are bound to hurt, rolling or otherwise. | Shogun Studios |
| 42 | 
|
Water Vellumental's Wheel | A water wheel in the Water Vellumental Shrine. You can make it turn with the power of the Water Vellumental's tears. | Shogun Studios |
| 43 | 
|
Relaxing Bench | A bench that's the perfect place to rest, reflect, and be renewed. | Shogun Studios |
| 44 | 
|
Paper Macho Koopa Troopa | This Paper Macho Koopa Troopa fell asleep at Shogun Studios. Only a loud, echoing noise will wake it back up. | Shogun Studios |
| 45 | 
|
Canned Tuna | Cans packed with juicy tuna. Rumor has it there's a Toad in Autumn Mountain who loves this stuff. | Shogun Studios |
| 46 | 
|
Big Sho' Theater | The symbol of Shogun Studios. Its four-story interior has been turned into a multistage theater with unique seating. | Shogun Studios |
| 47 | 
|
Canned-Food Par-tay Trio | Three great friends who love sharing canned food. Their latest party featured canned ravioli. Shy oh my! | Shogun Studios |
| 48 | 
|
Lookout Tower Bell | One clang of this bell is enough to wake even the sleepiest of sleepyheads in Shogun Studios. | Shogun Studios |
| 49 | 
|
Water Vellumental Shrine | A tiny shrine found in a corner of the Tall Grass Plains. Tuna-can offerings often disappear without a trace. | Shogun Studios |
| 50 | 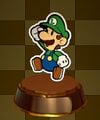
|
Luigi | Mario's younger brother. Notable for his green hat, his jumping ability, and literally nothing else. | Ninja Attraction |
| 51 | 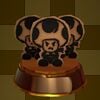
|
Ninja Signs | A few of the many ninjas hiding inside the ninja attraction. Find them all to become a Ninja Supreme! | Ninja Attraction |
| 52 | 
|
Bob-omb | An enthusiastic young Bob-omb without a fuse or memories but with plenty of gumption and explode-tuitiveness. | Ninja Attraction |
| 53 | 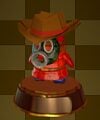
|
Paper Macho Snifit Outlaw | This Snifit Paper Macho Soldier rules a motley band of outlaws onstage and makes that cowboy hat look great. | Big Sho' Theater |
| 54 | 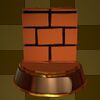
|
Block | Made of bricks, but can be smashed with a hammer or even a simple jump. They don't make 'em like they used to. | The Princess Peach |
| 55 | 
|
Super Star | This classic power-up grants invincibility. Crush your enemies! Walk on spikes! Fall into lava! Wait, not the last one... | The Princess Peach |
| 56 | 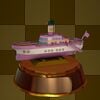
|
The Princess Peach | A beautiful cruise ship offering relaxing ocean getaways. Its captain's fondness of the real Princess Peach is...evident. | The Princess Peach |
| 57 | 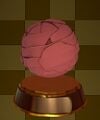
|
Huge Rock | The rock that Olly used to trap Olivia in Sweetpaper Valley. RIP in pieces, sweet Bob-omb. | Breezy Tunnel |
| 58 | 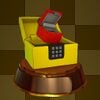
|
Important Box | The trusty lockbox that kept Bob-omb's special Olivia-saving item safe. Not even Gooper Blooper could crack it open! | Breezy Tunnel |
| 59 | 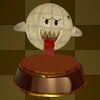
|
Paper Macho Boo | These oversized spirits are as skittish as their smaller counterparts, but turn your back and they'll come flying! | Scorching Sandpaper East |
| 60 | 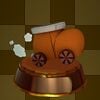
|
Boot Car | A perfect-scale replica of the Boot Car Type B developed by Toad's Automoboots. Do not attempt to drive. | Scorching Sandpaper Desert |
| 61 | 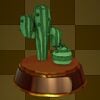
|
Cactus | Some cacti are filled with confetti and can be plowed through with the Boot Car. Some cannot. Know the difference! | Scorching Sandpaper Desert |
| 62 | 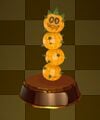
|
Mega Paper Macho Pokey | The largest and clumsiest Paper Macho enemy in the world. It falls and rolls around without any regard for safety! | Scorching Sandpaper Far West |
| 63 | 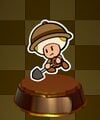
|
Professor Toad | The foremost expert on the Ancient Ones, with a scholarly background in many obscure and surprising subjects. | Scorching Sandpaper Minor |
| 64 | 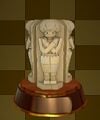
|
Temple of Shrooms Statues | Statues depicting the legendary King Shroomses. Is that what he really looked like? | Scorching Sandpaper Desert |
| 65 | 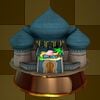
|
Snif City Royal Hotel | Snifits know a good opportunity when they see one—they remodeled this Toad palace into a five-star luxury hotel. | Shroom City |
| 66 | 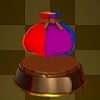
|
Bag of Confetti | A large bag of confetti occasionally found in the wild. Replenishes Mario's supply of confetti. | Shroom City |
| 67 | 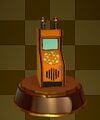
|
Ring Trainer | You won't get far if you can't arrange enemies! This nostalgic arcade cabinet will help you hone your lineup skills. | Shroom City |
| 68 | 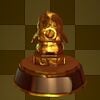
|
Golden Snifit Statue | What's a pool party without a glittering golden statue? ...It's still a pool party, just not as fabulous. | Shroom City |
| 69 | 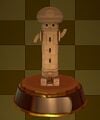
|
Desert Tower | One of four giant towers in the Scorching Sandpaper Desert. Said to be modeled after a legendary king! | Shroom City |
| 70 | 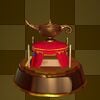
|
Lamp Scam | Is it an innocent game of chance or something more sinister? Leave it to Luigi to find out. | Shroom City |
| 71 | 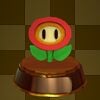
|
Fire Flower | Use this to become Fire Mario! He flings those fireballs without suffering a single singe upon his shiny 'stache. Such skill! | Fire Vellumental Cave |
| 72 | 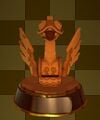
|
Fire Vellumental Statue | One of many stone figures in the Fire Vellumental's cave. It's probably a good idea to know how many there are. | Temple of Shrooms |
| 73 | 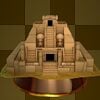
|
Temple of Shrooms | King Shroomses's Temple of Shrooms. It recedes into the sand when it's dark out, like a reverse vampire. | Temple of Shrooms |
| 74 | 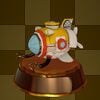
|
Submarine "Marino" | A sub piloted by Captain T. Ode. Who made it? How did he get it? These mysteries run as deep as the sub itself... | Bonehead Island |
| 75 | 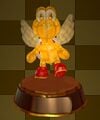
|
Paper Macho Koopa Paratroopa | A Paper Macho Soldier that's able to flap through the air. When it tries to dive-bomb you, that's your chance! | Full Moon Island |
| 76 | 
|
? Block | These are always fun to find. What will be inside this time? Some coins? An item? An enemy? So exciting! | ? Island |
| 77 | 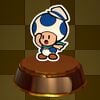
|
Sea Captain Toad | The seafaring Toad who was folded into a fish. No more flopping at the helm! | ? Island |
| 78 | 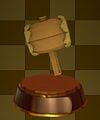
|
Hammer | When you only have a hammer, everything begins to look like a nail. And that's perfectly OK for Mario! | Hammer Island |
| 79 | 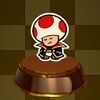
|
Captain T. Ode | A legendary figure, frozen for all of eternity for stealing a submarine. Hey, submarines are expensive! | Hammer Island |
| 80 | 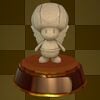
|
Shangri-Spa Toad Statue | A mysterious statue that points pilgrims toward a realm above the clouds. What cute little wings it has! | The Great Sea |
| 81 | 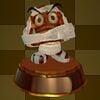
|
Paper Macho Mummy Goomba | A Paper Macho Goomba that looks like a mummy but is actually just cold. It's cold inside ancient temples! | The Great Sea |
| 82 | 
|
Healing Hearts | These hearts restore Mario's HP. The bigger they are, the more love they contain. | The Great Sea |
| 83 | 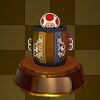
|
Spade Island Barrel | A rescue from this barrel apparently comes at the cost of your wardrobe. Insert friends carefully! | The Great Sea |
| 84 | 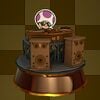
|
DJ Booth | A standard DJ setup, designed to help turn any place into a dance party, from a hotel pool to an ancient temple. | The Great Sea |
| 85 | 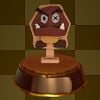
|
Training Mannequin | A mannequin handcrafted by Toads for battle training. Removes the miniscule danger of fighting a real Goomba. | The Great Sea |
| 86 | 
|
Origami Workbench | A desk found in the Origami Craftsman's workshop under Mushroom Island. It's stained with sweat, tears, and coffee. | The Great Sea |
| 87 | 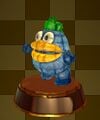
|
Paper Macho Stone Spike | A Paper Macho Soldier who rolls an unlimited supply of heavy stones. Get close and bop its belly between tosses. | The Great Sea |
| 88 | 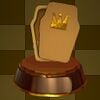
|
King Shroomses's Coffin | A historical reconstruction of what one of King Shroomses's coffins may have looked like. | The Great Sea |
| 89 | 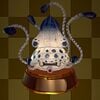
|
Paper Macho Gooper Blooper | A Paper Macho Soldier that attacked the Princess Peach cruise ship and sent Bob-omb flying overboard. What a jerk! | The Great Sea |
| 90 | 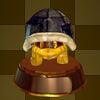
|
Paper Macho Buzzy Beetle | The personal pet of Scissors, stripped of its paper armor and Kamek's magic. It's still pretty dangerous! | Ice Vellumental Mountain |
| 91 | 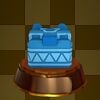
|
Ice Vellumental Bust | A model of the Ice Vellumental's head. It might invite bad luck to hit it with your hammer...but hey, why stop now? | Ice Vellumental Mountain |
| 92 | 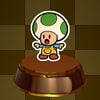
|
Origami Craftsman | The origami craftsman who brought King Olly to life. For some reason, Olly doesn't really seem that grateful. | Ice Vellumental Mountain |
| 93 | 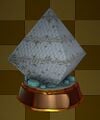
|
Diamond Island | An "island" slumbering beneath the Great Sea. Legendary structures await those who can find their way inside. | Ice Vellumental Mountain |
| 94 | 
|
Sea Captain Toad's Boat | Sea Captain Toad's trusty vessel. Since Mario rescued him from a fishy fate, the captain is happy to lend its services. | Sea Tower |
| 95 | 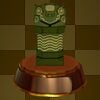
|
Earth Vellumental Idol | A model of the Earth Vellumental found inside the Sea Tower. It's considerably slimmer than the real thing. | Shangri-Spa |
| 96 | 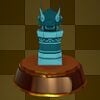
|
Water Vellumental Idol | A model of the Water Vellumental found inside the Sea Tower. This one won't cry, even if you bop it on the head. | Shangri-Spa |
| 97 | 
|
Fire Vellumental Idol | A model of the Fire Vellumental found inside the Sea Tower. Don't worry, it won't fall and crush you—probably. | Shangri-Spa |
| 98 | 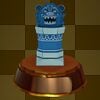
|
Ice Vellumental Idol | A model of the Ice Vellumental found inside the Sea Tower. It's not made of ice, but it's cool to the touch. | Shangri-Spa |
| 99 | 
|
Water Buckets | Used to douse yourself with hot water before entering a hot spring. Can be stacked and annoyingly knocked over. | Shangri-Spa |
| 100 | 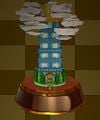
|
Sea Tower | A giant tower that has loomed over the Great Sea since the dawn of time. Legends say it leads to Shangri-Spa. | Shangri-Spa |
| 101 | 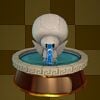
|
Shangri-Spa Fountain | The large foot bath in Shangri-Spa's main plaza. Like the dedication of the spa staff, the flow of water never ends. | Shangri-Spa |
| 102 | 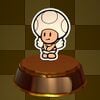
|
Shangri-Spa Toad | Don't be fooled. These Toads live in Shangri-Spa, but they're no angels. | Shangri-Spa |
| 103 | 
|
Boss Sumo Bro Cloud | The cloud that a Boss Sumo Bro uses to guard the entrance to Bowser's Castle—even from Kamek! | Shangri-Spa |
| 104 | 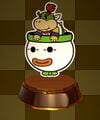
|
Bowser Jr. | Bowser's precocious son. Half the size, twice the energy, and just as loud as the big guy. | Spring of Jungle Mist |
| 105 | 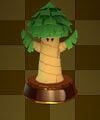
|
Sweet Sap Loggins | The vibrant form of Sweet Sap Loggins, Ol' Grandsappy's stage name from the glory days. | Spring of Jungle Mist |
| 106 | 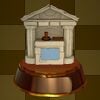
|
Stamp Booth | A commemorative stamp from the Shangri-Spa succesive-soaker loyalty program. Don't forget your stamp! | Spring of Jungle Mist |
| 107 | 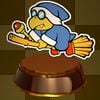
|
Kamek | Bowser's chief groundskeeper and occasional magician. Known for his diplomacy and tactical retreating skills. | Spring of Jungle Mist |
| 108 | 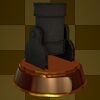
|
Sudden Death Cannon | Nothing heightens the stakes of a game show quite like an actual cannon. Good luck, Mario! | Spring of Rainbows |
| 109 | 
|
Paper Macho Chain Chomp | This wild animal is off the chain! Once it sets its big, round eyes on something, it'll chase it forever. So...start running! | Bowser's Castle |
| 110 | 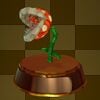
|
Paper Macho Piranha Plant | It lurks in the grass, waiting to snap up anyone who comes too close. If you get bitten, thrash around to escape! | Bowser's Castle |
| 111 | 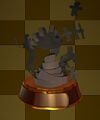
|
Cutout Soldiers | A set of soulless minions created by Scissors. They have no faces, no feelings, and no fear. | Bowser's Castle |
| 112 | 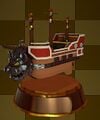
|
Bowser's Airship | Bowser's latest fuel-guzzling airship. Absolutely loaded down with armor and weapons—it should NOT be able to fly. | Bowser's Castle |
| 113 | 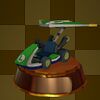
|
Luigi's Kart | Luigi's classic green kart, here shown equipped with optional hang glider. Step on it, Luigi! | Origami Castle |
| 114 | 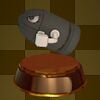
|
Bullet Bill | Lustrous black. Clenched fists. Bursting with energy. Once one of these targets you, there is no escape. | Origami Castle |
| 115 | 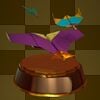
|
Paper Plane Squadron | A set of planes dispatched by King Olly to shoot down Bowser's airship. Show 'em who really rules the skies! | Origami Castle |
| 116 | 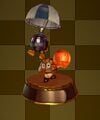
|
Paper Macho Crater Crashers | Paper Macho Soldiers who dropped into Hotfoot Crater. They're tough, so do your best to stay cool under pressure! | Origami Castle |
| 117 | 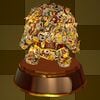
|
Paper Mistake Buzzy Beetle | This horrific creation was made from the faces of Bowser's minions. And each face still speaks, so it's really chatty. | Origami Castle |
| 118 | 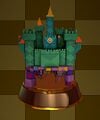
|
Origami Castle | An evil—but admittedly pretty cool—folded version of Princess Peach's Castle created by King Olly. | Origami Castle |
| 119 | 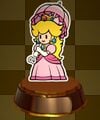
|
Princess Peach | She just wanted to host the Origami Festival, but Princess Peach was folded into a dark, edgy shadow of herself. | Toad Town |
| 120 | 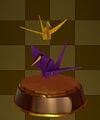
|
Origami Cranes | Some of the paper cranes King Olly folded in the hopes of eliminating all paper Toads. | Toad Town |
Trophies
| Image | Name | Description | Hint |
|---|---|---|---|

|
Battle King | You're not one to flee from battles as it shows. Congratulations on being crowned Battle King! | Win 200 battles. |

|
Coin Collector | You don't brag about it or show off, but you've collected a ton of coins. Now you can't let this trophy do the talking. | Collect 300000 coins. |

|
? Block Head | You've found—and hit—each and every ? Block in the game. Now tell us...which one was your favorite? | Hit every ? Block. |
|
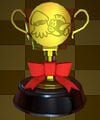
Fish Finder | No need to tell fish stories when you've got this trophy to back up your skills. | Catch the Legendary Cheep Cheep and Legendary Blooper. |
|
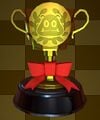
Ring Champion | A prize earned by besting an onslaught of Paper Macho goons on Scuffle Island. Bravo, warrior! The island is pleased! | Win every battle on Scuffle Island! |

|
The True Ringer | Earned by conquering all The Ringer puzzles in the Battle Lab. You spun 'em, slid 'em, and solved 'em all! Great work! | Clear every level of The Ringer. |

|
Speed Ring King | Earned by conquering all Speed Rings puzzles in the Battle Lab. Your super-fast reflexes must leave enemies dizzy! | Clear 16 levels in Speed Rings at the Battle Lab. |

|
Coin Captain | You've collected all possible coins on the Eddy River. And you're not even the one steering the boat! | Collect every coin on Eddy River. |

|
Shuriken Master | The mark of a veteran shuriken hurler who never misses their chosen target. Even thought of going pro? | Get 100 points in expert mode at the Shuriken Dojo. |

|
Quiz Master | Are you a bona fide game-show genius or simply a glutton for punishment? Doesn't matter. The trophy is yours. | Get a perfect score on Shy Guys Finish Last. |

|
Art Collector | You've collected every single piece of art in the world, so what are you doing looking at this trophy? Go look at art! | Complete the art gallery collection. |
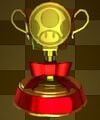
|
Origami Toad Collector | You've found—and unfolded—all of the plants, animals and origami objects made from Toads. What a collection! | Rescue all origami Toads. |

|
Collectible Collector | You've got deep pockets and plenty of storage space. In other words, you've gotten all possible Collectible Treasures! | Get every Collectible Treasure. |
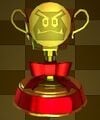
|
Origami Aficionado | When it comes to origami, you've seen it all. And fought it all. And flattened it all. Enjoy your trophy! (It's not origami.) | Complete the origami character gallery. |

|
Sound Disc Collector | What do collecting all music and fixing all holes have in common? This trophy! And this guy! You've done it all, Mario! | Complete the sound gallery collection. |
Origami Character Gallery
The Origami Character Gallery is organized into nine categories: each of the five streamers and "Origami Castle" for the enemies, "Vellumental", "King Olly - Vellumental Forms", and "Special". In order to unlock an enemy, with the exception of the Thwomp and Fuzzy, the player has to defeat it in battle, as defeating it in the overworld with high HP does not count. Some enemies are present more than once in this gallery, though they have same descriptions in every section (with the exception of the Ninjis, which have a different variant that hold tree branches). An enemy is unlocked in all sections regardless of where the player first fought it. Additionally, the player can rotate it and see the subject at all angles, with the exception of Princess Peach, who cannot be seen from the bottom.
Enemies
The colored columns indicate the section in which an enemy appears (R, B, Y, P, and G for the red, blue, yellow, purple, and green streamers respectively, and O for Origami Castle), marked by its number in the corresponding section.
| Number | Image | Name | Description | |||||
|---|---|---|---|---|---|---|---|---|
| R | B | Y | P | G | O | |||
| 1 | 10 | 24 | 41 | 68 | 93 | 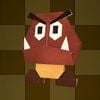
|
Goomba | Goombas transformed into origami. All that folding has added some bulk, but really, they're just as weak as ever. |
| 2 | 11 | 
|
Swoop | They love dark ceilings and swooping in on their foes. Low attacks won't cut it, so don't even bother with a hammer. | ||||
| 3 | 12 | 25 | 
|
Scaredy Rat | They adore dark corners. If they nab your coins in battle, defeat them before your gold is good as gone. | |||
| 26 | 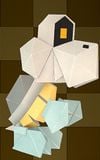
|
Dry Bones | They'll collapse into a bone heap upon defeat, but not for not long. Even the Boot Car can't keep them down. | |||||
| 4 | 13 | 27 | 42 | 69 | 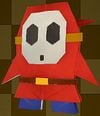
|
Shy Guy | Bashful blokes who like to hide behind masks. If you're lucky, you might even catch one riding a shell! | |
| 14 | 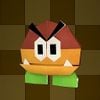
|
Galoomba | They make their homes near chestnut trees. A good stomping will make them topple over, so have at it. | |||||
| 28 | 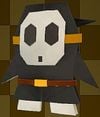
|
Black Shy Guy | Mysterious Shy Guys shrouded in darkness. They like to throw turnip-shaped things, so watch out for that. | |||||
| 43 | 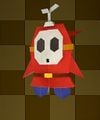
|
Fly Guy | They use tiny propellers to fly around the Sea Tower in the Great Sea. Don't let them fly circles around you too! | |||||
| 5 | 15 | 44 | 70 | 94 | 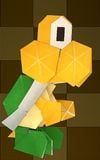
|
Koopa Troopa | Even though they've been transformed into origami, these versatile villains can still transform into a shell as well. | |
| 6 | 16 | 45 | 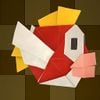
|
Cheep Cheep | Though at home in the sea, they're not shy about jumping out and attacking passerby. You've been warned! | |||
| 7 | 17 | 29 | 46 | 71 | 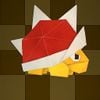
|
Spiny | Don't underestimate their spiky backs. Without some strong boots or a hammer, you're in for a world of hurt. | |
| 8 | 18 | 47 | 
|
Paragoomba | Paragoombas transformed into origami. They're pretty smug about those wings, but one stomp and they fall right off. | |||
| 9 | 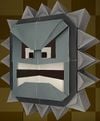
|
Thwomp | They're rough, tough, big, and bulky. That said, they're weak to star power, so slam 'em while you're sparkly! | |||||
| 30 | 48 | 72 | 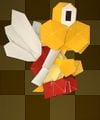
|
Koopa Paratroopa | Flying origami Koopa Troopas. Swoop in from above and stomp away their wings to secure the win. | |||
| 31 | 49 | 73 | 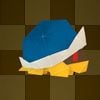
|
Buzzy Beetle | Buzzy Beetles, transformed into origami. As per usual, fireballs have no effect on them. Must be some high-quality paper! | |||
| 32 | 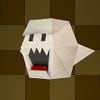
|
Boo | One glance at Mario's twinkling blues makes them freeze. They vanish in battle, so don't lose track of them. | |||||
| 19 | 50 | 
|
Sidestepper | They like to slide side to side. It's pretty snide. Their pincers are sharp as Scissors, so stomp at your own risk. | ||||
| 20 | 51 | 
|
Sidestepper | Blue Sidesteppers are rare. Is that why they value rarities themselves? Either way, keep an eye on your goods. | ||||
| 21 | 
|
Ninji | If they spot a hammer coming, they'll use their Ninji Vanish ability to turn things around. Stomp 'em instead! | |||||
| 74 | 
|
Ninji | Ninjis who like to lurk in tall grass. If you hit one with a hammer, expect an angry counterattack. | |||||
| 52 | 75 | 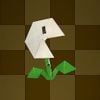
|
Nipper Plant | They look like adorable origami flowers, but don't be fooled. If left to their own devices, they'll spit fire at you. | ||||
| 22 | 53 | 76 | 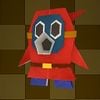
|
Snifit | They're ready and raring to shoot some trouble your way, and they're not shy about calling for backup in battle. | |||
| 33 | 54 | 
|
Scuttlebug | Even as origami, a Scuttlebug's range is quite wide. They're hard to avoid, so stay on your guard. | ||||
| 34 | 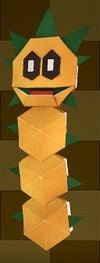
|
Pokey | They wait in the sand to attack all who approach. They probably just need a hug, but...it's not advisable. | |||||
| 55 | 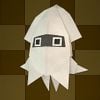
|
Blooper | They live in the Great Sea. They prefer the water but will occasionally cause mischief on dry land. | |||||
| 77 | 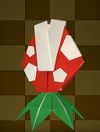
|
Jumping Piranha Plant | They look like teeny Piranha Plants with leafy little feet. Though adorable, their fire is still fire, so stay alert. | |||||
| 35 | 56 | 
|
Crowber | They fly around in circles, ever in wait to dive-bomb Mario on sight, as though they have nothing better to do. | ||||
| 36 | 57 | 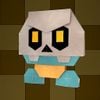
|
Bone Goomba | Goombas wearing tough skulls on their heads. Even in origami form, that's still pretty intimidating. | ||||
| 37 | 58 | 78 | 95 | 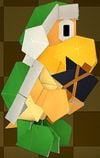
|
Hammer Bro | They throw hammers at people, which is remarkably rude. And won't someone think of the hammers?! | ||
| 59 | 96 | 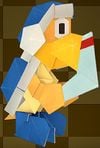
|
Boomerang Bro | Boomerang enthusiasts. Just when you think you've dodged a 'rang, BOOM! Right in the back of your head. | ||||
| 38 | 60 | 79 | 97 | 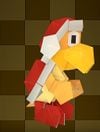
|
Fire Bro | No one likes being surrounded by flame-throwing bullies, so do your best to avoid these bros. | ||
| 39 | 
|
Shoe Goomba | You can't stomp them when they're safe in a shoe, but a defeated one will drop boots, so get to shoe collecting. | |||||
| 61 | 98 | 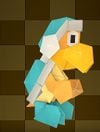
|
Ice Bro | The ice they throw is pretty. Pretty cold. And pretty painful. It's pretty much a bad idea to go near them. | ||||
| 62 | 80 | 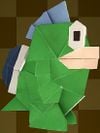
|
Spike | They spit up spiked balls on the regular. How unsettling! Those spikes smart, so don't stomp them by mistake! | ||||
| 81 | 
|
Rocky Wrench | They live underground and pop up only to throw spinner wrenches at folks... especially folks named Mario. | |||||
| 63 | 83 | 
|
Snow Spike | Mighty Spikes who thrive in the cold. Unless you use your hammer wisely, their snowballs will smash you flat. | ||||
| 64 | 84 | 
|
Stone Spike | You can't break a Blue Stone Spike's rocks with a hammer, so just do your best to avoid them altogether. | ||||
| 65 | 82 | 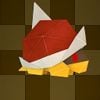
|
Spike Top | Notable for their large spike. They're not fun to step on, so do yourself a favor and pull out the ol' hammer. | ||||
| 66 | 99 | 
|
Sledge Bro | Very large and very strong Sledge Bros. Guarding is highly recommended, assuming you don't like throbbing pain. | ||||
| 85 | 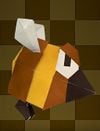
|
Stingby | They hide in tall grass, only to fly out all abuzz like it's some kind of sting operation. | |||||
| 86 | 
|
Chargin' Chuck | Always energetic and ready to roll, these hot-spring aficionados favor team tackles | |||||
| 87 | 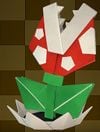
|
Piranha Plant | The[sic] look like they're stuck in the ground, harmless and immobile. Looks can be deceiving... | |||||
| 88 | 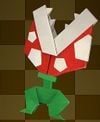
|
Ptooie | Word to the wise: those spiky balls they keep aloft by breath alone hurt a fair bit if they fall on you | |||||
| 89 | 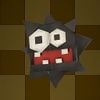
|
Fuzzy | They move along walls fast. They won't fight you, but touching one will cause damage, so maybe don't do that? | |||||
| 23 | 40 | 67 | 90 | 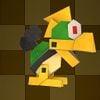
|
Mechakoopa | Known for getting dragged into battles. Besting one will earns[sic] lots of coins, so make defeating them a priority. | ||
| 91 | 100 | 
|
Sumo Bro | Shoots out lightning with a sumo stomp. You'll have to defeat these foes to recover any panels they steal in battle. | ||||
| 92 | 
|
Boss Sumo Bro | This bad boy is blocking the entrance to Bowser's Castle. Better bring your sturdiest boots to this lightning fight! | |||||
Vellumental
| Normal | King Olly/Olivia | Name | Description | ||
|---|---|---|---|---|---|
| Number | Image | Number | Image | ||
| 101 | 105 | 
|
Earth Vellumental | That thick shell offers great defense, so aim for its head, limbs, and especially its tail. | |
| 102 | 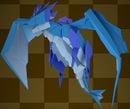
|
106 |  
|
Water Vellumental | Flies high and attacks with water. Send it to the ground with your boots, then use the Earth Vellumental's power. |
| 103 | 
|
107 |  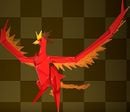
|
Fire Vellumental | Clad in ferocious flames. Use the power of the Water Vellumental first, and then unleash your 1,000-Fold Arms! |
| 104 | 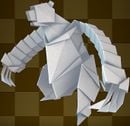
|
108 | 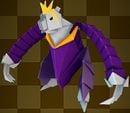 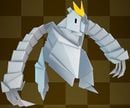
|
Ice Vellumental | A polar bear with ice-manipulation powers. It freezes to gaurd, so use the Fire Vellumental's power to melt it. |
Special
| Number | Image | Name | Description |
|---|---|---|---|
| 109 | 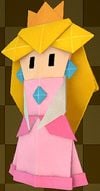
|
Princess Peach | Princess Peach transformed into origami. She's as lovely as ever, but it's still a bit unsettling. |
| 110 | 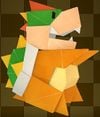
|
Bowser | Bowser, folded into a sumo wrestler. He's ready to rampage in the ring and defeat Olly. |
| 111 | 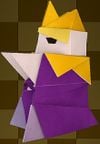
|
King Olly | Olly, folded into a sumo wrestler. He's as a cool as a paper cucumber, with enough strength to push even Bowser around. |
| 112 | 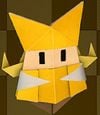
|
Olivia | An origami gal with a kind heart. She's King Olly's sister but is teaming up with Mario to stop her bro's reign of terror. |
| 113 | 
|
King Olly | The mighty origami king. Holds a bizarre grudge against Toads and vows to wipe out paperkind with his origami army. |
Sound Gallery
The Sound Gallery features a total of 244 songs.
Red Streamer
| Number | Name | Notes |
|---|---|---|
| 1 | Peach's Castle | Plays when Mario and Luigi arrive at the front door of Peach's Castle. Arrangement of "Inside the Castle Walls" from Super Mario 64. |
| 2 | Peach's Castle - Underground | Plays in the dungeons of Peach's Castle. |
| 3 | Olivia's First Appearance | Plays when Olivia calls for Mario in the dungeons of Peach's Castle. |
| 4 | Folded Soldier's First Appearance | Plays when King Olly (disguised as a Shy Guy) summons the first Folded Soldiers at the balcony of Peach's Castle. |
| 5 | Whispering Woods | Plays in Whispering Woods. |
| 6 | Whispering Woods - Whispers | Plays when Mario first enters Whispering Woods. |
| 7 | Ol' Grandsappy's Cry for Help | Plays after Ol' Grandsappy screams after his face is torn off. |
| 8 | Happy & Sappy | Plays after giving the Soul Seed to Ol' Grandsappy. The song is sung by Ol' Grandsappy and the Sap Sisters. |
| 9 | Sweet Sap Loggins Theme | Plays in the area with Ol' Grandsappy after he has transformed into Sweet Sap Loggins. |
| 10 | Toad's BBQ Foodeatery | Plays through the speakers at the Toad's BBQ Foodeatery area of Whispering Woods. |
| 11 | Olivia's Bench | Plays when Mario and Olivia sit at the bench in Whispering Woods. |
| 12 | Graffiti Underground | Plays in Graffiti Underground. Arrangement of the Underground Theme from Super Mario Bros. |
| 13 | Earth Vellumental Temple | Plays in the Earth Vellumental Temple. |
| 14 | Offering Box | Plays over the offering box recordings at the Earth Vellumental Temple Path. |
| 15 | A Giant Shell Falls | Plays when Mario is chased by the giant shell in the Earth Vellumental Temple. |
| 16 | Dance It Out | Plays while Olivia uses the Earth Vellumental power. |
| 17 | Overlook Tower under Fire | Plays in Overlook Tower before defeating Colored Pencils. |
| 18 | Overlook Tower | Plays in Overlook Tower after defeating Colored Pencils. |
| 19 | Toad Town in Trouble | Plays when Mario first visits Toad Town while Paper Macho Soldiers are present. |
| 20 | The Ruins of Peach's Castle | Plays in the ruins of Peach's Castle behind Toad Town. |
| 21 | Paper Macho Soldier on Patrol | Plays at Toad Town while battling the Paper Macho Goomba on the roof of a house after the red streamer is cleared. |
| 22 | Toad Town Ghost Town | Plays in Toad Town after defeating all of the Paper Macho Soldiers. |
| 23 | Toad Town - Red Streamer Removal | Plays in Toad Town after the red streamer has been removed. |
| 24 | Toad Town - Blue Streamer Removal | Plays in Toad Town after the blue streamer has been removed. |
| 25 | Toad Town - Yellow Streamer Removal | Plays in Toad Town after the yellow streamer has been removed. |
| 26 | Toad Town - Purple Streamer Removal | Plays in Toad Town after the purple streamer has been removed. |
| 27 | Toad Town - Green Streamer Removal | Plays in Toad Town after the green streamer has been removed. |
| 28 | Toad Town Port | Plays at the dock of Toad Town. |
| 29 | Musée Champignon | Plays in Musée Champignon. |
| 30 | Battle Lab | Plays in the Battle Lab. |
| 31 | Picnic Road | Plays at Picnic Road. |
| 32 | Picnic Road Shop | Plays near the shops in front of the Earth Vellumental Temple at Picnic Road. |
| 33 | Overlook Mountain | Plays at Overlook Mountain. |
| 34 | Overlook Mountain Occupied | Plays while climbing Overlook Mountain before Colored Pencils is defeated. |
| 35 | Panic at Overlook Tower | Plays in Overlook Tower when the origami Mini Goombas are set free in the restaurant. |
| 36 | Missile Launch | Plays at the outdoor café at Overlook Tower when Colored Pencils attacks Mario. |
| 37 | Monty Mole's Shop | Plays during the Monty Mole's auction for the Green Shell Stone at Overlook Mountain. |
| 38 | Paper Macho Soccer | Plays on the soccer field at Overlook Mountain with the three Paper Macho Shy Guys. |
| 39 | Fossilized Dry Bones | Plays when Mario uncovers the Dry Bones at Overlook Mountain. |
| 40 | The Mystery of the Magic Circle | Plays when Mario and Olivia first encounter the Earth Vellumental Magic Circle at the top of Overlook Mountain. |
| 41 | Red Streamer Battle | Plays while attacking during battles at Whispering Woods, Toad Town, Graffiti Underground, Picnic Road, Overlook Mountain, and Overlook Tower. |
| 42 | Red Streamer Battle - Thinking | Plays while arranging rings during battles at Whispering Woods, Toad Town, Graffiti Underground, Picnic Road, Overlook Mountain, and Overlook Tower. |
| 43 | Vellumental Area Battle | Plays while attacking during battles in the Vellumental areas. |
| 44 | Vellumental Area Battle - Thinking | Plays while arranging rings during battles in the Vellumental areas. |
| 45 | Event Battle | Plays while attacking during special battles. |
| 46 | Event Battle - Thinking | Plays while arranging rings during special battles. |
| 47 | Vellumental Battle | Plays while attacking during Vellumental boss battles. |
| 48 | Vellumental Battle - Thinking | Plays while arranging rings during Vellumental boss battles. |
| 49 | The Missile Maestro | Plays while attacking during Colored Pencils' boss battle. |
| 50 | The Missile Maestro - Thinking | Plays while arranging rings during Colored Pencils' boss battle. |
Blue Streamer
| Number | Name | Notes |
|---|---|---|
| 51 | Bob-omb Enters | Plays when Bob-omb introduces himself on the tram ride to Autumn Mountain. |
| 52 | Chestnut Valley | Plays at Chestnut Valley. |
| 53 | Sleeping Bob-omb | Plays when Mario and Olivia find Bob-omb sleeping at Chestnut Valley. |
| 54 | Water Vellumental Shrine | Plays in the Water Vellumental Shrine. |
| 55 | Eddy River | Plays during the boat ride on Eddy River. |
| 56 | The End of Eddy River | Plays when Mario descends the final rapids and at the end of Eddy River. |
| 57 | House of Tricky Ninjas | Plays outside of the Ninja Attraction. |
| 58 | House of Tricky Ninjas Cleared | Plays when Mario finds the way to the next room in the Ninja Attraction. |
| 59 | Autumn Mountain | Plays at Autumn Mountain. |
| 60 | Exploring Shogun Studios | Plays in Shogun Studios while searching for the Shogun Studios Master Key. |
| 61 | Tranquil Pipes Teahouse | Plays at the Tranquil Pipes Teahouse. Arrangement of Maple Treeway's music from Mario Kart Wii. |
| 62 | Shogun Studios | Plays in Shogun Studios after defeating Rubber Band. |
| 63 | Shogun Studios Entrance | Plays at the entrance of Shogun Studios. |
| 64 | Exploring Autumn Mountain | Plays at Autumn Mountain after discovering the Water Vellumental Magic Circle and while searching for the Water Vellumental Shrine. |
| 65 | Go with the Flow | Plays when first entering Eddy River. The song is sung by the Oarsman. |
| 66 | Shogun Studios Deserted | Plays when first exploring Shogun Studios after talking to the dressed-up Goomba, Snifit, and Koopa Troopa. |
| 67 | Shuriken Dojo | Plays while playing the minigame at the Shuriken Dojo. |
| 68 | Goomba Mask | Plays while trying on the Goomba Mask in the Shogun Studios staff room. |
| 69 | Jungle King Mask | Plays while trying on the Jungle King Mask in the Shogun Studios staff room. |
| 70 | Space Warrior Mask | Plays while trying on the Space Warrior Mask in the Shogun Studios staff room. Arrangement of the "Samus Appears" fanfare from the Metroid series. |
| 71 | Shogun Studios Parade | Plays during the parade at Shogun Studios after defeating Rubber Band. |
| 72 | Olivia Having Fun | Plays when Olivia laughs at the Goomba Mask in the Shogun Studios staff room. |
| 73 | Big Sho' Theater | Plays at the Big Sho' Theater. |
| 74 | Western Showdown - Enemy Enters | Plays when an enemy appears during the first act at the Big Sho' Theater. |
| 75 | Western Showdown - Mario Enters | Plays when Mario walks on stage during the first act at the Big Sho' Theater. |
| 76 | The Western Begins | Plays at the beginning of the first act at the Big Sho' Theater. |
| 77 | The Western Ends | Plays after Mario defeats the enemy during the first act at the Big Sho' Theater. |
| 78 | Enter Birdo | Plays at the end of the second act at the Big Sho' Theater. |
| 79 | Stage Play - Mario Enters | Plays when Mario walks on stage during the second act at the Big Sho' Theater. |
| 80 | Stage Play - Koopa Troopa Theme | Plays during the first phase of the fight against the Paper Macho Koopa Troopas during the second act at the Big Sho' Theater. |
| 81 | Stage Play - Koopa Troopa Boss | Plays during the second phase of the fight against the Paper Macho Koopa Troopas during the second act at the Big Sho' Theater. |
| 82 | Swan Lake - Punk Remix | Plays while battling the Paper Macho Shy Guys during the third act at the Big Sho' Theater. Arrangement of the theme from the ballet Swan Lake. |
| 83 | Big Sho' Theater - Cast Introductions | Plays during the curtain call at the Big Sho' Theater. |
| 84 | The Elastic Entertainer Enters | Plays during Rubber Band's introduction. |
| 85 | Tragedy of the Elastic Entertainer | Plays after defeating Rubber Band. |
| 86 | Blue Streamer Battle | Plays while attacking during battles in Shogun Studios. |
| 87 | Blue Streamer Battle - Thinking | Plays while arranging rings during battles in Shogun Studios. |
| 88 | Autumn Mountain Battle | Plays while attacking during battles at Autumn Mountain. |
| 89 | Autumn Mountain Battle - Thinking | Plays while arranging rings during battles at Autumn Mountain. |
| 90 | The Elastic Entertainer | Plays while attacking during Rubber Band's boss battle. |
| 91 | The Elastic Entertainer - Thinking | Plays while arranging rings during Rubber Band's boss battle. |
Yellow Streamer
| Number | Name | Notes |
|---|---|---|
| 92 | Breezy Tunnel | Plays in Breezy Tunnel. |
| 93 | Boot Car - Superboost | Plays when Mario uses the Boot Car in Breezy Tunnel. |
| 94 | Bob-omb's Encouragement | Plays when Bob-omb's ghost appears in Breezy Tunnel. |
| 95 | Fire Vellumental Cave | Plays in the Fire Vellumental Cave. |
| 96 | Bucket Panic! | Plays while battling the Paper Macho Shy Guys in the Fire Vellumental Cave. |
| 97 | Sweetpaper Valley | Plays when first arriving at Sweetpaper Valley before the boulder crushes Olivia. |
| 98 | Bob-omb's Memories | Plays during Bob-omb's flashbacks and when he sacrifices himself to rescue Olivia. |
| 99 | Sad Olivia | Plays in Breezy Tunnel before cheering up Olivia. |
| 100 | Bob-omb's Determination | Plays at Sweetpaper Valley. |
| 101 | Scorching Sandpaper Desert | Plays in the Scorching Sandpaper Desert and its subregions. |
| 102 | My Heart's a-Burnin' | Plays when summoning the Fire Vellumental Cave. The song is sung by Olivia. |
| 103 | Mega Paper Macho Pokey | Plays while battling Mega Paper Macho Pokey. |
| 104 | Shroom City | Plays in Shroom City after it is reclaimed by the Toads. |
| 105 | Snif City | Plays in Shroom City while it is taken over by the Snifits. |
| 106 | Snif City Royal Hotel | Plays in the Snif City Royal Hotel. |
| 107 | Hotel Mural | Plays when first examining the final mural in the Snif City Royal Hotel. |
| 108 | Snif City Royal Hotel - Pool | Played by the DJ at the pool in the Snif City Royal Hotel. The song's corresponding sound disc is titled "Pool Party (Jump In)". |
| 109 | Temple of Shrooms | Plays in the Temple of Shrooms. |
| 110 | Dread in the Temple of Shrooms 1 | Plays after entering the dark room in the Temple of Shrooms. |
| 111 | Dread in the Temple of Shrooms 2 | Plays in the Temple of Shrooms after the faceless Toad shadow disappears. |
| 112 | Exploring the Temple of Shrooms | Plays in the Temple of Shrooms while searching for the "Thrills at Night" sound disc. |
| 113 | Paper Macho Mummy Goomba | Plays while battling the Paper Macho Mummy Goombas. |
| 114 | Temple of Shrooms Disco | Played by the DJ Toad at the dance floor in the Temple of Shrooms upon first arrival. The song's corresponding sound disc is titled "Temple of Shrooms U.G." |
| 115 | Heartbeat Skipper | Played by the DJ Toad at the Temple of Shrooms dance floor and Snif City Royal Hotel pool. |
| 116 | Deep, Deep Vibes | Played by the DJ Toad at the Temple of Shrooms dance floor and Snif City Royal Hotel pool. |
| 117 | M-A-X Power! | Played by the DJ Toad at the Temple of Shrooms dance floor and Snif City Royal Hotel pool. |
| 118 | Thrills at Night | Played by the DJ Toad at the Temple of Shrooms dance floor and Snif City Royal Hotel pool. |
| 119 | Yellow Streamer Battle | Plays while attacking during battles at Breezy Tunnel, areas of Scorching Sandpaper Desert, and the Temple of Shrooms. |
| 120 | Yellow Streamer Battle - Thinking | Plays while arranging rings during battles at Breezy Tunnel, areas of Scorching Sandpaper Desert, and the Temple of Shrooms. |
| 121 | Disco Devil | Plays while attacking during Hole Punch's boss battle. |
| 122 | Disco Devil - Thinking | Plays while arranging rings during Hole Punch's boss battle. |
Purple Streamer
| Number | Name | Notes |
|---|---|---|
| 123 | The Great Sea | Plays at the Great Sea. |
| 124 | Exploring the Great Sea | Plays at the Great Sea after clearing the fog and before defeating Tape. |
| 125 | Bonehead Island | Plays on Bonehead Island. Arrangement of the Sailor's Song from Paper Mario: Color Splash. |
| 126 | Giant Fan of Bonehead Island | Plays as the Fan blows the fog away on Bonehead Island. Arrangement of the Fan Thing's music from Paper Mario: Sticker Star, which in turn is inspired by Also sprach Zarathustra. |
| 127 | Crescent Moon Island | Plays on Full Moon Island. |
| 128 | Hammer Island | Plays on Hammer Island. |
| 129 | Club Island | Plays on Club Island. |
| 130 | Club Island - Feelin' Fungi | Plays when Feelin' Fungi are dancing on Club Island. |
| 131 | Heart Island | Plays on Heart Island. |
| 132 | Spade Island | Plays on Spade Island. |
| 133 | ? Island - Stone Spike on the Hill | Plays on ? Island while Stone Spikes are present. |
| 134 | Scuffle Island | Plays while battling Paper Macho Soldiers on Scuffle Island. |
| 135 | Origami Workshop | Plays in the origami workshop on Mushroom Island. |
| 136 | The Fold of Life | Plays when the Origami Craftsman explains how he created King Olly. |
| 137 | Diamond Island | Plays on Diamond Island. |
| 138 | Diamond Island - Hall of Trials | Plays at the entrances to the three trials on Diamond Island. |
| 139 | Trial of Wisdom | Plays during the first and second stages of the Trial of Wisdom. |
| 140 | Trial of Wisdom - Final Question | Plays during the final stage of the Trial of Wisdom. |
| 141 | Trial of Power | Plays during the Trial of Power. |
| 142 | The Princess Peach | Plays on the Princess Peach. |
| 143 | The Princess Peach - Restoration Party | Plays on the Princess Peach after all of the former passengers have returned. |
| 144 | The Princess Peach - Nobody's Home | Plays when first entering the main hall of the Princess Peach. |
| 145 | The Princess Peach - Drenched in Ink | Plays when Mario and Bob-omb discover the ink left by Paper Macho Gooper Blooper on the Princess Peach. |
| 146 | The Princess Peach - Stolen Box! | Plays after Paper Macho Gooper Blooper takes Bob-omb's lockbox on the Princess Peach. |
| 147 | Paper Macho Gooper Blooper | Plays while battling Paper Macho Gooper Blooper. |
| 148 | Ice Vellumental Mountain | Plays at the Ice Vellumental Mountain. |
| 149 | Ice Vellumental Mountain - Rolling Snowball | Plays when the Snow Spikes roll snowballs at Mario at the Ice Vellumental Mountain. |
| 150 | Ice Slider | Plays when Mario and Olivia slide down the Ice Vellumental Mountain after defeating the Ice Vellumental. |
| 151 | Sea Tower - 1st Floor | Plays on the first floor of Sea Tower. |
| 152 | Sea Tower - 2nd Floor | Plays on the second floor of Sea Tower. |
| 153 | Sea Tower - Earth Vellumental Area | Plays in the Earth Vellumental area of Sea Tower. |
| 154 | Sea Tower - Water Vellumental Area | Plays in the Water Vellumental area of Sea Tower. |
| 155 | Sea Tower - Fire Vellumental Area | Plays in the Fire Vellumental area of Sea Tower. |
| 156 | Sea Tower - Ice Vellumental Area | Plays in the Ice Vellumental area of Sea Tower. |
| 157 | Purple Streamer Battle | Plays while attacking during battles at the Great Sea and its islands (besides Bonehead Island). |
| 158 | Purple Streamer Battle - Thinking | Plays while arranging rings during battles at the Great Sea and its islands (besides Bonehead Island). |
| 159 | Unsettling Area Battle | Plays while attacking during battles at the Princess Peach, Bonehead Island, and Bowser's Castle. |
| 160 | Unsettling Area Battle - Thinking | Plays while arranging rings during battles at the Princess Peach, Bonehead Island, and Bowser's Castle. |
| 161 | The Shifty Sticker | Plays while attacking during Tape's boss battle. |
| 162 | The Shifty Sticker - Thinking | Plays while arranging rings during Tape's boss battle. |
Green Streamer
| Number | Name | Notes |
|---|---|---|
| 163 | Entering Shangri-Spa | Plays when Shangri-Spa's entrance is revealed. |
| 164 | Shangri-Spa | Plays in Shangri-Spa. |
| 165 | Meet Kamek | Plays when Mario and Olivia meet Kamek. Arrangement of "The Blue Wizard" used in Paper Mario: Color Splash, while the song originates in Paper Mario: Sticker Star. |
| 166 | Kamek's Memories | Plays during Kamek's flashbacks. |
| 167 | Kamek Rebuked | Plays when a Shangri-Spa Toad rebukes Kamek for crashing Bowser's Castle onto Shangri-Spa's banquet hall. |
| 168 | Sumo Bro Enters | Plays when Boss Sumo Bro first appears. |
| 169 | Welcome to Shangri-Spa! | Plays when Mario and Olivia first bathe in the Spring of Purification. |
| 170 | Enter Bowser Jr. | Plays during scenes involving Bowser Jr. |
| 171 | Hurry to the Spring of Purification! | Plays while the party heads for the Spring of Purification after Bowser Jr. is cut up by Scissors. |
| 172 | Exploring Shangri-Spa | Plays while exploring the other springs to fix Bowser Jr. up in Shangri-Spa. |
| 173 | Minions Assemble! | Plays after Kamek makes his announcement to the Koopa Troop after defeating Boss Sumo Bro. |
| 174 | Spring of Rainbows Path | Plays in the cave leading to the Spring of Rainbows. |
| 175 | Crossing the Cliff | Plays at the cliff leading to the Spring of Rainbows. |
| 176 | Shy Guys Finish Last | Plays during Shy Guys Finish Last. |
| 177 | Tell 'Em How It Works | Plays when Emcee Shy Guy explains the rules and announces the results in Shy Guys Finish Last. |
| 178 | Today's Contestant | Plays when a category is selected in Shy Guys Finish Last. |
| 179 | Try the Sudden Death Round | Plays during the Sudden Death round's introduction in Shy Guys Finish Last. |
| 180 | Ring Scramble | Plays during the Ring Scramble game in Shy Guys Finish Last. |
| 181 | Race 'n' Place | Plays during the Race 'n' Place game in Shy Guys Finish Last. |
| 182 | Ninji Skills | Plays during the Ninji Skills game in Shy Guys Finish Last. |
| 183 | Bath Math | Plays during the Bath Math game in Shy Guys Finish Last. |
| 184 | Sudden Death | Plays during the Sudden Death round in Shy Guys Finish Last. |
| 185 | Spring of Jungle Mist | Plays in the Spring of Jungle Mist. |
| 186 | Paper Macho Chain Chomp | Plays when the party is being chased by the Paper Macho Chain Chomp. |
| 187 | Princess Unleashed | Plays in the Spring of Jungle Mist while the Paper Macho Chain Chomp is loose. |
| 188 | Bowser's Castle | Plays in Bowser's Castle. |
| 189 | Folded Soldier Banquet | Plays when the party first enters Bowser's Castle and finds the Folded Soldiers having a banquet. |
| 190 | Beware the Handaconda | Plays after the Handaconda grabs Olivia. |
| 191 | Paper Mistake Buzzy Beetle | Plays while fighting the Paper Mistake Buzzy Beetle. |
| 192 | Bowser's Encouragement | Plays when Bowser declares his joining Mario in defeating King Olly after defeating Scissors. |
| 193 | Nervous Olivia | Plays when Olivia thanks Mario for saving her repeatedly after defeating Scissors. |
| 194 | Bowser's Airship Appears | Plays when Bowser's airship appears. |
| 195 | Bowser's Airship - Locked and Loaded | Plays when boarding Bowser's airship. |
| 196 | Bowser's Airship - Launch | Plays as Bowser's airship departs. |
| 197 | Dog-Eared Fight | Plays while battling the Paper Plane Squadron. |
| 198 | Dog-Eared Fight - Boss Battle | Plays while battling the Paper Plane Squadron boss. |
| 199 | Incoming! | Plays when the Paper Plane Squadron appears. |
| 200 | Battle at Bowser's Castle | Plays when the Koopa Troop are fighting the Folded Soldiers in Bowser's Castle. |
| 201 | Green Streamer Battle | Plays while attacking during battles in the Spring of Jungle Mist. |
| 202 | Green Streamer Battle - Thinking | Plays while arranging rings during battles in the Spring of Jungle Mist. |
| 203 | Boss Fight | Plays while attacking during Boss Sumo Bro's and Handaconda's boss battles. |
| 204 | Boss Fight - Thinking | Plays while arranging rings during Boss Sumo Bro's and Handaconda's boss battles. |
| 205 | The Dual-Bladed Duelist | Plays while attacking during Scissors' boss battle. |
| 206 | The Dual-Bladed Duelist - Thinking | Plays while arranging rings during Scissors' boss battle. |
Special
| Number | Name | Notes |
|---|---|---|
| 207 | Hotfoot Crater | Plays in Hotfoot Crater. |
| 208 | Origami Castle | Plays in Origami Castle. |
| 209 | Olivia's Last Bench | Plays when Olivia sits on the bench before King Olly's boss battle. |
| 210 | King Olly's Throne Room | Plays in King Olly's throne room in Origami Castle. |
| 211 | Olivia Transforms - Final Battle | Plays when Olivia transforms into a giant hammer in the final battle. |
| 212 | King Olly, Origami Overlord | Plays after defeating King Olly. |
| 213 | The Fanged Fastener | Plays while attacking during Stapler's boss battle. |
| 214 | The Fanged Fastener - Thinking | Plays while arranging rings during Stapler's boss battle. |
| 215 | Battle with King Olly | Plays while attacking during the first phase of King Olly's boss battle. |
| 216 | Battle with King Olly - Thinking | Plays while arranging rings during the first phase of King Olly's boss battle. |
| 217 | King Olly and Mega Bowser | Plays during the sumo battle between Bowser and King Olly. |
| 218 | Mega Bowser on the Brink | Plays when Bowser is close to the edge during the sumo battle. |
| 219 | King Olly on the Brink | Plays when King Olly is close to the edge during the sumo battle. |
| 220 | Mega King Olly Transformation | Plays when King Olly transforms into his sumo form. |
| 221 | Mega Bowser Transformation | Plays when Olivia transforms Bowser into his sumo form. |
| 222 | Olivia's Plea | Plays after the first phase of King Olly's boss battle. |
| 223 | King Olly's Final Form | Plays when King Olly appears in his final form. |
| 224 | Olivia's Final Magic Circle | Plays when Olivia summons the Magic Circle before the final phase of King Olly's boss battle. |
| 225 | The Final Battle | Plays during the final phase of King Olly's boss battle. |
| 226 | 1,000-Fold Arms | Plays while using the 1,000-Fold Arms. |
| 227 | King Olly Enters | Plays during scenes involving King Olly. |
| 228 | Luigi Enters | Plays during scenes involving Luigi. |
| 229 | Vellumental Enters | Plays when a Vellumental appears. |
| 230 | The Legion of Stationery Enters | Plays when a member of the Legion of Stationery appears. |
| 231 | Olivia Transforms | Plays when Olivia transforms into a Vellumental form. |
| 232 | Super Star | Plays while using the Super Star. Arrangement of the Starman theme from Super Mario Bros. and Superstar Mario's theme from Super Mario World 2: Yoshi's Island. |
| 233 | Streamer Removal | Plays after destroying a streamer spool. |
| 234 | Peach's Castle Grand Opening | Plays during a cutscene showing the streamer's removal from Peach's Castle. |
| 235 | MAX Confetti Increased! | Plays after clearing the red, blue, yellow, and purple streamers. |
| 236 | All Streamers Cleared | Plays after clearing the green streamer. |
| 237 | Sensor Lab | Plays in the Sensor Lab and its satellite offices. |
| 238 | Toad Radar | Plays while testing inventions in the Sensor Lab. |
| 239 | Café | Plays in cafés. |
| 240 | Heading to Peach's Castle with Luigi | Plays in the opening scene when Mario and Luigi are driving to Peach's Castle. |
| 241 | Game Over | Plays on the Game Over screen. |
| 242 | Ending | Plays in the ending scene showing the Origami Festival. Arrangement of the ending theme from Super Mario Bros.: The Lost Levels. |
| 243 | Staff Credits | Plays during the ending credits. |
| 244 | Paper Mario: The Origami King | Plays on the title screen. |
One World, One Pipe
Template:Quote2 The hub on the other side of the gray Warp Pipe in the lobby contains six colored Warp Pipes leading to different areas of the game (with the first five colors corresponding to the streamer regions), though Mario cannot use one until he has unpeeled the Olly Tape stuck on the other end in the respective area. Attempting to enter a pipe leading to an area not yet visited causes a prompt to appear saying it is blocked on the other side and Mario to exit the pipe.
| Number | Color | Destination |
|---|---|---|
| 1 | Red | Overlook Mountain |
| 2 | Blue | Shogun Studios |
| 3 | Yellow | Scorching Sandpaper Desert |
| 4 | Purple | Sea Tower |
| 5 | Green | Shangri-Spa |
| 6 | Black | Volcano Peak (Peach's Castle / Origami Castle) |
Fish prints
If Mario has caught a Cheep Cheep or Blooper at any of the fishing spots, a fish print of his largest catch for each fish is hung on the wall in the lobby (the Cheep Cheep on the left and the Blooper on the right). Obtaining the largest fish prints (after catching the Legendary Cheep Cheep and Legendary Blooper) unlocks the Fish Finder trophy.
Names in other languages
| Language | Name | Meaning | Notes |
|---|---|---|---|
| Chinese (simplified) | 大博物馆[?] Dà Bówùguǎn |
Great Museum | |
| Chinese (traditional) | 大博物館[?] Dà Bówùguǎn |
Great Museum | |
| German | Myko-Museum[?] | ? | |
| Italian | Museo Champignon[?] | Mushroom Museum (Museo is Italian for "Museum" and Champignon is French for "Mushroom") |
|
| Korean | 키노피오 타운 중앙박물관[?] Kinopio Taun Jung'angbakmulgwan |
Toad Town Central Museum | |
| Spanish | Museo Champignon[?] | Mushroom Museum (Museo is Spanish for "Museum" and Champignon is French for "Mushroom") |


