Overlook Mountain: Difference between revisions
m (→Collectibles) |
|||
| Line 32: | Line 32: | ||
!width="20%"|Image | !width="20%"|Image | ||
|-style="background: #d09091;font-size:120%;color:#202122" | |-style="background: #d09091;font-size:120%;color:#202122" | ||
!colspan=3|[[List of hidden Toads in Paper Mario: The Origami King|{{color|36 Hidden Toads|#202122}}]] | |||
|- | |- | ||
![[File:Musee Origami Toad 16.png|75px]]<br># 1 | |||
|Just after entering Overlook Mountain, there is a Toad folded into the form of a signpost near the wall. | |Just after entering Overlook Mountain, there is a Toad folded into the form of a signpost near the wall. | ||
|[[File:PMTOK Overlook Mountain Hidden Toad 1.png|250px]] | |[[File:PMTOK Overlook Mountain Hidden Toad 1.png|250px]] | ||
|- | |- | ||
![[File:PMTOK Toad Artwork.png|75px]]<br># 2 | |||
|To the west of the entrance to Overlook Mountain is a path leading to a chest. Near the chest is a crumpled Toad hidden behind some grass. | |To the west of the entrance to Overlook Mountain is a path leading to a chest. Near the chest is a crumpled Toad hidden behind some grass. | ||
|[[File:PMTOK Overlook Mountain Hidden Toad 2.jpg|250px]] | |[[File:PMTOK Overlook Mountain Hidden Toad 2.jpg|250px]] | ||
|- | |- | ||
![[File:Musee Origami Toad 12.png|75px]]<br># 3 | |||
|After climbing the first ledge, Mario can approach a bush near the path from behind, causing an origami beetle Toad to scurry out of hiding. | |After climbing the first ledge, Mario can approach a bush near the path from behind, causing an origami beetle Toad to scurry out of hiding. | ||
|[[File:PMTOK Overlook Mountain Hidden Toad 3.jpg|250px]] | |[[File:PMTOK Overlook Mountain Hidden Toad 3.jpg|250px]] | ||
|- | |- | ||
![[File:Musee Origami Toad 17.png|75px]]<br># 4 to 6 | |||
|Three grasshoppers can be found among the bushes after climbing up the first ledge. One is already visible, but two of the grasshoppers hide behind a bush in front of the tree. Hammering the ground near one will trip them, making the task of unfolding them easier. | |Three grasshoppers can be found among the bushes after climbing up the first ledge. One is already visible, but two of the grasshoppers hide behind a bush in front of the tree. Hammering the ground near one will trip them, making the task of unfolding them easier. | ||
|[[File:PMTOK Overlook Mountain Hidden Toad 4.jpg|250px]] | |[[File:PMTOK Overlook Mountain Hidden Toad 4.jpg|250px]] | ||
|- | |- | ||
![[File:PMTOK Toad Artwork.png|75px]]<br># 7 | |||
|To the east of the entrance is a bench area with a blue roof. Mario can jump across this roof to rescue a crumpled Toad on a raised platform. | |To the east of the entrance is a bench area with a blue roof. Mario can jump across this roof to rescue a crumpled Toad on a raised platform. | ||
|[[File:PMTOK Overlook Mountain Hidden Toad 7.jpg|250px]] | |[[File:PMTOK Overlook Mountain Hidden Toad 7.jpg|250px]] | ||
|- | |- | ||
![[File:PMTOK Toad Artwork.png|75px]]<br># 8 | |||
|Near the [[Musée_Champignon#One_World,_One_Pipe|Musée Pipe]] is a rock, which is revealed to be resting atop a Toad when broken. | |Near the [[Musée_Champignon#One_World,_One_Pipe|Musée Pipe]] is a rock, which is revealed to be resting atop a Toad when broken. | ||
|[[File:PMTOK Overlook Mountain Hidden Toad 8.jpg|250px]] | |[[File:PMTOK Overlook Mountain Hidden Toad 8.jpg|250px]] | ||
|- | |- | ||
![[File:PMTOK Toad Artwork.png|75px]]<br># 9 | |||
|Just north of the Musée Pipe and behind the trees is a hidden ledge, where a crumpled Toad hops on the ground. | |Just north of the Musée Pipe and behind the trees is a hidden ledge, where a crumpled Toad hops on the ground. | ||
|[[File:PMTOK Overlook Mountain Hidden Toad 9.jpg|250px]] | |[[File:PMTOK Overlook Mountain Hidden Toad 9.jpg|250px]] | ||
|- | |- | ||
![[File:PMTOK Toad Artwork.png|75px]]<br># 10 | |||
|After crossing the bridge, Mario should head to the left to find a Toad crawling the wall above a Not-Bottomless Hole, then repair the ground and hammer the wall to make the Toad fall. | |After crossing the bridge, Mario should head to the left to find a Toad crawling the wall above a Not-Bottomless Hole, then repair the ground and hammer the wall to make the Toad fall. | ||
|[[File:PMTOK Overlook Mountain Hidden Toad 10.jpg|250px]] | |[[File:PMTOK Overlook Mountain Hidden Toad 10.jpg|250px]] | ||
|- | |- | ||
![[File:PMTOK Toads.png|75px]]<br># 11 to 15 | |||
|After reaching the Save Block, Mario should head east towards the fishing dock. On the way he will pass five Toads he can pull up. One of the Toads will be chased back to the Musée Pipe by a Goomba. | |After reaching the Save Block, Mario should head east towards the fishing dock. On the way he will pass five Toads he can pull up. One of the Toads will be chased back to the Musée Pipe by a Goomba. | ||
|[[File:PMTOK Overlook Mountain Hidden Toad 11.jpg|250px]] | |[[File:PMTOK Overlook Mountain Hidden Toad 11.jpg|250px]] | ||
|- | |- | ||
![[File:Musee Origami Toad 18.png|75px]]<br># 16 | |||
|After obtaining the [[Blue Shell Stone]], Mario can fish up a much more geometric fish from the pier. It can be hammered once caught, revealed to be a blue Toad. | |After obtaining the [[Blue Shell Stone]], Mario can fish up a much more geometric fish from the pier. It can be hammered once caught, revealed to be a blue Toad. | ||
|[[File:PMTOK Overlook Mountain Hidden Toad 16.jpg|250px]] | |[[File:PMTOK Overlook Mountain Hidden Toad 16.jpg|250px]] | ||
|- | |- | ||
![[File:PMTOK Toad Artwork.png|75px]]<br># 17 | |||
|After heading up the slope where [[Thwomp]]s dropped down, Mario should head left and back down the slope, now between the mountain and the fence. Here he will find another crumpled Toad. | |After heading up the slope where [[Thwomp]]s dropped down, Mario should head left and back down the slope, now between the mountain and the fence. Here he will find another crumpled Toad. | ||
|[[File:PMTOK Overlook Mountain Hidden Toad 17.jpg|250px]] | |[[File:PMTOK Overlook Mountain Hidden Toad 17.jpg|250px]] | ||
|- | |- | ||
![[File:PMTOK Toads.png|75px]]<br'# 18 to 27 | |||
|Once Mario reaches the tram area, he should go behind the set of stairs. Here there is a hidden area with a bundle of Toads tied up on the ground. | |Once Mario reaches the tram area, he should go behind the set of stairs. Here there is a hidden area with a bundle of Toads tied up on the ground. | ||
|[[File:PMTOK Overlook Mountain Hidden Toad 18.jpg|250px]] | |[[File:PMTOK Overlook Mountain Hidden Toad 18.jpg|250px]] | ||
|- | |- | ||
![[File:PMTOK Toad Artwork.png|75px]]<br># 28 | |||
|Mario can hammer the sign posted near [[Overlook Tower]] to reveal yet another crumpled Toad. | |Mario can hammer the sign posted near [[Overlook Tower]] to reveal yet another crumpled Toad. | ||
|[[File:PMTOK Overlook Mountain Hidden Toad 28.jpg|250px]] | |[[File:PMTOK Overlook Mountain Hidden Toad 28.jpg|250px]] | ||
|- | |- | ||
![[File:Musee Origami Toad 17.png|75px]]<br># 29 | |||
|After reaching the peak of the mountain, Mario should head down the western path and go behind the bushes to find another origami grasshopper Toad. | |After reaching the peak of the mountain, Mario should head down the western path and go behind the bushes to find another origami grasshopper Toad. | ||
|[[File:PMTOK Overlook Mountain Hidden Toad 29.jpg|250px]] | |[[File:PMTOK Overlook Mountain Hidden Toad 29.jpg|250px]] | ||
|- | |- | ||
![[File:PMTOK Toad Artwork.png|75px]]<br># 30 | |||
|When heading down the western path of the mountain, Mario should drop down from the gap in the fences. He will land on a small ledge with a [[%3F Block]] containing a Toad. | |When heading down the western path of the mountain, Mario should drop down from the gap in the fences. He will land on a small ledge with a [[%3F Block]] containing a Toad. | ||
|[[File:PMTOK Overlook Mountain Hidden Toad 30.jpg|250px]] | |[[File:PMTOK Overlook Mountain Hidden Toad 30.jpg|250px]] | ||
|- | |- | ||
![[File:PMTOK Toad Artwork.png|75px]]<br># 31 | |||
|After heading down the western path of the mountain, Mario will find a pair of Shy Guys passing a crumpled Toad around like a ball. Mario can either intercept the Toad or defeat the Shy Guys. | |After heading down the western path of the mountain, Mario will find a pair of Shy Guys passing a crumpled Toad around like a ball. Mario can either intercept the Toad or defeat the Shy Guys. | ||
|[[File:PMTOK Overlook Mountain Hidden Toad 31.jpg|250px]] | |[[File:PMTOK Overlook Mountain Hidden Toad 31.jpg|250px]] | ||
|- | |- | ||
![[File:PMTOK Toads.png|75px]]<br># 32 to 34 | |||
|At the end of the western path down the mountain is a large field with three [[Paper Macho Shy Guy]]s. After retrieving the [[Red Shell Stone]] from them, Mario can defeat them to release the Toads they held captive. | |At the end of the western path down the mountain is a large field with three [[Paper Macho Shy Guy]]s. After retrieving the [[Red Shell Stone]] from them, Mario can defeat them to release the Toads they held captive. | ||
|[[File:PMTOK Overlook Mountain Hidden Toad 32.jpg|250px]] | |[[File:PMTOK Overlook Mountain Hidden Toad 32.jpg|250px]] | ||
|-style="background:beige;"| | |-style="background:beige;"| | ||
![[File:PMTOK Toad Artwork.png|75px]]<br># 35 | |||
|''Required'': ''Red streamer destroyed''<br><br>Once the Red streamer is gone, Mario can access the tram station on the mountain. If Mario hits one of the flowerbeds from below, a crumpled Toad will fall out. | |''Required'': ''Red streamer destroyed''<br><br>Once the Red streamer is gone, Mario can access the tram station on the mountain. If Mario hits one of the flowerbeds from below, a crumpled Toad will fall out. | ||
|[[File:PMTOK Overlook Mountain Hidden Toad 35.jpg|250px]] | |[[File:PMTOK Overlook Mountain Hidden Toad 35.jpg|250px]] | ||
|-style="background:beige;"| | |-style="background:beige;"| | ||
![[File:PMTOK Green Toad Artwork.png|75px]]<br># 36 | |||
|''Required'': ''Red streamer destroyed''<br><br>With the Red streamer now gone, the green Toad operating the tram station can now send Mario off to [[Autumn Mountain]]. Following this, Mario can also ride the tram between Overlook Mountain and Toad Town. | |''Required'': ''Red streamer destroyed''<br><br>With the Red streamer now gone, the green Toad operating the tram station can now send Mario off to [[Autumn Mountain]]. Following this, Mario can also ride the tram between Overlook Mountain and Toad Town. | ||
|[[File:PMTOK Overlook Mountain tram Toad.png|250px]] | |[[File:PMTOK Overlook Mountain tram Toad.png|250px]] | ||
| Line 116: | Line 116: | ||
!Description | !Description | ||
!width="20%"|Image | !width="20%"|Image | ||
|-style="background: #d09091;font-size:120%;color:#202122 | |-style="background: #d09091;font-size:120%;color:#202122" | ||
!colspan=3|[[Not-Bottomless Hole|{{color|19 Holes|#202122}}]] | |||
|- | |- | ||
|Immediately seen on the wall after entering Overlook Mountain area. | |Immediately seen on the wall after entering Overlook Mountain area. | ||
| Line 184: | Line 184: | ||
!width=20%|Image | !width=20%|Image | ||
|-style="background: #d09091;font-size:120%;color:#202122" | |-style="background: #d09091;font-size:120%;color:#202122" | ||
!colspan=4|[[List of Collectible Treasures in Paper Mario: The Origami King|{{color|5 treasures|#202122}}]] | |||
|- | |- | ||
!style="background-color:#372500;"|[[File:PMTOK Collectible Treasure 17 (Lush Greenery).jpg|80px]]<br><br>{{color|Lush Greenery|white}} | !style="background-color:#372500;"|[[File:PMTOK Collectible Treasure 17 (Lush Greenery).jpg|80px]]<br><br>{{color|Lush Greenery|white}} | ||
| Line 214: | Line 214: | ||
!Description | !Description | ||
!width=20%|Image | !width=20%|Image | ||
|-style="background: #d09091;font-size:120%;color:#202122 | |-style="background: #d09091;font-size:120%;color:#202122" | ||
!colspan=4|[[List of ? Blocks in Paper Mario: The Origami King|{{color|9 blocks|#202122}}]] | |||
|- | |- | ||
| | | | ||
Revision as of 12:42, April 3, 2023
| Overlook Mountain | |
|---|---|
| |
| Toads | 36 |
| Not-Bottomless Holes | 19 |
| Collectible Treasures | 5 |
| ? Blocks | 9 |
| Enemies | Goombas Shy Guys Paragoombas Spinies Paper Macho Shy Guys |
- “Head for the red streamer! Oh, and enjoy all that intense mountain climbing.”
- —Olivia, Paper Mario: The Origami King
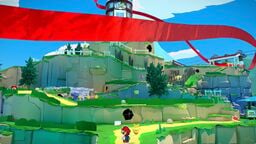
Overlook Mountain is a location in Paper Mario: The Origami King, a mountain road full of greenery. It is located in the red streamer district. The streamer's spool can be found in Overlook Tower, located atop the mountain. Overlook Mountain is north of Picnic Road. The four remaining Shell Stones can be found here.
Layout
At the start of the trail is a Red Toad disguised as a sign. To the left is a treasure chest guarded by two origami Shy Guys. To the right is a Not-Bottomless Hole, a ? Block containing Iron Boots, and an origami Spiny. To the right of this is a torn-out bench. Mario can use confetti to repair it, then sit on it to recover HP. Up the steps is a small garden area. There are a few grasshoppers nearby - when hammered, they are revealed to be Green Toads. There is also a tree Mario can hammer to drop down an origami Spiny, an origami Paragoomba behind a shrub, a ? Block containing a 100-Coin, and a Red Toad disguised as a beetle. To the left of this are a few Koopa Troopas gathered around a Monty Mole. They are auctioning off the green Shell Stone, which can be bought for as high as 10,000 coins or as little as 300. If Mario does not agree to 300 coins, a Koopa Troopa buys it instead, and the stone must be bought off him for 1,500 coins.
Just after this is a red, taped pipe. Mario can pull off the tape and enter the pipe to reach a special area, where various different pipes can be entered after being unlocked through exploration. Next to the pipe is a Red Toad trapped in a rock. There is a tree nearby with a hole in its trunk Mario can fix with confetti. There is a gap in the shrubs here Mario can walk through to get to a lower ledge with a Not-Bottomless Hole and a crumpled Red Toad. To the right is a bridge - when Mario starts to cross, an origami Goomba appears and summons a Paper Macho Goomba. Mario must let the Paper Macho Goomba run across the bridge, wait for it to walk back, and hammer the sticker on its back to weaken it. Once Mario defeats the Paper Macho Goomba, he can head left to find a Toad clinging to the wall. He must fill the Not-Bottomless Hole beneath him to rescue the Toad.
To the right is a Save Block in a bushy area. One of the shrubs moves a bit, and can be hammered to reveal an origami Goomba. Defeating it unlocks a Magic Circle, allowing Mario to use the 1,000-Fold Arms to pull off some of the north wall, revealing a wounded Dry Bones with the yellow Shell Stone. To the right, down the steps, there are some Toads stuck in the ground that can be pulled out. However, pulling out one of the Toads also reveals an origami Goomba, which chases him to the west side of the mountain. Down the next set of steps is a ? Block containing another 100-Coin. Here, there is a small dock with a Koopa Troopa, who has lost his lucky rock to a big fish. Mario must use the fishing rod to pull up the biggest origami Cheep Cheep, retrieving the blue Shell Stone. The Koopa Troopa tells him to keep it after realizing it belongs to the temple. Before leaving this area, Mario can head south to find a treasure chest in a small cave, containing a collectible treasure.
When Mario tries to scale the mountain some more, a set of origami Thwomps quickly appear and try to crush him. Mario must run out of the way, hammer a nearby tree to knock a Super Star off it, get invincibility, and run through the Thwomps, getting plenty of confetti in the process. To the right is a ? Block containing a 100-Coin. Up ahead, at the peak of the mountain, is a Toad Tram station wrapped up in the red streamer. Up to the left is Overlook Tower on a pile of dirt. Mario can head down to the left to reveal a soccer area with three Paper Macho Shy Guys playing soccer with the red Shell Stone. After these Shy Guys are defeated, the Toads start to happily play soccer themselves.
Upon clearing the Earth Vellumental Temple and unlocking the abilities of the Earth Vellumental, Mario and Olivia can return to the peak of the mountain to access the tower. After clearing the red streamer, they can use the Toad Tram to reach Autumn Mountain. The Toad Tram also connects Overlook Mountain to Toad Town.
Collectibles
NOTE: Some collectibles are found in areas that are inaccessible until returning later; these entries are highlighted in beige.
Hidden Toads
| Form | Description | Image |
|---|---|---|
| #202122 | ||
 # 1 |
Just after entering Overlook Mountain, there is a Toad folded into the form of a signpost near the wall. | 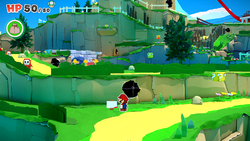
|
 # 2 |
To the west of the entrance to Overlook Mountain is a path leading to a chest. Near the chest is a crumpled Toad hidden behind some grass. | 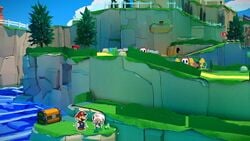
|
 # 3 |
After climbing the first ledge, Mario can approach a bush near the path from behind, causing an origami beetle Toad to scurry out of hiding. | 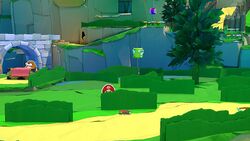
|
 # 4 to 6 |
Three grasshoppers can be found among the bushes after climbing up the first ledge. One is already visible, but two of the grasshoppers hide behind a bush in front of the tree. Hammering the ground near one will trip them, making the task of unfolding them easier. | 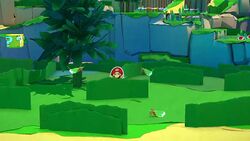
|
 # 7 |
To the east of the entrance is a bench area with a blue roof. Mario can jump across this roof to rescue a crumpled Toad on a raised platform. | 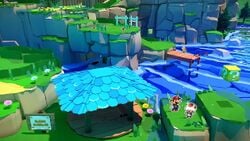
|
 # 8 |
Near the Musée Pipe is a rock, which is revealed to be resting atop a Toad when broken. | 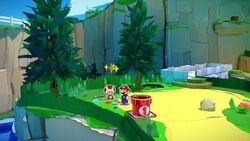
|
 # 9 |
Just north of the Musée Pipe and behind the trees is a hidden ledge, where a crumpled Toad hops on the ground. | 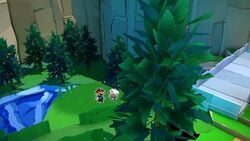
|
 # 10 |
After crossing the bridge, Mario should head to the left to find a Toad crawling the wall above a Not-Bottomless Hole, then repair the ground and hammer the wall to make the Toad fall. | 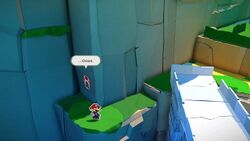
|
 # 11 to 15 |
After reaching the Save Block, Mario should head east towards the fishing dock. On the way he will pass five Toads he can pull up. One of the Toads will be chased back to the Musée Pipe by a Goomba. | 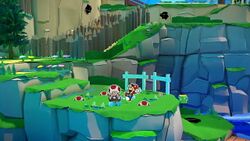
|
 # 16 |
After obtaining the Blue Shell Stone, Mario can fish up a much more geometric fish from the pier. It can be hammered once caught, revealed to be a blue Toad. | 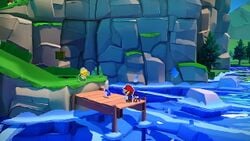
|
 # 17 |
After heading up the slope where Thwomps dropped down, Mario should head left and back down the slope, now between the mountain and the fence. Here he will find another crumpled Toad. | 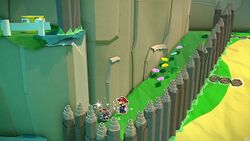
|
 <br'# 18 to 27 <br'# 18 to 27
|
Once Mario reaches the tram area, he should go behind the set of stairs. Here there is a hidden area with a bundle of Toads tied up on the ground. | 
|
 # 28 |
Mario can hammer the sign posted near Overlook Tower to reveal yet another crumpled Toad. | 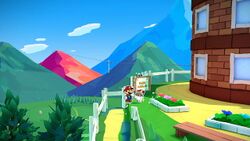
|
 # 29 |
After reaching the peak of the mountain, Mario should head down the western path and go behind the bushes to find another origami grasshopper Toad. | 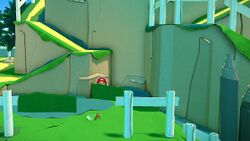
|
 # 30 |
When heading down the western path of the mountain, Mario should drop down from the gap in the fences. He will land on a small ledge with a ? Block containing a Toad. | 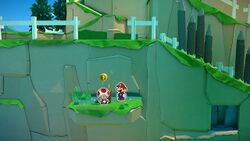
|
 # 31 |
After heading down the western path of the mountain, Mario will find a pair of Shy Guys passing a crumpled Toad around like a ball. Mario can either intercept the Toad or defeat the Shy Guys. | 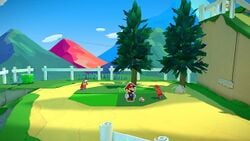
|
 # 32 to 34 |
At the end of the western path down the mountain is a large field with three Paper Macho Shy Guys. After retrieving the Red Shell Stone from them, Mario can defeat them to release the Toads they held captive. | 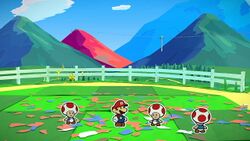
|
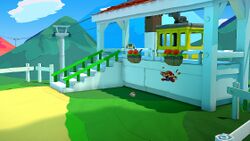
 # 35 |
Required: Red streamer destroyed Once the Red streamer is gone, Mario can access the tram station on the mountain. If Mario hits one of the flowerbeds from below, a crumpled Toad will fall out. |
|
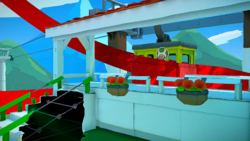
 # 36 |
Required: Red streamer destroyed With the Red streamer now gone, the green Toad operating the tram station can now send Mario off to Autumn Mountain. Following this, Mario can also ride the tram between Overlook Mountain and Toad Town. |
|
Not-Bottomless Holes
| Description | Image | |
|---|---|---|
| #202122 | ||
| Immediately seen on the wall after entering Overlook Mountain area. | 
| |
| Under the bench area with blue roof. | 
| |
| Right of the blue roof, under the ? Block. | 
| |
| On the path above the first ? Block. | 
| |
| On the wall, left of the Monty Mole auctioner. | 
| |
| On the tree left of the pipe to Musée Champignon. | 
| |
| Between the tree and bridge. | 
| |
| Behind previously mentioned trees is a secret ledge. On it is another hole. | 
| |
| Left of the other end of the bridge, under a Toad stuck on the wall. | 
| |
| Right of the other end of the bridge. | 
| |
| Right of the Save Block. | 
| |
| Left of the fishing spot, under a ? Block. | 
| |
| Continuing from previous one to the left takes Mario into a secret area with treasure chest and hole. | 
| |
| After defeating a row of Thwomps with Superstar, this hole is seen on the left on the wall. | 
| |
| After defeating a row of Thwomps with Superstar, this hole is seen on the right on the wall. | 
| |
| Continuing from previous one, Mario should keep going to the right to find another hole in the corner with ? Block above it. | 
| |
| In front of the wooden stairs in the tram area. | 
| |
| After the wooden stairs, this hole is seen on the wall. | 
| |
| Required: Destroy the red streamer. On the stairs in front of the tram to Autumn Mountain. |

| |
Collectible Treasures
| Treasure | Description | Image | |
|---|---|---|---|
| #202122 | |||
 white |
From the start of the area, Mario has to keep going to the left. | 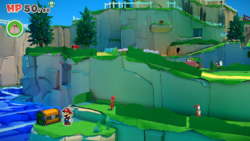
| |
 white |
Keep going left from Monty Mole auctioner to find a secret area under the slope. | 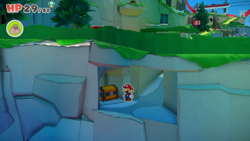
| |
 white |
Go to the right from the Save Block to reach a fishing spot, Not-Bottomless Hole and ? Block. Ignore them and go to the left to reach a secret area with another hole and treasure chest. | 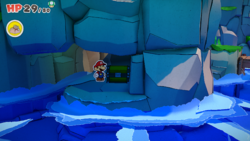
| |
 white |
Fished out from water by catching a fish with sparkles. | 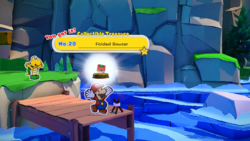
| |
 white |
Found south of the area with Paper Macho Shy Guys. | 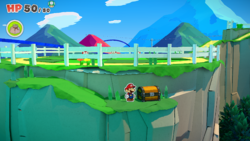
| |
? Blocks
| Hidden | Item | Description | Image |
|---|---|---|---|
| #202122 | |||
Iron Boots |
At the base of the Overlook Mountain path is a ? Block near a rock. | 
| |
Iron Boots |
To the east of the path to Picnic Road is a bench area with a blue roof. Above the center of this roof is a Hidden Block, which can be reached from the nearby ledge. | 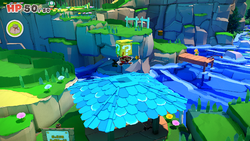
| |
Fire Flower |
After jumping onto the aforementioned blue roof, Mario can jump across to reach a ledge with a ? Block hovering over a Non-Bottomless Hole. | 
| |
100-Coin |
Near the Monty Mole auctioneer and off the main path, there is another ? Block. | 
| |
100-Coin |
After walking down a slope to reach the local fishing dock, a Not-Bottomless Hole can be repaired to gain access to a ? Block. | 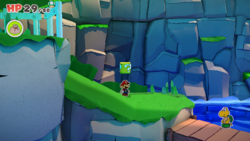
| |
100-Coin |
Just before reaching the local tram station, a ? Block can be found guarded by a line of Spinies. | 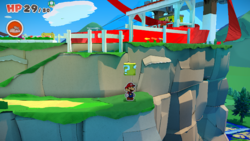
| |
100-Coin |
Beside the wooden stairs leading up Overlook Mountain from the tram station, Mario can find a ? Block resting on the ground. | 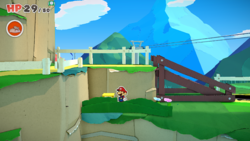
| |
Coin Bag |
After heading west from the mountain peak, making a detour to the right should bring Mario to a ? Block surrounded by wooden posts and guarded by an ambushing Shy Guy. | 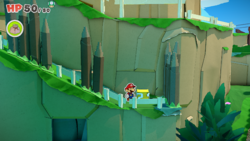
| |
Hidden Toad #30 |
After reaching the mountain peak, there is a gap in the fences to the west with a ledge just below. This block contains a Hidden Toad. | 
| |
Gallery
Overlook Tower on top of the mountain
An image of Overlook Mountain as depicted in Ring Scramble Level 3 of Shy Guys Finish Last
Names in other languages
| Language | Name | Meaning | Notes |
|---|---|---|---|
| Chinese | 观景山 (Simplified) 觀景山 (Traditional)[?] Guānjǐng Shān |
Overlook Mountain | |
| Dutch | Panoramaberg[?] | Panorama Mountain | |
| German | Panoramaberg[?] | Panorama Mountain | |
| Italian | Monte Belvedere[?] | Mount Belvedere/Viewpoint | |
| Spanish | Monte Bellavista[?] | Beautiful View Mountain |


