User:Winstein/Sandbox: Difference between revisions
(Added more Clinic Event information for Season 6 and 7) |
|||
| Line 28: | Line 28: | ||
* [[Heart]]s x 3 | * [[Heart]]s x 3 | ||
* [[Skill Up]] x 2 | * [[Skill Up]] x 2 | ||
|[[File:DMW-BlueToadNormalMedal.png| | |[[File:DMW-BlueToadNormalMedal.png|x100px|center]] | ||
|align=left| | |align=left| | ||
* [[Coin]]s x 1000 | * [[Coin]]s x 1000 | ||
* [[Capsule+]] x 2 | * [[Capsule+]] x 2 | ||
* [[Staff ticket]] x 1 | * [[Staff ticket]] x 1 | ||
|[[File:DMW-BlueToadGoldMedal.png| | |[[File:DMW-BlueToadGoldMedal.png|x100px|center]] | ||
|align=left| | |align=left| | ||
* [[Coin]]s x 2000 | * [[Coin]]s x 2000 | ||
* [[Skill filler]] x 2 | * [[Skill filler]] x 2 | ||
* [[Staff ticket]] x 1 | * [[Staff ticket]] x 1 | ||
|[[File:DMW-BlueToadPlatinumMedal.png| | |[[File:DMW-BlueToadPlatinumMedal.png|x100px|center]] | ||
|} | |} | ||
| Line 154: | Line 154: | ||
* [[Heart]]s x 3 | * [[Heart]]s x 3 | ||
* [[Skill Up]] x 2 | * [[Skill Up]] x 2 | ||
|[[File:DMW-GoombaNormalMedal.png| | |[[File:DMW-GoombaNormalMedal.png|x100px|center]] | ||
|align=left| | |align=left| | ||
* [[Coin]]s x 1000 | * [[Coin]]s x 1000 | ||
* [[Capsule+]] x 2 | * [[Capsule+]] x 2 | ||
* [[Staff ticket]] x 1 | * [[Staff ticket]] x 1 | ||
|[[File:DMW-GoombaGoldMedal.png| | |[[File:DMW-GoombaGoldMedal.png|x100px|center]] | ||
|align=left| | |align=left| | ||
* [[Coin]]s x 2000 | * [[Coin]]s x 2000 | ||
* [[Skill filler]] x 2 | * [[Skill filler]] x 2 | ||
* [[Staff ticket]] x 1 | * [[Staff ticket]] x 1 | ||
|[[File:DMW-GoombaPlatinumMedal.png| | |[[File:DMW-GoombaPlatinumMedal.png|x100px|center]] | ||
|} | |} | ||
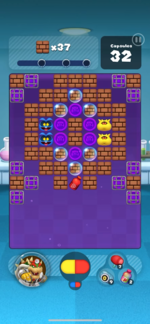
===Round 1 Stages=== | |||
{| border=1 cellspacing=0 cellpadding=3 style="border:1px solid black; border-collapse:collapse" width =80% | |||
|- | |||
! colspan=2 width=20% style="background: #ABC;" | Stage 1 | |||
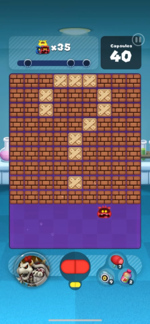
! colspan=2 width=20% style="background: #ABC;" | Stage 2 | |||
! colspan=2 width=20% style="background: #ABC;" | Stage 3 | |||
! colspan=2 width=20% style="background: #ABC;" | Stage 4 | |||
! colspan=2 width=20% style="background: #ABC;" | Stage 5 | |||
|- | |||
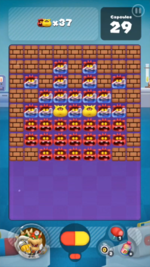
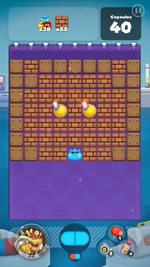
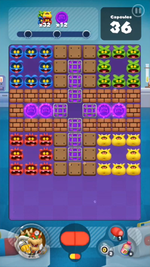
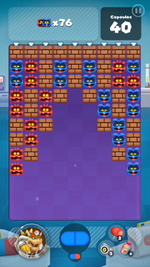
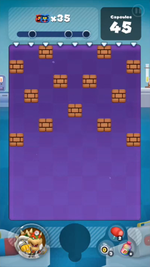
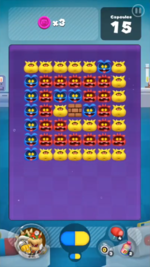
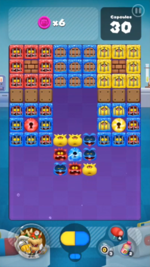
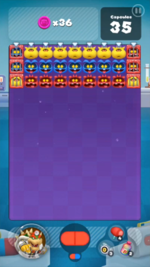
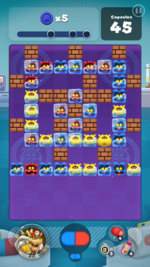
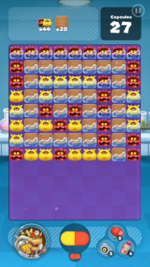
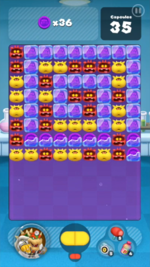
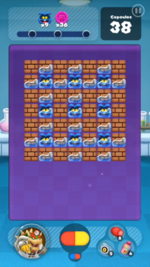
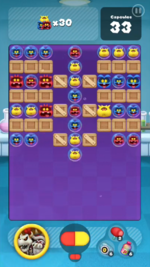
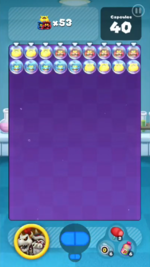
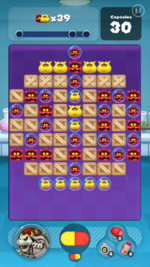
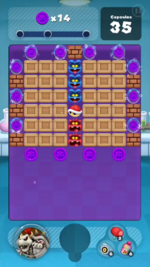
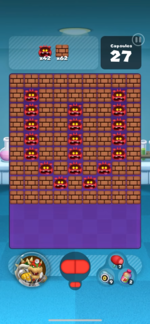
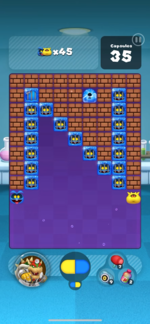
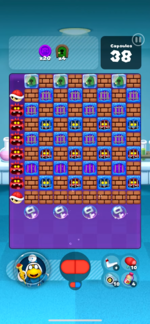
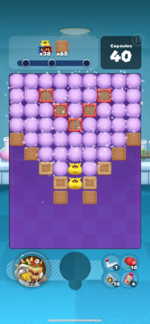
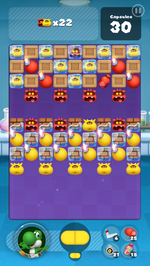
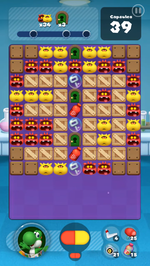
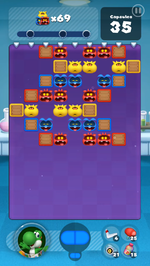
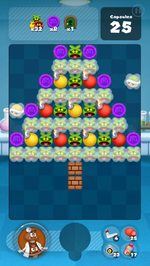
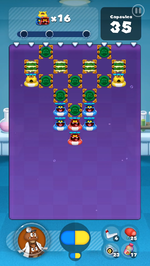
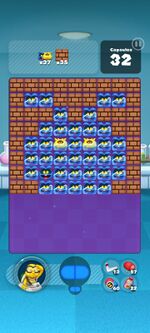
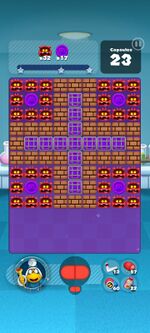
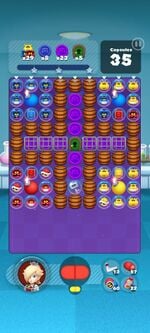
| colspan=2 | [[File:DrMarioWorld-CE2-1-1.png|150px|center]] | |||
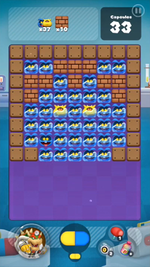
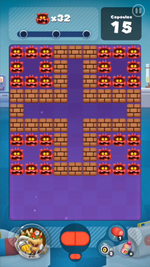
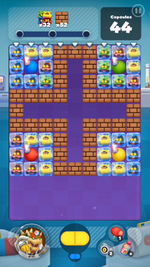
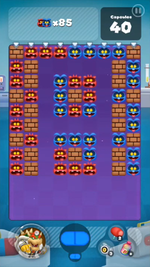
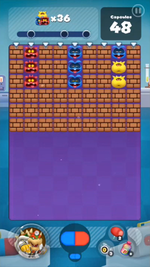
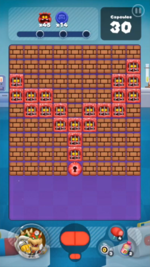
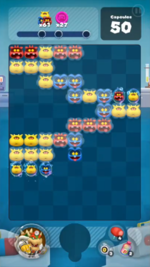
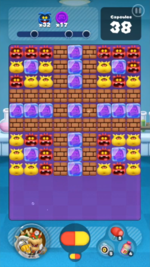
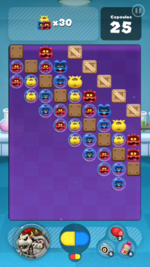
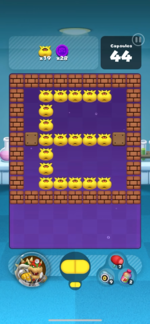
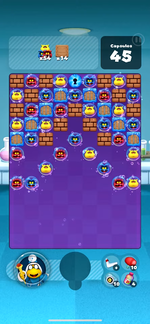
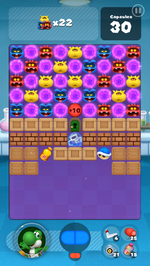
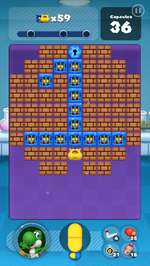
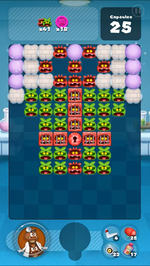
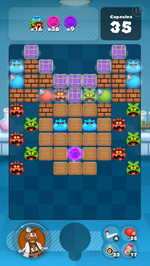
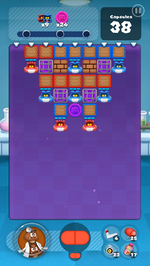
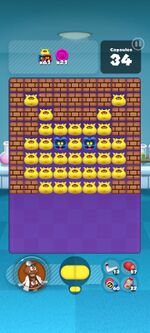
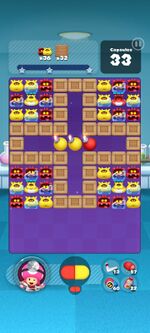
| colspan=2 | [[File:DrMarioWorld-CE2-1-2.png|150px|center]] | |||
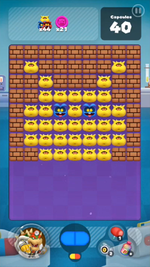
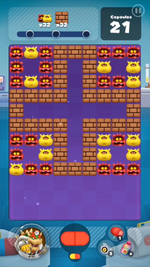
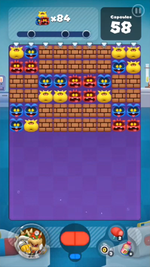
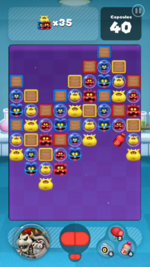
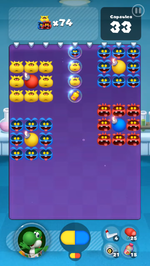
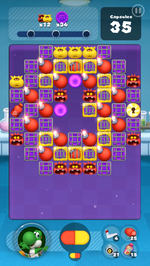
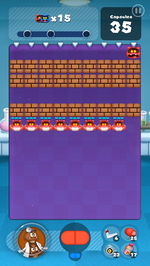
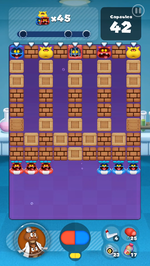
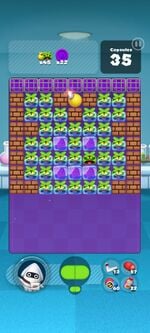
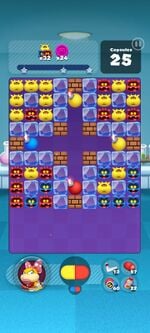
| colspan=2 | [[File:DrMarioWorld-CE2-1-3.png|150px|center]] | |||
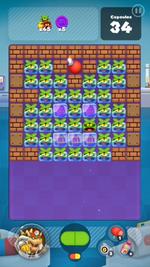
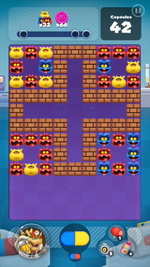
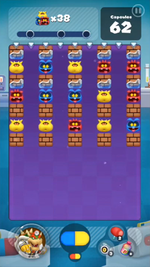
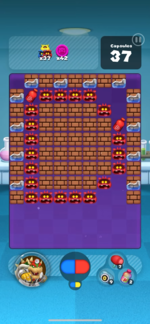
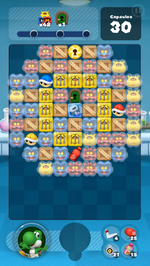
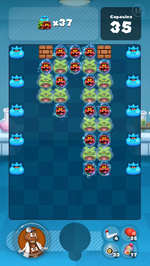
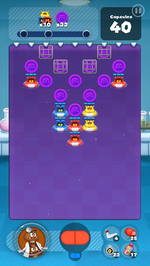
| colspan=2 | [[File:DrMarioWorld-CE2-1-4.png|150px|center]] | |||
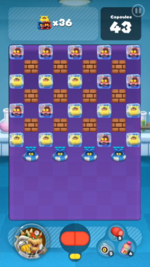
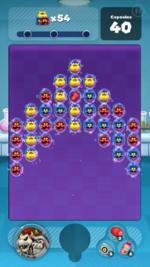
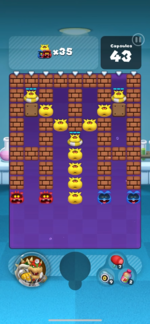
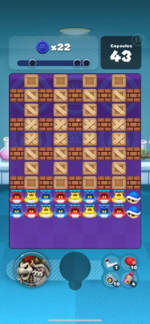
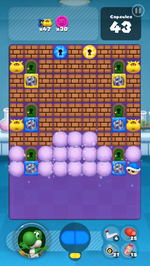
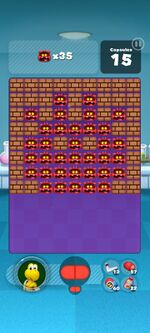
| colspan=2 | [[File:DrMarioWorld-CE2-1-5.png|150px|center]] | |||
|- | |||
| '''Objectives''' || | |||
* [[Virus]]es x 42 | |||
* [[Brick Block]]s x 62 | |||
| '''Objectives''' || | |||
* [[Virus]]es x 19 | |||
* [[Caged coin|Purple coins]] x 28 | |||
| '''Objectives''' || | |||
* [[Virus]]es x 45 | |||
| '''Objectives''' || | |||
* [[Virus]]es x 37 | |||
* [[Coin Block|Coins from blocks]] x 42 | |||
| '''Objectives''' || | |||
* [[Virus]]es x 35 | |||
|- | |||
| '''Capsules''' || 27 | |||
| '''Capsules''' || 44 | |||
| '''Capsules''' || 35 | |||
| '''Capsules''' || 37 | |||
| '''Capsules''' || 43 | |||
|- | |||
| '''Colors''' || Red | |||
| '''Colors''' || Yellow | |||
| '''Colors''' || Blue, yellow | |||
| '''Colors''' || Red, blue, yellow | |||
| '''Colors''' || Red, blue, yellow | |||
|- | |||
| '''Scroll''' || - | |||
| '''Scroll''' || - | |||
| '''Scroll''' || - | |||
| '''Scroll''' || - | |||
| '''Scroll''' || 3 rows | |||
|- | |||
|} | |||
===Round 2 and Round 3 Stages=== | |||
{| border=1 cellspacing=0 cellpadding=3 style="border:1px solid black; border-collapse:collapse" width =80% | |||
|- | |||
! colspan=2 width=20% style="background: #ABC;" | Stage 1 | |||
! colspan=2 width=20% style="background: #ABC;" | Stage 2 | |||
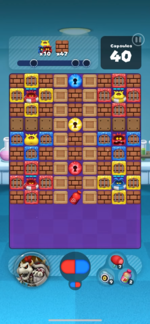
! colspan=2 width=20% style="background: #ABC;" | Stage 3 | |||
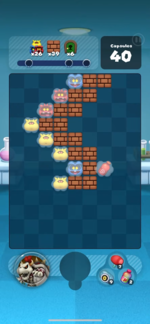
! colspan=2 width=20% style="background: #ABC;" | Stage 4 | |||
! colspan=2 width=20% style="background: #ABC;" | Stage 5 | |||
|- | |||
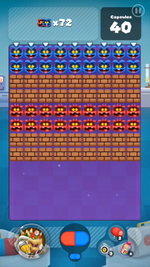
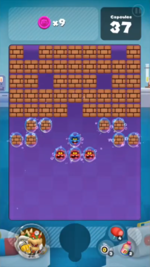
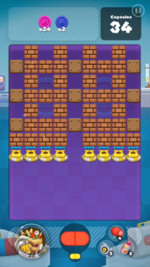
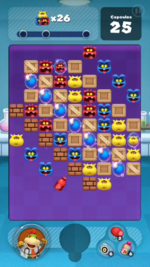
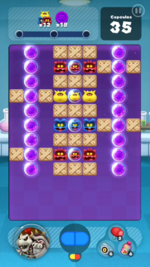
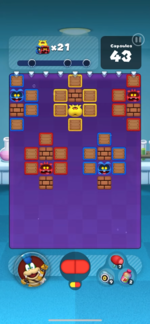
| colspan=2 | [[File:DrMarioWorld-CE2-2-1.png|150px|center]] | |||
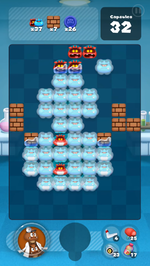
| colspan=2 | [[File:DrMarioWorld-CE2-2-2.png|150px|center]] | |||
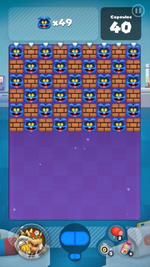
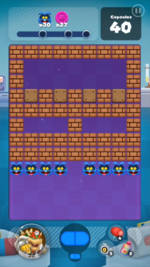
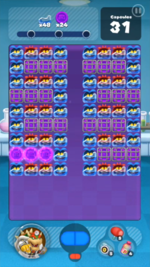
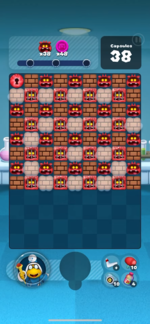
| colspan=2 | [[File:DrMarioWorld-CE2-2-3.png|150px|center]] | |||
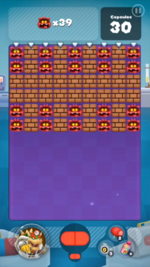
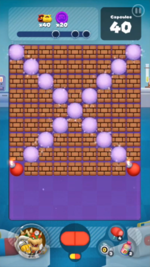
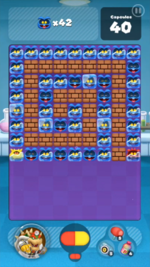
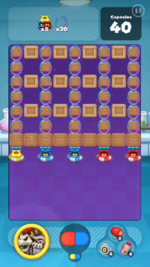
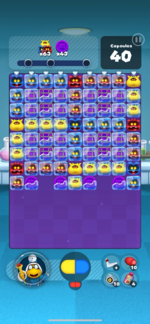
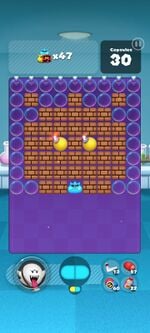
| colspan=2 | [[File:DrMarioWorld-CE2-2-4.png|150px|center]] | |||
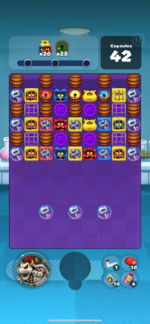
| colspan=2 | [[File:DrMarioWorld-CE2-2-5.png|150px|center]] | |||
|- | |||
| '''Objectives''' || | |||
* [[Virus]]es x 21 | |||
| '''Objectives''' || | |||
* [[Brick Block]]s x 37 | |||
| '''Objectives''' || | |||
* [[Virus]]es x 35 | |||
| '''Objectives''' || | |||
* [[Virus]]es x 10 | |||
* [[Brick Block]]s x 47 | |||
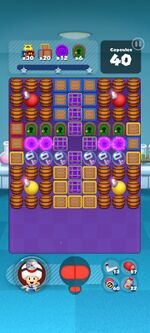
| '''Objectives''' || | |||
* [[Virus]]es x 26 | |||
* [[Brick Block]]s x 39 | |||
* [[Key Door|Doors]] x 6 | |||
|- | |||
| '''Capsules''' || 43 | |||
| '''Capsules''' || 32 | |||
| '''Capsules''' || 40 | |||
| '''Capsules''' || 40 | |||
| '''Capsules''' || 40 | |||
|- | |||
| '''Colors''' || Red, blue, yellow | |||
| '''Colors''' || Red, blue, yellow | |||
| '''Colors''' || Red, blue, yellow | |||
| '''Colors''' || Red, blue, yellow | |||
| '''Colors''' || Red, blue, yellow | |||
|- | |||
| '''Scroll''' || 9 rows | |||
| '''Scroll''' || - | |||
| '''Scroll''' || - | |||
| '''Scroll''' || - | |||
| '''Scroll''' || 12 rows | |||
|- | |||
|} | |||
</br> | |||
==Season 3== | ==Season 3== | ||
| Line 183: | Line 282: | ||
* [[Heart]]s x 3 | * [[Heart]]s x 3 | ||
* [[Skill Up]] x 2 | * [[Skill Up]] x 2 | ||
|[[File:DMW-SpikeNormalMedal.png| | |[[File:DMW-SpikeNormalMedal.png|x100px|center]] | ||
|align=left| | |align=left| | ||
* [[Coin]]s x 1000 | * [[Coin]]s x 1000 | ||
* [[Capsule+]] x 2 | * [[Capsule+]] x 2 | ||
* [[Staff ticket]] x 1 | * [[Staff ticket]] x 1 | ||
|[[File:DMW-SpikeGoldMedal.png| | |[[File:DMW-SpikeGoldMedal.png|x100px|center]] | ||
|align=left| | |align=left| | ||
* [[Coin]]s x 2000 | * [[Coin]]s x 2000 | ||
* [[Skill filler]] x 2 | * [[Skill filler]] x 2 | ||
* [[Staff ticket]] x 1 | * [[Staff ticket]] x 1 | ||
|[[File:DMW-SpikePlatinumMedal.png| | |[[File:DMW-SpikePlatinumMedal.png|x100px|center]] | ||
|} | |||
===Round 1 Stages=== | |||
{| border=1 cellspacing=0 cellpadding=3 style="border:1px solid black; border-collapse:collapse" width =80% | |||
|- | |||
! colspan=2 width=20% style="background: #ABC;" | Stage 1 | |||
! colspan=2 width=20% style="background: #ABC;" | Stage 2 | |||
! colspan=2 width=20% style="background: #ABC;" | Stage 3 | |||
! colspan=2 width=20% style="background: #ABC;" | Stage 4 | |||
! colspan=2 width=20% style="background: #ABC;" | Stage 5 | |||
|- | |||
| colspan=2 | [[File:DrMarioWorld-CE3-1-1.png|150px|center]] | |||
| colspan=2 | [[File:DrMarioWorld-CE3-1-2.png|150px|center]] | |||
| colspan=2 | [[File:DrMarioWorld-CE3-1-3.png|150px|center]] | |||
| colspan=2 | [[File:DrMarioWorld-CE3-1-4.png|150px|center]] | |||
| colspan=2 | [[File:DrMarioWorld-CE3-1-5.png|150px|center]] | |||
|- | |||
| '''Objectives''' || | |||
* [[Virus]]es x 42 | |||
* [[Brick Block]]s x 62 | |||
| '''Objectives''' || | |||
* [[Virus]]es x 19 | |||
* [[Caged coin|Purple coins]] x 28 | |||
| '''Objectives''' || | |||
* [[Virus]]es x 45 | |||
| '''Objectives''' || | |||
* [[Virus]]es x 37 | |||
* [[Coin Block|Coins from blocks]] x 42 | |||
| '''Objectives''' || | |||
* [[Virus]]es x 35 | |||
|- | |||
| '''Capsules''' || 27 | |||
| '''Capsules''' || 44 | |||
| '''Capsules''' || 35 | |||
| '''Capsules''' || 37 | |||
| '''Capsules''' || 43 | |||
|- | |||
| '''Colors''' || Red | |||
| '''Colors''' || Yellow | |||
| '''Colors''' || Blue, yellow | |||
| '''Colors''' || Red, blue, yellow | |||
| '''Colors''' || Red, blue, yellow | |||
|- | |||
| '''Scroll''' || - | |||
| '''Scroll''' || - | |||
| '''Scroll''' || - | |||
| '''Scroll''' || - | |||
| '''Scroll''' || 3 rows | |||
|- | |||
|} | |} | ||
===Round 2 and Round 3 Stages=== | |||
{| border=1 cellspacing=0 cellpadding=3 style="border:1px solid black; border-collapse:collapse" width =80% | |||
|- | |||
! colspan=2 width=20% style="background: #ABC;" | Stage 1 | |||
! colspan=2 width=20% style="background: #ABC;" | Stage 2 | |||
! colspan=2 width=20% style="background: #ABC;" | Stage 3 | |||
! colspan=2 width=20% style="background: #ABC;" | Stage 4 | |||
! colspan=2 width=20% style="background: #ABC;" | Stage 5 | |||
|- | |||
| colspan=2 | [[File:DrMarioWorld-CE3-2-1.png|150px|center]] | |||
| colspan=2 | [[File:DrMarioWorld-CE3-2-2.png|150px|center]] | |||
| colspan=2 | [[File:DrMarioWorld-CE3-2-3.png|150px|center]] | |||
| colspan=2 | [[File:DrMarioWorld-CE3-2-4.png|150px|center]] | |||
| colspan=2 | [[File:DrMarioWorld-CE3-2-5.png|150px|center]] | |||
|- | |||
| '''Objectives''' || | |||
* [[Virus]]es x 21 | |||
| '''Objectives''' || | |||
* [[Brick Block]]s x 37 | |||
| '''Objectives''' || | |||
* [[Virus]]es x 35 | |||
| '''Objectives''' || | |||
* [[Virus]]es x 10 | |||
* [[Brick Block]]s x 47 | |||
| '''Objectives''' || | |||
* [[Virus]]es x 26 | |||
* [[Brick Block]]s x 39 | |||
* [[Key Door|Doors]] x 6 | |||
|- | |||
| '''Capsules''' || 43 | |||
| '''Capsules''' || 32 | |||
| '''Capsules''' || 40 | |||
| '''Capsules''' || 40 | |||
| '''Capsules''' || 40 | |||
|- | |||
| '''Colors''' || Red, blue, yellow | |||
| '''Colors''' || Red, blue, yellow | |||
| '''Colors''' || Red, blue, yellow | |||
| '''Colors''' || Red, blue, yellow | |||
| '''Colors''' || Red, blue, yellow | |||
|- | |||
| '''Scroll''' || 9 rows | |||
| '''Scroll''' || - | |||
| '''Scroll''' || - | |||
| '''Scroll''' || - | |||
| '''Scroll''' || 12 rows | |||
|- | |||
|} | |||
</br> | |||
==Season 4== | ==Season 4== | ||
| Line 212: | Line 410: | ||
* [[Heart]]s x 3 | * [[Heart]]s x 3 | ||
* [[Skill Up]] x 2 | * [[Skill Up]] x 2 | ||
|[[File:DMW-KoopaTroopaNormalMedal.png| | |[[File:DMW-KoopaTroopaNormalMedal.png|x100px|center]] | ||
|align=left| | |align=left| | ||
* [[Coin]]s x 1000 | * [[Coin]]s x 1000 | ||
* [[Capsule+]] x 2 | * [[Capsule+]] x 2 | ||
* [[Staff ticket]] x 1 | * [[Staff ticket]] x 1 | ||
|[[File:DMW-KoopaTroopaGoldMedal.png| | |[[File:DMW-KoopaTroopaGoldMedal.png|x100px|center]] | ||
|align=left| | |align=left| | ||
* [[Coin]]s x 2000 | * [[Coin]]s x 2000 | ||
* [[Skill filler]] x 2 | * [[Skill filler]] x 2 | ||
* [[Staff ticket]] x 1 | * [[Staff ticket]] x 1 | ||
|[[File:DMW-KoopaTroopaPlatinumMedal.png| | |[[File:DMW-KoopaTroopaPlatinumMedal.png|x100px|center]] | ||
|} | |||
===Round 1 Stages=== | |||
{| border=1 cellspacing=0 cellpadding=3 style="border:1px solid black; border-collapse:collapse" width =80% | |||
|- | |||
! colspan=2 width=20% style="background: #ABC;" | Stage 1 | |||
! colspan=2 width=20% style="background: #ABC;" | Stage 2 | |||
! colspan=2 width=20% style="background: #ABC;" | Stage 3 | |||
! colspan=2 width=20% style="background: #ABC;" | Stage 4 | |||
! colspan=2 width=20% style="background: #ABC;" | Stage 5 | |||
|- | |||
| colspan=2 | [[File:DrMarioWorld-CE4-1-1.png|150px|center]] | |||
| colspan=2 | [[File:DrMarioWorld-CE4-1-2.png|150px|center]] | |||
| colspan=2 | [[File:DrMarioWorld-CE4-1-3.png|150px|center]] | |||
| colspan=2 | [[File:DrMarioWorld-CE4-1-4.png|150px|center]] | |||
| colspan=2 | [[File:DrMarioWorld-CE4-1-5.png|150px|center]] | |||
|- | |||
| '''Objectives''' || | |||
* [[Virus]]es x 42 | |||
* [[Brick Block]]s x 62 | |||
| '''Objectives''' || | |||
* [[Virus]]es x 19 | |||
* [[Caged coin|Purple coins]] x 28 | |||
| '''Objectives''' || | |||
* [[Virus]]es x 45 | |||
| '''Objectives''' || | |||
* [[Virus]]es x 37 | |||
* [[Coin Block|Coins from blocks]] x 42 | |||
| '''Objectives''' || | |||
* [[Virus]]es x 35 | |||
|- | |||
| '''Capsules''' || 27 | |||
| '''Capsules''' || 44 | |||
| '''Capsules''' || 35 | |||
| '''Capsules''' || 37 | |||
| '''Capsules''' || 43 | |||
|- | |||
| '''Colors''' || Red | |||
| '''Colors''' || Yellow | |||
| '''Colors''' || Blue, yellow | |||
| '''Colors''' || Red, blue, yellow | |||
| '''Colors''' || Red, blue, yellow | |||
|- | |||
| '''Scroll''' || - | |||
| '''Scroll''' || - | |||
| '''Scroll''' || - | |||
| '''Scroll''' || - | |||
| '''Scroll''' || 3 rows | |||
|- | |||
|} | |} | ||
===Round 2 and Round 3 Stages=== | |||
{| border=1 cellspacing=0 cellpadding=3 style="border:1px solid black; border-collapse:collapse" width =80% | |||
|- | |||
! colspan=2 width=20% style="background: #ABC;" | Stage 1 | |||
! colspan=2 width=20% style="background: #ABC;" | Stage 2 | |||
! colspan=2 width=20% style="background: #ABC;" | Stage 3 | |||
! colspan=2 width=20% style="background: #ABC;" | Stage 4 | |||
! colspan=2 width=20% style="background: #ABC;" | Stage 5 | |||
|- | |||
| colspan=2 | [[File:DrMarioWorld-CE4-2-1.png|150px|center]] | |||
| colspan=2 | [[File:DrMarioWorld-CE4-2-2.png|150px|center]] | |||
| colspan=2 | [[File:DrMarioWorld-CE4-2-3.png|150px|center]] | |||
| colspan=2 | [[File:DrMarioWorld-CE4-2-4.png|150px|center]] | |||
| colspan=2 | [[File:DrMarioWorld-CE4-2-5.png|150px|center]] | |||
|- | |||
| '''Objectives''' || | |||
* [[Virus]]es x 21 | |||
| '''Objectives''' || | |||
* [[Brick Block]]s x 37 | |||
| '''Objectives''' || | |||
* [[Virus]]es x 35 | |||
| '''Objectives''' || | |||
* [[Virus]]es x 10 | |||
* [[Brick Block]]s x 47 | |||
| '''Objectives''' || | |||
* [[Virus]]es x 26 | |||
* [[Brick Block]]s x 39 | |||
* [[Key Door|Doors]] x 6 | |||
|- | |||
| '''Capsules''' || 43 | |||
| '''Capsules''' || 32 | |||
| '''Capsules''' || 40 | |||
| '''Capsules''' || 40 | |||
| '''Capsules''' || 40 | |||
|- | |||
| '''Colors''' || Red, blue, yellow | |||
| '''Colors''' || Red, blue, yellow | |||
| '''Colors''' || Red, blue, yellow | |||
| '''Colors''' || Red, blue, yellow | |||
| '''Colors''' || Red, blue, yellow | |||
|- | |||
| '''Scroll''' || 9 rows | |||
| '''Scroll''' || - | |||
| '''Scroll''' || - | |||
| '''Scroll''' || - | |||
| '''Scroll''' || 12 rows | |||
|- | |||
|} | |||
</br> | |||
==Season 5== | ==Season 5== | ||
| Line 243: | Line 540: | ||
* [[Heart]]s x 3 | * [[Heart]]s x 3 | ||
* [[Skill Up]] x 2 | * [[Skill Up]] x 2 | ||
|[[File:DMW-PiranhaPlantNormalMedal.png| | |[[File:DMW-PiranhaPlantNormalMedal.png|x100px|center]] | ||
|align=left| | |align=left| | ||
* [[Coin]]s x 1000 | * [[Coin]]s x 1000 | ||
* [[Capsule+]] x 2 | * [[Capsule+]] x 2 | ||
* [[Staff ticket]] x 1 | * [[Staff ticket]] x 1 | ||
|[[File:DMW-PiranhaPlantGoldMedal.png| | |[[File:DMW-PiranhaPlantGoldMedal.png|x100px|center]] | ||
|align=left| | |align=left| | ||
* [[Coin]]s x 2000 | * [[Coin]]s x 2000 | ||
* [[Skill filler]] x 2 | * [[Skill filler]] x 2 | ||
* [[Staff ticket]] x 1 | * [[Staff ticket]] x 1 | ||
|[[File:DMW-PiranhaPlantPlatinumMedal.png| | |[[File:DMW-PiranhaPlantPlatinumMedal.png|x100px|center]] | ||
|} | |||
===Round 1 Stages=== | |||
{| border=1 cellspacing=0 cellpadding=3 style="border:1px solid black; border-collapse:collapse" width =80% | |||
|- | |||
! colspan=2 width=20% style="background: #ABC;" | Stage 1 | |||
! colspan=2 width=20% style="background: #ABC;" | Stage 2 | |||
! colspan=2 width=20% style="background: #ABC;" | Stage 3 | |||
! colspan=2 width=20% style="background: #ABC;" | Stage 4 | |||
! colspan=2 width=20% style="background: #ABC;" | Stage 5 | |||
|- | |||
| colspan=2 | [[File:DrMarioWorld-CE5-1-1.png|150px|center]] | |||
| colspan=2 | [[File:DrMarioWorld-CE5-1-2.png|150px|center]] | |||
| colspan=2 | [[File:DrMarioWorld-CE5-1-3.png|150px|center]] | |||
| colspan=2 | [[File:DrMarioWorld-CE5-1-4.png|150px|center]] | |||
| colspan=2 | [[File:DrMarioWorld-CE5-1-5.png|150px|center]] | |||
|- | |||
| '''Objectives''' || | |||
* [[Virus]]es x 42 | |||
* [[Brick Block]]s x 62 | |||
| '''Objectives''' || | |||
* [[Virus]]es x 19 | |||
* [[Caged coin|Purple coins]] x 28 | |||
| '''Objectives''' || | |||
* [[Virus]]es x 45 | |||
| '''Objectives''' || | |||
* [[Virus]]es x 37 | |||
* [[Coin Block|Coins from blocks]] x 42 | |||
| '''Objectives''' || | |||
* [[Virus]]es x 35 | |||
|- | |||
| '''Capsules''' || 27 | |||
| '''Capsules''' || 44 | |||
| '''Capsules''' || 35 | |||
| '''Capsules''' || 37 | |||
| '''Capsules''' || 43 | |||
|- | |||
| '''Colors''' || Red | |||
| '''Colors''' || Yellow | |||
| '''Colors''' || Blue, yellow | |||
| '''Colors''' || Red, blue, yellow | |||
| '''Colors''' || Red, blue, yellow | |||
|- | |||
| '''Scroll''' || - | |||
| '''Scroll''' || - | |||
| '''Scroll''' || - | |||
| '''Scroll''' || - | |||
| '''Scroll''' || 3 rows | |||
|- | |||
|} | |||
===Round 2 and Round 3 Stages=== | |||
{| border=1 cellspacing=0 cellpadding=3 style="border:1px solid black; border-collapse:collapse" width =80% | |||
|- | |||
! colspan=2 width=20% style="background: #ABC;" | Stage 1 | |||
! colspan=2 width=20% style="background: #ABC;" | Stage 2 | |||
! colspan=2 width=20% style="background: #ABC;" | Stage 3 | |||
! colspan=2 width=20% style="background: #ABC;" | Stage 4 | |||
! colspan=2 width=20% style="background: #ABC;" | Stage 5 | |||
|- | |||
| colspan=2 | [[File:DrMarioWorld-CE5-2-1.png|150px|center]] | |||
| colspan=2 | [[File:DrMarioWorld-CE5-2-2.png|150px|center]] | |||
| colspan=2 | [[File:DrMarioWorld-CE5-2-3.png|150px|center]] | |||
| colspan=2 | [[File:DrMarioWorld-CE5-2-4.png|150px|center]] | |||
| colspan=2 | [[File:DrMarioWorld-CE5-2-5.png|150px|center]] | |||
|- | |||
| '''Objectives''' || | |||
* [[Virus]]es x 21 | |||
| '''Objectives''' || | |||
* [[Brick Block]]s x 37 | |||
| '''Objectives''' || | |||
* [[Virus]]es x 35 | |||
| '''Objectives''' || | |||
* [[Virus]]es x 10 | |||
* [[Brick Block]]s x 47 | |||
| '''Objectives''' || | |||
* [[Virus]]es x 26 | |||
* [[Brick Block]]s x 39 | |||
* [[Key Door|Doors]] x 6 | |||
|- | |||
| '''Capsules''' || 43 | |||
| '''Capsules''' || 32 | |||
| '''Capsules''' || 40 | |||
| '''Capsules''' || 40 | |||
| '''Capsules''' || 40 | |||
|- | |||
| '''Colors''' || Red, blue, yellow | |||
| '''Colors''' || Red, blue, yellow | |||
| '''Colors''' || Red, blue, yellow | |||
| '''Colors''' || Red, blue, yellow | |||
| '''Colors''' || Red, blue, yellow | |||
|- | |||
| '''Scroll''' || 9 rows | |||
| '''Scroll''' || - | |||
| '''Scroll''' || - | |||
| '''Scroll''' || - | |||
| '''Scroll''' || 12 rows | |||
|- | |||
|} | |} | ||
</br> | |||
==Season 6== | ==Season 6== | ||
| Line 272: | Line 668: | ||
* [[Heart]]s x 3 | * [[Heart]]s x 3 | ||
* [[Skill Up]] x 2 | * [[Skill Up]] x 2 | ||
|[[File:DMW-GreenToadNormalMedal.png| | |[[File:DMW-GreenToadNormalMedal.png|x100px|center]] | ||
|align=left| | |align=left| | ||
* [[Coin]]s x 1000 | * [[Coin]]s x 1000 | ||
* [[Capsule+]] x 2 | * [[Capsule+]] x 2 | ||
* [[Staff ticket]] x 1 | * [[Staff ticket]] x 1 | ||
|[[File:DMW-GreenToadGoldMedal.png| | |[[File:DMW-GreenToadGoldMedal.png|x100px|center]] | ||
|align=left| | |align=left| | ||
* [[Coin]]s x 2000 | * [[Coin]]s x 2000 | ||
* [[Skill filler]] x 2 | * [[Skill filler]] x 2 | ||
* [[Staff ticket]] x 1 | * [[Staff ticket]] x 1 | ||
|[[File:DMW-GreenToadPlatinumMedal.png| | |[[File:DMW-GreenToadPlatinumMedal.png|x100px|center]] | ||
|} | |||
===Round 1 Stages=== | |||
{| border=1 cellspacing=0 cellpadding=3 style="border:1px solid black; border-collapse:collapse" width =80% | |||
|- | |||
! colspan=2 width=20% style="background: #ABC;" | Stage 1 | |||
! colspan=2 width=20% style="background: #ABC;" | Stage 2 | |||
! colspan=2 width=20% style="background: #ABC;" | Stage 3 | |||
! colspan=2 width=20% style="background: #ABC;" | Stage 4 | |||
! colspan=2 width=20% style="background: #ABC;" | Stage 5 | |||
|- | |||
| colspan=2 | [[File:DrMarioWorld-CE6-1-1.png|150px|center]] | |||
| colspan=2 | [[File:DrMarioWorld-CE6-1-2.png|150px|center]] | |||
| colspan=2 | [[File:DrMarioWorld-CE6-1-3.png|150px|center]] | |||
| colspan=2 | [[File:DrMarioWorld-CE6-1-4.png|150px|center]] | |||
| colspan=2 | [[File:DrMarioWorld-CE6-1-5.png|150px|center]] | |||
|- | |||
| '''Objectives''' || | |||
* [[Virus]]es x 42 | |||
* [[Brick Block]]s x 62 | |||
| '''Objectives''' || | |||
* [[Virus]]es x 19 | |||
* [[Caged coin|Purple coins]] x 28 | |||
| '''Objectives''' || | |||
* [[Virus]]es x 45 | |||
| '''Objectives''' || | |||
* [[Virus]]es x 37 | |||
* [[Coin Block|Coins from blocks]] x 42 | |||
| '''Objectives''' || | |||
* [[Virus]]es x 35 | |||
|- | |||
| '''Capsules''' || 27 | |||
| '''Capsules''' || 44 | |||
| '''Capsules''' || 35 | |||
| '''Capsules''' || 37 | |||
| '''Capsules''' || 43 | |||
|- | |||
| '''Colors''' || Red | |||
| '''Colors''' || Yellow | |||
| '''Colors''' || Blue, yellow | |||
| '''Colors''' || Red, blue, yellow | |||
| '''Colors''' || Red, blue, yellow | |||
|- | |||
| '''Scroll''' || - | |||
| '''Scroll''' || - | |||
| '''Scroll''' || - | |||
| '''Scroll''' || - | |||
| '''Scroll''' || 3 rows | |||
|- | |||
|} | |||
===Round 2 and Round 3 Stages=== | |||
{| border=1 cellspacing=0 cellpadding=3 style="border:1px solid black; border-collapse:collapse" width =80% | |||
|- | |||
! colspan=2 width=20% style="background: #ABC;" | Stage 1 | |||
! colspan=2 width=20% style="background: #ABC;" | Stage 2 | |||
! colspan=2 width=20% style="background: #ABC;" | Stage 3 | |||
! colspan=2 width=20% style="background: #ABC;" | Stage 4 | |||
! colspan=2 width=20% style="background: #ABC;" | Stage 5 | |||
|- | |||
| colspan=2 | [[File:DrMarioWorld-CE6-2-1.png|150px|center]] | |||
| colspan=2 | [[File:DrMarioWorld-CE6-2-2.png|150px|center]] | |||
| colspan=2 | [[File:DrMarioWorld-CE6-2-3.png|150px|center]] | |||
| colspan=2 | [[File:DrMarioWorld-CE6-2-4.png|150px|center]] | |||
| colspan=2 | [[File:DrMarioWorld-CE6-2-5.png|150px|center]] | |||
|- | |||
| '''Objectives''' || | |||
* [[Virus]]es x 21 | |||
| '''Objectives''' || | |||
* [[Brick Block]]s x 37 | |||
| '''Objectives''' || | |||
* [[Virus]]es x 35 | |||
| '''Objectives''' || | |||
* [[Virus]]es x 10 | |||
* [[Brick Block]]s x 47 | |||
| '''Objectives''' || | |||
* [[Virus]]es x 26 | |||
* [[Brick Block]]s x 39 | |||
* [[Key Door|Doors]] x 6 | |||
|- | |||
| '''Capsules''' || 43 | |||
| '''Capsules''' || 32 | |||
| '''Capsules''' || 40 | |||
| '''Capsules''' || 40 | |||
| '''Capsules''' || 40 | |||
|- | |||
| '''Colors''' || Red, blue, yellow | |||
| '''Colors''' || Red, blue, yellow | |||
| '''Colors''' || Red, blue, yellow | |||
| '''Colors''' || Red, blue, yellow | |||
| '''Colors''' || Red, blue, yellow | |||
|- | |||
| '''Scroll''' || 9 rows | |||
| '''Scroll''' || - | |||
| '''Scroll''' || - | |||
| '''Scroll''' || - | |||
| '''Scroll''' || 12 rows | |||
|- | |||
|} | |} | ||
</br> | |||
==Season 7== | ==Season 7== | ||
| Line 301: | Line 796: | ||
* [[Heart]]s x 3 | * [[Heart]]s x 3 | ||
* [[Skill Up]] x 2 | * [[Skill Up]] x 2 | ||
|[[File:DMW-ParagoombaNormalMedal.png| | |[[File:DMW-ParagoombaNormalMedal.png|x100px|center]] | ||
|align=left| | |align=left| | ||
* [[Coin]]s x 1000 | * [[Coin]]s x 1000 | ||
* [[Capsule+]] x 2 | * [[Capsule+]] x 2 | ||
* [[Staff ticket]] x 1 | * [[Staff ticket]] x 1 | ||
|[[File:DMW-ParagoombaGoldMedal.png| | |[[File:DMW-ParagoombaGoldMedal.png|x100px|center]] | ||
|align=left| | |align=left| | ||
* [[Coin]]s x 2000 | * [[Coin]]s x 2000 | ||
* [[Skill filler]] x 2 | * [[Skill filler]] x 2 | ||
* [[Staff ticket]] x 1 | * [[Staff ticket]] x 1 | ||
|[[File:DMW-ParagoombaPlatinumMedal.png| | |[[File:DMW-ParagoombaPlatinumMedal.png|x100px|center]] | ||
|} | |||
===Round 1 Stages=== | |||
{| border=1 cellspacing=0 cellpadding=3 style="border:1px solid black; border-collapse:collapse" width =80% | |||
|- | |||
! colspan=2 width=20% style="background: #ABC;" | Stage 1 | |||
! colspan=2 width=20% style="background: #ABC;" | Stage 2 | |||
! colspan=2 width=20% style="background: #ABC;" | Stage 3 | |||
! colspan=2 width=20% style="background: #ABC;" | Stage 4 | |||
! colspan=2 width=20% style="background: #ABC;" | Stage 5 | |||
|- | |||
| colspan=2 | [[File:DrMarioWorld-CE7-1-1.png|150px|center]] | |||
| colspan=2 | [[File:DrMarioWorld-CE7-1-2.png|150px|center]] | |||
| colspan=2 | [[File:DrMarioWorld-CE7-1-3.png|150px|center]] | |||
| colspan=2 | [[File:DrMarioWorld-CE7-1-4.png|150px|center]] | |||
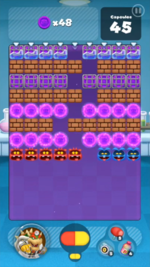
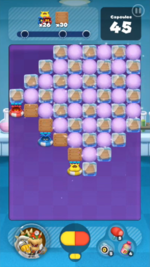
| colspan=2 | [[File:DrMarioWorld-CE7-1-5.png|150px|center]] | |||
|- | |||
| '''Objectives''' || | |||
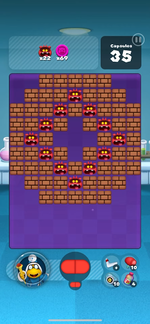
* [[Virus]]es x 22 | |||
* [[Coin Block|Coins from blocks]] x 69 | |||
| '''Objectives''' || | |||
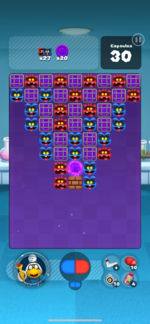
* [[Virus]]es x 27 | |||
* [[Caged coin|Purple coins]] x 20 | |||
| '''Objectives''' || | |||
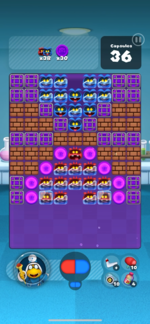
* [[Virus]]es x 38 | |||
* [[Caged coin|Purple coins]] x 30 | |||
| '''Objectives''' || | |||
* [[Caged coin|Purple coins]] x 20 | |||
* [[Key Door|Doors]] x 4 | |||
| '''Objectives''' || | |||
* [[Virus]]es x 54 | |||
* [[Crate]]s x 14 | |||
|- | |||
| '''Capsules''' || 35 | |||
| '''Capsules''' || 30 | |||
| '''Capsules''' || 36 | |||
| '''Capsules''' || 38 | |||
| '''Capsules''' || 45 | |||
|- | |||
| '''Colors''' || Red | |||
| '''Colors''' || Red, blue | |||
| '''Colors''' || Red, blue | |||
| '''Colors''' || Red, blue | |||
| '''Colors''' || Red, blue, yellow | |||
|- | |||
| '''Scroll''' || - | |||
| '''Scroll''' || - | |||
| '''Scroll''' || - | |||
| '''Scroll''' || - | |||
| '''Scroll''' || 5 rows | |||
|- | |||
|} | |||
===Round 2 and Round 3 Stages=== | |||
{| border=1 cellspacing=0 cellpadding=3 style="border:1px solid black; border-collapse:collapse" width =80% | |||
|- | |||
! colspan=2 width=20% style="background: #ABC;" | Stage 1 | |||
! colspan=2 width=20% style="background: #ABC;" | Stage 2 | |||
! colspan=2 width=20% style="background: #ABC;" | Stage 3 | |||
! colspan=2 width=20% style="background: #ABC;" | Stage 4 | |||
! colspan=2 width=20% style="background: #ABC;" | Stage 5 | |||
|- | |||
| colspan=2 | [[File:DrMarioWorld-CE7-2-1.png|150px|center]] | |||
| colspan=2 | [[File:DrMarioWorld-CE7-2-2.png|150px|center]] | |||
| colspan=2 | [[File:DrMarioWorld-CE7-2-3.png|150px|center]] | |||
| colspan=2 | [[File:DrMarioWorld-CE7-2-4.png|150px|center]] | |||
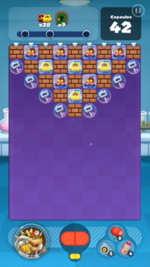
| colspan=2 | [[File:DrMarioWorld-CE7-2-5.png|150px|center]] | |||
|- | |||
| '''Objectives''' || | |||
* [[Virus]]es x 38 | |||
* [[Coin Block|Coins from blocks]] x 48 | |||
| '''Objectives''' || | |||
* [[Virus]]es x 63 | |||
* [[Caged coin|Purple coins]] x 43 | |||
| '''Objectives''' || | |||
* [[Virus]]es x 38 | |||
* [[Crate]]s x 65 | |||
| '''Objectives''' || | |||
* [[Virus coin]]s x 22 | |||
| '''Objectives''' || | |||
* [[Virus]]es x 20 | |||
* [[Key Door|Doors]] x 25 | |||
|- | |||
| '''Capsules''' || 38 | |||
| '''Capsules''' || 40 | |||
| '''Capsules''' || 40 | |||
| '''Capsules''' || 43 | |||
| '''Capsules''' || 42 | |||
|- | |||
| '''Colors''' || Red | |||
| '''Colors''' || Red, blue, yellow | |||
| '''Colors''' || Red, blue, yellow | |||
| '''Colors''' || Red, blue, yellow | |||
| '''Colors''' || Red, blue, yellow | |||
|- | |||
| '''Scroll''' || - | |||
| '''Scroll''' || 5 rows | |||
| '''Scroll''' || 5 rows | |||
| '''Scroll''' || - | |||
| '''Scroll''' || 4 rows | |||
|- | |||
|} | |} | ||
</br> | |||
==Season 8== | ==Season 8== | ||
| Line 330: | Line 927: | ||
* [[Heart]]s x 3 | * [[Heart]]s x 3 | ||
* [[Skill Up]] x 2 | * [[Skill Up]] x 2 | ||
|[[File:DMW-KoopaParatroopaNormalMedal.png| | |[[File:DMW-KoopaParatroopaNormalMedal.png|x100px|center]] | ||
|align=left| | |align=left| | ||
* [[Coin]]s x 1000 | * [[Coin]]s x 1000 | ||
* [[Capsule+]] x 2 | * [[Capsule+]] x 2 | ||
* [[Staff ticket]] x 1 | * [[Staff ticket]] x 1 | ||
|[[File:DMW-KoopaParatroopaGoldMedal.png| | |[[File:DMW-KoopaParatroopaGoldMedal.png|x100px|center]] | ||
|align=left| | |align=left| | ||
* [[Coin]]s x 2000 | * [[Coin]]s x 2000 | ||
* [[Skill filler]] x 2 | * [[Skill filler]] x 2 | ||
* [[Staff ticket]] x 1 | * [[Staff ticket]] x 1 | ||
|[[File:DMW-KoopaParatroopaPlatinumMedal.png| | |[[File:DMW-KoopaParatroopaPlatinumMedal.png|x100px|center]] | ||
|} | |} | ||
| Line 456: | Line 1,053: | ||
* [[Heart]]s x 3 | * [[Heart]]s x 3 | ||
* [[Skill Up]] x 2 | * [[Skill Up]] x 2 | ||
|[[File:DMW-ShyGuyNormalMedal.png| | |[[File:DMW-ShyGuyNormalMedal.png|x100px|center]] | ||
|align=left| | |align=left| | ||
* [[Coin]]s x 1000 | * [[Coin]]s x 1000 | ||
* [[Capsule+]] x 2 | * [[Capsule+]] x 2 | ||
* [[Staff ticket]] x 1 | * [[Staff ticket]] x 1 | ||
|[[File:DMW-ShyGuyGoldMedal.png| | |[[File:DMW-ShyGuyGoldMedal.png|x100px|center]] | ||
|align=left| | |align=left| | ||
* [[Coin]]s x 2000 | * [[Coin]]s x 2000 | ||
* [[Skill filler]] x 2 | * [[Skill filler]] x 2 | ||
* [[Staff ticket]] x 1 | * [[Staff ticket]] x 1 | ||
|[[File:DMW-ShyGuyPlatinumMedal.png| | |[[File:DMW-ShyGuyPlatinumMedal.png|x100px|center]] | ||
|} | |} | ||
| Line 587: | Line 1,184: | ||
* [[Heart]]s x 3 | * [[Heart]]s x 3 | ||
* [[Skill Up]] x 2 | * [[Skill Up]] x 2 | ||
|[[File:DMW-BlooperNormalMedal.png| | |[[File:DMW-BlooperNormalMedal.png|x100px|center]] | ||
|align=left| | |align=left| | ||
* [[Coin]]s x 1000 | * [[Coin]]s x 1000 | ||
* [[Capsule+]] x 2 | * [[Capsule+]] x 2 | ||
* [[Staff ticket]] x 1 | * [[Staff ticket]] x 1 | ||
|[[File:DMW-BlooperGoldMedal.png| | |[[File:DMW-BlooperGoldMedal.png|x100px|center]] | ||
|align=left| | |align=left| | ||
* [[Coin]]s x 2000 | * [[Coin]]s x 2000 | ||
* [[Skill filler]] x 2 | * [[Skill filler]] x 2 | ||
* [[Staff ticket]] x 1 | * [[Staff ticket]] x 1 | ||
|[[File:DMW-BlooperPlatinumMedal.png| | |[[File:DMW-BlooperPlatinumMedal.png|x100px|center]] | ||
|} | |} | ||
| Line 616: | Line 1,213: | ||
* [[Heart]]s x 3 | * [[Heart]]s x 3 | ||
* [[Doc token]] x 20 | * [[Doc token]] x 20 | ||
|[[File:DMW-BlueToadNormalMedal2.png| | |[[File:DMW-BlueToadNormalMedal2.png|x100px|center]] | ||
|align=left| | |align=left| | ||
* [[Coin]]s x 1000 | * [[Coin]]s x 1000 | ||
* [[Doc token]] x 30 | * [[Doc token]] x 30 | ||
* [[Staff ticket]] x 1 | * [[Staff ticket]] x 1 | ||
|[[File:DMW-BlueToadGoldMedal2.png| | |[[File:DMW-BlueToadGoldMedal2.png|x100px|center]] | ||
|align=left| | |align=left| | ||
* [[Coin]]s x 2000 | * [[Coin]]s x 2000 | ||
* [[Doc token]] x 50 | * [[Doc token]] x 50 | ||
* [[Staff ticket]] x 1 | * [[Staff ticket]] x 1 | ||
|[[File:DMW-BlueToadPlatinumMedal2.png| | |[[File:DMW-BlueToadPlatinumMedal2.png|x100px|center]] | ||
|} | |} | ||
| Line 742: | Line 1,339: | ||
* [[Heart]]s x 3 | * [[Heart]]s x 3 | ||
* [[Doc token]] x 20 | * [[Doc token]] x 20 | ||
|[[File:DMW-GoombaNormalMedal2.png| | |[[File:DMW-GoombaNormalMedal2.png|x100px|center]] | ||
|align=left| | |align=left| | ||
* [[Coin]]s x 1000 | * [[Coin]]s x 1000 | ||
* [[Doc token]] x 30 | * [[Doc token]] x 30 | ||
* [[Staff ticket]] x 1 | * [[Staff ticket]] x 1 | ||
|[[File:DMW-GoombaGoldMedal2.png| | |[[File:DMW-GoombaGoldMedal2.png|x100px|center]] | ||
|align=left| | |align=left| | ||
* [[Coin]]s x 2000 | * [[Coin]]s x 2000 | ||
* [[Doc token]] x 50 | * [[Doc token]] x 50 | ||
* [[Staff ticket]] x 1 | * [[Staff ticket]] x 1 | ||
|[[File:DMW-GoombaPlatinumMedal2.png| | |[[File:DMW-GoombaPlatinumMedal2.png|x100px|center]] | ||
|} | |} | ||
| Line 771: | Line 1,368: | ||
* [[Heart]]s x 3 | * [[Heart]]s x 3 | ||
* [[Doc token]] x 20 | * [[Doc token]] x 20 | ||
|[[File:DMW-PiranhaPlantNormalMedal2.png| | |[[File:DMW-PiranhaPlantNormalMedal2.png|x100px|center]] | ||
|align=left| | |align=left| | ||
* [[Coin]]s x 1000 | * [[Coin]]s x 1000 | ||
* [[Doc token]] x 30 | * [[Doc token]] x 30 | ||
* [[Staff ticket]] x 1 | * [[Staff ticket]] x 1 | ||
|[[File:DMW-PiranhaPlantGoldMedal2.png| | |[[File:DMW-PiranhaPlantGoldMedal2.png|x100px|center]] | ||
|align=left| | |align=left| | ||
* [[Coin]]s x 2000 | * [[Coin]]s x 2000 | ||
* [[Doc token]] x 50 | * [[Doc token]] x 50 | ||
* [[Staff ticket]] x 1 | * [[Staff ticket]] x 1 | ||
|[[File:DMW-PiranhaPlantPlatinumMedal2.png| | |[[File:DMW-PiranhaPlantPlatinumMedal2.png|x100px|center]] | ||
|} | |} | ||
| Line 800: | Line 1,397: | ||
* [[Heart]]s x 3 | * [[Heart]]s x 3 | ||
* [[Doc token]] x 20 | * [[Doc token]] x 20 | ||
|[[File:DMW-BlooperNormalMedal2.png| | |[[File:DMW-BlooperNormalMedal2.png|x100px|center]] | ||
|align=left| | |align=left| | ||
* [[Coin]]s x 1000 | * [[Coin]]s x 1000 | ||
* [[Doc token]] x 30 | * [[Doc token]] x 30 | ||
* [[Staff ticket]] x 1 | * [[Staff ticket]] x 1 | ||
|[[File:DMW-BlooperGoldMedal2.png| | |[[File:DMW-BlooperGoldMedal2.png|x100px|center]] | ||
|align=left| | |align=left| | ||
* [[Coin]]s x 2000 | * [[Coin]]s x 2000 | ||
* [[Doc token]] x 50 | * [[Doc token]] x 50 | ||
* [[Staff ticket]] x 1 | * [[Staff ticket]] x 1 | ||
|[[File:DMW-BlooperPlatinumMedal2.png| | |[[File:DMW-BlooperPlatinumMedal2.png|x100px|center]] | ||
|} | |} | ||
{{DMW}} | {{DMW}} | ||
[[:Category:Dr. Mario World]] | [[:Category:Dr. Mario World]] | ||
Revision as of 09:32, December 5, 2021
List of Clinic events in Dr. Mario World
In a Clinic Event, a character is introduced as a sick patient, where the objective is to clear ten stages (two sets of five stages) across three steps. The following three steps are:
- Examine the patient.
- Eliminate the viruses.
- Clear all stages with three stars!
In the first step "Examine the patient", each of the stages only need to be cleared, and completing each of them rewards 150 coins and a heart. These stages do not reward clear stars, meaning that it is not graded like the stages in Stage Mode. Also, once each stage is cleared, it cannot be replayed.
In the second step "Eliminate the viruses", the stages to be completed have changed from the first step, where they are generally more challenging than those in the first step. Like the stages in Stage Mode, clearing these stages also reward clear stars, meaning that the amount of coins rewarded is based on the amount of stars, where it's 50 coins per star gained. Earning a heart works the same way as in stage mode, where clearing the stage the first time rewards a heart. Previously-cleared stages within this step can be replayed. A heart is only rewarded the first time a stage is cleared for the first 10 seasons, while clearing a completed stage again will also rewards a heart for the last 4 seasons.
In the third step "Clear all stages with three stars!", which can be reached after clearing all the stages in the second step. The player will remain in this step if three stars aren't obtained from at least one of the stages. The objective is to clear three stars in every stage in the second step. If the player completed every stage during the second step with three stars each, the third step is also immediately completed.
Season 1
The patient of this season is Blue Toad. This clinic event takes place within 2019/10/10 06:00 to 2019/10/17 05:59 UTC. The following are rewarded based on which step of the clinic event is cleared:
| Round 1 Rewards | Round 1 Medal Reward | Round 2 Rewards | Round 2 Medal Reward | Round 3 Rewards | Round 3 Medal Reward |
|---|---|---|---|---|---|
|
|
Round 1 Stages
| Stage 1 | Stage 2 | Stage 3 | Stage 4 | Stage 5 | |||||
|---|---|---|---|---|---|---|---|---|---|
| Objectives |
|
Objectives |
|
Objectives |
|
Objectives |
|
Objectives |
|
| Capsules | 21 | Capsules | 26 | Capsules | 22 | Capsules | 25 | Capsules | 31 |
| Colors | Red, blue, yellow | Colors | Red, blue, yellow | Colors | Red, blue, yellow | Colors | Red, blue, yellow | Colors | Red, blue |
| Scroll | - | Scroll | - | Scroll | - | Scroll | - | Scroll | 8 rows |
Round 2 and Round 3 Stages
| Stage 1 | Stage 2 | Stage 3 | Stage 4 | Stage 5 | |||||
|---|---|---|---|---|---|---|---|---|---|
| Objectives |
|
Objectives |
|
Objectives |
|
Objectives |
|
Objectives |
|
| Capsules | 21 | Capsules | 26 | Capsules | 22 | Capsules | 25 | Capsules | 31 |
| Colors | Red, blue, yellow | Colors | Red, blue, yellow | Colors | Red, blue, yellow | Colors | Red, blue, yellow | Colors | Red, blue |
| Scroll | - | Scroll | - | Scroll | - | Scroll | - | Scroll | 8 rows |
Season 2
The patient of this season is Goomba. This clinic event takes place within 2019/11/07 06:00 to 2019/11/14 05:59 UTC. The following are rewarded based on which step of the clinic event is cleared:
| Round 1 Rewards | Round 1 Medal Reward | Round 2 Rewards | Round 2 Medal Reward | Round 3 Rewards | Round 3 Medal Reward |
|---|---|---|---|---|---|
|
|
Round 1 Stages
| Stage 1 | Stage 2 | Stage 3 | Stage 4 | Stage 5 | |||||
|---|---|---|---|---|---|---|---|---|---|
| Objectives |
|
Objectives |
|
Objectives |
|
Objectives |
|
Objectives |
|
| Capsules | 27 | Capsules | 44 | Capsules | 35 | Capsules | 37 | Capsules | 43 |
| Colors | Red | Colors | Yellow | Colors | Blue, yellow | Colors | Red, blue, yellow | Colors | Red, blue, yellow |
| Scroll | - | Scroll | - | Scroll | - | Scroll | - | Scroll | 3 rows |
Round 2 and Round 3 Stages
| Stage 1 | Stage 2 | Stage 3 | Stage 4 | Stage 5 | |||||
|---|---|---|---|---|---|---|---|---|---|
| Objectives |
|
Objectives |
|
Objectives |
|
Objectives |
|
Objectives |
|
| Capsules | 43 | Capsules | 32 | Capsules | 40 | Capsules | 40 | Capsules | 40 |
| Colors | Red, blue, yellow | Colors | Red, blue, yellow | Colors | Red, blue, yellow | Colors | Red, blue, yellow | Colors | Red, blue, yellow |
| Scroll | 9 rows | Scroll | - | Scroll | - | Scroll | - | Scroll | 12 rows |
Season 3
The patient of this season is Spike. This clinic event takes place within 2019/11/28 06:00 to 2019/12/05 05:59 UTC. The following are rewarded based on which step of the clinic event is cleared:
| Round 1 Rewards | Round 1 Medal Reward | Round 2 Rewards | Round 2 Medal Reward | Round 3 Rewards | Round 3 Medal Reward |
|---|---|---|---|---|---|
|
|
Round 1 Stages
| Stage 1 | Stage 2 | Stage 3 | Stage 4 | Stage 5 | |||||
|---|---|---|---|---|---|---|---|---|---|
| Objectives |
|
Objectives |
|
Objectives |
|
Objectives |
|
Objectives |
|
| Capsules | 27 | Capsules | 44 | Capsules | 35 | Capsules | 37 | Capsules | 43 |
| Colors | Red | Colors | Yellow | Colors | Blue, yellow | Colors | Red, blue, yellow | Colors | Red, blue, yellow |
| Scroll | - | Scroll | - | Scroll | - | Scroll | - | Scroll | 3 rows |
Round 2 and Round 3 Stages
| Stage 1 | Stage 2 | Stage 3 | Stage 4 | Stage 5 | |||||
|---|---|---|---|---|---|---|---|---|---|
| Objectives |
|
Objectives |
|
Objectives |
|
Objectives |
|
Objectives |
|
| Capsules | 43 | Capsules | 32 | Capsules | 40 | Capsules | 40 | Capsules | 40 |
| Colors | Red, blue, yellow | Colors | Red, blue, yellow | Colors | Red, blue, yellow | Colors | Red, blue, yellow | Colors | Red, blue, yellow |
| Scroll | 9 rows | Scroll | - | Scroll | - | Scroll | - | Scroll | 12 rows |
Season 4
The patient of this season is Koopa Troopa. This clinic event takes place within 2019/12/19 06:00 to 2019/12/26 05:59 UTC. The following are rewarded based on which step of the clinic event is cleared:
| Round 1 Rewards | Round 1 Medal Reward | Round 2 Rewards | Round 2 Medal Reward | Round 3 Rewards | Round 3 Medal Reward |
|---|---|---|---|---|---|
|
|
Round 1 Stages
| Stage 1 | Stage 2 | Stage 3 | Stage 4 | Stage 5 | |||||
|---|---|---|---|---|---|---|---|---|---|
| Objectives |
|
Objectives |
|
Objectives |
|
Objectives |
|
Objectives |
|
| Capsules | 27 | Capsules | 44 | Capsules | 35 | Capsules | 37 | Capsules | 43 |
| Colors | Red | Colors | Yellow | Colors | Blue, yellow | Colors | Red, blue, yellow | Colors | Red, blue, yellow |
| Scroll | - | Scroll | - | Scroll | - | Scroll | - | Scroll | 3 rows |
Round 2 and Round 3 Stages
| Stage 1 | Stage 2 | Stage 3 | Stage 4 | Stage 5 | |||||
|---|---|---|---|---|---|---|---|---|---|
| Objectives |
|
Objectives |
|
Objectives |
|
Objectives |
|
Objectives |
|
| Capsules | 43 | Capsules | 32 | Capsules | 40 | Capsules | 40 | Capsules | 40 |
| Colors | Red, blue, yellow | Colors | Red, blue, yellow | Colors | Red, blue, yellow | Colors | Red, blue, yellow | Colors | Red, blue, yellow |
| Scroll | 9 rows | Scroll | - | Scroll | - | Scroll | - | Scroll | 12 rows |
Season 5
The patient of this season is Piranha Plant. This clinic event takes place within 2020/01/27 06:00 to 2020/02/03 05:59 UTC. Season 5's event was originally started at 2020/01/16 06:00 UTC, but the event was suspended around 43 minutes later. A later announcement stated that the event was suspended due to "issues with the stages", and a compensation of one Staff Ticket and five Hearts were given out. Medals that were awarded before the suspension remained intact when the event resumed, but the other rewards could be claimed for a second time.
The following are rewarded based on which step of the clinic event is cleared:
| Round 1 Rewards | Round 1 Medal Reward | Round 2 Rewards | Round 2 Medal Reward | Round 3 Rewards | Round 3 Medal Reward |
|---|---|---|---|---|---|
|
|
Round 1 Stages
| Stage 1 | Stage 2 | Stage 3 | Stage 4 | Stage 5 | |||||
|---|---|---|---|---|---|---|---|---|---|
| Objectives |
|
Objectives |
|
Objectives |
|
Objectives |
|
Objectives |
|
| Capsules | 27 | Capsules | 44 | Capsules | 35 | Capsules | 37 | Capsules | 43 |
| Colors | Red | Colors | Yellow | Colors | Blue, yellow | Colors | Red, blue, yellow | Colors | Red, blue, yellow |
| Scroll | - | Scroll | - | Scroll | - | Scroll | - | Scroll | 3 rows |
Round 2 and Round 3 Stages
| Stage 1 | Stage 2 | Stage 3 | Stage 4 | Stage 5 | |||||
|---|---|---|---|---|---|---|---|---|---|
| Objectives |
|
Objectives |
|
Objectives |
|
Objectives |
|
Objectives |
|
| Capsules | 43 | Capsules | 32 | Capsules | 40 | Capsules | 40 | Capsules | 40 |
| Colors | Red, blue, yellow | Colors | Red, blue, yellow | Colors | Red, blue, yellow | Colors | Red, blue, yellow | Colors | Red, blue, yellow |
| Scroll | 9 rows | Scroll | - | Scroll | - | Scroll | - | Scroll | 12 rows |
Season 6
The patient of this season is Green Toad. This clinic event takes place within 2020/02/13 06:00 to 2020/02/20 05:59 UTC. The following are rewarded based on which step of the clinic event is cleared:
| Round 1 Rewards | Round 1 Medal Reward | Round 2 Rewards | Round 2 Medal Reward | Round 3 Rewards | Round 3 Medal Reward |
|---|---|---|---|---|---|
|
|
Round 1 Stages
| Stage 1 | Stage 2 | Stage 3 | Stage 4 | Stage 5 | |||||
|---|---|---|---|---|---|---|---|---|---|
| Objectives |
|
Objectives |
|
Objectives |
|
Objectives |
|
Objectives |
|
| Capsules | 27 | Capsules | 44 | Capsules | 35 | Capsules | 37 | Capsules | 43 |
| Colors | Red | Colors | Yellow | Colors | Blue, yellow | Colors | Red, blue, yellow | Colors | Red, blue, yellow |
| Scroll | - | Scroll | - | Scroll | - | Scroll | - | Scroll | 3 rows |
Round 2 and Round 3 Stages
| Stage 1 | Stage 2 | Stage 3 | Stage 4 | Stage 5 | |||||
|---|---|---|---|---|---|---|---|---|---|
| Objectives |
|
Objectives |
|
Objectives |
|
Objectives |
|
Objectives |
|
| Capsules | 43 | Capsules | 32 | Capsules | 40 | Capsules | 40 | Capsules | 40 |
| Colors | Red, blue, yellow | Colors | Red, blue, yellow | Colors | Red, blue, yellow | Colors | Red, blue, yellow | Colors | Red, blue, yellow |
| Scroll | 9 rows | Scroll | - | Scroll | - | Scroll | - | Scroll | 12 rows |
Season 7
The patient of this season is Paragoomba. This clinic event takes place within 2020/03/12 06:00 to 2020/03/19 05:59 UTC. The following are rewarded based on which step of the clinic event is cleared:
| Round 1 Rewards | Round 1 Medal Reward | Round 2 Rewards | Round 2 Medal Reward | Round 3 Rewards | Round 3 Medal Reward |
|---|---|---|---|---|---|
|
|
Round 1 Stages
| Stage 1 | Stage 2 | Stage 3 | Stage 4 | Stage 5 | |||||
|---|---|---|---|---|---|---|---|---|---|
| Objectives |
|
Objectives |
|
Objectives |
|
Objectives |
|
Objectives | |
| Capsules | 35 | Capsules | 30 | Capsules | 36 | Capsules | 38 | Capsules | 45 |
| Colors | Red | Colors | Red, blue | Colors | Red, blue | Colors | Red, blue | Colors | Red, blue, yellow |
| Scroll | - | Scroll | - | Scroll | - | Scroll | - | Scroll | 5 rows |
Round 2 and Round 3 Stages
| Stage 1 | Stage 2 | Stage 3 | Stage 4 | Stage 5 | |||||
|---|---|---|---|---|---|---|---|---|---|
| Objectives |
|
Objectives |
|
Objectives | Objectives |
|
Objectives | ||
| Capsules | 38 | Capsules | 40 | Capsules | 40 | Capsules | 43 | Capsules | 42 |
| Colors | Red | Colors | Red, blue, yellow | Colors | Red, blue, yellow | Colors | Red, blue, yellow | Colors | Red, blue, yellow |
| Scroll | - | Scroll | 5 rows | Scroll | 5 rows | Scroll | - | Scroll | 4 rows |
Season 8
The patient of this season is Koopa Paratroopa. This clinic event takes place within 2020/04/23 06:00 to 2020/04/30 05:59 UTC. The following are rewarded based on which step of the clinic event is cleared:
| Round 1 Rewards | Round 1 Medal Reward | Round 2 Rewards | Round 2 Medal Reward | Round 3 Rewards | Round 3 Medal Reward |
|---|---|---|---|---|---|
|
|
Round 1 Stages
| Stage 1 | Stage 2 | Stage 3 | Stage 4 | Stage 5 | |||||
|---|---|---|---|---|---|---|---|---|---|
| Objectives |
|
Objectives |
|
Objectives |
|
Objectives |
|
Objectives |
|
| Capsules | 28 | Capsules | 30 | Capsules | 30 | Capsules | 33 | Capsules | 43 |
| Colors | Red, blue, yellow | Colors | Red, yellow | Colors | Red, blue, yellow | Colors | Red, blue, yellow | Colors | Blue, yellow |
| Scroll | - | Scroll | - | Scroll | - | Scroll | 9 rows | Scroll | - |
Round 2 and Round 3 Stages
| Stage 1 | Stage 2 | Stage 3 | Stage 4 | Stage 5 | |||||
|---|---|---|---|---|---|---|---|---|---|
| Objectives | Objectives |
|
Objectives |
|
Objectives | Objectives |
| ||
| Capsules | 39 | Capsules | 36 | Capsules | 35 | Capsules | 30 | Capsules | 35 |
| Colors | Red, yellow | Colors | Blue, yellow | Colors | Red, yellow | Colors | Red, blue, yellow | Colors | Red, blue, yellow |
| Scroll | - | Scroll | - | Scroll | - | Scroll | - | Scroll | 8 rows |
Season 9
The patient of this season is Shy Guy. This clinic event takes place within 2020/05/07 06:00 to 2020/05/14 05:59 UTC. The following are rewarded based on which step of the clinic event is cleared:
| Round 1 Rewards | Round 1 Medal Reward | Round 2 Rewards | Round 2 Medal Reward | Round 3 Rewards | Round 3 Medal Reward |
|---|---|---|---|---|---|
|
|
Round 1 Stages
| Stage 1 | Stage 2 | Stage 3 | Stage 4 | Stage 5 | |||||
|---|---|---|---|---|---|---|---|---|---|
| Objectives |
|
Objectives |
|
Objectives |
|
Objectives |
|
Objectives |
|
| Capsules | 25 | Capsules | 32 | Capsules | 35 | Capsules | 25 | Capsules | 35 |
| Colors | Red, green | Colors | Red, light-blue | Colors | Red, green, light-blue | Colors | Red, yellow, green | Colors | Red, green, light-blue |
| Scroll | - | Scroll | - | Scroll | - | Scroll | 3 rows | Scroll | - |
Round 2 and Round 3 Stages
| Stage 1 | Stage 2 | Stage 3 | Stage 4 | Stage 5 | |||||
|---|---|---|---|---|---|---|---|---|---|
| Objectives |
|
Objectives |
|
Objectives |
|
Objectives |
|
Objectives |
|
| Capsules | 35 | Capsules | 40 | Capsules | 35 | Capsules | 38 | Capsules | 42 |
| Colors | Red, blue | Colors | Red, blue, yellow | Colors | Red, blue, yellow | Colors | Red, blue | Colors | Red, blue, yellow |
| Scroll | 11 rows (2 at a time) | Scroll | 7 rows | Scroll | 7 rows | Scroll | 7 rows | Scroll | 6 rows |
Season 10
The patient of this season is Blooper. This clinic event takes place within 2020/06/04 06:00 to 2020/06/11 05:59 UTC. The following are rewarded based on which step of the clinic event is cleared:
| Round 1 Rewards | Round 1 Medal Reward | Round 2 Rewards | Round 2 Medal Reward | Round 3 Rewards | Round 3 Medal Reward |
|---|---|---|---|---|---|
|
|
Season 1 (revisit)
The patient of this season is Blue Toad. This clinic event takes place within 2021/04/28 08:00 to 2021/05/13 07:59 UTC. The following are rewarded based on which step of the clinic event is cleared:
| Round 1 Rewards | Round 1 Medal Reward | Round 2 Rewards | Round 2 Medal Reward | Round 3 Rewards | Round 3 Medal Reward |
|---|---|---|---|---|---|
|
|
Round 1 Stages
| Stage 1 | Stage 2 | Stage 3 | Stage 4 | Stage 5 | |||||
|---|---|---|---|---|---|---|---|---|---|
| Objectives |
|
Objectives |
|
Objectives |
|
Objectives |
|
Objectives |
|
| Capsules | 21 | Capsules | 26 | Capsules | 22 | Capsules | 25 | Capsules | 31 |
| Colors | Red, blue, yellow | Colors | Red, blue, yellow | Colors | Red, blue, yellow | Colors | Red, blue, yellow | Colors | Red, blue |
| Scroll | - | Scroll | - | Scroll | - | Scroll | - | Scroll | 8 rows |
Round 2 and Round 3 Stages
| Stage 1 | Stage 2 | Stage 3 | Stage 4 | Stage 5 | |||||
|---|---|---|---|---|---|---|---|---|---|
| Objectives |
|
Objectives |
|
Objectives |
|
Objectives |
|
Objectives |
|
| Capsules | 21 | Capsules | 26 | Capsules | 22 | Capsules | 25 | Capsules | 31 |
| Colors | Red, blue, yellow | Colors | Red, blue, yellow | Colors | Red, blue, yellow | Colors | Red, blue, yellow | Colors | Red, blue |
| Scroll | - | Scroll | - | Scroll | - | Scroll | - | Scroll | 8 rows |
Season 2 (revisit)
The patient of this season is Goomba. This clinic event takes place within 2021/05/27 08:00 to 2021/06/10 07:59 UTC. The following are rewarded based on which step of the clinic event is cleared:
| Round 1 Rewards | Round 1 Medal Reward | Round 2 Rewards | Round 2 Medal Reward | Round 3 Rewards | Round 3 Medal Reward |
|---|---|---|---|---|---|
|
|
Season 3 (revisit)
The patient of this season is Piranha Plant. This clinic event takes place within 2021/06/24 08:00 to 2021/07/08 07:59 UTC. The following are rewarded based on which step of the clinic event is cleared:
| Round 1 Rewards | Round 1 Medal Reward | Round 2 Rewards | Round 2 Medal Reward | Round 3 Rewards | Round 3 Medal Reward |
|---|---|---|---|---|---|
|
|
Season 4 (revisit)
The patient of this season is Blooper. This clinic event takes place within 2021/07/21 08:00 to 2021/08/05 07:59 UTC.The following are rewarded based on which step of the clinic event is cleared:
| Round 1 Rewards | Round 1 Medal Reward | Round 2 Rewards | Round 2 Medal Reward | Round 3 Rewards | Round 3 Medal Reward |
|---|---|---|---|---|---|
|
|


