|
|
| Line 89: |
Line 89: |
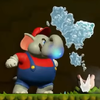
| |align=left|Blue dragons that fly and swim through lava during some [[Wonder Effect]]s. They help the player travel safely across hazards. | | |align=left|Blue dragons that fly and swim through lava during some [[Wonder Effect]]s. They help the player travel safely across hazards. |
| |[[Dragon Boneyard]], [[Deep Magma Bog Special Solar Roller]], [[The Final Battle! Bowser's Rage Stage]] | | |[[Dragon Boneyard]], [[Deep Magma Bog Special Solar Roller]], [[The Final Battle! Bowser's Rage Stage]] |
| |}
| |
|
| |
| ==Enemies and obstacles==
| |
| ===Enemies===
| |
| The enemies listed in this table match those on the [[Mario Portal|Mario Portal Game Archive]].<ref name=portal>{{cite|author=Nintendo Co., Ltd.|date=circa Jan. 2025|title=Super Mario Bros. Wonder|url=www.nintendo.com/jp/character/mario/en/history/wonder/index.html|publisher=Mario Portal|accessdate=23 Jan. 2025}}</ref> The default order they are listed derives from their occurrence in-game with adjustments to ensure enemies are listed next to their immediate relatives. King Boo, Kamek, the Big Fire Piranha Plant, Cloud Piranha, Wonder Packun, and Lakitu trio{{conjectural}} are not present on the archive, but are listed below. The first four are recognized in other primary sources,<ref name=kai12>{{cite|author=Kai, editor|date=12 Jan. 2024|url=www.nintendo.com/jp/topics/article/81448599-29e6-4579-b553-6c95c7201f65|title=全て合わせて120以上。マリオたちが冒険するフラワー王国のいろんなコースをご紹介。【ワンダーの世界へ Vol.12】|publisher=Nintendo Official Site|language=ja|accessdate=28 Jan. 2025}}</ref><ref name=kai4>{{cite|author=Kai, editor|date=6 Oct. 2023|url=www.nintendo.com/jp/topics/article/b38c0fae-7a5d-45e8-8a31-9d7c04894470|title=花にふれると土管が動き出す!? 不思議な変化「ワンダー」の秘密に迫る。【ワンダーの世界へ Vol.4】|publisher=Nintendo Official Site|language=ja|accessdate=28 Jan. 2025}}</ref> and the final two exhibit unique behaviors that differentiate them from normal Piranha Plants and Lakitus, respectively. The default order that enemies are listed in derives from their occurrence in-game with adjustments to ensure they are listed next to their immediate relatives.
| |
| {|class="wikitable sortable" style="width:100%;text-align:center"
| |
| |-style="color:white;background:#FF2400"
| |
| !rowspan=2 width=10%|Name
| |
| !rowspan=2 class=unsortable|Description
| |
| !colspan=2 class=unsortable|Courses
| |
| !rowspan=2|New
| |
| |-style="color:white;background:#FF2400"
| |
| !width=8%|First
| |
| !width=8%|Last
| |
| |-
| |
| |data-sort-value=Gooa style="background:white"|[[File:SMBW Screenshot Goomba.png|100x100px]]<br>[[Goomba]]
| |
| |align=left|Squat mushroom creatures that walk along the ground and are weak to all attacks. Direct contact damages Mario unless he [[stomp]]s them on the head. Touching sleeping Goombas does not harm him, but it does wake them. In some courses, Goombas lack the space to move and instead sit on the ground, disgruntled.<ref name=kai14>{{cite|author=Kai, editor|date=9 Feb. 2024|url=topics.nintendo.co.jp/article/3c24e9ec-6583-401a-a5ab-818180c2c0a8|title=マリオたちの行く手を阻む。フラワー王国の個性豊かな敵キャラクターをご紹介。~その2~【ワンダーの世界へ Vol.14】|publisher=Nintendo Official Site|language=ja|accessdate=9 Feb. 2024}}</ref> During the [[Wonder Effect]] in [[Sproings in the Twilight Forest]], their bodies greatly extend. In some other Wonder Effects, Mario is [[Goomba Mario|transformed into one]]. Goombas are the most common enemies in the game.
| |
| |data-sort-value=101|[[Welcome to the Flower Kingdom!]]
| |
| |data-sort-value=809|[[The Final Test Wonder Gauntlet]]
| |
| |—
| |
| |-
| |
| |data-sort-value=HefGa style="background:white"|[[File:SMBW Hefty Goomba.png|100x100px]]<br>[[Hefty Goomba]]
| |
| |align=left|Larger Goombas. Stomping Hefty Goombas split them into two normal-sized ones. In some courses, they drift down on dandelion seeds.
| |
| |data-sort-value=304|[[The Sharp Trial: Launch to Victory]]
| |
| |data-sort-value=714|[[The Final Battle! Bowser's Rage Stage]]
| |
| |—
| |
| |-
| |
| |data-sort-value=BigG style="background:white"|[[File:SMBW Big Goomba.png|100x100px]]<br>[[Big Goomba]]
| |
| |align=left|The largest Goombas. Stomping them splits them into two Hefty Goombas.
| |
| |data-sort-value=304|[[The Sharp Trial: Launch to Victory]]
| |
| |data-sort-value=714|[[The Final Battle! Bowser's Rage Stage]]
| |
| |—
| |
| |-
| |
| |data-sort-value=BonG style="background:white"|[[File:SMBW Bone Goomba.png|100x100px]]<br>[[Bone Goomba]]
| |
| |align=left|Boneheaded Goombas that are impervious to [[fireball]]s. Unlike other skeletal enemies, Bone Goombas are not undead. They are revealed to be living blue Goombas when stomped, which knocks away the skull covering their head.
| |
| |data-sort-value=112|[[Pipe-Rock Plateau Palace]]
| |
| |data-sort-value=410|[[Sunbaked Desert Palace]]
| |
| |—
| |
| |-
| |
| |data-sort-value=Goor style="background:white"|[[File:SMBW screenshot Goombrat.png|100x100px]]<br>[[Goombrat]]
| |
| |align=left|Goomba-like {{wp|persimmon}} enemies. Unlike Goombas, Goombrats turn around when they reach the edge of platforms. In some courses, they float down on dandelion seeds. Collisions with Bloomps bounce them away and, if equipped, destroy their seeds.
| |
| |data-sort-value=105|[[Here Come the Hoppos]]
| |
| |data-sort-value=502|[[Taily's Toxic Pond]]
| |
| |—
| |
| |-
| |
| |data-sort-value=HefGr style="background:white"|[[File:SMBW Big Goombrat Walking.jpg|100x100px]]<br>[[Hefty Goombrat]]
| |
| |align=left|Big Goombrats. Like Hefty Goombas, stomping them causes them to split into two normal-sized Goombrats. They similarly float on dandelion seeds.
| |
| |colspan=2 data-sort-value=405|[[Bloomps of the Desert Skies]]
| |
| |—
| |
| |-
| |
| |data-sort-value=Bro style="background:white"|[[File:SMBW screenshot Trompette.png|100x100px]]<br>[[Trompette|Brown Trompette]]
| |
| |align=left|Mushroom enemies of varying heights. Struck Trompettes fall back and knock out any enemies behind them or collect coins for Mario. The brown ones walk off the edge of platforms like Goombas.
| |
| |data-sort-value=104|[[Bulrush Coming Through!]]
| |
| |data-sort-value=805|[[Fungi Mines Special Dangerous Donut Ride]]
| |
| |{{icon|new}}
| |
| |-
| |
| |data-sort-value=PurT style="background:white"|[[File:SMBW Purple Trompette.png|100x100px]]<br>Purple Trompette
| |
| |align=left|The Purple Trompettes turn around when they reach the edge of platforms.
| |
| |data-sort-value=104|[[Bulrush Coming Through!]]
| |
| |data-sort-value=307|[[POOF! Badge Challenge Crouching High Jump I]]
| |
| |{{icon|new}}
| |
| |-
| |
| |data-sort-value=Pir style="background:white"|[[File:SMBW screenshot Piped Piranha Plant.png|100x100px]]<br>[[Piranha Plant]]
| |
| |align=left|Carnivorous plants that sit in [[Warp Pipe|pipes]]. They pop out of them with snapping jaws in consistent intervals, tilting their heads towards Mario. Piranha Plants do not emerge if he stands next to or on top of their pipes. Some Piranha Plants occur outside of pipes, and some are even rooted to the ceiling, where they perpetually snap.
| |
| |data-sort-value=102|[[Piranha Plants on Parade]]
| |
| |data-sort-value=810|[[The Final-Final Test Badge Marathon]]
| |
| |—
| |
| |-
| |
| |data-sort-value=BigP style="background:white"|[[File:SMBW Big Piranha Plant.png|100x100px]]<br>[[Big Piranha Plant]]
| |
| |align=left|The giant Piranha Plants occur inside [[Warp Pipe|giant pipes]], in which they behave like the normal-sized ones. In some areas, they are rooted to the ground and snap from side to side. Big Piranha Plants take three hits from [[fireball]]s to defeat.
| |
| |data-sort-value=102|[[Piranha Plants on Parade]]
| |
| |data-sort-value=808|[[The Semifinal Test Piranha Plant Reprise]]
| |
| |—
| |
| |-
| |
| |data-sort-value=TrotP style="background:white"|[[File:SMBW Singing Piranha Plants Artwork.png|100x100px]]<br>[[Trottin' Piranha Plant]]
| |
| |align=left|Walking Piranha Plants that exit their pipes to pursue Mario. Some even enter other pipes or walk along ceilings. Trottin' Piranha Plants sing and dance in unison during certain Wonder Effects.
| |
| |data-sort-value=102|[[Piranha Plants on Parade]]
| |
| |data-sort-value=808|[[The Semifinal Test Piranha Plant Reprise]]
| |
| |{{icon|new}}
| |
| |-
| |
| |data-sort-value=BigT style="background:white"|[[File:SMBW Big Trottin' Piranha Plant.png|100x100px]]<br>[[Big Trottin' Piranha Plant]]
| |
| |align=left|Big Trottin' Piranha Plants take three strikes from fireballs to be defeated, like stationary Big Piranha Plants. They otherwise behave like normal-sized Trottin' Piranha Plants, but emerge from and retreat into giant pipes.
| |
| |data-sort-value=102|[[Piranha Plants on Parade]]
| |
| |data-sort-value=808|[[The Semifinal Test Piranha Plant Reprise]]
| |
| |{{icon|new}}
| |
| |-
| |
| |data-sort-value=Mel style="background:white"|[[File:Melon Piranha.png|100x100px]]<br>[[Melon Piranha Plant]]
| |
| |align=left|Piranha Plants that look like [[watermelon]]s. They spit seeds that damage Mario, but they can be jumped on without taking damage. This allows Mario to cross large gaps or ascend tall platforms. Yoshis can eat and spit the seeds back at them and other enemies. Melon Piranha Plants are otherwise defeated when stomped.
| |
| |data-sort-value=207|[[Countdown to Drop Down]]
| |
| |data-sort-value=810|[[The Final-Final Test Badge Marathon]]
| |
| |{{icon|new}}
| |
| |-
| |
| |data-sort-value=FirP style="background:white"|[[File:SMBW Screenshot Fire Piranha.png|100x100px]]<br>[[Fire Piranha Plant]]
| |
| |align=left|Piranha Plants that spit fireballs. They emerge from pipes and aim their heads towards Mario's position before firing. Some Fire Piranha Plants spit multiple fireballs at once.
| |
| |data-sort-value=501|[[Upshroom Downshroom]]
| |
| |data-sort-value=808|[[The Semifinal Test Piranha Plant Reprise]]
| |
| |—
| |
| |-
| |
| |data-sort-value=BigF style="background:white"|[[File:Fire piranha big full.png|100x100px]]<br>[[Big Fire Piranha]]
| |
| |align=left|The giant Fire Piranha Plants are rooted to the earth and require three strikes from fireballs to defeat. They spit multiple fireballs at once.
| |
| |colspan=2 data-sort-value=501|[[Upshroom Downshroom]]
| |
| |—
| |
| |-
| |
| |data-sort-value=BonP style="background:white"|[[File:SMBW Bone Piranha.png|100x100px]]<br>[[Bone Piranha Plant]]
| |
| |align=left|Skeletal Piranhas. They behave like the living plants, but they are immune to fire. Bone Piranha Plants are heightened during the Wonder Effect in Fluff-Puff Peaks Palace.
| |
| |colspan=2 data-sort-value=210|[[Fluff-Puff Peaks Palace]]
| |
| |—
| |
| |-
| |
| |data-sort-value=TrotB style="background:white"|[[File:SMBW Trottin' Bone Piranha.png|100x100px]]<br>[[Trottin' Bone Piranha Plant]]
| |
| |align=left|Skeletal Trottin' Piranha Plants. Like the stationary ones, they are resistant to fireballs and heighten during their course's Wonder Effect.
| |
| |colspan=2 data-sort-value=210|[[Fluff-Puff Peaks Palace]]
| |
| |{{icon|new}}
| |
| |-
| |
| |data-sort-value=WonP style="background:white"|[[File:WonderPackunSMBW.png|100x100px]]<br>[[Wonder Packun]]
| |
| |align=left|Piranha Plants with thorned stalks that appeared after Bowser collects a [[Wonder Flower]] at the start of the game. They guard locked courses and can be eliminated by collecting enough [[Wonder Seed]]s, reverting them to normal Piranha Plants.
| |
| |data-sort-value=121|[[Badge House in Pipe-Rock Plateau]]
| |
| |data-sort-value=809|[[The Final Test Wonder Gauntlet]]
| |
| |{{icon|new}}
| |
| |-
| |
| |data-sort-value=Clo style="background:white"|[[File:CloudPiranhaSMBW.png|100x100px]]<br>[[Cloud Piranha]]
| |
| |align=left|Black, cloudy Piranha Plants that protect Castle Bowser and continuously swirl around him. One disappears once a [[Royal Seed]] is collected, and collecting all of the ones in the game makes Castle Bowser accessible.
| |
| |colspan=2 data-sort-value=700|[[Petal Isles]]
| |
| |{{icon|new}}
| |
| |-
| |
| |data-sort-value=Mun style="background:white"|[[File:MuncherSMBW.png|100x100px]]<br>[[Muncher]]
| |
| |align=left|Little Piranhas often found in large groups. Munchers are nearly invincible and make safe traversal unsafe for Mario. Yoshis are the only characters that can safely walk along them without touching a [[Super Star]]. Munchers are only defeated if struck by [[Red POW Block]]s.
| |
| |data-sort-value=708|[[Muncher Fields]]
| |
| |data-sort-value=810|[[The Final-Final Test Badge Marathon]]
| |
| |—
| |
| |-
| |
| |data-sort-value=Nip style="background:white"|[[File:SMBW Nipper.png|100x100px]]<br>[[Nipper Plant]]
| |
| |align=left|Young Piranha Plants that walk along floors, walls, and ceilings. Though physically similar to Munchers, Nipper Plants are weak to all means of attack.
| |
| |data-sort-value=708|[[Muncher Fields]]
| |
| |data-sort-value=718|[[KO Arena Petal Meddle]]
| |
| |—
| |
| |-
| |
| |data-sort-value=RedKT style="background:white"|[[File:SMBW screenshot Troopa red.png|100x100px]]<br>[[Koopa Troopa|Red Koopa Troopa]]
| |
| |align=left|Common turtle enemies that walk along the ground. When Koopa Troopas walk into each other, they knock their shells together before turning around as a way of saying "hello" to each other.<ref name=kai14/> Stomping Koopa Troopas makes them retreat into their [[Koopa Shell|shells]], which can be picked up and tossed along the ground as a projectile. Koopa Troopas with different colored shells have unique behaviors. The red-shelled ones turn around when the reach the edge of platforms.
| |
| |data-sort-value=103|[[Scram, Skedaddlers!]]
| |
| |data-sort-value=809|[[The Final Test Wonder Gauntlet]]
| |
| |—
| |
| |-
| |
| |data-sort-value=GreKT style="background:white"|[[File:SMBW screenshot Troopa green.png|100x100px]]<br>Green Koopa Troopa
| |
| |align=left|Green-shelled Koopa Troopas walk off edges at the end of platforms, but otherwise behave the same as the red-shelled ones.
| |
| |data-sort-value=205|[[Up 'n' Down with Puffy Lifts]]
| |
| |data-sort-value=602|[[Raarghs in the Ruins]]
| |
| |—
| |
| |-
| |
| |data-sort-value=Rol style="background:white"|[[File:SMBW screenshot Troopa pink.png|100x100px]]<br>[[Rolla Koopa]]
| |
| |align=left|Pink-shelled Koopa Troopas on roller skates. Rolla Koopas quickly skate along the ground and leap across gaps. They often occur in groups that skate together in the same direction.
| |
| |data-sort-value=106|[[Rolla Koopa Derby]]
| |
| |data-sort-value=809|[[The Final Test Wonder Gauntlet]]
| |
| |{{icon|new}}
| |
| |-
| |
| |data-sort-value=RedKP style="background:white"|[[File:SMBW screenshot Paratroopa red.png|100x100px]]<br>[[Koopa Paratroopa|Red Koopa Paratroopa]]
| |
| |align=left|Winged Koopa Troopas. Stomping Koopa Paratroopas makes them lose their wings and become normal Koopa Troopas. The red-shelled ones fly through the air in fixed patterns, often back-and-forth or up-and-down.
| |
| |data-sort-value=110|[[Sproings in the Twilight Forest]]
| |
| |data-sort-value=809|[[The Final Test Wonder Gauntlet]]
| |
| |—
| |
| |-
| |
| |data-sort-value=GreKP style="background:white"|[[File:SMBW screenshot Paratroopa green.png|100x100px]]<br>Green Koopa Paratroopa
| |
| |align=left|Green-shelled Koopa Paratroopas bounce along the ground in low arcs.
| |
| |data-sort-value=205|[[Up 'n' Down with Puffy Lifts]]
| |
| |data-sort-value=401|[[Armads on the Roll]]
| |
| |—
| |
| |-
| |
| |data-sort-value=Dry style="background:white"|[[File:SMBW Screenshot Dry Bones.png|100x100px]]<br>[[Dry Bones]]
| |
| |align=left|Undead Koopa Troopas that walk along the ground. Stomping Dry Bones causes them to collapse into a pile of bones for a brief period of time, but this does not defeat them. They are unfazed by fireballs. Yoshis can eat Dry Bones and spit projectile bones that take out other enemies.
| |
| |data-sort-value=112|[[Pipe-Rock Plateau Palace]]
| |
| |data-sort-value=608|[[Deep Magma Bog Palace]]
| |
| |—
| |
| |-
| |
| |data-sort-value=Shov style="background:white"|[[File:ShovaForeground.png|100x100px]]<br>[[Shova]]
| |
| |align=left|Burly [[Koopa (species)|Koopas]] in helmets and large gloves. Shovas push objects in the environment and contact with one head on simply pushes back Mario. Touching it anywhere else is damaging. The objects being pushed by Shovas can be pushed back against, often solving a puzzle in the level when it is shoved into a divot. For most attacks, Shovas take three hits to defeat.
| |
| |data-sort-value=107|[[Swamp Pipe Crawl]]
| |
| |data-sort-value=408|[[Secrets of Shova Mansion]]
| |
| |{{icon|new}}
| |
| |-
| |
| |data-sort-value=WonS style="background:white"|[[File:SMBW Screenshot Wonder Shova.png|100x100px]]<br>[[Wonder Shova]]
| |
| |align=left|A strong, invincible Shova that appears during a certain Wonder Effect. It pushes a gold [[Bowser Statue|Bowser statue]] from the left side of the course with the aide of normal Shovas. Unlike pushable walls, Mario cannot push back against the statue and must move rightward to avoid being crushed. Collecting a Wonder Seed makes the Wonder Shova disappear.
| |
| |colspan=2 data-sort-value=408|[[Secrets of Shova Mansion]]
| |
| |{{icon|new}}
| |
| |-
| |
| |data-sort-value=Ham style="background:white"|[[File:SMBW Screenshot Hammer Bro.png|100x100px]]<br>[[Hammer Bro]]
| |
| |align=left|Helmeted Koopas that toss [[hammer]]s. Hammer Bros often occur in pairs and leap between rows of platforms. Like the ''[[Super Mario Maker]]'' titles, Yoshis can eat Hammer Bros.
| |
| |data-sort-value=112|[[Pipe-Rock Plateau Palace]]
| |
| |data-sort-value=809|[[The Final Test Wonder Gauntlet]]
| |
| |—
| |
| |-
| |
| |data-sort-value=Snor style="background:white"|[[File:Sea Turtle Enemy.png|100x100px]]<br>[[Snortoise]]
| |
| |align=left|Finned Koopas similar to {{wp|pig-nosed turtle}}s. Snortoises swim swiftly underwater and turn around when they reach walls. On land, they slowly crawl. Like Koopa Troopas, stomping Snortoises make them recede into their shell and makes to available to be grabbed. Mario can swim faster with a Snortoise's shell in hand.
| |
| |data-sort-value=702|[[Robbird Cove]]
| |
| |data-sort-value=704|[[Downpour Uproar]]
| |
| |{{icon|new}}
| |
| |-
| |
| |data-sort-value=Lak style="background:white"|[[File:SMBW Screenshot Lakitu.png|100x100px]]<br>[[Lakitu]]
| |
| |align=left|[[Lakitu's Cloud|Cloud]]-riding Koopas. They closely follow Mario and toss Spiny Eggs at him from the top of the screen. If a Lakitu is stomped, its cloud becomes available to ride.
| |
| |data-sort-value=207|[[Countdown to Drop Down]]
| |
| |data-sort-value=613|[[Expert Badge Challenge Invisibility II]]
| |
| |—
| |
| |-
| |
| |data-sort-value=Lakt style="background:white"|[[File:Triple Lakitu enemy.png|100x100px]]<br>[[Lakitu trio]]<br>{{conjectural}}
| |
| |align=left|During certain Wonder Effects, a trio of Lakitus that share the same cloud appear in the background. They throw coins, power-ups, and [[Wonder Token]]s.
| |
| |data-sort-value=208|[[Cruising with Linking Lifts]]
| |
| |data-sort-value=803|[[Shining Falls Special Triple Threat Deluge]]
| |
| |{{icon|new}}
| |
| |-
| |
| |data-sort-value=SpinE style="background:white"|[[File:SMBW screenshot Spiny Egg.png|100x100px]]<br>[[Spiny Egg]]
| |
| |align=left|The retracted form of Spinies tossed by Lakitus. Spiny Eggs damage Mario on contact. When they make contact with the ground, they become Spinies.
| |
| |colspan=2 data-sort-value=207|[[Countdown to Drop Down]]
| |
| |—
| |
| |-
| |
| |data-sort-value=Spin style="background:white"|[[File:SMBW screenshot Spiny.png|100x100px]]<br>[[Spiny]]
| |
| |align=left|Spiked, stout Koopas. The spikes protect them from being jumped on and damage Mario on contact, but they are weak to indirect attacks like fireballs. Spinies walk off the edge of platforms like Green Koopa Troopas.
| |
| |data-sort-value=207|[[Countdown to Drop Down]]
| |
| |data-sort-value=601|[[Where the Rrrumbas Rule]]
| |
| |—
| |
| |-
| |
| |data-sort-value=Kam style="background:white"|[[File:Kamek SMBW Direct.png|100x100px]]<br>[[Kamek]]
| |
| |align=left|Bowser's adviser—a broom-riding [[Magikoopa]]. Kamek summons [[Airship|flying battleship]]s on the overworld map to inhibit Mario's progress. He otherwise appears in certain cutscenes with Bowser and [[Bowser Jr.]]
| |
| |data-sort-value=209|[[Fluff-Puff Peaks Flying Battleship]]
| |
| |data-sort-value=607|[[Deep Magma Bog Flying Battleship]]
| |
| |—
| |
| |-
| |
| |data-sort-value=Buz style="background:white"|[[File:SMBW Screenshot Buzzy Beetle.png|100x100px]]<br>[[Buzzy Beetle]]
| |
| |align=left|Cave-dwelling Koopas with shells that protect them from fire. Unlike other Koopas, Buzzy Beetles cannot be damaged by fireballs and safely walk through [[lava]]. Mario can hopped off their shells to avoid falling into lava.
| |
| |data-sort-value=602|[[Raarghs in the Ruins]]
| |
| |data-sort-value=606|[[Dragon Boneyard]]
| |
| |—
| |
| |-
| |
| |data-sort-value=Spik style="background:white"|[[File:Spike SMBW.png|100x100px]]<br>[[Spike]]
| |
| |align=left|Big-mouthed Koopas that spit [[Spike Ball]]s. Spikes remain still and are usually elevated above the ground. The Spike Balls they spit-up are indestructible and roll along the ground. During a particular Wonder Effect, the Spikes roll the Spike Balls in rhythm to the music.
| |
| |data-sort-value=108|[[Angry Spikes and Sinkin' Pipes]]
| |
| |data-sort-value=809|[[The Final Test Wonder Gauntlet]]
| |
| |—
| |
| |-
| |
| |data-sort-value=FirS style="background:white"|[[File:SMBW screenshot Fire Spike.png|100x100px]]<br>[[Fire Spike]]
| |
| |align=left| Red Spikes that spit balls of flame. Unlike normal Spikes, the balls tossed by Fire Spikes fly horizontally through the air.
| |
| |data-sort-value=605|[[Wavy Ride through the Magma Tube]]
| |
| |data-sort-value=616|[[KO Arena Magma Flare-Up]]
| |
| |{{icon|new}}
| |
| |-
| |
| |data-sort-value=Ske style="background:white"|[[File:SMBW Skedaddler.png|100x100px]]<br>[[Skedaddler]]
| |
| |align=left|Shelled squirrel-like creatures that frantically runaway from Mario when he is near. They fire large projectile seeds back at him as they skedaddle. These can be held by Yoshis and fired back. Skedaddlers do not run away if Mario has the [[Badge (Super Mario Bros. Wonder)#Expert Badges|Invisibility Expert Badge]] equipped.
| |
| |data-sort-value=103|[[Scram, Skedaddlers!]]
| |
| |data-sort-value=120|[[Wiggler Race Mountaineering!]]
| |
| |{{icon|new}}
| |
| |-
| |
| |data-sort-value=Bulr style="background:white"|[[File:BulrushArtworkWonder2.png|100x100px]]<br>[[Bulrush]]
| |
| |align=left|Herding [[dinosaur]]s in tracksuits. Bulrushes idly remain still until Mario is near, at which point they snort and charge at him. They destroy [[Hard Block|hard blocks]] in their path and leap at the end of upward [[slope]]s. Charging Bulrushes do not turn around if Mario leaps over them, and they are briefly stunned when they collide with indestructible terrain. Their backs can be safely stood on like platforms and used to reach otherwise inaccessible areas. Bulrushes appear on the savanna portion of the [[Pipe-Rock Plateau]] overworld, grazing.
| |
| |data-sort-value=104|[[Bulrush Coming Through!]]
| |
| |data-sort-value=413|[[Expert Badge Challenge Invisibility I]]
| |
| |{{icon|new}}
| |
| |-
| |
| |data-sort-value=WonBu style="background:white"|[[File:SMBW Screenshot Wonder Bulrush Herd.png|100x100px]]<br>[[Wonder Bulrush herd]]
| |
| |align=left|Nine Wonder Bulrushes stampede from the left side of the screen during certain Wonder Effects. Unlike normal Bulrushes, Wonder Bulrush herds are constantly on the the move and travel in predetermined paths, so they do not collide with walls. They are invincible and take out portions of the terrain as the run. Mario can reach secret areas and avoid oncoming hazards by standing on their backs.
| |
| |data-sort-value=104|[[Bulrush Coming Through!]]
| |
| |data-sort-value=714|[[The Final Battle! Bowser's Rage Stage]]
| |
| |{{icon|new}}
| |
| |-
| |
| |data-sort-value=Hop style="background:white"|[[File:SMBW Hoppo.png|100x100px]]<br>[[Hoppo]]
| |
| |align=left|Round-bodied hippopotamuses found on Pipe-Rock Plateau. Hoppos idly walk across the ground and unlike most enemies, they do not damage Mario on contact. Touching them instead causes them to roll along the ground. In most areas, they ultimately roll between gaps in the terrain and become wedged. They can be bounced on like [[trampoline]]s to reach higher areas. In the Wonder Effect for [[Cosmic Hoppos]], they float in space and function like [[Bumper (Super Mario series)|bumper]]s.
| |
| |data-sort-value=105|[[Here Come the Hoppos]]
| |
| |data-sort-value=809|[[The Final Test Wonder Gauntlet]]
| |
| |{{icon|new}}
| |
| |-
| |
| |data-sort-value=WonH style="background:white"|[[File:SMBW screenshot Hoppo roll big.png|100x100px]]<br>[[Wonder Hoppo]]
| |
| |align=left|Giant Hoppos that appear during certain Wonder Effects. They perpetually roll along the ground on their own. In Here Come the Hoppos, a Wonder Hoppo necessary to reach the Wonder Seed.
| |
| |data-sort-value=105|[[Here Come the Hoppos]]
| |
| |data-sort-value=809|[[The Final Test Wonder Gauntlet]]
| |
| |{{icon|new}}
| |
| |-
| |
| |data-sort-value=Swir style="background:white"|[[File:SMBW screenshot Climby Snail.png|100x100px]]<br>[[Swirlypod]]
| |
| |align=left|Snail enemies that adhere to surfaces, found crawling along floors, walls, and ceilings. Similarly to Koopa Troopas, stomping Swirlypods send them flying from their [[Swirlypod Shell|shell]]s, which can be used as projectiles. Unshelled Swirlypods are left dazed and vulnerable. When they come to, they try to return to their shells if they are still on the ground.
| |
| |data-sort-value=104|[[Bulrush Coming Through!]]
| |
| |data-sort-value=502|[[Taily's Toxic Pond]]
| |
| |{{icon|new}}
| |
| |-
| |
| |data-sort-value=HefSw style="background:white"|[[File:SMBWScreenshotUnknownSnailEnemy.png|100x100px]]<br>[[Hefty Swirlypod]]
| |
| |align=left|Big Swirlypods. They function like the smaller ones, but their [[big shell|shell]]s are so big that they can only be picked up by [[Elephant Mario]].
| |
| |data-sort-value=107|[[Swamp Pipe Crawl]]
| |
| |data-sort-value=302|[[The Anglefish Trial: Ready, Aim, Fly!]]
| |
| |{{icon|new}}
| |
| |-
| |
| |data-sort-value=Spr style="background:white"|[[File:ExtendoSproing.png|100x100px]]<br>[[Sproing]]
| |
| |align=left|Goomba-like enemies that protract their springy bodies when approached by Mario. Sproings are typically shrouded in darkness, but their bodies are briefly illuminated under certain conditions. In these moments, it is revealed that they look like acorns.
| |
| |data-sort-value=110|[[Sproings in the Twilight Forest]]
| |
| |data-sort-value=809|[[The Final Test Wonder Gauntlet]]
| |
| |{{icon|new}}
| |
| |-
| |
| |data-sort-value=Rac style="background:white"|[[File:SMBW Screenshot Racing Wiggler.png|100x100px]]<br>[[Racing Wiggler]]
| |
| |align=left|A friendly [[Wiggler]]<ref name=portal/> that wears roller skates. The Racing Wiggler is Mario's opponent during Wiggler Races. The Racing Wiggler cannot directly touch Mario or any enemy in the Wiggler Race courses, and seems happy to give Mario the Wonder Seed if it loses.
| |
| |data-sort-value=120|[[Wiggler Race Mountaineering!]]
| |
| |data-sort-value=720|[[Wiggler Race Spelunking!]]
| |
| |{{icon|new}}
| |
| |-
| |
| |data-sort-value=Smo style="background:white"|[[File:SMBW screenshot Cloud Menace small.png|100x100px]]<br>[[Smogrin]]
| |
| |align=left|Grimacing storm clouds with trailing bodies. Smogrins hover back-and-forth or up-and-down. Stomping on their trailing clouds clears them, but Mario must stomp on their bodies to truly defeat them. Smogrins apparently aspire to become {{wp|cumulonimbus cloud}}s.<ref name=kai14/>
| |
| |data-sort-value=104|[[Bulrush Coming Through!]]
| |
| |data-sort-value=710|[[Missile Meg Mayhem]]
| |
| |{{icon|new}}
| |
| |-
| |
| |data-sort-value=HefSm style="background:white"|[[File:Big Mokumokumo.png|100x100px]]<br>[[Hefty Smogrin]]
| |
| |align=left|Larger Smogrins. They behave like the normal-sized ones, but they are not trailed by small clouds and move more slowly.
| |
| |data-sort-value=217|[[KO Arena Fluff-Puff Kerfuff]]
| |
| |data-sort-value=614|[[Expert Badge Challenge Spring Feet II]]
| |
| |{{icon|new}}
| |
| |-
| |
| |data-sort-value=BigS style="background:white"|[[File:SMBW screenshot Cloud Menace big.png|100x100px]]<br>[[Big Smogrin]]<ref>{{cite|author=kikai, Kimiyosu Hongo, Chimtaro, Hiromi Karakita (HQ), and Yamato Ishibashi|date=2023|title=『スーパーマリオブラザーズ ワンダー 完全攻略本』|language=ja|location=Tokyo|publisher=ambit|isbn=4-198657-69-6|page=42}}</ref><ref name=portal/>
| |
| |align=left|The largest Smogrins. Like Hefty Smogrins, Big Smogrins float slowly and lack trailing clouds.
| |
| |data-sort-value=217|[[KO Arena Fluff-Puff Kerfuff]]
| |
| |data-sort-value=614|[[Expert Badge Challenge Spring Feet II]]
| |
| |{{icon|new}}
| |
| |-
| |
| |data-sort-value=Cas style="background:white"|[[File:SMBW CastleBowser Render.png|100x100px]]<br>[[Castle Bowser]]
| |
| |align=left|[[Bowser]] after having fused with [[Prince Florian]]'s Flower Castle. Castle Bowser has trapped the inhabitants of the Flower Kingdom in small [[fortress]]es and has corrupted the region's palaces. The castle interior becomes accessible once all Royal Seeds have been collected, within which Castle Bowser releases a flurry of hazards and enemies. Castle Bowser is defeated once [[Wonder Bowser]] is defeated, who is at the apex of the castle.
| |
| |colspan=2 data-sort-value=800|[[Petal Isles]]
| |
| |{{icon|new}}
| |
| |-
| |
| |data-sort-value=Sma style="background:white"|[[File:UnknownFlounderEnemySMBW.png|100x100px]]<br>[[Smackerel]]
| |
| |align=left|{{wp|Flatfish}} that hide under sand on the seafloor. Smackerels rapidly swim upward with snapping jaws when Mario is detected above. They destroy blocks and defeat enemies in their path. Smackerels can only be stomped as the descend, when their white flank are facing the screen. Attempting to touch them otherwise damages Mario.
| |
| |colspan=2 data-sort-value=701|[[Leaping Smackerel]]
| |
| |{{icon|new}}
| |
| |-
| |
| |data-sort-value=WonS style="background:white"|[[File:Giga Smackerel.png|100x100px]]<br>[[Wonder Smackerel]]
| |
| |align=left|A giant Smackerel that appears during the Wonder Effect in Leaping Smackerel. The Wonder Smackerel chomps through large swaths of terrain and blocks, making certain parts of the course accessible. It disappears once the Wonder Seed is collected.
| |
| |colspan=2 data-sort-value=701|[[Leaping Smackerel]]
| |
| |{{icon|new}}
| |
| |-
| |
| |data-sort-value=Che style="background:white"|[[File:SMBW screenshot Cheep Cheep.png|100x100px]]<br>[[Cheep Cheep]]
| |
| |align=left|Pudgy red fish. Cheep Cheeps slowly swim through [[water]] in straight lines, even passing over solid terrain. During the Wonder Effect of Robbird Cove, some become stranded on land where they weakly flop in place. Unlike previous ''Super Mario'' games, Cheep Cheeps can be stomped underwater.
| |
| |data-sort-value=701|[[Leaping Smackerel]]
| |
| |data-sort-value=617|[[Search Party Item Park]]
| |
| |—
| |
| |-
| |
| |data-sort-value=Slu style="background:white"|[[File:SMBW screenshot Hidey Nudibranch.png|100x100px]]<br>[[Sluglug]]
| |
| |align=left|Spiked {{wp|nudibranch}} enemies that emerge from underwater pipes. Sluglugs must be struck five times to be fully defeated, but each hit forces them to incrementally recede into their pipes. They slowly reemerge if not defeated immediately and need to be struck again.
| |
| |data-sort-value=701|[[Leaping Smackerel]]
| |
| |data-sort-value=719|[[Wiggler Race Swimming!]]
| |
| |{{icon|new}}
| |
| |-
| |
| |data-sort-value=Rob style="background:white"|[[File:SMBWScreenshotUnknownDivingBirdEnemy.png|100x100px]]<br>[[Robbird]]
| |
| |align=left|Flying {{wp|kingfisher}} enemies that dive into water. They flyoff as they exit, taking any [[coin]]s they touched with them.
| |
| |colspan=2 data-sort-value=702|[[Robbird Cove]]
| |
| |{{icon|new}}
| |
| |-
| |
| |data-sort-value=Urc style="background:white"|[[File:SMBW Urchin.png|100x100px]]<br>[[Urchin]]
| |
| |align=left|Sea creatures covered in spines. While underwater, Urchins float in the water without moving. On land, they roll along the ground like balls. Direct contact with Urchins damages Mario, but indirect means of attack defeats them.
| |
| |data-sort-value=702|[[Robbird Cove]]
| |
| |data-sort-value=704|[[Downpour Uproar]]
| |
| |—
| |
| |-
| |
| |data-sort-value=Ble style="background:white"|[[File:SMBW Bubble Bird Enemy.png|100x100px]]<br>[[Blewbird]]
| |
| |align=left|Shelled bird enemies that fire beak-like arrows like {{wp|blowgun}}s. The arrows extend into platforms upon hitting opposing walls. When a Blewbird is defeated, another emerges from the ground to take its place.
| |
| |colspan=2 data-sort-value=703|[[Blewbird Roost]]
| |
| |{{icon|new}}
| |
| |-
| |
| |data-sort-value=WonBle style="background:white"|[[File:SMBW Screenshot Wonder Blewbird.png|100x100px]]<br>[[Wonder Blewbird]]
| |
| |align=left|Wonder Blewbirds blow streams of colorful [[bubble]]s instead of arrows. The bubbles serve as bouncy platforms that are often required in the courses with Wonder Blewbirds. The enemies disappear once a nearby Wonder Seed is a collected.
| |
| |data-sort-value=703|[[Blewbird Roost]]
| |
| |data-sort-value=809|[[The Final Test Wonder Gauntlet]]
| |
| |{{icon|new}}
| |
| |-
| |
| |data-sort-value=Out style="background:white"|[[File:SMBWscreenshotOutmaway.png|100x100px]]<br>[[Outmaway]]
| |
| |align=left|Masked snow creatures. Outmaways are often on top of elevated platforms, where they kick giant [[Ice Block]]s that emerge from generators in the ground before them. They otherwise occur walking along the ground and turn at the edge of platforms like Goombrats. Outmaways are weak to most attacks, but they kick projectile shells back the way they cam.
| |
| |data-sort-value=201|[[Outmaway Valley]]
| |
| |data-sort-value=507|[[A Final Uncharted Area: Poison Ruins]]
| |
| |{{icon|new}}
| |
| |-
| |
| |data-sort-value=GreP style="background:white"|[[File:SMBWScreenshotUnknownBoxingWiggler-likeEnemy.png|100x100px]]<br>[[Pokipede|Green Pokipede]]
| |
| |align=left|Wiggler-like centipedes that swiftly move along [[track]]s. Pokipedes punch as they move, clearing falling [[Snow Block (Super Mario Bros. Wonder)|Snow Block]]s. Stomping on their unarmored segment or tossing three fireballs at them defeats them. Touching any other part of a Pokipede damages Mario unless he is in his [[Drill Mario|Drill]] or Elephant forms.
| |
| |data-sort-value=202|[[Pokipede Pass]]
| |
| |data-sort-value=720|[[Wiggler Race Spelunking!]]
| |
| |{{icon|new}}
| |
| |-
| |
| |data-sort-value=RedP style="background:white"|[[File:Red pokipede.png|100x100px]]<br>Red Pokipede
| |
| |align=left|The red-clad Pokipedes move much more rapidly than the green ones.
| |
| |data-sort-value=202|[[Pokipede Pass]]
| |
| |data-sort-value=720|[[Wiggler Race Spelunking!]]
| |
| |{{icon|new}}
| |
| |-
| |
| |data-sort-value=Who style="background:white"|[[File:SMBWScreenshotUnknownOwlEnemy.png|100x100px]]<br>[[Whohoo]]
| |
| |align=left|Owl enemies that swoop down from upside-down nests. Whohoos destroy Snow Blocks as they fly and sometimes carry coins with them. If undefeated, they grow tired and return to their nests.
| |
| |colspan=2 data-sort-value=202|[[Pokipede Pass]]
| |
| |{{icon|new}}
| |
| |-
| |
| |data-sort-value=Cona style="background:white"|[[File:Melicondor.png|100x100px]]<br>[[Condart]]
| |
| |align=left|Hovering dart-like birds. When Mario crosses their line of sight, Condarts forcefully propel themselves at him, destroying [[Brick Block]]s in their path and lodging themselves into opposing terrain. While lodged, they are briefly immobile and vulnerable to attack. They either slam themselves into floors or walls, depending on the direction they face. Condarts apparently lose their memories on impact.<ref name=kai14/>
| |
| |data-sort-value=203|[[Condarts Away!]]
| |
| |data-sort-value=402|[[The Desert Mystery]]
| |
| |{{icon|new}}
| |
| |-
| |
| |data-sort-value=Zip style="background:white"|[[File:SMBW Screenshot Zip-Zap.png|100x100px]]<br>[[Zip-Zap]]
| |
| |align=left|Living bolts concealed in storm clouds. Zip-Zaps occur in groups. They leap vertically from the clouds in set intervals and shock Mario on contact. They are defeated only by bubbles.
| |
| |colspan=2 data-sort-value=208|[[Cruising with Linking Lifts]]
| |
| |{{icon|new}}
| |
| |-
| |
| |data-sort-value=Conr style="background:white"|[[File:HakandoruDry.jpg|100x100px]]<br>[[Condrop]]
| |
| |align=left|Helmeted birds that fly in straight horizontal lines. Condrops carry enemies or items as they travel. When Mario is detected below, they screech and drop them. Some Condrops have coins trailing after them.
| |
| |data-sort-value=208|[[Cruising with Linking Lifts]]
| |
| |data-sort-value=809|[[The Final Test Wonder Gauntlet]]
| |
| |{{icon|new}}
| |
| |-
| |
| |data-sort-value=Bob style="background:white"|[[File:SMBW Bob-omb.png|100x100px]]<br>[[Bob-omb]]
| |
| |align=left|Walking bombs. Stomps or tossed fireballs light their fuses and renders them immobile. They can be picked up and tossed to destroy objects and enemies, but they damage Mario if they go off in his hands.
| |
| |colspan=2 data-sort-value=209|[[Fluff-Puff Peaks Flying Battleship]]
| |
| |—
| |
| |-
| |
| |data-sort-value=Bab style="background:white"|[[File:Firework-Bobomb.png|100x100px]]<br>[[Baboom]]
| |
| |align=left|Firework Bob-ombs composed of three segments. When struck, Babooms ignite. They discharge each body segment, one by one, into the sky. They explode at their apex, destroying [[crate]]s and defeating enemies in their blast radius. The fireworks do not damage Mario, and he can carry Babooms to direct them at desired targets.
| |
| |data-sort-value=209|[[Fluff-Puff Peaks Flying Battleship]]
| |
| |data-sort-value=616|[[KO Arena Magma Flare-Up]]
| |
| |{{icon|new}}
| |
| |-
| |
| |data-sort-value=Bulle style="background:white"|[[File:BulletBillMK8.png|100x100px]]<br>[[Bullet Bill]]
| |
| |align=left|Missiles fired from [[Bill Blaster]]s that fly horizontally. Bullet Bills are defeated by all means of attack.
| |
| |data-sort-value=209|[[Fluff-Puff Peaks Flying Battleship]]
| |
| |data-sort-value=808|[[The Semifinal Test Piranha Plant Reprise]]
| |
| |—
| |
| |-
| |
| |data-sort-value=See style="background:white"|[[File:SMBW Screenshot Seeker Bullet Bill.png|100x100px]]<br>[[Seeker Bullet Bill]]
| |
| |align=left|Bullet Bills that directly target Mario when he is near. Most Seeker Bullet Bills are fastened to terrain by their suction cup-like exhaust ports, bobbing back-and-forth in rhythm to the music as they wait for targets. They rapidly swing their arms and turn their heads to Mario's position before launching, flashing red. Once launched, Seeker Bullet Bills do not change their course of direction. When they collide with opposing terrain, they fasten themselves to it, positioned to launch back at Mario if he is within their sights. They can be damaged like normal Bullet Bills, but they can also be lured into [[Poison (obstacle)|poison swamps]]. There are rotating hexagonal objects in the ceiling that launch Seeker Bullet Bills like Bill Blasters.
| |
| |colspan=2 data-sort-value=712|[[Evade the Seeker Bullet Bills!]]
| |
| |{{icon|new}}
| |
| |-
| |
| |data-sort-value=BigS style="background:white"|[[File:Bigseeker.jpg|100x100px]]<br>[[Big Seeker Bullet Bill]]
| |
| |align=left|Big Seeker Bullet Bills. They have a bigger attack radius than the normal-sized ones, but otherwise behave the same way.
| |
| |colspan=2 data-sort-value=712|[[Evade the Seeker Bullet Bills!]]
| |
| |{{icon|new}}
| |
| |-
| |
| |data-sort-value=Bull'sEB style="background:white"|[[File:BullsEyeBillSMBW.png|100x100px]]<br>[[Bull's-Eye Billet Train]]
| |
| |align=left|Serpentine [[Bull's-Eye Bill]]s. While launched, Bull's-Eye Billet Trains directly target Mario and will change their course of direction mid-air to pursue him.
| |
| |colspan=2 data-sort-value=713|[[KnuckleFest Bowser's Blazing Beats]]
| |
| |{{icon|new}}
| |
| |-
| |
| |data-sort-value=Mis style="background:white"|[[File:SMBW Screenshot Missile Meg.png|100x100px]]<br>[[Missile Meg]]
| |
| |align=left|Long-bodied Bullet Bills launched from off-screen blasters. Missile Megs fly through the air horizontally. Their backs can be stood on like platforms, but contact immediately knocks them out and causes them to slowly descend. Mario loses a life if he does not get off by the time it descends past he boundary of the bottom screen.
| |
| |data-sort-value=710|[[Missile Meg Mayhem]]
| |
| |data-sort-value=810|[[The Final-Final Test Badge Marathon]]
| |
| |{{icon|new}}
| |
| |-
| |
| |data-sort-value=WonM style="background:white"|[[File:SMBW screenshot Blasted Bill.png|100x100px]]<br>[[Wonder Missile Meg]]
| |
| |align=left|During certain Wonder Effects, Wonder Missile Megs fly horizontally and do not lose altitude when stood on. Their exhaust is rainbow-colored.
| |
| |colspan=2 data-sort-value=710|[[Missile Meg Mayhem]]
| |
| |{{icon|new}}
| |
| |-
| |
| |data-sort-value=Hop style="background:white"|[[File:SMBW Hoppycat.png|100x100px]]<br>[[Hoppycat]]
| |
| |align=left|Spiked creatures that copy Mario's jumping movements, often ascending platforms with him or hopping out of pits. They otherwise compress their bodies and shiver in place, tracking Mario with their eyes. Hoppycats can be used to break blocks. The spikes on their back damage Mario on contact. Though not easily visible, the bottom of Hoppycats are lined with pointed teeth.
| |
| |data-sort-value=301|[[The Hoppycat Trial: Hop, Hop, and Awaaay]]
| |
| |data-sort-value=720|[[Wiggler Race Spelunking!]]
| |
| |{{icon|new}}
| |
| |-
| |
| |data-sort-value=WonH style="background:white"|[[File:Red Hoppycat screenshot.png|100x100px]]<br>[[Wonder Hoppycat]]
| |
| |align=left|A Hoppycat that jumps extremely high. Its body has turned orange due to rigorous training.<ref name=kai14/> Striking the Wonder Hoppycat releases a Wonder Flower.
| |
| |colspan=2 data-sort-value=303|[[The Midway Trial: Hop to It]]
| |
| |{{icon|new}}
| |
| |-
| |
| |data-sort-value=BigH style="background:white"|[[File:WonderEffectHoppycat.jpg|100x100px]]<br>[[Big Hoppycat]]
| |
| |align=left|Giant Hoppycats that appear during certain Wonder Effects. They jump straight through earth, destroying it. They are invincible to all means of attack and disappear once a nearby Wonder Seed is collected.
| |
| |data-sort-value=301|[[The Hoppycat Trial: Hop, Hop, and Awaaay]]
| |
| |data-sort-value=809|[[The Final Test Wonder Gauntlet]]
| |
| |{{icon|new}}
| |
| |-
| |
| |data-sort-value=Ang style="background:white"|[[File:AnglefishIdle.jpg|100x100px]]<br>[[Anglefish]]
| |
| |align=left|Tirangular fish that leap from water in high arcs when Mario is near. The arc of their jumps is dependent on Mario's position and conveyed by the light-blue glow of their flanks.
| |
| |colspan=2 data-sort-value=302|[[The Anglefish Trial: Ready, Aim, Fly!]]
| |
| |{{icon|new}}
| |
| |-
| |
| |data-sort-value=WonA style="background:white"|[[File:SMBW Screenshot Anglefish.png|100x100px]]<br>[[Wonder Anglefish]]
| |
| |align=left|In certain Wonder Effects, Anglefish shine green and fly through the air. Unlike most Wonder enemies, Wonder Anglefish are defeated when stomped and this provides Mario gives Mario a bigger boost than most other stomped enemies.
| |
| |data-sort-value=302|[[The Anglefish Trial: Ready, Aim, Fly!]]
| |
| |data-sort-value=809|[[The Final Test Wonder Gauntlet]]
| |
| |{{icon|new}}
| |
| |-
| |
| |data-sort-value=GreG style="background:white"|[[File:SMBW Screenshot Gamboo (Green).png|100x100px]]<br>[[Gamboo|Green Gamboo]]
| |
| |align=left|Walking bamboo enemies. Gamboos emerge from the ground and stack together to form towers. Individuals that can be picked up and tossed once stomped. During some Wonder Effects, Gamboos dance to the music. The green ones walk off the edge of platforms like Goombas and Green Koopa Troopas.
| |
| |data-sort-value=303|[[The Midway Trial: Hop to It]]
| |
| |data-sort-value=808|[[The Semifinal Test Piranha Plant Reprise]]
| |
| |{{icon|new}}
| |
| |-
| |
| |data-sort-value=PurG style="background:white"|[[File:TakeboPurple.png|100x100px]]<br>Purple Gamboo
| |
| |align=left|Purple-colored Gamboos turn around when the reach the edge of platforms.
| |
| |data-sort-value=303|[[The Midway Trial: Hop to It]]
| |
| |data-sort-value=809|[[The Final Test Wonder Gauntlet]]
| |
| |{{icon|new}}
| |
| |-
| |
| |data-sort-value=Gol style="background:white"|[[File:SMBW Screenshot Metal Gamboo (Gold).png|100x100px]]<br>[[Metal Gamboo|Gold Metal Gamboo]]
| |
| |align=left|Metal Gamboos are impervious to fire. When near an electric surge, they conduct the electricity for a brief period of time. Touching Metal Gamboos in this state damages Mario. The gold-rimmed ones walk off the edge of platforms.
| |
| |data-sort-value=710|[[Missile Meg Mayhem]]
| |
| |data-sort-value=713|[[KnuckleFest Bowser's Blazing Beats]]
| |
| |{{icon|new}}
| |
| |-
| |
| |data-sort-value=Sil style="background:white"|[[File:SMBW Screenshot Silver Metal Gamboo.png|100x100px]]<br>Silver Metal Gamboo
| |
| |align=left|The silver-rimmed Metal Gamboos turn around when the reach the edge of platforms.
| |
| |data-sort-value=710|[[Missile Meg Mayhem]]
| |
| |data-sort-value=713|[[KnuckleFest Bowser's Blazing Beats]]
| |
| |{{icon|new}}
| |
| |-
| |
| |data-sort-value=GreS style="background:white"|[[File:SMBW Screenshot Sugarstar (Green).png|100x100px]]<br>[[Sugarstar|Green Sugarstar]]
| |
| |align=left|Shimmering enemies similar to {{wp|konpeitō}}. Sugarstars appear in groups and move through the air in unison. Different groups move in different patterns and their paths can be tracked by the trailing streaks they leave in the sky. Sugarstars are temporarily reduced to undamaging black cores when struck, but they regenerate their crystalline exterior in a few seconds.
| |
| |data-sort-value=305|[[The Sugarstar Trial: Across the Night Sky]]
| |
| |data-sort-value=810|[[The Final-Final Test Badge Marathon]]
| |
| |{{icon|new}}
| |
| |-
| |
| |data-sort-value=PurS style="background:white"|[[File:SMBW Screenshot Sugarstar (Purple).png|100x100px]]<br>Purple Sugarstar
| |
| |align=left|The purple-colored Sugarstars are speedier than the green ones.
| |
| |data-sort-value=305|[[The Sugarstar Trial: Across the Night Sky]]
| |
| |data-sort-value=810|[[The Final-Final Test Badge Marathon]]
| |
| |{{icon|new}}
| |
| |-
| |
| |data-sort-value=Yel style="background:white"|[[File:Konk Direct.png|100x100px]]<br>[[Konk|Yellow Konk]]
| |
| |align=left|Thwomp-like enemies that follow Mario's movements. Yellow Konks slide along ceilings and slam down when he is detected below. They slowly rise back to the ceiling and can be used like rising [[lift]]s, but Mario will be crushed if he is still on top of them when the recollide with the ceiling. All Konks are indestructible.
| |
| |data-sort-value=705|[[Jewel-Block Cave]]
| |
| |data-sort-value=505|[[An Uncharted Area: Wubba Ruins]]
| |
| |{{icon|new}}
| |
| |-
| |
| |data-sort-value=Blu style="background:white"|[[File:Blue Konk.png|100x100px]]<br>Blue Konk
| |
| |align=left|The Blue Konks slide across the floor and thrust themselves skyward to strike Mario.
| |
| |data-sort-value=705|[[Jewel-Block Cave]]
| |
| |data-sort-value=505|[[An Uncharted Area: Wubba Ruins]]
| |
| |{{icon|new}}
| |
| |-
| |
| |data-sort-value=WonK style="background:white"|[[File:SMBW Screenshot Wonder Konk.png|100x100px]]<br>[[Wonder Konk]]
| |
| |align=left|A giant Yellow Konk that appears from during the Wonder Effect in Jewel-Block Cave. It crushes anything directly below it, including terrain, but it stalls briefly after breaking [[Rock Block]]s.
| |
| |colspan=2 data-sort-value=705|[[Jewel-Block Cave]]
| |
| |{{icon|new}}
| |
| |-
| |
| |data-sort-value=Arm style="background:white"|[[File:ArmadSMBW.png|100x100px]]<br>[[Armad]]
| |
| |align=left|Armadillo enemies that live in the [[Sunbaked Desert]]. They curl into a ball when Mario draws near and rapidly roll towards him. They also curl up when they reach a slope to roll downhill. Stomping Armads causes them to curl as well, which allows them to be picked up and tossed like a shell. They can be picked up and tossed. Some Armads are trailed by coins as they roll.
| |
| |data-sort-value=401|[[Armads on the Roll]]
| |
| |data-sort-value=804|[[Sunbaked Desert Special Pole Block Allure]]
| |
| |{{icon|new}}
| |
| |-
| |
| |data-sort-value=Pok style="background:white"|[[File:SMBW Pokey.png|100x100px]]<br>[[Pokey]]
| |
| |align=left|Segmented [[cactus]] enemies that shimmy back-and-forth across the ground. Pokeys are of varying heights, with some so tall that they are difficult to jump over. The damage Mario if he attempts to stomp them, but they are vulnerable to indirect attacks like fireballs, Elephant Mario's trunk, or Yoshi's tongue. Doing so knocks away individual segments, shortening them and making them easier to circumnavigate. Pokeys are defeated immediately when their heads are hit. During the Wonder Effect of Armads on the Roll, the speed of Pokeys rapidly increases.
| |
| |colspan=2 data-sort-value=401|[[Armads on the Roll]]
| |
| |—
| |
| |-
| |
| |data-sort-value=Mum style="background:white"|[[File:Mumsie.png|100x100px]]<br>[[Mumsy]]
| |
| |align=left|Mummy enemies enwrapped in loose cloth. The end of the cloth can be grabbed and pulled back to defeat them. Mumsies are of varying heights, with the tallest ones requiring the longest pulls to fully unfurl their bodies. They are otherwise difficult to defeat, with stomps, [[Ground Pound|ground pound]]s, and fireballs ineffective. When Mumsies reach the ends of platforms, they turn around.
| |
| |data-sort-value=402|[[The Desert Mystery]]
| |
| |data-sort-value=804|[[Sunbaked Desert Special Pole Block Allure]]
| |
| |{{icon|new}}
| |
| |-
| |
| |data-sort-value=Rev style="background:white"|[[File:SMBWScreenshotUnknownWheelChainLeashDryBones-likeEnemy.png|100x100px]]<br>[[Revver]]
| |
| |align=left|Skeletal dog-like enemies on wheels. Their chain leash is grabbable, and pulling back on it sends Revvers rolling forward like {{wp|pullback motor|pullback motor toys}}. They are defeated when they collide with a wall or obstacle. Stomping on one otherwise stuns it for a brief period of time.
| |
| |data-sort-value=403|[[Rolling-Ball Hall]]
| |
| |data-sort-value=604|[[Hot-Hot Hot!]]
| |
| |{{icon|new}}
| |
| |-
| |
| |data-sort-value=Nin style="background:white"|[[File:SMBW Ninji.png|96px]]<br>[[Ninji]]
| |
| |align=left|Impish ninja enemies that hop up and down. Ninjis are weak to all means of attack. During certain Wonder Effects, they dance and hop in rhythm to the background music.
| |
| |data-sort-value=404|[[Ninji Jump Party]]
| |
| |data-sort-value=415|[[Break Time! Raise the Stage]]
| |
| |—
| |
| |-
| |
| |data-sort-value=GreB style="background:white"|[[File:SMBWBLOOMP.png|100x100px]]<br>[[Bloomp|Green Bloomp]]
| |
| |align=left|{{wp|Balloonfish}} enemies that fly through the sky. Bloomps are inflated by [[Būsuke Hōdai|blaster-like turrets]] before release. Mario can bounce on their back to reach distant areas, but each bounce makes the ridden Bloomp deflate a little until eventually disappearing. Striking Bloomps from below immediately defeats them.
| |
| |data-sort-value=405|[[Bloomps of the Desert Skies]]
| |
| |data-sort-value=810|[[The Final-Final Test Badge Marathon]]
| |
| |{{icon|new}}
| |
| |-
| |
| |data-sort-value=PurB style="background:white"|[[File:SMBW Screenshot Bloomp (Purple).jpg|100x100px]]<br>Purple Bloomp
| |
| |align=left|The Purple Bloomps fly faster than the green ones. Other colored varieties appear during certain Wonder effects.
| |
| |data-sort-value=405|[[Bloomps of the Desert Skies]]
| |
| |data-sort-value=810|[[The Final-Final Test Badge Marathon]]
| |
| |{{icon|new}}
| |
| |-
| |
| |data-sort-value=WonBlo style="background:white"|[[File:SMBW Screenshot Wonder Bloomp.png|100x100px]]<br>[[Wonder Bloomp]]
| |
| |align=left|Big Green Bloomps filled with confetti. Mario bounces on Wonder Bloomps during certain Wonder Effects, but they do not deflate. Wonder Bloomps disappear when a nearby Wonder Seed is collected.
| |
| |data-sort-value=409|[[Flight of the Bloomps]]
| |
| |data-sort-value=804|[[Sunbaked Desert Special Pole Block Allure]]
| |
| |{{icon|new}}
| |
| |-
| |
| |data-sort-value=Snoo style="background:white"|[[File:Snootle.png|100x100px]]<br>[[Snootle]]
| |
| |align=left|Tumbling creatures that bounce around the immediate area. Some Snootles bounce Goombas around.
| |
| |colspan=2 data-sort-value=406|[[Valley Fulla Snootles]]
| |
| |{{icon|new}}
| |
| |-
| |
| |data-sort-value=BigS style="background:white"|[[File:SMBW Big Snootle.png|100x100px]]<br>[[Big Snootle]]
| |
| |align=left|A large Snootle that withholds a [[10-flower coin]]. It otherwise behaves like normal-sized Snootles.
| |
| |colspan=2 data-sort-value=406|[[Valley Fulla Snootles]]
| |
| |{{icon|new}}
| |
| |-
| |
| |data-sort-value=Ser style="background:white"|[[File:SnakePotWonder.png|100x100px]][[File:TsubochanWonder.png|100x100px]]<br>[[Serpont]]
| |
| |align=left|Little snakes with [[jar]]s on their heads. Serponts slowly slither while their heads are covered. Striking them breaks their pots, exposing their heads and enabling them to move quickly.
| |
| |data-sort-value=407|[[Color-Switch Dungeon]]
| |
| |data-sort-value=420|[[KO Arena Sunbaked Skirmish]]
| |
| |{{icon|new}}
| |
| |-
| |
| |data-sort-value=Li'lP style="background:white"|[[File:Lil' Sparky SMBW.png|100x100px]]<br>[[Li'l Sparky]]
| |
| |align=left|Energized balls of fire that tightly roll around platforms. They illuminate the space around them and damage Mario on contact. Li'l Sparkies can only be defeated by indirect means of attack, but fireballs pass right through them.
| |
| |data-sort-value=407|[[Color-Switch Dungeon]]
| |
| |data-sort-value=810|[[The Final-Final Test Badge Marathon]]
| |
| |—
| |
| |-
| |
| |data-sort-value=Hot style="background:white"|[[File:Hothead SMBW.png|100x100px]]<br>[[Hothead]]
| |
| |align=left|Big Sparkies. Hotheads move more slowly than Li'l Sparkies, but they also have larger [[:MarioWiki:Glossary#H|hitboxes]] and illuminate a larger amount of space.
| |
| |data-sort-value=407|[[Color-Switch Dungeon]]
| |
| |data-sort-value=810|[[The Final-Final Test Badge Marathon]]
| |
| |—
| |
| |-
| |
| |data-sort-value=RifM style="background:white"|[[File:DarkMarioScreenshot.png|100x100px]]<br>[[Rift Mario]]
| |
| |align=left|A shadowy doppelgänger that mimics Mario's movement during certain Wonder Effects. In multiplayer, Rift Mario chases the player character with the crown. It can be temporarily stunned by fireballs and nearby [[Wonder POW Block]]s. It disappears when the Wonder Seed is touched, but it can be permanently defeated beforehand if struck by fireballs fifty times.
| |
| |data-sort-value=407|[[Color-Switch Dungeon]]
| |
| |data-sort-value=504|[[Beware of the Rifts]]
| |
| |{{icon|new}}
| |
| |-
| |
| |data-sort-value=RifK style="background:white"|[[File:Dark Nokonoko.png|100x100px]]<br>[[Rift Koopa]]
| |
| |align=left|Dark entities that look like Koopa Troopas. They appear during the Wonder Effect in Beware of the Rifts and damage Mario on contact. Like Rift Mario, Rift Koopas disappear when the Wonder Seed is grabbed.
| |
| |colspan=2 data-sort-value=504|[[Beware of the Rifts]]
| |
| |{{icon|new}}
| |
| |-
| |
| |data-sort-value=Thw style="background:white"|[[File:ThwompSMBW.png|100x100px]]<br>[[Thwomp]]
| |
| |align=left|Grimacing stones. Thwomps suspend themselves above ground and slam into the earth below when they detect Mario underneath. Crushing him makes him lose a live. Directly touching Thwomps, even grounded ones, is damaging. They are invincible to all attacks.
| |
| |data-sort-value=410|[[Sunbaked Desert Palace]]
| |
| |data-sort-value=807|[[Petal Isles Special Way of the Goomba]]
| |
| |—
| |
| |-
| |
| |data-sort-value=Shoo style="background:white"|[[File:Baby Thwomp (short).png|100x100px]]<br>[[Shoomp]]
| |
| |align=left|Enemies that look like baby Thwomps. They occur on terrain that rocks back and forth, causing their spiked bodies to slide left and right. Contact with their sides damages Mario, and being between them and a wall makes him lose a life. Their tops are harmless and can be stood on like platforms. The swaying ruins apparently are invocative of a rocking cradle for Shoomps.<ref name=kai13>{{cite|author=Kai, editor|date=26 Jan. 2024|url=www.nintendo.com/jp/topics/article/f6d2505a-dd79-410d-b350-b2b2036213f0|title=マリオたちの行く手を阻む。フラワー王国の個性豊かな敵キャラクターをご紹介。~その1~【ワンダーの世界へ Vol.13】|publisher=Nintendo Official Site|language=ja|accessdate=11 Jul. 2024}}</ref>
| |
| |colspan=2 data-sort-value=506|[[Another Uncharted Area: Swaying Ruins]]
| |
| |{{icon|new}}
| |
| |-
| |
| |data-sort-value=Shoo style="background:white"|[[File:Baby Thwomp (long).png|100x100px]]<br>[[Big Shoomp]]
| |
| |align=left|Long-bodied Shoomps. Some of them are interlocked to form broad, shifting platforms in the swaying ruins.
| |
| |colspan=2 data-sort-value=506|[[Another Uncharted Area: Swaying Ruins]]
| |
| |{{icon|new}}
| |
| |-
| |
| |data-sort-value=Mec style="background:white"|[[File:MechakoopaSMBW.png|100x100px]]<br>[[Mechakoopa]]
| |
| |align=left|Toy Koopas modeled after Bowser. Mechakoopas walk back and forth on platforms, turning at ledges. Stomping on them makes them collapse briefly. They can be picked up and tossed in this state. Mechakoopas are created by [[Mecha Maker]]s in the hearts of battleships.
| |
| |colspan=2 data-sort-value=709|[[Petal Isles Flying Battleship]]
| |
| |—
| |
| |-
| |
| |data-sort-value=Fly style="background:white"|[[File:Flying Mechakoopa.png|100x100px]]<br>[[Flying Mechakoopa]]
| |
| |align=left|Airborne Mechakoopas. They ascend from the bottom screen until they match Mario's position, then directly pursue him. Flying Mechakoopas conduct nearby electricity and make them briefly damaging to touch. Stomping them makes them collapse on the ground and usable as a projectile, like their grounded counterparts.
| |
| |data-sort-value=607|[[Deep Magma Bog Flying Battleship]]
| |
| |data-sort-value=711|[[High-Voltage Gauntlet]]
| |
| |{{icon|new}}
| |
| |-
| |
| |data-sort-value=Tai style="background:white"|[[File:Taily.png|100x100px]]<br>[[Taily]]
| |
| |align=left|{{wp|Pitcher plant}} enemies that stand on the ceiling with vines hanging down. Tailies periodically release spiked fruits that damage Mario on contact. Mario can defeat them by pulling their vines or by striking them from above in his [[Drill Mario|Drill form]]. [[:File:SMBW Taily's Toxic Pond Wonder Effect.jpg|Yellow, red, and blue Tailies]] appear during the Wonder Effect of Taily's Toxic Pond, with each one corresponding to the answers to a quiz.
| |
| |data-sort-value=502|[[Taily's Toxic Pond]]
| |
| |data-sort-value=511|[[KO Arena Fungi Funk]]
| |
| |{{icon|new}}
| |
| |-
| |
| |data-sort-value=Boo style="background:white"|[[File:Boo SMBW.png|100x100px]]<br>[[Boo]]
| |
| |align=left|Ghost enemies. Boos pursue Mario when his back is turned to them. They stop and shield their eyes when faced. Boos are unaffected by most normal attacks, but are weak to light. Turning on overhanging [[spotlight (object)|lamp]]s and luring them into the light defeats them. In the Wonder Effect of Light-Switch Mansion, Boos sing opera alongside their king.
| |
| |data-sort-value=503|[[Light-Switch Mansion]]
| |
| |data-sort-value=511|[[KO Arena Fungi Funk]]
| |
| |—
| |
| |-
| |
| |data-sort-value=Kin style="background:white"|[[File:SMBW King Boo.png|100x100px]]<br>[[King Boo]]
| |
| |align=left|The king of Boos. He appears during certain Wonder Effects, in which he takes up nearly the entire left-hand side of the screen and sings opera with a deep baritone voice. King Boo travels leftward with the camera following his movement, forcing Mario to move leftward or else risk being hit by him. King Boo is invincible, but the camera slows a bit if Mario turns to face him. He vanishes once a nearby Wonder Seed is collected.
| |
| |data-sort-value=503|[[Light-Switch Mansion]]
| |
| |data-sort-value=714|[[The Final Battle! Bowser's Rage Stage]]
| |
| |—
| |
| |-
| |
| |data-sort-value=Nok style="background:white"|[[File:SMBW Screenshot Door Enemy.png|100x100px]]<br>[[Noknok]]
| |
| |align=left|Monsters disguised as [[Warp Door|door]]s. Noknoks expose themselves and give chase when Mario tries to open them, an action accompanied by a fearful scream. Attacking them leaves them stunned and returns them to their door-like appearance. Some Noknoks can be used like normal doors in this state, but most release a [[coin]] and disappear when opened in this state. In the Wonder Effect of Light-Switch Mansion, Noknoks dance in place as the Boos sing.
| |
| |data-sort-value=503|[[Light-Switch Mansion]]
| |
| |data-sort-value=714|[[The Final Battle! Bowser's Rage Stage]]
| |
| |{{icon|new}}
| |
| |-
| |
| |data-sort-value=Wub style="background:white"|[[File:SMBW Screenshot Wubba.png|100x100px]]<br>[[Wubba]]
| |
| |align=left|Underground slimes. Wubbas slide back-and-forth and swim through larger bodies of [[goo]]. Some occur clinging to ceilings and walls. Few have coins in their bodies. Mario [[Wubba Mario|transforms into a Wubba]] during certain Wonder Effects.
| |
| |data-sort-value=505|[[An Uncharted Area: Wubba Ruins]]
| |
| |data-sort-value=511|[[KO Arena Fungi Funk]]
| |
| |{{icon|new}}
| |
| |-
| |
| |data-sort-value=Gna style="background:white"|[[File:WingChomps.png|100x100px]]<br>[[Gnawsher]]
| |
| |align=left|Metal spheres with wings and golden teeth. Gnawshers fly through the air in fixed horizontal or vertical paths, only stalling to eat certain objects that enter their proximity, including power-ups, coins, [[block]]s, and even other enemies. Their prominent teeth are apparently made of a special alloy that allows them to bite through hard blocks.<ref name=kai13/> Gnawshers are weak to all means of attack and take only one hit to defeat.
| |
| |colspan=2 data-sort-value=706|[[Gnawsher Lair]]
| |
| |{{icon|new}}
| |
| |-
| |
| |data-sort-value=WonG style="background:white"|[[File:SMBW Screenshot Wonder Gnawsher.png|100x100px]]<br>[[Wonder Gnawsher]]
| |
| |align=left|The black Gnawshers that appear during certain Wonder Effects appear in a large swarm. Unlike the normal ones, Wonder Gnawshers do not stall when they make contact with a consumable target and cannot be damaged. They are only stunned briefly when struck by [[Red POW Block]]s.
| |
| |data-sort-value=706|[[Gnawsher Lair]]
| |
| |data-sort-value=809|[[The Final Test Wonder Gauntlet]]
| |
| |{{icon|new}}
| |
| |-
| |
| |data-sort-value=Bull'sEG style="background:white"|[[File:RedGnawsher.png|100x100px]]<br>[[Bull's-Eye Gnawsher]]
| |
| |align=left|Red-bodied Gnawshers. Unlike the more numerous black ones, Bull's-Eye Gnawshers move idly through the air. They actively try to bite targets of interest that enter their vicinity, including coins, other enemies, and the player character.
| |
| |data-sort-value=706|[[Gnawsher Lair]]
| |
| |data-sort-value=616|[[KO Arena Magma Flare-Up]]
| |
| |{{icon|new}}
| |
| |-
| |
| |data-sort-value=Maw style="background:white"|[[File:MawmawIdle.jpg|100x100px]]<br>[[Maw-Maw]]
| |
| |align=left|{{wp|Giant salamander}} enemies that chase and eat anything and everything in their path, even other enemies. After chasing for a period of time, they become exhausted and stop. While in his [[Goomba Mario|Goomba form]], Mario can only avoid Maw-Maws by hiding behind shrubs.
| |
| |data-sort-value=707|[[Maw-Maw Mouthful]]
| |
| |data-sort-value=809|[[The Final Test Wonder Gauntlet]]
| |
| |{{icon|new}}
| |
| |-
| |
| |data-sort-value=Rrr style="background:white"|[[File:Rrrumba.png|100x100px]]<br>[[Rrrumba]]
| |
| |align=left|{{wp|Armadillidiidae|Pillbug}} enemies in [[boulder]]-like shells. Rrrumbas crawl on the ground until they reach a slope or see Mario, at which point they roll. They gain speed as the roll if they are on inclines, making them harder to avoid. Their shells protect them from most attacks, and attempting to stomp them simply sends them rolling. The only ways to defeat Rrrumbas is to ground pound them or strike them from below as Drill Mario. The cracks in the shells of some Rrrrumbas glow, indicating they contain items or Wonder Flowers.
| |
| |colspan=2 data-sort-value=601|[[Where the Rrrumbas Rule]]
| |
| |{{icon|new}}
| |
| |-
| |
| |data-sort-value=Raa style="background:white"|[[File:RaarghScreenshot.png|100x100px]]<br>[[Raargh]]
| |
| |align=left|Maned [[Blargg]]s that emerge from walls and ceilings. They roar and fling themselves in a straight line when Mario is in their line of sight. Raarghs fall apart when they collide with the opposing terrain, but new ones emerge to take their place after a few seconds. Raarghs are large and often the same width as the corridors in which they are encountered, making them difficult to avoid.
| |
| |colspan=2 data-sort-value=602|[[Raarghs in the Ruins]]
| |
| |{{icon|new}}
| |
| |-
| |
| |data-sort-value=LavBu style="background:white"|[[File:SMBW Screenshot Lava Bubble.png|100x100px]]<br>[[Lava Bubble]]
| |
| |align=left|Incandescent drops of lava that leap vertically from greater magma pools. Direct contact damages Mario. They are weak only to bubbles.
| |
| |colspan=2 data-sort-value=603|[[Pull, Turn, Burn]]
| |
| |—
| |
| |-
| |
| |data-sort-value=LavBl style="background:white"|[[File:Track-riding Lava Bubble.png|100x100px]]<br>[[Lava Blobble]]
| |
| |align=left|Large Lava Bubble-like enemies that ride on tracks. They are invincible to normal attacks, but can be destroyed by attacks from a [[Flying battleship (Wonder Effect)|flying battleship]] during a Wonder Effect.
| |
| |colspan=2 data-sort-value=607|[[Deep Magma Bog Flying Battleship]]
| |
| |{{icon|new}}
| |
| |-
| |
| |data-sort-value=Ker style="background:white"|[[File:SMBWScreenshotUnknownCorn KernelEnemy.png|100x100px]][[File:SMBW Screenshot Popcorn Enemy.png|100x100px]]<br>[[Kerpop]]
| |
| |align=left|Corn kernel enemies that slowly walk along the ground. When Kerpops make contact with heated sources like [[Hot-Hot Rock]]s they turn into bouncy pieces of popcorn that make them more difficult to avoid. Kerpops apparently give off a savory aroma in this state.
| |
| |data-sort-value=604|[[Hot-Hot Hot!]]
| |
| |data-sort-value=616|[[KO Arena Magma Flare-Up]]
| |
| |{{icon|new}}
| |
| |-
| |
| |data-sort-value=Li'lC style="background:white"|[[File:Fryguy-like Enemy.png|100x100px]]<br>[[Li'l Scorcher]]
| |
| |align=left|Enflamed enemies that spit slow-moving fireballs at Mario. Li'l Scorchers occur on floors and ceilings. Despite resembling flames, they can be safely stomped on to defeat them. They are also defeated when doused with water or struck by bubbles.
| |
| |colspan=2 data-sort-value=608|[[Deep Magma Bog Palace]]
| |
| |{{icon|new}}
| |
| |}
| |
|
| |
| ===Obstacles===
| |
| These are objects that primarily function as damaging hazards or obstructions. Obstacles that cause the conventional player characters to lose a life on contact, such as lava or poison swamps, affect Yoshis and Nabbit as well.
| |
| {|class="wikitable"style="width:100%;text-align:center"
| |
| |-style="color:white;background:red"
| |
| !rowspan=2 width=10%|Name
| |
| !rowspan=2|Description
| |
| !colspan=2|Levels
| |
| |-style="color:white;background:red"
| |
| !width=8%|First
| |
| !width=8%|Last
| |
| |-
| |
| |style="background:white"|[[File:Giant Note Piranha.png|100x100px]]<br>[[Big Note Piranha Plant]]<br>{{conjectural}}
| |
| |align=left|Big Note Piranha Plants are too large to be avoided through normal [[jump]]s and are invincible. During later phases of the battle, Big Note Piranha Plants fall the sky and break into the normal-sized ones when they collide with the floor.
| |
| |colspan=2|[[The Final Battle! Bowser's Rage Stage]]
| |
| |-
| |
| |style="background:white"|[[File:SMBW Bill Blaster.png|100x100px]]<br>[[Bill Blaster]]
| |
| |align=left|Turrets that fire [[Bullet Bill]]s. The direction they face determines the path of the fired Bullet Bills. Within certain Wonder Effects in [[Castle Bowser]], Bill Blasters fire Bullet Bills in rhythm with music. A hexagonal rotating object similar to Bill Blasters fires [[Seeker Bullet Bill]]s, and there apparently are unique types off-screen that launch [[Missile Meg]]s.<ref name=kai14/>
| |
| |[[Fluff-Puff Peaks Flying Battleship]]
| |
| |[[The Semifinal Test Piranha Plant Reprise]]
| |
| |-
| |
| |style="background:white"|[[File:SMBW Cannon.png|100x100px]]<br>[[Bob-omb Cannon]]
| |
| |align=left|[[Bob-omb]]-firing Mortars that look like small Bill Blasters. They are fastened to the tops of pushable walls.
| |
| |colspan=2|[[Fluff-Puff Peaks Flying Battleship]]
| |
| |-
| |
| |style="background:white"|[[File:SMBW Gold Bowser Statue.jpg|100x100px]]<br>[[Bowser Statue|Bowser statue]]
| |
| |align=left|Statues of Bowser that come in gold and gray variants. The gold one is pushed by a [[Wonder Shova]] during the Wonder Effect of Secrets of Shova Mansion, who tries to crush Mario with it. The stone ones appear on Bowser's Rage Stage where they block Mario's path until they are destroyed by a [[Wonder Bulrush herd]].
| |
| |[[Secrets of Shova Mansion]]
| |
| |[[The Final Battle! Bowser's Rage Stage]]
| |
| |-
| |
| |style="background:white"|[[File:SMBW Screenshot Bull's-Eye Blaster.png|100x100px]]<br>[[Bull's-Eye Blaster]]
| |
| |align=left|The red Bill Blasters that fire [[Bull's-Eye Billet Train]]s. Some are fastened to the ceiling upside down.
| |
| |colspan=2|[[KnuckleFest Bowser's Blazing Beats]]
| |
| |-
| |
| |style="background:white"|[[File:SMBW Screenshot Burner.png|100x100px]]<br>[[Burner]]
| |
| |align=left|Burners expel strong flames, typically in set intervals. They can safely be stood on when their flames are out. There are some double-barreled burners that spin in the air.
| |
| |colspan=2|[[Petal Isles Flying Battleship]]
| |
| |-
| |
| |style="background:white"|[[File:SMBW Screenshot Busuke Hodai.jpg|100x100px]]<br>[[Būsuke Hōdai]]<ref>{{cite|author=kikai, Kimiyosu Hongo, Chimtaro, Hiromi Karakita (HQ), and Yamato Ishibashi|date=2023|title=『スーパーマリオブラザーズ ワンダー 完全攻略本』|language=ja|location=Tokyo|publisher=ambit|isbn=4-198657-69-6|page=45}}</ref>
| |
| |align=left|The Bill Blaster-like turrets the blow-up Bloomps like balloons. During the Wonder Effect of Bloomps of the Desert Skies, a Būsuke Hōdai fires a Wonder Bloomp instead of the normal green or purple ones.
| |
| |[[Bloomps of the Desert Skies]]
| |
| |[[The Final-Final Test Badge Marathon]]
| |
| |-
| |
| |style="background:white"|[[File:SMBW Screenshot Electricity Block.jpg|100x100px]]<br>[[Electricity Block]]
| |
| |align=left|[[Block]]s that generate damaging electrical circuits. They always occur in pairs, where the currents come out in rapid intervals. While damaging, they are the only source of light in some courses. [[Metal Mario]] is impervious to the circuits of Electricity Blocks, and certain enemies conduct the electricity when they walk through it themselves. It makes them damaging to touch for a brief period of time.
| |
| |[[High-Voltage Gauntlet]]
| |
| |[[The Final-Final Test Badge Marathon]]
| |
| |-
| |
| |style="background:white"|[[File:SMBW Thundercloud.jpg|100x100px]]<br>[[Electricity Cloud]]<ref>''Super Mario Bros. Wonder'' internal filename (<tt>ObjectCloudElectricity.bfres.zs</tt>)</ref><ref name=kikai56>{{cite|author=kikai, Kimiyosu Hongo, Chimtaro, Hiromi Karakita (HQ), and Yamato Ishibashi|date=2023|title=『スーパーマリオブラザーズ ワンダー 完全攻略本』|language=ja|location=Tokyo|publisher=ambit|isbn=4-198657-69-6|page=56}}</ref>
| |
| |align=left|Small [[cloud (cover)|thundercloud]]s that damage Mario on contact. They appear only in the Wonder Effect of Downpour Uproar.
| |
| |colspan=2|[[Downpour Uproar]]
| |
| |-
| |
| |style="background:white"|[[File:Fire Bar SMBW.jpg|100x100px]]<br>[[Fire Bar]]
| |
| |align=left|Rotating bars of fireballs that burn Mario on contact. Fire Bars can be of varying lengths.
| |
| |[[Sunbaked Desert Palace]]
| |
| |[[The Final-Final Test Badge Marathon]]
| |
| |-
| |
| |style="background:white"|[[File:SMBW Screenshot Fire Knuckle.jpg|100x100px]]<br>[[Fire Knuckle]]<ref name=kikai56/>
| |
| |align=left|Fiery fists fastened to the ceilings and floors. They rapidly punch forward list pistons and can destroy blocks. During Wonder Effects, Fire Knuckles move in time with the beat of the background music.
| |
| |[[KnuckleFest Bowser's Blazing Beats]]
| |
| |[[The Final Battle! Bowser's Rage Stage]]
| |
| |-
| |
| |style="background:white"|[[File:Fiery Pinwheel-thing.png|100x100px]]<br>[[Fire Wheel]]<ref name=kikai56/>
| |
| |align=left|Spinning wheels of fire that travel along tracks. Their tracks are physically shifted by pulling nearby [[Handle (Super Mario Bros. Wonder)|handle]]s, but slowly move back to their original position.
| |
| |colspan=2|[[Pull, Turn, Burn]]
| |
| |-
| |
| |style="background:white"|[[File:SMBW Screenshot Fireball.jpg|100x100px]]<br>[[Fireball (obstacle)|Fireball]]
| |
| |align=left|Balls of flame that slowly travel through the air, often in groups of three or five. Fireballs sometimes materialize from streaks of Wonder power from corrupted palaces.
| |
| |[[Fluff-Puff Peaks Palace]]
| |
| |[[Deep Magma Bog Palace]]
| |
| |-
| |
| |style="background:white"|[[File:Robo-Bowser Head.png|100x100px]]<br>[[Flying battleship (Wonder Effect)]]
| |
| |align=left|During the Wonder Effects on [[Airship|flying battleship]]s, the figurehead of their bows disconnects and fires artillery from the background of the course. The blasts are strong enough to destroy terrain, [[Iron Block]]s, and otherwise indestructible enemies. The figureheads vanish when a nearby Wonder Seed is collected.
| |
| |[[Fluff-Puff Peaks Flying Battleship]]
| |
| |[[Deep Magma Bog Flying Battleship]]
| |
| |-
| |
| |style="background:white"|[[File:SMBW screenshot Giant Spiked Ball.png|100x100px]]<br>[[Giant Spiked Ball]]
| |
| |align=left|Giant, golden Spike-Balls that roll down [[slope]]s. A very large one appears during the Wonder Effect of Rolling Ball Hall, which much be outran. Collecting the course's Wonder Seed makes it disappear.
| |
| |[[Rolling-Ball Hall]]
| |
| |[[The Final Battle! Bowser's Rage Stage]]
| |
| |-
| |
| |style="background:white"|[[File:SMBW Screenshot Handle-controlled Burner.jpg|100x100px]]<br>[[Handle-controlled burner]]<br>{{conjectural}}
| |
| |align=left|Large burners whose flames recede when a corresponding handle is pulled. The flame returns after a few seconds when the handle is let go.
| |
| |colspan=2|[[Deep Magma Bog Flying Battleship]]
| |
| |-
| |
| |style="background:white"|[[File:SMBW Screenshot Honey.jpg|100x100px]]<br>[[Honey]]
| |
| |align=left|During the battle with [[Wonder Bowser Jr.]], he transforms the terrain into a sticky substance that reduces Mario's jump height and speed. Wonder Bowser Jr. himself swims through the honey.
| |
| |colspan=2|[[Fluff-Puff Peaks Palace]]
| |
| |-
| |
| |style="background:white"|[[File:SMBW Screenshot Hot-Hot Rock.jpg|100x100px]]<br>[[Hot-Hot Rock]]
| |
| |align=left|Craggy blocks that heat up in set intervals, generating damaging magma. Dowsing Hot-Hot Rocks with [[water]] cools them down early. They can be safely stood on and [[Wall Jump|wall-jumped]] between while cool. Like [[Atchi Muite Block]]s, they come in large and small sizes.
| |
| |[[Hot-Hot Hot!]]
| |
| |[[The Final-Final Test Badge Marathon]]
| |
| |-
| |
| |style="background:white"|[[File:SMBW Screenshot Ice.jpg|100x100px]]<br>[[Ice]]
| |
| |align=left|Frozen surfaces that reduce Mario's traction. Ice makes it difficult to make precise jumps and avoid oncoming hazards. [[Outmaway]]s are surefooted on ice.
| |
| |[[Outmaway Valley]]
| |
| |[[Fluff-Puff Peaks Palace]]
| |
| |-
| |
| |style="background:white"|[[File:SMBWLavaTide.png|100x100px]]<br>[[Lava]]
| |
| |align=left|Direct contact with lava causes Mario to lose a life. Some areas, particularly Deep Magma Bog, are completely covered in lava. During some Wonder Effects it appears as enclosed circles in the air that must be avoided. In [[Expert Badge Challenge Jet Run II]], the lava [[lava tide|rises like the tide]].
| |
| |[[Where the Rrrumbas Rule]]
| |
| |[[Deep Magma Bog Special Solar Roller]]
| |
| |-
| |
| |style="background:white"|[[File:SMBW Lava Geyser.jpg|100x100px]][[File:SMBW Poison Geyser.jpg|100px]]<br>[[Lava Geyser]]
| |
| |align=left|Lava Geysers rise and fall in set intervals that can be timed. [[Bone Lift (Super Mario Bros. Wonder)|Bone Lift]]s{{derived}} sit on top of some Lava Geysers. There are green equivalencies in the toxic ooze that appears in the game.
| |
| |colspan=2|[[Pull, Turn, Burn]]
| |
| |-
| |
| |style="background:white"|[[File:SMBW Screenshot Lightning.jpg|100x100px]]<br>[[Lightning (obstacle)|Lightning]]
| |
| |align=left|Lightning appears rapidly on the screen in set intervals during certain Wonder Effects. It is proceeded by faint outlines the bolts.
| |
| |[[Downpour Uproar]]
| |
| |[[The Final Test Wonder Gauntlet]]
| |
| |-
| |
| |style="background:white"|[[File:SMBW Bowser machine.png|100x100px]]<br>[[Mecha Maker]]
| |
| |align=left|The heart of the battleships that create [[Mechakoopa]]s and Bob-ombs. The red buttons on their tops causes them to malfunction and the battleships to self-destruct. Striking them completes flying battleship courses.
| |
| |[[Fluff-Puff Peaks Flying Battleship]]
| |
| |[[Deep Magma Bog Flying Battleship]]
| |
| |-
| |
| |style="background:white"|[[File:SMBW Screenshot Moving Torch.png|100x100px]]<br>[[Burner|Moving torch]]<ref>{{cite|author=Bueno, Fernando|date=2009|title=''New Super Mario Bros. Wii: PRIMA Official Game Guide''|location=Roseville|publisher=Prima Games|isbn=978-0-3074-6767-6|page=90}}</ref>
| |
| |align=left|Burners fastened to pivots on the floors and ceilings. They rotate back and forth.
| |
| |colspan=2|[[Petal Isles Flying Battleship]]
| |
| |-
| |
| |style="background:white"|[[File:SMBW Screenshot Note Piranha Plant.png|100x100px]]<br>[[Note Piranha Plant]]<br>{{conjectural}}
| |
| |align=left|Blazing Piranha Plants spit by [[Bowser]]. Their movement is in synch with the music of the battle and encourages rhythmic dodges from Mario. Note Piranha Plants are only defeated by strikes from [[Elephant Mario]] or tossed [[bubble]]s.
| |
| |colspan=2|[[The Final Battle! Bowser's Rage Stage]]
| |
| |-
| |
| |style="background:white"|[[File:SMBW Screenshot Piston.jpg|100x100px]]<br>[[Piston]]
| |
| |align=left|Giant compressors within the Fluff-Puff Peaks Flying Battleship. They rapidly slam down onto the ship's internal [[Conveyor Belt]].
| |
| |colspan=2|[[Fluff-Puff Peaks Flying Battleship]]
| |
| |-
| |
| |style="background:white"|[[File:PoisonTideSMBW.png|100x100px]][[File:PoisonTideGreenSMBW.png|100x100px]]<br>[[Poison (obstacle)|Poison swamp]]
| |
| |align=left|Toxic swamp waters that cause Mario to lose a life on contact. In addition to the purple swamp water, a similar green ooze appears in the game. In some courses, poison swamps have a [[poison tide|rising tide]].
| |
| |[[Swamp Pipe Crawl]]
| |
| |[[The Final Test Wonder Gauntlet]]
| |
| |-
| |
| |style="background:white"|[[File:SMBW Rift.jpg|100x100px]]<br>[[Rift]]
| |
| |align=left|A mysterious, vacuous material that distorts space in some courses. Rifts open up and reseal perceivable space as they shift through environments, but platforms and enemies that are overlaid by Rifts can still be interacted with. Direct contact damages Mario.
| |
| |[[Beware of the Rifts]]
| |
| |[[The Final Test Wonder Gauntlet]]
| |
| |-
| |
| |style="background:white"|[[File:SMBW Sand.png|100x100px]]<br>[[Soft sand|Sand]]
| |
| |align=left|The sands of the Sunbaked Desert reduce the height of Mario's jumps, making it difficult for him to avoid oncoming [[Armad]]s and other desert enemies.
| |
| |[[Armads on the Roll]]
| |
| |[[Sunbaked Desert Palace]]
| |
| |-
| |
| |style="background:white"|[[File:SwayingRuins Wonder.jpg|100x100px]]<br>Slime<br>{{conjectural}}
| |
| |align=left|The swaying ruins become coated with a slimy substance during the course's Wonder Effect. Mario slides along the top with no means of stopping until he collects a Wonder Seed.
| |
| |colspan=2|[[Another Uncharted Area: Swaying Ruins]]
| |
| |-
| |
| |style="background:white"|[[File:SMBW Screenshot Spike Ball.jpg|100x100px]]<br>[[Spike Ball|Spike-Ball]]
| |
| |align=left|Balls covered in damaging spikes. Spike-Balls roll down inclines and damage Mario on contact. During two Wonder Effects, he is [[Spike-Ball Mario|transformed into one]].
| |
| |[[Up 'n' Down with Puffy Lifts]]
| |
| |[[Petal Isles Special Way of the Goomba]]
| |
| |-
| |
| |style="background:white"|[[File:SMBW Screenshot Spike Trap.jpg|100x100px]]<br>[[Spike Trap]]
| |
| |align=left|Spikes that damage Mario on contact. The design of Spike Traps vary on the environment. They sometimes are laid on the floor of an area or are fastened to orbs suspended in the air.
| |
| |[[Bulrush Coming Through!]]
| |
| |[[The Final-Final Test Badge Marathon]]
| |
| |-
| |
| |style="background:white"|[[File:Spike Statue's Boulder.png|100x100px]]<br>[[Volcanic debris]]
| |
| |align=left|Enflamed boulders launched from a giant statue of a [[Fire Spike]] during the Wonder Effect of Wavy Ride through the Magma Tube. Volcanic debris falls slowly, but is indestructible and can only be avoided. Direct contact damages Mario.
| |
| |colspan=2|[[Wavy Ride through the Magma Tube]]
| |
| |}
| |
|
| |
| ===Bosses===
| |
| {|class="wikitable"style="width:100%;text-align:center"
| |
| |-style="color:white;background:red"
| |
| !rowspan=2 width=10%|Name
| |
| !rowspan=2|Description
| |
| !colspan=2|Levels
| |
| |-style="color:white;background:red"
| |
| !width=8%|First
| |
| !width=8%|Last
| |
| |-
| |
| |style="background:white"|[[File:SMBW Artwork Bowser Jr.png|100x100px]][[File:SMBW Artwork Wonder Bowser Jr.png|100x100px]]<br>[[Bowser Jr.]] / [[Wonder Bowser Jr.]]
| |
| |align=left|Bowser's son. He is the boss fought at the end of the [[castle|palace]] courses. Initially, Bowser Jr. appears as he normally does and attacks Mario by spitting fireballs and spinning along the ground in his shell. However, once struck, [[Castle Bowser]] uses his Wonder power to transform his son into Wonder Bowser Jr. In this form, Bowser Jr. utilizes various Wonder Effects to battle Mario that vary from course to course. In the first battle, Wonder Bowser Jr. and Mario grow and shrink in size, whereas in the second the terrain is turned cycles between slippery [[ice]] and sticky [[honey]]. During the third encounter, [[water]] appears to float through the air like a lava lamp. In the final encounter with Wonder Bowser Jr., he creates copies of himself and hops around in the [[dark]].
| |
| |[[Pipe-Rock Plateau Palace]]
| |
| |[[Deep Magma Bog Palace]]
| |
| |-
| |
| |style="background:white"|[[File:SMBW Screenshot Wonder Bowser.png|100x100px]]<br>[[Wonder Bowser]]<ref name=portal/>
| |
| |align=left|The apex of Castle Bowser and the form of [[Bowser]] that is directly fought. Wonder Bowser appears as the spire of the Flower Castle with disembodied hands. The arena he is fought in as rhythmic segments of the floor the launch Mario high into the air if he jumps in time with the beat of the course, allowing him to avoid oncoming hazards and strike the Koopa King. His weak point is the big [[! Switch]] beneath his chin. Wonder Bowser spits [[Note Piranha Plant]]s and drops disco ball-like [[Spike Ball|Spike-Ball]]s from his palms. Wonder Bowser takes three hits to fully defeat, and his means of attack become more complex with each strike. Beating him returns the Flower Castle to normal and frees the [[Flower Kingdom]] of his influence.
| |
| |colspan=2|[[The Final Battle! Bowser's Rage Stage]]
| |
| |} | | |} |
|
| |
|









![Squared screenshot of Sproing Mario[derived] from Super Mario Bros. Wonder.](https://mario.wiki.gallery/images/thumb/3/35/SMBW_Screenshot_Sproing_Mario.jpg/100px-SMBW_Screenshot_Sproing_Mario.jpg)




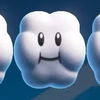





























 Pushable wall
![Squared screenshot of a the rhythm platform[conjectural] from Super Mario Bros. Wonder.](https://mario.wiki.gallery/images/thumb/c/ce/SMBW_Screenshot_Rhythm_Platform.png/100px-SMBW_Screenshot_Rhythm_Platform.png)
