|
|
| Line 1: |
Line 1: |
| =Mario Bros. House=
| |
| {|class=wikitable style="text-align:center"
| |
| !Item
| |
| !Image
| |
| !Location
| |
| !Location Image
| |
| |-
| |
| |[[Autograph]]
| |
| |[[File:Luigi's Autograph.png]]
| |
| |Given by [[Luigi]] while doing [[Koopa Koot]]'s fifth favor in ''Paper Mario''.
| |
| |[[File:Mario Bros. House (Autograph).png|250px]]
| |
| |}
| |
|
| |
| =Toad Town=
| |
| {|class=wikitable style="text-align:center"
| |
| !Item
| |
| !Image
| |
| !Location
| |
| !Location Image
| |
| |-
| |
| |[[Star Piece (Paper Mario series)|Star Piece]] (x12)
| |
| |[[File:PM StarPiece.gif]]
| |
| |<nowiki/>
| |
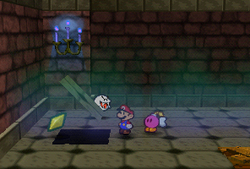
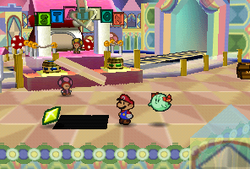
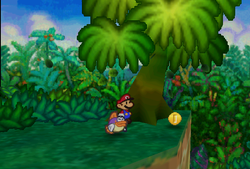
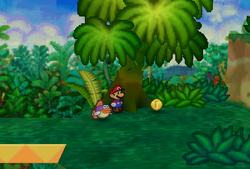
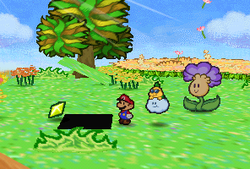
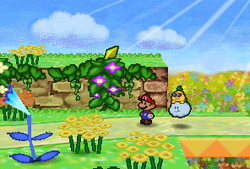
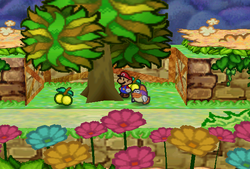
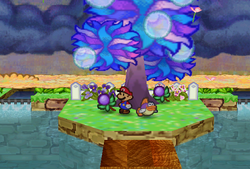
| *Inside a tree near the Toad Town notice board.
| |
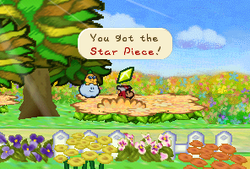
| *Given by [[Merlon]] after giving him a letter from [[Mt. Rugged]].
| |
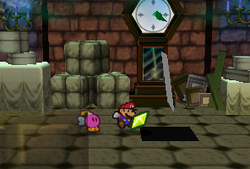
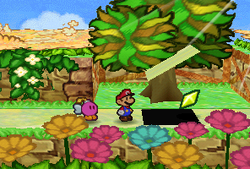
| *Under a hidden panel near the Dojo and by the Three Beautiful Sisters.
| |
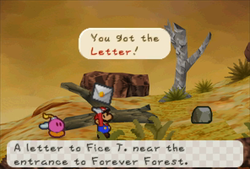
| *Under a hidden panel near where [[Fice T.]] guards [[Forever Forest]].
| |
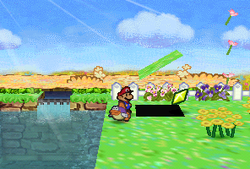
| *Under a hidden panel near the [[Dry Dry Railroad]], in the southeastern corner.
| |
| *Under a hidden panel in front of [[Club 64]].
| |
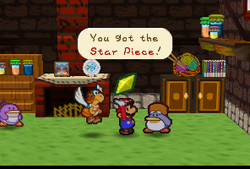
| *Given by [[Fice T.]] after giving him a letter in [[Gusty Gulch]].
| |
| *Two given by [[Russ T.]] after returning his [[Dictionary]] and a letter from [[Jade Jungle]].
| |
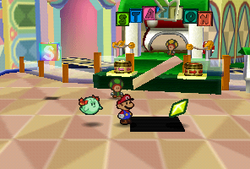
| *Given by the [[postmaster]] after giving him the [[Mailbag]].
| |
| *On ledge near the gate to Goomba Village (Requires [[Sushie]]).
| |
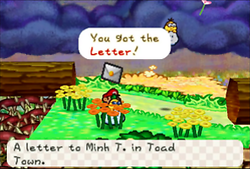
| *Given by [[Minh T.]] after giving her a letter from [[Flower Fields]].
| |
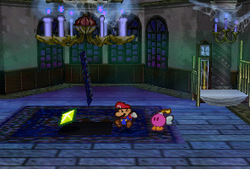
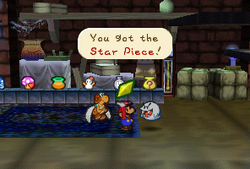
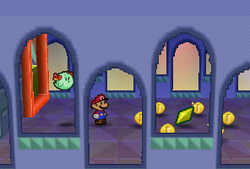
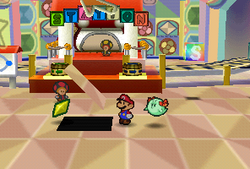
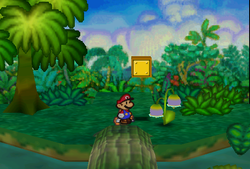
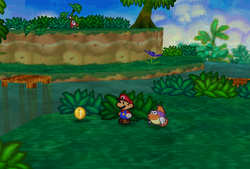
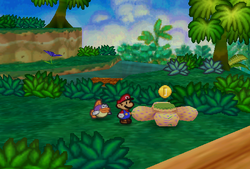
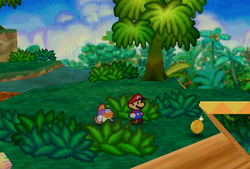
| |[[File:PM Star Piece ToadTownTree.png|250px]][[File:PM Star Piece Merlon.png|250px]][[File:PM Star Piece ToadTownSisters.png|250px]][[File:PM Star Piece ToadTownFicePanel.png|250px]][[File:PM Star Piece ToadTownRailroad.png|250px]][[File:PM Star Piece ToadTownDock.png|250px]][[File:PM Star Piece FiceT.png|250px]][[File:PM Star Piece RussT.png|250px]][[File:PM Star Piece Postmaster.png|250px]][[File:PM Star Piece ToadTownPond.png|250px]][[File:PM Star Piece MinhT.png|250px]]
| |
| |-
| |
| |[[Letter]] (x5)
| |
| |[[File:PM Letter Sprite.png]]
| |
| |<nowiki/>
| |
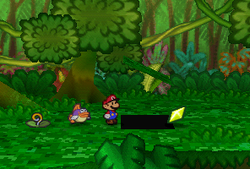
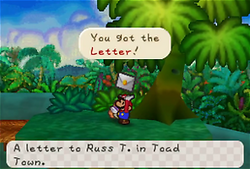
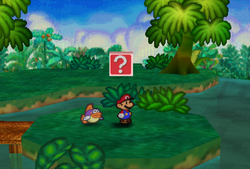
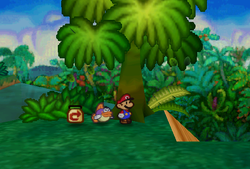
| *Given by [[Muss T.]] after giving him a letter from [[Goompapa]].
| |
| *Given by [[Fishmael]] after giving him a letter from [[Koover]].
| |
| *Given by [[Miss T.]] after giving her a letter from [[Mr. E (Paper Mario)|Mr. E]].
| |
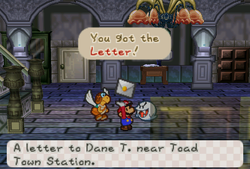
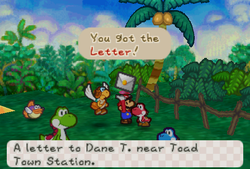
| *Given by [[Dane T.]] after giving him a letter from [[Franky]].
| |
| *Given by [[Dane T.]] after giving him a letter from the red Yoshi kid in [[Yoshi Village]]
| |
| |[[File:Toad Town (Letter 1).png|250px]][[File:Toad Town (Letter 2).png|250px]][[File:Toad Town (Letter 3).png|250px]][[File:Toad Town (Letter 4).png|250px]][[File:Toad Town (Letter 5).png|250px]]
| |
| |-
| |
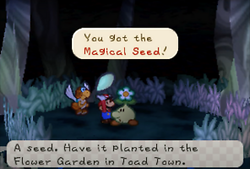
| |[[Magical Seed]]
| |
| |[[File:PM Magical Seed pink.png]]
| |
| |Given by the [[Bub-ulb]].
| |
| |[[File:Magical Seed 1 Shot.png|250px]]
| |
| |-
| |
| |[[Maple Syrup]]
| |
| |[[File:PaperMario Items MapleSyrup.png]]
| |
| |Given by the [[Trading Event Toad]] for participating in the first contest.
| |
| |[[File:Toad Town (Maple Syrup).png|250px]]
| |
| |-
| |
| |[[Yummy Meal]]
| |
| |{{PM item|Yummy Meal|text=}}
| |
| |Given by the Trading Event Toad for participating in the third contest.
| |
| |[[File:Toad Town (Yummy Meal).png|250px]]
| |
| |-
| |
| |[[Quick Change]]
| |
| |[[File:Quick Change Badge.png]]
| |
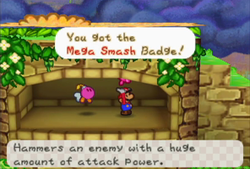
| |Inside [[Merlon]]'s place. Mario must [[Spin Jump]] three times to get this badge.
| |
| |[[File:Toad Town (Quick Change).png|250px]]
| |
| |-
| |
| |[[Attack FX D]]
| |
| |[[File:Attack FX D Badge.png]]
| |
| |Given by [[Pop Diva]] after finishing her errand.
| |
| |[[File:Attack FX D Club 64.png|250px]]
| |
| |-
| |
| |[[I Spy]]
| |
| |[[File:I-Spy Badge.png]]
| |
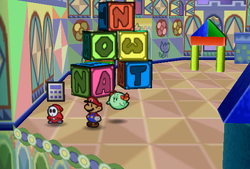
| |Given by [[Rowf]] after returning his [[Calculator]].
| |
| |[[File:I Spy Badge Reward PM.png|250px]]
| |
| |-
| |
| |[[Odd Key]]
| |
| |[[File:OddKey PM.png]]
| |
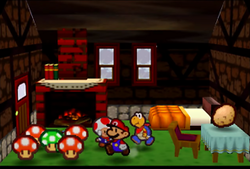
| |Found inside the house. Opens the other end of Toad Town Tunnels.
| |
| |[[File:Odd Key Toad Town.png|250px]]
| |
| |-
| |
| |[[Snowman Doll]]<br>[[Volt Mushroom|Volt Shroom]]<br>[[Toy Train]]<br>[[Dizzy Dial]]
| |
| |{{PM item|Snowman Doll|text=}} {{PM item|Volt Shroom|text=}} [[File:ToyTrain PM.png]] {{PM item|Dizzy Dial|text=}}
| |
| |Found in [[Harry (Paper Mario)|Harry]]'s storeroom.
| |
| |[[File:Toad Town (Harry's Shop Storeroom Items).png|250px]]
| |
| |-
| |
| |[[Lyrics]]
| |
| |[[File:Lyrics PM.png]]
| |
| |Given by [[Master Poet]] after taking Pop Diva's errand.
| |
| |[[File:Toad Town (Lyrics).png|250px]]
| |
| |-
| |
| |[[First-Degree Card]]
| |
| |[[File:First-DegreeCard PM.png]]
| |
| |Given by [[The Master]] at [[Toad Town Dojo]] after defeating [[Chan]].
| |
| |[[File:Toad Town (First-Degree Card).png|250px]]
| |
| |-
| |
| |[[Second-Degree Card]]
| |
| |[[File:Second-DegreeCard PM.png]]
| |
| |Given by The Master at Toad Town Dojo after defeating [[Lee]].
| |
| |[[File:Toad Town (Second-Degree Card).png|250px]]
| |
| |-
| |
| |[[Third-Degree Card]]
| |
| |[[File:Third-DegreeCard PM.png]]
| |
| |Given by The Master at Toad Town Dojo after defeating him the first time.
| |
| |[[File:Toad Town (Third-Degree Card).png|250px]]
| |
| |-
| |
| |[[Fourth-Degree Card]]
| |
| |[[File:Fourth-DegreeCard PM.png]]
| |
| |Given by The Master at Toad Town Dojo after defeating him the second time.
| |
| |[[File:Toad Town (Fourth-Degree Card).png|250px]]
| |
| |-
| |
| |[[Diploma]]
| |
| |[[File:Diploma.png]]
| |
| |Given by The Master at Toad Town Dojo after defeating him the third time.
| |
| |[[File:Toad Town (Diploma).png|250px]]
| |
| |-
| |
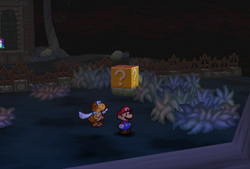
| |10 [[Coin]]s
| |
| |[[File:PMCoin.png]][[File:PMCoin.png]][[File:PMCoin.png]][[File:PMCoin.png]][[File:PMCoin.png]][[File:PMCoin.png]][[File:PMCoin.png]][[File:PMCoin.png]][[File:PMCoin.png]][[File:PMCoin.png]]
| |
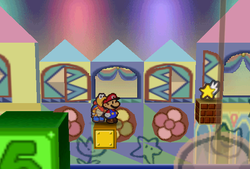
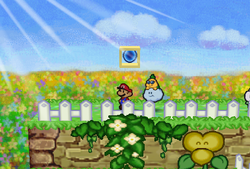
| |After gaining access to the rest of Toad Town, this block is found floating above wooden crates in the port.
| |
| |[[File:Toad Town Block.png|250px]]
| |
| |-
| |
| |[[Super Block]]
| |
| |[[File:PM Super Block Render.png]]
| |
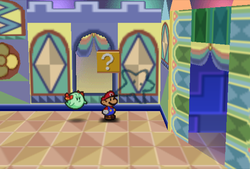
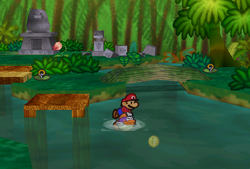
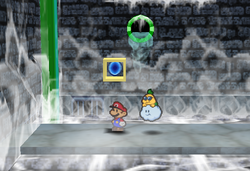
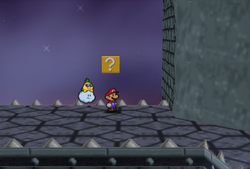
| |In the entrance of Toad Town, Mario must dive with [[Sushie]] and enter the pipe at the center of the pond in the south. The Super Block is at the end of the path below.
| |
| |[[File:PM Super Block ToadTown.png|250px]]
| |
| |}
| |
|
| |
| Additionally, [[Rowf and Rhuff]] have 16 badges to sell. Other items can be obtained from [[Shroom Grocery]], [[Harry (Paper Mario)|Harry]], [[Tayce T.]], and [[Li'l Oink]]s. Star Pieces can be obtained from [[Kolorado]] and [[Chuck Quizmo]] who have a chance to appear here.
| |
|
| |
| =Peach's Castle=
| |
| {|class=wikitable style="text-align:center"
| |
| !Item
| |
| !Image
| |
| !Location
| |
| !Location Image
| |
| |-
| |
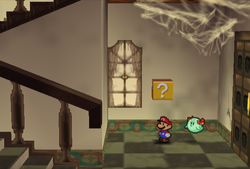
| |[[Life Mushroom (Paper Mario series)|Life Shroom]]
| |
| |{{PM item|Life Mushroom (Paper Mario series)|Life Shroom|text=}}
| |
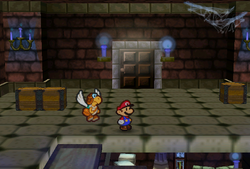
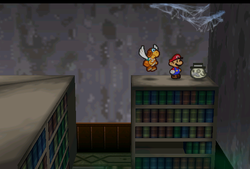
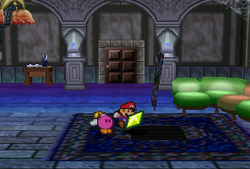
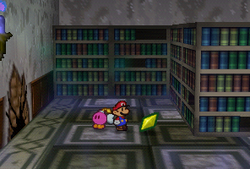
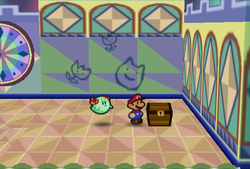
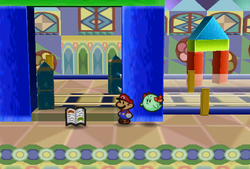
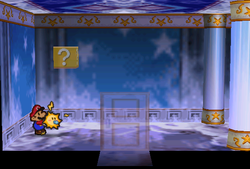
| |At the end of the corridor on the wall in the southwestern book room on the second floor (get it with Mario, using a pile of books to climb that high)
| |
| |[[File:Life Shroom Peach's Castle.png|250px]]
| |
| |-
| |
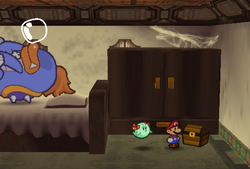
| |[[Last Stand]]
| |
| |[[File:Last Stand Badge.png]]
| |
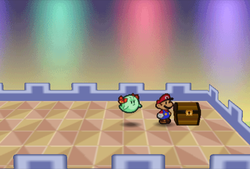
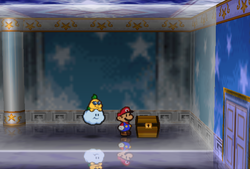
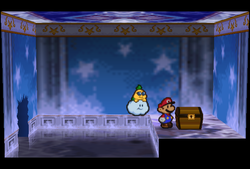
| |In a [[treasure chest]] in the room in the east room in the first floor.
| |
| |[[File:Princess Peach's Castle Treasure Chest.png|250px]]
| |
| |-
| |
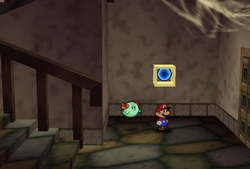
| |[[Deep Focus]]
| |
| |[[File:Deep Focus Badge.png]]
| |
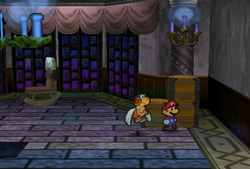
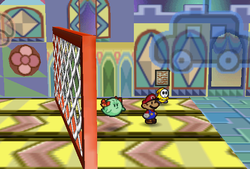
| |Next to the big treasure chest in the east room on the second floor.
| |
| |[[File:Deep Focus Peach's Castle.png|250px]]
| |
| |-
| |
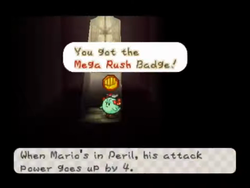
| |[[Power Rush]]
| |
| |[[File:Power Rush Badge.png]]
| |
| |In a corner in the southwestern book room on the second floor
| |
| |[[File:Power Rush Peach's Castle.png|250px]]
| |
| |}
| |
|
| |
| In addition, the following items are available only to Princess Peach.
| |
| {|class=wikitable style="text-align:center"
| |
| !Item
| |
| !Image
| |
| !Location
| |
| !Location Image
| |
| |-
| |
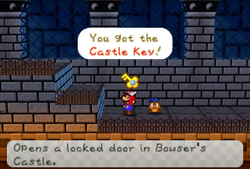
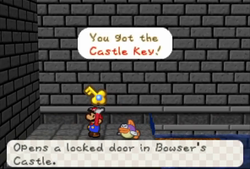
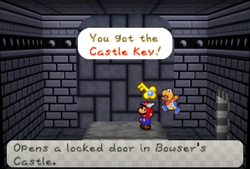
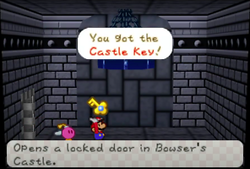
| |[[Castle Key (Peach's Castle)|Castle Key]]
| |
| |[[File:PM Peach Castle Key.png]]
| |
| |<nowiki/>
| |
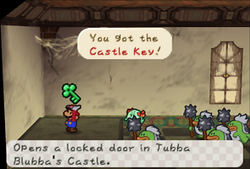
| *Given by [[Gourmet Guy]] to Peach in Chapter 4.
| |
| *Given by a [[Koopatrol]] to Peach as another in Chapter 6.
| |
| |[[File:Castle Key 1 Peach's Castle PM.png|250px]][[File:Castle Key 2 Peach's Castle PM.png|250px]]
| |
| |-
| |
| |[[Jammin' Jelly]]
| |
| |{{PM item|Jammin' Jelly|text=}}
| |
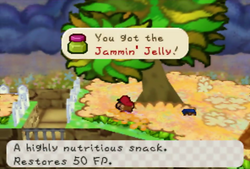
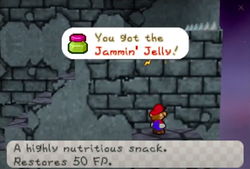
| |Given by [[Mr. Hammer]] to Peach if she wins in the [[64th Trivia Quiz-Off]] in Chapter 5.
| |
| |[[File:Jammin' Jelly Peach's Castle.png|250px]]
| |
| |-
| |
| |[[Butter]]
| |
| |[[File:Butter PM.png]]
| |
| |In the kitchen, accessible in Chapter 4.
| |
| |[[File:Princess Peach's Castle (Butter).png|250px]]
| |
| |-
| |
| |[[Cleanser]]
| |
| |[[File:PMCleanser.png]]
| |
| |In the kitchen, accessible in Chapter 4.
| |
| |[[File:Princess Peach's Castle (Cleanser).png|250px]]
| |
| |-
| |
| |[[Cream]]
| |
| |[[File:PM Cream.png]]
| |
| |In the kitchen, accessible in Chapter 4.
| |
| |[[File:Princess Peach's Castle (Cream).png|250px]]
| |
| |-
| |
| |[[Egg]]
| |
| |{{PM item|Egg|text=}}
| |
| |In the kitchen, accessible in Chapter 4.
| |
| |[[File:Princess Peach's Castle (Egg).png|250px]]
| |
| |-
| |
| |[[Flour]]
| |
| |[[File:PM Flour.png]]
| |
| |In the kitchen, accessible in Chapter 4.
| |
| |[[File:Princess Peach's Castle (Flour).png|250px]]
| |
| |-
| |
| |[[Milk]]
| |
| |[[File:PM Milk.png]]
| |
| |In the kitchen, accessible in Chapter 4.
| |
| |[[File:Princess Peach's Castle (Milk).png|250px]]
| |
| |-
| |
| |[[Salt]]
| |
| |[[File:PM Salt.png]]
| |
| |In the kitchen, accessible in Chapter 4.
| |
| |[[File:Princess Peach's Castle (Salt).png|250px]]
| |
| |-
| |
| |[[Strawberry]]
| |
| |[[File:Strawberry.png]]
| |
| |In the kitchen, accessible in Chapter 4.
| |
| |[[File:Princess Peach's Castle (Strawberry).png|250px]]
| |
| |-
| |
| |[[Sugar (item)|Sugar]]
| |
| |[[File:PM Sugar.png]]
| |
| |In the kitchen, accessible in Chapter 4.
| |
| |[[File:Princess Peach's Castle (Sugar).png|250px]]
| |
| |-
| |
| |[[Water]]
| |
| |[[File:PMWater.png]]
| |
| |In the kitchen, accessible in Chapter 4.
| |
| |[[File:Princess Peach's Castle (Water).png|250px]]
| |
| |-
| |
| |[[Sneaky Parasol]]
| |
| |[[File:PM Sneaky Parasol.png]]
| |
| |Given by Mr. Hammer to Peach for participating in the 64th Trivia Quiz-Off in Chapter 5.
| |
| |[[File:Sneaky Parasol Sixth Peach Interlude.png|250px]]
| |
| |-
| |
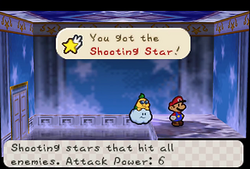
| |[[Shooting Star (item)|Shooting Star]]
| |
| |{{PM item|Shooting Star (item)|Shooting Star|text=}}
| |
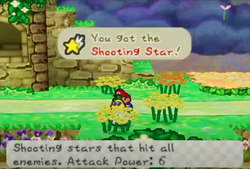
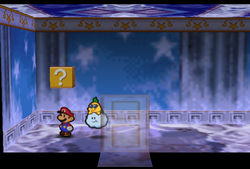
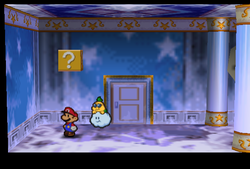
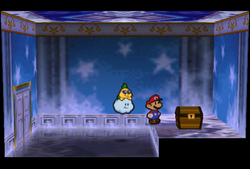
| |Given by a Hammer Bro in the far western side of the library in Chapter 6 by talking to him repeatedly.
| |
| |[[File:Princess Peach's Castle (Shooting Star).png|250px]]
| |
| |}
| |
|
| |
| ====[[List of hidden blocks in Paper Mario|Hidden block]]====
| |
| {|class=wikitable style="text-align:center"
| |
| !Item
| |
| !Image
| |
| !Location
| |
| !Location Image
| |
| |-
| |
| |[[Ultra Mushroom|Ultra Shroom]]
| |
| |{{PM item|Ultra Shroom|text=}}
| |
| |In the first area, the final hidden ? Block is directly on the opposite side of the Save Block, across the steps in the east.
| |
| |[[File:PMHiddenBlock42.png|250px]]
| |
| |}
| |
|
| |
| =Goomba Village=
| |
| {|class=wikitable style="text-align:center"
| |
| !Item
| |
| !Image
| |
| !Location
| |
| !Location Image
| |
| |-
| |
| |[[Coin]]
| |
| |[[File:PMCoin.png]]
| |
| |<nowiki/>
| |
| *In a bush found near the gate leading to Goomba Road.
| |
| *The first five bushes in the Jr. Troopa's playground contain one Coin each, with the northernmost one containing one extra.
| |
| *In the left and middle trees in the Jr. Troopa's playground.
| |
| *Ten of them in the Coin Block in Jr. Troopa's playground, near the right tree.
| |
| *In the ? Block near the entrance to Jr. Troopa's playground.
| |
| *Four of them above the trampoline found in the area behind Goomba Village.
| |
| *In the tree in the middle of the fork north of the path to the northwest of Goomba Village.
| |
| |[[File:Goomba Village (Coin).png|250px]][[File:Goomba Village (6 Coins).png|250px]][[File:Goomba Village (2 Coins).png|250px]][[File:Goomba Village Block 1.png|250px]][[File:Goomba Village Block 2.png|250px]][[File:Goomba Village (4 Coins).png|250px]][[File:Goomba Village (Coin 2).png|250px]]
| |
| |-
| |
| |[[Hammer]]
| |
| |[[File:PM Normal Hammer Sprite.png]]
| |
| |In the westernmost bush in the Jr. Troopa's playground.
| |
| |[[File:Paper Mario Goompa Hammer.png|250px]]
| |
| |-
| |
| |[[Dolly]]
| |
| |[[File:PeachDoll PM.png]]
| |
| |In the tree near the exit of Jr. Troopa's playground. Originally belongs to [[Goombaria]] and probably stolen by Jr. Troopa.
| |
| |[[File:Goomba Village (Dolly).png|250px]]
| |
| |-
| |
| |[[Mushroom]]
| |
| |{{PM item|Mushroom|text=}}
| |
| |In the tree near the fence in the area behind Goomba Village.
| |
| |[[File:Goomba Village (Mushroom).png|250px]]
| |
| |-
| |
| |[[Fire Flower]]
| |
| |{{PM item|Fire Flower|text=}}
| |
| |High above the trampoline in the area behind Goomba Village.
| |
| |[[File:Goomba Village (Fire Flower).png|250px]]
| |
| |-
| |
| |[[Star Piece (Paper Mario series)|Star Piece]]
| |
| |[[File:PM StarPiece.gif]]
| |
| |<nowiki/>
| |
| *At the end of the fork north of the path to the northwest of Goomba Village.
| |
| *Given by [[Goombaria]] after Mario gives her [[Dolly]] back.
| |
| *Given by [[Goompa]] as a reward for delivering his letter from [[Dry Dry Desert (Paper Mario)|Dry Dry Desert]].
| |
| *Under a hidden panel in the peaceful clearing to the southwest of Goomba Village.
| |
| *Under a hidden panel near the Stone Block in the area behind Goomba Village.
| |
| |[[File:PM Star Piece GoombaVillagePlatform.png|250px]][[File:PM Star Piece Goombaria.png|250px]][[File:PM Star Piece Goompa.png|250px]][[File:PM Star Piece GoombaVillageGrassland.png|250px]][[File:PM Star Piece GoombaVillagePanel.png|250px]]
| |
| |-
| |
| |[[Power Jump]]
| |
| |[[File:Power Jump Badge.png]]
| |
| |In the prologue of ''Paper Mario'', [[Goompa]] will give this badge to Mario at Goomba Village.
| |
| |[[File:Paper Mario Goompa Power Jump Badge.png|250px]]
| |
| |-
| |
| |[[Goomnut]]
| |
| |{{PM item|Goomnut|text=}}
| |
| |<font color=green>Produced by the Goomnut tree in the northeast corner of Goomba Village, can be collected infinitely by leaving the scene and returning.</font>
| |
| |[[File:PM Goomba Village Goomnut Tree.png|250px]]
| |
| |-
| |
| |[[Shooting Star (item)|Shooting Star]]
| |
| |{{PM item|Shooting Star (item)|Shooting Star|text=}}
| |
| |On the veranda of the Goombas' house; can be obtained after visiting the Shooting Star Summit.
| |
| |[[File:Goomba Village (Shooting Star).png|250px]]
| |
| |-
| |
| |[[Tape (Paper Mario)|Tape]]
| |
| |[[File:Tape PM.png]]
| |
| |Given by Goompa while doing [[Koopa Koot]]'s 3rd favor.
| |
| |[[File:Tape Goomba Village Obtained.png|250px]]
| |
| |-
| |
| |[[Letter]]
| |
| |[[File:PM Letter Sprite.png]]
| |
| |From [[Goompapa]] after delivering his letter found in [[Mt. Rugged]]. This is the second letter in the long chain.
| |
| |[[File:Goomba Village (Letter).png|250px]]
| |
| |-
| |
| |[[Lucky Day]]
| |
| |[[File:Lucky Day Badge.png]]
| |
| |From Goompapa after delivering his letter from [[Frost T.]] This is the final reward for delivering the long chain of letters.
| |
| |[[File:Lucky Day Goomba Village.png|250px]]
| |
| |}
| |
| Additional items include [[Mushroom]]s which can be dropped by [[Goomba]]-based enemies on the northwestern path, and [[Star Piece (Paper Mario series)|Star Piece]]s from [[Chuck Quizmo]] who has a chance to appear in the village.
| |
|
| |
| There is one [[List of hidden blocks in Paper Mario|Hidden ? block]] in Goomba Village:
| |
| {|class=wikitable style="text-align:center"
| |
| !Item
| |
| !Image
| |
| !Location
| |
| !Location Image
| |
| |-
| |
| |[[Repel Gel]]
| |
| |{{PM item|Repel Gel|text=}}
| |
| |In the area immediately east of [[Jr. Troopa]]'s playground, Mario will find a gray block that can only be broken with the [[Super Hammer|Super]] or [[Ultra Hammer]]. Jumping in the center where the block once was will reveal the hidden ? Block.
| |
| |[[File:PMHiddenBlock1.png|250px]]
| |
| |}
| |
|
| |
| =Goomba Road=
| |
| {|class=wikitable style="text-align:center"
| |
| !Item
| |
| !Image
| |
| !Location
| |
| !Location Image
| |
| |-
| |
| |[[Coin]]
| |
| |[[File:PMCoin.png]]
| |
| |<nowiki/>
| |
| *One each in the two ? Blocks found in the first scene.
| |
| *In the tree after Goomba King's Fortress.
| |
| |[[File:Goomba Road Blocks 1-2.png|250px]][[File:Goomba Road (Coin).png|250px]]
| |
| |-
| |
| |[[Close Call (badge)|Close Call]]
| |
| |[[File:Close Call Badge.png]]
| |
| |In the red badge block on the second part of the path.
| |
| |[[File:Goomba Road Block 3.png|250px]]
| |
| |-
| |
| |[[Hammer Throw (badge)|Hammer Throw]]
| |
| |[[File:Hammer Throw Badge.png]]
| |
| |In a chest box on the roof of Toad Town entrance; get it by hitting the tree for a trampoline.
| |
| |[[File:Goomba Road Treasure Chest.png|250px]]
| |
| |-
| |
| |[[Mushroom]]
| |
| |[[File:PaperMario Items Mushroom.png]]
| |
| |Jumps off the notice board near the second part of the path when Mario finishes reading it.
| |
| |[[File:Goomba Road (Mushroom).png|250px]]
| |
| |-
| |
| |[[Star Piece (Paper Mario series)|Star Piece]] (x2)
| |
| |[[File:PM StarPiece.gif]]
| |
| |<nowiki/>
| |
| *In the tree before Goomba King's Fortress.
| |
| *Under the hidden panel in the north of the opening after Goomba King's Fortress.
| |
| |[[File:PM Star Piece GoombaKingTree.png|250px]][[File:PM Star Piece GoombaKingPanel.png|250px]]
| |
| |-
| |
| |[[Super Mushroom|Super Shroom]]
| |
| |[[File:PaperMario Items SuperShroom.png]]
| |
| |To the south of the opening after Goomba King's Fortress, there is a brick hitting which will reveal a ? Block with this item.
| |
| |[[File:Goomba Road Block 4.png|250px]]
| |
| |-
| |
| |[[Sleepy Sheep]]
| |
| |[[File:PaperMario Items SleepySheep.png]]
| |
| |In the ? Block near the descending stairs between Goomba King's Fortress and Toad Town.
| |
| |[[File:Goomba Road Block 5.png|250px]]
| |
| |}
| |
|
| |
| =Shooting Star Summit=
| |
| {|class=wikitable style="text-align:center"
| |
| !Item
| |
| !Image
| |
| !Location
| |
| !Location Image
| |
| |-
| |
| |[[Star Piece (Paper Mario series)|Star Piece]] (x5)
| |
| |[[File:PM StarPiece.gif]]
| |
| |<nowiki/>
| |
| *Upon entering the Shooting Star Summit scene, go direct north to find this Star Piece.
| |
| *Under a hidden panel to the right of the bridge before Shooting Star Summit.
| |
| *Under a hidden panel to the south of [[Merluvlee]]'s house.
| |
| *Under a hidden panel on the first step of the Shooting Star Summit.
| |
| *Given by [[Merlow]] after giving him a letter from [[Shiver Snowfield]].
| |
| |[[File:PM Star Piece ShootingStarSummitSideway.png|250px]][[File:PM Star Piece ShootingStarSummitBridge.png|250px]][[File:PM Star Piece ShootingStarSummitHouse.png|250px]][[File:PM Star Piece ShootingStarSummitFloor.png|250px]][[File:PM Star Piece Merlow.png|250px]]
| |
| |-
| |
| |[[Lucky Star (Paper Mario)|Lucky Star]]
| |
| |[[File:LuckyStar PM.png]]
| |
| |Given by [[Twink]] after visiting Shooting Star Summit.
| |
| |[[File:Shooting Star Summit (Lucky Star).png|250px]]
| |
| |-
| |
| |[[Autograph (Paper Mario)|Autograph]]
| |
| |[[File:Merluvlee's Autograph.png]]
| |
| |Given by [[Merluvlee]] while doing [[Koopa Koot]]'s 8th favor.
| |
| |[[File:Shooting Star Summit (Autograph).png|250px]]
| |
| |}
| |
| In addition to the items listed above, [[Merlow]] has 15 Badges to sell, and [[Mario]] can get items from Princess Peach's [[Mysterious Treasure Chest]].
| |
|
| |
| =Pleasant Path=
| |
| Note: The scenes are numbered from west to east.
| |
| {|class=wikitable style="text-align:center"
| |
| !Item
| |
| !Image
| |
| !Location
| |
| !Location Image
| |
| |-
| |
| |[[Coin]]
| |
| |[[File:PMCoin.png]]
| |
| |<nowiki/>
| |
| *Ten of them in the Coin Block at the end of the second scene.
| |
| *Five of them act as a trap near the start of the fourth scene.
| |
| |[[File:Pleasant Path Block 5.png|250px]][[File:Pleasant Path (5 Coins).png|250px]]
| |
| |-
| |
| |[[Heart (item)|Hearts]]
| |
| |[[File:Heart Point Pickup PM.png]]
| |
| |<font color=green>In the third scene, there are three Candy Canes before the bridge. By running around the left one, it spawns endless supply of Hearts.</font>
| |
| |[[File:Pleasant Path (Hearts).png|250px]]
| |
| |-
| |
| |Coin and [[Dizzy Attack]] Badge
| |
| |[[File:PMCoin.png]] [[File:Dizzy Attack Badge.png]]
| |
| |In the first two ? Blocks at the first scene.
| |
| |[[File:Pleasant Path Blocks 1-2.png|250px]]
| |
| |-
| |
| |[[Fright Mask|Fright Jar]]
| |
| |{{PM item|Fright Jar|link=Fright Mask|text=}}
| |
| |In the rightmost block at the first scene.
| |
| |[[File:Pleasant Path Block 3.png|250px]]
| |
| |-
| |
| |[[POW Block]]
| |
| |{{PM item|POW Block|text=}}
| |
| |In the ? Block at the second scene.
| |
| |[[File:Pleasant Path Block 4.png|250px]]
| |
| |-
| |
| |[[Sleepy Sheep]]
| |
| |{{PM item|Sleepy Sheep|text=}}
| |
| |Behind a fence in the second scene.
| |
| |[[File:Pleasant Path (Sleepy Sheep).png|250px]]
| |
| |-
| |
| |[[Honey Syrup]]
| |
| |{{PM item|Honey Syrup|text=}}
| |
| |Behind the rightmost [[Candy Pop|Candy Cane]] in the third scene.
| |
| |[[File:Pleasant Path (Honey Syrup).png|250px]]
| |
| |-
| |
| |[[Attack FX B (Paper Mario)|Attack FX B]]
| |
| |[[File:Attack FX B Badge.png]]
| |
| |Smashing the blocks near the entrance of [[Koopa Village]] in the order "left, right, middle" will reveal a red ? Badge block with this badge inside.
| |
| |[[File:Pleasant Path Block 6.png|250px]]
| |
| |-
| |
| |[[Thunder Bolt (item)|Thunder Bolt]]
| |
| |[[File:PaperMario Items ThunderBolt.png]]
| |
| |On the first block in the fourth scene (requires [[Kooper]] or [[Tornado Jump (move)|Tornado Jump]])
| |
| |[[File:Pleasant Path (Thunder Bolt).png|250px]]
| |
| |-
| |
| |[[Star Piece (Paper Mario series)|Star Piece]]
| |
| |[[File:PM StarPiece.gif]]
| |
| |<nowiki/>
| |
| *On the southern small island in the second scene (requires [[Kooper]])
| |
| *In the tree at the fifth scene.
| |
| *Under a hidden panel between the three [[Candy Pop|Candy Cane]]s in the third scene.
| |
| *Under a hidden panel at the coin trap in the fourth scene.
| |
| |[[File:PM Star Piece PleasantPathIsland.png|250px]][[File:PM Star Piece PleasantPathTree.png|250px]][[File:PM Star Piece PleasantPathCandyCane.png|250px]][[File:PM Star Piece PleasantPathTrap.png|250px]]
| |
| |-
| |
| |[[FP Plus]]
| |
| |[[File:FP Plus Badge.png]]
| |
| |On a high platform near [[Koopa Bros. Fortress]], accessed through a pipe by blasting the wall near the Heart Block first.
| |
| |[[File:Koopa Bros. Fortress Treasure Chest 1.png|250px]]
| |
| |}
| |
| Pleasant Path also has one [[list of hidden blocks in Paper Mario|hidden ? block]]:
| |
| {|class=wikitable style="text-align:center"
| |
| !Item
| |
| !Image
| |
| !Location
| |
| !Location Image
| |
| |-
| |
| |[[Fire Flower]]
| |
| |{{PM item|Fire Flower|text=}}
| |
| |In the area two screens west of the [[Koopa Bros. Fortress]], the hidden ? Block is between the two [[Brick Block]]s.
| |
| |[[File:PMHiddenBlock2.png|250px]]
| |
| |}
| |
|
| |
| =Koopa Village=
| |
| In addition to the items listed below, [[Koopa's Shop]] has several items on sale. [[Koopa Koot]] has 15 Star Pieces and gives them in threes if Mario does favors for him. [[Kolorado]] also has two Star Pieces that can be given to Mario if a letter for him and the [[Artifact]] are delivered by [[Parakarry]] outside [[Dry Dry Desert (Paper Mario)|Dry Dry Desert]] or [[Mt. Lavalava]].
| |
| {|class=wikitable style="text-align:center"
| |
| !Item
| |
| !Image
| |
| !Location
| |
| !Location Image
| |
| |-
| |
| |[[Coin]]
| |
| |[[File:PMCoin.png]]
| |
| |<nowiki/>
| |
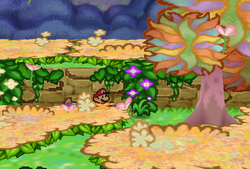
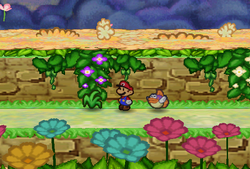
| *In the first bush in the first scene.
| |
| *In the second-to-last bush in the first scene.
| |
| *In the second scene, one given by Koopa Koot for every favor but the 4th, 8th, 12th, 16th, and 20th.
| |
| |[[File:Koopa Village (Coin 1).png|250px]][[File:Koopa Village (Coin 2).png|250px]][[File:Koopa Village (Koopa Koot Coins).png|250px]]
| |
| |-
| |
| |[[Dried Mushroom|Dried Shroom]]
| |
| |[[File:PaperMario Items DriedShroom.png]]
| |
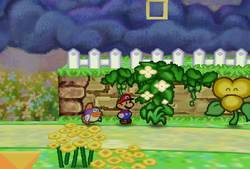
| |In the southest bush at the southwestern corner of the first scene.
| |
| |[[File:Koopa Village (Dried Shroom).png|250px]]
| |
| |-
| |
| |[[Turtley Leaf|Koopa Leaf]] (x2)
| |
| |[[File:PaperMario Items KoopaLeaf.png]]
| |
| |<nowiki/>
| |
| *<font color=green>In the southeast bush at the southeastern corner of the first scene (replenish-able resource).</font>
| |
| *<font color=green>In the bush nearest to the entrance in the second scene (replenish-able resource).</font>
| |
| |[[File:Koopa Village (Koopa Leaf 1).png|250px]][[File:Koopa Village (Koopa Leaf 2).png|250px]]
| |
| |-
| |
| |[[Kooper's Shell]]
| |
| |[[File:Kooper'sShell PM.png]]
| |
| |Returned by the [[Fuzzy|Fuzzies]] after winning their minigame.
| |
| |[[File:Koopa Village (Kooper's Shell).png|250px]]
| |
| |-
| |
| |[[HP Plus (badge)|HP Plus]]
| |
| |[[File:HP Plus Badge.png]]
| |
| |On a trunk in the scene behind [[Kooper]]'s house, by getting it with Kooper.
| |
| |[[File:PM Kooper HP Plus.png|250px]]
| |
| |-
| |
| |[[Koopa Legends]]
| |
| |[[File:KoopaLegends PM.png]]
| |
| |Given by [[Kolorado's wife]] for [[Koopa Koot]]'s 1st favor.
| |
| |[[File:Koopa Village (Koopa Legends).png|250px]]
| |
| |-
| |
| |[[Silver Card|Silver Credit]]
| |
| |[[File:PM Silver Credit.png]]
| |
| |Given by Koopa Koot after finishing his 2nd favor.
| |
| |[[File:Koopa Village (Silver Credit).png|250px]]
| |
| |-
| |
| |[[Letter]] (x2)
| |
| |[[File:PM Letter Sprite.png]]
| |
| |<nowiki/>
| |
| *Given by [[Koover]] after giving him a letter from [[Muss T.]]
| |
| *Given by Koover after giving him a letter from [[Fishmael]].
| |
| |[[File:Koopa Village (Letter 1).png|250px]][[File:Koopa Village (Letter 2).png|250px]]
| |
| |-
| |
| |[[Star Piece (Paper Mario series)|Star Piece]] (x3)
| |
| |[[File:PM StarPiece.gif]]
| |
| |<nowiki/>
| |
| *On a block after Fuzzies flee the second scene (requires puzzle-solving with the blue block or Tornado Jump).
| |
| *Given by [[Mort T.]] after giving him a letter from Dry Dry Desert.
| |
| *Under a hidden panel near the [[Bob-omb]]s in the first scene.
| |
| |[[File:PM Star Piece KoopaVillageBrick.png|250px]][[File:PM Star Piece MortT.png|250px]][[File:PM Star Piece KoopaVillagePanel.png|250px]]
| |
| |-
| |
| |[[Empty Wallet]]
| |
| |[[File:PM Empty Wallet.png]]
| |
| |Appears in the northeast bush in the southeastern corner of the first scene after taking Koopa Koot's 6th favor.
| |
| |[[File:Koopa Village (Empty Wallet).png|250px]]
| |
| |-
| |
| |[[Golden Card|Gold Credit]]
| |
| |[[File:GoldCredit PM.png]]
| |
| |Given by Koopa Koot after finishing his 10th favor.
| |
| |[[File:Koopa Village (Gold Credit).png|250px]]
| |
| |-
| |
| |[[Glasses]]
| |
| |[[File:Glasses PM.png]]
| |
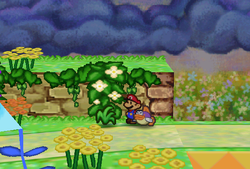
| |Appears in the bush with a white flower in the southwestern corner of the first scene after taking Koopa Koot's 15th favor.
| |
| |[[File:Koopa Village (Glasses).png|250px]]
| |
| |}
| |
|
| |
| =Koopa Bros. Fortress=
| |
| {|class=wikitable style="text-align:center"
| |
| !Item
| |
| !Image
| |
| !Location
| |
| !Location Image
| |
| |-
| |
| |[[Coin]]
| |
| |[[File:PMCoin.png]]
| |
| |<font color=green>Ten of them appear after jumping over the firebars in the west room of the basement (with the Fortress Key). There are 2 firebars for the total of 20 Coins to collect. (replenish-able resource).</font>
| |
| |[[File:Koopa Bros. Fortress (10 Coins 1).png|250px]][[File:Koopa Bros. Fortress (10 Coins 2).png|250px]]
| |
| |-
| |
| |[[Fortress Key]] (x4)
| |
| |[[File:FortressKey PM.png]]
| |
| |<nowiki/>
| |
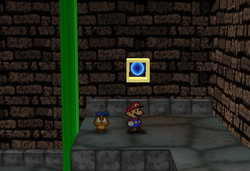
| *Held by the [[Koopa Troopa]] in the first room.
| |
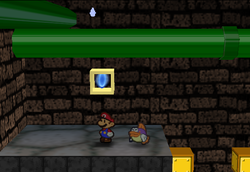
| *On the west end of the basement, which can be accessed by lowering the stairs in the east.
| |
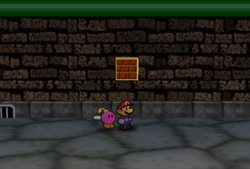
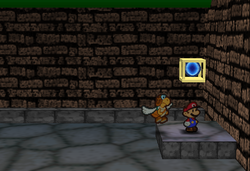
| *Locked behind bars on the first floor. Mario can get it by blasting the wall with [[Bombette]].
| |
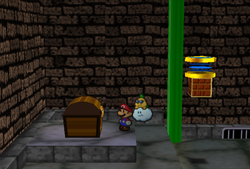
| *Locked behind bars on the first floor. Mario can get it by lowering the stairs on the second floor.
| |
| |[[File:PM Fortress Key 1.png|250px]][[File:PM Fortress Key 2.png|250px]][[File:PM Fortress Key 3.png|250px]][[File:PM Fortress Key 4.png|250px]]
| |
| |-
| |
| |[[Power Bounce]]
| |
| |[[File:Power Bounce Badge.png]]
| |
| |Locked behind bars on the first floor. Mario can get it by blasting the wall or enter from the back side.
| |
| |[[File:PM Power Bounce obtained.png|250px]]
| |
| |-
| |
| |[[Refund]]
| |
| |[[File:Refund Badge.png]]
| |
| |In a small area outside the fortress that can be accessed by blasting the wall on the east end.
| |
| |[[File:Koopa Bros. Fortress Treasure Chest 2.png|250px]]
| |
| |-
| |
| |[[Smash Charge]]
| |
| |[[File:Smash Charge Badge.png]]
| |
| |Guarded by a [[Bob-omb]] at the end of the slope stair on the third floor.
| |
| |[[File:PM Smash Charge.png|250px]]
| |
| |-
| |
| |[[Maple Syrup]]
| |
| |[[File:PaperMario Items MapleSyrup.png]]
| |
| |At the [[Bullet Bill]] dodging scene, in a question block at the southwestern corner.
| |
| |[[File:Koopa Bros. Fortress Block 2.png|250px]]
| |
| |}
| |
|
| |
| =Mt. Rugged=
| |
| {|class=wikitable style="text-align:center"
| |
| !Item
| |
| !Image
| |
| !Location
| |
| !Location Image
| |
| |-
| |
| |[[Coin]]
| |
| |[[File:PMCoin.png]]
| |
| |<nowiki/>
| |
| *There are four bushes at the start of the first scene, all but the northern one contain one Coin each.
| |
| *Three of them found on the slope in the second scene.
| |
| *Two of them found on the lower ground between the trampoline and Star Piece surrounded by 6 Coins, all found in the scene north of the second scene.
| |
| *After using the trampoline in the same scene, found on the left in the ? Block.
| |
| |[[File:Mt. Rugged (3 Coins 1).png|250px]][[File:Mt. Rugged (3 Coins 2).png|250px]][[File:Mt. Rugged (2 Coins).png|250px]][[File:Mt. Rugged Block 3.png|250px]]
| |
| |-
| |
| |[[Egg]]
| |
| |[[File:PaperMario Items Egg.png]]
| |
| |<font color=green>In a bush near the Dry Dry Railroad station (can be collected indefinitely by reloading the area).</font>
| |
| |[[File:Mt. Rugged (Egg).png|250px]]
| |
| |-
| |
| |[[Sleepy Sheep]]
| |
| |[[File:PaperMario Items SleepySheep.png]]
| |
| |In a [[? Block]] at the southeastern corner of the second scene.
| |
| |[[File:Mt. Rugged Block 1.png|250px]]
| |
| |-
| |
| |[[Whacka Bump|Whacka's Bump]] (x8)
| |
| |[[File:PaperMario Items WhackasBump.png]]
| |
| |Dropped by hitting [[Whacka]].
| |
| |[[File:Mt. Rugged (Whacka Bumps).png|250px]]
| |
| |-
| |
| |[[Letter]] (x3)
| |
| |[[File:PM Letter Sprite.png]]
| |
| |<nowiki/>
| |
| *On a big stone in the third scene (requires Kooper).
| |
| *In the room to the north of the second room, accessible after sliding the slope.
| |
| *Down the cliff in the fifth scene.
| |
| |[[File:Mt. Rugged First Letter.png|250px]][[File:Mt. Rugged Second Letter.png|250px]][[File:Mt. Rugged Third Letter.png|250px]]
| |
| |-
| |
| |[[Mushroom]]
| |
| |[[File:PaperMario Items Mushroom.png]]
| |
| |In a ? Block at the scene to the north of the second room.
| |
| |[[File:Mt. Rugged Block 2.png|250px]]
| |
| |-
| |
| |[[Damage Dodge]]
| |
| |[[File:Damage Dodge Badge.png]]
| |
| |In the scene to the north of the second room, by going in the cave for a chest box.
| |
| |[[File:Mt. Rugged Treasure Chest.png|250px]]
| |
| |-
| |
| |[[Honey Syrup]]
| |
| |[[File:PaperMario Items HoneySyrup.png]]
| |
| |In a ? Block at the scene to the north of the second room.
| |
| |[[File:Mt. Rugged Block 4.png|250px]]
| |
| |-
| |
| |[[Quake Hammer]]
| |
| |[[File:Quake Hammer Badge.png]]
| |
| |On a big stone in the third scene (requires Parakarry).
| |
| |[[File:Quake Hammer Mt. Rugged.png|250px]]
| |
| |-
| |
| |[[Magical Seed]]
| |
| |[[File:PM Magical Seed purple.png]]
| |
| |Given by the [[Bub-ulb]] (requires Parakarry).
| |
| |[[File:Magical Seed 2 Shot.png|250px]]
| |
| |-
| |
| |[[Star Piece (Paper Mario series)|Star Piece]] (x3)
| |
| |[[File:PM StarPiece.gif]]
| |
| |<nowiki/>
| |
| *On a ledge in the fourth scene.
| |
| *In the southwestern corner of the room to the north of the second room (requires Parakarry). This piece is surrounded by 6 Coins.
| |
| *Under a hidden panel in the corner by the slope in the third scene.
| |
| |[[File:PM Star Piece MtRuggedWood.png|250px]][[File:PM Star Piece MtRuggedGap.png|250px]][[File:PM Star Piece MtRuggedCliff.png|250px]]
| |
| |-
| |
| |[[Super Block]]
| |
| |[[File:PM Super Block Render.png]]
| |
| |In the entrance scene, there is a Stone Block on the path in the northwest. Mario may find the Super Block at the end of the path.
| |
| |[[File:PM Super Block MtRugged.png|250px]]
| |
| |}
| |
|
| |
| =Dry Dry Desert=
| |
| In addition to the items listed below, others such as [[Dried Fruit]]s may be dropped by enemies.
| |
| {|class=wikitable style="text-align:center"
| |
| !Item
| |
| !Image
| |
| !Location
| |
| !Location Image
| |
| |-
| |
| |[[Coin]]
| |
| |[[File:PMCoin.png]]
| |
| |<nowiki/>
| |
| *Ten of them in the Coin Block near the palm tree in the scene A7
| |
| *Same scene, in said palm tree.
| |
| *In the scene C6, there are 7 brick blocks. The two in the middle are Coin Blocks and both have 10 Coins each.
| |
| *In the palm tree found in the scene C7.
| |
| *In the scene D7, three can be found in palm trees.
| |
| *In the palm tree next to the entrance to scene D5 in scene D6.
| |
| *In the palm tree in the scene D5.
| |
| *In the scene E1, there are four brick blocks. The middle one is a Coin Block containing 10 Coins.
| |
| *In the ? Block in the scene E4.
| |
| *In the ? Block in the scene E7.
| |
| *Same scene, in the palm tree closest to the oasis entrance.
| |
| *In the oasis scene (F7), in the palm tree closest to the entrance to scene F6.
| |
| *Same scene, in the palm tree under the Recovery Block.
| |
| *In the Coin Block in the scene F6, next to a palm tree.
| |
| *Same scene, in said palm tree.
| |
| *In the scene F3, there are three brick blocks. The northern one is a Coin Block containing 10 Coins.
| |
| *In the ? Block in the scene G5.
| |
| *In the scene G7, there are six brick blocks. All of them are Coin Blocks, with each containing 10 Coins.
| |
| *Same scene, found in the right palm tree.
| |
| |[[File:Dry Dry Desert Block 3.png|250px]][[File:Dry Dry Desert (Coin 1).png|250px]][[File:Dry Dry Desert Blocks 15-16.png|250px]][[File:Dry Dry Desert (Coin 2).png|250px]][[File:Dry Dry Desert (3 Coins).png|250px]][[File:Dry Dry Desert (Coin 3).png|250px]][[File:Dry Dry Desert (Coin 4).png|250px]][[File:Dry Dry Desert Block 17.png|250px]][[File:Dry Dry Desert Block 18.png|250px]][[File:Dry Dry Desert Block 19.png|250px]][[File:Dry Dry Desert (Coin 5).png|250px]][[File:Dry Dry Desert (Coin 6).png|250px]][[File:Dry Dry Desert (Coin 7).png|250px]][[File:Dry Dry Desert Block 21.png|250px]][[File:Dry Dry Desert (Coin 8).png|250px]][[File:Dry Dry Desert Block 20.png|250px]][[File:Dry Dry Desert Block 22.png|250px]][[File:Dry Dry Desert Blocks 23-28.png|250px]][[File:Dry Dry Desert (Coin 9).png|250px]]
| |
| |-
| |
| |[[Spin Attack (Badge)|Spin Attack]]
| |
| |[[File:Spin Attack Badge.png]]
| |
| |On a big stone at scene E6, get it with the help from the tornado at F5 (2 screens south of [[Nomadimouse (character)|Nomadimouse]], obtainable via the whirlwind in area with blue cacti).
| |
| |[[File:Dry Dry Desert (Spin Attack).png|250px]]
| |
| |-
| |
| |[[Stop Watch]]
| |
| |{{PM item|Stop Watch|text=}}
| |
| |On a block at scene E6 (requires Kooper or Tornado Jump).
| |
| |[[File:Dry Dry Desert (Stop Watch).png|250px]]
| |
| |-
| |
| |[[Tasty Tonic]]
| |
| |{{PM item|Tasty Tonic|text=}}
| |
| |Behind a bush at the southeastern corner of scene F6.
| |
| |[[File:Dry Dry Desert (Tasty Tonic).png|250px]]
| |
| |-
| |
| |[[Lemon]]
| |
| |{{PM item|Lemon|text=}}
| |
| |<font color=green>Endlessly harvestable from the west tree in the oasis (F7)</font> - can be given to [[Moustafa]] in [[Dry Dry Outpost]] to get a hint about progressing (non-mandatory).
| |
| |[[File:Dry Dry Desert (Lemon).png|250px]]
| |
| |-
| |
| |[[Lime]]
| |
| |{{PM item|Lime|text=}}
| |
| |<font color=green>Endlessly harvestable from the east tree in the oasis (F7).</font>
| |
| |[[File:Dry Dry Desert (Lime).png|250px]]
| |
| |-
| |
| |[[Letter]]
| |
| |[[File:PM Letter Sprite.png]]
| |
| |<nowiki/>
| |
| *In the most southeastern tree at the final scene (D7).
| |
| *In the tree at the first scene (D1). Obtainable after [[Kolorado]] removes his camp.
| |
| |[[File:Letter Eastern Dry Dry Desert.png|250px]][[File:Letter in Dry Dry Desert PM.png|250px]]
| |
| |-
| |
| |[[Fire Flower]]
| |
| |{{PM item|Fire Flower|text=}}
| |
| |Behind the northeast cactus at scene A6.
| |
| |[[File:Dry Dry Desert (Fire Flower).png|250px]]
| |
| |-
| |
| |4 Coins and Fire Flower
| |
| |[[File:PMCoin.png]] {{PM item|Fire Flower|text=}}
| |
| |In the blocks of scene C3.
| |
| |[[File:Dry Dry Desert Blocks 10-14.png|250px]]
| |
| |-
| |
| |2 Coins and [[Honey Syrup]]
| |
| |[[File:PMCoin.png]] {{PM item|Honey Syrup|text=}}
| |
| |In the blocks at scene B5.
| |
| |[[File:Dry Dry Desert Blocks 4-6.png|250px]]
| |
| |-
| |
| |[[Star Piece (Paper Mario series)|Star Piece]]
| |
| |[[File:PM StarPiece.gif]]
| |
| |<nowiki/>
| |
| *Two given by Kolorado at his camp: When delivering his letter and in exchange for the [[Artifact]] found in [[Dry Dry Ruins (Paper Mario)|Dry Dry Ruins]].
| |
| *Given by the Nomadimouse at scene D5 after giving him a letter from Dry Dry Outpost.
| |
| *Under a hidden panel near the stone cactus in the most center scene (D4).
| |
| |[[File:PM Star Piece Kolorado Mail.png|250px]][[File:PM Star Piece Nomadimouse.png|250px]][[File:PM Star Piece DryDryDesert.png|250px]]
| |
| |-
| |
| |Coin and [[Fright Mask|Fright Jar]]
| |
| |[[File:PMCoin.png]] {{PM item|Fright Jar|link=Fright Mask|text=}}
| |
| |In the ? blocks at scene A1.
| |
| |[[File:Dry Dry Desert Blocks 1-2.png|250px]]
| |
| |-
| |
| |[[Mushroom]], [[Super Mushroom|Super Shroom]] and [[Ultra Mushroom|Ultra Shroom]]
| |
| |{{PM item|Mushroom|text=}} {{PM item|Super Shroom|text=}} {{PM item|Ultra Shroom|text=}}
| |
| |At scene C1, in the ? block that appears after hitting the block 1 time (Mushroom)/10 times (Super Shroom)/100 times (Ultra Shroom).
| |
| |[[File:Dry Dry Desert Blocks 7-9.png|250px]]
| |
| |-
| |
| |[[Maple Super]]
| |
| |{{PM item|Maple Super|text=}}
| |
| |Given by the [[Trading Event Toad]] at scene A3 when participating in the second contest.
| |
| |[[File:Dry Dry Desert (Maple Super).png|250px]]
| |
| |-
| |
| |[[Super Block]]
| |
| |[[File:PM Super Block Render.png]]
| |
| |In the oasis, there is a Super Block to the south of the pond.
| |
| |[[File:PM Super Block DryDryDesert.png|250px]]
| |
| |}
| |
|
| |
| Additionally, there are four [[List of hidden blocks in Paper Mario|Hidden ? blocks]]:
| |
|
| |
| {|class=wikitable style="text-align:center"
| |
| !Item
| |
| !Image
| |
| !Location
| |
| !Location Image
| |
| |-
| |
| |[[Thunder Rage]]
| |
| |{{PM item|Thunder Rage|text=}}
| |
| |[[File:PMHiddenBlock3.png|250px]]
| |
| |In the area two screens north of [[Kolorado|Kolorado's]] camp, the hidden ? Block is above the easternmost rock.
| |
| |-
| |
| |[[Attack FX C]]
| |
| |[[File:Attack FX C Badge.png]]
| |
| |[[File:PMHiddenBlock4.png|250px]]
| |
| |In the area one screen east and three south from Kolorado's camp, the hidden ? Block is above the lone rock.
| |
| |-
| |
| |[[Runaway Pay]]
| |
| |[[File:Runaway Pay Badge.png]]
| |
| |[[File:PMHiddenBlock5.png|250px]]
| |
| |In the area one screen north and four east from Kolorado's camp, the hidden ? Block is in the center of the triangle of trees.
| |
| |-
| |
| |[[Life Mushroom (Paper Mario series)|Life Shroom]]
| |
| |{{PM item|Life Shroom|text=}}
| |
| |[[File:PMHiddenBlock6.png|250px]]
| |
| |In the area one screen north of the oasis, the hidden ? Block is above the ? Block on the ground.
| |
| |}
| |
|
| |
| =Dry Dry Outpost=
| |
| In addition to the items listed below, [[Little Mouser's Shop]] has several items on sale. 64 [[Star Piece (Paper Mario series)|Star Pieces]] in total can be obtained from [[Chuck Quizmo]].
| |
| {|class=wikitable style="text-align:center"
| |
| !Item
| |
| !Image
| |
| !Location
| |
| !Location Image
| |
| |-
| |
| |[[Coin]]
| |
| |[[File:PMCoin.png]]
| |
| |In the red palm tree in the first scene.
| |
| |[[File:Dry Dry Outpost (Coin).png|250px]]
| |
| |-
| |
| |[[Letter]]
| |
| |[[File:PM Letter Sprite.png]]
| |
| |<nowiki/>
| |
| *Given by [[Mr. E (Paper Mario)|Mr. E]] after giving him a letter from [[Koover]].
| |
| *Given by the owner of Little Mouser's Shop after giving him a letter from [[Miss T.]]
| |
| *On the roof of the [[Toad House]].
| |
| |[[File:Dry Dry Outpost (Letter 1).png|250px]][[File:Dry Dry Outpost (Letter 2).png|250px]][[File:Letter Dry Dry Outpost PM.png|250px]]
| |
| |-
| |
| |[[Star Piece (Paper Mario series)|Star Piece]]
| |
| |[[File:PM StarPiece.gif]]
| |
| |Under a hidden panel on the roof of the most eastern house.
| |
| |[[File:PM Star Piece DryDryOutpost.png|250px]]
| |
| |-
| |
| |[[Red Jar]]
| |
| |[[File:PM Red Jar.png]]
| |
| |Given by the owner of [[Little Mouser's Shop]] after purchasing a Dusty Hammer, a Dried Pasta, another Dusty Hammer, and a Dried Shroom in order.
| |
| |[[File:Dry Dry Outpost (Red Jar).png|250px]]
| |
| |-
| |
| |[[Crystal Ball]]
| |
| |[[File:Crystal Ball PM.png]]
| |
| |Given by [[Merlee]] while doing Koopa Koot's 8th favor.
| |
| |[[File:Dry Dry Outpost (Crystal Ball).png|250px]]
| |
| |-
| |
| |[[Melody (item)|Melody]]
| |
| |[[File:PM Melody.png]]
| |
| |Given by the composer in the pink house after bringing him [[Lyrics]].
| |
| |[[File:Dry Dry Outpost (Melody).png|250px]]
| |
| |-
| |
| |[[Pulse Stone]]
| |
| |[[File:PulseStone PM.png]]
| |
| |Given by [[Moustafa]] after he reveals his true identity.
| |
| |[[File:Dry Dry Outpost (Pulse Stone).png|250px]]
| |
| |}
| |
|
| |
| =Dry Dry Ruins=
| |
| In addition to the ones listed below, enemies found in this area can also drop items.
| |
|
| |
| {|class=wikitable style="text-align:center"
| |
| !Item
| |
| !Image
| |
| !Location
| |
| !Location Image
| |
| |-
| |
| |[[Ruins Key (Paper Mario)|Ruins Key]] (x4)
| |
| |[[File:RuinsKey PM.png]]
| |
| |<nowiki/>
| |
| *In the lower room right of the first coffin area.
| |
| *In the rooms to the upper-east of the first hub room.
| |
| *Falls down after Mario defeats the [[Pokey Mummy|Pokey Mummies]] in the corridor between the two hub rooms.
| |
| *In the east of the area beneath the second hub room.
| |
| |[[File:Dry Dry Ruins (Ruins Key 1).png|250px]][[File:Dry Dry Ruins (Ruins Key 2).png|250px]][[File:Dry Dry Ruins (Ruins Key 3).png|250px]][[File:Dry Dry Ruins (Ruins Key 4).png|250px]]
| |
| |-
| |
| |[[Spike Shield]]
| |
| |[[File:Spike Shield Badge PM.png]]
| |
| |In the first area with three coffins, the badge can be found in the second coffin.
| |
| |[[File:Dry Dry Ruins (Spike Shield).png|250px]]
| |
| |-
| |
| |[[Artifact]]
| |
| |[[File:Artifact PM.png]]
| |
| |On a ledge by the corridor between the two hub rooms.
| |
| |[[File:Dry Dry Ruins (Artifact).png|250px]]
| |
| |-
| |
| |[[Slow Go]]
| |
| |[[File:Slow Go Badge.png]]
| |
| |In the area with the [[Super Hammer]], falling on the ledges above the chest and following them will lead to the badge.
| |
| |[[File:Dry Dry Ruins Treasure Chest 1.png|250px]]
| |
| |-
| |
| |[[Super Hammer]]
| |
| |[[File:PM Super Hammer Sprite.png]]
| |
| |Inside a small room with rotating stairs and a Stone Block blocking the way out.
| |
| |[[File:Dry Dry Ruins Treasure Chest 2.png|250px]]
| |
| |-
| |
| |[[Star Piece (Paper Mario series)|Star Piece]]
| |
| |[[File:PM StarPiece.gif]]
| |
| |In the room by blasting the wall to the upper-east of the first hub room. Exposed after draining the sand.
| |
| |[[File:PM Star Piece DryDryRuins.png|250px]]
| |
| |-
| |
| |[[Pyramid Stone]]
| |
| |[[File:PyramidStone PM.png]]
| |
| |To the lower-east of the first hub room.
| |
| |[[File:Dry Dry Ruins (Pyramid Stone).png|250px]]
| |
| |-
| |
| |[[Diamond Stone]]
| |
| |[[File:DiamondStone PM.png]]
| |
| |At the west end of the area beneath the second hub room.
| |
| |[[File:Dry Dry Ruins (Diamond Stone).png|250px]]
| |
| |-
| |
| |[[Lunar Stone]]
| |
| |[[File:LunarStone PM.png]]
| |
| |At the east end of the area beneath the second hub room.
| |
| |[[File:Dry Dry Ruins (Lunar Stone).png|250px]]
| |
| |-
| |
| |[[Super Block]]
| |
| |[[File:PM Super Block Render.png]]
| |
| |In the area with two floors of stairs, Mario must go left from the first floor to find the Super Block.
| |
| |[[File:PM Super Block DryDryRuins.png|250px]]
| |
| |}
| |
|
| |
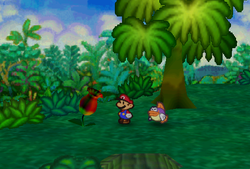
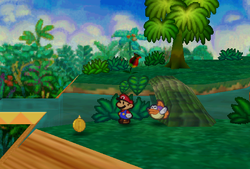
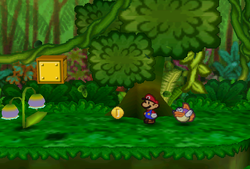
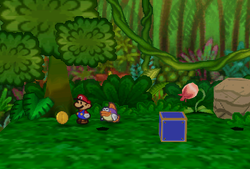
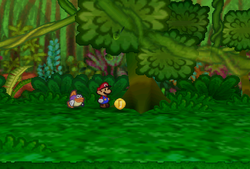
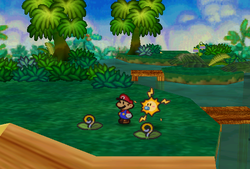
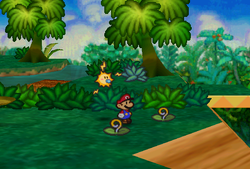
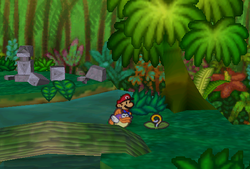
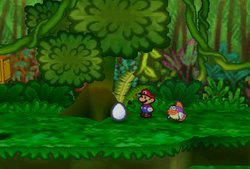
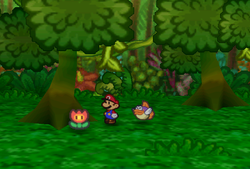
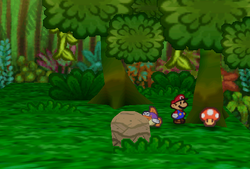
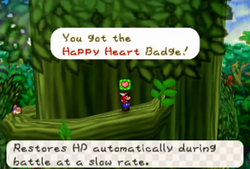
| =Forever Forest= | | =Forever Forest= |
| {|class=wikitable style="text-align:center" | | {|class=wikitable style="text-align:center" |
