User:Mid188/Sandbox: Difference between revisions
No edit summary |
mNo edit summary |
||
| Line 107: | Line 107: | ||
|In the last scene, there is a hole visible only after flipping into 3-D. Chests can be found at the bottom of said hole. | |In the last scene, there is a hole visible only after flipping into 3-D. Chests can be found at the bottom of said hole. | ||
|[[File:Gloam Valley Treasure Chests 4-5.png|350px]] | |[[File:Gloam Valley Treasure Chests 4-5.png|350px]] | ||
|} | |||
==Chapter 2-2: Tricks, Treats, Traps== | |||
There are a total of 3 treasure chests to find in [[Merlee's Mansion]] during the Chapter 2-2. | |||
{| style="text-align: center; width: 100%; margin: 0 auto; border: #A5C631; border-collapse: collapse;" border="1" cellpadding="4" cellspacing="1" | |||
|-style="background: #FF9410;font-size:14pt;color:white" | |||
!Item/s | |||
!Description | |||
!Image | |||
|- | |||
|-style="background: #FFCE08;font-size:120%;color:#202122" id="Merlee's Mansion" | |||
!colspan=3|[[Merlee's Mansion|{{color|#202122|Merlee's Mansion}}]] ­ ­ ­ ­|­ ­ ­ ­ 3 Treasure Chests | |||
|- | |||
|[[File:Stop Watch SPM.png]]<br>[[Stop_Watch#Super_Paper_Mario|Stop Watch]] | |||
|In the outside scene, found at the top of the roof. | |||
|[[File:Merlee's Mansion (2-2) Treasure Chest 1.png|350px]] | |||
|- | |||
|[[File:CatchCardOrangeSPM.png]]<br>[[Cursya]] Catch Card | |||
|Same scene, found on the balcony above the entrance door. | |||
|[[File:Merlee's Mansion (2-2) Treasure Chest 2.png|350px]] | |||
|- | |||
|[[File:Door Key SPM.png]]<br>[[House Key (Super Paper Mario)|House Key]] | |||
|After reaching the room with spike ceiling trap (last door on the second floor of the second room), found at the end of the path above the trap. | |||
|[[File:Merlee's Mansion (2-2) Treasure Chest 3.png|350px]] | |||
|} | |||
==Chapter 2-3: Breaking the Bank== | |||
There are a total of 2 treasure chests to find in [[Merlee's Mansion]] during the Chapter 2-3. | |||
{| style="text-align: center; width: 100%; margin: 0 auto; border: #A5C631; border-collapse: collapse;" border="1" cellpadding="4" cellspacing="1" | |||
|-style="background: #FF9410;font-size:14pt;color:white" | |||
!Item/s | |||
!Description | |||
!Image | |||
|- | |||
|-style="background: #FFCE08;font-size:120%;color:#202122" id="Merlee's Mansion" | |||
!colspan=3|[[Merlee's Mansion|{{color|#202122|Merlee's Mansion}}]] ­ ­ ­ ­|­ ­ ­ ­ 2 Treasure Chests | |||
|- | |||
|[[File:CatchCardOrangeSPM.png]]<br>[[Boo]] Catch Card | |||
|In the secret section of the first room found after going to east part of the second floor, flipping into 3-D and blowing up the [[Brick Block]]s with Boomer. | |||
|[[File:Merlee's Mansion (2-3) Treasure Chest 1.png|350px]] | |||
|- | |||
|[[File:SPM Slim Sprite.png|50px]]<br>[[Slim (Pixl)|Slim]] | |||
|In the secret section of the first room found after going to west part of the second floor and flipping into 3-D. | |||
|[[File:Merlee's Mansion (2-3) Treasure Chest 2.png|350px]] | |||
|} | |||
=Between Chapters 2 and 3= | |||
There are a total of 2 tresure chests to find in [[Flipside]] between Chapters 2 and 3. | |||
{| style="text-align: center; width: 100%; margin: 0 auto; border: #ABC; border-collapse: collapse;" border="1" cellpadding="4" cellspacing="1" | |||
|-style="background: #ABC;font-size:14pt;color:white" | |||
!Item/s | |||
!Description | |||
!Image | |||
|- | |||
|-style="background: #ABC;font-size:120%;color:#202122" id="Flipside" | |||
!colspan=3|[[Flipside|{{color|#202122|Flipside}}]] ­ ­ ­ ­|­ ­ ­ ­ 2 Treasure Chests | |||
|- | |||
|[[File:Cooking Disk R SPM.png]]<br>[[Cooking Disk]] R/2 (PAL) | |||
|After reaching the middle part of the 2nd Floor, going left, then destroying the brick blocks with Boomer to reach a pipe to the foreground part of 3rd Floor. Here, Mario must use [[Tippi]]'s ability to make a path out of [[Hard Block]]s. Chest is found at the end of the path, at the large block platform. | |||
|[[File:Flipside Treasure Chest 3.png|350px]] | |||
|- | |||
|[[File:CatchCardSilverSPM.png]]<br>[[The InterNed]] Catch Card | |||
|After using the newly functional elevator from 1st Floor to B1, then going right to the water and flipping into 3-D, found in the alcove in the wall. | |||
|[[File:Flipside Treasure Chest 4.png|350px]] | |||
|} | |||
=Chapter 3: The Bitlands= | |||
==Chapter 3-1: When Geeks Attack== | |||
There are a total of 3 treasure chests to find in [[The Bitlands]] during the Chapter 3-1. | |||
{| style="text-align: center; width: 100%; margin: 0 auto; border: #CEEF6B; border-collapse: collapse;" border="1" cellpadding="4" cellspacing="1" | |||
|-style="background: #FFE75A;font-size:14pt;color:white" | |||
!Item/s | |||
!Description | |||
!Image | |||
|- | |||
|-style="background: #FFFF5A;font-size:120%;color:#202122" id="The Bitlands" | |||
!colspan=3|[[The Bitlands|{{color|#202122|The Bitlands}}]] ­ ­ ­ ­|­ ­ ­ ­ 3 Treasure Chests | |||
|- | |||
|[[File:CatchCardOrangeSPM.png]]<br>[[Piranha_Plant#Super_Paper_Mario|Piranha Plant]] Catch Card | |||
|In the first scene, found at the end on the block platform. | |||
|[[File:The Bitlands Treasure Chest 1.png|350px]] | |||
|- | |||
|[[File:Thunder Rage SPM.png]]<br>[[Thunder Rage]] | |||
|Same scene, after going through the pipe at the very end, Mario is taken into the background. Chest is found after entering the next pipe there. | |||
|[[File:The Bitlands Treasure Chest 2.png|350px]] | |||
|- | |||
|[[File:CatchCardSilverSPM.png]]<br>[[Magikoopa#Super_Paper_Mario|Magikoopa]] Catch Card | |||
|In the underground scene, after reaching the very end, going through the rightmost pipe in the secret section. Found at the ground after flipping to 3-D. | |||
|[[File:The Bitlands Treasure Chest 3.png|350px]] | |||
|} | |||
==Chapter 3-2: Bloops Ahoy== | |||
There are a total of 2 treasure chests to find in [[The Tile Pool]] during the Chapter 3-2. | |||
{| style="text-align: center; width: 100%; margin: 0 auto; border: #CEEF6B; border-collapse: collapse;" border="1" cellpadding="4" cellspacing="1" | |||
|-style="background: #FFE75A;font-size:14pt;color:white" | |||
!Item/s | |||
!Description | |||
!Image | |||
|- | |||
|-style="background: #FFFF5A;font-size:120%;color:#202122" id="The Tile Pool" | |||
!colspan=3|[[The Tile Pool|{{color|#202122|The Tile Pool}}]] ­ ­ ­ ­|­ ­ ­ ­ 2 Treasure Chests | |||
|- | |||
|[[File:Gold Bar SPM.png]]<br>[[Gold_Bar#Paper_Mario_series|Gold Bar]] | |||
|In the second scene, after reaching the first dry part (the one in the pipe), found behind said pipe after flipping into 3-D. | |||
|[[File:The Tile Pool Treasure Chest 1.png|350px]] | |||
|- | |||
|[[File:SPM Thudley Sprite.png|50px]]<br>[[Thudley]] | |||
|After going through the pipe near the previous chest and the door at the end of the new scene, a door locks. Enemies in this room must be defeated to make the chest appear. | |||
|[[File:The Tile Pool Treasure Chest 2.png|350px]] | |||
|} | |||
==Chapter 3-3: Up, Up, and a Tree== | |||
There are a total of 1 treasure chest to find in [[The Dotwood Tree]] during the Chapter 3-3. | |||
{| style="text-align: center; width: 100%; margin: 0 auto; border: #CEEF6B; border-collapse: collapse;" border="1" cellpadding="4" cellspacing="1" | |||
|-style="background: #FFE75A;font-size:14pt;color:white" | |||
!Item/s | |||
!Description | |||
!Image | |||
|- | |||
|-style="background: #FFFF5A;font-size:120%;color:#202122" id="The Dotwood Tree" | |||
!colspan=3|[[The Dotwood Tree|{{color|#202122|The Dotwood Tree}}]] ­ ­ ­ ­|­ ­ ­ ­ 1 Treasure Chest | |||
|- | |||
|[[File:CatchCardSilverSPM.png]]<br>[[Princess Peach|Peach]] (2) Catch Card | |||
|In the inside scene, found in the room accessed by a pipe jutting out of the right wall. Here, two [[Chain_Chomp#Super_Paper_Mario|Chain Chomp]]s must be defeated for chest to appear. | |||
|[[File:The Dotwood Tree Treasure Chest.png|350px]] | |||
|} | |||
==Chapter 3-4: The Battle of Fort Francis== | |||
There are a total of 3 treasure chests to find in [[The Dotwood Tree]] during the Chapter 3-3. | |||
{| style="text-align: center; width: 100%; margin: 0 auto; border: #CEEF6B; border-collapse: collapse;" border="1" cellpadding="4" cellspacing="1" | |||
|-style="background: #FFE75A;font-size:14pt;color:white" | |||
!Item/s | |||
!Description | |||
!Image | |||
|- | |||
|-style="background: #FFFF5A;font-size:120%;color:#202122" id="Fort Francis" | |||
!colspan=3|[[Fort Francis|{{color|#202122|Fort Francis}}]] ­ ­ ­ ­|­ ­ ­ ­ 3 Treasure Chests | |||
|- | |||
|[[File:Fort Key SPM.png]]<br>[[Fort Key]] | |||
|In the first scene, there is a pipe only visible after reaching the east end and flipping into 3-D. Chest is in the room reached by the said pipe. | |||
|[[File:Fort Francis Treasure Chest 1.png|350px]] | |||
|- | |||
|[[File:Fort Key SPM.png]]<br>Fort Key | |||
|In the room reached by a outdoor bridge and going past the [[SecuriMeow]]. | |||
|[[File:Fort Francis Block 1 and Treasure Chest 2.png|350px]] | |||
|- | |||
|[[File:Fort Key SPM.png]]<br>Fort Key | |||
|In the room reach by going past the SecuriMeow and the elevator. | |||
|[[File:Fort Francis Block 2 and Treasure Chest 3.png|350px]] | |||
|} | |||
=Chapter 4: Outer Space= | |||
==Chapter 4-4: The Mysterious Mr. L== | |||
There are a total of 3 treasure chests to find in [[Whoa Zone]] during the Chapter 4-4. | |||
{| style="text-align: center; width: 100%; margin: 0 auto; border: #39DE21; border-collapse: collapse;" border="1" cellpadding="4" cellspacing="1" | |||
|-style="background: #A5BD18;font-size:14pt;color:white" | |||
!Item/s | |||
!Description | |||
!Image | |||
|- | |||
|-style="background: #ADF708;font-size:120%;color:#202122" id="Whoa Zone" | |||
!colspan=3|[[Whoa Zone|{{color|#202122|Whoa Zone}}]] ­ ­ ­ ­|­ ­ ­ ­ 3 Treasure Chests | |||
|- | |||
|[[File:Dimension Key SPM.png]]<br>[[Dimension Key]] | |||
|At the end of the fourth scene. | |||
|[[File:The Whoa Zone Treasure Chest 1.png|350px]] | |||
|- | |||
|[[File:Dimension Key SPM.png]]<br>Dimension Key | |||
|At the ceiling of the scene with the second locked door. | |||
|[[File:The Whoa Zone Treasure Chest 2.png|350px]] | |||
|- | |||
|[[File:Dimension Key SPM.png]]<br>Dimension Key | |||
|In the scene reached by the third door in the room with 90° [[Gravity switch|gravity switches]]. | |||
|[[File:The Whoa Zone Treasure Chest 3.png|350px]] | |||
|} | |||
=Between Chapters 4 and 5= | |||
There are a total of 1 tresure chest to find in [[Flopside]] between Chapters 4 and 5. | |||
{| style="text-align: center; width: 100%; margin: 0 auto; border: #ABC; border-collapse: collapse;" border="1" cellpadding="4" cellspacing="1" | |||
|-style="background: #ABC;font-size:14pt;color:white" | |||
!Item/s | |||
!Description | |||
!Image | |||
|- | |||
|-style="background: #ABC;font-size:120%;color:#202122" id="Flopside" | |||
!colspan=3|[[Flopside|{{color|#202122|Flopside}}]] ­ ­ ­ ­|­ ­ ­ ­ 1 Treasure Chest | |||
|- | |||
|[[File:Cooking Disk W SPM.png]]<br>Cooking Disk W/3 (PAL) | |||
|After reaching the foreground part of the 3rd Floor. Here, Mario must use Tippi's ability to make a path out of Hard Blocks. Chest is found at the end of the path, at the large block platform. | |||
|[[File:Flopside Treasure Chest 1.png|350px]] | |||
|} | |||
=Chapter 5: Land of the Cragnons= | |||
==Chapter 5-1: Downtown of Crag== | |||
There are a total of 2 treasure chests to find in [[Downtown of Crag]] during the Chapter 5-1. | |||
{| style="text-align: center; width: 100%; margin: 0 auto; border: #7394EF; border-collapse: collapse;" border="1" cellpadding="4" cellspacing="1" | |||
|-style="background: #18CEFF;font-size:14pt;color:white" | |||
!Item/s | |||
!Description | |||
!Image | |||
|- | |||
|-style="background: #218CDE;font-size:120%;color:#202122" id="Downtown of Crag" | |||
!colspan=3|[[Downtown of Crag|{{color|#202122|Downtown of Crag}}]] ­ ­ ­ ­|­ ­ ­ ­ 2 Treasure Chests | |||
|- | |||
|[[File:CatchCardOrangeSPM.png]]<br>[[Cleft|Moon Cleft]] Catch Card | |||
|In the second scene, found in the alcove after jumping down between the two elevated grounds to the west and flipping to 3-D. | |||
|[[File:Downtown of Crag Treasure Chest 1.png|350px]] | |||
|- | |||
|[[File:CatchCardSilverSPM.png]]<br>[[Bowser]] (2) Carch Card | |||
|Same scene, after entering the easternmost pipe and defeating the enemies there, a chest spawns. | |||
|[[File:Downtown of Crag Treasure Chest 2.png|350px]] | |||
|} | |||
==Chapter 5-2: Pixls, Tablets, and Crag== | |||
There are a total of 2 treasure chests to find in [[Gap of Crag]] during the Chapter 5-2. | |||
{| style="text-align: center; width: 100%; margin: 0 auto; border: #7394EF; border-collapse: collapse;" border="1" cellpadding="4" cellspacing="1" | |||
|-style="background: #18CEFF;font-size:14pt;color:white" | |||
!Item/s | |||
!Description | |||
!Image | |||
|- | |||
|-style="background: #218CDE;font-size:120%;color:#202122" id="Gap of Crag" | |||
!colspan=3|[[Gap of Crag|{{color|#202122|Gap of Crag}}]] ­ ­ ­ ­|­ ­ ­ ­ 2 Treasure Chests | |||
|- | |||
|[[File:Water Tablet SPM.png]]<br>[[Water Tablet]] | |||
|In the first scene, found under the water. | |||
|[[File:Gap of Crag Treasure Chest 1.png|350px]] | |||
|- | |||
|[[File:CatchCardOrangeSPM.png]]<br>[[Stone Buzzy]] Catch Card | |||
|In the last scene, found after reaching the east end and flipping to 3-D. | |||
|[[File:Gap of Crag Treasure Chest 2.png|350px]] | |||
|} | |||
==Chapter 5-3: A Crag in the Dark== | |||
There are a total of 1 treasure chest to find in [[Floro Caverns]] during the Chapter 5-3. | |||
{| style="text-align: center; width: 100%; margin: 0 auto; border: #7394EF; border-collapse: collapse;" border="1" cellpadding="4" cellspacing="1" | |||
|-style="background: #18CEFF;font-size:14pt;color:white" | |||
!Item/s | |||
!Description | |||
!Image | |||
|- | |||
|-style="background: #218CDE;font-size:120%;color:#202122" id="Floro Caverns" | |||
!colspan=3|[[Floro Caverns|{{color|#202122|Floro Caverns}}]] ­ ­ ­ ­|­ ­ ­ ­ 1 Treasure Chest | |||
|- | |||
|[[File:Shroom Shake SPM.png]]<br>Shroom Shake | |||
|Found after entering the third pipe in the third scene and the flipping to 3-D to find a secret section of the room. | |||
|[[File:Floro Caverns (5-3) Treasure Chest.png|350px]] | |||
|} | |||
==Chapter 5-4: The Menace of King Croacus== | |||
There are a total of 1 treasure chest to find in [[Floro Caverns]] during the Chapter 5-4. | |||
{| style="text-align: center; width: 100%; margin: 0 auto; border: #7394EF; border-collapse: collapse;" border="1" cellpadding="4" cellspacing="1" | |||
|-style="background: #18CEFF;font-size:14pt;color:white" | |||
!Item/s | |||
!Description | |||
!Image | |||
|- | |||
|-style="background: #218CDE;font-size:120%;color:#202122" id="Floro Caverns" | |||
!colspan=3|[[Floro Caverns|{{color|#202122|Floro Caverns}}]] ­ ­ ­ ­|­ ­ ­ ­ 1 Treasure Chest | |||
|- | |||
|[[File:CatchCardSilverSPM.png]]<br>[[Floro Cragnien]] Catch Card | |||
|Found at the west end of the third scene of the Processing Center. | |||
|[[File:Floro Caverns (5-4) Treasure Chest.png|350px]] | |||
|} | |} | ||
Revision as of 06:59, August 5, 2024
Chapter 1: Lineland
Chapter 1-1: The Adventure Unfolds
There are a total of 2 tresure chests to find in Lineland Road during the Chapter 1-1.
| Item/s | Description | Image |
|---|---|---|
| Lineland Road | 2 Treasure Chests | ||
Shroom Shake |
In the underground scene after entering the second pipe in the first scene. | 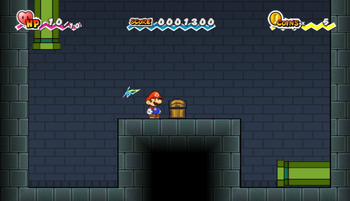
|
Koopa Troopa Catch Card |
In the last scene, found by flipping to 3-D at the very end and going to secret section. | 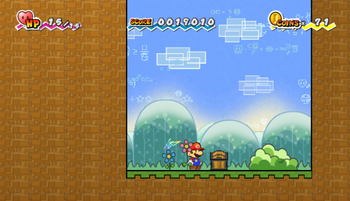
|
Chapter 1-2: Afoot in the Foothills
There are a total of 2 tresure chests to find in Mount Lineland during the Chapter 1-2.
| Item/s | Description | Image |
|---|---|---|
| Mount Lineland | 2 Treasure Chests | ||
Paratroopa Catch Card |
In the first scene, there is a secret path visible after flipping to 3-D near the start of the area. | 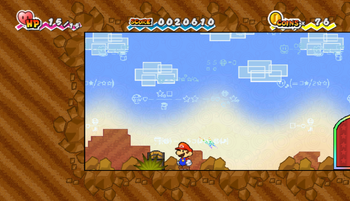
|
Thoreau |
In the room after reaching the end of the second house in Yold Town. | 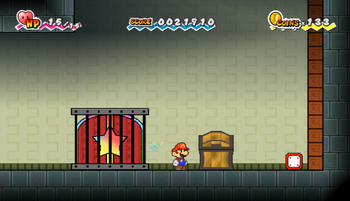
|
Chapter 1-4: Monster of the Ruins
There are a total of 3 tresure chests to find in Yold Ruins during the Chapter 1-4.
| Item/s | Description | Image |
|---|---|---|
| Yold Ruins | 3 Treasure Chests | ||
Life Shroom |
In the second scene, found by going to the upper east and then down the ladder which is found there. | 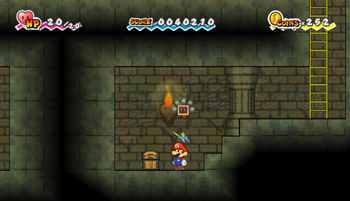
|
Ruins Key |
In the upper part of fourth scene. | 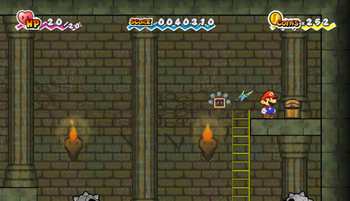
|
Buzzy Beetle Catch Card |
In the eighth scene, after reaching the east end and then flipping to 3-D, a secret path is revealed. Chest is found at the end of it. | 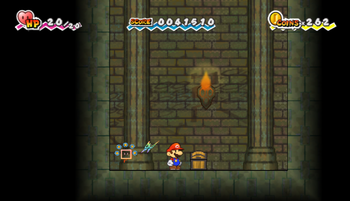
|
Between Chapters 1 and 2
There are a total of 2 tresure chests to find in Flipside between Chapters 1 and 2.
| Item/s | Description | Image |
|---|---|---|
| Flipside | 2 Treasure Chests | ||
Merlon and Merluvlee Catch Cards |
After getting the Old Key from Merlon, used to reach 1st Floor Outskirts, found after falling in the first hole. | 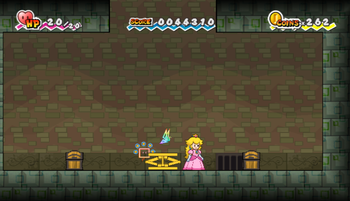
|
Chapter 2: Gloam Valley
Chapter 2-1: Bogging to Merlee's
There are a total of 5 treasure chests to find in Gloam Valley during the Chapter 2-1.
| Item/s | Description | Image |
|---|---|---|
| Gloam Valley | 5 Treasure Chests | ||
Door Key |
In the first scene, there is a pipe found above the exit door. By entering it and defeating the enemies inside, a chest spawns. | 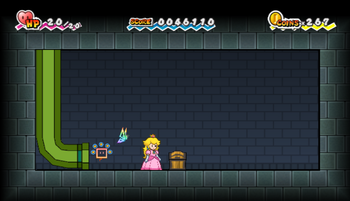
|
Boomer |
In the fifth scene, there is a pipe found near the end. By entering it, pushing a ! switch in the first room and defeating a Growmeba in the second one, a chest spawns. | 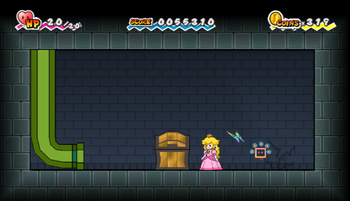
|
Watchitt Catch Card |
After getting Boomer from the previous chest, he can be used to blow up a cracked wall behind the chest. Then by flipping into 3-D with Mario, another chest can be reached | 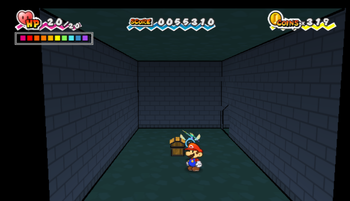
|
Shlurp and Swooper Catch Cards |
In the last scene, there is a hole visible only after flipping into 3-D. Chests can be found at the bottom of said hole. | 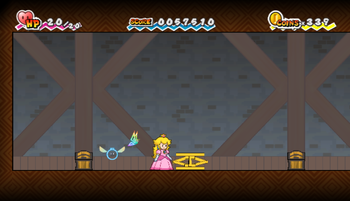
|
Chapter 2-2: Tricks, Treats, Traps
There are a total of 3 treasure chests to find in Merlee's Mansion during the Chapter 2-2.
| Item/s | Description | Image |
|---|---|---|
| Merlee's Mansion | 3 Treasure Chests | ||
Stop Watch |
In the outside scene, found at the top of the roof. | 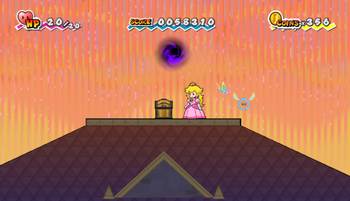
|
Cursya Catch Card |
Same scene, found on the balcony above the entrance door. | 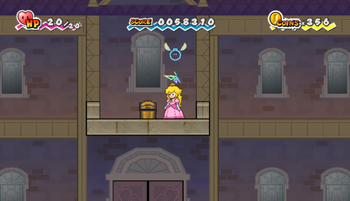
|
House Key |
After reaching the room with spike ceiling trap (last door on the second floor of the second room), found at the end of the path above the trap. | 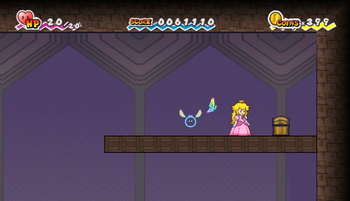
|
Chapter 2-3: Breaking the Bank
There are a total of 2 treasure chests to find in Merlee's Mansion during the Chapter 2-3.
| Item/s | Description | Image |
|---|---|---|
| Merlee's Mansion | 2 Treasure Chests | ||
Boo Catch Card |
In the secret section of the first room found after going to east part of the second floor, flipping into 3-D and blowing up the Brick Blocks with Boomer. | 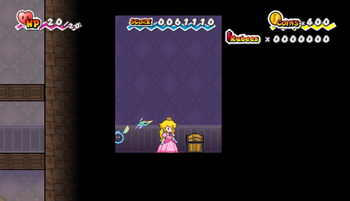
|
Slim |
In the secret section of the first room found after going to west part of the second floor and flipping into 3-D. | 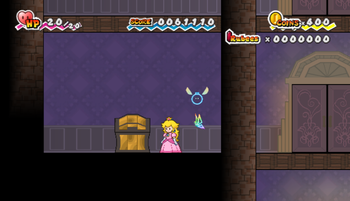
|
Between Chapters 2 and 3
There are a total of 2 tresure chests to find in Flipside between Chapters 2 and 3.
| Item/s | Description | Image |
|---|---|---|
| Flipside | 2 Treasure Chests | ||
Cooking Disk R/2 (PAL) |
After reaching the middle part of the 2nd Floor, going left, then destroying the brick blocks with Boomer to reach a pipe to the foreground part of 3rd Floor. Here, Mario must use Tippi's ability to make a path out of Hard Blocks. Chest is found at the end of the path, at the large block platform. | 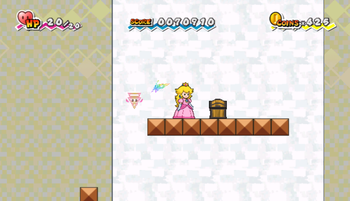
|
The InterNed Catch Card |
After using the newly functional elevator from 1st Floor to B1, then going right to the water and flipping into 3-D, found in the alcove in the wall. | 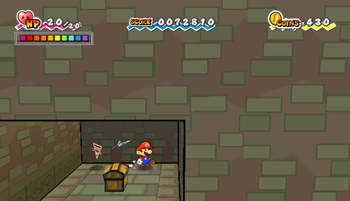
|
Chapter 3: The Bitlands
Chapter 3-1: When Geeks Attack
There are a total of 3 treasure chests to find in The Bitlands during the Chapter 3-1.
| Item/s | Description | Image |
|---|---|---|
| The Bitlands | 3 Treasure Chests | ||
Piranha Plant Catch Card |
In the first scene, found at the end on the block platform. | 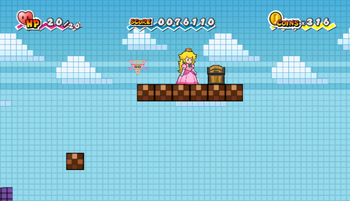
|
Thunder Rage |
Same scene, after going through the pipe at the very end, Mario is taken into the background. Chest is found after entering the next pipe there. | 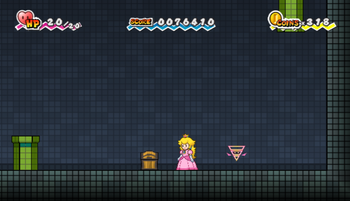
|
Magikoopa Catch Card |
In the underground scene, after reaching the very end, going through the rightmost pipe in the secret section. Found at the ground after flipping to 3-D. | 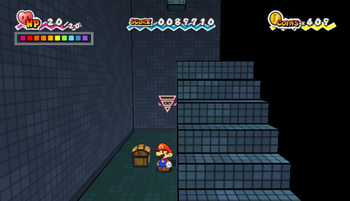
|
Chapter 3-2: Bloops Ahoy
There are a total of 2 treasure chests to find in The Tile Pool during the Chapter 3-2.
| Item/s | Description | Image |
|---|---|---|
| The Tile Pool | 2 Treasure Chests | ||
Gold Bar |
In the second scene, after reaching the first dry part (the one in the pipe), found behind said pipe after flipping into 3-D. | 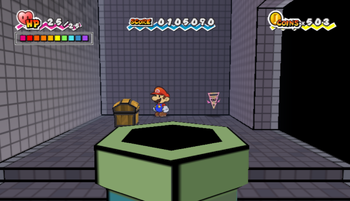
|
Thudley |
After going through the pipe near the previous chest and the door at the end of the new scene, a door locks. Enemies in this room must be defeated to make the chest appear. | 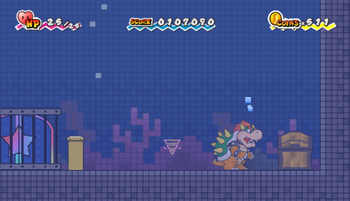
|
Chapter 3-3: Up, Up, and a Tree
There are a total of 1 treasure chest to find in The Dotwood Tree during the Chapter 3-3.
| Item/s | Description | Image |
|---|---|---|
| The Dotwood Tree | 1 Treasure Chest | ||
Peach (2) Catch Card |
In the inside scene, found in the room accessed by a pipe jutting out of the right wall. Here, two Chain Chomps must be defeated for chest to appear. | 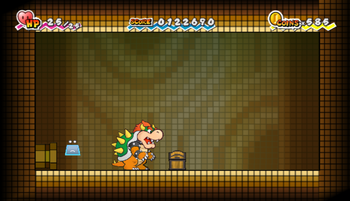
|
Chapter 3-4: The Battle of Fort Francis
There are a total of 3 treasure chests to find in The Dotwood Tree during the Chapter 3-3.
| Item/s | Description | Image |
|---|---|---|
| Fort Francis | 3 Treasure Chests | ||
Fort Key |
In the first scene, there is a pipe only visible after reaching the east end and flipping into 3-D. Chest is in the room reached by the said pipe. | 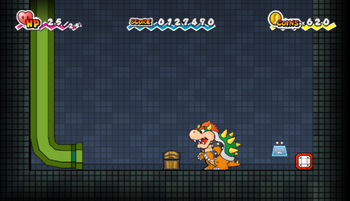
|
Fort Key |
In the room reached by a outdoor bridge and going past the SecuriMeow. | 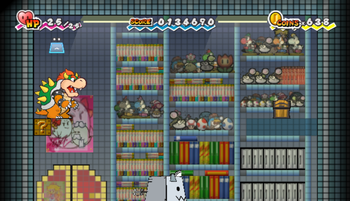
|
Fort Key |
In the room reach by going past the SecuriMeow and the elevator. | 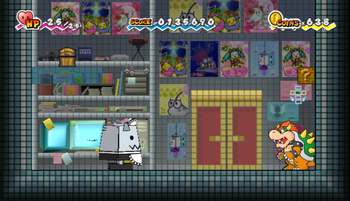
|
Chapter 4: Outer Space
Chapter 4-4: The Mysterious Mr. L
There are a total of 3 treasure chests to find in Whoa Zone during the Chapter 4-4.
| Item/s | Description | Image |
|---|---|---|
| Whoa Zone | 3 Treasure Chests | ||
Dimension Key |
At the end of the fourth scene. | 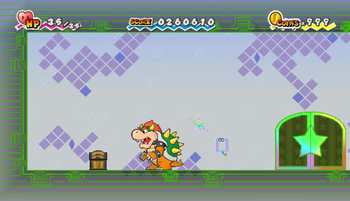
|
Dimension Key |
At the ceiling of the scene with the second locked door. | 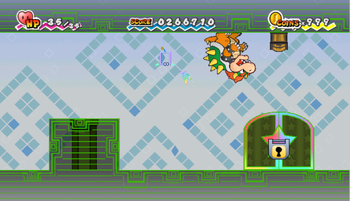
|
Dimension Key |
In the scene reached by the third door in the room with 90° gravity switches. | 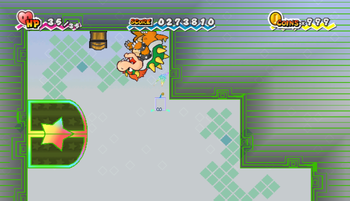
|
Between Chapters 4 and 5
There are a total of 1 tresure chest to find in Flopside between Chapters 4 and 5.
| Item/s | Description | Image |
|---|---|---|
| Flopside | 1 Treasure Chest | ||
Cooking Disk W/3 (PAL) |
After reaching the foreground part of the 3rd Floor. Here, Mario must use Tippi's ability to make a path out of Hard Blocks. Chest is found at the end of the path, at the large block platform. | 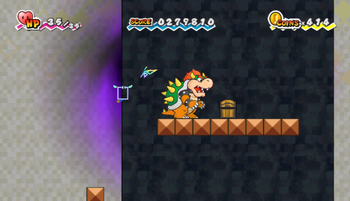
|
Chapter 5: Land of the Cragnons
Chapter 5-1: Downtown of Crag
There are a total of 2 treasure chests to find in Downtown of Crag during the Chapter 5-1.
| Item/s | Description | Image |
|---|---|---|
| Downtown of Crag | 2 Treasure Chests | ||
Moon Cleft Catch Card |
In the second scene, found in the alcove after jumping down between the two elevated grounds to the west and flipping to 3-D. | 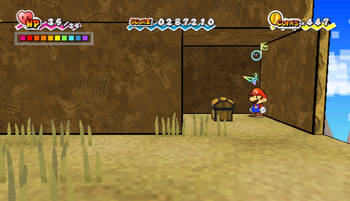
|
Bowser (2) Carch Card |
Same scene, after entering the easternmost pipe and defeating the enemies there, a chest spawns. | 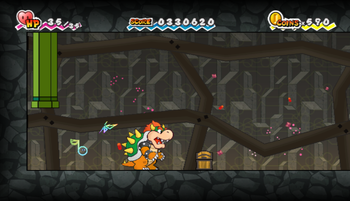
|
Chapter 5-2: Pixls, Tablets, and Crag
There are a total of 2 treasure chests to find in Gap of Crag during the Chapter 5-2.
| Item/s | Description | Image |
|---|---|---|
| Gap of Crag | 2 Treasure Chests | ||
Water Tablet |
In the first scene, found under the water. | 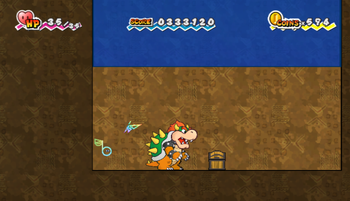
|
Stone Buzzy Catch Card |
In the last scene, found after reaching the east end and flipping to 3-D. | 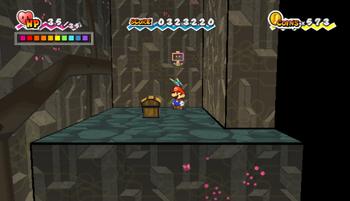
|
Chapter 5-3: A Crag in the Dark
There are a total of 1 treasure chest to find in Floro Caverns during the Chapter 5-3.
| Item/s | Description | Image |
|---|---|---|
| Floro Caverns | 1 Treasure Chest | ||
Shroom Shake |
Found after entering the third pipe in the third scene and the flipping to 3-D to find a secret section of the room. | 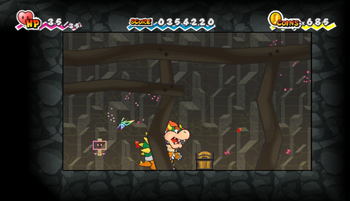
|
Chapter 5-4: The Menace of King Croacus
There are a total of 1 treasure chest to find in Floro Caverns during the Chapter 5-4.
| Item/s | Description | Image |
|---|---|---|
| Floro Caverns | 1 Treasure Chest | ||
Floro Cragnien Catch Card |
Found at the west end of the third scene of the Processing Center. | 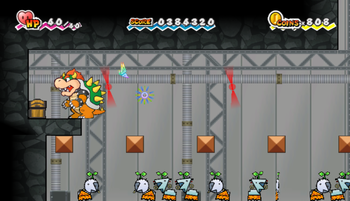
|