User:Green Star/sandbox: Difference between revisions
Green Star (talk | contribs) No edit summary |
Green Star (talk | contribs) No edit summary |
||
| Line 1: | Line 1: | ||
{{location-infobox | {{location-infobox | ||
|image= | |image=FireVellumentalCave.png | ||
|greaterloc=[[ | |greaterloc=[[Scorching Sandpaper Desert]] | ||
|ruler=[[Fire Vellumental]] | |||
|first_appearance=''[[Paper Mario: The Origami King]]'' ([[List of games by date#2020|2020]]) | |first_appearance=''[[Paper Mario: The Origami King]]'' ([[List of games by date#2020|2020]]) | ||
}} | }} | ||
'''Fire Vellumental Cave''' is a location in ''[[Paper Mario: The Origami King]]'', a cave buried and hidden beneath [[Scorching Sandpaper Desert]], home to the [[Fire Vellumental]], who is fought at the very end. There are a good number of fiery obstacles, puzzles, and enemies [[Mario]] encounters along the way. There are no [[Toad (species)|Toad]]s to be found or rescued here. | |||
==History== | ==History== | ||
After | There are a few steps [[Mario]] must take to unearth and unlock the Fire Vellumental Cave. After having rescued [[Professor Toad]], finding [[Luigi]] and acquiring the [[Suite Key]], he must enter the master suite in the [[Shroom City (Paper Mario: The Origami King)|Snif City]] hotel and examine the images on the wall. This prompts Professor Toad to teach [[Olivia]] a new song which must be performed to attract the [[Fire Vellumental]]. From here, they must return to [[Scorching Sandpaper Desert]] and locate the circle of bird statues in the southeast region - south of the [[Sun Altar]] and west of the ruins. Mario must hit each statue with his hammer a certain number of times to get them to face toward the center, thus opening up a mic. Mario must have Olivia perform "[[My Heart's a-Burnin']]" in front of the mic to unearth the Fire Vellumental Cave just behind the statues. | ||
Professor Toad is astonished by this and eager to enter. However, once they do, he asks to sit out on exploring the cave, most likely afraid of the fire. Olivia understands this, telling him he can wait at the entrance while they explore. After passing through puzzles requiring them to memorize patterns of glowing tiles, long sections with [[Fire Bar]]s and various fire-themed enemies and obstacles, Mario and Olivia make it through to the end of the cave. Here, they encounter the Fire Vellumental, corrupted in its origami form. Once it is defeated, it surrenders a [[Bibliofold]], giving Olivia the power to transform into and harness the Fire Vellumental's abilities. After learning how to use this newfound power, Olivia reveals a staircase allowing them to board a lift taking them back to the entrance. Professor Toad is seen contemplating whether or not he should have followed before the lift strikes the back of a statue, nearly crushing him. They describe their experiences to each other before exiting the cave. | |||
==Layout== | ==Layout== | ||
The actual location of the Fire Vellumental Cave is not on ground level - rather, it is buried in the southeast region of Scorching Sandpaper Desert. It is between the Sun Altar and bird statue circle, requiring various story missions to unlock, including finding Professor Toad and entering the master suite in the hotel. As soon as it is unearthed, Mario, Olivia and Professor Toad may enter. The entrance room itself is intimidating, featuring a pool of lava and several bird statues representing the Fire Vellumental. Professor Toad stays here, allowing Mario and Olivia to explore the rest of this area on their own. The following room features several tiles and requires the player to remember which tiles light up and in what order, then have Mario go along that route. If Mario steps on an incorrect tile, he loses [[HP]] and must restart. If the player fails more than once, the tiles stay light up until the path is finished. At the end of this room is a [[Not-Bottomless Hole]] and a [[Save Block]]. | |||
The next room is very small, with two vases containing confetti, two Not-Bottomless Holes in the wall and a [[Koopa Paratroopa]] surveying the area. When Mario enters the room to the right, both doors slam shut, trapping him in. Here, he must battle a number of small [[Paper Macho Shy Guy]]s carrying buckets of fire, which they use to attack | |||
==Enemies== | ==Enemies== | ||
*[[ | *[[Buzzy Beetle]]s | ||
*[[ | *[[Fire Bro]]s | ||
*[[ | *[[Koopa Paratroopa]]s | ||
*[[ | *[[Paper Macho Shy Guy]]s | ||
*[[Fire Vellumental]] (Boss) | |||
==Not-Bottomless Holes== | ==Not-Bottomless Holes== | ||
{|border=1 cellpadding=0 style="text-align: center; border-collapse: collapse; border: 1px solid black; width:100%" | {|border=1 cellpadding=0 style="text-align: center; border-collapse: collapse; border: 1px solid black; width:100%" | ||
|- | |- | ||
|There is a [[Not-Bottomless Hole]] in the | |There is a [[Not-Bottomless Hole]] in the ground in the southwest corner of the main room. | ||
|[[File: | |[[File:WaterVellumentalShrineHoleA.jpg|250px]] | ||
|- | |- | ||
|There is a Not-Bottomless Hole in the | |There is a Not-Bottomless Hole in the stairs leading up to the room with the easier tile puzzle. | ||
|[[File: | |[[File:WaterVellumentalShrineHoleB.jpg|250px]] | ||
|- | |- | ||
|There is a Not-Bottomless Hole | |There is a Not-Bottomless Hole in the ground in the southeast corner of the main room. | ||
|[[File: | |[[File:WaterVellumentalShrineHoleC.jpg|250px]] | ||
|- | |||
|There is a Not-Bottomless Hole below the wheel, guarded by [[Swoop]]s. | |||
|[[File:WaterVellumentalShrineHoleD.jpg|250px]] | |||
|- | |||
|There are two Not-Bottomless Holes in the breakable block section. They are both in the walls on the opposite sides of the room. Mario must be careful not to break certain blocks, make it to the end of the section, and walk along the top of the blocks to reach them. | |||
|[[File:WaterVellumentalShrineHoleE.jpg|250px]] | |||
|- | |||
|There are two Not-Bottomless Holes beneath one of the blocks in this section, closer to the entrance. | |||
|[[File:WaterVellumentalShrineHoleF.jpg|250px]] | |||
|- | |||
|There is a Not-Bottomless Hole in the wall in the northeast corner of the room with the smaller stone dragon head. | |||
|[[File:WaterVellumentalShrineHoleG.jpg|250px]] | |||
|- | |||
|There is a Not-Bottomless Hole in the right side of the cavern area. | |||
|[[File:WaterVellumentalShrineHoleH.jpg|250px]] | |||
|- | |||
|There is a Not-Bottomless Hole on the other side of the cavern in the shape of a mushroom, revealed to be the door to a coffee shop when filled in. | |||
|[[File:WaterVellumentalShrineHoleI.jpg|250px]] | |||
|} | |} | ||
| Line 39: | Line 58: | ||
{|border=1 cellpadding=0 style="text-align: center; border-collapse: collapse; border: 1px solid black; width:100%" | {|border=1 cellpadding=0 style="text-align: center; border-collapse: collapse; border: 1px solid black; width:100%" | ||
|- | |- | ||
| | |Mario must head down below the wheel and continue to the southwest corner to find the chest containing Collectible Treasure #37: Restaurant Fridge. | ||
|[[File: | |[[File:WaterVellumentalShrineCollectibleA.jpg|250px]] | ||
|- | |- | ||
| | |Mario must hammer around the northwest area below the wheel to find a small set of [[Hidden Block]]s allowing him to enter a tunnel leading to the chest containing Collectible Treasure #38: [[MAX UP Heart]]. | ||
|[[File: | |[[File:WaterVellumentalShrineCollectibleB.jpg|250px]] | ||
|- | |- | ||
| | |Mario must destroy certain blocks in the block section and keep others, allowing him to hop along them to a small overhead tunnel at the entrance with a chest containing Collectible Treasure #39: [[POW Block]]. | ||
|[[File:WaterVellumentalShrineCollectibleC.png|250px]] | |||
|[[File: | |||
|} | |} | ||
| Line 55: | Line 71: | ||
{|border=1 cellpadding=0 style="text-align: center; border-collapse: collapse; border: 1px solid black; width:100%" | {|border=1 cellpadding=0 style="text-align: center; border-collapse: collapse; border: 1px solid black; width:100%" | ||
|- | |- | ||
| | |There is a [[? Block]] on the west side of the wheel in the main area. | ||
|[[File: | |[[File:WaterVellumentalShrineBlockA.jpg|250px]] | ||
|- | |||
|There are two ? Blocks in the first room west of the main area. One contains a bag of confetti, while the other contains [[Shiny Iron Boots]]. | |||
|[[File:WaterVellumentalShrineBlockB.jpg|250px]] | |||
|- | |||
|There is a ? Block on the east side of the wheel in the main area. | |||
|[[File:WaterVellumentalShrineBlockC.jpg|250px]] | |||
|- | |||
|There is a set of four [[Hidden Block]]s creating a ledge down below the wheel. | |||
|[[File:WaterVellumentalShrineBlockD.jpg|250px]] | |||
|- | |||
|There is a ? Block on a ledge in the southeast corner of the block section, right in front of a [[Not-Bottomless Hole]]. | |||
|[[File:WaterVellumentalShrineBlockE.jpg|250px]] | |||
|- | |||
|There is a ? Block near the exit of the block section. | |||
|[[File:WaterVellumentalShrineBlockF.jpg|250px]] | |||
|- | |||
|There is a ? Block on the left side of the cavern. | |||
|[[File:WaterVellumentalShrineBlockG.jpg|250px]] | |||
|- | |- | ||
| | |There is a ? Block on the right side of the cavern. | ||
|[[File: | |[[File:WaterVellumentalShrineBlockH.jpg|250px]] | ||
|} | |} | ||
{{PMTOK}} | {{PMTOK}} | ||
[[ | [[NOCategory:Paper Mario: The Origami King Places]] | ||
Revision as of 23:02, August 17, 2020
Template:Location-infobox Fire Vellumental Cave is a location in Paper Mario: The Origami King, a cave buried and hidden beneath Scorching Sandpaper Desert, home to the Fire Vellumental, who is fought at the very end. There are a good number of fiery obstacles, puzzles, and enemies Mario encounters along the way. There are no Toads to be found or rescued here.
History
There are a few steps Mario must take to unearth and unlock the Fire Vellumental Cave. After having rescued Professor Toad, finding Luigi and acquiring the Suite Key, he must enter the master suite in the Snif City hotel and examine the images on the wall. This prompts Professor Toad to teach Olivia a new song which must be performed to attract the Fire Vellumental. From here, they must return to Scorching Sandpaper Desert and locate the circle of bird statues in the southeast region - south of the Sun Altar and west of the ruins. Mario must hit each statue with his hammer a certain number of times to get them to face toward the center, thus opening up a mic. Mario must have Olivia perform "My Heart's a-Burnin'" in front of the mic to unearth the Fire Vellumental Cave just behind the statues.
Professor Toad is astonished by this and eager to enter. However, once they do, he asks to sit out on exploring the cave, most likely afraid of the fire. Olivia understands this, telling him he can wait at the entrance while they explore. After passing through puzzles requiring them to memorize patterns of glowing tiles, long sections with Fire Bars and various fire-themed enemies and obstacles, Mario and Olivia make it through to the end of the cave. Here, they encounter the Fire Vellumental, corrupted in its origami form. Once it is defeated, it surrenders a Bibliofold, giving Olivia the power to transform into and harness the Fire Vellumental's abilities. After learning how to use this newfound power, Olivia reveals a staircase allowing them to board a lift taking them back to the entrance. Professor Toad is seen contemplating whether or not he should have followed before the lift strikes the back of a statue, nearly crushing him. They describe their experiences to each other before exiting the cave.
Layout
The actual location of the Fire Vellumental Cave is not on ground level - rather, it is buried in the southeast region of Scorching Sandpaper Desert. It is between the Sun Altar and bird statue circle, requiring various story missions to unlock, including finding Professor Toad and entering the master suite in the hotel. As soon as it is unearthed, Mario, Olivia and Professor Toad may enter. The entrance room itself is intimidating, featuring a pool of lava and several bird statues representing the Fire Vellumental. Professor Toad stays here, allowing Mario and Olivia to explore the rest of this area on their own. The following room features several tiles and requires the player to remember which tiles light up and in what order, then have Mario go along that route. If Mario steps on an incorrect tile, he loses HP and must restart. If the player fails more than once, the tiles stay light up until the path is finished. At the end of this room is a Not-Bottomless Hole and a Save Block.
The next room is very small, with two vases containing confetti, two Not-Bottomless Holes in the wall and a Koopa Paratroopa surveying the area. When Mario enters the room to the right, both doors slam shut, trapping him in. Here, he must battle a number of small Paper Macho Shy Guys carrying buckets of fire, which they use to attack
Enemies
Not-Bottomless Holes
| There is a Not-Bottomless Hole in the ground in the southwest corner of the main room. | 
|
| There is a Not-Bottomless Hole in the stairs leading up to the room with the easier tile puzzle. | 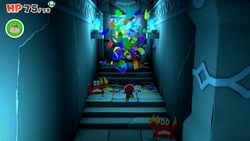
|
| There is a Not-Bottomless Hole in the ground in the southeast corner of the main room. | 
|
| There is a Not-Bottomless Hole below the wheel, guarded by Swoops. | 
|
| There are two Not-Bottomless Holes in the breakable block section. They are both in the walls on the opposite sides of the room. Mario must be careful not to break certain blocks, make it to the end of the section, and walk along the top of the blocks to reach them. | 
|
| There are two Not-Bottomless Holes beneath one of the blocks in this section, closer to the entrance. | 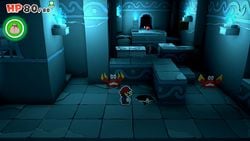
|
| There is a Not-Bottomless Hole in the wall in the northeast corner of the room with the smaller stone dragon head. | 
|
| There is a Not-Bottomless Hole in the right side of the cavern area. | 
|
| There is a Not-Bottomless Hole on the other side of the cavern in the shape of a mushroom, revealed to be the door to a coffee shop when filled in. | 
|
Collectible Treasures
| Mario must head down below the wheel and continue to the southwest corner to find the chest containing Collectible Treasure #37: Restaurant Fridge. | 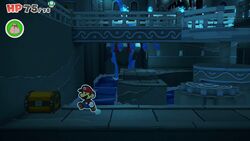
|
| Mario must hammer around the northwest area below the wheel to find a small set of Hidden Blocks allowing him to enter a tunnel leading to the chest containing Collectible Treasure #38: MAX UP Heart. | 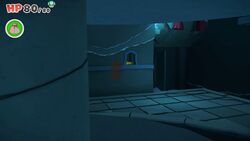
|
| Mario must destroy certain blocks in the block section and keep others, allowing him to hop along them to a small overhead tunnel at the entrance with a chest containing Collectible Treasure #39: POW Block. | 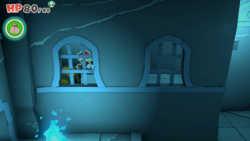
|
? Blocks
| There is a ? Block on the west side of the wheel in the main area. | 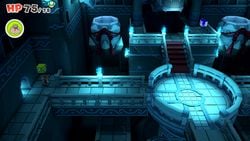
|
| There are two ? Blocks in the first room west of the main area. One contains a bag of confetti, while the other contains Shiny Iron Boots. | 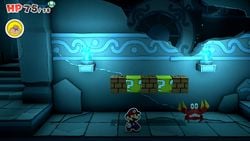
|
| There is a ? Block on the east side of the wheel in the main area. | 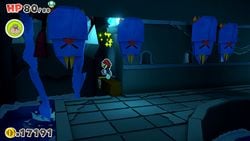
|
| There is a set of four Hidden Blocks creating a ledge down below the wheel. | 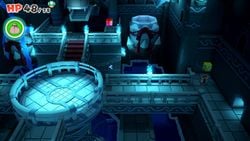
|
| There is a ? Block on a ledge in the southeast corner of the block section, right in front of a Not-Bottomless Hole. | 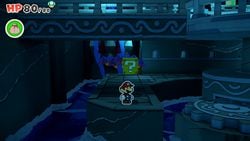
|
| There is a ? Block near the exit of the block section. | 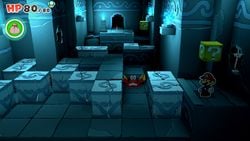
|
| There is a ? Block on the left side of the cavern. | 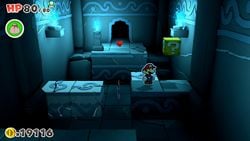
|
| There is a ? Block on the right side of the cavern. | 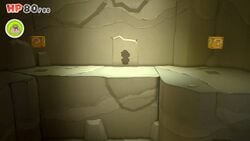
|