User:Green Star/sandbox: Difference between revisions
Green Star (talk | contribs) No edit summary |
Green Star (talk | contribs) No edit summary |
||
| Line 1: | Line 1: | ||
{{ | {{new subject}} | ||
{{ | {{location-infobox | ||
''' | |image=WaterVellumentalShrinePMTOK.png | ||
|greaterloc=[[Autumn Mountain]] | |||
|ruler=[[Water Vellumental]] | |||
|first_appearance=''[[Paper Mario: The Origami King]]'' ([[List of games by date#2020|2020]]) | |||
}} | |||
The '''Water Vellumental Shrine''' is a location in ''[[Paper Mario: The Origami King]]'', a shrine found on [[Autumn Mountain]] dedicated to the [[Water Vellumental]], who is fought at the end. As such, most of the temple is water-themed, with a couple of sliding tile puzzles along the way. | |||
==History== | ==History== | ||
There are two tiles in front of the closed doors to the shrine, each requiring someone to stand on them. [[Mario]] must find [[Bob-omb (Paper Mario: The Origami King)|Bob-omb]] down in [[Chestnut Valley]] and bring him to the temple, allowing them to enter. However, Bob-omb decides to wait outside for them, claiming he is exhausted from standing on the switch, not really wanting to enter the temple. | |||
As soon as they enter the temple, [[Olivia]] notes the large stone dragon in back representing the [[Water Vellumental]]. After Mario finishes both of the sliding tile puzzles in the surrounding rooms, the head is jerked open, allowing them to enter the area where the Water Vellumental is fought. When Mario steps into the arena, the surrounding water starts to swirl about, causing the bridge to sink, preventing escape. | |||
The Water Vellumental appears, also corrupted by the power of origami. Like the [[Earth Vellumental]], Mario must defeat the Water Vellumental to obtain a [[Bibliofolds|Bibliofold]] teaching Olivia the powers of the Vellumental. This gives her the power to fill herself to the brim with water, allowing them to e | |||
==Layout== | |||
One of the four towers is located in northwestern territory of this desert. Additionally, the Sun Altar is in the northeast region, with a village ruins area to be found southwest. To the right of the ruins is a hidden area, where the door to a coffee shop can be found. Inside, Mario can order a "Mega Tasty Coffee" from a [[Sledge Bro]] for 100 [[coin]]s. Doing so triggers a cutscene in which a depressed [[Mini Goomba]] orders another cup, the contents of which are quickly drunk by a hoard of other Mini Goombas. | |||
There is a special [[pipe]] shortly southwest of the altar which can be used as a shortcut to the other universal pipes. On the west end of the kingdom is a small ledge with the door to the green [[Sensor Lab]]. Notably, in the southwest edge of the desert is a ring of rocks. Mario can have Professor Toad dig in the center of them to recover a [[Shriveled MAX UP Heart]]. Mario can bring this item to the spring in [[Whispering Woods]] to turn it into a regular [[MAX UP Heart]], giving him 5 additional [[HP]]. | |||
There are several small spots of light throughout the desert and its surrounding areas. After Professor Toad is rescued, Mario can have him dig in any of these spots to reveal an abundance of coins, or perhaps a collectible treasure. These spots remain after the desert is restored to its original state. If Mario leaves the desert, the professor does not follow him. However, Mario can return at any time and have the professor join him until he leaves again. After the sun is restored to the sky, the entire desert lights up in addition to revealing a set of stairs beneath the altar. These stairs lead to a freezer where [[Captain T. Ode]] is trapped in a large chunk of ice. After he is rescued, he requests they take him to his submarine in the museum and set out to [[The Great Sea]] in search of the next streamer. | |||
==Hidden Toads== | |||
{|border=1 cellpadding=0 style="text-align: center; border-collapse: collapse; border: 1px solid black; width:100%" | |||
{| | |||
|- | |- | ||
|There is a [[Toad (species)|Toad]] buried in the ground at a small distance southeast of the altar. | |||
|[[File:ScorchingSandpaperDesertToad1.png|250px]] | |||
|- | |- | ||
| | |There is a Toad disguised as a yellow scorpion in one of the village strongholds. | ||
|[[File:ScorchingSandpaperDesertBlock2.png|250px]] | |||
|- | |- | ||
| | |There is a Toad stuck in the arm of a cactus in the secret area to the right of the ruins, next to the door to the coffee shop. | ||
|[[File:ScorchingSandpaperDesertNotBottomlessHole8.png|250px]] | |||
|- | |- | ||
| | |There is a Toad buried in the ground at a fair distance in front of the bird statues. | ||
|[[File:ScorchingSandpaperDesertToad2.png|250px]] | |||
|- | |- | ||
| | |There is a Toad jammed in the fax machine in the [[Sensor Lab]]. | ||
|[[File:ScorchingSandpaperDesertToad3.png|250px]] | |||
|- | |- | ||
| | |There is a Toad disguised as a green lizard climbing the cliff wall below the Sensor Lab. Mario must slide down to knock it off and hammer it at the bottom. | ||
|[[File:ScorchingSandpaperDesertToad4.png|250px]] | |||
|- | |- | ||
| | |There is a Toad disguised as a yellow beetle climbing the tower's right foot. | ||
|[[File:ScorchingSandpaperDesertToad5.png|250px]] | |||
|- | |- | ||
| | |A Toad's hand is seen sticking out of the ground southeast of the tower, just over the hill. | ||
|[[File:ScorchingSandpaperDesertToad6.png|250px]] | |||
|- | |- | ||
| | |[[Professor Toad]] is automatically rescued and becomes Mario's ally after [[Mega Paper Macho Pokey]] is defeated. | ||
|[[File:ScorchingSandpaperDesertProfessorToadRescue.png|250px]] | |||
|- | |- | ||
| | |The final Toad, [[Captain T. Ode]], is frozen in a large chunk of ice in the freezer below the altar. Mario must activate a [[Magic Circle]] and use the [[Fire Vellumental]] to thaw out the ice. | ||
|[[File:ScorchingSandpaperDesertCaptainToadRescue.png|250px]] | |||
|} | |||
==Not-Bottomless Holes== | |||
{|border=1 cellpadding=0 style="text-align: center; border-collapse: collapse; border: 1px solid black; width:100%" | |||
|- | |- | ||
| | |There is a [[Not-Bottomless Hole]] in the wall rounding the altar and the ruins. | ||
|[[File:ScorchingSandpaperDesertNotBottomlessHole1.png|250px]] | |||
|- | |- | ||
| | |There is a Not-Bottomless Hole in the ground just before the narrow path to [[Scorching Sandpaper Minor]]. | ||
|[[File:ScorchingSandpaperDesertNotBottomlessHole2.png|250px]] | |||
|- | |- | ||
| | |There is a Not-Bottomless Hole in the cliff wall next to the origami lizard. | ||
|[[File:ScorchingSandpaperDesertNotBottomlessHole3.png|250px]] | |||
|- | |- | ||
| | |There is a Not-Bottomless Hole on this ledge revealed to be the door to a [[Sensor Lab]] when filled in. | ||
|[[File:ScorchingSandpaperDesertNotBottomlessHole4.png|250px]] | |||
|- | |- | ||
| | |There is a Not-Bottomless Hole in the wall rounding out the southwestern area of the desert. | ||
|[[File:ScorchingSandpaperDesertNotBottomlessHole5.png|250px]] | |||
|- | |- | ||
| | |There are two Not-Bottomless Holes in the ground at the start of the ruins section. | ||
|[[File:ScorchingSandpaperDesertNotBottomlessHole6.png|250px]] | |||
|- | |- | ||
| | |There is a Not-Bottomless Hole below a ? Block in the southwestern portion of the desert. | ||
|[[File:ScorchingSandpaperDesertBlock6.png|250px]] | |||
|- | |- | ||
| | |There is a Not-Bottomless Hole in the southeastern part of the ruins. | ||
|[[File:ScorchingSandpaperDesertNotBottomlessHole7.png|250px]] | |||
|- | |- | ||
| | |There is a Not-Bottomless Hole at the end of the hidden area to the right of the ruins revealed to be the door to a coffee shop when filled in. | ||
|[[File:ScorchingSandpaperDesertNotBottomlessHole8.png|250px]] | |||
|} | |||
==Collectible Treasures== | |||
{|border=1 cellpadding=0 style="text-align: center; border-collapse: collapse; border: 1px solid black; width:100%" | |||
|- | |- | ||
| Mario | |Mario must have [[Professor Toad]] dig in a glowing spot in the west side of the ruins to find Collectible Treasure #60: [[Boot Car]]. | ||
|[[File:ScorchingSandpaperDesertCollectible1.png|250px]] | |||
|- | |- | ||
| | |Mario must head a good distance southeast of the tower and have Professor Toad dig in a glowing spot to find Collectible Treasure #61: Cactus. | ||
|[[File:ScorchingSandpaperDesertCollectible2.png|250px]] | |||
|- | |- | ||
| [[ | |Mario must strike the [[Hidden Block]] above the crate in the freezer to find Collectible Treasure #64: [[Temple of Shrooms]] Statues. | ||
|[[File:ScorchingSandpaperDesertCollectible3.png|250px]] | |||
| [[ | |} | ||
==? Blocks== | |||
|- | {|border=1 cellpadding=0 style="text-align: center; border-collapse: collapse; border: 1px solid black; width:100%" | ||
|- | |- | ||
| | |There is a [[? Block]] on the east side of the desert, at a fair distance southeast of the [[Sun Altar]], containing a [[giant coin]]. | ||
|[[File:ScorchingSandpaperDesertBlock1.png|250px]] | |||
|- | |- | ||
| | |There are two ? Blocks in the village ruins. One contains a [[Shiny Fire Flower]], while the other contains [[Flashy Boots]]. | ||
|[[File:ScorchingSandpaperDesertBlock2.png|250px]] | |||
|- | |- | ||
| | |There is a ? Block in the secret area to the right of the ruins containing an Ice Flower. | ||
|[[File:ScorchingSandpaperDesertBlock3.png|250px]] | |||
|- | |- | ||
| | |In the freezer below the altar, there is a [[Hidden Block]] Mario must hammer to get onto the crate. | ||
|[[File:ScorchingSandpaperDesertBlock4.png|250px]] | |||
|- | |- | ||
| | |While on top of the crate, Mario must jump to reveal another [[Hidden Block]] containing Collectible Treasure #64: [[Temple of Shrooms]] Statues. | ||
|[[File:ScorchingSandpaperDesertBlock5.png|250px]] | |||
|- | |- | ||
| | |At the start of the area, off to the left, there is a [[Not-Bottomless Hole]] below a ? Block containing a [[Flashy Hammer]]. | ||
|[[File:ScorchingSandpaperDesertBlock6.png|250px]] | |||
|} | |} | ||
== | ==See also== | ||
*[[Scorching Sandpaper Minor]] | |||
*[[Scorching Sandpaper East]] | |||
*[[Scorching Sandpaper West]] | |||
*[[Scorching Sandpaper Far East]] | |||
*[[Scorching Sandpaper Far West]] | |||
{{PMTOK}} | {{PMTOK}} | ||
[[Category: | [[Category:Deserts]] | ||
[[Category:Paper Mario: The Origami King Places]] | |||
[[Category:Paper Mario: The Origami King]] | |||
Revision as of 20:59, July 31, 2020
This article is about a subject in an upcoming or recently released game. When the game is released, or more information about this subject is found, this article may need major rewriting. This notice should be removed after a month has passed since the game was first released.
Template:Location-infobox The Water Vellumental Shrine is a location in Paper Mario: The Origami King, a shrine found on Autumn Mountain dedicated to the Water Vellumental, who is fought at the end. As such, most of the temple is water-themed, with a couple of sliding tile puzzles along the way.
History
There are two tiles in front of the closed doors to the shrine, each requiring someone to stand on them. Mario must find Bob-omb down in Chestnut Valley and bring him to the temple, allowing them to enter. However, Bob-omb decides to wait outside for them, claiming he is exhausted from standing on the switch, not really wanting to enter the temple.
As soon as they enter the temple, Olivia notes the large stone dragon in back representing the Water Vellumental. After Mario finishes both of the sliding tile puzzles in the surrounding rooms, the head is jerked open, allowing them to enter the area where the Water Vellumental is fought. When Mario steps into the arena, the surrounding water starts to swirl about, causing the bridge to sink, preventing escape.
The Water Vellumental appears, also corrupted by the power of origami. Like the Earth Vellumental, Mario must defeat the Water Vellumental to obtain a Bibliofold teaching Olivia the powers of the Vellumental. This gives her the power to fill herself to the brim with water, allowing them to e
Layout
One of the four towers is located in northwestern territory of this desert. Additionally, the Sun Altar is in the northeast region, with a village ruins area to be found southwest. To the right of the ruins is a hidden area, where the door to a coffee shop can be found. Inside, Mario can order a "Mega Tasty Coffee" from a Sledge Bro for 100 coins. Doing so triggers a cutscene in which a depressed Mini Goomba orders another cup, the contents of which are quickly drunk by a hoard of other Mini Goombas.
There is a special pipe shortly southwest of the altar which can be used as a shortcut to the other universal pipes. On the west end of the kingdom is a small ledge with the door to the green Sensor Lab. Notably, in the southwest edge of the desert is a ring of rocks. Mario can have Professor Toad dig in the center of them to recover a Shriveled MAX UP Heart. Mario can bring this item to the spring in Whispering Woods to turn it into a regular MAX UP Heart, giving him 5 additional HP.
There are several small spots of light throughout the desert and its surrounding areas. After Professor Toad is rescued, Mario can have him dig in any of these spots to reveal an abundance of coins, or perhaps a collectible treasure. These spots remain after the desert is restored to its original state. If Mario leaves the desert, the professor does not follow him. However, Mario can return at any time and have the professor join him until he leaves again. After the sun is restored to the sky, the entire desert lights up in addition to revealing a set of stairs beneath the altar. These stairs lead to a freezer where Captain T. Ode is trapped in a large chunk of ice. After he is rescued, he requests they take him to his submarine in the museum and set out to The Great Sea in search of the next streamer.
Hidden Toads
| There is a Toad buried in the ground at a small distance southeast of the altar. | 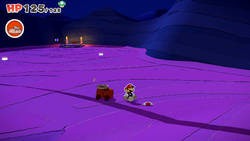
|
| There is a Toad disguised as a yellow scorpion in one of the village strongholds. | 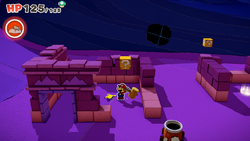
|
| There is a Toad stuck in the arm of a cactus in the secret area to the right of the ruins, next to the door to the coffee shop. | 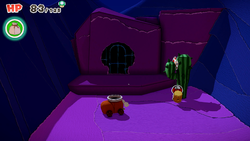
|
| There is a Toad buried in the ground at a fair distance in front of the bird statues. | 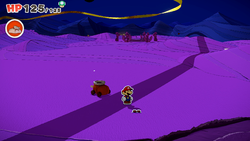
|
| There is a Toad jammed in the fax machine in the Sensor Lab. | 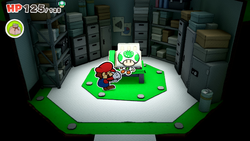
|
| There is a Toad disguised as a green lizard climbing the cliff wall below the Sensor Lab. Mario must slide down to knock it off and hammer it at the bottom. | 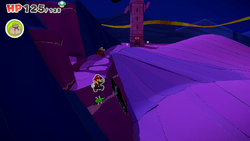
|
| There is a Toad disguised as a yellow beetle climbing the tower's right foot. | 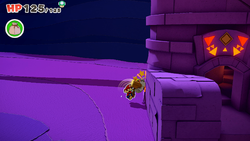
|
| A Toad's hand is seen sticking out of the ground southeast of the tower, just over the hill. | 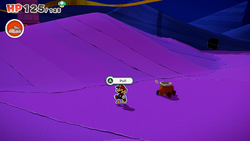
|
| Professor Toad is automatically rescued and becomes Mario's ally after Mega Paper Macho Pokey is defeated. | 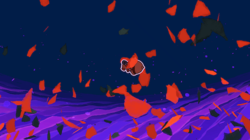
|
| The final Toad, Captain T. Ode, is frozen in a large chunk of ice in the freezer below the altar. Mario must activate a Magic Circle and use the Fire Vellumental to thaw out the ice. | 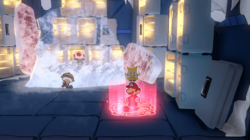
|
Not-Bottomless Holes
| There is a Not-Bottomless Hole in the wall rounding the altar and the ruins. | 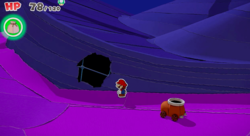
|
| There is a Not-Bottomless Hole in the ground just before the narrow path to Scorching Sandpaper Minor. | 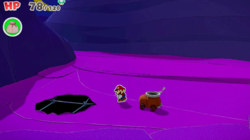
|
| There is a Not-Bottomless Hole in the cliff wall next to the origami lizard. | 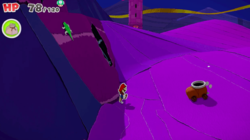
|
| There is a Not-Bottomless Hole on this ledge revealed to be the door to a Sensor Lab when filled in. | 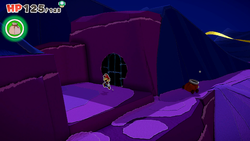
|
| There is a Not-Bottomless Hole in the wall rounding out the southwestern area of the desert. | 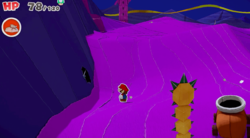
|
| There are two Not-Bottomless Holes in the ground at the start of the ruins section. | 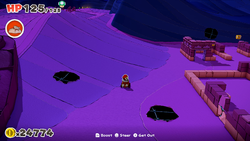
|
| There is a Not-Bottomless Hole below a ? Block in the southwestern portion of the desert. | 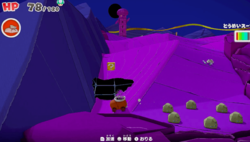
|
| There is a Not-Bottomless Hole in the southeastern part of the ruins. | 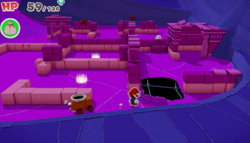
|
| There is a Not-Bottomless Hole at the end of the hidden area to the right of the ruins revealed to be the door to a coffee shop when filled in. | 
|
Collectible Treasures
| Mario must have Professor Toad dig in a glowing spot in the west side of the ruins to find Collectible Treasure #60: Boot Car. | 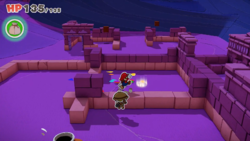
|
| Mario must head a good distance southeast of the tower and have Professor Toad dig in a glowing spot to find Collectible Treasure #61: Cactus. | 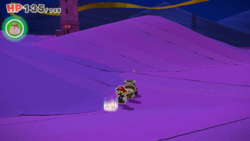
|
| Mario must strike the Hidden Block above the crate in the freezer to find Collectible Treasure #64: Temple of Shrooms Statues. | 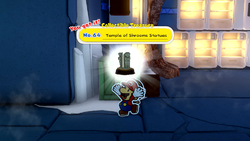
|
? Blocks
| There is a ? Block on the east side of the desert, at a fair distance southeast of the Sun Altar, containing a giant coin. | 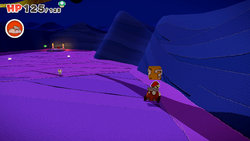
|
| There are two ? Blocks in the village ruins. One contains a Shiny Fire Flower, while the other contains Flashy Boots. | 
|
| There is a ? Block in the secret area to the right of the ruins containing an Ice Flower. | 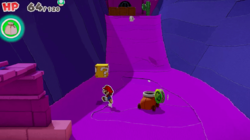
|
| In the freezer below the altar, there is a Hidden Block Mario must hammer to get onto the crate. | 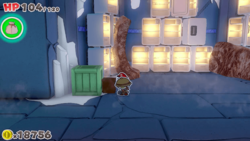
|
| While on top of the crate, Mario must jump to reveal another Hidden Block containing Collectible Treasure #64: Temple of Shrooms Statues. | 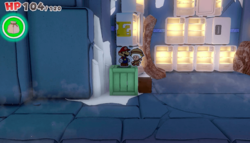
|
| At the start of the area, off to the left, there is a Not-Bottomless Hole below a ? Block containing a Flashy Hammer. | 
|
See also
- Scorching Sandpaper Minor
- Scorching Sandpaper East
- Scorching Sandpaper West
- Scorching Sandpaper Far East
- Scorching Sandpaper Far West