Sherbet Desert: Difference between revisions
| Line 61: | Line 61: | ||
==Challenges== | ==Challenges== | ||
{| style="text-align: center; width: 100%; margin: 0 auto 10px auto; border-collapse: collapse; font-family:Arial;" border="1" cellpadding="1" cellspacing="1" | {| style="text-align: center; width: 100%; margin: 0 auto 10px auto; border-collapse: collapse; font-family:Arial;" border="1" cellpadding="1" cellspacing="1" | ||
|-style="background: #ABC;" | |-style="background: #ABC;" | ||
| Line 74: | Line 73: | ||
|1 | |1 | ||
|[[The Frozen Desert]] | |[[The Frozen Desert]] | ||
| | |[[File:TheFrozenDesert - Sherbet Desert.png|150px]] | ||
|The first battleground of [[Cold Hands, Warm Heart|Chapter 1]]. | |The first battleground of [[Cold Hands, Warm Heart|Chapter 1]]. | ||
|Defeat All | |Defeat All | ||
| Line 82: | Line 81: | ||
|2 | |2 | ||
|[[Home Sweet Home]] | |[[Home Sweet Home]] | ||
| | |[[File:HomeSweetHome - Sherbet Desert.png|150px]] | ||
|The second battleground of Chapter 1. | |The second battleground of Chapter 1. | ||
|Reach Areas | |Reach Areas | ||
| Line 90: | Line 89: | ||
|3 | |3 | ||
|[[Ten Obnoxious Rabbids]] | |[[Ten Obnoxious Rabbids]] | ||
| | |[[File:TenObnoxiousRabbids - Sherbet Desert.png|150px]] | ||
|The first curve of the battleground of [[Undergarment Gulch|Chapter 2]]. | |The first curve of the battleground of [[Undergarment Gulch|Chapter 2]]. | ||
|Defeat All | |Defeat All | ||
| Line 98: | Line 97: | ||
|4 | |4 | ||
|[[Squeeze Them, You Fools!]] | |[[Squeeze Them, You Fools!]] | ||
| | |[[File:SqueezeThemYouFools - Sherbet Desert.png|150px]] | ||
|The upper portion of the battleground of Chapter 2. | |The upper portion of the battleground of Chapter 2. | ||
|Reach Area | |Reach Area | ||
| Line 106: | Line 105: | ||
|5 | |5 | ||
|[[Taking In the Fights]] | |[[Taking In the Fights]] | ||
| | |[[File:TakingIntheFights - Sherbet Desert.png|150px]] | ||
|The lower portion of the first battleground of [[Guardians of the Oasis|Chapter 3]]. | |The lower portion of the first battleground of [[Guardians of the Oasis|Chapter 3]]. | ||
|Escort Toad | |Escort Toad | ||
| Line 114: | Line 113: | ||
|6 | |6 | ||
|[[Chomp and Circumstance]] | |[[Chomp and Circumstance]] | ||
| | |[[File:ChompandCircumstance - Sherbet Desert.png|150px]] | ||
|Just after the second battleground of Chapter 3. | |Just after the second battleground of Chapter 3. | ||
|Defeat All | |Defeat All | ||
| Line 122: | Line 121: | ||
|7 | |7 | ||
|[[In the Heart of the Sherbet]] | |[[In the Heart of the Sherbet]] | ||
| | |[[File:IntheHeartoftheSherbet - Sherbet Desert.png|150px]] | ||
|The battleground of [[The Gatecrashers|Chapter 5]]. | |The battleground of [[The Gatecrashers|Chapter 5]]. | ||
|Defeat 4 Enemies | |Defeat 4 Enemies | ||
| Line 130: | Line 129: | ||
|8 | |8 | ||
|[[Statue Rendezvous]] | |[[Statue Rendezvous]] | ||
| | |[[File:StatueRendezvous - Sherbet Desert.png|150px]] | ||
|The first battleground of [[Temple of Bwahmanweewee|Chapter 7]]. | |The first battleground of [[Temple of Bwahmanweewee|Chapter 7]]. | ||
|Reach Area | |Reach Area | ||
| Line 138: | Line 137: | ||
|9 | |9 | ||
|[[Chomp Alley]] | |[[Chomp Alley]] | ||
| | |[[File:ChompAlley - Sherbet Desert.png|150px]] | ||
|The beginning of the second battleground of Chapter 7. | |The beginning of the second battleground of Chapter 7. | ||
|Escort Toad | |Escort Toad | ||
| Line 146: | Line 145: | ||
|10 | |10 | ||
|[[Mid-Boss Mayhem]] | |[[Mid-Boss Mayhem]] | ||
| | |[[File:MidBossMayhem - Sherbet Desert.png|150px]] | ||
|The first battleground of [[Call of Sherbet Mountain|Chapter 8]]. | |The first battleground of [[Call of Sherbet Mountain|Chapter 8]]. | ||
|Defeat 6 Enemies | |Defeat 6 Enemies | ||
Revision as of 09:44, October 18, 2017
Template:Worldbox Sherbet Desert is the second world in Mario + Rabbids Kingdom Battle. It is a desert and snow area located to the west of Ancient Gardens and to the east of Spooky Trails, consisting of many canyons, snowdrifts, frozen Bloopers, and an icy summit.
History
Mario and co. first land in Sherbet Desert while pursuing Bowser Jr. and Spawny. After a brief run-in with Bowser Jr., Mario and co. happen to meet up with Toad, whom they escort to Toadette. Mario and co. then fights Blizzy and Sandy, and Rabbid Mario joins shortly thereafter. Venturing into the summit, they encounter a refridgerator, which Spawny uses the SupaMerge on to form the Icicle Golem. Princess Peach joins immediately thereafter. After defeating Icicle Golem, Beep-0 reports that Bowser Jr. had fled to Spooky Trails, thus revealing their next destination.
Levels
| Level | Preview | Description |
|---|---|---|
| Cold Hands, Warm Heart | 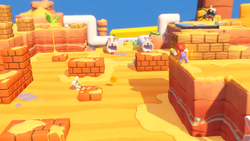
|
A level that features Sherbet Ziggies and Hoppers. |
| Undergarment Gulch | 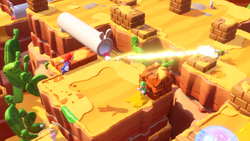
|
A level that features Sherbet Smashers and a Banzai Bill stuck in underwear. |
| Guardians of the Oasis | 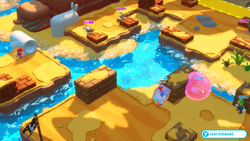
|
A level that introduces Supporters and an escort mission. |
| Square One | 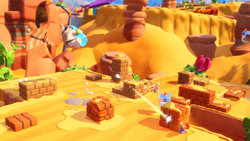
|
A level that escorts Toad through Undergarment Gulch. |
| The Gatecrashers | 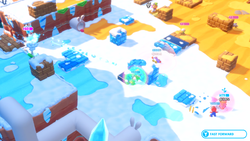
|
A level where Blizzy and Sandy are fought. |
| Shields of Sherbet Desert | 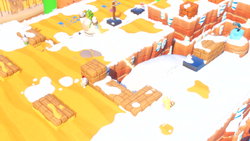
|
A level that introduces Bucklers. |
| Temple of Bwahmanweewee | 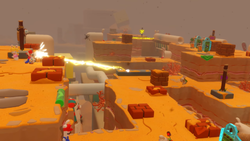
|
A level that features a tornado hazard. |
| Call of Sherbet Mountain | 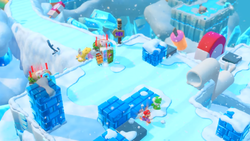
|
A level that is at an entirely icy area. |
| It Came From the Freezer | 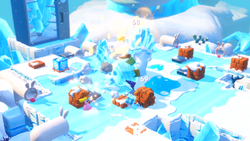
|
A level where the Icicle Golem is fought. |
| The Hidden Gorge | 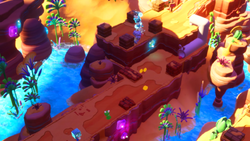
|
A secret level featuring a rematch against Blizzy and Sandy. |
Challenges
| # | Name | Preview | Location | To Clear | Turn Limit | Difficulty |
|---|---|---|---|---|---|---|
| 1 | The Frozen Desert | 
|
The first battleground of Chapter 1. | Defeat All | 4 | Medium |
| 2 | Home Sweet Home | 
|
The second battleground of Chapter 1. | Reach Areas | 4 | Easy |
| 3 | Ten Obnoxious Rabbids | 
|
The first curve of the battleground of Chapter 2. | Defeat All | 5 | Medium |
| 4 | Squeeze Them, You Fools! | 
|
The upper portion of the battleground of Chapter 2. | Reach Area | 1 | Medium |
| 5 | Taking In the Fights | 
|
The lower portion of the first battleground of Chapter 3. | Escort Toad | 5 | Medium |
| 6 | Chomp and Circumstance | 
|
Just after the second battleground of Chapter 3. | Defeat All | 1 | Easy |
| 7 | In the Heart of the Sherbet | 
|
The battleground of Chapter 5. | Defeat 4 Enemies | 1 | Medium |
| 8 | Statue Rendezvous | 
|
The first battleground of Chapter 7. | Reach Area | 3 | Hard |
| 9 | Chomp Alley | 
|
The beginning of the second battleground of Chapter 7. | Escort Toad | 10 | Hard |
| 10 | Mid-Boss Mayhem | 
|
The first battleground of Chapter 8. | Defeat 6 Enemies | 5 | Medium |
DLC Challenges
| # | Name | Preview | Location | To Clear | Turn Limit | Difficulty |
|---|---|---|---|---|---|---|
| S1 | Super Effect Free-For-All | 
|
The end of the first battleground of the secret chapter. | Reach Areas | 1 | Ultra Hard |
| S2 | Phalanx Fracas | 
|
The end of the lower portion of the second battleground of the secret chapter. | Defeat All | 3 | Ultra Hard |