Disturbing Tomb: Difference between revisions
No edit summary |
|||
| (59 intermediate revisions by 27 users not shown) | |||
| Line 1: | Line 1: | ||
{{level | {{level infobox | ||
|image=[[File:DisturbingTomb.png|275px]] | |||
|image=[[ | |||
|code=1-S1 | |code=1-S1 | ||
|game=''[[Wario Land: Shake It!]]'' | |game=''[[Wario Land: Shake It!]]'' | ||
|track=Whoopsy Desert (before holding a Merfle Barrel)<br>Disturbing Tomb (after freeing a black Merfle) | |||
|before=[[Whoopsy Desert|<<]] | |before=[[Whoopsy Desert|<<]] | ||
|after=>> | |after=>> | ||
}} | }} | ||
'''Disturbing Tomb''' is | {{quote|This is Disturbing Tomb. This one'll be tough for sure!|[[Merfle|Black Merfle]]|Wario Land: Shake It!}} | ||
'''Disturbing Tomb''' is the first secret level of [[Ratl Ruins]] in the game ''[[Wario Land: Shake It!]]'' It can be accessed by finding a [[List of Secret Maps in Wario Land: Shake It!|Secret Map]] in [[Whoopsy Desert]]. | |||
==Layout== | |||
This level has a desert theme and takes place during the night. The background consists of purple-colored sand and pyramids. Disturbing Tomb is full of [[Mummer]]s, [[Flipsting]]s and [[Bumbleprod]]s. Many [[quicksand]] pits and [[Bomb Block (Wario Land: Shake It!)|Bomb Blocks]] also litter the area. [[Wario]] starts inside the pyramid where he finds a Mummer and a large coin bag. When he exits, he has to traverse quicksand pits while encountering several enemies and obtain the hidden diamond. Walking through another pyramid, he has to throw enemies to pave way for coins and avoid [[Turkeyjerk]]s on his way to the third pyramid, which is full of enemies. After freeing a black [[Merfle]] from a [[Merfle Barrel]], he need to use lots of [[Blast-O-Cannon]]s to reach higher places and run on roads made of Bomb Blocks. Following the Bomb Blocks, Wario can quickly return, but a hidden sky road can lead him to a diamond and accelerate his return. There are two quicksand pits that lead Wario to [[treasure chest]]s. The golden enemy here is a golden Mummer and is also the only golden Mummer in the game. | |||
==Missions== | ==Missions== | ||
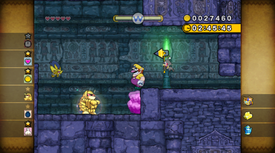
[[File:WLSI Disturbing Tomb golden enemy.png|thumb|275px|Wario near the level's golden enemy]] | |||
{| class="wikitable" style="text-align:center" | |||
! Icon | |||
! Mission | |||
! Description | |||
|- | |||
<br | | [[File:WLSI! Clock icon.png]] | ||
| style="text-align:left" | ''Finish before the clock hits 3:00:00'' | |||
| style="text-align:left" | After holding a [[Merfle Barrel]], Wario must hurry back to the start of the level within a set time limit of one minute and thirty seconds (1:30:00). | |||
|- | |||
| [[File:WLSI! Heart icon.png]] | |||
| style="text-align:left" | ''Beat the stage without taking damage'' | |||
| style="text-align:left" | Wario must clear the level without taking any damage. | |||
|- | |||
| [[File:WLSI! Coin icon.png]] | |||
| style="text-align:left" | ''Collect 36,000 [[coin]]s'' | |||
| style="text-align:left" | Wario must collect at least 36,000 coins, including [[diamond]]s. | |||
|- | |||
| [[File:WLSI! Golden Mummer icon.png]] | |||
| style="text-align:left" | ''Defeat the golden enemy'' | |||
| style="text-align:left" | Wario must defeat a lone golden [[Mummer]]. | |||
|- | |||
| [[File:WLSI! Bomb icon.png]] | |||
| style="text-align:left" | ''Destroy all [[Bomb Block (Wario Land: Shake It!)|bomb block]]s'' | |||
| style="text-align:left" | Wario must destroy every Bomb Block in the level. | |||
|- | |||
| [[File:WLSI! Garlic icon.png]] | |||
| style="text-align:left" | ''Eat 5 heads of [[garlic]]'' | |||
| style="text-align:left" | Wario must shake [[Bandinero]]s, [[Flipsting]]s, and/or [[Turkeyjerk]]s to collect at least five heads of garlic. | |||
|} | |||
==Enemies== | |||
*[[Bandinero]] (red and yellow) | |||
*[[Bumbleprod]] | |||
*[[Flipsting]] (red and yellow) | |||
*[[Mummer]] (normal and gold) | |||
*[[Turkeyjerk]] | |||
==Treasures== | |||
{| class="wikitable sortable" style="text-align:center" | |||
! rowspan="2" width="5%" | Treasure | |||
! rowspan="2" width="5%" class="unsortable" | Image | |||
! colspan="2" width="30%" | Description | |||
! rowspan="2" width="5%" class="unsortable" | Location image | |||
|- | |||
! width="15%" class="unsortable" | NTSC-U | |||
! width="15%" class="unsortable" | PAL | |||
|- | |||
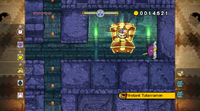
| Instant Tutanramen | |||
| [[File:WLSItreasure16.png]] | |||
| colspan="2" style="text-align:left" | ''It's been 3,000 years since someone poured in the hot water. The noodles may be a bit soggy.'' | |||
| [[File:WLSI Disturbing Tomb chest1.png|200px]] | |||
|- | |||
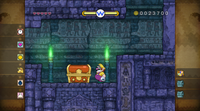
| Golden Tissues | |||
| [[File:WLSItreasure17.png]] | |||
| style="text-align:left" | ''You don't know what luxury is until you blow your nose on a piece of 24K gold.'' | |||
| style="text-align:left" | ''You simply haven't experienced luxury until you blow your nose on a sheet of 24-carat gold.'' | |||
| [[File:WLSI Disturbing Tomb chest2.png|200px]] | |||
|- | |||
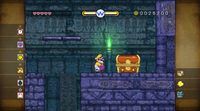
| Oasis in a Teapot<br><small>Bottomless Teapot</small> | |||
| [[File:WLSItreasure18.png]] | |||
| colspan="2" style="text-align:left" | ''This amazing teapot never runs out of water. You'll have to supply your own tea, though.'' | |||
| [[File:WLSI Disturbing Tomb chest3.png|200px]] | |||
|} | |||
==Data== | |||
{| class="wikitable" style="text-align:center" | |||
! Given time | |||
! Sum of coins | |||
|- | |||
| 4:30:00 | |||
| 40,140 | |||
|- | |||
| colspan="2" style="text-align:left; background:#eaecf0" | <small>The theoretical sum of 40,140 cannot be reached in fact, so the maximum sum that can be reached is 38,540.</small> | |||
|} | |||
==Names in other languages== | |||
{{foreign names| | |||
|Jpn=ゴミさばく | |||
|JpnR=Gomi Sabaku | |||
|JpnM=Portmanteau of "{{wp|Gobi Desert}}" and「ミイラ」(''miira'', mummy), which includes Mummer's Japanese name「ミィ」(''Mī'') | |||
|Ger=Sandfluss Labyrinth | |||
|GerM=Sandflow Maze | |||
|Ita=Tomba Catacomba | |||
|ItaM=Catacomb Tomb | |||
|SpaE=Tumba turbia | |||
|SpaEM=Shady Tomb | |||
|Fre=Pénible Tombeau | |||
|FreM=Troublesome Tomb | |||
}} | |||
{{WLSI}} | {{WLSI}} | ||
[[Category:Wario | [[Category:Deserts]] | ||
[[Category:Haunted areas]] | |||
[[Category:Secret levels]] | |||
[[Category:Wario Land: Shake It! levels]] | |||
Latest revision as of 23:11, January 19, 2025
| Level | |
|---|---|
| Disturbing Tomb | |
| |
| Level code | 1-S1 |
| Game | Wario Land: Shake It! |
| Music track | Whoopsy Desert (before holding a Merfle Barrel) Disturbing Tomb (after freeing a black Merfle) |
| << Directory of levels >> | |
- “This is Disturbing Tomb. This one'll be tough for sure!”
- —Black Merfle, Wario Land: Shake It!
Disturbing Tomb is the first secret level of Ratl Ruins in the game Wario Land: Shake It! It can be accessed by finding a Secret Map in Whoopsy Desert.
Layout[edit]
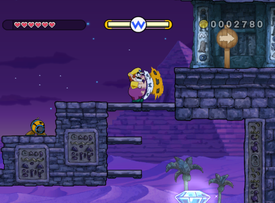
This level has a desert theme and takes place during the night. The background consists of purple-colored sand and pyramids. Disturbing Tomb is full of Mummers, Flipstings and Bumbleprods. Many quicksand pits and Bomb Blocks also litter the area. Wario starts inside the pyramid where he finds a Mummer and a large coin bag. When he exits, he has to traverse quicksand pits while encountering several enemies and obtain the hidden diamond. Walking through another pyramid, he has to throw enemies to pave way for coins and avoid Turkeyjerks on his way to the third pyramid, which is full of enemies. After freeing a black Merfle from a Merfle Barrel, he need to use lots of Blast-O-Cannons to reach higher places and run on roads made of Bomb Blocks. Following the Bomb Blocks, Wario can quickly return, but a hidden sky road can lead him to a diamond and accelerate his return. There are two quicksand pits that lead Wario to treasure chests. The golden enemy here is a golden Mummer and is also the only golden Mummer in the game.
Missions[edit]
| Icon | Mission | Description |
|---|---|---|
| Finish before the clock hits 3:00:00 | After holding a Merfle Barrel, Wario must hurry back to the start of the level within a set time limit of one minute and thirty seconds (1:30:00). | |
| Beat the stage without taking damage | Wario must clear the level without taking any damage. | |
| Collect 36,000 coins | Wario must collect at least 36,000 coins, including diamonds. | |
| Defeat the golden enemy | Wario must defeat a lone golden Mummer. | |
| Destroy all bomb blocks | Wario must destroy every Bomb Block in the level. | |
| Eat 5 heads of garlic | Wario must shake Bandineros, Flipstings, and/or Turkeyjerks to collect at least five heads of garlic. |
Enemies[edit]
- Bandinero (red and yellow)
- Bumbleprod
- Flipsting (red and yellow)
- Mummer (normal and gold)
- Turkeyjerk
Treasures[edit]
Data[edit]
| Given time | Sum of coins |
|---|---|
| 4:30:00 | 40,140 |
| The theoretical sum of 40,140 cannot be reached in fact, so the maximum sum that can be reached is 38,540. | |
Names in other languages[edit]
| Language | Name | Meaning | Notes |
|---|---|---|---|
| Japanese | ゴミさばく[?] Gomi Sabaku |
Portmanteau of "Gobi Desert" and「ミイラ」(miira, mummy), which includes Mummer's Japanese name「ミィ」(Mī) | |
| French | Pénible Tombeau[?] | Troublesome Tomb | |
| German | Sandfluss Labyrinth[?] | Sandflow Maze | |
| Italian | Tomba Catacomba[?] | Catacomb Tomb | |
| Spanish (NOE) | Tumba turbia[?] | Shady Tomb |
