Lowdown Depths: Difference between revisions
m (Text replacement - "(\| *)Jap([RMCN\d]* *=)" to "$1Jpn$2") |
|||
| (2 intermediate revisions by one other user not shown) | |||
| Line 4: | Line 4: | ||
|code=2-S2 | |code=2-S2 | ||
|game=''[[Wario Land: Shake It!]]'' | |game=''[[Wario Land: Shake It!]]'' | ||
|track=Savannah Valley (before | |track=Savannah Valley (before holding a Merfle Barrel)<br>Lowdown Depths (after freeing a yellow Merfle) | ||
|before=[[Sneak Peak|<<]] | |before=[[Sneak Peak|<<]] | ||
|after=>> | |after=>> | ||
| Line 12: | Line 12: | ||
==Layout== | ==Layout== | ||
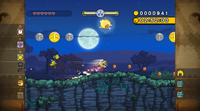
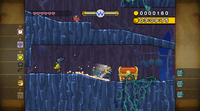
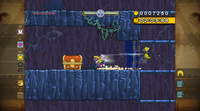
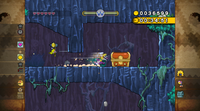
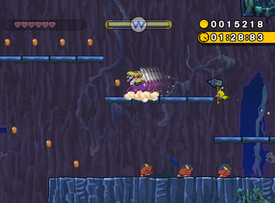
This level takes place in a cave of an Africa-like plain at midnight, filled with many forks in the roads. Blue rocks form most of the cave with moss and other plantlife growing from it. Inside the cave, [[List of treasures in Wario Land: Shake It!|treasures]] and [[coin]]s are scattered all around, as well as [[Bandinero]]s and [[Pitchfork]]s. | This level takes place in a cave of an Africa-like plain at midnight, filled with many forks in the roads. Blue rocks form most of the cave with moss and other plantlife growing from it. Inside the cave, [[List of treasures in Wario Land: Shake It!|treasures]] and [[coin]]s are scattered all around, as well as [[Bandinero]]s and [[Pitchfork]]s. A yellow [[Merfle]] caged in a [[Merfle Barrel]] is found right at the start of the level, so the majority of the level is an escape sequence. The instant Wario frees the Merfle, he rolls down from the slope and falls straight to the very depth of the cave, just as the title Lowdown Depths implies. There is a [[Max Fastosity Dasherator]] waiting for him at the corner of the depth, and Wario has to use it to rush to the right. The first section requires Wario to quickly choose a route in the face of several forks. The first treasure can be obtained only if he chooses the deeper route and avoids being struck by rocks. In the second section, Wario can see the bright blue sky where a [[Floating Bandinero]] roams cozily, which is the golden enemy in this level. Proceeding forward, Wario should break stone blocks and use [[Certainy Switch]]es to get coins and the second treasure, in the meantime jumping up to the next section. Entering the fourth section, Wario can jump on the rope above the water full of [[Scarracuda]]s only in max speed and collect hidden coins, then breaking stone blocks and switching the direction to the left. The fifth section is where the last few stone blocks lie, and it should be easy to pass. In the sixth section, Wairo encounters the long moving platforms from [[Savannah Valley]], and he needs to stay on them with his max speed so as to break metallic blocks for the last treasure and a diamond. As Wario enters the last section, he must strike the Certainy Switch to collect the last few coins. Eventually, he manages to come back from above and leaves the cave with all coins and treasures before time expires. | ||
==Missions== | ==Missions== | ||
[[File:WLSI Lowdown Depths golden enemy.png|thumb|Wario dashing past the level's golden enemy]] | [[File:WLSI Lowdown Depths golden enemy.png|thumb|Wario dashing past the level's golden enemy]] | ||
{ | {| class="wikitable" style="text-align:center" | ||
| | ! Icon | ||
| | ! Mission | ||
| | ! Description | ||
| | |- | ||
| | | [[File:WLSI! Clock icon.png]] | ||
| | | style="text-align:left" | ''Finish before the clock hits 1:55:00'' | ||
| | | style="text-align:left" | After holding a [[Merfle Barrel]], Wario must hurry back to the start of the level within a set time limit of one minute and thirty-five seconds (1:35:00). | ||
| | |- | ||
| | | [[File:WLSI! Heart icon.png]] | ||
| | | style="text-align:left" | ''Beat the stage without taking damage'' | ||
| | | style="text-align:left" | Wario must clear the level without taking any damage. | ||
| | |- | ||
| [[File:WLSI! Coin icon.png]] | |||
| style="text-align:left" | ''Collect 42,000 [[coin]]s'' | |||
| style="text-align:left" | Wario must collect at least 42,000 coins, including [[diamond]]s. | |||
|- | |||
| [[File:WLSI! Max Fastosity Dasherator icon.png]] | |||
| style="text-align:left" | ''Don't use any [[Max Fastosity Dasherator]]s'' | |||
| style="text-align:left" | Wario must clear the level without using any [[Max Fastosity Dasherator]]s. | |||
|- | |||
| [[File:WLSI! Golden Bandinero icon.png]] | |||
| style="text-align:left" | ''Defeat the golden enemy'' | |||
| style="text-align:left" | Wario must defeat a lone golden [[Floating Bandinero]]. | |||
|- | |||
| [[File:WLSI! Stone Block icon.png]] | |||
| style="text-align:left" | ''Break all [[Stone Block|stone block]]s'' | |||
| style="text-align:left" | Wario must destroy every Stone Block in the level. | |||
|} | |||
==Enemies== | ==Enemies== | ||
| Line 39: | Line 53: | ||
==Treasures== | ==Treasures== | ||
{|class="wikitable"style="text-align:center" | {| class="wikitable sortable" style="text-align:center" | ||
! rowspan="2" width="5%" | Treasure | |||
! rowspan="2" width="5%" class="unsortable" | Image | |||
! colspan="2" width="30%" | Description | |||
! rowspan="2" width="5%" class="unsortable" | Location image | |||
|- | |- | ||
!width=" | ! width="15%" class="unsortable" | NTSC-U | ||
! width="15%" class="unsortable" | PAL | |||
!width="15%" | |||
|- | |- | ||
| | | Lion-Mane Wig | ||
|[[File:WLSItreasure37.png | | [[File:WLSItreasure37.png]] | ||
|align | | style="text-align:left" | ''Like everyone, you've always wanted to look more like a lion. Admit it. Go on.'' | ||
|align | | style="text-align:left" | ''Haven't you always wanted to look more like a lion? Go on, admit it!'' | ||
| [[File:WLSI Lowdown Depths chest1.png|200px]] | |||
|- | |- | ||
| | | Moon Light | ||
|[[File:WLSItreasure38.png | | [[File:WLSItreasure38.png]] | ||
|align | | style="text-align:left" | ''Illuminate your desk with light from a real chunk of moon! May smell of cheese, though.'' | ||
|align | | style="text-align:left" | ''Now you can enjoy romantic moonlight any time, anywhere!'' | ||
| [[File:WLSI Lowdown Depths chest2.png|200px]] | |||
|- | |- | ||
| | | B.C. Bongo<br><small>Prehistoric Bongo</small> | ||
| [[File:WLSItreasure39.png]] | |||
|align | | style="text-align:left" | ''The first bongo drums were made of rock. Lousy sound, but they sure were durable.'' | ||
|align | | style="text-align:left" | ''The first bongo drums were made of rock. They sound awful, but they're built to last!'' | ||
| [[File:WLSI Lowdown Depths chest3.png|200px]] | |||
|} | |} | ||
==Data== | ==Data== | ||
{ | {| class="wikitable" style="text-align:center" | ||
| | ! Given time | ||
| | ! Sum of coins | ||
|- | |||
| 3:30:00 | |||
| 49,720 | |||
|} | |||
==Names in other languages== | ==Names in other languages== | ||
Latest revision as of 03:19, January 20, 2025
| Level | |
|---|---|
| Lowdown Depths | |
| |
| Level code | 2-S2 |
| Game | Wario Land: Shake It! |
| Music track | Savannah Valley (before holding a Merfle Barrel) Lowdown Depths (after freeing a yellow Merfle) |
| << Directory of levels >> | |
- “This is Lowdown Depths. This one'll be tough for sure!”
- —Yellow Merfle, Wario Land: Shake It!
Lowdown Depths is a secret level in Wiggly Wilds in the game Wario Land: Shake It!, also one of the two all-escape levels in the game. It is unlocked by finding a Secret Map in Sneak Peak.
Layout[edit]
This level takes place in a cave of an Africa-like plain at midnight, filled with many forks in the roads. Blue rocks form most of the cave with moss and other plantlife growing from it. Inside the cave, treasures and coins are scattered all around, as well as Bandineros and Pitchforks. A yellow Merfle caged in a Merfle Barrel is found right at the start of the level, so the majority of the level is an escape sequence. The instant Wario frees the Merfle, he rolls down from the slope and falls straight to the very depth of the cave, just as the title Lowdown Depths implies. There is a Max Fastosity Dasherator waiting for him at the corner of the depth, and Wario has to use it to rush to the right. The first section requires Wario to quickly choose a route in the face of several forks. The first treasure can be obtained only if he chooses the deeper route and avoids being struck by rocks. In the second section, Wario can see the bright blue sky where a Floating Bandinero roams cozily, which is the golden enemy in this level. Proceeding forward, Wario should break stone blocks and use Certainy Switches to get coins and the second treasure, in the meantime jumping up to the next section. Entering the fourth section, Wario can jump on the rope above the water full of Scarracudas only in max speed and collect hidden coins, then breaking stone blocks and switching the direction to the left. The fifth section is where the last few stone blocks lie, and it should be easy to pass. In the sixth section, Wairo encounters the long moving platforms from Savannah Valley, and he needs to stay on them with his max speed so as to break metallic blocks for the last treasure and a diamond. As Wario enters the last section, he must strike the Certainy Switch to collect the last few coins. Eventually, he manages to come back from above and leaves the cave with all coins and treasures before time expires.
Missions[edit]
| Icon | Mission | Description |
|---|---|---|
| Finish before the clock hits 1:55:00 | After holding a Merfle Barrel, Wario must hurry back to the start of the level within a set time limit of one minute and thirty-five seconds (1:35:00). | |
| Beat the stage without taking damage | Wario must clear the level without taking any damage. | |
| Collect 42,000 coins | Wario must collect at least 42,000 coins, including diamonds. | |
| Don't use any Max Fastosity Dasherators | Wario must clear the level without using any Max Fastosity Dasherators. | |
| Defeat the golden enemy | Wario must defeat a lone golden Floating Bandinero. | |
| Break all stone blocks | Wario must destroy every Stone Block in the level. |
Enemies[edit]
- Bandinero (red and yellow)
- Floating Bandinero (blue and gold)
- Pitchfork (blue)
- Scarracuda (red)
Treasures[edit]
Data[edit]
| Given time | Sum of coins |
|---|---|
| 3:30:00 | 49,720 |
Names in other languages[edit]
| Language | Name | Meaning | Notes |
|---|---|---|---|
| Japanese | サバンヌー[?] Sabannū |
From "savanna" | |
| French | Dédales Souterrains[?] | Underground Labyrinths | |
| German | Schwindelnde Tiefen[?] | Dizzying Depths | |
| Italian | Profondità rocciose[?] | Rocky depths |
