Deep Keep: Difference between revisions
mNo edit summary |
m (Text replacement - "(\| *)Jap([RMCN\d]* *=)" to "$1Jpn$2") |
||
| Line 74: | Line 74: | ||
===Names in other languages=== | ===Names in other languages=== | ||
{{foreign names | {{foreign names | ||
| | |Jpn=めざめた海底いせき | ||
| | |JpnR=Mezameta Kaitei Iseki | ||
| | |JpnM=Awakened Seabed Ruins | ||
|Spa=Santuario sumergido | |Spa=Santuario sumergido | ||
|SpaM=Submerged Sanctuary | |SpaM=Submerged Sanctuary | ||
Latest revision as of 13:28, January 7, 2025
| Level | |
|---|---|
| Deep Keep | |

| |
| Level code | 4-1 |
| World | Sea Breeze Cove |
| Game | Donkey Kong Country: Tropical Freeze |
| Music track | Deep Keep, Funky Waters, Aquatic Ambiance Returns |
| << Directory of levels >> ** | |
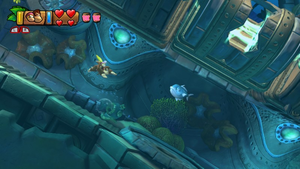
Deep Keep is the first level of Sea Breeze Cove in Donkey Kong Country: Tropical Freeze and its Nintendo Switch port of the same name, and the first underwater level in the game. Unlike in the previous Donkey Kong Country games, the Kongs must either exit the water or swim into bubbles in the water in order to breathe, otherwise they drown. Aside from various underwater enemies, common obstacles in this level include moving spiked structures and strong currents that can push Donkey Kong and the others into the spikes. The currents are generated by Giant Underwater Fans,[1] which are a part of the underwater ruins that make up the background of much of the level; when these currents are operating, the ruins emit a green stream of light. The level contains seven Puzzle Pieces.
Three soundtracks play throughout this stage. At the beginning, "Deep Keep" plays in the area immediately before entering the water. "Funky Waters," and later, "Aquatic Ambiance Returns," play throughout the underwater sections of the level.
In Time Attack mode, a time of 2:27.00 is required to get a gold medal, a time of 2:47.00 for silver, and a time of 2:55.00 for bronze.
Overview[edit]
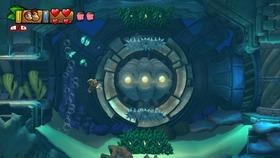
The level begins on the beach, where the Kongs can find a Tucks, a Papa Painguin, and a Tuff Tucks, as well as some collectibles such as bananas and a Banana Coin. The beach soon ends and the Kongs can enter the underwater portion of the level. The first underwater section is wide and does not contain any unique obstacles. Here, the Kongs can find fish enemies and bananas that float through the water. A treasure chest containing bananas is located on a beach section above this area, and collecting them all yields a Puzzle Piece. The letter K is also within this area, as well as the first DK Barrel. After passing urchin enemies, the path leads to a massive room with underwater ruins through much of the background. Here, Donkey Kong and the others can find bananas in the seaweed and within a water current that is created by a Giant Underwater Fan. Another Puzzle Piece is hidden behind a sunken ship in the top-right corner of this room. To advance from here, the Kongs are required to pound into a large switch that opens a path within the ruins in the background. This path is entered through a Blast Barrel. The room beyond here contains a set of three yellow buttons, which are projected from the ruins in the background. By passing through the three buttons within a short period of time, the path ahead opens. The main obstacles through this path are large, spiked bars that slowly rotate. The first checkpoint is nearby.
The path widens into a long room with more spiked, rotating structures. The danger here is increased by the addition of water currents entering from the top of the area. The letter O is located around one of the spiked bars. A DK Barrel lies beyond this room, and near it, the Kongs can again find bananas and other items within the seaweed on the walls. Continuing from here after breaking through a wall leads through a narrower pathway within the underwater ruins, where urchin enemies surround the edges of the area. Part of this path contains a water current and a moving stream of bananas. It should be noted that the player can determine when the current will turn on and off by watching the machinery light up in the background. A similar water current appears at the end of the path, and it creates a hazard for dodging a spiked bar nearby. Following this current, the Kongs must smash through a wall to enter a large room. Here, they can find rotating spikes and another collection of yellow buttons to swim through to open the path ahead. A new area also opens in the previous path, which leads to a secret exit. However, if the Kongs continue ahead, they pass through a current, pushing them past urchin-infested walls. The second checkpoint is beyond this.
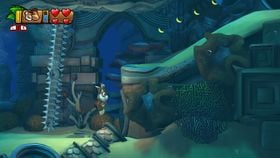
In this next section, a new gimmick is introduced: spiked barriers extend and retract in a repeated and ordered sequence. The Kongs must wait for the spikes to retract into the walls and then proceed quickly, as the spikes soon extend back outwards in order. This obstacle is repeated again soon after, this time where the Kongs must pass through a water current. The letter N is between these two sections among four surrounding fish. A DK Barrel waits at the beginning of the next room. This massive room is full of spiked bars that move together in a wide, circular path. There is also a wall that the Kongs can break through at the bottom to find a room with bananas. A Puzzle Piece appears if they collect all the bananas. On the other side of the large room, the Kongs can find another series of yellow buttons that they must swim through to open the path ahead. A current-generating machine also powers on as the path opens. The current then pushes them through more series of extending and retracting spikes, then into a room with a constant current flowing to the right. Urchin enemies serve as a hazard throughout this room. They form in lines, which the Kongs must then pass through. The letter G is in this room. If the letter is missed, Donkey Kong cannot swim back to it unless Dixie Kong is with him, as the current is too strong. The Slot Machine Barrel is located in a large room that follows here.
Secret exit[edit]
In the section following the first checkpoint, the Kongs enter an area where they are closed in by two walls and must progress by swimming over three yellow buttons in the background. Once they do so, the path opens ahead. However, if they travel back to the left instead, a new path opens by way of a large piece of metal dropping, which leads to a portal that opens the secret exit to Rockin' Relics. The portal is preceded by a current that can only be crossed with assistance from Dixie Kong's propeller abilities.
Collectibles[edit]
KONG Letters[edit]
- K: In the underwater area at the beginning of the level, the letter K is surrounded by two fish enemies.
- O: After the first checkpoint, the letter O is located next to a rotating spike structure.
- N: Immediately following the second checkpoint, the letter N is located in the center of four fish enemies.
- G: The letter G is in the center of a large area located immediately before the end of the level.
Puzzle Pieces[edit]
- A small beach area is located above the water at the beginning of the level. Here, the Kongs can find a treasure chest. If they break it open and collects all the bananas that come from it, a Puzzle Piece appears.
- In the large room shortly beyond the first DK Barrel, the Kongs can find a Puzzle Piece in the top-right corner of the area. It is hidden behind a sunken ship, which disappears once they enter the alcove.
- The Kongs can find a hidden door immediately after passing the letter O. It is hidden on the side of a ledge, and they must dodge a spiked bar to reach it. Donkey Kong must break through the door to enter a Bonus Level, where he must use two Blast Barrels to collect all of the bananas in the room. Once everything is collected, the Puzzle Piece appears.
- Following the second DK Barrel, Donkey Kong enters a narrow passage blocked by a wall that he must break through. After breaking through the wall, he must break through the hidden wall below this area to enter a small alcove with the Puzzle Piece in it.
- To find the fifth Puzzle Piece, Donkey Kong must first open the passage to the secret exit. The Puzzle Piece is located within this passage at the end of a water current.
- Before reaching the room with the letter G, the Kongs pass through a large area that contains spike bars moving in a wide, circular path. If Donkey Kong swims to the bottom of this area and breaks through the ground, he can find a room full of bananas. The sixth Puzzle Piece appears when these bananas are collected.
- Donkey Kong can break through the ground directly below the Slot Machine Barrel at the end of the level. Doing so leads to a Bonus Level, where he must collect bananas through the use of three large, moving springs. The Puzzle Piece appears when everything is collected.
Enemies[edit]
Gallery[edit]
Funky Kong swimming in Deep Keep in the Nintendo Switch version
Additional names[edit]
Internal names[edit]
| Game | File | Name | Meaning
|
|---|---|---|---|
| Donkey Kong Country: Tropical Freeze | content/Worlds/w04_ocean/l01_ocean_temple.pak | l01_ocean_temple.pak | Ocean Level 1: Temple |
Names in other languages[edit]
| Language | Name | Meaning | Notes |
|---|---|---|---|
| Japanese | めざめた海底いせき[?] Mezameta Kaitei Iseki |
Awakened Seabed Ruins | |
| French | Pièges pélagiques[?] | Pelagic Traps | |
| German | Playa del Kong[?] | Spanish for "Kong Beach". | |
| Italian | Santuario Sommerso[?] | Submerged Sanctuary | |
| Spanish | Santuario sumergido[?] | Submerged Sanctuary |
References[edit]
- ^ von Esmarch, Nick, and Cory van Grier (February 21, 2014). Donkey Kong Country: Tropical Freeze PRIMA Official Game Guide. Prima Games (American English). ISBN 978-0-804-16252-4. Page 26.


