The Dark Museum & the Purple Mystery: Difference between revisions
Apikachu68 (talk | contribs) m (→Names in other languages: Added Korean translation.) |
|||
| (7 intermediate revisions by 3 users not shown) | |||
| Line 8: | Line 8: | ||
|track=Into The Darkness | |track=Into The Darkness | ||
|sample=[[File:Princess Peach Showtime! 013 Into the Darkness.oga]] | |sample=[[File:Princess Peach Showtime! 013 Into the Darkness.oga]] | ||
|before=[[The Case of the Rainy-Day Plot|<<]] | |before=[[The Case of the Rainy-Day Plot|{{ruby|<<|Detective}}]] | ||
|after=>> | |after=[[The Dark School & the Twisted Fist|{{ruby|>>|BF right}}]] | ||
}} | }} | ||
| Line 15: | Line 15: | ||
==Layout== | ==Layout== | ||
Upon entering the stage, [[Princess Peach]] is already in her [[Detective Peach]] transformation. [[Stella]] suggests to ask around at the museum for clues as to where the Detective Sparkla may be. There are several [[Theet]]s in the museum, but all of them are | Upon entering the stage, [[Princess Peach]] is already in her [[Detective Peach]] transformation. [[Stella]] suggests to ask around at the museum for clues as to where the Detective Sparkla may be. There are several [[Theet]]s in the museum, but all of them talk unreasonably to Peach (for instance by trying to convince her that everything is fine and that she should leave) and are secretly [[Criminal]]s in disguise. After progressing to the right and exposing a criminal disguised as a Theet blocking a door, Detective Peach enters an area where two doors slam shut. Before they close completely, a piece of paper flies out and lands on the ground. Upon inspecting it, the paper is from the Detective Sparkla. It states that the doors will only open if the exhibits with a shared element are examined in the proper order. | ||
There is a hallway to the right of the doors that leads to a room where four Themec Face Statues are. If all four statues are facing forwards towards the camera, a wall moves to reveal a golden statue. To open the main doors, Peach must examine four exhibits that have circles. First she must examine the Ancient Sparkle Relief that has one circle, then the Pink Crystal that has two circles, then the golden statue that has three circles, then finally the Theepota Water Urn that has four circles. With the four exhibits investigated in the correct order, the doors open. | There is a hallway to the right of the doors that leads to a room where four Themec Face Statues are. If all four statues are facing forwards towards the camera, a wall moves to reveal a golden statue. To open the main doors, Peach must examine four exhibits that have circles. First she must examine the Ancient Sparkle Relief that has one circle, then the Pink Crystal that has two circles, then the golden statue that has three circles, then finally the Theepota Water Urn that has four circles. With the four exhibits investigated in the correct order, the doors open. | ||
| Line 23: | Line 23: | ||
[[File:PPS The Dark Museum & the Purple Mystery 2.jpg|right|thumb|Detective Peach and the Detective Sparkla in the room where several objects are]] | [[File:PPS The Dark Museum & the Purple Mystery 2.jpg|right|thumb|Detective Peach and the Detective Sparkla in the room where several objects are]] | ||
This next room has several objects, and is also a dead end. When the detectives make their way back to the previous room, they find themselves in an almost identical room. The Detective Sparkla takes a picture of this room and hangs the photo on the wall of the first room. The second room lacks the magnifying glass on a crate, and so Peach must investigate that object to reveal the path forward, which the | This next room has several objects, and is also a dead end. When the detectives make their way back to the previous room, they find themselves in an almost identical room. The Detective Sparkla takes a picture of this room and hangs the photo on the wall of the first room. The second room lacks the magnifying glass on a crate, and so Peach must investigate that object to reveal the path forward, which the detectives use to continue their escape. | ||
The path leads Peach and the Sparkla to a roof where they meet the Junior Detective, who claims to have found the exit. The Detective Sparkla then asks the Junior Detective three questions: the first is about what color cushions to get for the sofa back at the office, the second is about what time to arrive for a meeting at 9:00, and the third is how they feel about [[Grape (character)|Grape]]. The Junior Detective replies with purple, 9:00 and refers to Grape as Madame Grape. Upon investigating the Junior Detective, it is revealed to be another criminal in disguise, and the real exit is revealed. The stage is then completed. | The path leads Peach and the Sparkla to a roof where they meet the Junior Detective, who claims to have found the exit. The Detective Sparkla then asks the Junior Detective three questions: the first is about what color cushions to get for the sofa back at the office, the second is about what time to arrive for a meeting at 9:00, and the third is how they feel about [[Grape (character)|Grape]]. The Junior Detective replies with purple, 9:00 and refers to Grape as Madame Grape. Upon investigating the Junior Detective, it is revealed to be another criminal in disguise, and the real exit is revealed. The stage is then completed. | ||
| Line 29: | Line 29: | ||
== Loss outcomes == | == Loss outcomes == | ||
*If Peach selects the wrong Detective Sparkla among the four choices, the Sparkla turns out to be a disguised Sour Bunch member, who laughs as Peach falls down a trapdoor and loses one [[Heart Point|HP]]. | |||
*In the final section, if Peach use Strike of Intuition on Detective Sparkla instead of Junior Detective, Detective Sparkla will become sad, as Peach lose one HP and is returned to the choice. | |||
*In the same section, if Peach heads directly up the fake exit, the stairs fall down along with Peach, as the Junior Detective cheers and Peach lose one HP and is returned to the choice. | |||
== Sparkle Gems == | == Sparkle Gems == | ||
Sparkle | [[Sparkle Gem]]s marked with an asterisk ⁽*⁾ will always be obtained during regular gameplay. | ||
# | # After opening the door to where the Detective Sparkla is.* | ||
# | # After using a [[Strike of Intuition]] on the real Detective Sparkla.* | ||
# | # After using a Strike of Intuition on the magnifying glass on a crate. | ||
# Found in a sub-area before the door to the last section of the stage. Detective Peach must strike a pose on a specific area to reach the sub-area. To obtain the Sparkle Gem, Detective Peach must use a Strike of Intuition on a glowing crate. | # Found in a [[sub-area]] before the door to the last section of the stage. Detective Peach must strike a pose on a specific area to reach the sub-area. To obtain the Sparkle Gem, Detective Peach must use a Strike of Intuition on a glowing crate. | ||
# | # After using a Strike of Intuition on the criminal disguised as the Junior Detective.* | ||
== Stella ribbon == | == Stella ribbon == | ||
'''Multicolored Detective Ribbon''': To the far right of the first section of the stage, there is a lift that takes Peach up to the second floor. To the far left of the second floor is the [[Ribboner]], where he is stuck. Detective Peach must turn the Themec Face Statues to face the left, which will cause a bridge to appear on the second floor. Peach can then reach the Ribboner, who awards her the ribbon and thanks her for fixing the floor, and runs over to his travel equipment that had been stuck on the right side of the floor. | '''Multicolored Detective Ribbon''': To the far right of the first section of the stage, there is a lift that takes Peach up to the second floor. To the far left of the second floor is the [[Ribboner]], where he is stuck. Detective Peach must turn the Themec Face Statues to face the left, which will cause a bridge to appear on the second floor. Peach can then reach the Ribboner, who awards her the [[Stella ribbon|ribbon]] and thanks her for fixing the floor, and runs over to his travel equipment that had been stuck on the right side of the floor. | ||
*Help request: ''"Help! I'm stuuuuck!"'' | *Help request: ''"Help! I'm stuuuuck!"'' | ||
*Rescue message: ''"You fixed it! You fixed the floor!"'' | *Rescue message: ''"You fixed it! You fixed the floor!"'' | ||
== Postgame hidden Theet == | == Postgame hidden Theet == | ||
The stage has one [[Ninja (Princess Peach: Showtime!)|Ninja]] [[Theet]] when it is played in the postgame: | |||
*Found in the first section of the stage, in the statue area. This Theet is along the background wall to the right of the rightmost statue. | |||
== Gallery == | == Gallery == | ||
<gallery> | <gallery widths=170> | ||
PPS Detective album 3.jpg|The stage's album picture | PPS Detective album 3.jpg|The stage's album picture | ||
PPS The Dark Museum & the Purple Mystery reversed prompts.png|A disguised [[Sour Bunch]] member near the start, while the Jump/Action buttons have been reversed in the game settings | |||
</gallery> | </gallery> | ||
==Names in other languages== | ==Names in other languages== | ||
{{foreign names | {{foreign names | ||
| Line 67: | Line 68: | ||
|ChiTM=Dark Exhibition Hall and Purple Mystery | |ChiTM=Dark Exhibition Hall and Purple Mystery | ||
|Dut=Het duistere museum | |Dut=Het duistere museum | ||
|DutM= | |DutM=The dark museum | ||
|Fre=Musée sombre et mystère violet | |Fre=Musée sombre et mystère violet | ||
|FreM=Dark museum and purple mystery | |FreM=Dark museum and purple mystery | ||
|Ger=Das lila Rätsel im Museum | |Ger=Das lila Rätsel im Museum | ||
|GerM= | |GerM=The purple Puzzle in the Museum | ||
|Ita=Il museo oscuro e il mistero viola | |Ita=Il museo oscuro e il mistero viola | ||
|ItaM=The dark museum and the purple mystery | |ItaM=The dark museum and the purple mystery | ||
|Kor= | |Kor=어둠의 박물관과 보라색 수수께끼 | ||
|KorR= | |KorR=Eodum'ui bagmulgwangwa bolasaeg susukkekki | ||
|KorM= | |KorM=Dark Museum and Purple Mystery | ||
|Por=O Museu Sombrio e o Enigma Púrpuro | |Por=O Museu Sombrio e o Enigma Púrpuro | ||
|PorM=The Dark Museum and the Purple Enigma | |PorM=The Dark Museum and the Purple Enigma | ||
|Rus=Загадки в музее мрака | |Rus=Загадки в музее мрака | ||
|RusR=Zagadki v muzeē mraka | |RusR=Zagadki v muzeē mraka | ||
|RusM= | |RusM=Riddles in the Museum of Darkness | ||
|Spa=El museo malgurio | |Spa=El museo malgurio | ||
|SpaM=The darkle museum | |SpaM=The darkle museum | ||
| Line 87: | Line 88: | ||
{{PPS levels}} | {{PPS levels}} | ||
[[Category:Princess Peach: Showtime! levels]] | [[Category:Princess Peach: Showtime! levels]] | ||
[[Category:Museums]] | |||
Latest revision as of 13:01, September 4, 2024
| Level | |||
|---|---|---|---|
| The Dark Museum & the Purple Mystery | |||

| |||
| World | BF | ||
| Game | Princess Peach: Showtime! | ||
| Primary power-up | Detective Peach | ||
| Music track | Into The Darkness | ||
| |||
The Dark Museum & the Purple Mystery is a stage in Princess Peach: Showtime!, located in the upper section of the BF on the fifth-from-left. After completing The Case of the Rainy-Day Plot, the player will get the opportunity to play this stage. The Detective Sparkla is trapped in this stage.
Layout[edit]
Upon entering the stage, Princess Peach is already in her Detective Peach transformation. Stella suggests to ask around at the museum for clues as to where the Detective Sparkla may be. There are several Theets in the museum, but all of them talk unreasonably to Peach (for instance by trying to convince her that everything is fine and that she should leave) and are secretly Criminals in disguise. After progressing to the right and exposing a criminal disguised as a Theet blocking a door, Detective Peach enters an area where two doors slam shut. Before they close completely, a piece of paper flies out and lands on the ground. Upon inspecting it, the paper is from the Detective Sparkla. It states that the doors will only open if the exhibits with a shared element are examined in the proper order.
There is a hallway to the right of the doors that leads to a room where four Themec Face Statues are. If all four statues are facing forwards towards the camera, a wall moves to reveal a golden statue. To open the main doors, Peach must examine four exhibits that have circles. First she must examine the Ancient Sparkle Relief that has one circle, then the Pink Crystal that has two circles, then the golden statue that has three circles, then finally the Theepota Water Urn that has four circles. With the four exhibits investigated in the correct order, the doors open.

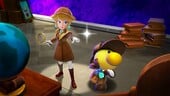
After entering the doors, Peach and Stella find the Junior Detective, who claims to have found four Detective Sparklas, but only one is the real one. He then leaves, confusing Stella. The real Detective Sparkla is the third one, as he is normal and confident in Peach. After finding the real Detective Sparkla, the two then start to make their escape. They enter nearby doors to another room.

This next room has several objects, and is also a dead end. When the detectives make their way back to the previous room, they find themselves in an almost identical room. The Detective Sparkla takes a picture of this room and hangs the photo on the wall of the first room. The second room lacks the magnifying glass on a crate, and so Peach must investigate that object to reveal the path forward, which the detectives use to continue their escape.
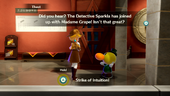
The path leads Peach and the Sparkla to a roof where they meet the Junior Detective, who claims to have found the exit. The Detective Sparkla then asks the Junior Detective three questions: the first is about what color cushions to get for the sofa back at the office, the second is about what time to arrive for a meeting at 9:00, and the third is how they feel about Grape. The Junior Detective replies with purple, 9:00 and refers to Grape as Madame Grape. Upon investigating the Junior Detective, it is revealed to be another criminal in disguise, and the real exit is revealed. The stage is then completed.
Loss outcomes[edit]
- If Peach selects the wrong Detective Sparkla among the four choices, the Sparkla turns out to be a disguised Sour Bunch member, who laughs as Peach falls down a trapdoor and loses one HP.
- In the final section, if Peach use Strike of Intuition on Detective Sparkla instead of Junior Detective, Detective Sparkla will become sad, as Peach lose one HP and is returned to the choice.
- In the same section, if Peach heads directly up the fake exit, the stairs fall down along with Peach, as the Junior Detective cheers and Peach lose one HP and is returned to the choice.
Sparkle Gems[edit]
Sparkle Gems marked with an asterisk ⁽*⁾ will always be obtained during regular gameplay.
- After opening the door to where the Detective Sparkla is.*
- After using a Strike of Intuition on the real Detective Sparkla.*
- After using a Strike of Intuition on the magnifying glass on a crate.
- Found in a sub-area before the door to the last section of the stage. Detective Peach must strike a pose on a specific area to reach the sub-area. To obtain the Sparkle Gem, Detective Peach must use a Strike of Intuition on a glowing crate.
- After using a Strike of Intuition on the criminal disguised as the Junior Detective.*
Stella ribbon[edit]
Multicolored Detective Ribbon: To the far right of the first section of the stage, there is a lift that takes Peach up to the second floor. To the far left of the second floor is the Ribboner, where he is stuck. Detective Peach must turn the Themec Face Statues to face the left, which will cause a bridge to appear on the second floor. Peach can then reach the Ribboner, who awards her the ribbon and thanks her for fixing the floor, and runs over to his travel equipment that had been stuck on the right side of the floor.
- Help request: "Help! I'm stuuuuck!"
- Rescue message: "You fixed it! You fixed the floor!"
[edit]
The stage has one Ninja Theet when it is played in the postgame:
- Found in the first section of the stage, in the statue area. This Theet is along the background wall to the right of the rightmost statue.
Gallery[edit]
The stage's album picture
A disguised Sour Bunch member near the start, while the Jump/Action buttons have been reversed in the game settings


Names in other languages[edit]
| Language | Name | Meaning | Notes |
|---|---|---|---|
| Japanese | ヤミのミュージアムと Yami no Myūjiamu to Murasaki no Nazo |
Dark Museum and Purple Mystery | |
| Chinese (simplified) | 黑暗的展览馆与紫色的谜[?] Hēi'àn De Zhǎnlǎn Guǎn Yǔ Zǐsè De Mí |
Dark Exhibition Hall and Purple Mystery | |
| Chinese (traditional) | 黑暗的展覽館與紫色的謎[?] Hēi'àn De Zhǎnlǎn Guǎn Yǔ Zǐsè De Mí |
Dark Exhibition Hall and Purple Mystery | |
| Dutch | Het duistere museum[?] | The dark museum | |
| French | Musée sombre et mystère violet[?] | Dark museum and purple mystery | |
| German | Das lila Rätsel im Museum[?] | The purple Puzzle in the Museum | |
| Italian | Il museo oscuro e il mistero viola[?] | The dark museum and the purple mystery | |
| Korean | 어둠의 박물관과 보라색 수수께끼[?] Eodum'ui bagmulgwangwa bolasaeg susukkekki |
Dark Museum and Purple Mystery | |
| Portuguese | O Museu Sombrio e o Enigma Púrpuro[?] | The Dark Museum and the Purple Enigma | |
| Russian | Загадки в музее мрака[?] Zagadki v muzeē mraka |
Riddles in the Museum of Darkness | |
| Spanish | El museo malgurio[?] | The darkle museum |