Spooky Trails: Difference between revisions
m (Text replacement - "{{[Qq]uote2\|" to "{{quote|") |
m (Text replacement - "(\| *)Jap([RMCN\d]* *=)" to "$1Jpn$2") |
||
| (3 intermediate revisions by 2 users not shown) | |||
| Line 11: | Line 11: | ||
'''Spooky Trails''' is the third world in ''[[Mario + Rabbids Kingdom Battle]]''. It is a haunted area located to the west of [[Sherbet Desert]] and to the east of the [[Lava Pit (Mario + Rabbids Kingdom Battle)|Lava Pit]], consisting of many gates, abandoned towns, graveyards, moving vines, ensnared [[Boo]]s, swamps, and an old clock tower. The instruments that move to the music are various harp-like vines. | '''Spooky Trails''' is the third world in ''[[Mario + Rabbids Kingdom Battle]]''. It is a haunted area located to the west of [[Sherbet Desert]] and to the east of the [[Lava Pit (Mario + Rabbids Kingdom Battle)|Lava Pit]], consisting of many gates, abandoned towns, graveyards, moving vines, ensnared [[Boo]]s, swamps, and an old clock tower. The instruments that move to the music are various harp-like vines. | ||
[[Mario]] and co. first land in Spooky Trails while pursuing [[Bowser Jr.]] and [[Spawny]] and searching for the Relics of Goodness to open the Moon Gate and awaken "Tom Phan". Along the way, Mario and co. happen to meet up with [[Toadette]], whom they escort to [[Toad]], and use the collected relics to open another gate. Mario and co. then fight [[Calavera]] and free [[Rabbid Yoshi]], who joins shortly thereafter. Venturing into the deeper part of the woods, they encounter a clock tower, which they use to reverse the [[Moon]]'s orbit and open the Moon Gate. Mario and co. then suddenly find that they had been deceived by Bowser Jr., and Spawny uses the [[SupaMerge]] on the Relics of Goodness and a [[Rabbid]] to form the [[Phantom (boss)|Phantom]]. After defeating the Phantom, [[Beep-0]] reports that Bowser Jr. had fled to the Lava Pit, thus revealing their final destination. | [[Mario]] and co. first land in Spooky Trails while pursuing [[Bowser Jr.]] and [[Spawny]] and searching for the Relics of Goodness to open the Moon Gate and awaken "Tom Phan". Along the way, Mario and co. happen to meet up with [[Toadette]], whom they escort to [[Toad]], and use the collected relics to open another gate. Mario and co. then fight [[Calavera]] and free [[Rabbid Yoshi]], who joins shortly thereafter. Venturing into the deeper part of the woods, they encounter a clock tower, which they use to reverse the [[Moon]]'s orbit and open the Moon Gate. Mario and co. then suddenly find that they had been deceived by Bowser Jr., and Spawny uses the [[SupaMerge]] on the Relics of Goodness and a [[Rabbid]] to form the [[Phantom (boss)|Phantom]]. After defeating the Phantom, [[Beep-0]] reports that Bowser Jr. had fled to the Lava Pit, thus revealing their final destination. | ||
==Levels== | ==Levels== | ||
{ | {{content description | ||
| | |name1=3-1- [[Looking for Mr. Tom Phan]] | ||
|image1=[[File:LookingForMrTomPhan MarioRabbids.png|250px]] | |||
|description1=A level featuring Spooky [[Ziggy|Ziggies]]. | |||
|name2=3-2- [[Peek-a-Boo!]] | |||
|image2=[[File:PeekaBoo MarioRabbids.png|250px]] | |||
|description2=A level that introduces [[Peek-a-Boo (enemy)|Peek-a-Boos]]. | |||
|[[File:LookingForMrTomPhan MarioRabbids.png|250px]] | |name3=3-3- [[Benefits of Getting Lost]] | ||
|A level featuring Spooky [[Ziggy|Ziggies]]. | |image3=[[File:BenefitsofGettingLost MarioRabbids.png|250px]] | ||
| | |description3=A level that has an escort [[Toadette]] mission. | ||
|name4=3-4- [[Madame Bwahstrella (level)|Madame Bwahstrella]] | |||
|[[File:PeekaBoo MarioRabbids.png|250px]] | |image4=[[File:MadameBwahstrella MarioRabbids.png|250px]] | ||
|A level that introduces [[Peek-a-Boo (enemy)|Peek-a-Boos]]. | |description4=A level that features [[Madame Bwahstrella]]. | ||
| | |name5=3-5- [[Introducing El Calavera!]] | ||
|image5=[[File:IntroducingElCalavera MarioRabbids.png|250px]] | |||
|[[File:BenefitsofGettingLost MarioRabbids.png|250px]] | |description5=A level where [[Calavera]] is fought. | ||
|A level that has an escort [[Toadette]] mission. | |name6=3-6- [[Double-Barreled]] | ||
| | |image6=[[File:DoubleBarreled MarioRabbids.png|250px]] | ||
|description6=A level that introduces [[Valkyrie|Valkyries]] and [[Boo]] hazards. | |||
|[[File:MadameBwahstrella MarioRabbids.png|250px]] | |name7=3-7- [[Every Treasure Has Its Thorn]] | ||
|A level that features [[Madame Bwahstrella]]. | |image7=[[File:EveryTreasureHasItsThorn MarioRabbids.png|250px]] | ||
| | |description7=A level that features Spooky [[Buckler|Bucklers]]. | ||
|name8=3-8- [[Moonlight Sonata]] | |||
|[[File:IntroducingElCalavera MarioRabbids.png|250px]] | |image8=[[File:MoonlightSonata MarioRabbids.png|250px]] | ||
|A level where [[Calavera]] is fought. | |description8=A level that features a clock tower. | ||
| | |name9=3-BOSS- [[Opening Night!]] | ||
|image9=[[File:OpeningNight MarioRabbids.png|250px]] | |||
|[[File:DoubleBarreled MarioRabbids.png|250px]] | |description9=A level where the [[Phantom (boss)|Phantom]] is fought. | ||
|A level that introduces [[Valkyrie|Valkyries]] and [[Boo]] hazards. | |name10=3-S- [[Secret Swamp]] | ||
| | |image10=[[File:SecretSwamp MarioRabbids.png|250px]] | ||
|description10=A secret level featuring a rematch against Calavera. | |||
|[[File:EveryTreasureHasItsThorn MarioRabbids.png|250px]] | }} | ||
|A level that features Spooky [[Buckler|Bucklers]]. | |||
| | |||
|[[File:MoonlightSonata MarioRabbids.png|250px]] | |||
|A level that features a clock tower. | |||
| | |||
|[[File:OpeningNight MarioRabbids.png|250px]] | |||
|A level where the [[Phantom (boss)|Phantom]] is fought. | |||
| | |||
|[[File:SecretSwamp MarioRabbids.png|250px]] | |||
|A secret level featuring a rematch against Calavera. | |||
==Challenges== | ==Challenges== | ||
{| style="text-align: center; width: 100% | {| style="text-align: center; width: 100%" class=wikitable | ||
!width="1%"|# | !width="1%"|# | ||
!width="4%"|Name | !width="4%"|Name | ||
| Line 155: | Line 139: | ||
===DLC Challenges=== | ===DLC Challenges=== | ||
{| style="text-align: center; width: 100% | {| style="text-align: center; width: 100%" class=wikitable | ||
!width="1%"|# | !width="1%"|# | ||
!width="4%"|Name | !width="4%"|Name | ||
| Line 184: | Line 167: | ||
==Names in other languages== | ==Names in other languages== | ||
{{foreign names | {{foreign names | ||
| | |Jpn=スプーキートレイル | ||
| | |JpnR=Supūki Toreiru | ||
| | |JpnM=Spooky Trail | ||
| | |Dut=Geestwegen | ||
| | |DutM=Ghost Roads | ||
|Ita=Sentieri Spettrali | |Ita=Sentieri Spettrali | ||
|ItaM=Spectral Paths | |ItaM=Spectral Paths | ||
Latest revision as of 14:51, January 7, 2025
| Spooky Trails | |
|---|---|
| |
| Game | Mario + Rabbids Kingdom Battle |
| Level(s) | 10 |
| << List of worlds >> | |
- “If we could unlock these gates we could visit this haunted slum of unimaginable horrors anytime we wanted.”
- —Beep-0's quote before World 3
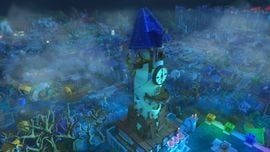
Spooky Trails is the third world in Mario + Rabbids Kingdom Battle. It is a haunted area located to the west of Sherbet Desert and to the east of the Lava Pit, consisting of many gates, abandoned towns, graveyards, moving vines, ensnared Boos, swamps, and an old clock tower. The instruments that move to the music are various harp-like vines.
Mario and co. first land in Spooky Trails while pursuing Bowser Jr. and Spawny and searching for the Relics of Goodness to open the Moon Gate and awaken "Tom Phan". Along the way, Mario and co. happen to meet up with Toadette, whom they escort to Toad, and use the collected relics to open another gate. Mario and co. then fight Calavera and free Rabbid Yoshi, who joins shortly thereafter. Venturing into the deeper part of the woods, they encounter a clock tower, which they use to reverse the Moon's orbit and open the Moon Gate. Mario and co. then suddenly find that they had been deceived by Bowser Jr., and Spawny uses the SupaMerge on the Relics of Goodness and a Rabbid to form the Phantom. After defeating the Phantom, Beep-0 reports that Bowser Jr. had fled to the Lava Pit, thus revealing their final destination.
Levels[edit]
| Image | Name | Description
|
|---|---|---|
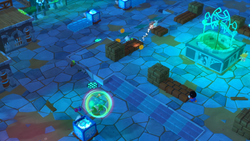 |
3-1- Looking for Mr. Tom Phan | A level featuring Spooky Ziggies. |
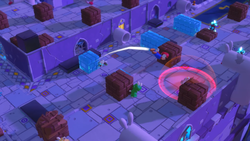 |
3-2- Peek-a-Boo! | A level that introduces Peek-a-Boos. |
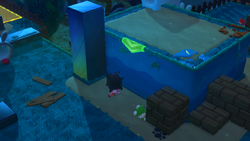 |
3-3- Benefits of Getting Lost | A level that has an escort Toadette mission. |
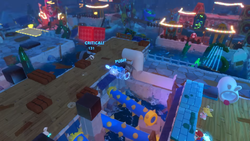 |
3-4- Madame Bwahstrella | A level that features Madame Bwahstrella. |
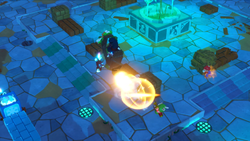 |
3-5- Introducing El Calavera! | A level where Calavera is fought. |
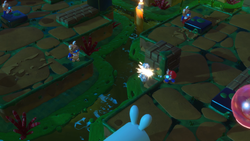 |
3-6- Double-Barreled | A level that introduces Valkyries and Boo hazards. |
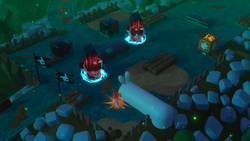 |
3-7- Every Treasure Has Its Thorn | A level that features Spooky Bucklers. |
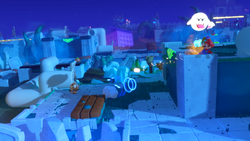 |
3-8- Moonlight Sonata | A level that features a clock tower. |
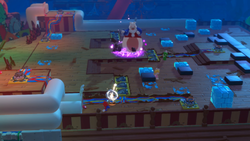 |
3-BOSS- Opening Night! | A level where the Phantom is fought. |
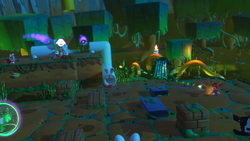 |
3-S- Secret Swamp | A secret level featuring a rematch against Calavera. |
Challenges[edit]
| # | Name | Preview | Location | To Clear | Turn Limit | Difficulty |
|---|---|---|---|---|---|---|
| 1 | So Close, Yet So Far | 
|
The corner of Spooky Square between the green and blue passages. | Reach Area | 3 | Medium |
| 2 | Throw Caution to the Wind | 
|
The corner of Spooky Square between the blue and red passages. | Reach Areas | 1 | Hard |
| 3 | We're Not Alone | 
|
The beginning of the battleground of Chapter 3. | Defeat All | 2 | Medium |
| 4 | Behind the Eight Ball | 
|
The end of the battleground of Chapter 3. | Defeat 8 Enemies | 1 | Hard |
| 5 | Boo Blockade | 
|
The middle upper portion of the first battleground of Chapter 4. | Escort Toadette | 5 | Hard |
| 6 | Go for a Stroll | 
|
The second battleground of Chapter 4. | Reach Areas | 3 | Hard |
| 7 | Off the Chain! | 
|
The corner of Spooky Square between the green and purple passages. | Defeat All | 6 | Supa Hard |
| 8 | Blink and You're Inked | 
|
The first battleground of Chapter 7. | Defeat All | 1 | Hard |
| 9 | Return Engagement | 
|
The second battleground of Chapter 7. | Defeat All | 5 | Supa Hard |
| 10 | Graveyard Tour | 
|
The beginning of the battleground of Chapter 8. | Escort Toadette | 15 | Supa Hard |
DLC Challenges[edit]
| # | Name | Preview | Location | To Clear | Turn Limit | Difficulty |
|---|---|---|---|---|---|---|
| S1 | A Sticky Situation | 
|
The first battleground of the secret chapter. | Defeat All | 1 | Ultra Hard |
| S2 | Go Ahead and Take Ten | 
|
The second battleground of the secret chapter. | Defeat 28 Enemies | 8 | Ultra Hard |
Names in other languages[edit]
| Language | Name | Meaning | Notes |
|---|---|---|---|
| Japanese | スプーキートレイル[?] Supūki Toreiru |
Spooky Trail | |
| Dutch | Geestwegen[?] | Ghost Roads | |
| Italian | Sentieri Spettrali[?] | Spectral Paths | |
| Russian | Жуткие тропинки[?] Zhutkie tropinki |
Spooky Paths | |
| Spanish | Senderos Siniestros[?] | Spooky Paths |