Simian Swing: Difference between revisions
m (Text replacement - "({{[Ff]oreign names[^{}]+[^\n])}}" to "$1 }}") |
m (Text replacement - "(\| *)Jap([RMCN\d]* *=)" to "$1Jpn$2") |
||
| (7 intermediate revisions by 5 users not shown) | |||
| Line 1: | Line 1: | ||
{{ | {{level infobox | ||
|image=[[File:Simian Swing.png]] | |image=[[File:Simian Swing.png]] | ||
|code=1-3 | |code=1-3 | ||
|world=[[Gangplank Galleon Ahoy!]] | |||
|game=''[[Donkey Kong Land]]'' | |game=''[[Donkey Kong Land]]'' | ||
|after=[[Deck Trek|>>]] | |after=[[Deck Trek|>>]] | ||
|before=[[Freezing Fun|<<]] | |before=[[Freezing Fun|<<]] | ||
}} | }} | ||
'''Simian Swing'''<ref>''Donkey Kong Land'' instruction booklet | '''Simian Swing'''<ref>{{cite|language=en-us|publisher=Nintendo of America|date=1995|title=''Donkey Kong Land'' instruction booklet|page=16}}</ref> is the third level in ''[[Donkey Kong Land]]'' and of the first world, [[Gangplank Galleon Ahoy!]] It is a jungle level where [[Donkey Kong]] and [[Diddy Kong]] must swing from many ropes to cross wide gaps and reach high ledges, while avoiding [[Zinger]]s flying around near the ropes along the way. A large portion of the level takes place on the treetops, some of which have hidden items on them. | ||
==Layout== | ==Layout== | ||
From the start of the | From the start of the level, the Kongs must jump up several ledges and defeat some Kremlings. Soon, they come up to an abyss, which must be crossed by using the rope above. From there, they must continue east and cross another gap with the aid of a few ropes. After beating a Gnawty, they must journey farther and get atop some treetops. They reach another gap here, so they need to swing along another rope and land on a small platform. However, there is another abyss after this, so the heroes must grab onto yet another rope and swing across. Once across the gaps, the Kongs need to defeat a couple Slippas and hit the [[Continue Point]]. | ||
Halfway through the level, the | Halfway through the level, the Kongs have to get back on the treetops and watch out for jumping Kremlings. Then, they encounter another abyss. To cross it, they must swing across a series of ropes while dodging a Zinger. Soon, they are able to get back on land and continue their adventure. After reaching and crossing another abyss, dodging more Zingers, the Kongs encounter a lone Kremling on a small platform, behind which is a larger platform leading to the level's exit. | ||
==Enemies== | ==Enemies== | ||
The following enemies appear in the following quantities: | |||
<gallery> | |||
Gnawty DKL.PNG|[[Gnawty]] (1) | |||
Kritter DKL.PNG|[[Kritter]] (8) | |||
Slippa DKL.PNG|[[Slippa]] (3) | |||
Zinger DKL.PNG|[[Zinger]] (4) | |||
</gallery> | |||
==Items and objects== | ==Items and objects== | ||
The following items and objects appear in the following quantities: | |||
*[[DK Barrel]]: 2 | *[[DK Barrel]]: 2 | ||
*[[Kong Token]]: 2 | *[[Kong Token]]: 2 | ||
| Line 27: | Line 32: | ||
===K-O-N-G Letters=== | ===K-O-N-G Letters=== | ||
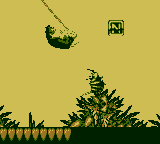
[[File:Simian Swing DKL letter N.png|thumb|Donkey Kong swinging to the letter N]] | |||
*K: Found with some bananas on the first rope swing. | *K: Found with some bananas on the first rope swing. | ||
*O: Located near two Slippas after some rope swinging. | *O: Located near two Slippas after some rope swinging. | ||
*N: Hovering in the air in a rope swinging segment after the checkpoint. It can also be obtained by | *N: Hovering in the air in a rope swinging segment after the checkpoint. It can also be obtained by following bananas underneath one of the trees and entering a nearby [[Barrel Cannon]]. | ||
*G: Found at the very end near a question mark formation of bananas. | *G: Found at the very end near a question mark formation of bananas. | ||
{{br}} | |||
==Bonus Areas== | ==Bonus Areas== | ||
*Shortly before the Continue Point, the Kongs must swing from a rope and bounce on a Gnawty. In mid-air, they must move to the right and land on a patch of ground in front of a small ledge. This causes a rope to appear out of the ground, and the Kongs must grab it to go to the [[Bonus Area]]. There, they must cross a gap via cloud platforms and collect the bananas scattered overhead. Once over the abyss, the Kongs can exit the area by walking into the opening nearby. | |||
*After passing the Continue Point, there are a few bananas floating under a treetop. Following them puts the Kongs on a platform next to the aforementioned Barrel Cannon, which sends them flying toward the cave containing the Bonus Area. There, the Kongs must jump on a button that fires their [[Kong Token]]s from a barrel, each rewarding an [[extra life]] if caught. The Kongs can then exit from an opening to the right. | |||
==Gallery== | ==Gallery== | ||
| Line 49: | Line 47: | ||
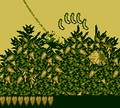
Simian Swing DKL Slippa.png|Donkey Kong jumping to a Slippa | Simian Swing DKL Slippa.png|Donkey Kong jumping to a Slippa | ||
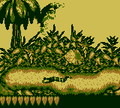
Simian Swing DKL Kritter on treetop.png|Donkey Kong holding a barrel to throw at a Kritter | Simian Swing DKL Kritter on treetop.png|Donkey Kong holding a barrel to throw at a Kritter | ||
</gallery> | </gallery> | ||
==Names in other languages== | ==Names in other languages== | ||
{{foreign names | {{foreign names | ||
| | |Jpn=ロープ・ジャングル1 | ||
| | |JpnR=Rōpu Janguru1 | ||
| | |JpnM=Rope Jungle 1 | ||
|Spa=Monos balanceándose | |Spa=Monos balanceándose | ||
|SpaM=Monkeys swinging | |SpaM=Monkeys swinging | ||
|Ita=Lo swing scimmiesco<ref>{{cite|title=''[[Donkey Kong Land]]'' Italian booklet|page=16}}</ref> | |||
|ItaM=The simian swing | |||
}} | }} | ||
Latest revision as of 16:05, January 7, 2025
| Level | |
|---|---|
| Simian Swing | |
| |
| Level code | 1-3 |
| World | Gangplank Galleon Ahoy! |
| Game | Donkey Kong Land |
| << Directory of levels >> | |
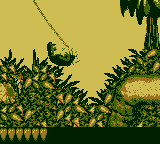
Simian Swing[1] is the third level in Donkey Kong Land and of the first world, Gangplank Galleon Ahoy! It is a jungle level where Donkey Kong and Diddy Kong must swing from many ropes to cross wide gaps and reach high ledges, while avoiding Zingers flying around near the ropes along the way. A large portion of the level takes place on the treetops, some of which have hidden items on them.
Layout[edit]
From the start of the level, the Kongs must jump up several ledges and defeat some Kremlings. Soon, they come up to an abyss, which must be crossed by using the rope above. From there, they must continue east and cross another gap with the aid of a few ropes. After beating a Gnawty, they must journey farther and get atop some treetops. They reach another gap here, so they need to swing along another rope and land on a small platform. However, there is another abyss after this, so the heroes must grab onto yet another rope and swing across. Once across the gaps, the Kongs need to defeat a couple Slippas and hit the Continue Point.
Halfway through the level, the Kongs have to get back on the treetops and watch out for jumping Kremlings. Then, they encounter another abyss. To cross it, they must swing across a series of ropes while dodging a Zinger. Soon, they are able to get back on land and continue their adventure. After reaching and crossing another abyss, dodging more Zingers, the Kongs encounter a lone Kremling on a small platform, behind which is a larger platform leading to the level's exit.
Enemies[edit]
The following enemies appear in the following quantities:
Items and objects[edit]
The following items and objects appear in the following quantities:
- DK Barrel: 2
- Kong Token: 2
- Red Balloon: 1
K-O-N-G Letters[edit]
- K: Found with some bananas on the first rope swing.
- O: Located near two Slippas after some rope swinging.
- N: Hovering in the air in a rope swinging segment after the checkpoint. It can also be obtained by following bananas underneath one of the trees and entering a nearby Barrel Cannon.
- G: Found at the very end near a question mark formation of bananas.
Bonus Areas[edit]
- Shortly before the Continue Point, the Kongs must swing from a rope and bounce on a Gnawty. In mid-air, they must move to the right and land on a patch of ground in front of a small ledge. This causes a rope to appear out of the ground, and the Kongs must grab it to go to the Bonus Area. There, they must cross a gap via cloud platforms and collect the bananas scattered overhead. Once over the abyss, the Kongs can exit the area by walking into the opening nearby.
- After passing the Continue Point, there are a few bananas floating under a treetop. Following them puts the Kongs on a platform next to the aforementioned Barrel Cannon, which sends them flying toward the cave containing the Bonus Area. There, the Kongs must jump on a button that fires their Kong Tokens from a barrel, each rewarding an extra life if caught. The Kongs can then exit from an opening to the right.
Gallery[edit]
Names in other languages[edit]
| Language | Name | Meaning | Notes |
|---|---|---|---|
| Japanese | ロープ・ジャングル1[?] Rōpu Janguru1 |
Rope Jungle 1 | |
| Italian | Lo swing scimmiesco[2] | The simian swing | |
| Spanish | Monos balanceándose[?] | Monkeys swinging |
References[edit]
- ^ 1995. Donkey Kong Land instruction booklet. Nintendo of America (American English). Page 16.
- ^ Donkey Kong Land Italian booklet. Page 16.


