Riverbank Riot: Difference between revisions
m (→Summary) |
LinkTheLefty (talk | contribs) mNo edit summary |
||
| (12 intermediate revisions by 4 users not shown) | |||
| Line 1: | Line 1: | ||
{{ | {{level infobox | ||
|image=[[File:Riverbank Riot DKL3c.png]] | |image=[[File:Riverbank Riot DKL3c.png]] | ||
|code=2-5 | |code=2-5 | ||
|world=[[Primate Plains | |world=[[Primate Plains]] | ||
|game=''[[Donkey Kong Land III]]'' | |game=''[[Donkey Kong Land III]]'' | ||
|before=[[Black Ice Blitz|<<]] | |before=[[Black Ice Blitz|<<]] | ||
|after=[[Miller Instinct|>>]] | |after=[[Miller Instinct|>>]] | ||
}} | }} | ||
'''Riverbank Riot''' is the eleventh level of ''[[Donkey Kong Land III]]'' | '''Riverbank Riot''', named '''River''' in the [[Donkey Kong Land III#Time Attack Mode|Time Attack]] mode, is the eleventh level of ''[[Donkey Kong Land III]]'' and the fifth level of [[Primate Plains]]. It takes place at a riverbank where [[Dixie Kong]] and [[Kiddy Kong]] can either move along the banks or swim in the river. The banks are much higher than in [[Koco Channel]], requiring the [[Kong]]s to often use [[Barrel Cannon]]s to reach the hilltops. Riverbank Riot is one of the twelve levels appearing in the Time Attack mode, where the Kongs are given 55 seconds to complete the level. | ||
==Layout== | ==Layout== | ||
When the level begins, the Kongs travel into a nearby Barrel Cannon. It blasts them to a higher area, where they need to fall down from some ledges and make it down the mound of land. Crossing a small gap of water, they walk down a mostly flat surface while passing some enemies. A trail near the letter K indicates that they must jump down into a shallow body of water and through a narrow trench. After dodging all the fish foes there, they can find the surface of the water and soon make it to land. Once they jump over two Buzzes, they can find the [[Star Barrel]]. | When the level begins, the Kongs travel into a nearby Barrel Cannon. It blasts them to a higher area, where they need to fall down from some ledges and make it down the mound of land. Crossing a small gap of water, they walk down a mostly flat surface while passing some enemies. A trail near [[KONG Letters|the letter K]] indicates that they must jump down into a shallow body of water and through a narrow trench. After dodging all the fish foes there, they can find the surface of the water and soon make it to land. Once they jump over two Buzzes, they can find the [[Star Barrel]]. | ||
About halfway through the level, the apes make their way down the path and use the help of a Niknak to cross a small gap. Farther on, they enter a small area of water and swim across, finding the letter N and land. Walking across the area, the apes find themselves jumping up some ledges and later crossing small, Buzz infested abysses. After the third gap, they can find the letter G and head up some slanted pathways while avoiding common enemies to enter another body of water. Once they get to the other side of the water, they should see a flagpole on land. If they get on land and touch the pole, the level ends. | About halfway through the level, the apes make their way down the path and use the help of a Niknak to cross a small gap. Farther on, they enter a small area of water and swim across, finding the letter N and land. Walking across the area, the apes find themselves jumping up some ledges and later crossing small, Buzz infested abysses. After the third gap, they can find the letter G and head up some slanted pathways while avoiding common enemies to enter another body of water. Once they get to the other side of the water, they should see a flagpole on land. If they get on land and touch the pole, the level ends. | ||
| Line 28: | Line 22: | ||
==Items and objects== | ==Items and objects== | ||
*[[Bear | The following items and objects appear in the following quantities: | ||
*[[Bear coin]]s: 2 | |||
===K-O-N-G Letters=== | ===K-O-N-G Letters=== | ||
*K: Found above a lake full of Kocos. | *K: Found above a lake full of Kocos. | ||
| Line 36: | Line 30: | ||
*G: Found after a Bristles near a Buzz. | *G: Found after a Bristles near a Buzz. | ||
== | ===DK Coin=== | ||
[[File:Riverbank Riot Koin.png|thumb|The Koin of Riverbank Riot]] | |||
When the level begins, the Kongs encounter the [[Koin]] next to the first ledge. They Kongs can use a [[Iron Barrel|Steel Barrel]] found behind the start and throw it against the wall behind Koin. The Steel Barrel bounces back into Koin, defeating it and rewarding the [[DK Coin]] to the Kongs. | |||
{{br}} | |||
== | ==Bonus Levels== | ||
[[File:Riverbank Riot DKL3 Bonus Level 1.png|thumb|The first Bonus Level of Riverbank Riot]] | |||
Riverbank Riot has two [[Bonus room|Bonus Level]]s, listed by type: | |||
*'''Find the Token!''': When the Kongs enter the first body of water, they must swim to the bottom-left, passing some enemies along the way, and enter a [[Bonus Barrel]]. In the [[Bonus Level]], the Kongs must swim through a riverbank, avoid some Buzzes, and collect the [[Bonus Coin (Donkey Kong franchise)|Bonus Coin]] at the end. | |||
*'''Bash the Baddies!''': Shortly after the letter N is a [[Iron Barrel|Steel Barrel]], which must be used to defeat two nearby Buzzes, allowing the Kongs to enter a hidden Barrel Cannon that blasts them up into a Bonus Barrel. In the Bonus Level, the Kongs have to defeat four Niknaks, specifically by jumping on them. After doing so, the Bonus Coin appears for them to collect. | |||
|When the | |||
==Gallery== | ==Gallery== | ||
<gallery> | <gallery> | ||
Riverbank Riot DKL3 start.png|Dixie at the start of the level | Riverbank Riot DKL3 start.png|Dixie at the start of the level | ||
Riverbank Riot DKL3 Bear Coin.png|Kiddy swimming to a | Riverbank Riot DKL3 Bear Coin.png|Kiddy swimming to a bear coin | ||
Riverbank Riot DKL3 letter K.png|The letter K | Riverbank Riot DKL3 letter K.png|The letter K | ||
Riverbank Riot DKL3 Lurchins.png|Dixie swims between two Lurchins | Riverbank Riot DKL3 Lurchins.png|Dixie swims between two Lurchins | ||
Riverbank Riot DKL3 letter N.png|The letter N | Riverbank Riot DKL3 letter N.png|The letter N | ||
Riverbank Riot DKL3 end.png|Kiddy at the Level Flag | Riverbank Riot DKL3 end.png|Kiddy at the End of Level Flag | ||
</gallery> | </gallery> | ||
==Names in other languages== | ==Names in other languages== | ||
{{foreign names | {{foreign names | ||
|Jap= | |Jap=かわべの大あばれ | ||
|JapR=Kawabe no Dai-abare | |JapR=Kawabe no Dai-abare | ||
|JapM=Riverside Rampage | |JapM=Riverside Rampage | ||
}} | }} | ||
{{DKL3}} | {{DKL3}} | ||
[[Category:Donkey Kong Land III | [[Category:Donkey Kong Land III levels]] | ||
[[Category:Northern Kremisphere]] | [[Category:Northern Kremisphere]] | ||
[[Category: | [[Category:Aquatic areas]] | ||
[[Category:Forests | [[Category:Forests]] | ||
Latest revision as of 20:21, January 2, 2024
| Level | |
|---|---|
| Riverbank Riot | |
| |
| Level code | 2-5 |
| World | Primate Plains |
| Game | Donkey Kong Land III |
| << Directory of levels >> | |
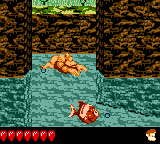
Riverbank Riot, named River in the Time Attack mode, is the eleventh level of Donkey Kong Land III and the fifth level of Primate Plains. It takes place at a riverbank where Dixie Kong and Kiddy Kong can either move along the banks or swim in the river. The banks are much higher than in Koco Channel, requiring the Kongs to often use Barrel Cannons to reach the hilltops. Riverbank Riot is one of the twelve levels appearing in the Time Attack mode, where the Kongs are given 55 seconds to complete the level.
Layout[edit]
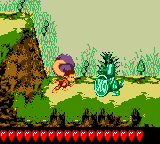
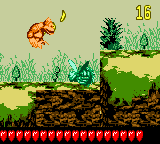
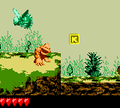
When the level begins, the Kongs travel into a nearby Barrel Cannon. It blasts them to a higher area, where they need to fall down from some ledges and make it down the mound of land. Crossing a small gap of water, they walk down a mostly flat surface while passing some enemies. A trail near the letter K indicates that they must jump down into a shallow body of water and through a narrow trench. After dodging all the fish foes there, they can find the surface of the water and soon make it to land. Once they jump over two Buzzes, they can find the Star Barrel.
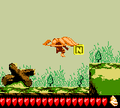
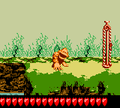
About halfway through the level, the apes make their way down the path and use the help of a Niknak to cross a small gap. Farther on, they enter a small area of water and swim across, finding the letter N and land. Walking across the area, the apes find themselves jumping up some ledges and later crossing small, Buzz infested abysses. After the third gap, they can find the letter G and head up some slanted pathways while avoiding common enemies to enter another body of water. Once they get to the other side of the water, they should see a flagpole on land. If they get on land and touch the pole, the level ends.
Enemies[edit]
Items and objects[edit]
The following items and objects appear in the following quantities:
- Bear coins: 2
K-O-N-G Letters[edit]
- K: Found above a lake full of Kocos.
- O: Hovering above a lake with a Bounty Bass.
- N: After the Star Barrel, the "N" is to the right of the lake.
- G: Found after a Bristles near a Buzz.
DK Coin[edit]
When the level begins, the Kongs encounter the Koin next to the first ledge. They Kongs can use a Steel Barrel found behind the start and throw it against the wall behind Koin. The Steel Barrel bounces back into Koin, defeating it and rewarding the DK Coin to the Kongs.
Bonus Levels[edit]
Riverbank Riot has two Bonus Levels, listed by type:
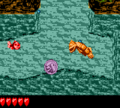
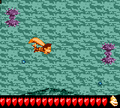
- Find the Token!: When the Kongs enter the first body of water, they must swim to the bottom-left, passing some enemies along the way, and enter a Bonus Barrel. In the Bonus Level, the Kongs must swim through a riverbank, avoid some Buzzes, and collect the Bonus Coin at the end.
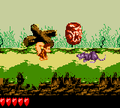
- Bash the Baddies!: Shortly after the letter N is a Steel Barrel, which must be used to defeat two nearby Buzzes, allowing the Kongs to enter a hidden Barrel Cannon that blasts them up into a Bonus Barrel. In the Bonus Level, the Kongs have to defeat four Niknaks, specifically by jumping on them. After doing so, the Bonus Coin appears for them to collect.
Gallery[edit]
Names in other languages[edit]
| Language | Name | Meaning | Notes |
|---|---|---|---|
| Japanese | かわべの大あばれ[?] Kawabe no Dai-abare |
Riverside Rampage |
