Bad Manor: Difference between revisions
mNo edit summary |
|||
| (23 intermediate revisions by 10 users not shown) | |||
| Line 1: | Line 1: | ||
{{ | {{level infobox | ||
|title=Bad Manor | |title=Bad Manor | ||
|image=[[File: | |image=[[File:Bad Manor.png|275px]] | ||
|code=5-4 | |code=5-4 | ||
|game=''[[Wario Land: Shake It!]]'' | |game=''[[Wario Land: Shake It!]]'' | ||
|track=Bad Manor (before holding a Merfle Barrel)<br>Boogie Mansion (after freeing a black Merfle) | |||
|before=[[Slipshod Slopes|<<]] | |before=[[Slipshod Slopes|<<]] | ||
|after=>> | |after=[[Large Fry Cook-Off|>>]] | ||
|secret=[[Boogie Mansion|**]] | |secret=[[Boogie Mansion|**]] | ||
}} | }} | ||
'''Bad Manor''' is the fourth level of the [[Quiver Cliffs]] and final normal level in ''[[Wario Land: Shake It! | {{quote|This is Bad Manor. This one could be tough. Oh, and there's a secret map here!|[[Merfle|Black Merfle]]|Wario Land: Shake It!}} | ||
'''Bad Manor''' is the fourth level of the [[Quiver Cliffs]] and final normal level in ''[[Wario Land: Shake It!]]'' | |||
==Layout== | ==Layout== | ||
This level is based on a typical haunted mansion showered from the moonlight, featuring many traps and undead enemies, and is one of the two levels to contain [[shrinkbarrel]]s and [[Recapitator]]s. Wario | This level is based on a typical haunted mansion showered from the moonlight, featuring many traps and undead enemies, and is one of the two levels to contain [[shrinkbarrel]]s and [[Recapitator]]s. Wario finds the first shrinkbarrel at the root of the mansion, which can turn Wario to [[Mini Wario]]. He also needs to use the [[push button]] to climb up and enter the mansion, inside which walls are golden and statues of devils stand still. There, he jumps away from various enemies and becomes [[Flaming Wario]] to unlock the second shrinkbarrel. Most treasures here require Wario to become Mini Wario to go through. Finally, he uses [[Blast-O-Cannon]]s to skyrocket to the top of the mansion and shoots himself from one building to the other, where he finds a black [[Merfle]] caged in a [[Merfle Barrel]]. When Wario sets the Merfle free, there are two ways for him to choose. One is for speed and coins, and the other leads to a Secret Map. | ||
==Secret | ==Secret Map location== | ||
This level has a [[List of Secret Maps in Wario Land: Shake It!|Secret Map]] to [[Boogie Mansion]]. In order to get it, the player must free the [[Merfle]] and [[Ground Pound]] down the hole, then keep going through the areas until reaching an area with a [[Max Fastosity Dasherator]]. The player should use it on the first set of blocks, then crash into the wall to stop. Then, the player should jump up and walk over to the next set of blocks and [[Earthshake Punch]] to reveal the map and end the level. | This level has a [[List of Secret Maps in Wario Land: Shake It!|Secret Map]] to [[Boogie Mansion]]. In order to get it, the player must free the [[Merfle]] and [[Ground Pound]] down the hole, then keep going through the areas until reaching an area with a [[Max Fastosity Dasherator]]. The player should use it on the first set of blocks, then crash into the wall to stop. Then, the player should jump up and walk over to the next set of blocks and [[Earthshake Punch]] to reveal the map and end the level. | ||
==Missions== | ==Missions== | ||
{| class="wikitable" style="text-align:center" | |||
! Icon | |||
! Mission | |||
! Description | |||
|- | |||
| [[File:WLSI! Clock icon.png]] | |||
| style="text-align:left" | ''Finish before the clock hits 1:50:00'' | |||
| style="text-align:left" | After holding a [[Merfle Barrel]], Wario must hurry back to the start of the level within a set time limit of forty seconds (0:40:00). | |||
|- | |||
| [[File:WLSI! Heart icon.png]] | |||
| style="text-align:left" | ''Beat the stage without taking damage'' | |||
| style="text-align:left" | Wario must clear the level without taking any damage. | |||
|- | |||
| [[File:WLSI! Coin icon.png]] | |||
| style="text-align:left" | ''Collect 55,000 [[coin]]s'' | |||
| style="text-align:left" | Wario must collect at least 55,000 coins, including [[diamond]]s. | |||
|- | |||
| [[File:WLSI! Push Button icon.png]] | |||
| style="text-align:left" | ''Pound down all [[push button]]s'' | |||
| style="text-align:left" | Wario must [[Ground Pound]] over every push button. | |||
|- | |||
| [[File:WLSI! Enemy icon.png]] | |||
| style="text-align:left" | ''Don't defeat any enemies'' | |||
| style="text-align:left" | Wario must clear the level without defeating any enemies. | |||
|} | |||
==Enemies== | |||
*[[Bandinero]] (red) | |||
*[[Bumbleprod]] | |||
*[[Flimflam]] | |||
*[[Floating Bandinero]] | |||
*[[Mummer]] | |||
*[[Pitchfork]] (blue) | |||
*[[Scarracuda]] (red) | |||
*[[Spike Trap]] | |||
*[[Spinbat]] | |||
==Treasures== | ==Treasures== | ||
{| class="wikitable sortable" style="text-align:center" | |||
! rowspan="2" width="5%" | Treasure | |||
! rowspan="2" width="5%" class="unsortable" | Image | |||
! colspan="2" width="30%" | Description | |||
! rowspan="2" width="5%" class="unsortable" | Location image | |||
|- | |||
! width="15%" class="unsortable" | NTSC-U | |||
! width="15%" class="unsortable" | PAL | |||
|- | |||
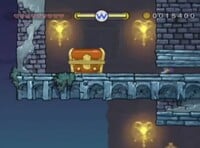
| Vampire's Mirror<br><small>Undead Mirror</small> | |||
| [[File:WLSItreasure88.png]] | |||
| style="text-align:left" | ''Shows you yourself as a vampire. Vampires don't have reflections, so it's always blank.'' | |||
| style="text-align:left" | ''Shows you as a vampire. Let's see... Hey, there's nothing there! Is this thing broken?'' | |||
| [[File:WLSI Bad Manor chest1.jpg|200px]] | |||
|- | |||
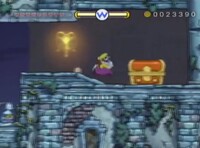
| Star Hammer | |||
| [[File:WLSItreasure89.png]] | |||
| colspan="2" style="text-align:left" | ''Leave a star-shaped mark on anything (or anyone) you hit!'' | |||
| [[File:WLSI Bad Manor chest2.jpg|200px]] | |||
|- | |||
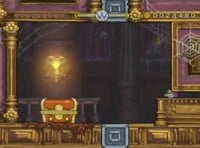
| Pandora's Box | |||
| [[File:WLSItreasure90.png]] | |||
| style="text-align:left" | ''Under no circumstances should you open this. But I'll bet there's neat stuff in there...'' | |||
| style="text-align:left" | ''Under no circumstances should you open this. But there's probably some nice stuff in there...'' | |||
| [[File:WLSI Bad Manor chest3.jpg|200px]] | |||
|} | |||
==Data== | ==Data== | ||
{| class="wikitable" style="text-align:center" | |||
! Given time | |||
! Sum of coins | |||
|- | |||
| 2:30:00 | |||
| 59,270 | |||
|- | |||
| colspan="2" style="text-align:left; background:#eaecf0" | <small>The theoretical sum of 59,270 coins cannot be reached in fact, so the maximum sum that can be reached is 58,990 coins.</small> | |||
|} | |||
==Names in other languages== | ==Names in other languages== | ||
{{foreign names| | {{foreign names| | ||
| | |Jpn=ゴーストキャッスル | ||
| | |JpnR=Gōsuto Kyassuru | ||
| | |JpnM=Ghost Castle | ||
|Ger=Villa Weichknie}} | |Ger=Villa Weichknie | ||
|Ita=Castello fantasma | |||
|ItaM=Ghost castle | |||
|Spa=Caserón cadavérico | |||
|SpaM=Cadaveric manor | |||
|Fre=Couloirs du Manoir | |||
|FreM=Manor's Hallways | |||
}} | |||
{{WLSI}} | {{WLSI}} | ||
[[Category:Ghost Houses]] | [[Category:Ghost Houses]] | ||
[[Category:Wario Land: Shake It! | [[Category:Wario Land: Shake It! levels]] | ||
Latest revision as of 08:53, January 20, 2025
| Level | |
|---|---|
| Bad Manor | |

| |
| Level code | 5-4 |
| Game | Wario Land: Shake It! |
| Music track | Bad Manor (before holding a Merfle Barrel) Boogie Mansion (after freeing a black Merfle) |
| << Directory of levels >> ** | |
- “This is Bad Manor. This one could be tough. Oh, and there's a secret map here!”
- —Black Merfle, Wario Land: Shake It!
Bad Manor is the fourth level of the Quiver Cliffs and final normal level in Wario Land: Shake It!
Layout[edit]
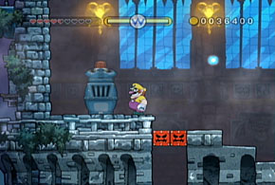
This level is based on a typical haunted mansion showered from the moonlight, featuring many traps and undead enemies, and is one of the two levels to contain shrinkbarrels and Recapitators. Wario finds the first shrinkbarrel at the root of the mansion, which can turn Wario to Mini Wario. He also needs to use the push button to climb up and enter the mansion, inside which walls are golden and statues of devils stand still. There, he jumps away from various enemies and becomes Flaming Wario to unlock the second shrinkbarrel. Most treasures here require Wario to become Mini Wario to go through. Finally, he uses Blast-O-Cannons to skyrocket to the top of the mansion and shoots himself from one building to the other, where he finds a black Merfle caged in a Merfle Barrel. When Wario sets the Merfle free, there are two ways for him to choose. One is for speed and coins, and the other leads to a Secret Map.
Secret Map location[edit]
This level has a Secret Map to Boogie Mansion. In order to get it, the player must free the Merfle and Ground Pound down the hole, then keep going through the areas until reaching an area with a Max Fastosity Dasherator. The player should use it on the first set of blocks, then crash into the wall to stop. Then, the player should jump up and walk over to the next set of blocks and Earthshake Punch to reveal the map and end the level.
Missions[edit]
| Icon | Mission | Description |
|---|---|---|
| Finish before the clock hits 1:50:00 | After holding a Merfle Barrel, Wario must hurry back to the start of the level within a set time limit of forty seconds (0:40:00). | |
| Beat the stage without taking damage | Wario must clear the level without taking any damage. | |
| Collect 55,000 coins | Wario must collect at least 55,000 coins, including diamonds. | |
| Pound down all push buttons | Wario must Ground Pound over every push button. | |
| Don't defeat any enemies | Wario must clear the level without defeating any enemies. |
Enemies[edit]
- Bandinero (red)
- Bumbleprod
- Flimflam
- Floating Bandinero
- Mummer
- Pitchfork (blue)
- Scarracuda (red)
- Spike Trap
- Spinbat
Treasures[edit]
Data[edit]
| Given time | Sum of coins |
|---|---|
| 2:30:00 | 59,270 |
| The theoretical sum of 59,270 coins cannot be reached in fact, so the maximum sum that can be reached is 58,990 coins. | |
Names in other languages[edit]
| Language | Name | Meaning | Notes |
|---|---|---|---|
| Japanese | ゴーストキャッスル[?] Gōsuto Kyassuru |
Ghost Castle | |
| French | Couloirs du Manoir[?] | Manor's Hallways | |
| German | Villa Weichknie[?] | - | |
| Italian | Castello fantasma[?] | Ghost castle | |
| Spanish | Caserón cadavérico[?] | Cadaveric manor |


