Chestnut Valley: Difference between revisions
LinkTheLefty (talk | contribs) mNo edit summary |
Scrooge200 (talk | contribs) No edit summary |
||
| (22 intermediate revisions by 10 users not shown) | |||
| Line 1: | Line 1: | ||
{{ | {{PMTOK location infobox | ||
|image=PMTOK Chestnut Valley.png | |||
|image= | |||
|caption= | |caption= | ||
|toads=8 | |toads=8 | ||
| Line 10: | Line 9: | ||
|streamer=2977B5 | |streamer=2977B5 | ||
}} | }} | ||
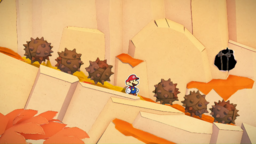
'''Chestnut Valley''' is a location in ''[[Paper Mario: The Origami King]]''. It is located in the blue streamer district, found directly below [[Autumn Mountain]]. When [[Mario]], [[Olivia]], and [[Bob-omb (Paper Mario: The Origami King)|Bob-omb]] reach the bridge connecting to the [[Water Vellumental Shrine]] section, a [[Paper Macho Soldier|Paper Macho]] [[Goomba]] appears on the other side. Thinking it is friendly, Bob-omb runs toward it only to be knocked off the bridge. Mario has no choice but to jump off the bridge and rescue Bob-omb multiple times from different areas of Chestnut Valley. | {{quote|Remember Chestnut Valley? Bobby kept rolling away because he was so round... He was really good at getting in trouble, wasn't he?|Olivia|Paper Mario: The Origami King}} | ||
'''Chestnut Valley''' is a location in ''[[Paper Mario: The Origami King]]''. It is located in the blue [[streamer]] district, found directly below [[Autumn Mountain]]. When [[Mario]], [[Olivia]], and [[Bob-omb (Paper Mario: The Origami King)|Bob-omb]] reach the bridge connecting to the [[Water Vellumental Shrine]] section, a [[Paper Macho Soldier|Paper Macho]] [[Goomba]] appears on the other side. Thinking it is friendly, Bob-omb runs toward it only to be knocked off the bridge. Mario has no choice but to jump off the bridge and rescue Bob-omb multiple times from different areas of Chestnut Valley. Portions of the ''[[Super Mario Bros. 3]]'' athletic theme are used in this location's theme. | |||
==Layout== | ==Layout== | ||
| Line 19: | Line 19: | ||
When traversing through the next section, Mario must run down a slope just ahead of chestnuts. Eventually, Bob-omb slows down and is knocked aside by the chestnuts. Three chestnuts then come in from the other side, trapping Mario and revealing a Galoomba in each chestnut. At the end of this section is a small area Mario must navigate carefully to avoid the chestnuts. There is a Goomba rolling a chestnut in the back to try to hinder Mario. The next section features chestnuts rolling down a slope. Near the end, Mario must drop down to the right, where there is a [[Pipe]] allowing him to reach a higher ledge with a Goomba hitting a tree to drop down chestnuts. Mario must hammer this tree to drop down Bob-omb, who starts rolling down the slope. He somehow ends up dozing off on a stump near the end of the level, allowing them to exit the valley and move on to the shrine. | When traversing through the next section, Mario must run down a slope just ahead of chestnuts. Eventually, Bob-omb slows down and is knocked aside by the chestnuts. Three chestnuts then come in from the other side, trapping Mario and revealing a Galoomba in each chestnut. At the end of this section is a small area Mario must navigate carefully to avoid the chestnuts. There is a Goomba rolling a chestnut in the back to try to hinder Mario. The next section features chestnuts rolling down a slope. Near the end, Mario must drop down to the right, where there is a [[Pipe]] allowing him to reach a higher ledge with a Goomba hitting a tree to drop down chestnuts. Mario must hammer this tree to drop down Bob-omb, who starts rolling down the slope. He somehow ends up dozing off on a stump near the end of the level, allowing them to exit the valley and move on to the shrine. | ||
==Hidden Toads== | ==Collectibles== | ||
{| | ===Hidden Toads=== | ||
{| style="text-align: center; width: 100%; margin: 0 auto; border: #7b9ec3; border-collapse: collapse;" border="1" cellpadding="4" cellspacing="1" | |||
|-style="background: #2977B5;font-size:14pt;color:white" | |||
!width="5%"|Form | |||
!width="75%"|Description | |||
!width="20%"|Image | |||
|-style="background: #7b9ec3;font-size:120%;color:#202122" | |||
!colspan=3|[[List of hidden Toads in Paper Mario: The Origami King|{{color|#202122|8 Hidden Toads}}]] | |||
|- | |- | ||
|Mario must hammer the tree at the top of the second sloped section to drop | ![[File:PMTOK Origami Toad 33 (Chestnut).png|75px]]<br># 1 to 3 | ||
|Mario must hammer the tree at the top of the second sloped section to drop a [[chestnut]], which breaks open to reveal a yellow origami crown. Hammering this reveals a trio of yellow Toads. | |||
|[[File:PMTOK Chestnut Valley hidden Toad (crown).png|250px]] | |||
|- | |- | ||
|After defeating the trio of | ![[File:PMTOK Toads.png|75px]]<br># 4 to 6 | ||
|After defeating the trio of [[Galoomba]]s, Mario must hammer their tree to drop a trio of Toads from its branches. | |||
|[[File:PMTOK Chestnut Valley hidden Toad (trio).png|250px]] | |||
|- | |- | ||
|There is a small hole in the ground | ![[File:PMTOK Toad Artwork.png|75px]]<br># 7 | ||
|There is a small hole in the ground behind the chestnut maze. Mario must hammer it to reveal a red scroll, which he must then pull out of the hole to reveal a Toad. | |||
|[[File:PMTOK Chestnut Valley Hidden Toad hole.jpg|250px]] | |||
|- | |- | ||
| | ![[File:PMTOK Origami Toad 34 (Butterfly).png|75px]]<br># 8 | ||
|When watching [[Bob-omb (Paper Mario: The Origami King)|Bob-omb]] sleep peacefully on a tree stump, an origami butterfly Toad will descend onto a patch of flowers. | |||
|[[File:PMTOK Chesnut Valley nap.png|250px]] | |||
|} | |} | ||
==Not-Bottomless Holes== | ===Not-Bottomless Holes=== | ||
{| | {| style="text-align: center; width: 100%; margin: 0 auto; border: #7b9ec3; border-collapse: collapse;" border="1" cellpadding="4" cellspacing="1" | ||
|-style="background: #2977B5;font-size:14pt;color:white" | |||
!Description | |||
!width="20%"|Image | |||
|-style="background: #7b9ec3;font-size:120%;color:#202122" | |||
!colspan=3|[[Not-Bottomless Hole|{{color|#202122|12 Holes}}]] | |||
|- | |- | ||
| | |Three at the start of the level with two in the wall and one in the ground. | ||
|[[File:PMTOK Chestnut Valley Not-Bottomless Holes 1-3.png|250px]] | |||
|- | |- | ||
| | |In the wall between the second and third sections. | ||
|[[File:PMTOK Chestnut Valley Not-Bottomless Holes 4 and 5.png|250px]] | |||
|- | |- | ||
| | |In the wall behind the tree with 3 yellow Toads. | ||
|[[File:PMTOK Chestnut Valley Not-Bottomless Hole 6.png|250px]] | |||
|- | |- | ||
| | |In the wall behind the Galoomba tree. | ||
|[[File:PMTOK Chestnut Valley Not-Bottomless Hole 7.png|250px]] | |||
|- | |- | ||
| | |In the cliff wall near the end of the slope after the Save Block. | ||
|[[File:PMTOK Chestnut Valley Not-Bottomless Hole 8.png|250px]] | |||
|- | |- | ||
| | |In the cliff wall at the start of the final slope section. | ||
|[[File:PMTOK Chestnut Valley Not-Bottomless Holes 9 and 10.png|250px]] | |||
|- | |||
|In the cliff wall at the end of the final slope section. | |||
|[[File:PMTOK Chestnut Valley Not-Bottomless Holes 11 and 12.png|250px]] | |||
|} | |} | ||
==Collectible Treasures== | ===Collectible Treasures=== | ||
{| | {| style="text-align: center; width: 100%; margin: 0 auto; border: #7b9ec3; border-collapse: collapse;" border="1" cellpadding="4" cellspacing="1" | ||
|-style="background: #2977B5;font-size:14pt;color:white" | |||
!width="10%"|Treasure | |||
!Description | |||
!width="20%"|Image | |||
|-style="background: #7b9ec3;font-size:120%;color:#202122" | |||
!colspan=3|[[List of Collectible Treasures in Paper Mario: The Origami King|{{color|#202122|3 treasures}}]] | |||
|- | |- | ||
|From the start of the level, Mario should head toward the foreground to find a small ledge with a bag of confetti, as well as a treasure chest | !style="background-color:#372500;"|[[File:PMTOK Collectible Treasure 34 (Sturdy Crates).jpg|80px|link=Crate]]<br><br>[[Crate|{{color|white|Sturdy Crates}}]] | ||
|From the start of the level, Mario should head toward the foreground to find a small ledge with a bag of confetti, as well as a treasure chest. | |||
|[[File:PMTOK Chestnut Valley Collectible Treasure 1.png|250px]] | |||
|- | |- | ||
|After pulling up Bob-omb from the platform between the rolling chestnuts | !style="background-color:#372500;"|[[File:PMTOK Collectible Treasure 35 (Sign).jpg|80px]]<br><br>[[Sign|{{color|white|Sign}}]] | ||
|After pulling up Bob-omb from the platform between the rolling chestnuts. | |||
|[[File:PMTOK Chestnut Valley Collectible Treasure 2.png|250px]] | |||
|- | |- | ||
|From the tree with the origami | !style="background-color:#372500;"|[[File:PMTOK Collectible Treasure 36 (Spinning Shells).jpg|80px|link=Earth Vellumental Temple]]<br><br>[[Earth Vellumental Temple|{{color|white|Spinning Shells}}]] | ||
|From the tree with the origami [[Galoomba]]s, Mario must head toward the foreground to find a small ledge with a treasure chest. | |||
|[[File:PMTOK Chestnut Valley Collectible Treasure 3.png|250px]] | |||
|} | |} | ||
==? Blocks== | ===? Blocks=== | ||
{| | {| style="text-align: center; width: 100%; margin: 0 auto; border: #7b9ec3; border-collapse: collapse;" border="1" cellpadding="4" cellspacing="1" | ||
|-style="background: #2977B5;font-size:14pt;color:white" | |||
!width=10%|Hidden | |||
!width=10%|Item | |||
!Description | |||
!width=20%|Image | |||
|-style="background: #7b9ec3;font-size:120%;color:#202122" | |||
!colspan=4|[[List of ? Blocks in Paper Mario: The Origami King|{{color|#202122|4 blocks}}]] | |||
|- | |- | ||
|At the start of the level, there is a | | | ||
|[[File:PMTOK 100-Coin leaf icon.png|48px]]<br>[[100-Coin]] | |||
|At the start of the level, there is a ? Block to the right containing a [[100-Coin]]. | |||
|[[File:PMTOK Chestnut Valley Not-Bottomless Holes 1-3.png|250px]] | |||
|- | |- | ||
|Between the first and second sloped sections is | |[[File:Hidden Block Alert PMTOK icon.png|48px]] | ||
|[[File:Shiny Mushroom PMTOK icon.png|48px]]<br>[[Shiny Mushroom]] | |||
|Between the first and second sloped sections is another ? Block. | |||
|[[File:PMTOK Chestnut Valley Question Block 2.png|250px]] | |||
|- | |- | ||
| | | | ||
|[[File:Fire Flower PMTOK icon.png|48px]]<br>[[Fire Flower]] | |||
|A ? Block hides on a ledge in the southeast corner of the [[chestnut]] maze. | |||
|[[File:PMTOK Chestnut Valley Question Block 3.png|250px]] | |||
|- | |- | ||
|There is a | | | ||
|[[File:PMTOK 100-Coin leaf icon.png|48px]]<br>[[100-Coin]] | |||
|There is a ledge that can be reached through a [[pipe]] near the peak of the valley,<br>where [[Bob-omb (Paper Mario: The Origami King)|Bob-omb]] and a ? Block can be found. | |||
|[[File:PMTOK Chestnut Valley Question Block 4.png|250px]] | |||
|} | |} | ||
==Media== | |||
{{media table | |||
|file1=PMTOK Chestnut Valley.oga | |||
|title1=Chestnut Valley | |||
|description1=Plays in Chestnut Valley. | |||
|file2=PMTOK Sleeping Bob-omb.oga | |||
|title2=Sleeping Bob-omb | |||
|description2=Plays when Mario and Olivia find Bob-omb sleeping at Chestnut Valley. | |||
}} | |||
==Names in other languages== | ==Names in other languages== | ||
{{Foreign names | {{Foreign names | ||
|Jap=イガグリ | |Jap=イガグリ{{hover|谷|だに}} | ||
|JapR=Igaguri dani | |JapR=Igaguri dani | ||
|JapM=Prickly Chestnut Valley | |JapM=Prickly Chestnut Valley | ||
|Spa=Valle de los Castaños | |Spa=Valle de los Castaños | ||
|SpaM=Chestnut Valley | |SpaM=Chestnut Valley | ||
| | |Fre=Vallon des marrons | ||
| | |FreM=Little Chestnut Valley | ||
|Ger=Kastaniental | |Ger=Kastaniental | ||
|GerM=Chestnut Valley | |GerM=Chestnut Valley | ||
| Line 87: | Line 158: | ||
|ChiR=Cìlì Gǔ | |ChiR=Cìlì Gǔ | ||
|ChiM=Prickly Chestnut Valley | |ChiM=Prickly Chestnut Valley | ||
|Kor=밤송이 계곡 | |||
|KorR=Bamsong'i Gyegok | |||
|KorM=Chestnut Bur Valley | |||
}} | }} | ||
{{PMTOK}} | {{PMTOK}} | ||
[[Category:Paper Mario: The Origami King | [[Category:Paper Mario: The Origami King locations]] | ||
Latest revision as of 19:13, July 11, 2024
| Chestnut Valley | |
|---|---|
| |
| Toads | 8 |
| Not-Bottomless Holes | 12 |
| Collectible Treasures | 3 |
| ? Blocks | 4 |
| Enemies | Goombas Spinies Galoombas |
- “Remember Chestnut Valley? Bobby kept rolling away because he was so round... He was really good at getting in trouble, wasn't he?”
- —Olivia, Paper Mario: The Origami King
Chestnut Valley is a location in Paper Mario: The Origami King. It is located in the blue streamer district, found directly below Autumn Mountain. When Mario, Olivia, and Bob-omb reach the bridge connecting to the Water Vellumental Shrine section, a Paper Macho Goomba appears on the other side. Thinking it is friendly, Bob-omb runs toward it only to be knocked off the bridge. Mario has no choice but to jump off the bridge and rescue Bob-omb multiple times from different areas of Chestnut Valley. Portions of the Super Mario Bros. 3 athletic theme are used in this location's theme.
Layout[edit]
When Mario lands in Chestnut Valley, Olivia requests they follow the path ahead to find Bob-omb. To begin, Mario must head left to the first rolling chestnut section. Olivia notices something rolling toward them. She thinks it is Bob-omb, gets excited, and runs toward it, only to find out is actually the first of many chestnuts here. Fortunately, this path is big enough for Mario to dodge the chestnuts on his own. He can also use the small opening in the northern wall to wait for a set of chestnuts to roll past. The next chestnut section leads to the left, and is much narrower, requiring Mario to use the opening to avoid being knocked off, then use his hammer to hit a crack just ahead, creating another opening. When Mario gets to the top of the slope, it is revealed the chestnuts are coming from a tree guarded by an origami Goomba.
To the left is a ledge with a Heart Mario may pick up before moving on to the next section, which features chestnuts dropping from overhead trees with rhythm. After making it halfway through, Mario must drop down onto a platform Bob-omb is wedged into and pull him out. He apologizes for slowing them down, and Olivia tells him to be more careful next time. At the end of the next chestnut section is a Save Block and a tree guarded by an origami Goomba. However, when he notices Mario, he climbs up the tree. If Mario hammers this tree, the Goomba falls down, as well as three origami Galoombas Mario is forced to battle.
When traversing through the next section, Mario must run down a slope just ahead of chestnuts. Eventually, Bob-omb slows down and is knocked aside by the chestnuts. Three chestnuts then come in from the other side, trapping Mario and revealing a Galoomba in each chestnut. At the end of this section is a small area Mario must navigate carefully to avoid the chestnuts. There is a Goomba rolling a chestnut in the back to try to hinder Mario. The next section features chestnuts rolling down a slope. Near the end, Mario must drop down to the right, where there is a Pipe allowing him to reach a higher ledge with a Goomba hitting a tree to drop down chestnuts. Mario must hammer this tree to drop down Bob-omb, who starts rolling down the slope. He somehow ends up dozing off on a stump near the end of the level, allowing them to exit the valley and move on to the shrine.
Collectibles[edit]
Hidden Toads[edit]
| Form | Description | Image |
|---|---|---|
| 8 Hidden Toads | ||
 # 1 to 3 |
Mario must hammer the tree at the top of the second sloped section to drop a chestnut, which breaks open to reveal a yellow origami crown. Hammering this reveals a trio of yellow Toads. | 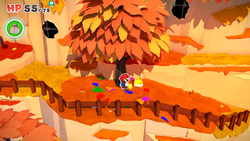
|
 # 4 to 6 |
After defeating the trio of Galoombas, Mario must hammer their tree to drop a trio of Toads from its branches. | 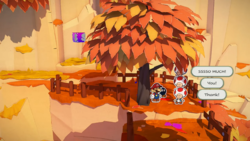
|
 # 7 |
There is a small hole in the ground behind the chestnut maze. Mario must hammer it to reveal a red scroll, which he must then pull out of the hole to reveal a Toad. | 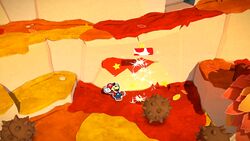
|
 # 8 |
When watching Bob-omb sleep peacefully on a tree stump, an origami butterfly Toad will descend onto a patch of flowers. | 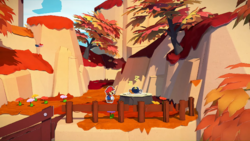
|
Not-Bottomless Holes[edit]
| Description | Image | |
|---|---|---|
| 12 Holes | ||
| Three at the start of the level with two in the wall and one in the ground. | 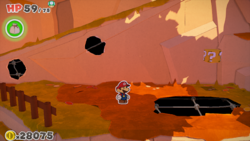
| |
| In the wall between the second and third sections. | 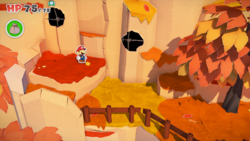
| |
| In the wall behind the tree with 3 yellow Toads. | 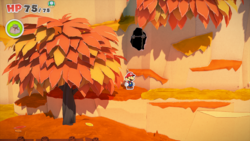
| |
| In the wall behind the Galoomba tree. | 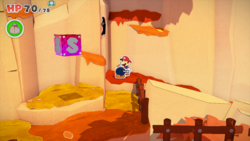
| |
| In the cliff wall near the end of the slope after the Save Block. | 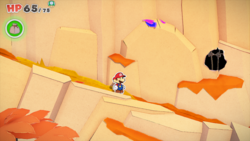
| |
| In the cliff wall at the start of the final slope section. | 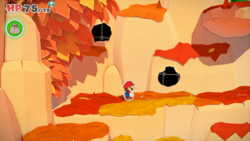
| |
| In the cliff wall at the end of the final slope section. | 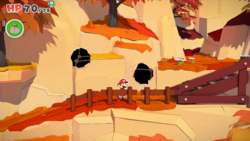
| |
Collectible Treasures[edit]
| Treasure | Description | Image |
|---|---|---|
| 3 treasures | ||
 Sturdy Crates |
From the start of the level, Mario should head toward the foreground to find a small ledge with a bag of confetti, as well as a treasure chest. | 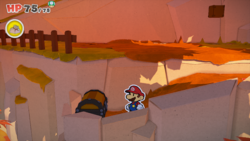
|
 Sign |
After pulling up Bob-omb from the platform between the rolling chestnuts. | 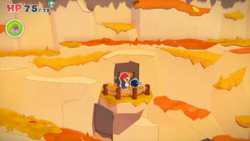
|
 Spinning Shells |
From the tree with the origami Galoombas, Mario must head toward the foreground to find a small ledge with a treasure chest. | 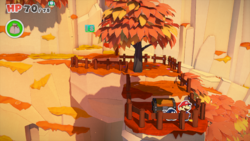
|
? Blocks[edit]
| Hidden | Item | Description | Image |
|---|---|---|---|
| 4 blocks | |||
100-Coin |
At the start of the level, there is a ? Block to the right containing a 100-Coin. | 
| |
Shiny Mushroom |
Between the first and second sloped sections is another ? Block. | 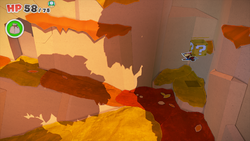
| |
Fire Flower |
A ? Block hides on a ledge in the southeast corner of the chestnut maze. | 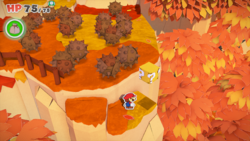
| |
100-Coin |
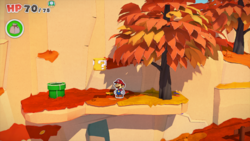
There is a ledge that can be reached through a pipe near the peak of the valley, where Bob-omb and a ? Block can be found. |
| |
Media[edit]
| File info |
| File info |
Names in other languages[edit]
| Language | Name | Meaning | Notes |
|---|---|---|---|
| Japanese | イガグリ谷[?] Igaguri dani |
Prickly Chestnut Valley | |
| Chinese | 刺栗谷[?] Cìlì Gǔ |
Prickly Chestnut Valley | |
| Dutch | Kastanjevallei[?] | Chestnut Valley | |
| French | Vallon des marrons[?] | Little Chestnut Valley | |
| German | Kastaniental[?] | Chestnut Valley | |
| Italian | Valle Castagna[?] | Chestnut Valley | |
| Korean | 밤송이 계곡[?] Bamsong'i Gyegok |
Chestnut Bur Valley | |
| Spanish | Valle de los Castaños[?] | Chestnut Valley |