Jetty Jitters: Difference between revisions
LinkTheLefty (talk | contribs) mNo edit summary |
LinkTheLefty (talk | contribs) mNo edit summary |
||
| (6 intermediate revisions by 4 users not shown) | |||
| Line 1: | Line 1: | ||
{{ | {{level infobox | ||
|image=[[File:Jetty Jitters DKL3c.png]] | |image=[[File:Jetty Jitters DKL3c.png]] | ||
|code=2-3 | |code=2-3 | ||
| Line 7: | Line 7: | ||
|after=[[Black Ice Blitz|>>]] | |after=[[Black Ice Blitz|>>]] | ||
}} | }} | ||
'''Jetty Jitters''' is the ninth level in ''[[Donkey Kong Land III]]'' and the third level of [[Primate Plains]]. | '''Jetty Jitters''' is the ninth level in ''[[Donkey Kong Land III]]'' and the third level of [[Primate Plains]]. It takes place on a series of boardwalks overhanging a shallow river. Eventually [[Dixie Kong|Dixie]] and [[Kiddy Kong|Kiddy]] must climb across several horizontal [[rope]]s in order to cross the wide gaps between the wharves. However, most ropes have a [[Klasp]] hanging from them, moving back and forth in a fixed pattern. Jetty Jitters is among the few levels shown on the title screen's gameplay demo. | ||
==Layout== | ==Layout== | ||
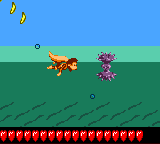
[[File:JettyJitters-Lurchin.png|thumb|left|Dixie swimming toward a Lurchin]] | [[File:JettyJitters-Lurchin.png|thumb|left|Dixie swimming toward a Lurchin]] | ||
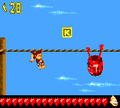
At the beginning of the level, the heroes have to walk down a short, slanted wharf and cross a small gap. Soon, they reach a long tightrope. After dodging all the Klasps on it, they need to jump to the letter K and the next rope. Once the group jumps off one last tightrope, they have to get back on the wharves and head under a small roof-like structure. Eventually, the monkeys walk up some more slanted paths and need to climb over a long tightrope. Once they get over the tightrope, they have to roll into a nearby gap to find the letter O, and then cross another small pit to find the [[Star Barrel]]. | At the beginning of the level, the heroes have to walk down a short, slanted wharf and cross a small gap. Soon, they reach a long tightrope. After dodging all the Klasps on it, they need to jump to [[KONG Letters|the letter K]] and the next rope. Once the group jumps off one last tightrope, they have to get back on the wharves and head under a small roof-like structure. Eventually, the monkeys walk up some more slanted paths and need to climb over a long tightrope. Once they get over the tightrope, they have to roll into a nearby gap to find the letter O, and then cross another small pit to find the [[Star Barrel]]. | ||
About halfway through the level, the Kongs find another tightrope to climb across. Once they find the third tightrope in that area, they will be able to collect to [[ | About halfway through the level, the Kongs find another tightrope to climb across. Once they find the third tightrope in that area, they will be able to collect to [[bear coin]]s, as well as the letter N. After this, they need to drop down onto another rope and make their way back to solid ground. There, they have to walk under another roof, defeating Kobbles, and cross a small gap to find another roof towering above the wharves. Beating some Kobbles again, they find the letter G and have to swim through a small watery area. Though most parts of the water in this level are filled with Lurchins, this part only has one foe in it, making the monkeys journey through this area a little easier. Once out of the water, the apes need to walk up another slanted pathway and get over more boardwalks to find another gap. After crossing it, the heroes walk up a slanted pathway again to find a flagpole. One touch of the flagpole ends the level. | ||
{{br}} | {{br}} | ||
==Enemies== | ==Enemies== | ||
The following enemies appear in the following quantities: | |||
*[[Kobble]]: 6 | *[[Kobble]]: 6 | ||
*[[Sneek]]: 6 | *[[Sneek]]: 6 | ||
| Line 27: | Line 23: | ||
*[[Krumple]]: 1 | *[[Krumple]]: 1 | ||
==Items== | ==Items and objects== | ||
*[[Bear | The following items and objects appear in the following quantities: | ||
*[[Bear coin]]: 3 | |||
*[[DK Barrel]]: 3 | *[[DK Barrel]]: 3 | ||
*[[Iron Barrel|Steel Barrel]]: 1 | *[[Iron Barrel|Steel Barrel]]: 1 | ||
===K-O-N-G Letters=== | ===K-O-N-G Letters=== | ||
*K: Above the second Klasp in the level. | *K: Above the second Klasp in the level. | ||
*O: In a gap between two pieces of boardwalk. | *O: In a gap between two pieces of boardwalk. | ||
*N: To the right of the two | *N: To the right of the two bear coins. | ||
*G: Found on the floor of the boardwalk below some ropes late into the level. A Sneek is near it. | *G: Found on the floor of the boardwalk below some ropes late into the level. A Sneek is near it. | ||
===DK Coin=== | ===DK Coin=== | ||
[[File:Jetty Jitters DKL3 Koin.png|thumb|The Koin of Jetty Jitters]] | |||
When starting the level, the Kongs must go left to find the [[Koin]]. They must pick up a nearby [[Iron Barrel|Steel Barrel]] and throw it to the left behind Koin. The Steel Barrel rolls into Koin from behind, and the Kongs are rewarded the [[DK Coin]]. | |||
{{br}} | |||
==Bonus Levels== | ==Bonus Levels== | ||
{ | {{multiframe|[[File:JettyJitters-Bonus.png]] [[File:Jetty Jitters DKL3 Bonus Level 2.png]]|size=340|The first and second Bonus Levels respectively}} | ||
Jetty Jitters has two [[Bonus room|Bonus Level]]s, listed by type: | |||
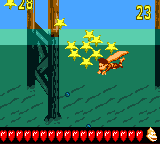
*'''Collect the Stars!''': Right before the letter O is a long rope dangling above a small gap. The Kongs must fall into the gap to be caught by a hidden [[Bonus Barrel]]. In the [[Bonus Level]], Dixie or Kiddy have 40 seconds to collect all 63 [[Star (Donkey Kong franchise)|star]]s along a boardwalk. Each of the stars are sorted in groups of nine in the form of an arrow. At the end of the boardwalk, the active Kong must jump down into the water and swim left to the remaining stars under the boardwalks. When Dixie or Kiddy collect every star, the [[Bonus Coin (Donkey Kong franchise)|Bonus Coin]] appears on the boardwalk. | |||
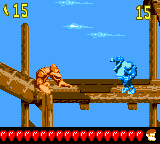
*'''Find the Token!''': After the letter N, Dixie must jump from the last rope in the area and use her [[Helicopter Spin]] to get onto a roof. If she and [[Kiddy Kong|Kiddy]] walk along this roof, they enter a Barrel Cannon that shoots them into the second Bonus Barrel. In the Bonus Level, the active Kong has 20 seconds to go across a series of boardwalks and reach the Bonus Coin at the other end. There are two Buzzes in the area, and if Kiddy is active, he can jump on a Krumple to get onto the roof, where the Bonus Coin is. Alternatively, the active Kong can get on top by jumping from two Booty Birds. | |||
|[[File:JettyJitters-Bonus.png]] | |||
|'''Collect the Stars!''' | |||
==Gallery== | ==Gallery== | ||
| Line 63: | Line 49: | ||
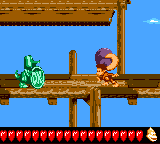
JettyJitters-K.png|The letter K is between Dixie and a Klasp | JettyJitters-K.png|The letter K is between Dixie and a Klasp | ||
JettyJitters-O.png|The letter O | JettyJitters-O.png|The letter O | ||
Jetty Jitters DKL3 Bear Coins.png|Dixie jumping at two | Jetty Jitters DKL3 Bear Coins.png|Dixie jumping at two bear coins | ||
JettyJitters-G.png|The letter G | JettyJitters-G.png|The letter G | ||
</gallery> | </gallery> | ||
== Names in other languages == | ==Names in other languages== | ||
{{foreign names | {{foreign names | ||
|Jap=クラスプロープ | |Jap=クラスプロープ | ||
| Line 73: | Line 59: | ||
|JapM=Klasp Rope | |JapM=Klasp Rope | ||
}} | }} | ||
{{DKL3}} | {{DKL3}} | ||
[[Category: | [[Category:Lakes]] | ||
[[Category:Northern Kremisphere]] | [[Category:Northern Kremisphere]] | ||
[[Category:Donkey Kong Land III levels]] | |||
Latest revision as of 19:03, January 2, 2024
| Level | |
|---|---|
| Jetty Jitters | |
| |
| Level code | 2-3 |
| World | Primate Plains |
| Game | Donkey Kong Land III |
| << Directory of levels >> | |
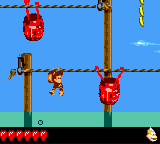
Jetty Jitters is the ninth level in Donkey Kong Land III and the third level of Primate Plains. It takes place on a series of boardwalks overhanging a shallow river. Eventually Dixie and Kiddy must climb across several horizontal ropes in order to cross the wide gaps between the wharves. However, most ropes have a Klasp hanging from them, moving back and forth in a fixed pattern. Jetty Jitters is among the few levels shown on the title screen's gameplay demo.
Layout[edit]
At the beginning of the level, the heroes have to walk down a short, slanted wharf and cross a small gap. Soon, they reach a long tightrope. After dodging all the Klasps on it, they need to jump to the letter K and the next rope. Once the group jumps off one last tightrope, they have to get back on the wharves and head under a small roof-like structure. Eventually, the monkeys walk up some more slanted paths and need to climb over a long tightrope. Once they get over the tightrope, they have to roll into a nearby gap to find the letter O, and then cross another small pit to find the Star Barrel.
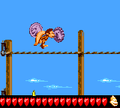
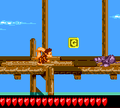
About halfway through the level, the Kongs find another tightrope to climb across. Once they find the third tightrope in that area, they will be able to collect to bear coins, as well as the letter N. After this, they need to drop down onto another rope and make their way back to solid ground. There, they have to walk under another roof, defeating Kobbles, and cross a small gap to find another roof towering above the wharves. Beating some Kobbles again, they find the letter G and have to swim through a small watery area. Though most parts of the water in this level are filled with Lurchins, this part only has one foe in it, making the monkeys journey through this area a little easier. Once out of the water, the apes need to walk up another slanted pathway and get over more boardwalks to find another gap. After crossing it, the heroes walk up a slanted pathway again to find a flagpole. One touch of the flagpole ends the level.
Enemies[edit]
The following enemies appear in the following quantities:
Items and objects[edit]
The following items and objects appear in the following quantities:
- Bear coin: 3
- DK Barrel: 3
- Steel Barrel: 1
K-O-N-G Letters[edit]
- K: Above the second Klasp in the level.
- O: In a gap between two pieces of boardwalk.
- N: To the right of the two bear coins.
- G: Found on the floor of the boardwalk below some ropes late into the level. A Sneek is near it.
DK Coin[edit]
When starting the level, the Kongs must go left to find the Koin. They must pick up a nearby Steel Barrel and throw it to the left behind Koin. The Steel Barrel rolls into Koin from behind, and the Kongs are rewarded the DK Coin.
Bonus Levels[edit]
Jetty Jitters has two Bonus Levels, listed by type:
- Collect the Stars!: Right before the letter O is a long rope dangling above a small gap. The Kongs must fall into the gap to be caught by a hidden Bonus Barrel. In the Bonus Level, Dixie or Kiddy have 40 seconds to collect all 63 stars along a boardwalk. Each of the stars are sorted in groups of nine in the form of an arrow. At the end of the boardwalk, the active Kong must jump down into the water and swim left to the remaining stars under the boardwalks. When Dixie or Kiddy collect every star, the Bonus Coin appears on the boardwalk.
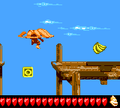
- Find the Token!: After the letter N, Dixie must jump from the last rope in the area and use her Helicopter Spin to get onto a roof. If she and Kiddy walk along this roof, they enter a Barrel Cannon that shoots them into the second Bonus Barrel. In the Bonus Level, the active Kong has 20 seconds to go across a series of boardwalks and reach the Bonus Coin at the other end. There are two Buzzes in the area, and if Kiddy is active, he can jump on a Krumple to get onto the roof, where the Bonus Coin is. Alternatively, the active Kong can get on top by jumping from two Booty Birds.
Gallery[edit]
Names in other languages[edit]
| Language | Name | Meaning | Notes |
|---|---|---|---|
| Japanese | クラスプロープ[?] Kurasupu Rōpu |
Klasp Rope |
