Scorching Sandpaper Desert: Difference between revisions
SmokedChili (talk | contribs) |
m (Text replacement - "(\| *)Jap([RMCN\d]* *=)" to "$1Jpn$2") |
||
| (39 intermediate revisions by 18 users not shown) | |||
| Line 1: | Line 1: | ||
{{ | {{PMTOK location infobox | ||
|image=PMTOK Scorching Sandpaper Desert.png | |||
|image= | |caption= | ||
| | |toads=10 | ||
|holes=12 | |||
|treasures=3 | |||
|blocks=7 | |||
|enemies=[[Boo]]s<br>[[Dry Bones]]<br>''[[Paper Macho Boo]]s''<br>[[Pokey]]s<br>[[Bone Goomba]]s<br>''[[Paper Macho Koopa Paratroopa]]s''<br>'''''[[Mega Paper Macho Pokey]]''''' | |||
|streamer=EBED4E | |||
}} | }} | ||
{{quote|It is really big! Wow! I guess it must be the desert after all, since it's just a wiiiiide open space filled with sand.|Olivia|Paper Mario: The Origami King}} | {{quote|It is really big! Wow! I guess it must be the desert after all, since it's just a wiiiiide open space filled with sand.|Olivia|Paper Mario: The Origami King}} | ||
'''Scorching Sandpaper Desert''' is a location in ''[[Paper Mario: The Origami King]]'', a desert divided into several smaller sections, all of which are shrouded in darkness due to the missing sun. It is located in the yellow streamer district, explored directly after the [[Breezy Tunnel]]. A coffee shop can be found here, as well as the green [[Sensor Lab]]. In addition, one of the four desert towers is found here, along with the [[Sun Altar]] and a village ruins area located in the southeast corner of this desert. Fortunately, the [[Boot Car]] is unlocked recently, allowing for easy exploration and travel over the desert and its surrounding areas. | '''Scorching Sandpaper Desert''' is a location in ''[[Paper Mario: The Origami King]]'', a desert divided into several smaller sections, all of which are shrouded in darkness due to the missing sun. It is located in the yellow [[streamer]] district, explored directly after the [[Breezy Tunnel]]. A coffee shop can be found here, as well as the green [[Sensor Lab]]. In addition, one of the four desert towers is found here, along with the [[Sun Altar]] and a village ruins area located in the southeast corner of this desert. Fortunately, the [[Boot Car]] is unlocked recently, allowing for easy exploration and travel over the desert and its surrounding areas. | ||
==History== | ==History== | ||
| Line 13: | Line 18: | ||
==Layout== | ==Layout== | ||
One of the four towers is located in northwestern territory of this desert. Additionally, the Sun Altar is in the northeast region, with a village ruins area to be found | One of the four towers is located in northwestern territory of this desert. Additionally, the Sun Altar is in the northeast region, with a village ruins area to be found southeast. To the right of the ruins is a hidden area, where the door to a coffee shop can be found. Inside, Mario can order a "Mega Tasty Coffee" from a [[Sledge Bro]] for 100 [[coin]]s. Doing so triggers a cutscene in which a depressed [[Mini Goomba]] orders another cup, the contents of which are quickly drunk by a hoard of other Mini Goombas. | ||
There is a special [[pipe]] shortly southwest of the altar which can be used as a shortcut to the other universal pipes. On the west end of the kingdom is a small ledge with the door to the green [[Sensor Lab]]. Notably, in the southwest edge of the desert is a ring of rocks. Mario can have Professor Toad dig in the center of them to recover a [[Shriveled MAX UP Heart]]. Mario can bring this item to the spring in [[Whispering Woods]] to turn it into a regular [[MAX UP Heart]], giving him 5 additional [[HP]]. | There is a special [[pipe]] shortly southwest of the altar which can be used as a shortcut to the other universal pipes. On the west end of the kingdom is a small ledge with the door to the green [[Sensor Lab]]. Notably, in the southwest edge of the desert is a ring of rocks. Mario can have Professor Toad dig in the center of them to recover a [[Shriveled MAX UP Heart]]. Mario can bring this item to the spring in [[Whispering Woods]] to turn it into a regular [[MAX UP Heart]], giving him 5 additional [[Heart Point|HP]]. | ||
There are several small spots of light throughout the desert and its surrounding areas. After Professor Toad is rescued, Mario can have him dig in any of these spots to reveal an abundance of coins, or perhaps a collectible treasure. These spots remain after the desert is restored to its original state. If Mario leaves the desert, the professor does not follow him. However, Mario can return at any time and have the professor join him until he leaves again. After the sun is restored to the sky, the entire desert lights up in addition to revealing a set of stairs beneath the altar. These stairs lead to a freezer where [[Captain T. Ode]] is trapped in a large chunk of ice. After he is rescued, he requests they take him to his submarine in the museum and set out to [[The Great Sea]] in search of the next streamer. | There are several small spots of light throughout the desert and its surrounding areas. After Professor Toad is rescued, Mario can have him dig in any of these spots to reveal an abundance of coins, or perhaps a collectible treasure. These spots remain after the desert is restored to its original state. If Mario leaves the desert, the professor does not follow him. However, Mario can return at any time and have the professor join him until he leaves again. After the sun is restored to the sky, the entire desert lights up in addition to revealing a set of stairs beneath the altar. These stairs lead to a freezer where [[Captain T. Ode]] is trapped in a large chunk of ice. After he is rescued, he requests they take him to his submarine in the museum and set out to [[The Great Sea]] in search of the next streamer. | ||
==Hidden Toads== | ==Collectibles== | ||
{| | '''NOTE''': Some collectibles are found in areas that are inaccessible until returning later; these entries are highlighted in beige. | ||
===Hidden Toads=== | |||
{| style="text-align: center; width: 100%; margin: 0 auto; border: #cbc689; border-collapse: collapse;" border="1" cellpadding="4" cellspacing="1" | |||
|-style="background: #bf9b1c;font-size:14pt;color:white" | |||
!width="5%"|Form | |||
!width="75%"|Description | |||
!width="20%"|Image | |||
|-style="background: #cbc689;font-size:120%;color:#202122" | |||
!colspan=3|[[List of hidden Toads in Paper Mario: The Origami King|{{color|#202122|10 Hidden Toads}}]] | |||
|- | |- | ||
![[File:Musee Origami Toad 20.png|75px]]<br># 1 | |||
|[[File: | |There is a Toad disguised as a yellow beetle, climbing the tower's right foot. | ||
|[[File:ScorchingSandpaperDesertToad5.png|250px]] | |||
|- | |- | ||
|There is a Toad disguised as a yellow scorpion in one of the village strongholds. | ![[File:PMTOK Origami Toad 51 (Scorpion).png|75px]]<br># 2 | ||
|There is a Toad disguised as a yellow scorpion, in one of the southeast village strongholds. | |||
|[[File:ScorchingSandpaperDesertBlock2.png|250px]] | |[[File:ScorchingSandpaperDesertBlock2.png|250px]] | ||
|- | |- | ||
|There is a Toad | ![[File:PMTOK Origami Toad 52 (Lizard).png|75px]]<br># 3 | ||
|[[File: | |There is a Toad disguised as a green lizard, climbing the cliff wall below the desert [[Sensor Lab|satellite office]]. Mario must slide down to knock it off and then hammer it. | ||
|[[File:ScorchingSandpaperDesertToad4.png|250px]] | |||
|- | |- | ||
|There is a Toad buried in the ground | ![[File:PMTOK Toad Artwork.png|75px]]<br># 4 | ||
|There is a Toad buried in the ground between the entrance to Breezy Tunnel and a group of bird statues. | |||
|[[File:ScorchingSandpaperDesertToad2.png|250px]] | |[[File:ScorchingSandpaperDesertToad2.png|250px]] | ||
|- | |- | ||
| | ![[File:PMTOK Toad Artwork.png|75px]]<br># 5 | ||
|[[File: | |Another Toad buried in the ground at a small distance southeast of the Sun Altar. | ||
|[[File:ScorchingSandpaperDesertToad1.png|250px]] | |||
|- | |- | ||
| | ![[File:PMTOK Toad Artwork.png|75px]]<br># 6 | ||
|[[File: | |A Toad's hand is seen sticking out of the ground southeast of the tower, between the dunes. | ||
|[[File:ScorchingSandpaperDesertToad6.png|250px]] | |||
|- | |- | ||
|There is a Toad | ![[File:PMTOK Toad Artwork.png|75px]]<br># 7 | ||
|[[File: | |There is a Toad stuck in the arm of a cactus in secluded area just east of the ruins, in front of a [[Café]] door. | ||
|[[File:ScorchingSandpaperDesertNotBottomlessHole8.png|250px]] | |||
|- | |- | ||
|A Toad | ![[File:Sensor Lab Toad green PMTOK sprite.png|75px]]<br># 8 | ||
|[[File: | |A green Sensor Lab Toad can be found jammed into the fax machine of this desert satellite office, south of the tower. After being freed, Mario can fax travel to and from the Scorching Sandpaper Desert. | ||
|- | |[[File:ScorchingSandpaperDesertToad3.png|250px]] | ||
|[[Professor Toad]] | |-style="background:beige;"| | ||
![[File:King Olly seal PMTOK sprite.png|40px]]<br>[[File:PMTOK Professor Toad cheering sprite.png|75px]]<br>{{color|red|# 9}} | |||
|''Required'': ''[[Sun Incense]]''<br><br>After placing the Sun Incense onto the Sun Altar, Mario must fight the [[Mega Paper Macho Pokey]]. Upon its defeat, [[Professor Toad]] is saved and becomes Mario's ally. | |||
|[[File:ScorchingSandpaperDesertProfessorToadRescue.png|250px]] | |[[File:ScorchingSandpaperDesertProfessorToadRescue.png|250px]] | ||
|- | |-style="background:beige;"| | ||
| | ![[File:PMTOK Captain T. ode10.png|75px]]<br>{{color|red|# 10}} | ||
|''Required'': ''[[streamer|Yellow streamer]] destroyed''<br><br>[[Captain T. Ode]] is frozen in a large chunk of ice below the Sun Altar, which opens up once the sun has been returned to its place in the sky. Mario must activate a [[Magic Circle]] to transform Olivia into the [[Fire Vellumental]] and thaw out the ice. | |||
|[[File:ScorchingSandpaperDesertCaptainToadRescue.png|250px]] | |[[File:ScorchingSandpaperDesertCaptainToadRescue.png|250px]] | ||
|} | |} | ||
==Not-Bottomless Holes== | ===Not-Bottomless Holes=== | ||
{| | {| style="text-align: center; width: 100%; margin: 0 auto; border: #cbc689; border-collapse: collapse;" border="1" cellpadding="4" cellspacing="1" | ||
|-style="background: #bf9b1c;font-size:14pt;color:white" | |||
!Description | |||
!width="20%"|Image | |||
|-style="background: #cbc689;font-size:120%;color:#202122" | |||
!colspan=3|[[Not-Bottomless Hole|{{color|#202122|12 Holes}}]] | |||
|- | |- | ||
| | |In the wall rounding the altar and the ruins. | ||
|[[File:ScorchingSandpaperDesertNotBottomlessHole1.png|250px]] | |[[File:ScorchingSandpaperDesertNotBottomlessHole1.png|250px]] | ||
|- | |- | ||
| | |In the ground just before the narrow path to [[Scorching Sandpaper Minor]]. | ||
|[[File:ScorchingSandpaperDesertNotBottomlessHole2.png|250px]] | |[[File:ScorchingSandpaperDesertNotBottomlessHole2.png|250px]] | ||
|- | |- | ||
| | |In the cliff wall next to the origami lizard. | ||
|[[File:ScorchingSandpaperDesertNotBottomlessHole3.png|250px]] | |[[File:ScorchingSandpaperDesertNotBottomlessHole3.png|250px]] | ||
|- | |- | ||
| | |Above the previous one, revealed to be the door to a [[Sensor Lab]] when filled in. | ||
|[[File:ScorchingSandpaperDesertNotBottomlessHole4.png|250px]] | |[[File:ScorchingSandpaperDesertNotBottomlessHole4.png|250px]] | ||
|- | |- | ||
| | |In the wall rounding out the southwestern area of the desert. | ||
|[[File:ScorchingSandpaperDesertNotBottomlessHole5.png|250px]] | |[[File:ScorchingSandpaperDesertNotBottomlessHole5.png|250px]] | ||
|- | |- | ||
| | |Two in the ground at the start of the ruins section and another one in the wall above the ruins, next to the ? Block. | ||
|[[File:ScorchingSandpaperDesertNotBottomlessHole6.png|250px]] | |[[File:ScorchingSandpaperDesertNotBottomlessHole6.png|250px]] | ||
|- | |- | ||
| | |Below a ? Block in the southwestern portion of the desert. | ||
|[[File:ScorchingSandpaperDesertBlock6.png|250px]] | |[[File:ScorchingSandpaperDesertBlock6.png|250px]] | ||
|- | |- | ||
| | |In the southeastern part of the ruins. | ||
|[[File:ScorchingSandpaperDesertNotBottomlessHole7.png|250px]] | |[[File:ScorchingSandpaperDesertNotBottomlessHole7.png|250px]] | ||
|- | |- | ||
| | |At the end of the hidden area to the right of the ruins revealed to be the door to a coffee shop when filled in. | ||
|[[File:ScorchingSandpaperDesertNotBottomlessHole8.png|250px]] | |[[File:ScorchingSandpaperDesertNotBottomlessHole8.png|250px]] | ||
|- | |||
|On the sarcophagus in the tower. | |||
|[[File:PMTOK Scorching Sandpaper Desert Not-Bottomless Hole 12.png|250px]] | |||
|} | |} | ||
==Collectible Treasures== | ===Collectible Treasures=== | ||
{| | {| style="text-align: center; width: 100%; margin: 0 auto; border: #cbc689; border-collapse: collapse;" border="1" cellpadding="4" cellspacing="1" | ||
|-style="background: #bf9b1c;font-size:14pt;color:white" | |||
!width=10%|Treasure | |||
!Description | |||
!width=20%|Image | |||
|-style="background: #cbc689;font-size:120%;color:#202122" | |||
!colspan=4|[[List of Collectible Treasures in Paper Mario: The Origami King|{{color|#202122|3 treasures}}]] | |||
|- | |- | ||
| | |-style="background:beige" | ||
!style="background-color:#372500;"|[[File:PMTOK Collectible Treasure 60 (Boot Car).jpg|80px|link=Boot Car]]<br><br>[[Boot Car|{{color|white|Boot Car}}]] | |||
|''Required'': ''[[Professor Toad]] rescued''<br><br>Mario must have Professor Toad dig in a glowing spot in the west side of the ruins. | |||
|[[File:ScorchingSandpaperDesertCollectible1.png|250px]] | |[[File:ScorchingSandpaperDesertCollectible1.png|250px]] | ||
|- | |- | ||
|Mario must head a good distance southeast of the tower and have Professor Toad dig in a glowing spot | |-style="background:beige" | ||
!style="background-color:#372500;"|[[File:PMTOK Collectible Treasure 61 (Cactus).jpg|80px]]<br><br>{{color|white|Cactus}} | |||
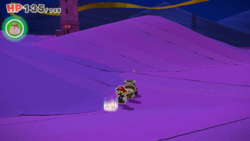
|''Required'': ''[[Professor Toad]] rescued''<br><br>Mario must head a good distance southeast of the tower and have Professor Toad dig in a glowing spot. | |||
|[[File:ScorchingSandpaperDesertCollectible2.png|250px]] | |[[File:ScorchingSandpaperDesertCollectible2.png|250px]] | ||
|- | |- | ||
|Mario must strike the | |-style="background:beige" | ||
|[[File: | !style="background-color:#372500;"|[[File:PMTOK Collectible Treasure 64 (Temple of Shrooms Statues).jpg|80px|link=Temple of Shrooms]]<br><br>[[Temple of Shrooms|{{color|white|Temple of Shrooms Statues}}]] | ||
|''Required'': ''Yellow streamer destroyed''<br><br>Mario must strike the Hidden Block above the crate in the freezer. | |||
|[[File:ScorchingSandpaperDesertBlock5.png|250px]] | |||
|} | |} | ||
==? Blocks== | ===? Blocks=== | ||
{| | {| style="text-align: center; width: 100%; margin: 0 auto; border: #cbc689; border-collapse: collapse;" border="1" cellpadding="4" cellspacing="1" | ||
|-style="background: #bf9b1c;font-size:14pt;color:white" | |||
!width=10%|Hidden | |||
!width=10%|Item | |||
!Description | |||
!width=20%|Image | |||
|-style="background: #cbc689;font-size:120%;color:#202122" | |||
!colspan=4|[[List of ? Blocks in Paper Mario: The Origami King|{{color|#202122|7 blocks}}]] | |||
|- | |- | ||
| | | | ||
|[[File:PMTOK 100-Coin leaf icon.png|48px]]<br>[[100-Coin]] | |||
|Towards the east side of the desert with the Sun Altar in sight, there is a ? Block containing a [[100-Coin]]. | |||
|[[File:ScorchingSandpaperDesertBlock1.png|250px]] | |[[File:ScorchingSandpaperDesertBlock1.png|250px]] | ||
|- | |- | ||
| | | | ||
|[[File:Flashy Hammer PMTOK icon.png|48px]]<br>[[Flashy Hammer]] | |||
|South of the local desert tower where the sand slopes down, a ? Block can be found above a [[Not-Bottomless Hole]]. | |||
|[[File:ScorchingSandpaperDesertBlock6.png|250px]] | |||
|- | |||
| | |||
|[[File:Shiny Fire Flower PMTOK icon.png|48px]]<br>[[Shiny Fire Flower]]<br>[[File:Flashy Boots PMTOK icon.png|48px]]<br>[[Flashy Boots]] | |||
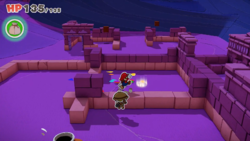
|There are two ? Blocks among the village ruins found in the southeast corner of the desert. | |||
|[[File:ScorchingSandpaperDesertBlock2.png|250px]] | |[[File:ScorchingSandpaperDesertBlock2.png|250px]] | ||
|- | |- | ||
| | | | ||
|[[File:Ice Flower PMTOK icon.png|48px]]<br>[[Ice Flower]] | |||
|Beyond the village ruins and desert cliffs is a hidden area, with a ? Block near the entrance. | |||
|[[File:ScorchingSandpaperDesertBlock3.png|250px]] | |[[File:ScorchingSandpaperDesertBlock3.png|250px]] | ||
|- | |-style="background:beige;"| | ||
|In the freezer below the | |[[File:Hidden Block Alert PMTOK icon.png|48px]] | ||
|[[File:PMTOK coin effect.png|48px]]<br>[[Coin]] | |||
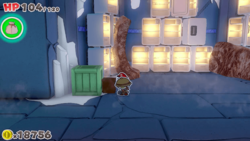
|''Required'': ''[[Streamer|Yellow Streamer]] destroyed''<br><br>In the freezer below the Sun Altar, there is a Hidden Block resting beside a crate. | |||
|[[File:ScorchingSandpaperDesertBlock4.png|250px]] | |[[File:ScorchingSandpaperDesertBlock4.png|250px]] | ||
|- | |-style="background:beige;"| | ||
| | |[[File:Hidden Block Alert PMTOK icon.png|48px]] | ||
|[[File:PMTOK Collectible Treasure 64 (Temple of Shrooms Statues).jpg|80px]]<br>[[Musée Champignon#Treasure Gallery|Collectible Treasure '''#64''']] | |||
|''Required'': ''[[Streamer|Yellow Streamer]] destroyed''<br><br>Using the previous ? Block to jump onto the crate, Mario can jump to reveal another Hidden Block, indicated by a dark square patch. This block contains a Collectible Treasure: [[Temple of Shrooms]] Statues. | |||
|[[File:ScorchingSandpaperDesertBlock5.png|250px]] | |[[File:ScorchingSandpaperDesertBlock5.png|250px]] | ||
|} | |} | ||
==Media== | |||
{{media table | |||
|file1=PMTOK Scorching Sandpaper Desert.oga | |||
|title1=Scorching Sandpaper Desert | |||
|description1=Plays in the Scorching Sandpaper Desert and its subregions. | |||
|file2=PMTOK My Heart's a-Burnin'.oga | |||
|title2=[[My Heart's a-Burnin']] | |||
|description2=Plays when summoning the Fire Vellumental Cave. The song is sung by Olivia. | |||
|file3=PMTOK Mega Paper Macho Pokey.oga | |||
|title3=Mega Paper Macho Pokey | |||
|description3=Plays while battling Mega Paper Macho Pokey. | |||
}} | |||
==See also== | ==See also== | ||
| Line 128: | Line 205: | ||
==Names in other languages== | ==Names in other languages== | ||
{{Foreign names | {{Foreign names | ||
| | |Jpn=ヤケスナ{{hover|大|だい}}さばく | ||
| | |JpnR=Yakesuna Dai Sabaku | ||
| | |JpnM=Great Burning Sand Desert | ||
|Spa=Gran Desierto de Lija | |Spa=Gran Desierto de Lija | ||
|SpaM=Great Sandpaper Desert | |SpaM=Great Sandpaper Desert | ||
| | |Fre=Grand désert de Kalémeri | ||
| | |FreM=Great Kalémeri Desert; possibly a reference to [[N64 Kalimari Desert|Kalimari Desert]] | ||
|Ger=Große Sandpapierwüste | |Ger=Große Sandpapierwüste | ||
|GerM=Large Sandpaper-Desert | |GerM=Large Sandpaper-Desert | ||
|Dut= | |Dut=Grote Imposantvlakte | ||
|DutM= | |DutM=Large Imposing Plains<br>(pun on ''zandvlakte'' (sand plain)) | ||
|Ita= | |Ita=Deserto Cartavetro maggiore | ||
|ItaM= | |ItaM=Sandpaper Desert Major | ||
|Kor= | |Kor=작열모래 대사막 | ||
|KorR= | |KorR=Jagyeol-morae Daesamak | ||
|KorM= | |KorM=Great Burning Sand Desert | ||
|ChiT= | |ChiT=熱沙大沙漠 | ||
|ChiTR= | |ChiTR=Rèshā Dà Shāmò | ||
|ChiTM= | |ChiTM=Great Burning Sand Desert | ||
|ChiS= | |ChiS=热沙大沙漠 | ||
|ChiSR= | |ChiSR=Rèshā Dà Shāmò | ||
|ChiSM= | |ChiSM=Great Burning Sand Desert | ||
}} | }} | ||
{{PMTOK}} | {{PMTOK}} | ||
[[Category:Deserts]] | [[Category:Deserts]] | ||
[[Category:Paper Mario: The Origami King | [[Category:Haunted areas]] | ||
[[Category:Paper Mario: The Origami King locations]] | |||
Latest revision as of 16:05, January 7, 2025
| Scorching Sandpaper Desert | |
|---|---|
| |
| Toads | 10 |
| Not-Bottomless Holes | 12 |
| Collectible Treasures | 3 |
| ? Blocks | 7 |
| Enemies | Boos Dry Bones Paper Macho Boos Pokeys Bone Goombas Paper Macho Koopa Paratroopas Mega Paper Macho Pokey |
- “It is really big! Wow! I guess it must be the desert after all, since it's just a wiiiiide open space filled with sand.”
- —Olivia, Paper Mario: The Origami King
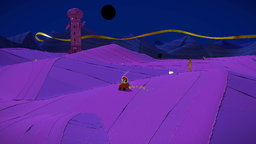
Scorching Sandpaper Desert is a location in Paper Mario: The Origami King, a desert divided into several smaller sections, all of which are shrouded in darkness due to the missing sun. It is located in the yellow streamer district, explored directly after the Breezy Tunnel. A coffee shop can be found here, as well as the green Sensor Lab. In addition, one of the four desert towers is found here, along with the Sun Altar and a village ruins area located in the southeast corner of this desert. Fortunately, the Boot Car is unlocked recently, allowing for easy exploration and travel over the desert and its surrounding areas.
History[edit]
When Mario and Olivia first exit the tunnel and enter the desert, Olivia comments on its size and unusual darkness, believing the sun is the source. She then realizes the sun is actually missing, replaced by a dark hole in the sky. As she begins to wonder and ponder how this happened, she decides to ignore it and focus on trailing and finding the yellow streamer. The most obvious point of interest is the tall tower in the northwest part of the desert. This is one of four towers in the desert areas. Mario must use the Diamond Jewel buried at the foot of the statue to activate the tower from the inside, placing the jewel in the hollow eye. This turns the tower to the northwest, shooting a laser down into Scorching Sandpaper Minor. After finding the other jewels and activating the other towers, Mario is able to complete a Magic Circle, allowing him to use the Earth Vellumental to access the Temple of Shrooms.
Before Mario can clear all of the towers, he must head to the hotel in Snif City and obtain the Sun Incense from the front desk. He must place this at the Sun Altar, located northeast in the main desert area. This summons Mega Paper Macho Pokey, who creates a sandstorm trapping Mario. Mario must defeat him by hammering a sticker on each segment, made easier by using the Boot Car to reach a segment before he sinks back into the sand. Defeating Mega Paper Macho Pokey frees Professor Toad, who becomes Mario's ally as he explores the desert. Later on, Mario must head south of the altar to find six bird statues facing different directions. He must hammer them a certain number of times to get them to stare directly in the center. Doing this reveals a microphone, requiring Olivia to sing a special song to make the Fire Vellumental Cave appear nearby.
Layout[edit]
One of the four towers is located in northwestern territory of this desert. Additionally, the Sun Altar is in the northeast region, with a village ruins area to be found southeast. To the right of the ruins is a hidden area, where the door to a coffee shop can be found. Inside, Mario can order a "Mega Tasty Coffee" from a Sledge Bro for 100 coins. Doing so triggers a cutscene in which a depressed Mini Goomba orders another cup, the contents of which are quickly drunk by a hoard of other Mini Goombas.
There is a special pipe shortly southwest of the altar which can be used as a shortcut to the other universal pipes. On the west end of the kingdom is a small ledge with the door to the green Sensor Lab. Notably, in the southwest edge of the desert is a ring of rocks. Mario can have Professor Toad dig in the center of them to recover a Shriveled MAX UP Heart. Mario can bring this item to the spring in Whispering Woods to turn it into a regular MAX UP Heart, giving him 5 additional HP.
There are several small spots of light throughout the desert and its surrounding areas. After Professor Toad is rescued, Mario can have him dig in any of these spots to reveal an abundance of coins, or perhaps a collectible treasure. These spots remain after the desert is restored to its original state. If Mario leaves the desert, the professor does not follow him. However, Mario can return at any time and have the professor join him until he leaves again. After the sun is restored to the sky, the entire desert lights up in addition to revealing a set of stairs beneath the altar. These stairs lead to a freezer where Captain T. Ode is trapped in a large chunk of ice. After he is rescued, he requests they take him to his submarine in the museum and set out to The Great Sea in search of the next streamer.
Collectibles[edit]
NOTE: Some collectibles are found in areas that are inaccessible until returning later; these entries are highlighted in beige.
Hidden Toads[edit]
| Form | Description | Image |
|---|---|---|
| 10 Hidden Toads | ||
 # 1 |
There is a Toad disguised as a yellow beetle, climbing the tower's right foot. | 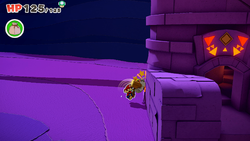
|
 # 2 |
There is a Toad disguised as a yellow scorpion, in one of the southeast village strongholds. | 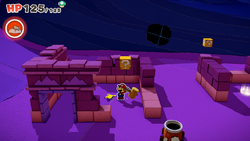
|
 # 3 |
There is a Toad disguised as a green lizard, climbing the cliff wall below the desert satellite office. Mario must slide down to knock it off and then hammer it. | 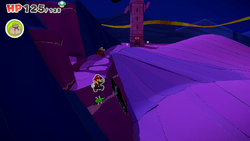
|
 # 4 |
There is a Toad buried in the ground between the entrance to Breezy Tunnel and a group of bird statues. | 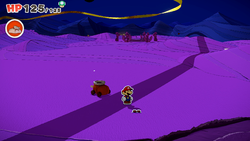
|
 # 5 |
Another Toad buried in the ground at a small distance southeast of the Sun Altar. | 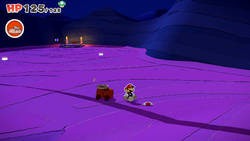
|
 # 6 |
A Toad's hand is seen sticking out of the ground southeast of the tower, between the dunes. | 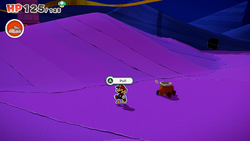
|
 # 7 |
There is a Toad stuck in the arm of a cactus in secluded area just east of the ruins, in front of a Café door. | 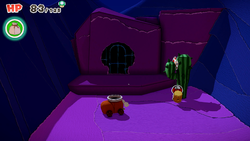
|
# 8 |
A green Sensor Lab Toad can be found jammed into the fax machine of this desert satellite office, south of the tower. After being freed, Mario can fax travel to and from the Scorching Sandpaper Desert. | 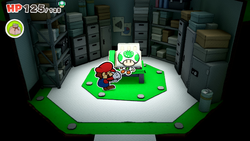
|
# 9 |
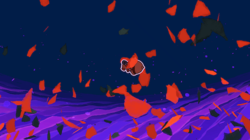
Required: Sun Incense After placing the Sun Incense onto the Sun Altar, Mario must fight the Mega Paper Macho Pokey. Upon its defeat, Professor Toad is saved and becomes Mario's ally. |
|
 # 10 |
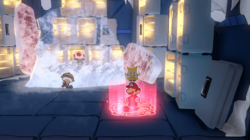
Required: Yellow streamer destroyed Captain T. Ode is frozen in a large chunk of ice below the Sun Altar, which opens up once the sun has been returned to its place in the sky. Mario must activate a Magic Circle to transform Olivia into the Fire Vellumental and thaw out the ice. |
|
Not-Bottomless Holes[edit]
| Description | Image | |
|---|---|---|
| 12 Holes | ||
| In the wall rounding the altar and the ruins. | 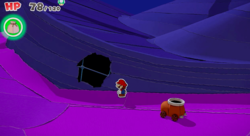
| |
| In the ground just before the narrow path to Scorching Sandpaper Minor. | 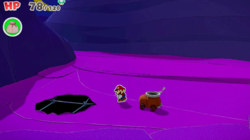
| |
| In the cliff wall next to the origami lizard. | 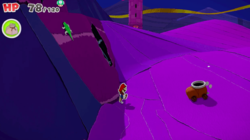
| |
| Above the previous one, revealed to be the door to a Sensor Lab when filled in. | 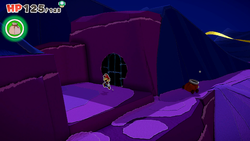
| |
| In the wall rounding out the southwestern area of the desert. | 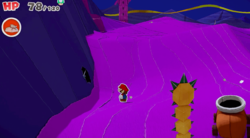
| |
| Two in the ground at the start of the ruins section and another one in the wall above the ruins, next to the ? Block. | 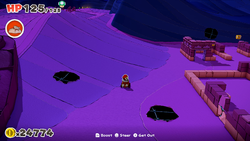
| |
| Below a ? Block in the southwestern portion of the desert. | 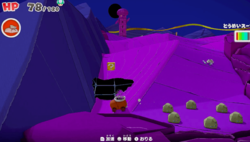
| |
| In the southeastern part of the ruins. | 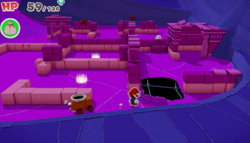
| |
| At the end of the hidden area to the right of the ruins revealed to be the door to a coffee shop when filled in. | 
| |
| On the sarcophagus in the tower. | 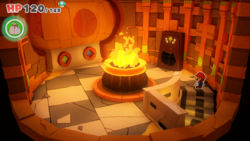
| |
Collectible Treasures[edit]
| Treasure | Description | Image | |
|---|---|---|---|
| 3 treasures | |||
 Boot Car |
Required: Professor Toad rescued Mario must have Professor Toad dig in a glowing spot in the west side of the ruins. |
| |
 Cactus |
Required: Professor Toad rescued Mario must head a good distance southeast of the tower and have Professor Toad dig in a glowing spot. |
| |
 Temple of Shrooms Statues |
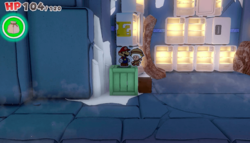
Required: Yellow streamer destroyed Mario must strike the Hidden Block above the crate in the freezer. |
| |
? Blocks[edit]
| Hidden | Item | Description | Image |
|---|---|---|---|
| 7 blocks | |||
100-Coin |
Towards the east side of the desert with the Sun Altar in sight, there is a ? Block containing a 100-Coin. | 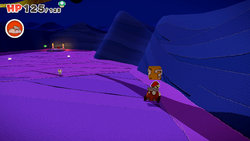
| |
Flashy Hammer |
South of the local desert tower where the sand slopes down, a ? Block can be found above a Not-Bottomless Hole. | 
| |
Shiny Fire Flower Flashy Boots |
There are two ? Blocks among the village ruins found in the southeast corner of the desert. | 
| |
Ice Flower |
Beyond the village ruins and desert cliffs is a hidden area, with a ? Block near the entrance. | 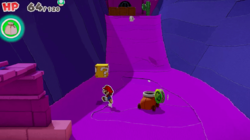
| |
Coin |
Required: Yellow Streamer destroyed In the freezer below the Sun Altar, there is a Hidden Block resting beside a crate. |
| |
 Collectible Treasure #64 |
Required: Yellow Streamer destroyed Using the previous ? Block to jump onto the crate, Mario can jump to reveal another Hidden Block, indicated by a dark square patch. This block contains a Collectible Treasure: Temple of Shrooms Statues. |

| |
Media[edit]
| File info |
| File info |
| File info |
See also[edit]
- Scorching Sandpaper Minor
- Scorching Sandpaper East
- Scorching Sandpaper West
- Scorching Sandpaper Far East
- Scorching Sandpaper Far West
Names in other languages[edit]
| Language | Name | Meaning | Notes |
|---|---|---|---|
| Japanese | ヤケスナ大さばく[?] Yakesuna Dai Sabaku |
Great Burning Sand Desert | |
| Chinese (simplified) | 热沙大沙漠[?] Rèshā Dà Shāmò |
Great Burning Sand Desert | |
| Chinese (traditional) | 熱沙大沙漠[?] Rèshā Dà Shāmò |
Great Burning Sand Desert | |
| Dutch | Grote Imposantvlakte[?] | Large Imposing Plains (pun on zandvlakte (sand plain)) |
|
| French | Grand désert de Kalémeri[?] | Great Kalémeri Desert; possibly a reference to Kalimari Desert | |
| German | Große Sandpapierwüste[?] | Large Sandpaper-Desert | |
| Italian | Deserto Cartavetro maggiore[?] | Sandpaper Desert Major | |
| Korean | 작열모래 대사막[?] Jagyeol-morae Daesamak |
Great Burning Sand Desert | |
| Spanish | Gran Desierto de Lija[?] | Great Sandpaper Desert |