Clockwork Ruins Galaxy: Difference between revisions
Gobblegut7 (talk | contribs) No edit summary |
Waluigi Time (talk | contribs) No edit summary |
||
| (35 intermediate revisions by 18 users not shown) | |||
| Line 1: | Line 1: | ||
{{ | {{course infobox | ||
|image=[[File:Clockwork Ruins Galaxy.png|250px]] | |image=[[File:Clockwork Ruins Galaxy.png|250px]] | ||
|area=[[World 6 (Super Mario Galaxy 2)|World 6]] | |area=[[World 6 (Super Mario Galaxy 2)|World 6]] | ||
|boss=None | |boss=None | ||
| | |comets=[[Prankster Comet#Purple Comet|Purple Comet]]<br>[[Prankster Comet#Green Comet|Green Comet]] | ||
| | |missions=[[Time for Adventure]]<br>[[The Adventure of the Purple Coins]]<br>[[The Ledge Hammer Trap]]<br>[[#Green Star 1|Green Star 1]]<br>[[#Green Star 2|Green Star 2]]<br>[[#Green Star 3|Green Star 3]] | ||
|stars=[[File:Smg2_icon_powerstar.png|20px]][[File:Smg2_icon_prankstercomet.png|20px]][[File:Smg2_icon_powerstar.png|20px]][[File:Smg2_icon_greencomet.png|20px]][[File:Smg2_icon_greencomet.png|20px]][[File:Smg2_icon_greencomet.png|20px]] | |stars=[[File:Smg2_icon_powerstar.png|20px]][[File:Smg2_icon_prankstercomet.png|20px]][[File:Smg2_icon_powerstar.png|20px]][[File:Smg2_icon_greencomet.png|20px]][[File:Smg2_icon_greencomet.png|20px]][[File:Smg2_icon_greencomet.png|20px]] | ||
|unlock=Get a [[Power Star]] from [[Melty Monster Galaxy]] | |unlock=Get a [[Power Star]] from [[Melty Monster Galaxy]] | ||
|icon=A off-scale version of the [[# | |icon=A off-scale version of the [[#Giant Rotation Planet|Giant Rotation Planet]] | ||
| | |more=[[Melty Monster Galaxy|<<]] [[Throwback Galaxy|>>]] | ||
}} | }} | ||
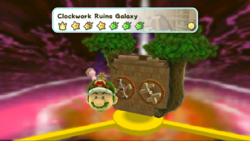
The '''Clockwork Ruins Galaxy''' is a [[galaxy]] located in [[World 6 (Super Mario Galaxy 2)|World 6]] appearing in the game ''[[Super Mario Galaxy 2]]''. | The '''Clockwork Ruins Galaxy''' is a [[galaxy]] located in [[World 6 (Super Mario Galaxy 2)|World 6]] appearing in the game ''[[Super Mario Galaxy 2]]''. It is an ancient ruins-themed location featuring several stone structures as planets, oftentimes decorated with face carvings, grass and trees. The galaxy includes new gimmicks such as rolling [[millstone]]s and walls that push the player out of the gravitational force. [[Wire|Bar]]s are also introduced in this level. Only Goomba enemies are found here, and they include [[Jack O'Goomba]]s and [[Octoomba]]s. | ||
The music in this galaxy is the same as the music in the [[Slipsand Galaxy]]. They also share the towers in the background. | The music in this galaxy is the same as the music in the [[Slipsand Galaxy]]. They also share the towers in the background. | ||
==Planets== | ==Planets== | ||
===Giant Rotation Planet=== | |||
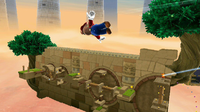
=== | [[File:Clockwork Ruins Galaxy SMG2 starting planet.png|thumb|left|Mario approaching the Giant Rotation Planet]] | ||
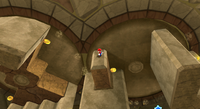
[[File: | [[File:SMG2 Clockwork Ruins Starting Planet.png|thumb|Mario on the Giant Rotation Planet.]] | ||
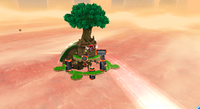
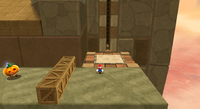
[[File:SMG2 Clockwork Ruins Starting Planet.png|thumb|Mario on the | The Giant Rotation Planet<ref name=Noclip>Texture file names associated with each planet, retrieved from [https://noclip.website/#smg2/AncientExcavationGalaxy;ShareData=AL:zWUty=iT$ noclip.website].</ref> is where the player first lands. Two [[Jack O'Goomba]]s are encountered at the beginning. The planet consists of four odd-shaped millstones that the player must use to get to the [[Launch Star]] at the end. Many [[Octoomba]]s are found on the millstones. At the bottom of the second and fourth millstones are areas of land which protects the player if they fall off. Under the fourth millstone is a [[Hungry Luma]] which requires the player to feed it 30 [[coin]]s. If the player does so, the Luma can open the passage to the [[#Huge Hammer Planet|Huge Hammer Planet]]. If not, the player can take the Launch Star to the [[#Pusher Wall Planet|Pusher Wall Planet]]. | ||
The | |||
{{br|left}} | {{br|left}} | ||
=== | ===Pusher Wall Planet=== | ||
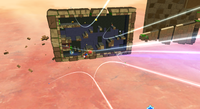
[[File:SMG2 Clockwork Ruins Pushing Wall Planet.png|thumb|left|Mario flying towards the | [[File:SMG2 Clockwork Ruins Pushing Wall Planet.png|thumb|left|Mario flying towards the Pusher Wall Planet.]] | ||
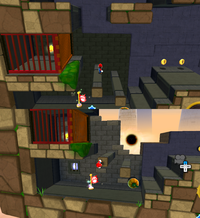
[[File:SMG2 Clockwork Ruins Wall Before and After.png|thumb|Mario on the | [[File:SMG2 Clockwork Ruins Wall Before and After.png|thumb|Mario on the Pusher Wall Planet, before and after flipping the switch]] | ||
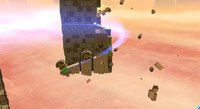
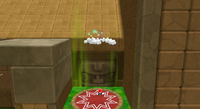
The | The Pusher Wall Planet<ref name=Noclip></ref> is filled with [[Jack O'Goomba]]s. As the name suggests, the planet's main obstacle is the wall's ability to push the player out of the planet's gravitational force to a [[black hole]], similar to that of a [[Bomp]]. The objective is to free the [[Luma]] that is trapped in a cage. The player needs to climb to the top left where a switch similar to those found in [[Gusty Garden Galaxy]] from the [[Super Mario Galaxy|first game]] is located. After the player hits the switch, the walls fall apart and the gravity changes. The player needs to make the way to the ground pound switch on the bottom, freeing the Luma. The Luma transforms into a Launch Star and takes the player to the [[#Rolling Drum Planet|Rolling Drum Planet]]. | ||
{{br|left}} | {{br|left}} | ||
=== | ===Huge Hammer Planet=== | ||
[[File:SMG2 Clockwork Ruins Ledge Hammer Planet.png|thumb|left|200px|Mario heading to the | [[File:SMG2 Clockwork Ruins Ledge Hammer Planet.png|thumb|left|200px|Mario heading to the Huge Hammer Planet.]] | ||
The | The Huge Hammer Planet<ref name=Noclip></ref> is accessed by feeding the [[Hungry Luma]] thirty [[coin]]s on the [[#Giant Rotation Planet|Giant Rotation Planet]]. The planet is only visited during [[The Ledge Hammer Trap]] mission. It is a planet that has six [[Ledge Hammer]]s on it. Getting flattened by a Ledge Hammer makes the player automatically lose a life. The ground moves in a circular pattern and has many pieces of it cut out. Electrical fences also appear on the planet. There are two [[Blue switch (Super Mario Galaxy)|blue switch]]es found here that slows down time temporarily, and they are helpful when trying to get to the other side. There is also a [[1-Up Mushroom]] that can be acquired by jumping onto the head of a Ledge Hammer after slowing down time. After the player passes the first Ledge Hammers, there is a green [[Warp Pipe]] that leads to the upper area of the planet. The same five ledge hammers are found here, but this time, the cracks in the wall show where the Ledge Hammers are hitting. There are no blue switches up here to slow down time. Another 1-Up Mushroom can be found above one of these Ledge Hammers. At the end of the upper area is the [[Power Star]]. | ||
{{br|left}} | {{br|left}} | ||
=== | ===Rolling Drum Planet=== | ||
[[File:SMG2 Clockwork Ruins Millstone Planet.png|thumb|left|Mario near the | [[File:SMG2 Clockwork Ruins Millstone Planet.png|thumb|left|Mario near the Rolling Drum Planet]] | ||
[[File:SMG2 Clockwork Ruins Millstone Screenshot.png|thumb|Mario on the | [[File:SMG2 Clockwork Ruins Millstone Screenshot.png|thumb|Mario on the Rolling Drum Planet]] | ||
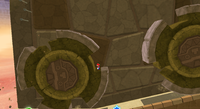
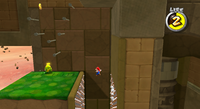
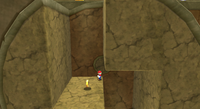
The | The Rolling Drum Planet<ref name=Noclip></ref> is the final planet in the galaxy. It is made up of three distinct areas. In the first area, there are [[millstone]]s that fall from the sky and roll downhill. The player should use the indents in the stones to avoid being crushed. This specific area is where the [[Comet Medal]] is located. The second area consists of spiked ground and walls which the player must avoid. [[Wire|Bar]]s are also found here. The player can wall jump off the two millstones in the area to reach the final area. In this area, the player should take the elevator and hit the switch to make millstones fall from the sky. The player needs to use the millstones to reach the bars and finally the [[Power Star]]. | ||
{{ | {{multiple image | ||
|align=center | |||
SMG2 Spike Wall.png|Mario wall jumping | |width=200 | ||
SMG2 Ground Pound Platform.png|Mario ground pounds a platform | |direction=horizontal | ||
SMG2 Rolling Wheel.png|The rolling wheels | |image1=SMG2 Spike Wall.png | ||
SMG2 Stone Lift.png|The elevator that takes Mario to the top | |caption1=Mario wall jumping across the spiked walls | ||
|image2=SMG2 Ground Pound Platform.png | |||
|caption2=Mario ground pounds a platform | |||
|image3=SMG2 Rolling Wheel.png | |||
|caption3=The area with rolling wheels | |||
|image4=SMG2 Stone Lift.png | |||
|caption4=The elevator that takes Mario to the top | |||
|footer= | |||
}} | |||
{{br}} | {{br}} | ||
| Line 50: | Line 55: | ||
*[[Octoomba]]s | *[[Octoomba]]s | ||
*[[Elite Octoomba]]s | *[[Elite Octoomba]]s | ||
==Missions== | ==Missions== | ||
{|width=100% | {|width=100% class=wikitable style="text-align:center" | ||
!Name | |||
! | |||
!Image | !Image | ||
! | !width=70%|Description | ||
|- | |- | ||
|[[Time for Adventure]] | |||
|[[File:Time for Adventure.png|200px]] | |||
|This mission's objective is to navigate the galaxy and find the [[Power Star]]. | |align=left|This mission's objective is to navigate the galaxy and find the [[Power Star]]. | ||
|- | |- | ||
|[[The Adventure of the Purple Coins]] | |||
|[[File:Purple Coin Adventure.png|200px]] | |||
|This mission's objective is to collect 100 [[Purple Coin]]s within | |align=left|This mission's objective is to collect all 100 [[Purple Coin]]s within five minutes. | ||
|- | |- | ||
|[[The Ledge Hammer Trap]] | |||
|[[File:Ledge Hammer Trap.png|200px]] | |||
|This mission's objective is to avoid the [[Ledge Hammer]]s and reach the Power Star. | |align=left|This mission's objective is to feed a [[Hungry Luma]] thirty [[coin]]s and avoid the [[Ledge Hammer]]s and reach the Power Star. | ||
|} | |} | ||
===Green Stars=== | ===Green Stars=== | ||
====Green Star 1==== | ====Green Star 1==== | ||
[[File:SMG2 Clockwork Ruins Green Star 1.png|thumb|200px|[[Luigi]] near the first [[Green Star]] | [[File:SMG2 Clockwork Ruins Green Star 1.png|thumb|200px|[[Luigi]] near the first [[Green Star]]]] | ||
The player has to redo the [[Time for Adventure]] mission. However, when | The player has to redo the [[Time for Adventure]] mission. However, when they get to the third millstone on the [[#Giant Rotation Planet|Starting Planet]], the [[Green Star]] is above it. The player can easily jump and [[spin]] to get it. | ||
;Enemies | ;Enemies | ||
*[[Jack O'Goomba]]s | *[[Jack O'Goomba]]s | ||
*[[Octoomba]]s | *[[Octoomba]]s | ||
;Planets visited | ;Planets visited | ||
*[[#Starting Planet| | *[[#Starting Planet|Giant Rotation Planet]] | ||
{{br|left}} | {{br|left}} | ||
====Green Star 2==== | ====Green Star 2==== | ||
[[File:SMG2 Clockwork Ruins Green Star 2.png|thumb|200px|[[Luigi]] about to snag the second Green Star.]] | [[File:SMG2 Clockwork Ruins Green Star 2.png|thumb|200px|[[Luigi]] about to snag the second Green Star.]] | ||
The player should replay the [[Time for Adventure]] mission. The second Green Star is located on the [[# | The player should replay the [[Time for Adventure]] mission. The second Green Star is located on the [[#Pusher Wall Planet|Pusher Wall Planet]]. The player needs to first change the gravitational force of the planet so they walking on the wall. The player can then do one of two things: they can either do a backwards somersault followed by a [[spin]] to get on the borders of the level or just have a pushing wall push him or her towards the border. The Green Star is on the top right corner. | ||
The early location of Green Star 2 was after the first set of millstones on the [[#Starting Planet|Starting Planet]]. | The early location of Green Star 2 was after the first set of millstones on the [[#Starting Planet|Starting Planet]]. | ||
;Enemies | ;Enemies | ||
*[[Jack O'Goomba]]s | *[[Jack O'Goomba]]s | ||
*[[Octoomba]]s | *[[Octoomba]]s | ||
;Planets visited | ;Planets visited | ||
*[[# | *[[#Giant Rotation Planet|Giant Rotation Planet]] | ||
*[[# | *[[#Pusher Wall Planet|Pusher Wall Planet]] | ||
{{br|left}} | {{br|left}} | ||
====Green Star 3==== | ====Green Star 3==== | ||
[[File:SMG2 Clockwork Ruins Green Star 3.png|thumb|200px|[[Luigi]] jumping to the third Green Star.]] | [[File:SMG2 Clockwork Ruins Green Star 3.png|thumb|200px|[[Luigi]] jumping to the third Green Star.]] | ||
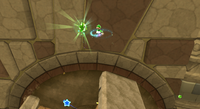
The player should replay the [[Time for Adventure]] mission. This time, the final Green Star is located on the [[# | The player should replay the [[Time for Adventure]] mission. This time, the final Green Star is located on the [[#Rolling Drum Planet|Rolling Drum Planet]]. The player needs to travel through the millstone planet until they reach the part where the [[Power Star]] is. The player should see the Green Star off to the distance. The player must climb onto a millstone to head towards the star. Once the player is close enough, they should perform a somersault followed by a [[spin]] to reach the Star. | ||
;Enemies | ;Enemies | ||
*[[Jack O'Goomba]]s | *[[Jack O'Goomba]]s | ||
| Line 109: | Line 107: | ||
*[[Elite Octoomba]]s | *[[Elite Octoomba]]s | ||
*[[Goomba]]s | *[[Goomba]]s | ||
;Planets visited | ;Planets visited | ||
*[[# | *[[#Giant Rotation Planet|Giant Rotation Planet]] | ||
*[[# | *[[#Pusher Wall Planet|Pusher Wall Planet]] | ||
*[[# | *[[#Rolling Drum Planet|Rolling Drum Planet]] | ||
==Media== | ==Media== | ||
{{media table | {{media table | ||
| | |file1=Slipsand Galaxy Super Mario Galaxy 2.oga | ||
|title1="Slipsand Galaxy" | |||
| | |description1=Clockwork Ruins Galaxy soundtrack. [[Slipsand Galaxy]] also shares this theme. | ||
|description1=Clockwork Ruins Galaxy soundtrack | |||
|length=3:08 | |length=3:08 | ||
}} | }} | ||
==Prima Official Game Guide description== | |||
*"''Can you survive the cogs and wheels built into these ancient ruins? Drive into empty holes to avoid getting smashed by rolling wheels. And be sure to collect [[coin]]s as you explore because there's a little [[Luma]] in this galaxy that would gladly accept your spare change in exchange for revealing the hidden [[Power Star]].''" | |||
==Names in other languages== | ==Names in other languages== | ||
{{foreign names | {{foreign names | ||
| | |Jpn=こだいの遺跡ギャラクシー | ||
| | |JpnR=Kodai no Iseki Gyarakushī | ||
| | |JpnM=Ancient Ruins Galaxy | ||
|Spa=Galaxia Ruinas Mecánicas | |Spa=Galaxia Ruinas Mecánicas | ||
|SpaM=Mechanical Ruins Galaxy | |SpaM=Mechanical Ruins Galaxy | ||
| | |FreA=Galaxie des Ruines perpétuelles | ||
| | |FreAM=Perpetual Ruins Galaxy | ||
| | |FreE=Ruines perpétuelles | ||
| | |FreEM=Perpetual Ruins | ||
|Ita=Galassia Vecchio Ingranaggio | |Ita=Galassia Vecchio Ingranaggio | ||
|ItaM=Old Gear Galaxy | |ItaM=Old Gear Galaxy | ||
| Line 140: | Line 139: | ||
|GerM=Clockwork Ruins Galaxy | |GerM=Clockwork Ruins Galaxy | ||
|Chi=古代遺跡銀河 | |Chi=古代遺跡銀河 | ||
|ChiR=Gǔdài | |ChiR=Gǔdài Yíjì Yínhé | ||
|ChiM=Ancient Ruins Galaxy | |ChiM=Ancient Ruins Galaxy | ||
|Kor=고대 유적 갤럭시 | |Kor=고대 유적 갤럭시 | ||
| Line 147: | Line 146: | ||
}} | }} | ||
{{SMG2 | ==References== | ||
<references/> | |||
{{SMG2 missions}} | |||
[[de:Uhrwerkruinen-Galaxie]] | [[de:Uhrwerkruinen-Galaxie]] | ||
[[Category:Galaxies]] | [[Category:Galaxies]] | ||
[[Category:Super Mario Galaxy 2 | [[Category:Temples]] | ||
[[Category:Super Mario Galaxy 2 locations]] | |||
Latest revision as of 12:09, January 24, 2025
| Clockwork Ruins Galaxy | |
|---|---|
| |
| Area | World 6 |
| How to unlock | Get a Power Star from Melty Monster Galaxy |
| Boss(es) | None |
| Comet(s) | Purple Comet Green Comet |
| Mission(s) | Time for Adventure The Adventure of the Purple Coins The Ledge Hammer Trap Green Star 1 Green Star 2 Green Star 3 |
| Stars | |
| Galaxy icon | A off-scale version of the Giant Rotation Planet |
| << >> | |
The Clockwork Ruins Galaxy is a galaxy located in World 6 appearing in the game Super Mario Galaxy 2. It is an ancient ruins-themed location featuring several stone structures as planets, oftentimes decorated with face carvings, grass and trees. The galaxy includes new gimmicks such as rolling millstones and walls that push the player out of the gravitational force. Bars are also introduced in this level. Only Goomba enemies are found here, and they include Jack O'Goombas and Octoombas.
The music in this galaxy is the same as the music in the Slipsand Galaxy. They also share the towers in the background.
Planets[edit]
Giant Rotation Planet[edit]
The Giant Rotation Planet[1] is where the player first lands. Two Jack O'Goombas are encountered at the beginning. The planet consists of four odd-shaped millstones that the player must use to get to the Launch Star at the end. Many Octoombas are found on the millstones. At the bottom of the second and fourth millstones are areas of land which protects the player if they fall off. Under the fourth millstone is a Hungry Luma which requires the player to feed it 30 coins. If the player does so, the Luma can open the passage to the Huge Hammer Planet. If not, the player can take the Launch Star to the Pusher Wall Planet.
Pusher Wall Planet[edit]
The Pusher Wall Planet[1] is filled with Jack O'Goombas. As the name suggests, the planet's main obstacle is the wall's ability to push the player out of the planet's gravitational force to a black hole, similar to that of a Bomp. The objective is to free the Luma that is trapped in a cage. The player needs to climb to the top left where a switch similar to those found in Gusty Garden Galaxy from the first game is located. After the player hits the switch, the walls fall apart and the gravity changes. The player needs to make the way to the ground pound switch on the bottom, freeing the Luma. The Luma transforms into a Launch Star and takes the player to the Rolling Drum Planet.
Huge Hammer Planet[edit]
The Huge Hammer Planet[1] is accessed by feeding the Hungry Luma thirty coins on the Giant Rotation Planet. The planet is only visited during The Ledge Hammer Trap mission. It is a planet that has six Ledge Hammers on it. Getting flattened by a Ledge Hammer makes the player automatically lose a life. The ground moves in a circular pattern and has many pieces of it cut out. Electrical fences also appear on the planet. There are two blue switches found here that slows down time temporarily, and they are helpful when trying to get to the other side. There is also a 1-Up Mushroom that can be acquired by jumping onto the head of a Ledge Hammer after slowing down time. After the player passes the first Ledge Hammers, there is a green Warp Pipe that leads to the upper area of the planet. The same five ledge hammers are found here, but this time, the cracks in the wall show where the Ledge Hammers are hitting. There are no blue switches up here to slow down time. Another 1-Up Mushroom can be found above one of these Ledge Hammers. At the end of the upper area is the Power Star.
Rolling Drum Planet[edit]
The Rolling Drum Planet[1] is the final planet in the galaxy. It is made up of three distinct areas. In the first area, there are millstones that fall from the sky and roll downhill. The player should use the indents in the stones to avoid being crushed. This specific area is where the Comet Medal is located. The second area consists of spiked ground and walls which the player must avoid. Bars are also found here. The player can wall jump off the two millstones in the area to reach the final area. In this area, the player should take the elevator and hit the switch to make millstones fall from the sky. The player needs to use the millstones to reach the bars and finally the Power Star.
Enemies[edit]
Missions[edit]
| Name | Image | Description |
|---|---|---|
| Time for Adventure | 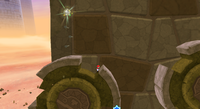
|
This mission's objective is to navigate the galaxy and find the Power Star. |
| The Adventure of the Purple Coins | 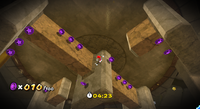
|
This mission's objective is to collect all 100 Purple Coins within five minutes. |
| The Ledge Hammer Trap | 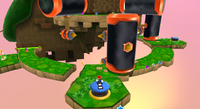
|
This mission's objective is to feed a Hungry Luma thirty coins and avoid the Ledge Hammers and reach the Power Star. |
Green Stars[edit]
Green Star 1[edit]
The player has to redo the Time for Adventure mission. However, when they get to the third millstone on the Starting Planet, the Green Star is above it. The player can easily jump and spin to get it.
- Enemies
- Planets visited
Green Star 2[edit]
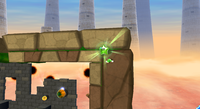
The player should replay the Time for Adventure mission. The second Green Star is located on the Pusher Wall Planet. The player needs to first change the gravitational force of the planet so they walking on the wall. The player can then do one of two things: they can either do a backwards somersault followed by a spin to get on the borders of the level or just have a pushing wall push him or her towards the border. The Green Star is on the top right corner.
The early location of Green Star 2 was after the first set of millstones on the Starting Planet.
- Enemies
- Planets visited
Green Star 3[edit]
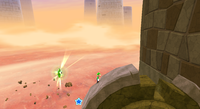
The player should replay the Time for Adventure mission. This time, the final Green Star is located on the Rolling Drum Planet. The player needs to travel through the millstone planet until they reach the part where the Power Star is. The player should see the Green Star off to the distance. The player must climb onto a millstone to head towards the star. Once the player is close enough, they should perform a somersault followed by a spin to reach the Star.
- Enemies
- Planets visited
Media[edit]
| File info |
Prima Official Game Guide description[edit]
- "Can you survive the cogs and wheels built into these ancient ruins? Drive into empty holes to avoid getting smashed by rolling wheels. And be sure to collect coins as you explore because there's a little Luma in this galaxy that would gladly accept your spare change in exchange for revealing the hidden Power Star."
Names in other languages[edit]
| Language | Name | Meaning | Notes |
|---|---|---|---|
| Japanese | こだいの遺跡ギャラクシー[?] Kodai no Iseki Gyarakushī |
Ancient Ruins Galaxy | |
| Chinese | 古代遺跡銀河[?] Gǔdài Yíjì Yínhé |
Ancient Ruins Galaxy | |
| French (NOA) | Galaxie des Ruines perpétuelles[?] | Perpetual Ruins Galaxy | |
| French (NOE) | Ruines perpétuelles[?] | Perpetual Ruins | |
| German | Uhrwerkruinen-Galaxie[?] | Clockwork Ruins Galaxy | |
| Italian | Galassia Vecchio Ingranaggio[?] | Old Gear Galaxy | |
| Korean | 고대 유적 갤럭시[?] Godae Yujeok Gaelleoksi |
Ancient Ruin Galaxy | |
| Spanish | Galaxia Ruinas Mecánicas[?] | Mechanical Ruins Galaxy |
References[edit]
- ^ a b c d Texture file names associated with each planet, retrieved from noclip.website.
