Landslide Leap: Difference between revisions
mNo edit summary |
Pifouillou (talk | contribs) mNo edit summary |
||
| (16 intermediate revisions by 7 users not shown) | |||
| Line 1: | Line 1: | ||
{{ | {{level infobox | ||
|image=[[File:Landslide Leap.png]] | |||
|image=[[File: | |||
|code=3-6 | |code=3-6 | ||
|world=[[Monkey Mountains & Chimpanzee Clouds]] | |||
|game=''[[Donkey Kong Land]]'' | |game=''[[Donkey Kong Land]]'' | ||
| | |track=Mountain | ||
|after=[[Collapsing Clouds|>>]] | |after=[[Collapsing Clouds|>>]] | ||
|before=[[Sky High Caper|<<]] | |before=[[Sky High Caper|<<]] | ||
}} | }} | ||
'''Landslide Leap''' is the twenty-second level | '''Landslide Leap'''<ref>{{cite|language=en-us|publisher=Nintendo of America|date=1995|title=''Donkey Kong Land'' instruction booklet|page=18}}</ref> is the twenty-second level of ''[[Donkey Kong Land]]'' and the sixth level of the [[Monkey Mountains & Chimpanzee Clouds]] world. It takes place in a mountain range, like [[Mountain Mayhem]], although Landslide Leap is more flat and instead involves [[Donkey Kong]] and [[Diddy Kong]] making their way across a mountain, rather than up one. Some of the obstacles include [[pit]]s, some of which can only be crossed by bouncing from a [[tire (object)|tire]], and falling [[boulder]]s. | ||
==Layout== | |||
[[File:LandslideLeap-2.png|thumb|left|Diddy bouncing on a tire to reach a Kong Token]] | |||
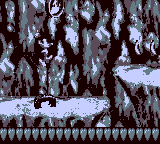
When they start the level, the Kongs must follow a banana trail off of a ledge and land on a Mini-Necky. They should travel to the right, then, and cross two small abysses. Without hitting any Kritters, the Kongs must continue to journey along the path and hop down a few platforms, which will be occupied by some enemies, including a Zinger. At the bottom of this area, they walk a little farther and jump up some ledges to find another abyss. When they jump across it, they must be cautious, as there are rocks falling all around them. After this, they will have to jump up some large platforms and pass to Krushas to end up on an even bigger platform. As they walk across it, they should beware of the rocks falling from above. The heroes must follow another banana trail off of a ledge after this, and travel to the east, but while jumping to several platforms. Soon, they will come up to a tire. They will need to bounce off of it and land on a Hogwash, bouncing off of it. The Kongs should land right onto the platform nearby, and then jump up a few more platforms to find a [[Continue Point]]. | |||
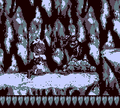
Halfway through the level, the group must travel to the right and dodge several Kritters, as well as falling rocks. Soon, the Kongs will come up to a very wide abyss. To cross it, they must bounce off of the three Hogwashes flying in the center of it. Once on the other side of the pit, they must hop onto a few small platforms while jumping over Zingers. When they are out of this part of the level, the will have to jump up a ledge and defeat a Krusha with a nearby [[TNT Barrel]]. After they beat him, the heroes will come up to another area filled with several more small platforms. They must jump to each one, avoiding the Gnawties around them, and eventually making it to a big platform. They should travel a little farther here, and defeat some Gnawties to find a few more small platforms to hop over. As they jump to them, the Kongs must, as usual, watch out for falling rocks. Once they reach a bigger platform, the group will notice even smaller platforms ahead of them. They will need to get over each of these tiny platforms, and again, try not to be smashed by any falling rocks. When the heroes complete this area, they should travel a little bit more to the east and find the portal, which spins backwards. A small area with extra bananas is to the bottom-right of the portal. | |||
==Enemies== | |||
*[[Gnawty]] | |||
*[[Hogwash the Flying Pig]] | |||
*[[Kritter]] | |||
*[[Krusha]] | |||
*[[Mincer]] (Bonus Area only) | |||
*[[Mini-Necky]] | |||
*[[Zinger]] | |||
==Items and objects== | |||
The following items and objects appear in the following quantities: | |||
*[[DK Barrel]]s: 3 | |||
*[[Kong Token]]: 2 | |||
*[[TNT Barrel]]: 2 | |||
===K-O-N-G Letters=== | |||
*K: On a ledge reached by rolling a [[tire (object)|tire]] and jumping off it. | |||
*O: Obtained by jumping off a tire along the normal path of the level. Hard to miss. | |||
*N: Found beyond three Zingers and a Krusha. | |||
*G: In the second bonus room. | |||
== | ==Bonus Areas== | ||
{{multiframe|[[File:Landslide Leap DKL Bonus Area 1.png]] [[File:LandslideLeap-G-Bonus.png]]|size=340|The first and second Bonus Areas respectively}} | |||
Landslide Leap has two [[Bonus room|Bonus Area]]s: | |||
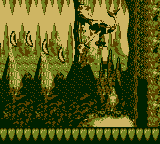
*After dodging two Krushas and some falling rocks, the Kongs must jump off a high ledge and follow a banana trail down onto a dark patch in the ground. Doing so releases a rope, which carries the Kongs up to the first [[Bonus Area]]. There, the Kongs must walk into a Barrel Cannon to be shot across an abyss to an [[animal crate]] of Expresso. The lead Kong must ride Expresso to get across the following abyss. While Expresso glides across the pit, the Kongs can collect some bananas and a Kong Token along the way. An entryway on the right side leads back into the main level, although Expresso carry over into there. | |||
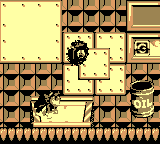
*Near the end of the level, there is a Hogwash flying in the air. The active Kong must bounce on the Hogwash to land in a [[Blast Barrel]] to the right, leading them to the second Bonus Area. There, the Kongs must get across a few pits in a construction site area by jumping from [[oil drum]]s and avoiding some Mincers around the small platforms. The letter G also appears in the Bonus Area, and the Kongs can exit the Bonus Area from a Blast Barrel to the right. | |||
== | ==Gallery== | ||
<gallery> | |||
Landslide Leap DKL TNT Barrel.png|Donkey Kong holding a TNT Barrel at a Kritter | |||
Landslide Leap DKL boulder.png|Donkey Kong in front of a falling boulder | |||
Landslide Leap DKL Zingers.png|Donkey Kong standing on a small platform between some Zingers | |||
</gallery> | |||
==Names in other languages== | ==Names in other languages== | ||
| Line 27: | Line 58: | ||
|JapM=Monkey Mountain 2 | |JapM=Monkey Mountain 2 | ||
|Spa=Sorteando el alud | |Spa=Sorteando el alud | ||
|SpaM=Avoiding the rock slide}} | |SpaM=Avoiding the rock slide | ||
{{ | |Ita=Il balzo della valang-{{sic}}<ref>{{cite|title=''[[Donkey Kong Land]]'' Italian booklet|page=18}}</ref> | ||
|ItaM=The leap of the avalan-; probably meant to say ''valanga'' ("avalanche") | |||
}} | |||
==References== | |||
<references/> | |||
{{DKL}} | {{DKL}} | ||
[[Category:Mountains]] | [[Category:Mountains]] | ||
[[Category:Donkey Kong Land | [[Category:Donkey Kong Land levels]] | ||
Latest revision as of 06:06, August 25, 2024
| Level | |
|---|---|
| Landslide Leap | |
| |
| Level code | 3-6 |
| World | Monkey Mountains & Chimpanzee Clouds |
| Game | Donkey Kong Land |
| Music track | Mountain |
| << Directory of levels >> | |
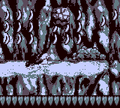
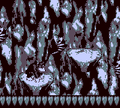
Landslide Leap[1] is the twenty-second level of Donkey Kong Land and the sixth level of the Monkey Mountains & Chimpanzee Clouds world. It takes place in a mountain range, like Mountain Mayhem, although Landslide Leap is more flat and instead involves Donkey Kong and Diddy Kong making their way across a mountain, rather than up one. Some of the obstacles include pits, some of which can only be crossed by bouncing from a tire, and falling boulders.
Layout[edit]
When they start the level, the Kongs must follow a banana trail off of a ledge and land on a Mini-Necky. They should travel to the right, then, and cross two small abysses. Without hitting any Kritters, the Kongs must continue to journey along the path and hop down a few platforms, which will be occupied by some enemies, including a Zinger. At the bottom of this area, they walk a little farther and jump up some ledges to find another abyss. When they jump across it, they must be cautious, as there are rocks falling all around them. After this, they will have to jump up some large platforms and pass to Krushas to end up on an even bigger platform. As they walk across it, they should beware of the rocks falling from above. The heroes must follow another banana trail off of a ledge after this, and travel to the east, but while jumping to several platforms. Soon, they will come up to a tire. They will need to bounce off of it and land on a Hogwash, bouncing off of it. The Kongs should land right onto the platform nearby, and then jump up a few more platforms to find a Continue Point.
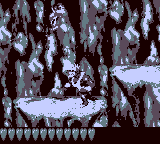
Halfway through the level, the group must travel to the right and dodge several Kritters, as well as falling rocks. Soon, the Kongs will come up to a very wide abyss. To cross it, they must bounce off of the three Hogwashes flying in the center of it. Once on the other side of the pit, they must hop onto a few small platforms while jumping over Zingers. When they are out of this part of the level, the will have to jump up a ledge and defeat a Krusha with a nearby TNT Barrel. After they beat him, the heroes will come up to another area filled with several more small platforms. They must jump to each one, avoiding the Gnawties around them, and eventually making it to a big platform. They should travel a little farther here, and defeat some Gnawties to find a few more small platforms to hop over. As they jump to them, the Kongs must, as usual, watch out for falling rocks. Once they reach a bigger platform, the group will notice even smaller platforms ahead of them. They will need to get over each of these tiny platforms, and again, try not to be smashed by any falling rocks. When the heroes complete this area, they should travel a little bit more to the east and find the portal, which spins backwards. A small area with extra bananas is to the bottom-right of the portal.
Enemies[edit]
- Gnawty
- Hogwash the Flying Pig
- Kritter
- Krusha
- Mincer (Bonus Area only)
- Mini-Necky
- Zinger
Items and objects[edit]
The following items and objects appear in the following quantities:
- DK Barrels: 3
- Kong Token: 2
- TNT Barrel: 2
K-O-N-G Letters[edit]
- K: On a ledge reached by rolling a tire and jumping off it.
- O: Obtained by jumping off a tire along the normal path of the level. Hard to miss.
- N: Found beyond three Zingers and a Krusha.
- G: In the second bonus room.
Bonus Areas[edit]
Landslide Leap has two Bonus Areas:
- After dodging two Krushas and some falling rocks, the Kongs must jump off a high ledge and follow a banana trail down onto a dark patch in the ground. Doing so releases a rope, which carries the Kongs up to the first Bonus Area. There, the Kongs must walk into a Barrel Cannon to be shot across an abyss to an animal crate of Expresso. The lead Kong must ride Expresso to get across the following abyss. While Expresso glides across the pit, the Kongs can collect some bananas and a Kong Token along the way. An entryway on the right side leads back into the main level, although Expresso carry over into there.
- Near the end of the level, there is a Hogwash flying in the air. The active Kong must bounce on the Hogwash to land in a Blast Barrel to the right, leading them to the second Bonus Area. There, the Kongs must get across a few pits in a construction site area by jumping from oil drums and avoiding some Mincers around the small platforms. The letter G also appears in the Bonus Area, and the Kongs can exit the Bonus Area from a Blast Barrel to the right.
Gallery[edit]
Names in other languages[edit]
| Language | Name | Meaning | Notes |
|---|---|---|---|
| Japanese | モンキー・マウンテン2[?] Monkī Maunten2 |
Monkey Mountain 2 | |
| Italian | Il balzo della valang-[sic][2] | The leap of the avalan-; probably meant to say valanga ("avalanche") | |
| Spanish | Sorteando el alud[?] | Avoiding the rock slide |
References[edit]
- ^ 1995. Donkey Kong Land instruction booklet. Nintendo of America (American English). Page 18.
- ^ Donkey Kong Land Italian booklet. Page 18.
