Creepy Castle: Difference between revisions
Luigibros2 (talk | contribs) No edit summary |
Blueyoshisrc (talk | contribs) (replace a paragraph at the top describing the geography with a whole section for it and re-do/add list of collectibles) |
||
| (173 intermediate revisions by 81 users not shown) | |||
| Line 1: | Line 1: | ||
[[ | {{DK64 level infobox | ||
'''Creepy Castle''' is the seventh | |image=[[File:Creepy Castle.png|250px]] | ||
|entry=80 Golden Bananas | |||
|boss=[[King Kut Out]] | |||
|boss_requirement=400 bananas | |||
|trapped_kong=None | |||
|before=[[Crystal Caves|<<]] | |||
|after=[[Hideout Helm|>>]] | |||
}} | |||
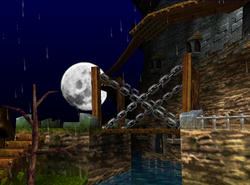
'''Creepy Castle''' is the seventh level of ''[[Donkey Kong 64]]''. It is a haunted [[Kremling]] castle high atop [[Crocodile Isle|K. Rool's warship]],<ref>{{cite|author=Bihldorff, Nate, Jason Leung, and Drew Williams|title=''Donkey Kong 64'' Player's Guide|page=97|date=1999|publisher=Nintendo of America|language=en-us}}</ref><ref>{{cite|author=Bihldorff, Nate, Jason Leung, and Drew Williams|title=''Donkey Kong 64'' Player's Guide|page=100|date=1999|publisher=Nintendo of America|language=en-us|quote=<u>'''GO GRAVEROBBING</u>:''' Deep inside the catacombs is a large coffin that could house only the corpse of some huge Kremling.}}</ref> acting as a successor to both [[Gloomy Gulch]] and [[K. Rool's Keep]] from the original [[Crocodile Isle]]. The Kongs must have at least 80 [[Golden Banana]]s for [[B. Locker]] to allow them to enter the level. The [[Kong]]s can only enter this level from its lobby where three [[Kosha]]s are found from using a large [[Barrel Cannon]] near [[K. Lumsy's Prison]]. Although Creepy Castle is said to be located on K. Rool's Crocodile Isle, it also appears to be floating above ground. If the active Kong falls off the location, they respawn back from the beginning portal. The level takes place both inside and outside of the old, abandoned castle. | |||
Like typical haunted areas, a continuous thunderstorm takes place in the area. Many of the enemies featured are undead, such as [[Skeleton Kremling|Skeleton Kremling]] and [[Ghost (Donkey Kong 64)|Ghost]]s, and is inhabited by [[Flipflap|Bat]]s. The castle interior features haunted corridors, mostly-empty rooms, and haunted catacombs on the lowest floor. A loud moaning and a variety of haunted noises can be heard inside various areas of the level. Additionally, this level is the first to have the red [[Kong Switch]]es, which can only be activated from using the [[Simian Slam|Super Duper Simian Slam]] move learned from [[Cranky Kong]]. In this level, the red switches are usually used for opening entrances to various parts of the castle. The boss of Creepy Castle is [[King Kut Out]], a hastily-made cardboard cutout of [[King K. Rool]]. [[Lanky Kong]] is required to take part in the boss fight, but all Kongs may potentially be used, as whenever one misses King Kut Out, they go out of bounds and another Kong takes their place. | |||
==Geography== | |||
===Outside the Castle=== | |||
* [[Kosha]] | The area that houses the castle and essentially most of the level. The entrance of the level can be found at the very bottom with a mostly linear pathway up towards the top of the castle connecting just about every other area of the level. Most of the paths are rather narrow and small making it easy to fall either onto earlier parts of the level or into the [[Pit|bottomless pit]]. The path starts grassy with various wooden planks connecting the path over the pit, a big tree with a pond in front of it can be found very early. It continues past the graveyard area, without directly connecting to it, and past an entrance to the closed-off cave with a #1 Pad in front of it, it finally connects to the moat which serves as the halfway point. Past the moat the path starts to consist of stone, it continues past the #2 Pad with bigger wooden structures connecting various platforms. Once Cranky's Lab with a #3 Pad is reached the path starts to mostly consist of a tiled stone floor, immediately after is the entrance to the museum with the greenhouse area shortly after. The path ends off by going past the ballroom with the library shortly after and then finally reaching the top. | ||
* [[ | |||
* [[Puftup]] (during the boss | ====Graveyard Area==== | ||
* [[ | This area can easily be missed as it is not directly connected to the pathway towards the top of the castle, instead the player has to jump down a level near the entrance to the closed-off cave with a #1 Pad in front of it. The graveyard is connecting two narrow pathways winding around some of the level. Various tombs can be found in the center around the entrance to the graveyard cave. | ||
====Moat==== | |||
Roughly the halfway point of the path towards the top and the central area of the lower half, having several ladders surrounding it that connect to various lower points of the level. Despite being the halfway point, it can be missed easily as the yellow [[Banana]]s skip right past it, instead following up a ladder that connects the path before & after the moat. The moat includes one of every single Bananaporter Pad with a Tag Barrel and Rocketbarrel Boost barrel near it. The moat itself is filled with water, an entrance to the closed-off cave can be found on the water. A drawbridge is found over the water that connects the moat area to the path made of stone that continues to lead up the castle. | |||
====Greenhouse==== | |||
Found on the second half of the climb towards the top of the castle, between the museum and ballroom. It includes the #4 Pad, a greenhouse with a wooden shack connected directly to it and a big trash can right next to it. The wooden shack can be entered by Chunky Kong by destroying the door using a [[Primate Punch]]. The greenhouse includes a hedge maze that can be accessed by Lanky Kong, the [[Battle Arena Pad]] can be found inside as well. Tiny Kong can access the trash can by using the [[Mini-Monkey]] barrel right above it, the inside consists of various trash and a rotten piece of cheese with several [[Fly (Donkey Kong 64)|flies]] flying around. | |||
====Top of the Castle==== | |||
The final area of the level and the end of the path towards it, the #5 Pad can be found here. [[Snide's H.Q.]] is found on a small platform off to the side with a [[DK Dirt Pile]] behind it. Lanky Kong can enter the tip of the castle, the room inside features upward wind and not much else. Above said room is a [[Bonus Barrel]] and a set of clouds that can only be reached by using Diddy's [[Rocketbarrel Boost]] ability. | |||
===Big Tree=== | |||
Located near the entrance to the level at the very bottom. An iron gate is blocking the entrance to the inside of the tree, it can only be opened up by Donkey after using the [[Baboon Blast]] Pad in fron of it and finishing the [[Barrel Cannon]] course. The inside of the tree is hollow and features a small room to the side behind a breakable wall with a Golden Banana for Chunky Kong. A pit can be found at the back, falling down reveals a deep water reservoir, the water-level of which can be raised by hitting targets on the wall, the exit of the reservoir leads to a small pond outside the big tree. | |||
===Graveyard Cave=== | |||
Can be found at the graveyard. The floor of the cave is covered with a thick mist, it starts off with a four-way junction; going straight ahead leads to [[Funky's Store]]. Towards the left of the entrance is a big skull that leads to the catacombs, on the opposite side is a small shack that houses the mausoleum. | |||
====Catacombs==== | |||
The catacombs of the graveyard cave consist of a set of narrow pathways with walls being made out of large skulls. Only Donkey, Diddy and Chunky Kong can enter this area, all three have their seperate rooms at the end of the pathways. Three new sets of Bananaporter Pads are featured, each of which connects the entrance to one of the three rooms. All three rooms can only be entered by shooting a switch for each respective kong, the inside of Diddy's and Chunky's rooms feature a big coffin in the center and a set of smaller coffins on the walls. Donkey's room includes six levers which open up a path to a [[Mine Cart]] minigame that features a challenge against its [[resident demon]]. | |||
====Mausoleum==== | |||
Only Tiny and Lanky Kong can enter the shack that leads here. The walls and floors of the mausoleum consist of big, blueish rocks, the ground in some areas is covered in a layer of mist. The path is split into two pathways, one for Lanky and one for Tiny, both lead to a room with a big [[toxic waste]] pool, Tiny's room also features big hands made out of stone coming from the toxic waste. | |||
===Closed-off Cave=== | |||
There are two entrances to this cave on opposite sides of the level, both feature wooden beams to block off the cave, however a small gap makes it possible to enter the cave regardless. One of the entrances is found at the moat, the other next to a #1 Pad. The inside features a floor covered in a thin layer of mist and a mostly linear path between both entrances, only having three deviations; one of which leading to [[Candy's Music Shop]], one leading over a pit to a Bonus Barrel and the middle one to the dungeon. | |||
====Dungeon==== | |||
Found in the middle of the closed-off cave and similar to that cave is also covered in a layer of mist. The walls of the dungeon are built using dark stone blocks, with various chains hanging from the ceiling and from the wall. A couple empty, turned over buckets are also found scattered around. Several alcoves exist with metal gates blocking them off, all of which can be destroyed by Chunky's Primate Punch. There are three seperate sections, all connected to the entrance. Each of the sections includes a red switch for either Donkey, Diddy or Lanky, they all open a new room for their respective Kong. Donkey's room features a puzzle on the floor, Diddy's room includes a long hallway and finally, Lanky's room features a long hallway with toxic waste, several [[Baboon Balloon]] Pads are scattered around the room. | |||
===Museum=== | |||
The entrance, found between Cranky's Lab and the greenhouse on the upper half of the castle, can only be opened as Chunky by hitting the red switch in front of it. The inside starts off with a hallway that leads past two rooms that are blocked off by glass, both have a [[Monkeyport]] Pad inside. One of those rooms has a small barn inside that can be accessed using the Monkeyport Pad inside the ballroom, the inside of the barn leads to a race against [[Mini-Car]] held in [[Frantic Factory]]. The other room blocked by glass can be accessed from a Monkeyport Pad behind the barn, it includes a small pillar made of stone. Past the two rooms is a big hall including a big switch in the center, two monkey faces made of stone and also three switches next to each other that look like a set of shields. One of the two stone faces can be opened by hitting the three switches, the other by activating the big switch in the center. | |||
===Ballroom=== | |||
The ballroom is found on the upper half of the castle pathway, between the greenhouse and the library. Only Diddy can hit the red switch to open the entrance, however by using the Tag Barrel nearby other Kongs can enter it as well. The inside features a short hallway to a big room with a checkered floor and three tall candles. A Monkeyport Pad is found near the checkered floor, leading to the barn in the museum. A Rocketbarrel Boost barrel can be spawned which allows Diddy to reach the top of the candles. | |||
===Library=== | |||
A floating cloud is right before the entrance to the library, which is found after the ballroom. The entrance will only be opened up when Donkey hits the red switch with his face on it near the top of the castle. Inside is a junction that leads to two seperate paths, the left one leads to a room with three big books in it and a switch that can be spawned to open up the other pathway. The right path, which is initially blocked off, features books flying from one side to the other. At the end of the path is a exit which ends up at the red Donkey Kong switch outside the castle that opened up the library entrance. | |||
==Enemies== | |||
*[[Flipflap|Bat]] | |||
*[[Skeleton Kremling|Skeleton Kremling]] | |||
*[[Book]] | |||
*[[Fly (Donkey Kong 64)|Fly]] | |||
*[[Ghost (Donkey Kong 64)|Ghost]] | |||
*[[Kasplat]] | |||
*[[Kosha]] | |||
*[[Kroc]] | |||
*[[Puftup]] (only during the boss fight) | |||
==Golden Banana locations== | |||
===Donkey Kong=== | |||
{|class=wikitable style=width:100%" | |||
!style="background:#f3f777;width:16%"|Images!!style="background:#f3f777"|Description!!style="background:#f3f777;width:10%"|Type | |||
|- | |||
|align=center|[[File:DK64_Creepy_Castle_Donkey_Kasplat.png|200px]] | |||
|Inside the big tree above the pit. Defeat the yellow [[Kasplat]] and give their blueprint to [[Snide]]. | |||
|align=center|[[File:DK64_Yellow_Blueprint.gif|30px]] | |||
|- | |||
|align=center|[[File:DK64_Creepy_Castle_Donkey_Coin_1.png|200px]] [[File:DK64_Creepy_Castle_Donkey_Golden_1.png|200px]] | |||
|Requires the sniper upgrade from [[Funky's Store]].<br>Use the [[Baboon Blast]] pad in front of the big tree near the entrance of the level and complete the [[Barrel Cannon]] course to open the gate of the big tree. Once inside, fall down the pit, jump on the wooden plank and hit the target on the wall. Once 3 targets are hit the water will have risen enough to reach the Golden Banana. | |||
|align=center|[[File:DK64_Animated_Golden_Banana.gif|30px]] | |||
|- | |||
|align=center|[[File:DK64_Creepy_Castle_Donkey_Golden_2.png|200px]] [[File:DK64_Creepy_Castle_Donkey_Golden_2b.png|200px]] | |||
|Inside the catacombs, switch the lever on the left closest to the door, then the middle one on the right and finally the one farthest away from the door on the left. Enter the newly opened door and collect 25 coins in the [[Mine Cart]] minigame to receive a Golden Banana. | |||
|align=center|[[File:DK64_Animated_Golden_Banana.gif|30px]] | |||
|- | |||
|align=center|[[File:DK64_Creepy_Castle_Donkey_Golden_3.png|200px]] | |||
|Requires the Super Duper Simian Slam upgrade from Cranky's Lab.<br>Received when flipping the puzzle panels to resemble Donkey Kong's face. The puzzle can be found inside the dungeon, behind a gate that's opened when hitting the red Donkey Kong switch.<br>The dungeon is found inside the closed-off cave. | |||
|align=center|[[File:DK64_Animated_Golden_Banana.gif|30px]] | |||
|- | |||
|align=center|[[File:DK64_Creepy_Castle_Donkey_Banana_7.png|200px]] [[File:DK64_Creepy_Castle_Donkey_Golden_4.png|200px]] | |||
|Requires the Super Duper Simian Slam upgrade from Cranky's Lab.<br>[[Simian Slam]] the red Donkey Kong switch shortly after the library on the path to the top of the castle, then rush over to enter the library within 20 seconds. Once inside, take the left path and defeat all enemies found in the room, then hit the red Donkey Kong switch that appears. Backtrack and take the other path, that is now accessible, and optionally use the [[Strong Kong]] ability to get through the corridor with books flying from one side to the other to reach the Golden Banana at the end. | |||
|align=center|[[File:DK64_Animated_Golden_Banana.gif|30px]] | |||
|} | |||
===Diddy Kong=== | |||
{|class=wikitable style=width:100%" | |||
!style="background:#ff7061;width:16%"|Images!!style="background:#ff7061"|Description!!style="background:#ff7061;width:10%"|Type | |||
|- | |||
|align=center|[[File:DK64_Creepy_Castle_Diddy_Kasplat.png|200px]] | |||
|At the first junction inside the graveyard cave. Defeat the red Kasplat and give their blueprint to Snide. | |||
|align=center|[[File:DK64_Red_Blueprint.gif|30px]] | |||
|- | |||
|align=center|[[File:DK64_Creepy_Castle_Diddy_Golden_1.png|200px]] | |||
|Inside the catacombs, go left and then left again to reach a big coffin in the middle of a room. Use [[Chimpy Charge]] to hit the 4 switches in order from lowest to biggest number, a Golden Banana will then be revealed.<br>The catacombs can be found inside the big skull inside the graveyard cave at the very bottom of the level. | |||
|align=center|[[File:DK64_Animated_Golden_Banana.gif|30px]] | |||
|- | |||
|align=center|[[File:DK64_Creepy_Castle_Diddy_Golden_2.png|200px]] | |||
|Requires the sniping upgrade from Funky's Store and the Super Duper Simian Slam upgrade from Cranky's Lab.<br>Inside a revolving door found inside the dungeon, shoot the [[Peanut Popgun|Peanut]] switch from across the room, then swing across the chains to reach it.<br>The dungeon can be found inside the closed-off cave. | |||
|align=center|[[File:DK64_Animated_Golden_Banana.gif|30px]] | |||
|- | |||
|align=center|[[File:DK64_Creepy_Castle_Diddy_Golden_3.png|200px]] | |||
|Requires the Super Duper Simian Slam upgrade from Cranky's Lab.<br>Enter the ballroom, found shortly after the greenhosue when walking up the castle, by Simian Slamming the red Diddy Kong switch in front of it. Ideally center the camera using {{button|n64|R}} once inside, then defeat all enemies on and near the checkered floor. Jump into the [[Rocketbarrel Boost]] barrel that just appeared and light-up all three candles by flying over them to reveal a [[Bonus Barrel]]. | |||
|align=center|[[File:Bonus_Barrel_DK64_art.png|40px]]<br>[[Minecart Mayhem!]] | |||
|- | |||
|align=center|[[File:DK64_Creepy_Castle_Diddy_Golden_4.png|200px]] | |||
|At the very top of the castle. Use the Rocketbarrel Boost barrel above the Bananaporter #2 to fly up there. | |||
|align=center|[[File:Bonus_Barrel_DK64_art.png|40px]]<br>[[Big Bug Bash!]] | |||
|} | |||
===Lanky Kong=== | |||
{|class=wikitable style=width:100%" | |||
!style="background:#7b90ff;width:16%"|Images!!style="background:#7b90ff"|Description!!style="background:#7b90ff;width:10%"|Type | |||
|- | |||
|align=center|[[File:DK64_Creepy_Castle_Lanky_Golden_1.png|200px]] [[File:DK64_Creepy_Castle_Lanky_Golden_1b.png|200px]] | |||
|Enter the graveyard cave at the very bottom of the level, then enter the mausoleum by hitting a [[Grape Shooter|Grape]] switch on the small shack. Hit another Grape switch inside the mausoleum, jump into the [[OrangStand Sprint]] barrel near it and get past the gate within 13 seconds. Use the [[Trombone Tremor]] pad behind the second gate and use the lowered vines to reach the Golden Banana. | |||
|align=center|[[File:DK64_Animated_Golden_Banana.gif|30px]] | |||
|- | |||
|align=center|[[File:DK64_Creepy_Castle_Lanky_Golden_2.png|200px]] | |||
|Found at the end of the room with several [[Baboon Balloon]] pads inside the dungeon, use the ability to reach the [[Bonus Barrel]].<br>The dungeon can be found inside the closed-off cave. | |||
|align=center|[[File:Bonus_Barrel_DK64_art.png|40px]]<br>[[Kremling Kosh!]] | |||
|- | |||
|align=center|[[File:DK64_Creepy_Castle_Lanky_Kasplat.png|200px]] | |||
|On the stone path between the moat and the Bananaporter #2 with a Rocketbarrel Boost barrel above it. | |||
|align=center|[[File:DK64_Blue_Blueprint.gif|30px]] | |||
|- | |||
|align=center|[[File:DK64_Creepy_Castle_Lanky_Golden_3.png|200px]] | |||
|Requires the Super Duper Simian Slam upgrade from Cranky's Lab.<br>Inside the greenhouse, reach the Golden Banana at the end of the maze within 40 seconds. A OrangStand Sprint barrel can be found to the left of Lanky when entering the greenhouse. | |||
|align=center|[[File:DK64_Animated_Golden_Banana.gif|30px]] | |||
|- | |||
|align=center|[[File:DK64_Creepy_Castle_Lanky_Banana_2.png|200px]] [[File:DK64_Creepy_Castle_Lanky_Golden_4.png|200px]] | |||
|Requires the sniper upgrade from Funky's Store and the Super Duper Simian Slam upgrade from Cranky's Lab.<br>Simian Slam the red Lanky Kong switch in front of the room at the very tip of the castle. Once inside, defeat all enemies to reveal a Baboon Baloon pad, then hit the three really high-up Grape switches to activate the wind in the center. Use the Baboon Ballon pad and fly into the wind to reach the Bonus Barrel the top. | |||
|align=center|[[File:Bonus_Barrel_DK64_art.png|40px]]<br>[[Beaver Bother!]] | |||
|} | |||
===Tiny Kong=== | |||
{|class=wikitable style=width:100%" | |||
!style="background:#ea72fb;width:16%"|Images!!style="background:#ea72fb"|Description!!style="background:#ea72fb;width:10%"|Type | |||
|- | |||
|align=center|[[File:DK64_Creepy_Castle_Tiny_Kasplat.png|200px]] | |||
|On a sole platform on the narrow pathway that connects to the graveyard cave at the very bottom of the level. Defeat the purple Kasplat and give their blueprint to Snide. | |||
|align=center|[[File:DK64_Purple_Blueprint.gif|30px]] | |||
|- | |||
|align=center|[[File:DK64_Creepy_Castle_Tiny_Golden_1.png|200px]] | |||
|Requires the Super Duper Simian Slam upgrade from Cranky's Lab.<br>Enter the graveyard cave at the very bottom of the level and enter the mausoleum by hitting a [[Feather Bow|Feather]] switch on the small shack. The mausoleum features a red Tiny Kong switch at the end of the right path, Simian Slam it and use PonyTail Twirl to reach the Golden Banana. | |||
|align=center|[[File:DK64_Animated_Golden_Banana.gif|30px]] | |||
|- | |||
|align=center|[[File:DK64_Creepy_Castle_Tiny_Golden_2.png|200px]] | |||
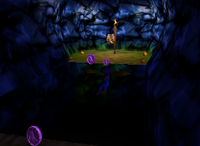
|Found over a long gap that requires the [[Pony Tail Twirl]] ability to cross inside the closed-off cave. | |||
|align=center|[[File:Bonus_Barrel_DK64_art.png|40px]]<br>[[Teetering Turtle Trouble!]] | |||
|- | |||
|align=center|[[File:DK64_Creepy_Castle_Tiny_Banana_6.png|200px]] | |||
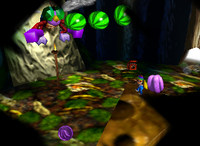
|Enter the trash can next to the greenhouse as [[Mini-Monkey|Mini-Tiny]] from the top, then defeat all flies inside, this can easily be done by using [[Saxophone Slam]]. | |||
|align=center|[[File:DK64_Animated_Golden_Banana.gif|30px]] | |||
|- | |||
|align=center|[[File:DK64_Creepy_Castle_Tiny_Banana_7.png|200px]] [[File:DK64_Creepy_Castle_Tiny_Golden_3.png|200px]] | |||
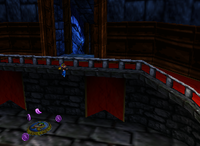
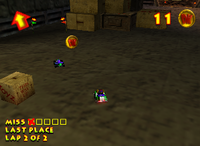
|Requires the Super Duper Simian Slam upgrade from Cranky's Lab.<br>Open the ballroom as Diddy, then switch to Tiny and enter the ballroom. Use the [[Monkeyport]] pad inside to reach the barn in the museum, use the Mini-Monkey barrel above to enter the barn. Inside awaits another race against the [[Mini-Car]], win the 2-lap race while collecting 10 coins to win a Golden Banana. | |||
|align=center|[[File:DK64_Animated_Golden_Banana.gif|30px]] | |||
|} | |||
===Chunky Kong=== | |||
{|class=wikitable style=width:100%" | |||
!style="background:#a0ce99;width:16%"|Images!!style="background:#a0ce99"|Description!!style="background:#a0ce99;width:10%"|Type | |||
|- | |||
|align=center|[[File:DK64_Creepy_Castle_Chunky_Golden_3.png|200px]] | |||
|Requires the sniper upgrade from Funky's Store.<br>Enter the big tree and destroy a breakable wall inside it near the start using a Primate Punch. Behind the breakable wall is a cage with a [[Pineapple Launcher|Pineapple]] switch above it, hit the Pineapple switch from afar so it doesn't disappear and enter the Bonus Barrel inside the now-opened cage. | |||
|align=center|[[File:Bonus_Barrel_DK64_art.png|40px]]<br>[[Beaver Bother!]] | |||
|- | |||
|align=center|[[File:DK64_Creepy_Castle_Chunky_Golden_1.png|200px]] | |||
|Found in one of the caskets on the wall inside the catacombs behind the Bananaporter #3, found by going right. | |||
|align=center|[[File:Bonus_Barrel_DK64_art.png|40px]]<br>[[Searchlight Seek!]] | |||
|- | |||
|align=center|[[File:DK64_Creepy_Castle_Chunky_Kasplat.png|200px]] | |||
|At a junction in front of [[Candy's Music Shop]] inside the closed-off cave. Defeat the green Kasplat and give their blueprint to Snide. | |||
|align=center|[[File:DK64_Green_Blueprint.gif|30px]] | |||
|- | |||
|align=center|[[File:DK64_Creepy_Castle_Chunky_Banana_5.png|200px]] [[File:DK64_Creepy_Castle_Chunky_Banana_6.png|200px]] | |||
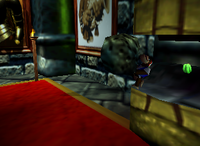
|Requires the Super Duper Simian Slam upgrade from Cranky's Lab.<br>Enter the museum, found shortly after Cranky's Lab, by Simian Slamming a red Chunky switch in front of it. Once inside, hit the three switches on the wall, that look like shields and have green Banana Coins in front of them, using Primate Punch. One of the stone-monkeys opened up, grab the boulder inside and put it down on the big switch in the center of the room, this opens up the second stone monkey on the wall allowing Chunky to grab the Golden Banana inside it. | |||
|align=center|[[File:DK64_Animated_Golden_Banana.gif|30px]] | |||
|- | |||
|align=center|[[File:DK64_Creepy_Castle_Chunky_Golden_2.png|200px]] | |||
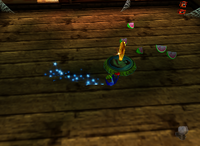
|Enter the wooden shack connected to the greenhouse by breaking down the door using a Primate Punch. Inside, destroy the ?-Box using another Primate Punch and use the Gorilla Gone pad. Once invisible all the bats can be defeated, ideally with a Triangle Trample, which spawns a Golden Banana. | |||
|align=center|[[File:DK64_Animated_Golden_Banana.gif|30px]] | |||
|} | |||
==Colored Bananas== | |||
{{main|List of Bananas in Creepy Castle}} | |||
There are a total of 500 [[Banana]]s (100 for each [[Donkey_Kong_64#Playable|Kong]]) to collect. | |||
==Banana Coins== | |||
{{main|List of Banana Coins in Creepy Castle}} | |||
There are a total of 85 [[Banana Coin]]s across all five Kongs and 1 [[5-Banana Coin]] to collect. | |||
==Banana Fairies== | |||
{|class=wikitable style="width:100%" | |||
!style="width:16%;background:#F3F777"|Image!!style="background:#F3F777"|Description | |||
|- | |||
|align=center|[[File:DK64_Creepy_Castle_Donkey_Golden_1.png|200px]] | |||
|Requires the sniper upgrade from Funky's Store. At the bottom of the pit inside the big tree, hit the targets on the wall to raise the water level. | |||
|- | |||
|align=center|[[File:DK64_Creepy_Castle_Fairy_1.png|200px]] | |||
|Found behind a house in the museum. Open up the ballroom, found shortly after the greenhouse, as Diddy, then switch to Tiny and enter the ballroom. Inside, use the Monkeyport pad to reach the house. | |||
|} | |||
==Battle Arena Pad== | |||
{|class=wikitable style="width:100%" | |||
!style="width:16%;background:#d8c1a3"|Image!!style="background:#d8c1a3"|Description | |||
|- | |||
|align=center|[[File:DK64_Creepy_Castle_Battle_Arena_Pad_1.png|200px]] | |||
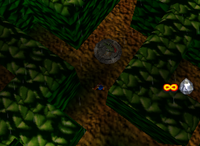
|In the middle of the maze inside the greenhouse, can only be accessed by Lanky. The Battle Arena Pad will only appear once the Golden Banana inside the maze has been collected. | |||
|} | |||
==Profiles== | |||
*'''Instruction booklet bio by Cranky Kong:''' ''It’s a castle, and it’s creepy. Will that do? Mmm... apparently not. Alright, I’ll try my best to make this sound exciting. Ahem, steel your nerves as you hesitantly edge around the precarious exterior, desperately trying to find a way into the fortress’s foreboding walls. Once inside, the horrors of the creepy crypts, the haunted regal ballroom and the mad museum await, their hideous inhabitants eager to welcome unwanted guests. There, not bad, eh? Almost makes you want to play it.''<ref>{{cite|page=21|title=''Donkey Kong 64'' instruction booklet|date=1999|publisher=Nintendo of America|language=en}}</ref> | |||
*'''Player's Guide:''' ''The Kongs are one step away from K. Rool's lair, but before they can challenge the tyrant, they'll have to explore a spooky stone structure high atop the warship. Beware-a storm rages in the dark skies above and evil prowls the castle walls.''<ref>{{cite|author=Bihldorff, Nate, Jason Leung, and Drew Williams|title=''Donkey Kong 64'' Player's Guide|page=97|date=1999|publisher=Nintendo of America|language=en-us}}</ref> | |||
==Gallery== | |||
===Exterior=== | |||
<gallery> | |||
Creepycastle.png|Castle's exterior | |||
Creepy Castle moat.png|Moat | |||
Creepy Castle graveyard.png|Graveyard | |||
Creepy Castle yard.png|Yard | |||
Creepy Castle upper.png|Upper | |||
</gallery> | |||
===Interior=== | |||
<gallery> | |||
Creepy Castle inside.png|Inside | |||
Creepy Castle dungeon.png|Dungeon | |||
Creepy Castle crypt.png|Crypt | |||
Creepy Castle catacombs.png|Catacombs | |||
Creepy Castle mine cart.png|Mine cart ride | |||
Creepy Castle mausoleum.png|Mausoleum | |||
Creepy Castle library.png|Library | |||
Creepy Castle ballroom.png|Ballroom | |||
Creepy Castle wind tower.png|Wind tower | |||
Creepy Castle museum.png|Museum | |||
Creepy Castle tree.png|Tree | |||
Creepy Castle greenhouse.png|Greenhouse | |||
Creepy Castle trashcan.png|Trashcan | |||
Creepy Castle tool shed.png|Tool shed | |||
Creepy Castle boss arena.png|Boss arena | |||
</gallery> | |||
===Miscellaneous=== | |||
<gallery> | |||
DK64 Creepy Castle exterior.png|[[Chunky Kong]] exploring the exterior of Creepy Castle | |||
DK64 Mist.png|Mist screen | |||
</gallery> | |||
==Names in other languages== | |||
{{foreign names | |||
|Jpn=ゾゾゾ~キャッスル | |||
|JpnR={{nw|Zozozo~ Kyassuru}} | |||
|JpnM=From「ゾゾゾ~」(''zozozo~'', Japanese onomatopoeia for fearsome laughter) and "castle" | |||
|Spa=Castillo Canguelo | |||
|SpaM=Fear Castle | |||
|Ger=Kamikaze Kastell | |||
|GerM=Kamikaze Castle | |||
|Fre=Château-Chocotte | |||
|FreM=Scary Castle | |||
|Ita=Il Castello Spettrale | |||
|ItaM=The Spectral Castle | |||
}} | |||
==Trivia== | |||
*The background music for Creepy Castle, as well as some of the dungeons, is an arrangement of the "[[Game Kaishi (Donkey Kong)|Game Kaishi]]" theme from ''[[Donkey Kong (game)|Donkey Kong]]'', heard as [[Pauline]] is taken to the top of the construction site. This theme was composed for a ''{{iw|jiggywikki|Banjo-Kazooie}}'' level called "Prickly Pear Island," a level that was ultimately cut while the game was still known as "Project Dream".<ref>{{cite|url=tcrf.net/Prerelease:Banjo-Kazooie/Project_Dream#Prickly_Pear_Island|title=''Banjo-Kazooie''|language=en|publisher=The Cutting Room Floor|accessdate=February 21, 2022}}</ref> | |||
*The museum's background music has a sample of {{iw|wikipedia|Johann Sebastian Bach|Bach's}} {{iw|wikipedia|Toccata and Fugue}}. A similar sample can be heard in ''Banjo-Kazooie'' when entering the haunted church in Mad Monster Mansion. This snippet was also used in the arcade versions of ''[[Donkey Kong Jr. (game)|Donkey Kong Jr.]]'' | |||
*The piano part of this level's theme was composed by Grant Kirkhope before being employed by Rare. He then included it in the music for Creepy Castle, as he found it fit its theme.<ref>{{cite|timestamp=41:59|url=youtu.be/hsqCnMMjylg?t=2519|title=The Kongversation - 734: Inteview: Grant Kirkhope|publisher=YouTube|language=en|author=DK Vine|date=December 11, 2019|accessdate=June 22, 2024}}</ref> | |||
==References== | |||
<references/> | |||
{{DK64}} | {{DK64}} | ||
[[Category:Castles]] | |||
[[Category:Haunted areas]] | |||
[[Category: | [[Category:Donkey Kong 64 levels]] | ||
[[Category: | |||
Latest revision as of 13:23, January 11, 2025
| Creepy Castle | |
|---|---|
| |
| Entrance requirement | 80 Golden Bananas |
| Boss | King Kut Out |
| Boss requirement | 400 bananas |
| Trapped Kongs | None |
| << List of levels >> | |
Creepy Castle is the seventh level of Donkey Kong 64. It is a haunted Kremling castle high atop K. Rool's warship,[1][2] acting as a successor to both Gloomy Gulch and K. Rool's Keep from the original Crocodile Isle. The Kongs must have at least 80 Golden Bananas for B. Locker to allow them to enter the level. The Kongs can only enter this level from its lobby where three Koshas are found from using a large Barrel Cannon near K. Lumsy's Prison. Although Creepy Castle is said to be located on K. Rool's Crocodile Isle, it also appears to be floating above ground. If the active Kong falls off the location, they respawn back from the beginning portal. The level takes place both inside and outside of the old, abandoned castle.
Like typical haunted areas, a continuous thunderstorm takes place in the area. Many of the enemies featured are undead, such as Skeleton Kremling and Ghosts, and is inhabited by Bats. The castle interior features haunted corridors, mostly-empty rooms, and haunted catacombs on the lowest floor. A loud moaning and a variety of haunted noises can be heard inside various areas of the level. Additionally, this level is the first to have the red Kong Switches, which can only be activated from using the Super Duper Simian Slam move learned from Cranky Kong. In this level, the red switches are usually used for opening entrances to various parts of the castle. The boss of Creepy Castle is King Kut Out, a hastily-made cardboard cutout of King K. Rool. Lanky Kong is required to take part in the boss fight, but all Kongs may potentially be used, as whenever one misses King Kut Out, they go out of bounds and another Kong takes their place.
Geography[edit]
Outside the Castle[edit]
The area that houses the castle and essentially most of the level. The entrance of the level can be found at the very bottom with a mostly linear pathway up towards the top of the castle connecting just about every other area of the level. Most of the paths are rather narrow and small making it easy to fall either onto earlier parts of the level or into the bottomless pit. The path starts grassy with various wooden planks connecting the path over the pit, a big tree with a pond in front of it can be found very early. It continues past the graveyard area, without directly connecting to it, and past an entrance to the closed-off cave with a #1 Pad in front of it, it finally connects to the moat which serves as the halfway point. Past the moat the path starts to consist of stone, it continues past the #2 Pad with bigger wooden structures connecting various platforms. Once Cranky's Lab with a #3 Pad is reached the path starts to mostly consist of a tiled stone floor, immediately after is the entrance to the museum with the greenhouse area shortly after. The path ends off by going past the ballroom with the library shortly after and then finally reaching the top.
Graveyard Area[edit]
This area can easily be missed as it is not directly connected to the pathway towards the top of the castle, instead the player has to jump down a level near the entrance to the closed-off cave with a #1 Pad in front of it. The graveyard is connecting two narrow pathways winding around some of the level. Various tombs can be found in the center around the entrance to the graveyard cave.
Moat[edit]
Roughly the halfway point of the path towards the top and the central area of the lower half, having several ladders surrounding it that connect to various lower points of the level. Despite being the halfway point, it can be missed easily as the yellow Bananas skip right past it, instead following up a ladder that connects the path before & after the moat. The moat includes one of every single Bananaporter Pad with a Tag Barrel and Rocketbarrel Boost barrel near it. The moat itself is filled with water, an entrance to the closed-off cave can be found on the water. A drawbridge is found over the water that connects the moat area to the path made of stone that continues to lead up the castle.
Greenhouse[edit]
Found on the second half of the climb towards the top of the castle, between the museum and ballroom. It includes the #4 Pad, a greenhouse with a wooden shack connected directly to it and a big trash can right next to it. The wooden shack can be entered by Chunky Kong by destroying the door using a Primate Punch. The greenhouse includes a hedge maze that can be accessed by Lanky Kong, the Battle Arena Pad can be found inside as well. Tiny Kong can access the trash can by using the Mini-Monkey barrel right above it, the inside consists of various trash and a rotten piece of cheese with several flies flying around.
Top of the Castle[edit]
The final area of the level and the end of the path towards it, the #5 Pad can be found here. Snide's H.Q. is found on a small platform off to the side with a DK Dirt Pile behind it. Lanky Kong can enter the tip of the castle, the room inside features upward wind and not much else. Above said room is a Bonus Barrel and a set of clouds that can only be reached by using Diddy's Rocketbarrel Boost ability.
Big Tree[edit]
Located near the entrance to the level at the very bottom. An iron gate is blocking the entrance to the inside of the tree, it can only be opened up by Donkey after using the Baboon Blast Pad in fron of it and finishing the Barrel Cannon course. The inside of the tree is hollow and features a small room to the side behind a breakable wall with a Golden Banana for Chunky Kong. A pit can be found at the back, falling down reveals a deep water reservoir, the water-level of which can be raised by hitting targets on the wall, the exit of the reservoir leads to a small pond outside the big tree.
Graveyard Cave[edit]
Can be found at the graveyard. The floor of the cave is covered with a thick mist, it starts off with a four-way junction; going straight ahead leads to Funky's Store. Towards the left of the entrance is a big skull that leads to the catacombs, on the opposite side is a small shack that houses the mausoleum.
Catacombs[edit]
The catacombs of the graveyard cave consist of a set of narrow pathways with walls being made out of large skulls. Only Donkey, Diddy and Chunky Kong can enter this area, all three have their seperate rooms at the end of the pathways. Three new sets of Bananaporter Pads are featured, each of which connects the entrance to one of the three rooms. All three rooms can only be entered by shooting a switch for each respective kong, the inside of Diddy's and Chunky's rooms feature a big coffin in the center and a set of smaller coffins on the walls. Donkey's room includes six levers which open up a path to a Mine Cart minigame that features a challenge against its resident demon.
Mausoleum[edit]
Only Tiny and Lanky Kong can enter the shack that leads here. The walls and floors of the mausoleum consist of big, blueish rocks, the ground in some areas is covered in a layer of mist. The path is split into two pathways, one for Lanky and one for Tiny, both lead to a room with a big toxic waste pool, Tiny's room also features big hands made out of stone coming from the toxic waste.
Closed-off Cave[edit]
There are two entrances to this cave on opposite sides of the level, both feature wooden beams to block off the cave, however a small gap makes it possible to enter the cave regardless. One of the entrances is found at the moat, the other next to a #1 Pad. The inside features a floor covered in a thin layer of mist and a mostly linear path between both entrances, only having three deviations; one of which leading to Candy's Music Shop, one leading over a pit to a Bonus Barrel and the middle one to the dungeon.
Dungeon[edit]
Found in the middle of the closed-off cave and similar to that cave is also covered in a layer of mist. The walls of the dungeon are built using dark stone blocks, with various chains hanging from the ceiling and from the wall. A couple empty, turned over buckets are also found scattered around. Several alcoves exist with metal gates blocking them off, all of which can be destroyed by Chunky's Primate Punch. There are three seperate sections, all connected to the entrance. Each of the sections includes a red switch for either Donkey, Diddy or Lanky, they all open a new room for their respective Kong. Donkey's room features a puzzle on the floor, Diddy's room includes a long hallway and finally, Lanky's room features a long hallway with toxic waste, several Baboon Balloon Pads are scattered around the room.
Museum[edit]
The entrance, found between Cranky's Lab and the greenhouse on the upper half of the castle, can only be opened as Chunky by hitting the red switch in front of it. The inside starts off with a hallway that leads past two rooms that are blocked off by glass, both have a Monkeyport Pad inside. One of those rooms has a small barn inside that can be accessed using the Monkeyport Pad inside the ballroom, the inside of the barn leads to a race against Mini-Car held in Frantic Factory. The other room blocked by glass can be accessed from a Monkeyport Pad behind the barn, it includes a small pillar made of stone. Past the two rooms is a big hall including a big switch in the center, two monkey faces made of stone and also three switches next to each other that look like a set of shields. One of the two stone faces can be opened by hitting the three switches, the other by activating the big switch in the center.
Ballroom[edit]
The ballroom is found on the upper half of the castle pathway, between the greenhouse and the library. Only Diddy can hit the red switch to open the entrance, however by using the Tag Barrel nearby other Kongs can enter it as well. The inside features a short hallway to a big room with a checkered floor and three tall candles. A Monkeyport Pad is found near the checkered floor, leading to the barn in the museum. A Rocketbarrel Boost barrel can be spawned which allows Diddy to reach the top of the candles.
Library[edit]
A floating cloud is right before the entrance to the library, which is found after the ballroom. The entrance will only be opened up when Donkey hits the red switch with his face on it near the top of the castle. Inside is a junction that leads to two seperate paths, the left one leads to a room with three big books in it and a switch that can be spawned to open up the other pathway. The right path, which is initially blocked off, features books flying from one side to the other. At the end of the path is a exit which ends up at the red Donkey Kong switch outside the castle that opened up the library entrance.
Enemies[edit]
Golden Banana locations[edit]
Donkey Kong[edit]
| Images | Description | Type |
|---|---|---|
|
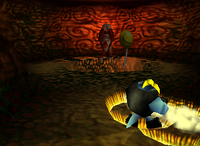
Inside the big tree above the pit. Defeat the yellow Kasplat and give their blueprint to Snide. | |
|
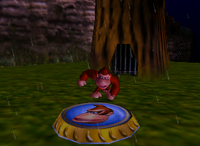
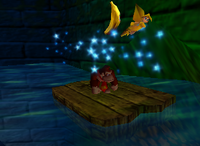
Requires the sniper upgrade from Funky's Store. Use the Baboon Blast pad in front of the big tree near the entrance of the level and complete the Barrel Cannon course to open the gate of the big tree. Once inside, fall down the pit, jump on the wooden plank and hit the target on the wall. Once 3 targets are hit the water will have risen enough to reach the Golden Banana. |
|
|
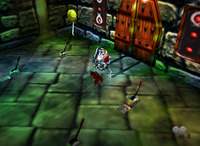
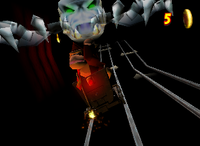
Inside the catacombs, switch the lever on the left closest to the door, then the middle one on the right and finally the one farthest away from the door on the left. Enter the newly opened door and collect 25 coins in the Mine Cart minigame to receive a Golden Banana. | |
|
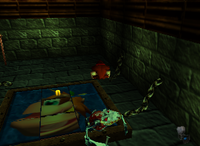
Requires the Super Duper Simian Slam upgrade from Cranky's Lab. Received when flipping the puzzle panels to resemble Donkey Kong's face. The puzzle can be found inside the dungeon, behind a gate that's opened when hitting the red Donkey Kong switch. The dungeon is found inside the closed-off cave. |
|
|
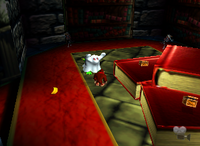
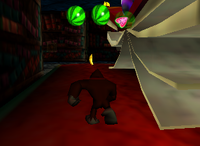
Requires the Super Duper Simian Slam upgrade from Cranky's Lab. Simian Slam the red Donkey Kong switch shortly after the library on the path to the top of the castle, then rush over to enter the library within 20 seconds. Once inside, take the left path and defeat all enemies found in the room, then hit the red Donkey Kong switch that appears. Backtrack and take the other path, that is now accessible, and optionally use the Strong Kong ability to get through the corridor with books flying from one side to the other to reach the Golden Banana at the end. |
Diddy Kong[edit]
| Images | Description | Type |
|---|---|---|
|
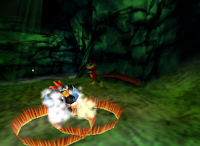
At the first junction inside the graveyard cave. Defeat the red Kasplat and give their blueprint to Snide. | |
|
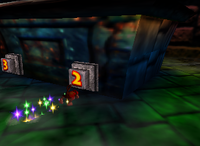
Inside the catacombs, go left and then left again to reach a big coffin in the middle of a room. Use Chimpy Charge to hit the 4 switches in order from lowest to biggest number, a Golden Banana will then be revealed. The catacombs can be found inside the big skull inside the graveyard cave at the very bottom of the level. |
|
|
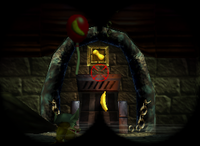
Requires the sniping upgrade from Funky's Store and the Super Duper Simian Slam upgrade from Cranky's Lab. Inside a revolving door found inside the dungeon, shoot the Peanut switch from across the room, then swing across the chains to reach it. The dungeon can be found inside the closed-off cave. |
|
|
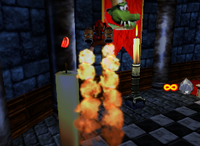
Requires the Super Duper Simian Slam upgrade from Cranky's Lab. Enter the ballroom, found shortly after the greenhosue when walking up the castle, by Simian Slamming the red Diddy Kong switch in front of it. Ideally center the camera using |
Minecart Mayhem! |
|
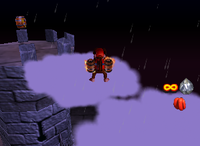
At the very top of the castle. Use the Rocketbarrel Boost barrel above the Bananaporter #2 to fly up there. | Big Bug Bash! |
Lanky Kong[edit]
| Images | Description | Type |
|---|---|---|
 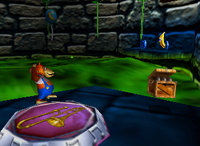
|
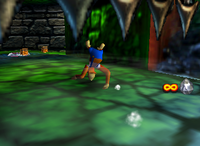
Enter the graveyard cave at the very bottom of the level, then enter the mausoleum by hitting a Grape switch on the small shack. Hit another Grape switch inside the mausoleum, jump into the OrangStand Sprint barrel near it and get past the gate within 13 seconds. Use the Trombone Tremor pad behind the second gate and use the lowered vines to reach the Golden Banana. | |
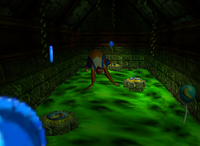
|
Found at the end of the room with several Baboon Balloon pads inside the dungeon, use the ability to reach the Bonus Barrel. The dungeon can be found inside the closed-off cave. |
Kremling Kosh! |
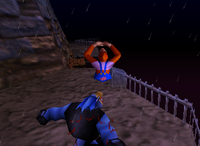
|
On the stone path between the moat and the Bananaporter #2 with a Rocketbarrel Boost barrel above it. | |
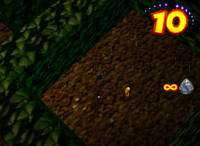
|
Requires the Super Duper Simian Slam upgrade from Cranky's Lab. Inside the greenhouse, reach the Golden Banana at the end of the maze within 40 seconds. A OrangStand Sprint barrel can be found to the left of Lanky when entering the greenhouse. |
|
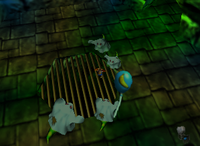 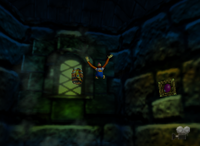
|
Requires the sniper upgrade from Funky's Store and the Super Duper Simian Slam upgrade from Cranky's Lab. Simian Slam the red Lanky Kong switch in front of the room at the very tip of the castle. Once inside, defeat all enemies to reveal a Baboon Baloon pad, then hit the three really high-up Grape switches to activate the wind in the center. Use the Baboon Ballon pad and fly into the wind to reach the Bonus Barrel the top. |
Beaver Bother! |
Tiny Kong[edit]
| Images | Description | Type |
|---|---|---|
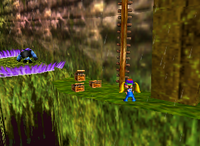
|
On a sole platform on the narrow pathway that connects to the graveyard cave at the very bottom of the level. Defeat the purple Kasplat and give their blueprint to Snide. | |
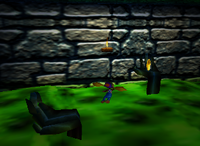
|
Requires the Super Duper Simian Slam upgrade from Cranky's Lab. Enter the graveyard cave at the very bottom of the level and enter the mausoleum by hitting a Feather switch on the small shack. The mausoleum features a red Tiny Kong switch at the end of the right path, Simian Slam it and use PonyTail Twirl to reach the Golden Banana. |
|
|
Found over a long gap that requires the Pony Tail Twirl ability to cross inside the closed-off cave. | Teetering Turtle Trouble! |
|
Enter the trash can next to the greenhouse as Mini-Tiny from the top, then defeat all flies inside, this can easily be done by using Saxophone Slam. | |
|
Requires the Super Duper Simian Slam upgrade from Cranky's Lab. Open the ballroom as Diddy, then switch to Tiny and enter the ballroom. Use the Monkeyport pad inside to reach the barn in the museum, use the Mini-Monkey barrel above to enter the barn. Inside awaits another race against the Mini-Car, win the 2-lap race while collecting 10 coins to win a Golden Banana. |
Chunky Kong[edit]
| Images | Description | Type |
|---|---|---|
|
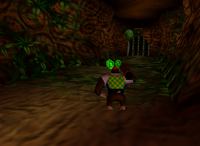
Requires the sniper upgrade from Funky's Store. Enter the big tree and destroy a breakable wall inside it near the start using a Primate Punch. Behind the breakable wall is a cage with a Pineapple switch above it, hit the Pineapple switch from afar so it doesn't disappear and enter the Bonus Barrel inside the now-opened cage. |
Beaver Bother! |
|
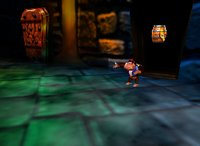
Found in one of the caskets on the wall inside the catacombs behind the Bananaporter #3, found by going right. | Searchlight Seek! |
|
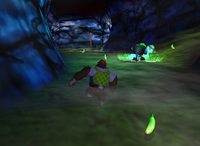
At a junction in front of Candy's Music Shop inside the closed-off cave. Defeat the green Kasplat and give their blueprint to Snide. | |
|
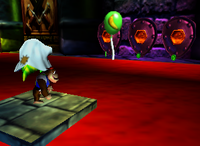
Requires the Super Duper Simian Slam upgrade from Cranky's Lab. Enter the museum, found shortly after Cranky's Lab, by Simian Slamming a red Chunky switch in front of it. Once inside, hit the three switches on the wall, that look like shields and have green Banana Coins in front of them, using Primate Punch. One of the stone-monkeys opened up, grab the boulder inside and put it down on the big switch in the center of the room, this opens up the second stone monkey on the wall allowing Chunky to grab the Golden Banana inside it. |
|
|
Enter the wooden shack connected to the greenhouse by breaking down the door using a Primate Punch. Inside, destroy the ?-Box using another Primate Punch and use the Gorilla Gone pad. Once invisible all the bats can be defeated, ideally with a Triangle Trample, which spawns a Golden Banana. |
Colored Bananas[edit]
- Main article: List of Bananas in Creepy Castle
There are a total of 500 Bananas (100 for each Kong) to collect.
Banana Coins[edit]
- Main article: List of Banana Coins in Creepy Castle
There are a total of 85 Banana Coins across all five Kongs and 1 5-Banana Coin to collect.
Banana Fairies[edit]
Battle Arena Pad[edit]
| Image | Description |
|---|---|
|
In the middle of the maze inside the greenhouse, can only be accessed by Lanky. The Battle Arena Pad will only appear once the Golden Banana inside the maze has been collected. |
Profiles[edit]
- Instruction booklet bio by Cranky Kong: It’s a castle, and it’s creepy. Will that do? Mmm... apparently not. Alright, I’ll try my best to make this sound exciting. Ahem, steel your nerves as you hesitantly edge around the precarious exterior, desperately trying to find a way into the fortress’s foreboding walls. Once inside, the horrors of the creepy crypts, the haunted regal ballroom and the mad museum await, their hideous inhabitants eager to welcome unwanted guests. There, not bad, eh? Almost makes you want to play it.[3]
- Player's Guide: The Kongs are one step away from K. Rool's lair, but before they can challenge the tyrant, they'll have to explore a spooky stone structure high atop the warship. Beware-a storm rages in the dark skies above and evil prowls the castle walls.[4]
Gallery[edit]
Exterior[edit]
Interior[edit]
Miscellaneous[edit]
Chunky Kong exploring the exterior of Creepy Castle
Names in other languages[edit]
| Language | Name | Meaning | Notes |
|---|---|---|---|
| Japanese | ゾゾゾ~キャッスル[?] Zozozo~ Kyassuru |
From「ゾゾゾ~」(zozozo~, Japanese onomatopoeia for fearsome laughter) and "castle" | |
| French | Château-Chocotte[?] | Scary Castle | |
| German | Kamikaze Kastell[?] | Kamikaze Castle | |
| Italian | Il Castello Spettrale[?] | The Spectral Castle | |
| Spanish | Castillo Canguelo[?] | Fear Castle |
Trivia[edit]
- The background music for Creepy Castle, as well as some of the dungeons, is an arrangement of the "Game Kaishi" theme from Donkey Kong, heard as Pauline is taken to the top of the construction site. This theme was composed for a Banjo-Kazooie level called "Prickly Pear Island," a level that was ultimately cut while the game was still known as "Project Dream".[5]
- The museum's background music has a sample of Bach's Toccata and Fugue. A similar sample can be heard in Banjo-Kazooie when entering the haunted church in Mad Monster Mansion. This snippet was also used in the arcade versions of Donkey Kong Jr.
- The piano part of this level's theme was composed by Grant Kirkhope before being employed by Rare. He then included it in the music for Creepy Castle, as he found it fit its theme.[6]
References[edit]
- ^ Bihldorff, Nate, Jason Leung, and Drew Williams (1999). Donkey Kong 64 Player's Guide. Nintendo of America (American English). Page 97.
- ^ "GO GRAVEROBBING: Deep inside the catacombs is a large coffin that could house only the corpse of some huge Kremling." – Bihldorff, Nate, Jason Leung, and Drew Williams (1999). Donkey Kong 64 Player's Guide. Nintendo of America (American English). Page 100.
- ^ 1999. Donkey Kong 64 instruction booklet. Nintendo of America (English). Page 21.
- ^ Bihldorff, Nate, Jason Leung, and Drew Williams (1999). Donkey Kong 64 Player's Guide. Nintendo of America (American English). Page 97.
- ^ Banjo-Kazooie. The Cutting Room Floor (English). Retrieved February 21, 2022.
- ^ DK Vine (December 11, 2019). The Kongversation - 734: Inteview: Grant Kirkhope (41:59). YouTube (English). Retrieved June 22, 2024.
