Construction Site Fight: Difference between revisions
mNo edit summary |
m (Text replacement - "(\| *)Jap([RMCN\d]* *=)" to "$1Jpn$2") |
||
| (43 intermediate revisions by 19 users not shown) | |||
| Line 1: | Line 1: | ||
{{ | {{level infobox | ||
|image=[[File:ConstructionSiteFight.png|160px]] | |||
|image=[[File: | |code=4-1 | ||
|code=4 - 1 | |world=[[Big Ape City]] | ||
|game=''[[Donkey Kong Land]] | |game=''[[Donkey Kong Land]] | ||
| | |track=Building Site | ||
|after=[[Kong Krazy|>>]] | |after=[[Kong Krazy|>>]] | ||
|before=[[Mad Mole Holes|<<]] | |before=[[Mad Mole Holes|<<]] | ||
}} | }} | ||
'''Construction Site Fight''' is the twenty-fourth level in | '''Construction Site Fight'''<ref>{{cite|language=en-us|publisher=Nintendo of America|date=1995|title=''Donkey Kong Land'' instruction booklet|page=19}}</ref> is the twenty-fourth level in ''[[Donkey Kong Land]]'' and the first level of [[Big Ape City]]. Construction Site Fight takes place around a series of skyscrapers, and it features [[balloon]] platforms that [[Donkey Kong]] and [[Diddy Kong]] must use to cross gaps between the buildings. The [[Kong]]s can easily fall off the balloons, which inflate and deflate as they rise and fall respectively. | ||
Despite the level's name, it does not take place in a construction site. The level is also filled with balloons, though the level's title does not make note of that as it normally would. However, another level, [[Balloon Barrage]], takes place in a construction site, and does not have balloons except for a [[Red Balloon|Life Balloon]] in a bonus stage. Because of this, the level names are incorrect, and should be switched around to match the correct description. Therefore, it was very likely that there was an error in the instruction booklet during the creation of ''Donkey Kong Land'', something that was not addressed in the digital manual for the [[Nintendo 3DS]] [[Virtual Console]] version. | |||
== | ==Layout== | ||
[[File:ConstructionSiteFight-2.png|thumb|left|Donkey Kong jumps to some bananas and a Kritter]] | |||
From the start of the level, the Kongs must ride up a balloon to break open a [[DK Barrel]]. They must walk on to the next balloon and ride it up to a high platform, where the Kongs will encounter a wide abyss. It will have to be crossed using the balloons floating around above it. After jumping to each balloon and getting across, they must jump down a few platforms and come up to another pit. Again, balloons should be used to cross it. Once the heroes jump off of the final balloon in this area, they will land on a tire to bounce off of and land farther through the level to another gap. Only one balloon is needed to get over this. When they are over the pit, the group must jump onto more balloon platforms and make it too a safe area, with only a few Gnawties. A few steps from there will lead the Kongs to yet another abyss. With balloons, it must be crossed. On the other end of this gap is the [[Continue Point]]. | From the start of the level, the Kongs must ride up a balloon to break open a [[DK Barrel]]. They must walk on to the next balloon and ride it up to a high platform, where the Kongs will encounter a wide abyss. It will have to be crossed using the balloons floating around above it. After jumping to each balloon and getting across, they must jump down a few platforms and come up to another pit. Again, balloons should be used to cross it. Once the heroes jump off of the final balloon in this area, they will land on a tire to bounce off of and land farther through the level to another gap. Only one balloon is needed to get over this. When they are over the pit, the group must jump onto more balloon platforms and make it too a safe area, with only a few Gnawties. A few steps from there will lead the Kongs to yet another abyss. With balloons, it must be crossed. On the other end of this gap is the [[Continue Point]]. | ||
From there, the Kongs must keep going east and hop atop several more balloons to cross a wide abyss. On the other side of the abyss, they must walk along a rather long path and soon come up to another gap. As usual, they will need to jump balloon-to-balloon, until they reach the next solid platform. There, they must defeat a Hogwash and hop over a small gap. The Kongs will then near yet another gap. With balloons, they will have to shoot upwards and get to a high ledge of a skyscraper. Walking along this path will take them to one of the level's final abysses. The Kongs must hop to many several balloons than before, and watch out for enemies to make it to the other end of the abyss. Shortly after landing, though, they will have to yet again jump to several balloons over a wide pit. Once they get over each of the balloons, they will be on a long area outside of a skyscraper. If they travel a little farther, they | From there, the Kongs must keep going east and hop atop several more balloons to cross a wide abyss. On the other side of the abyss, they must walk along a rather long path and soon come up to another gap. As usual, they will need to jump balloon-to-balloon, until they reach the next solid platform. There, they must defeat a Hogwash and hop over a small gap. The Kongs will then near yet another gap. With balloons, they will have to shoot upwards and get to a high ledge of a skyscraper. Walking along this path will take them to one of the level's final abysses. The Kongs must hop to many several balloons than before, and watch out for enemies to make it to the other end of the abyss. Shortly after landing, though, they will have to yet again jump to several balloons over a wide pit. Once they get over each of the balloons, they will be on a long area outside of a skyscraper. If they travel a little farther, they will find a portal. When they jump into it, it will take them to the [[Kong Krazy|next level]]. | ||
{{br}} | |||
==Enemies== | |||
*[[Army|Armies]] | |||
*[[Kritter]]s | |||
*[[Gnawty|Gnawties]] | |||
*[[Hogwash the Flying Pig|Hogwash]]es | |||
*[[Zinger]]s | |||
==Items and objects== | |||
The following items and objects appear in the following quantities: | |||
*[[DK Barrel]]s: 3 | |||
*[[Kong Token]]s: 18 | |||
===K-O-N-G Letters=== | |||
*K: Found between two balloon platforms. | |||
*O: Between a balloon and a building with two Gnawtys. | |||
*N: At the end of the second Bonus Level. | |||
*G: Above a Zinger, between two balloon platforms. | |||
==Bonus Areas== | |||
{{multiframe|[[File:ConstructionSiteFight-1.png]] [[File:ConstructionSiteFight-3.png]]|size=340|The first and second Bonus Areas respectively}} | |||
Construction Site Fight has two [[Bonus room|Bonus Areas]]: | |||
*When the Kongs start the level, they must jump on the first balloon. As it goes up, the Kongs must jump into a [[Blast Barrel]] on the left to be shot into the first Bonus Area. The area is similar to [[Track Attack]] because the Kongs must ride a small platform on a thin path within the clouds. As the platform moves around, the Kongs can jump at the 14 Kong Tokens hovering the air. Donkey Kong or Diddy must jump from several platforms to reach the end at the right, where a Blast Barrel blasts the Kongs back into the main level. | |||
*When the | *After the first Hogwash following the Continue Point, the Kongs must jump from a few balloons, go across a building, and then jump from a few more balloons. The Blast Barrel that leads to the second Bonus Area is located in midair, high above the third and fourth Barrel Cannons. The Bonus Area is similar to [[Sky High Caper]] because the Kongs must ride a platform which moves within a path and changes direction if the Kongs jump or if the platform hits a wall. The Kongs can collect four Kong Tokens along the way and the letter N just before the Blast Barrel that blasts them back into the main level. | ||
* | |||
==Gallery== | |||
<gallery> | |||
Construction Site Fight.png|The letter K | |||
ConstructionSiteFight-O.png|The letter O | |||
ConstructionSiteFight-G.png|The letter G | |||
</gallery> | |||
==Names in other languages== | ==Names in other languages== | ||
{{foreign names | {{foreign names | ||
| | |Jpn=バルーン・リフト | ||
| | |JpnR=Barūn Rifuto | ||
| | |JpnM=Balloon Lift | ||
|Spa=Bombardeo de globos | |Spa=Bombardeo de globos | ||
|SpaM=Balloon barrage}} | |SpaM=Balloon barrage | ||
|Ita=Il combattimento nel cantiere<ref>{{cite|title=''[[Donkey Kong Land]]'' Italian booklet|page=19}}</ref> | |||
|ItaM=Fight on the countruction site | |||
}} | |||
==References== | |||
<references/> | |||
{{DKL}} | {{DKL}} | ||
[[Category: | [[Category:Cities]] | ||
[[Category:Donkey Kong Land | [[Category:Donkey Kong Land levels]] | ||
Latest revision as of 11:00, January 7, 2025
| Level | |
|---|---|
| Construction Site Fight | |
| |
| Level code | 4-1 |
| World | Big Ape City |
| Game | Donkey Kong Land |
| Music track | Building Site |
| << Directory of levels >> | |
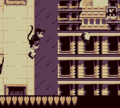
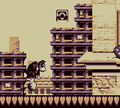
Construction Site Fight[1] is the twenty-fourth level in Donkey Kong Land and the first level of Big Ape City. Construction Site Fight takes place around a series of skyscrapers, and it features balloon platforms that Donkey Kong and Diddy Kong must use to cross gaps between the buildings. The Kongs can easily fall off the balloons, which inflate and deflate as they rise and fall respectively.
Despite the level's name, it does not take place in a construction site. The level is also filled with balloons, though the level's title does not make note of that as it normally would. However, another level, Balloon Barrage, takes place in a construction site, and does not have balloons except for a Life Balloon in a bonus stage. Because of this, the level names are incorrect, and should be switched around to match the correct description. Therefore, it was very likely that there was an error in the instruction booklet during the creation of Donkey Kong Land, something that was not addressed in the digital manual for the Nintendo 3DS Virtual Console version.
Layout[edit]
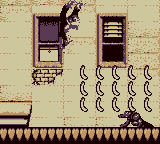
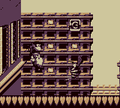
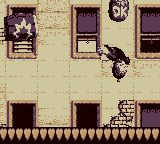
From the start of the level, the Kongs must ride up a balloon to break open a DK Barrel. They must walk on to the next balloon and ride it up to a high platform, where the Kongs will encounter a wide abyss. It will have to be crossed using the balloons floating around above it. After jumping to each balloon and getting across, they must jump down a few platforms and come up to another pit. Again, balloons should be used to cross it. Once the heroes jump off of the final balloon in this area, they will land on a tire to bounce off of and land farther through the level to another gap. Only one balloon is needed to get over this. When they are over the pit, the group must jump onto more balloon platforms and make it too a safe area, with only a few Gnawties. A few steps from there will lead the Kongs to yet another abyss. With balloons, it must be crossed. On the other end of this gap is the Continue Point.
From there, the Kongs must keep going east and hop atop several more balloons to cross a wide abyss. On the other side of the abyss, they must walk along a rather long path and soon come up to another gap. As usual, they will need to jump balloon-to-balloon, until they reach the next solid platform. There, they must defeat a Hogwash and hop over a small gap. The Kongs will then near yet another gap. With balloons, they will have to shoot upwards and get to a high ledge of a skyscraper. Walking along this path will take them to one of the level's final abysses. The Kongs must hop to many several balloons than before, and watch out for enemies to make it to the other end of the abyss. Shortly after landing, though, they will have to yet again jump to several balloons over a wide pit. Once they get over each of the balloons, they will be on a long area outside of a skyscraper. If they travel a little farther, they will find a portal. When they jump into it, it will take them to the next level.
Enemies[edit]
Items and objects[edit]
The following items and objects appear in the following quantities:
- DK Barrels: 3
- Kong Tokens: 18
K-O-N-G Letters[edit]
- K: Found between two balloon platforms.
- O: Between a balloon and a building with two Gnawtys.
- N: At the end of the second Bonus Level.
- G: Above a Zinger, between two balloon platforms.
Bonus Areas[edit]
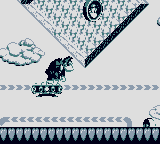
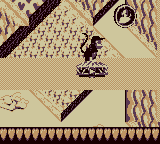
Construction Site Fight has two Bonus Areas:
- When the Kongs start the level, they must jump on the first balloon. As it goes up, the Kongs must jump into a Blast Barrel on the left to be shot into the first Bonus Area. The area is similar to Track Attack because the Kongs must ride a small platform on a thin path within the clouds. As the platform moves around, the Kongs can jump at the 14 Kong Tokens hovering the air. Donkey Kong or Diddy must jump from several platforms to reach the end at the right, where a Blast Barrel blasts the Kongs back into the main level.
- After the first Hogwash following the Continue Point, the Kongs must jump from a few balloons, go across a building, and then jump from a few more balloons. The Blast Barrel that leads to the second Bonus Area is located in midair, high above the third and fourth Barrel Cannons. The Bonus Area is similar to Sky High Caper because the Kongs must ride a platform which moves within a path and changes direction if the Kongs jump or if the platform hits a wall. The Kongs can collect four Kong Tokens along the way and the letter N just before the Blast Barrel that blasts them back into the main level.
Gallery[edit]
Names in other languages[edit]
| Language | Name | Meaning | Notes |
|---|---|---|---|
| Japanese | バルーン・リフト[?] Barūn Rifuto |
Balloon Lift | |
| Italian | Il combattimento nel cantiere[2] | Fight on the countruction site | |
| Spanish | Bombardeo de globos[?] | Balloon barrage |
References[edit]
- ^ 1995. Donkey Kong Land instruction booklet. Nintendo of America (American English). Page 19.
- ^ Donkey Kong Land Italian booklet. Page 19.
