|
|
| (39 intermediate revisions by 17 users not shown) |
| Line 1: |
Line 1: |
| {{worldbox | | {{world infobox |
| |title=World A | | |title=World A |
| |image=[[File:WorldA-4SMBTheLostLevelsEnding.png]] | | |image=[[File:SMAS LL World-A In Another Castle.png]] |
| |app=''[[Super Mario Bros.: The Lost Levels]]'' | | |game=''[[Super Mario Bros.: The Lost Levels]]'' |
| |lev=4 | | |levels=4 |
| |before=[[World 8 (Super Mario Bros.: The Lost Levels)|<]][[World 9 (Super Mario Bros.: The Lost Levels)|<]] | | |before=[[World 8 (Super Mario Bros.: The Lost Levels)|<]][[World 9 (Super Mario Bros.: The Lost Levels)|<]] |
| |after=[[World B|>>]] | | |after=[[World B|>>]] |
| }} | | }} |
| '''World A''' is the second secret world and the tenth world that was first featured in the game ''[[Super Mario Bros.: The Lost Levels]]'', coming after [[World 9 (Super Mario Bros.: The Lost Levels)|World 9]]. The [[Koopa Troopa]]s from this world on move faster than the normal ones. | | '''World A''' is the second secret world and the tenth world that was first featured in the game ''[[Super Mario Bros.: The Lost Levels]]'', coming after [[World 9 (Super Mario Bros.: The Lost Levels)|World 9]]. World A can be accessed by beating the game eight times and then pressing the Start button while holding down the A button on the title screen ({{button|gba|B}} in the ''Famicom Mini'' release) in order to access World A, and in turn the other later worlds. However, in the ''[[Super Mario All-Stars]]'' version of the game, the player proceeds to the later worlds directly after completing World 8 (or World 9 if the player accesses it by beating Worlds 1 to 8 without using warp pipes). World A and later worlds were left unused in the ''[[Super Mario Bros. Deluxe]]'' version of the game. |
|
| |
|
| In the Famicom Disk System version of ''Super Mario Bros. 2'', the player must beat the game eight consecutive times and hold down the A button on the title screen in order to access World A, and in turn the other later worlds. In the ''Famicom Mini'' version for the Game Boy Advance, this was changed so that the B button must be held instead of the A button. However, in the ''[[Super Mario All-Stars]]'' version of the game, the player simply has to beat World 9 in order to access the later worlds unless they use warping to avoid access to World 9. World 9 and the later worlds were left unused in the ''[[Super Mario Bros. Deluxe]]'' version of the game.
| | ==Levels== |
| | | {{content description |
| ==Level information== | | |name1=[[World A-1]] |
| {| style="text-align: center; width: 100%; margin: 0 auto 10px auto; border-collapse: collapse; font-family:Arial;" border="1" cellpadding="1" cellspacing="1" | | |image1=[[File:SMAS LL World A-1 Title Card.png]] |
| |-style="background: #ABC;" | | |description1=The first level of World A has several [[Koopa Troopa]]s, [[Koopa Paratroopa]]s, [[Hammer Bro]]s., and [[Piranha Plant]]s. |
| !width="5%"|Level
| | |name2=[[World A-2]] |
| !width="1%"|Preview
| | |image2=[[File:SMAS LL World A-2 Title Card.png]] |
| !width="20%"|Description
| | |description2=The second level of World A is an underground area with many small platforms and narrow passages. |
| |-
| | |name3=[[World A-3]] |
| |[[World A-1]]
| | |image3=[[File:SMAS LL World A-3 Title Card.png]] |
| |style="background: #202020" |[[File:World A-1.PNG]] | | |description3=The third level of World A takes place in the sky with long platforms and jumping [[Cheep Cheep]]s. |
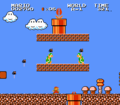
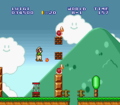
| |The player starts off at a place with eight [[? Block]]s with [[Koopa Troopa]]s on them, and a [[Koopa Paratroopa]] on the ground. If the player jumps in between the gap of the second row of ? Blocks, a power-up will pop out of it. Now the player will see [[Brick Block]]s with three Koopa Troopas walking on them. If the player were to hit the Brick Block on the topmost right, a [[Beanstalk|vine]] will pop out of it, leading to a [[Coin Heaven]] room. The player will see two [[Warp Pipe]]s with [[Piranha Plant|Red Piranha Plant]]s in them. Also, the Brick Block floating high in the air contains a [[1-Up Mushroom|1-Up]]. Now, the player will see many ? Blocks, along with two [[Hammer Bro]]s. trying to attack the player. One of the ? Blocks contain a [[Poison Mushroom]], while the others contain [[coin]]s. Now the player will see rows of Brick Blocks with Koopa Troopas walking on them. If the player kicks the Red Koopa Troopa at the top first, and runs along with it so it stays at the screen, they shall get a 1-Up. Here is another pipe with a Red Piranha Plant in it, along with a couple more ? Blocks with coins and another Poison Mushroom. Hammer Bros. are also seen in this area, along with more Red Piranha Plants. If the player goes in the one atop the Brick Blocks, they will be in a Bonus Room. A Koopa Paratroopa will appear, and the player will see coins along with a pipe and Brick Blocks that are only accessible if the player took the Bonus Room route. The player will then see two pipes facing each other here, and both of them have Red Piranha Plants in them. Some Koopa Troopas can be seen here, and two Brick Blocks, the bottom one containing a multiple coin block, along with a [[Trampoline]]. The player will see [[Block]]s with Koopa Troopas walking on them, along with a platform that will fall if the player is standing on it. The [[Flagpole]] can be seen here. Slide down it to gain access to World A-2. In the SNES remake, an image displaying a Green Koopa Troopa, a Red Koopa Troopa, a Green Koopa Paratroopa, and a Red Koopa Paratroopa is shown before the level starts. However, that image is missing a Hammer Bro, and the Red Koopa Paratroopa never appeared in this level at all. | | |name4=[[World A-4]] |
| |- | | |image4=[[File:SMAS Bowser Title Card.png]] |
| |[[World A-2]]
| | |description4=The final level of World A is a [[castle]] with small platforms and fire enemies. |
| |style="background: #202020" |[[File:World A-2LL.PNG]] | | }} |
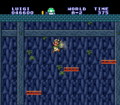
| |The player will start off from the overworld, and go down a pipe to an underground area. The player will see a trampoline, the Brick Block right over it contains a 1-Up. The player will also see some platforms that will fall down the longer the player stands on them. The player will see a row of Brick Blocks, one of them containing a power-up. Now a moving platform can be seen, along with pipes on the ground infested with Piranha Plants. A staircase of blocks can be seen. If the player wants to go to the [[Warp Zone]], then it is recommended for the player to break the Brick Blocks and head on toward the lone pipe leading to [[World B]]. The player will see a platform that will fall, and then Brick Blocks with pipes infested with Piranha Plants. The player will see a Hammer Bro here, along with two [[Bill Blaster]]s. The player will advance, finding a pipe with a lone Piranha Plant, and a pipe leading to the exit. The player will climb up the stack of blocks, slide down the Flagpole, and clear the level. They will now have access to World A-3. | |
| |- | |
| |[[World A-3]]
| |
| |style="background: #202020" |[[File:World A-3LL.PNG]] | |
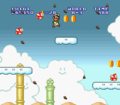
| |This level will use clouds as platforms, have strong wind, and will have flying [[Cheep Cheep]]s as well. The player should keep running while collecting coins. They will now see a [[Blooper]], along with some more coins, and then a Koopa Paratroopa that will go horizontally. After that, some more coins and another Koopa Paratroopa going vertically can be seen. A trampoline with the Flagpole, and another vertical flying Koopa Paratroopa can be seen. Slide down the Flagpole to gain access to World A-4. Or, the player can use the trampoline to jump over the Flagpole, and run towards the end. There will be a Warp Pipe leading to [[World C]]. | |
| {{br}}
| |
| |-
| |
| |[[World A-4]] | |
| |style="background: #202020" |[[File:World 1-4.PNG]] | |
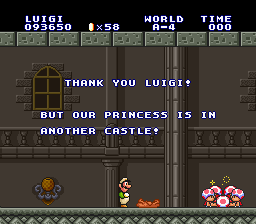
| |The player will start off and see two small [[Fire Bar]]s and a large one along with a [[Lava Bubble]] that will move faster than usual. The ? Block over here will contain a power-up. The player will see some more lava with two more Fire Bars. A staircase can be seen here, and at the ledge right after it, a Koopa Troopa will walk by the player. The player will see small stone blocks going down the lava, splitting it into sections in which Lava Bubbles are jumping about. The player will cautiously advance forward, and then find a [[Bill Blaster]] hanging from the wall. The player will see yet another Bill Blaster, this time on the ground. The [[Bowser Impostor]] will start shooting fireballs at the player now. The player will then see one final Bill Blaster, with a bed of lava for them to cross. Then a small staircase leading to the fight with the Bowser Impostor will appear. The Bowser Impostor will breathe fire in the original version, but in ''All-Stars'', he throws hammers instead. Defeating this impostor will reveal it to be either a Goomba (original) or a Red Koopa Troopa (''All-Stars''). The player will then rescue the [[Toad (species)|Toad]], but the princess isn't in this castle. The player will now have access to World B-1. | |
| |}
| |
|
| |
|
| ==Gallery== | | ==Gallery== |
| ==Level maps== | | ===Level maps=== |
| <gallery widths="500px" heights="40px"> | | <gallery widths="500px" heights="40px"> |
| SuperMarioBros2jMapA-1.png|World A-1
| | NES LL World A-1 Map.png|World A-1 |
| World A-2.png|World A-2 | | NES LL World A-2 Map.png|World A-2 |
| World A-3.png|World A-3 | | NES LL World A-3 Map.png|World A-3 |
| World A-4.png|World A-4 | | NES LL World A-4 Map.png|World A-4 |
| </gallery> | | </gallery> |
|
| |
|
| ===Screenshots=== | | ===Screenshots=== |
| <gallery> | | <gallery> |
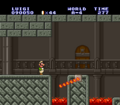
| WorldA-1SMBTheLostLevels.png|[[Luigi]] and some Koopa Troopas in World A-1.
| | SMBLL World A-1 Screenshot.png|World A-1 (original) |
| WorldA-2SMBTheLostLevels.png|A 1-Up moving along the bricks while Luigi is trying to get it in World A-2.
| | SMAS LL World A-1 Screenshot.png|World A-1 (''All-Stars'') |
| WorldA-3SMBTheLostLevels.png|Cheep Cheeps along with the heavy wind while Luigi is collecting coins in World A-3.
| | SMAS LL World A-2 Screenshot.png|World A-2 |
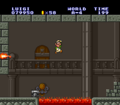
| FirebarWorldA4.png|[[Fire Bar]] in {{world|A|4}}. | | SMAS LL World A-3 Screenshot.png|World A-3 |
| WorldA-4SMBTheLostLevels.png|Luigi jumping over the bed of lava right before the fight with the Bowser Impostor in World A-4.
| | FirebarWorldA4.png|World A-4 |
| | SMAS LL World A-4 Screenshot.png|World A-4 |
| </gallery> | | </gallery> |
| | |
| | {{SMBTLL levels}} |
| {{SMB}} | | {{SMB}} |
| [[Category:Places]]
| |
| [[Category:Levels]]
| |
| [[Category:Worlds]]
| |
| [[Category:Grasslands]] | | [[Category:Grasslands]] |
| [[Category:Sky Locations]] | | [[Category:Sky areas]] |
| [[Category:Secret Areas]] | | [[Category:Secret areas]] |
| [[Category:Unlockables]]
| | [[Category:Super Mario Bros.: The Lost Levels worlds]] |
| [[Category:Super Mario Bros.: The Lost Levels]] | |
![]() in the Famicom Mini release) in order to access World A, and in turn the other later worlds. However, in the Super Mario All-Stars version of the game, the player proceeds to the later worlds directly after completing World 8 (or World 9 if the player accesses it by beating Worlds 1 to 8 without using warp pipes). World A and later worlds were left unused in the Super Mario Bros. Deluxe version of the game.
in the Famicom Mini release) in order to access World A, and in turn the other later worlds. However, in the Super Mario All-Stars version of the game, the player proceeds to the later worlds directly after completing World 8 (or World 9 if the player accesses it by beating Worlds 1 to 8 without using warp pipes). World A and later worlds were left unused in the Super Mario Bros. Deluxe version of the game.


