Savannah Valley: Difference between revisions
m (Robot: Removing template: BoxTop) |
m (Text replacement - "(\| *)Jap([RMCN\d]* *=)" to "$1Jpn$2") |
||
| (25 intermediate revisions by 11 users not shown) | |||
| Line 1: | Line 1: | ||
{{level | {{level infobox | ||
|title=Savannah Valley | |title=Savannah Valley | ||
|image=[[File:SavannahValley.png|275px]] | |image=[[File:SavannahValley.png|275px]] | ||
|code=2-4 | |code=2-4 | ||
|game=''[[Wario Land: Shake It!]]'' | |game=''[[Wario Land: Shake It!]]'' | ||
|track=Savannah Valley (before freeing Merfle)<br>Lowdown Depths (after freeing Merfle) | |||
|before=[[Mt. Lava Lava|<<]] | |before=[[Mt. Lava Lava|<<]] | ||
|after=[[ | |after=[[Hot Roderick Race|>>]] | ||
}} | }} | ||
{{quote|This is Savannah Valley. This one could be tough.|[[Merfle|Turquoise Merfle]]|Wario Land: Shake It!}} | |||
'''Savannah Valley''' is the fourth level of [[Wiggly Wilds]] in ''[[Wario Land: Shake It!]]'' | '''Savannah Valley''' is the fourth level of [[Wiggly Wilds]] in ''[[Wario Land: Shake It!]]'' | ||
The level begins with [[Wario]] entering a large cave. Inside, there are many bars that he can swing on to reach higher areas of the cave. In fact, the whole cave is filled with these swing bars, and it is also filled with [[coin]]s | ==Layout== | ||
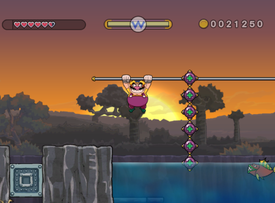
The stage takes place at an Africa-like plain with the sunrise shown in the background. The level begins with [[Wario]] entering a large cave. Inside, there are many bars that he can swing on to reach higher areas of the cave. In fact, the whole cave is filled with these swing bars, and it is also filled with [[coin]]s. The golden enemy, a [[Floating Bandinero]], hides in the corner. Upon finally exiting the cave, Wario will be in grassy plains and take a platform to a higher cliff. Here, Wario will move across a bar while watching out for [[Bomb (object)|bombs]]. Wario will later enter another cave where he will meet a [[Merfle Barrel|caged]] [[Merfle]]. When freeing him, an alarm will go off, making Wario run to the beginning of the level and finishing it. | |||
This is the only level in ''Wario Land: Shake It!'' where a coin can be found hidden underwater; however, a [[diamond]] here only grants Wario 10,000 coins, like all other diamonds in the game | |||
==Missions== | ==Missions== | ||
{{image|more=yes|section=yes|Each mission has an icon associated. They should be uploaded and added to this section.}} | |||
[[File:WLSI Savannah Valley golden enemy.png|thumb|275px|Wario near the level's golden enemy]] | |||
This is one of the two levels with five missions where Wario can complete them all in a single visit, the other one being [[Airytale Castle]]. | |||
{{WLSI missions table | |||
|icon1=[[File:No image.png|18px]] | |||
|mission1=''Finish before the clock hits 2:40:00'' | |||
|icon2=[[File:No image.png|18px]] | |||
|mission2=''Beat the stage without taking damage'' | |||
|icon3=[[File:No image.png|18px]] | |||
|mission3=''Collect 46,000 [[coin]]s'' | |||
|icon4=[[File:No image.png|18px]] | |||
|mission4=''Defeat the golden enemy'' | |||
|icon5=[[File:No image.png|18px]] | |||
|mission5=''Break all [[Stone Block|stone block]]s'' | |||
}} | |||
==Enemies== | |||
*[[Bandinero]] (red, yellow and white) | |||
*[[Bumbleprod]] | |||
*[[Floating Bandinero]] (blue and gold) | |||
*Electric Orbs (blue and purple) | |||
*[[Grunchin]] (red) | |||
*[[Nosedozer]] | |||
*[[Pitchfork]] (blue and purple) | |||
*[[Scarracuda]] (red) | |||
*[[Shortfuse]] | |||
*[[Spinbat]] | |||
*[[Turkeyjerk]] (green) | |||
==Treasures== | |||
{|class="wikitable"style="text-align:center" | |||
|- | |||
!width="5%"|Chest location | |||
!width="5%"|Treasure | |||
!width="15%"|NTSC-U description | |||
!width="15%"|PAL description | |||
|- | |||
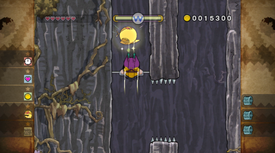
|[[File:WLSI Savannah Valley chest1.png|200px]] | |||
|[[File:WLSItreasure31.png|55px]]<br>Hypno-Specs<br><small>Hypno-Spex</small> | |||
|align=left|''Hypnotize your friends! Hypnotize your enemies! Basically, just hypnotize everybody!'' | |||
|align=left|''Hypnotise your friends! Hypnotise your enemies! Just hypnotise everybody, basically.'' | |||
|- | |||
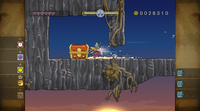
|[[File:WLSI Savannah Valley chest2.png|200px]] | |||
|[[File:WLSItreasure32.png|55px]]<br>Diamond Ski Mask<br><small>Diamond Balaclava</small> | |||
|align=left|''You know what the problem with ski masks is? Too many eye holes, not enough diamonds.'' | |||
|align=left|''You know what the problem with balaclavas is? Too many eye holes, not enough diamonds.'' | |||
|- | |||
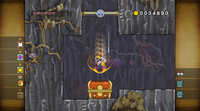
|[[File:WLSI Savannah Valley chest3.png|200px]] | |||
|[[File:WLSItreasure33.png|55px]]<br>Solid-Gold Shuttlecock<br><small>Golden Shuttlecock</small> | |||
|colspan=2 align=left|''Play badminton the way the wealthiest emperors play it. You're worth it.'' | |||
|} | |||
==Data== | |||
{{WLSI level data | |||
|time=4:00:00 | |||
|coins=54,090 | |||
}} | |||
==Names in other languages== | ==Names in other languages== | ||
{{ | {{foreign names| | ||
| | |Jpn=ハーゲンへいげん | ||
| | |JpnR=Hāgen heigen | ||
| | |JpnM=Häagen Plains | ||
|Ger=Wirbelsavanne | |||
|Ita=Val Savana | |||
|ItaM=Savana Valley | |||
|Fre=Panne dans la Savanne | |||
|FreM=Breakdown in the Savannah | |||
}} | |||
{{WLSI}} | {{WLSI}} | ||
[[Category:Wario Land: Shake It! | [[Category:Grasslands]] | ||
[[Category:Wario Land: Shake It! levels]] | |||
Latest revision as of 15:52, January 7, 2025
| Level | |
|---|---|
| Savannah Valley | |
| |
| Level code | 2-4 |
| Game | Wario Land: Shake It! |
| Music track | Savannah Valley (before freeing Merfle) Lowdown Depths (after freeing Merfle) |
| << Directory of levels >> | |
- “This is Savannah Valley. This one could be tough.”
- —Turquoise Merfle, Wario Land: Shake It!
Savannah Valley is the fourth level of Wiggly Wilds in Wario Land: Shake It!
Layout[edit]
The stage takes place at an Africa-like plain with the sunrise shown in the background. The level begins with Wario entering a large cave. Inside, there are many bars that he can swing on to reach higher areas of the cave. In fact, the whole cave is filled with these swing bars, and it is also filled with coins. The golden enemy, a Floating Bandinero, hides in the corner. Upon finally exiting the cave, Wario will be in grassy plains and take a platform to a higher cliff. Here, Wario will move across a bar while watching out for bombs. Wario will later enter another cave where he will meet a caged Merfle. When freeing him, an alarm will go off, making Wario run to the beginning of the level and finishing it.
This is the only level in Wario Land: Shake It! where a coin can be found hidden underwater; however, a diamond here only grants Wario 10,000 coins, like all other diamonds in the game
Missions[edit]
It has been requested that more images be uploaded for this section. Remove this notice only after the additional images have been added. Specifics: Each mission has an icon associated. They should be uploaded and added to this section.
This is one of the two levels with five missions where Wario can complete them all in a single visit, the other one being Airytale Castle.
| Icon | Mission
|
|---|---|
| Finish before the clock hits 2:40:00 | |
| Beat the stage without taking damage | |
| Collect 46,000 coins | |
| Defeat the golden enemy | |
| Break all stone blocks |
Enemies[edit]
- Bandinero (red, yellow and white)
- Bumbleprod
- Floating Bandinero (blue and gold)
- Electric Orbs (blue and purple)
- Grunchin (red)
- Nosedozer
- Pitchfork (blue and purple)
- Scarracuda (red)
- Shortfuse
- Spinbat
- Turkeyjerk (green)
Treasures[edit]
Data[edit]
| Given time | Sum of coins |
|---|---|
| 4:00:00 | 54,090 |
Names in other languages[edit]
| Language | Name | Meaning | Notes |
|---|---|---|---|
| Japanese | ハーゲンへいげん[?] Hāgen heigen |
Häagen Plains | |
| French | Panne dans la Savanne[?] | Breakdown in the Savannah | |
| German | Wirbelsavanne[?] | - | |
| Italian | Val Savana[?] | Savana Valley |
