Bowser's Galaxy Generator: Difference between revisions
m (Bot: Automated text replacement (-<br clear=all> +{{br}})) |
Waluigi Time (talk | contribs) No edit summary |
||
| (111 intermediate revisions by 60 users not shown) | |||
| Line 1: | Line 1: | ||
{{ | {{course infobox | ||
|image=[[File:Bowser's_Galaxy_Generator.png|250px]] | |image=[[File:Bowser's_Galaxy_Generator.png|250px]] | ||
|area=[[World 6 (Super Mario Galaxy 2)|World 6]] | |area=[[World 6 (Super Mario Galaxy 2)|World 6]] | ||
|boss=[[ | |boss=[[Bowser]] | ||
| | |comets=[[Prankster Comet#Speedy Comet|Speedy Comet]]<br>[[Prankster Comet#Green Comet|Green Comet]] | ||
| | |missions=[[Bowser's Fortified Fortress]]<br>[[Bowser's Big Bad Speed Run]]<br>[[#Green Star 1|Green Star 1]]<br>[[#Green Star 2|Green Star 2]] | ||
|stars=[[File:Smg2_icon_grandstar.png|20px]][[File:Smg2_icon_prankstercomet.png|20px]][[File:Smg2_icon_greencomet.png|20px]][[File:Smg2_icon_greencomet.png|20px]] | |stars=[[File:Smg2_icon_grandstar.png|20px]][[File:Smg2_icon_prankstercomet.png|20px]][[File:Smg2_icon_greencomet.png|20px]][[File:Smg2_icon_greencomet.png|20px]] | ||
|unlock=Get 70 [[Power Star]]s, including one from either [[Battle Belt Galaxy]] or [[Slimy Spring Galaxy]] | |unlock=Get 70 [[Power Star]]s, including one from either [[Battle Belt Galaxy]] or [[Slimy Spring Galaxy]] | ||
|icon=A gigantic, fortress-like version of [[Bowser]]'s head, that looks like Bowser's adaptation of [[Starship Mario]] | |icon=A gigantic, fortress-like version of [[Bowser]]'s head, that looks like Bowser's adaptation of [[Starship Mario]] | ||
|more=[[Slimy Spring Galaxy|<<]] [[Mario Squared Galaxy|>>]] | |||
}} | }} | ||
{{quote| | {{distinguish|Bowser's Galaxy Reactor}} | ||
{{quote|GAH! Give it up already! Why won't [[Mario|you]] stop trying to mess up my awesome master plan?! I'm building my new galactic empire right here! And you can't stop me! Why don't you just run off and find some [[Warp Pipe|green pipe]] to hide in?! Can't you see that I'm busy here?! I don't have time to chat, so let's cut this short... Shorty!|Bowser|Super Mario Galaxy 2}} | |||
'''Bowser's Galaxy Generator''' is a [[galaxy]] in the game ''[[Super Mario Galaxy 2]]''. It is located in [[World 6 (Super Mario Galaxy 2)|World 6]] and is the last galaxy of this world. [[Bowser]] is fought here for the final time. The entire galaxy appears to take place inside a giant, foggy hallway; this is likely somewhere inside the giant Bowser head that forms the galaxy's exterior. | |||
The galaxy uses elements from every part of the game, such as [[Snake Block]]s and the [[Spin Drill]]. [[Yoshi]] will also be needed to bypass certain obstacles, but he cannot be used in the final battle (without the use of [[List of Super Mario Galaxy 2 glitches#Yoshi's infinite Flutter Jump|glitches]]). | |||
The | The power-ups found here are the [[Cloud Flower]], [[Blimp Fruit]], [[Spin Drill]], and [[Dash Pepper]]. The galaxy has many obstacles such as lava and electricity. Common enemies here include [[Magikoopa]]s, [[Bomber Bill|Banzai Bill]]s, [[Hammer Bro]]s., [[Boomerang Bro]]s., and [[Magmaargh]]s. | ||
The | The [[Prankster Comet]] for this galaxy is the Speedy Comet. This Speedy Comet requires the player to reach the Star before time expires. There are [[+ Clock]]s that will increase the player's time limit, and Bowser is not present. | ||
An arrangement of the music can be heard in ''[[Mario & Sonic at the Sochi 2014 Olympic Winter Games]]''. The music and the final boss theme, "Fated Battle", also appear as selectable songs in the [[Mario Galaxy (stage)|Mario Galaxy]] stage in ''[[Super Smash Bros. for Wii U]]'' and ''[[Super Smash Bros. Ultimate]]''. | |||
==Planets/Areas== | |||
==Planets== | {{conjecture|subsections=yes}} | ||
=== | [[File:SMG2 Bowser eating Comet.png|thumb|200px|Bowser eating [[Comet Observatory|a comet]] to grow even bigger]] | ||
[[File:Life Shroom | ===Starting Planet=== | ||
A small planet that resembles the platforms in the Bowser levels of the [[Super Mario Galaxy|first game]]. Once Mario lands on this planet, a [[Luma]] | [[File:Life Shroom Pole.png|200px|thumb|left|Mario about to get a Life Mushroom]] | ||
A small planet that resembles the platforms in the Bowser levels of the [[Super Mario Galaxy|first game]]. Once Mario lands on this planet, a [[Luma]] leads Mario down a path and change into a [[Launch Star]]. However, if Mario chooses another route and climbs to the top of a pole, he obtains a [[Life Mushroom]]. Note that the [[#Large Door Planet|Large Door Planet]] is almost directly under the planet a long way down. | |||
{{br}} | {{br}} | ||
=== | ===Platform Planet=== | ||
[[File:SMG2 Platform Planet.png|thumb | [[File:SMG2 Platform Planet.png|thumb|200px|The {{conjectural|Platform Planet|planet}}]] | ||
A small platform occupied by three [[Hammer Bro]]s. The player must defeat them to reveal the [[Floaty Fluff]] to sail down the Volcanic Planet, although it is not actually needed to get down safely since the player can touch a wall of lava and use this momentum to fall to the bottom safely. During the speed run, the Hammer Bros. are replaced by two [[Boomerang Bro]]s. The Platform Planet is actually separate from the Volcanic Planet. | A small platform occupied by three [[Hammer Bro]]s. The player must defeat them to reveal the [[Fluff (object)|Floaty Fluff]] to sail down the Volcanic Planet, although it is not actually needed to get down safely since the player can touch a wall of lava and use this momentum to fall to the bottom safely. During the speed run, the Hammer Bros. are replaced by two [[Boomerang Bro]]s. The Platform Planet is actually separate from the Volcanic Planet. | ||
{{br}} | {{br}} | ||
=== | ===Volcanic Planet=== | ||
[[File:BowserGalaxyGenerator-VolcanicPlanet.png|200px|left|thumb|Mario flying over lava with a Floaty Fluff | [[File:BowserGalaxyGenerator-VolcanicPlanet.png|200px|left|thumb|Mario flying over [[lava]] with a Floaty Fluff]] | ||
A planet made out of lava waterfalls that come out of volcanoes. Fireballs come out of torches, and Mario can fly using the [[Floaty Fluff]] found in the previous planet until he reaches the bottom or he can touch a wall of lava and use this momentum to fall to the bottom safely and avoid the fireballs until he gets to the bottom, where he can use a [[Drill]] to exit the planet. | A planet made out of [[lava]] waterfalls that come out of volcanoes. Fireballs come out of torches, and Mario can fly using the [[Fluff (object)|Floaty Fluff]] found in the previous planet until he reaches the bottom or he can touch a wall of lava and use this momentum to fall to the bottom safely and avoid the fireballs until he gets to the bottom, where he can use a [[Spin Drill]] to exit the planet. | ||
{{br}} | {{br}} | ||
=== | ===[[Bomber Bill|Banzai Bill]] Planet=== | ||
[[File:BowserGalaxyGenerator-BanzaiBillPlanet.png|200px | [[File:BowserGalaxyGenerator-BanzaiBillPlanet.png|200px|thumb|Mario in front of a [[Bomber Bill|Banzai Bill]]]] | ||
A cylindrical planet surrounded by lava. There are several [[Banzai Bill Cannon]]s here, and Mario can use the Spin Drill to go through the dirt and access other areas of the planet while avoiding the many Banzai | [[File:SMG2 Galaxy Generator Shortcut.png|200px|thumb|left|Mario taking a shortcut.]] | ||
A cylindrical planet surrounded by lava. There are several [[Banzai Bill Cannon]]s here, and Mario can use the Spin Drill to go through the dirt and access other areas of the planet while avoiding the many [[Bomber Bill|Banzai Bill]]s and lava; however, he can save much more time if he ditches the spin drill and backflips on to the Banzai Bill Cannon then long jumps to the [[Launch Star]] at the end. Also, during the [[Prankster Comet]] mission, the Banzai Bills are replaced by [[Octoomba]]s. | |||
{{br}} | {{br}} | ||
=== | ===Lava Castle Planet=== | ||
[[File:BowserGalaxyGenerator-CastleTowerPlanet.png|200px|thumb|left|Cloud Mario avoiding bullet bills and creating clouds.]] | [[File:BowserGalaxyGenerator-CastleTowerPlanet.png|200px|thumb|left|Cloud Mario avoiding bullet bills and creating clouds]] | ||
In this sidescroller planet are several platforms that spin around, [[Bullet Bill]]s and also [[Cloud Flower]]s. There is lava at the top and bottom of the planet. At the end is a Launch Star. There is a glitch | [[File:SMG2 Lava Castle.png|200px|thumb|Mario flying to the planet.]] | ||
In this sidescroller planet are several platforms that spin around, [[Bullet Bill]]s and also [[Cloud Flower]]s. There is lava at the top and bottom of the planet. At the end is a Launch Star. There is a glitch that allows the player to infinitely circle this planet which is shown below. During the prankster comet mission, the Bullet Bills are not present. Also, on the top of the planet, there will be a small area barely tall enough for Mario and Luigi. The area is filled with [[coin]]s and a [[1-Up Mushroom]] and leads to the Luma that turns into the Launch Star. This can be a shortcut. | |||
{{br}} | {{br}} | ||
=== | ===[[Yoshi]] Bridge Planet=== | ||
[[File:BowserGalaxyGenerator-BridgePlanet.png|200px|thumb | [[File:BowserGalaxyGenerator-BridgePlanet.png|200px|thumb|Cloud Mario crossing the bridge]] | ||
A planet with a wooden bridge where a [[Magikoopa]] is found. There is also a platform that tilts according to Mario's current position on it. Yoshi's Egg is found on the right side, and the Yoshi can use the flower grapples on the left side to reach the next planet. | A planet with a wooden bridge where a [[Magikoopa]] is found. There is also a platform that tilts according to Mario's current position on it. [[Yoshi's Egg]] is found on the right side, and the [[Yoshi]] can use the flower grapples on the left side to reach the next planet. | ||
{{br}} | {{br}} | ||
=== | ===Yoshi Magma Planet=== | ||
[[File:Lava_Yoshi_Swing.png|200px|thumb|left|Mario and Yoshi about to touch down on the planet | [[File:Lava_Yoshi_Swing.png|200px|thumb|left|Mario and Yoshi about to touch down on the planet]] | ||
[[File:BowserGalaxyGenerator-LavaPlanet.png|thumb|200px | [[File:BowserGalaxyGenerator-LavaPlanet.png|thumb|200px|The second area of the Yoshi Magma Planet.]] | ||
A big, long planet. If Yoshi goes | A big, long planet. If Yoshi goes forward and swings to the left, he will get a [[1-Up Mushroom|1-Up mushroom]]. From the platform with the [[Boomerang Bro]] on it Yoshi can infinitely flutter-jump until he is so high he gets caught in the Lava Castle Planet's gravity orbit, Mario (with or without Yoshi) will orbit the planet indefinitely. Yoshi must navigate the sinking lava platforms to reach the left side. On the left side are three [[Boomerang Bro]]s. and several [[Lava Geyser]]s. After defeating the enemies, two lava walls open briefly. After eating a [[Dash Pepper]], Yoshi can rush through a long section before the walls close again and crush them. After using a [[Sling Star]], Mario and Yoshi get to a second area with a large chain of [[Snake Block]]s. They must dodge the lava geysers and [[Magmaargh]]s. At the end, there is a [[Comet Medal]] and a [[Blimp Fruit]] that is used to avoid being eaten by a Magmaargh. The player needs to use Yoshi in order to obtain the Comet Medal. The top of this planet can be explored by getting Yoshi on the previous planet and using the infinite [[Flutter Jump]] glitch. From up there, the Large Door Planet can be seen, but the Big Door itself cannot. | ||
{{br}} | {{br}} | ||
=== | ===Large Door Planet=== | ||
[[File:BowserGalaxyGenerator-BigDoorPlanet.png|thumb | [[File:BowserGalaxyGenerator-BigDoorPlanet.png|thumb|200px|Mario preparing to launch meteorites at the big door]] | ||
A castle-like planet with a few | [[File:SMG2 Galaxy Generator Checkpoint.png|left|200px|thumb|The Bowser Statue.]] | ||
A castle-like planet with a few Lumas, a large [[Bowser Statue]], and a pole that Mario can use to get to the top. Mario must get off of Yoshi to climb the pole unless he uses Yoshi's Infinite Flutter glitch. On the top part of the planet, there is a Life Mushroom on the left, on top of another pole and [[meteorite]]s in the center. Mario must [[Ground Pound]] these to smash open the door locks and finally enter [[Bowser]]'s lair. When Yoshi is dismounted right before the fight with Bowser, he waves goodbye to Mario or Luigi, and will not re-enter his egg. The two extensions to the door's sides are not solid.<ref>https://www.youtube.com/watch?v=RcdpmAHUkWw</ref> | |||
{{br}} | {{br}} | ||
=== | ===Throne Planets=== | ||
[[File:SMG2 Throne Planet.png|thumb|left|200px|One of the thrones.]] | [[File:SMG2 Throne Planet.png|thumb|left|200px|One of the thrones.]] | ||
A small planet shaped slightly like a star. In front of this planet is another planet that is shaped like a large throne. Bowser is seen sitting on this throne when Mario first enters the area. He only remains here briefly before battling Bowser on the Bowser Battle Planet. | A small planet shaped slightly like a star. In front of this planet is another planet that is shaped like a large throne. Bowser is seen sitting on this throne when Mario first enters the area. He only remains here briefly before battling Bowser on the Bowser Battle Planet. | ||
{{br}} | {{br}} | ||
=== | ===Bowser Battle Planet=== | ||
[[File:BowserGalaxyGenerator-BowserBattlePlanet.png|thumb | [[File:BowserGalaxyGenerator-BowserBattlePlanet.png|thumb|200px|The {{conjectural|Bowser Battle Planet|planet}}]] | ||
It is identical to the other battle planets. It is a small, round planet made out of black bricks with a few rocks that release coins. | It is identical to the other battle planets. It is a small, round planet made out of black bricks with a few rocks that release coins. | ||
{{br}} | |||
===Bowser Battle Vortex=== | |||
[[File:SMG2 Galaxy Generator Final Battle.png|thumb|left|200px|The second stage of the Bowser battle]] | |||
This area is the setting of the second stage of the fight with Bowser. It is a vortex with a black hole in the background. The only places for Mario to stand is on the meteorites used against Bowser. If all present meteorites have been used up or destroyed, a new one will immediately be called in; the meteorites will never disintegrate on their own. | |||
{{br}} | {{br}} | ||
=== | ===Garden Planet=== | ||
[[File:Grand_Star_Planet.png|thumb | [[File:Grand_Star_Planet.png|thumb|200px|Mario with Peach and the Grand Star]] | ||
A small garden planet with flowers, a | A small garden planet with flowers, a small pond, dirt and some [[Star Bit]]s on the underside of the planet. This is the planet where the final [[Grand Star]] and [[Princess Peach]] will appear after [[Bowser#Size|Giant Bowser]] is defeated. It resembles a simplified version of [[Gusty Garden Galaxy]]'s planets since there are grass and flowers on the top half and only dirt on the bottom. | ||
{{br}} | {{br}} | ||
==Enemies== | ==Enemies== | ||
*[[Hammer Bro]] | *[[Hammer Bro]] | ||
*[[Banzai Bill]] | *[[Bomber Bill|Banzai Bill]] | ||
*[[Dry Bones]] | *[[Dry Bones]] | ||
*[[Bullet Bill]] | *[[Bullet Bill]] | ||
| Line 85: | Line 96: | ||
*[[Boomerang Bro]] | *[[Boomerang Bro]] | ||
*[[Magmaargh]] | *[[Magmaargh]] | ||
*[[Fire Bar]] | |||
*[[Lava Bubble]] | |||
*[[Fire Shooter]] | |||
*[[Octoomba]] (Prankster Comet only) | *[[Octoomba]] (Prankster Comet only) | ||
*[[Bowser|Giant Bowser]] ( | *[[Bowser|Giant Bowser]] (final boss) | ||
==Missions== | ==Missions== | ||
===Bowser's Fortified Fortress | {|width=100% class=wikitable style="text-align:center" | ||
[[File: | !Name | ||
!Image | |||
!width=70%|Description | |||
|- | |||
|[[Bowser's Fortified Fortress]] | |||
|[[File:SMG2 Bowsers Fortified Fortress.png|200px]] | |||
|align=left|This mission's objective is to defeat [[Bowser]] for the final time. | |||
|- | |||
|[[Bowser's Big Bad Speed Run]] | |||
|[[File:SMG2 Bowsers Big Bad Speed Run.png|200px]] | |||
|align=left|This mission's objective is to complete a version of the previous mission without the boss battle within thirty seconds by collecting [[+ Clock|clock]]s to extend the time limit. | |||
|} | |||
===Green Stars=== | |||
====Green Star 1==== | |||
[[File:Galaxy Generator Green Star 1.png|thumb|200px|Location of the first Green Star.]] | |||
The first Green Star is in the beginning, on the small [[Fluff (object)|Floaty Fluff]] course. Mario or Luigi must carefully get the star near the last lava cliff before the [[Spin Drill]] platform. | |||
;Enemies | ;Enemies | ||
*[[Hammer Bro]] | *[[Hammer Bro]] | ||
;Planets Visited | ;Planets Visited | ||
*[[#Starting Planet|Starting Planet]] | *[[#Starting Planet|Starting Planet]] | ||
*[[#Platform Planet|Platform Planet]] | *[[#Platform Planet|Platform Planet]] | ||
*[[#Volcanic Planet|Volcanic Planet]] | *[[#Volcanic Planet|Volcanic Planet]] | ||
====Green Star 2==== | |||
[[File:Galaxy Generator Green Star 2.png|thumb|left|200px|Location of the second Green Star.]] | |||
The second Green Star is in front of the tilting platform, where [[Yoshi]] is. The player can see the star far out, and there are multiple ways to reach it. The easiest way is to get on Yoshi, jump straight toward the star from the tilting platform, flutter jump, dismount, and spin to get the star. Another way is that Mario can also reach the star if they have the [[Cloud Flower]] power-up, where they must long jump, make a cloud, and then long jump again. Yet another way is to beat the Boomerang Bros. on the next planet, get the Dash Pepper in the opening, and go back to where the Green Star is. Dash Yoshi can then jump, flutter jump, and dismount to get the star. | |||
;Enemies | ;Enemies | ||
*[[Hammer Bro]] | *[[Hammer Bro]] | ||
*[[Bomber Bill|Banzai Bill]] | |||
*[[ | |||
*[[Dry Bones]] | *[[Dry Bones]] | ||
*[[Bullet Bill]] | *[[Bullet Bill]] | ||
*[[Magikoopa]] | *[[Magikoopa]] | ||
;Planets Visited | ;Planets Visited | ||
*[[#Starting Planet|Starting Planet]] | *[[#Starting Planet|Starting Planet]] | ||
| Line 203: | Line 145: | ||
*[[#Yoshi Bridge Planet|Yoshi Bridge Planet]] | *[[#Yoshi Bridge Planet|Yoshi Bridge Planet]] | ||
*[[#Yoshi Magma Planet|Yoshi Magma Planet]] (depending on method used to get the star) | *[[#Yoshi Magma Planet|Yoshi Magma Planet]] (depending on method used to get the star) | ||
==Prima Official Game Guide description== | |||
*"''This is it -- [[Bowser]]'s last stand in the cosmos. If you can survive his trap-loaded defenses and [[Magmaargh]] minions, Bowser will challenge you to a final showdown for the sixth [[Grand Star]]. Bowser will not go quietly, though. You must muster all your strength to bring down the Koopa King and free the universe from his evil plans.''" | |||
==Names in other languages== | ==Names in other languages== | ||
{{ | {{foreign names | ||
| | |Jpn=クッパの新銀河帝国 | ||
| | |JpnR=Kuppa no Shin Ginga Teikoku | ||
| | |JpnM=Bowser's New Galactic Empire | ||
|Spa=Grieta Galáctica de Bowser | |Spa=Grieta Galáctica de Bowser | ||
|SpaM=Bowser's Galactic Rift | |SpaM=Bowser's Galactic Rift | ||
|FreA=Génératrice de galaxies de Bowser | |FreA=Génératrice de galaxies de Bowser | ||
|FreAM=Bowser's galaxy Generator | |FreAM=Bowser's galaxy Generator | ||
| | |FreE=Fabrique de galaxies de Bowser | ||
| | |FreEM=Bowser's galaxies factory | ||
|Ita=Generatore Galattico di Bowser | |Ita=Generatore Galattico di Bowser | ||
|ItaM=Bowser's Galactic Generator | |ItaM=Bowser's Galactic Generator | ||
|Kor=쿠파의 새로운 은하 제국 | |||
|KorR=Kupa-ui Saeroun Eunha Jeguk | |||
|KorM=Bowser's New Galactic Empire | |||
|Ger=Bowsers Galaxiengenerator | |Ger=Bowsers Galaxiengenerator | ||
|GerM=Bowser's Galaxy Generator | |GerM=Bowser's Galaxy Generator | ||
| Line 225: | Line 173: | ||
==Trivia== | ==Trivia== | ||
* | *This is the only galaxy in a game where the galaxy's world map icon is seen in a cutscene, and the only Bowser galaxy whose icon is not a castle on a lake of lava. It is also the only galaxy whose icon does not rotate. | ||
{{SMG2 | ==References== | ||
<references/> | |||
[[Category: | |||
[[Category: | {{SMG2 missions}} | ||
[[Category: | [[Category:Boss galaxies]] | ||
[[Category: | [[Category:Bowser's castles]] | ||
[[ | [[Category:Volcanic areas]] | ||
[[Category:Super Mario Galaxy 2 locations]] | |||
[[de:Bowsers Galaxiengenerator]] | |||
Latest revision as of 16:45, January 12, 2025
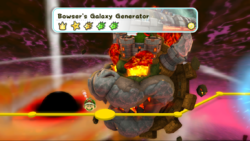
| Bowser's Galaxy Generator | |
|---|---|
| |
| Area | World 6 |
| How to unlock | Get 70 Power Stars, including one from either Battle Belt Galaxy or Slimy Spring Galaxy |
| Boss(es) | Bowser |
| Comet(s) | Speedy Comet Green Comet |
| Mission(s) | Bowser's Fortified Fortress Bowser's Big Bad Speed Run Green Star 1 Green Star 2 |
| Stars | |
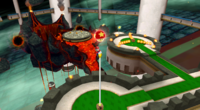
| Galaxy icon | A gigantic, fortress-like version of Bowser's head, that looks like Bowser's adaptation of Starship Mario |
| << >> | |
- Not to be confused with Bowser's Galaxy Reactor.
- “GAH! Give it up already! Why won't you stop trying to mess up my awesome master plan?! I'm building my new galactic empire right here! And you can't stop me! Why don't you just run off and find some green pipe to hide in?! Can't you see that I'm busy here?! I don't have time to chat, so let's cut this short... Shorty!”
- —Bowser, Super Mario Galaxy 2
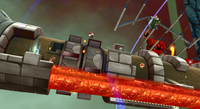
Bowser's Galaxy Generator is a galaxy in the game Super Mario Galaxy 2. It is located in World 6 and is the last galaxy of this world. Bowser is fought here for the final time. The entire galaxy appears to take place inside a giant, foggy hallway; this is likely somewhere inside the giant Bowser head that forms the galaxy's exterior.
The galaxy uses elements from every part of the game, such as Snake Blocks and the Spin Drill. Yoshi will also be needed to bypass certain obstacles, but he cannot be used in the final battle (without the use of glitches).
The power-ups found here are the Cloud Flower, Blimp Fruit, Spin Drill, and Dash Pepper. The galaxy has many obstacles such as lava and electricity. Common enemies here include Magikoopas, Banzai Bills, Hammer Bros., Boomerang Bros., and Magmaarghs.
The Prankster Comet for this galaxy is the Speedy Comet. This Speedy Comet requires the player to reach the Star before time expires. There are + Clocks that will increase the player's time limit, and Bowser is not present.
An arrangement of the music can be heard in Mario & Sonic at the Sochi 2014 Olympic Winter Games. The music and the final boss theme, "Fated Battle", also appear as selectable songs in the Mario Galaxy stage in Super Smash Bros. for Wii U and Super Smash Bros. Ultimate.
Planets/Areas[edit]
The titles of the following subsections are conjectural unless otherwise noted; an official name for each section's subject has not been found, so it has been given a fitting title by the editors. If an acceptable name is found for a given section, then that section should be changed to the new title.
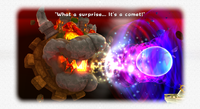
Starting Planet[edit]
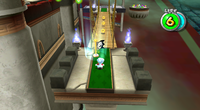
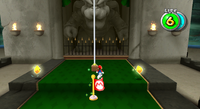
A small planet that resembles the platforms in the Bowser levels of the first game. Once Mario lands on this planet, a Luma leads Mario down a path and change into a Launch Star. However, if Mario chooses another route and climbs to the top of a pole, he obtains a Life Mushroom. Note that the Large Door Planet is almost directly under the planet a long way down.
Platform Planet[edit]
A small platform occupied by three Hammer Bros. The player must defeat them to reveal the Floaty Fluff to sail down the Volcanic Planet, although it is not actually needed to get down safely since the player can touch a wall of lava and use this momentum to fall to the bottom safely. During the speed run, the Hammer Bros. are replaced by two Boomerang Bros. The Platform Planet is actually separate from the Volcanic Planet.
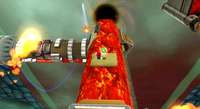
Volcanic Planet[edit]
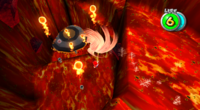
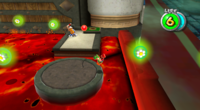
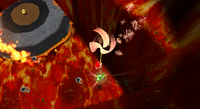
A planet made out of lava waterfalls that come out of volcanoes. Fireballs come out of torches, and Mario can fly using the Floaty Fluff found in the previous planet until he reaches the bottom or he can touch a wall of lava and use this momentum to fall to the bottom safely and avoid the fireballs until he gets to the bottom, where he can use a Spin Drill to exit the planet.
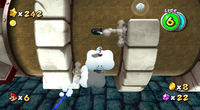
Banzai Bill Planet[edit]
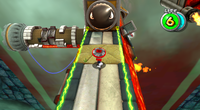
A cylindrical planet surrounded by lava. There are several Banzai Bill Cannons here, and Mario can use the Spin Drill to go through the dirt and access other areas of the planet while avoiding the many Banzai Bills and lava; however, he can save much more time if he ditches the spin drill and backflips on to the Banzai Bill Cannon then long jumps to the Launch Star at the end. Also, during the Prankster Comet mission, the Banzai Bills are replaced by Octoombas.
Lava Castle Planet[edit]
In this sidescroller planet are several platforms that spin around, Bullet Bills and also Cloud Flowers. There is lava at the top and bottom of the planet. At the end is a Launch Star. There is a glitch that allows the player to infinitely circle this planet which is shown below. During the prankster comet mission, the Bullet Bills are not present. Also, on the top of the planet, there will be a small area barely tall enough for Mario and Luigi. The area is filled with coins and a 1-Up Mushroom and leads to the Luma that turns into the Launch Star. This can be a shortcut.
Yoshi Bridge Planet[edit]
A planet with a wooden bridge where a Magikoopa is found. There is also a platform that tilts according to Mario's current position on it. Yoshi's Egg is found on the right side, and the Yoshi can use the flower grapples on the left side to reach the next planet.
Yoshi Magma Planet[edit]
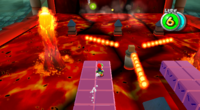
A big, long planet. If Yoshi goes forward and swings to the left, he will get a 1-Up mushroom. From the platform with the Boomerang Bro on it Yoshi can infinitely flutter-jump until he is so high he gets caught in the Lava Castle Planet's gravity orbit, Mario (with or without Yoshi) will orbit the planet indefinitely. Yoshi must navigate the sinking lava platforms to reach the left side. On the left side are three Boomerang Bros. and several Lava Geysers. After defeating the enemies, two lava walls open briefly. After eating a Dash Pepper, Yoshi can rush through a long section before the walls close again and crush them. After using a Sling Star, Mario and Yoshi get to a second area with a large chain of Snake Blocks. They must dodge the lava geysers and Magmaarghs. At the end, there is a Comet Medal and a Blimp Fruit that is used to avoid being eaten by a Magmaargh. The player needs to use Yoshi in order to obtain the Comet Medal. The top of this planet can be explored by getting Yoshi on the previous planet and using the infinite Flutter Jump glitch. From up there, the Large Door Planet can be seen, but the Big Door itself cannot.
Large Door Planet[edit]
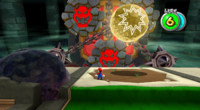
A castle-like planet with a few Lumas, a large Bowser Statue, and a pole that Mario can use to get to the top. Mario must get off of Yoshi to climb the pole unless he uses Yoshi's Infinite Flutter glitch. On the top part of the planet, there is a Life Mushroom on the left, on top of another pole and meteorites in the center. Mario must Ground Pound these to smash open the door locks and finally enter Bowser's lair. When Yoshi is dismounted right before the fight with Bowser, he waves goodbye to Mario or Luigi, and will not re-enter his egg. The two extensions to the door's sides are not solid.[1]
Throne Planets[edit]
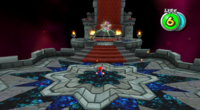
A small planet shaped slightly like a star. In front of this planet is another planet that is shaped like a large throne. Bowser is seen sitting on this throne when Mario first enters the area. He only remains here briefly before battling Bowser on the Bowser Battle Planet.
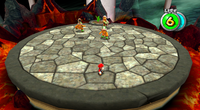
Bowser Battle Planet[edit]
It is identical to the other battle planets. It is a small, round planet made out of black bricks with a few rocks that release coins.
Bowser Battle Vortex[edit]
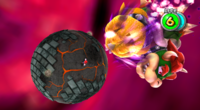
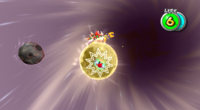
This area is the setting of the second stage of the fight with Bowser. It is a vortex with a black hole in the background. The only places for Mario to stand is on the meteorites used against Bowser. If all present meteorites have been used up or destroyed, a new one will immediately be called in; the meteorites will never disintegrate on their own.
Garden Planet[edit]
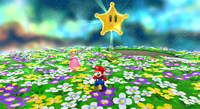
A small garden planet with flowers, a small pond, dirt and some Star Bits on the underside of the planet. This is the planet where the final Grand Star and Princess Peach will appear after Giant Bowser is defeated. It resembles a simplified version of Gusty Garden Galaxy's planets since there are grass and flowers on the top half and only dirt on the bottom.
Enemies[edit]
- Hammer Bro
- Banzai Bill
- Dry Bones
- Bullet Bill
- Magikoopa
- Boomerang Bro
- Magmaargh
- Fire Bar
- Lava Bubble
- Fire Shooter
- Octoomba (Prankster Comet only)
- Giant Bowser (final boss)
Missions[edit]
| Name | Image | Description |
|---|---|---|
| Bowser's Fortified Fortress | 
|
This mission's objective is to defeat Bowser for the final time. |
| Bowser's Big Bad Speed Run | 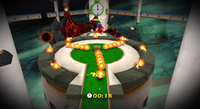
|
This mission's objective is to complete a version of the previous mission without the boss battle within thirty seconds by collecting clocks to extend the time limit. |
Green Stars[edit]
Green Star 1[edit]
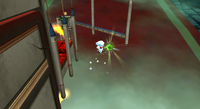
The first Green Star is in the beginning, on the small Floaty Fluff course. Mario or Luigi must carefully get the star near the last lava cliff before the Spin Drill platform.
- Enemies
- Planets Visited
Green Star 2[edit]
The second Green Star is in front of the tilting platform, where Yoshi is. The player can see the star far out, and there are multiple ways to reach it. The easiest way is to get on Yoshi, jump straight toward the star from the tilting platform, flutter jump, dismount, and spin to get the star. Another way is that Mario can also reach the star if they have the Cloud Flower power-up, where they must long jump, make a cloud, and then long jump again. Yet another way is to beat the Boomerang Bros. on the next planet, get the Dash Pepper in the opening, and go back to where the Green Star is. Dash Yoshi can then jump, flutter jump, and dismount to get the star.
- Enemies
- Planets Visited
- Starting Planet
- Platform Planet
- Volcanic Planet
- Banzai Bill Planet
- Lava Castle Planet
- Yoshi Bridge Planet
- Yoshi Magma Planet (depending on method used to get the star)
Prima Official Game Guide description[edit]
- "This is it -- Bowser's last stand in the cosmos. If you can survive his trap-loaded defenses and Magmaargh minions, Bowser will challenge you to a final showdown for the sixth Grand Star. Bowser will not go quietly, though. You must muster all your strength to bring down the Koopa King and free the universe from his evil plans."
Names in other languages[edit]
| Language | Name | Meaning | Notes |
|---|---|---|---|
| Japanese | クッパの新銀河帝国[?] Kuppa no Shin Ginga Teikoku |
Bowser's New Galactic Empire | |
| Chinese | 庫巴的新銀河帝國[?] Kùbā de Xīn Yínhé Dìguó |
Bowser's New Galactic Empire | |
| French (NOA) | Génératrice de galaxies de Bowser[?] | Bowser's galaxy Generator | |
| French (NOE) | Fabrique de galaxies de Bowser[?] | Bowser's galaxies factory | |
| German | Bowsers Galaxiengenerator[?] | Bowser's Galaxy Generator | |
| Italian | Generatore Galattico di Bowser[?] | Bowser's Galactic Generator | |
| Korean | 쿠파의 새로운 은하 제국[?] Kupa-ui Saeroun Eunha Jeguk |
Bowser's New Galactic Empire | |
| Spanish | Grieta Galáctica de Bowser[?] | Bowser's Galactic Rift |
Trivia[edit]
- This is the only galaxy in a game where the galaxy's world map icon is seen in a cutscene, and the only Bowser galaxy whose icon is not a castle on a lake of lava. It is also the only galaxy whose icon does not rotate.
