Diddy Kong Racing DS: Difference between revisions
Danhartz994 (talk | contribs) |
m (Text replacement - "([Cc])olor-link" to "$1olor link") |
||
| (251 intermediate revisions by 100 users not shown) | |||
| Line 1: | Line 1: | ||
{{italic title}} | {{italic title}} | ||
{{ | {{game infobox | ||
|image=[[File: | |image=[[File:DKRDS NA box art.jpg|250px]]<br>North American box cover | ||
|developer=[[Rare | |developer=[[Rare]] | ||
|publisher=[[Nintendo]] | |publisher=[[Nintendo]] | ||
| | |release={{flag list|USA|February 5, 2007|Australia|April 19, 2007|Europe|April 20, 2007<ref>{{cite|url=https://www.nintendo.com/en-gb/Games/Nintendo-DS/Diddy-Kong-Racing-DS-270440.html|title=Diddy Kong Racing DS {{!}} Nintendo DS {{!}} Games {{!}} Nintendo|publisher=Nintendo UK|language=en-gb}}</ref>}} | ||
|languages={{languages|en_us=y|es_es=y|fr_fr=y|de=y|it=y}} | |||
|genre= [[Genre#Racing|Racing]], Adventure | |||
|genre=Racing, Adventure | |||
|modes=Single-player, multiplayer, online multiplayer | |modes=Single-player, multiplayer, online multiplayer | ||
|ratings={{ratings|esrb=E|acb=G}} | |ratings={{ratings|esrb=E|acb=G|pegi=3|usk=0}} | ||
|platforms=[[Nintendo DS]] | |platforms=[[Nintendo DS]] | ||
| | |format={{format|ds=1}} | ||
| | |input={{input|ds=1}} | ||
|input={{input| | |serials={{flag list|USA|NTR-AWDE-USA|Europe|NTR-AWDP-EUR|Australia|NTR-AWDE-AUS}} | ||
}} | }} | ||
'''''Diddy Kong Racing DS''''' is the [[Nintendo DS]] remake of the [[Nintendo 64]] game | '''''Diddy Kong Racing DS''''', also referred to as '''''Diddy Kong Racing''''',<ref>''The name given to the game on its icon on the Nintendo DS menu.''</ref> is a [[Genre#Racing|racing]] game for the [[Nintendo DS]]. It is a [[Reissue#Remakes|remake]] of the [[Nintendo 64]] game ''[[Diddy Kong Racing]]''. ''Diddy Kong Racing DS'' is [[Rare]]'s first Nintendo DS game. This game adds online multiplayer via [[Nintendo Wi-Fi Connection]]. | ||
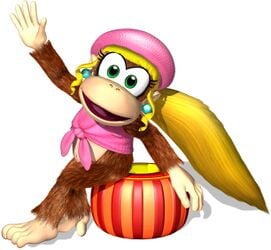
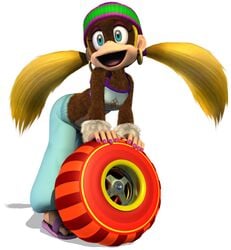
Due to Rare's acquisition by {{wp|Microsoft}}, [[Banjo]] and [[Conker]] were replaced by [[Tiny Kong]] and [[Dixie Kong]] respectively, although [[Tiptup]] was kept in the game, despite his appearances in several ''Banjo-Kazooie'' games. [[Nintendo]] owns the copyright to the original ''Diddy Kong Racing'' game code and Microsoft had never entered the handheld gaming market, therefore allowing Rare to work on the game with Nintendo for the DS. This is the final game created by Rare to feature a character from a Nintendo franchise. | |||
==Story== | ==Story== | ||
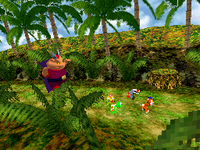
[[File:DKRDSintro1.png|thumb|left|Timber and the others running away from Wizpig.]] | [[File:DKRDSintro1.png|thumb|left|Timber and the others running away from Wizpig.]] | ||
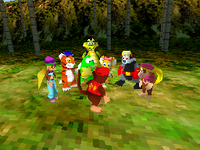
[[File:DKRDSintro2.png|thumb|The Kongs agree to help in their fight with Wizpig.]] | [[File:DKRDSintro2.png|thumb|The Kongs agree to help in their fight with Wizpig.]] | ||
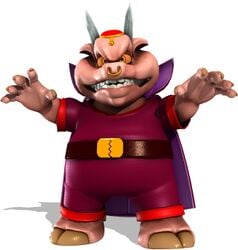
When [[ | When [[List of implied characters#The Tigers|his parents]] go on vacation, [[Timber]] is left to care for the family island, [[Timber's Island]]. Unfortunately, an evil pig wizard, named [[Wizpig]], invades the island and brainwashes [[Tricky]], [[Bluey]], [[Bubbler]], and [[Smokey]] to be his lieutenants. One of the island's fastest racers, [[Drumstick (character)|Drumstick]], challenges Wizpig to a race, only to disappear without a trace after doing so. In desperation, Timber, along with his friends [[Tiptup]], [[Pipsy]], and [[Bumper (character)|Bumper]], sends a letter to his friend [[Diddy Kong]] via [[Squawks the Parrot|Squawks]], asking for help. Accepting Timber's plea, Diddy calls [[Dixie Kong]] and [[Tiny Kong]] to assist him. [[Krunch]], a [[Kremling Krew]] spy, sets off to Timber's Island following the Kongs, attempting to figure out what they are up to and to bring that information to [[King K. Rool]]. | ||
With help from Taj and [[T.T.]], Diddy, Timber, and co. manage to beat Tricky, Bluey, Bubbler, and Smokey in races and snap them out of Wizpig's brainwashing. Drumstick, who had been turned into a frog by Wizpig, is also returned to normal. | |||
After Wizpig's brainwashed minions are defeated, Wizpig is next challenged by Diddy Kong and his friends. After a race, Wizpig is seemingly defeated and a victory celebration is held. Unfortunately, Wizpig crashes the party. | |||
Following Wizpig to his home planet, [[Future Fun Land]], Diddy Kong and his friends manage to get past all of Wizpig's challenges and get a rematch with the rocket-riding Wizpig. After another race, Wizpig is beaten and his rocket malfunctions, causing it to crash into a deserted planet. Wizpig is stranded, but he mentions that he shall return sometime. | |||
Returning to Timber's Island, another celebration is held, with Wizpig having been beaten for good and his hold on the island gone. | |||
==Drivers== | |||
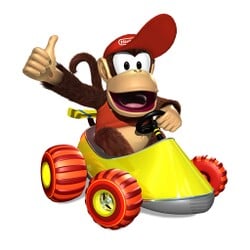
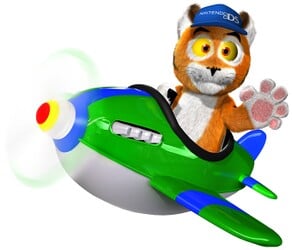
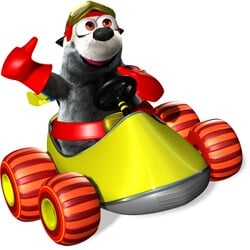
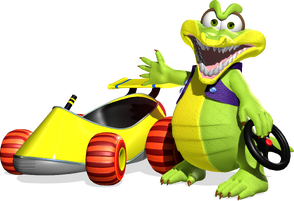
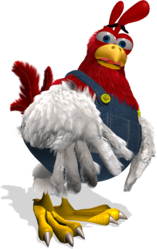
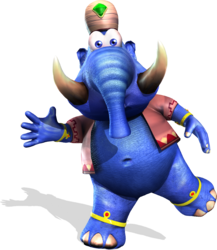
''Diddy Kong Racing DS'' features a total of twelve racers, four of which are unlockable. The racers' stats vary in three major categories: speed, acceleration, and handling. Eight of the racers, Diddy Kong, Tiptup, Pipsy, Bumper, Timber, Krunch, T.T., and Drumstick, are all available as racers in ''[[Diddy Kong Racing]]''. Taj and Wizpig are in the original ''Diddy Kong Racing'', but are not playable characters. [[Banjo]] and [[Conker]] were replaced with Tiny and Dixie Kong respectively. | |||
Many of the stats listed on the menu do not match up up with the character's actual hidden stats within the game. For example, [[T.T.]] is listed as having max speed when he is actually slower than [[Krunch]], while [[Drumstick]] is listed having 5/5 acceleration when he actually has some of the lowest acceleration.<ref>{{cite|url=gamefaqs.gamespot.com/ds/933008-diddy-kong-racing-ds/faqs/47301|title=Diddy Kong Racing DS - Upgrade/Character Guide - DS - by Drea|publisher=GameFAQs|accessdate=May 3, 2024}}</ref> | |||
{|border=1 style="text-align:center;border:1px solid black;border-collapse:collapse;max-width:1258px;background:wheat" | |||
</ | |||
{| border= | |||
|- | |- | ||
! | !style="background:saddlebrown;color:white"|Default characters | ||
|- | |- | ||
| | |style="display:inline-block;background:peru;max-width:306px"width=100%| | ||
{|class="wikitable dk"border=0 cellspacing=0 cellpadding=4 margin=0 padding=0 style="border:1px solid black;border-collapse:collapse;padding:0px;margin:0px;height:100%"width=100% | |||
|- | |- | ||
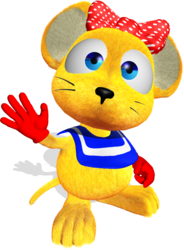
| | !colspan=2 style="background:burlywood;height:32px"align="center"|[[File:DKRDS icon Pipsy.png]]<br><big>{{text outline|{{color link|yellow|Pipsy}}}}</big> | ||
|- | |- | ||
| | !colspan=2 style="background:white;height:250px"align="center"|[[File:PipsyDS.png|294x250px]] | ||
|- | |- | ||
| | !width=50% style="background:burlywood"|Acceleration: | ||
|<big>{{text outline|{{color|dodgerblue|★★★★★}}}}</big> | |||
|- | |- | ||
| | !style="background:burlywood"|Turning: | ||
|<big>{{text outline|{{color|dodgerblue|★★★★★}}}}</big> | |||
|- | |- | ||
| | !style="background:burlywood"|Top speed: | ||
|<big>{{text outline|{{color|red|★☆☆☆☆}}}}</big> | |||
|} | |||
|style="display:inline-block;background:peru;max-width:306px"width=100%| | |||
{|class="wikitable dk"border=0 cellspacing=0 cellpadding=4 margin=0 padding=0 style="border:1px solid black;border-collapse:collapse;padding:0px;margin:0px;height:100%"width=100% | |||
|- | |- | ||
| | !colspan=2 style="background:burlywood; height:32px"align="center"|[[File:DKRDS icon Tiptup.png]]<br><big>{{text outline|{{color link|lawngreen|Tiptup}}}}</big> | ||
|- | |- | ||
| | !colspan=2 style="background:white; height:250px"align="center"|[[File:TiptupDKRDSArtwork.png|294x250px]] | ||
|- | |- | ||
| | !width=50% style="background:burlywood"|Acceleration: | ||
|<big>{{text outline|{{color|dodgerblue|★★★★★}}}}</big> | |||
|- | |- | ||
| | !style="background:burlywood"|Turning: | ||
|<big>{{text outline|{{color|dodgerblue|★★★★★}}}}</big> | |||
| | |||
|- | |- | ||
!style="background:burlywood"|Top speed: | |||
|<big>{{text outline|{{color|red|★☆☆☆☆}}}}</big> | |||
|} | |} | ||
|style="display:inline-block;background:peru;max-width:306px"width=100%| | |||
= | {|class="wikitable dk"border=0 cellspacing=0 cellpadding=4 margin=0 padding=0 style="border:1px solid black;border-collapse:collapse;padding:0px;margin:0px;height:100%"width=100% | ||
{| | |||
|- | |- | ||
! colspan= | !colspan=2 style="background:burlywood;height:32px"align="center"|[[File:DKRDS icon Diddy.png]]<br><big>{{text outline|{{color link|crimson|Diddy Kong}}}}</big> | ||
|- | |- | ||
| | !colspan=2 style="background:white;height:250px"align="center"|[[File:DKRDS Diddy Kong.jpg|294x250px]] | ||
|- | |- | ||
| | !width=50% style="background:burlywood"|Acceleration: | ||
|<big>{{text outline|{{color|gold|★★★☆☆}}}}</big> | |||
|- | |- | ||
| | !style="background:burlywood"|Turning: | ||
|<big>{{text outline|{{color|gold|★★★☆☆}}}}</big> | |||
|- | |- | ||
| | !style="background:burlywood"|Top speed: | ||
|<big>{{text outline|{{color|darkorange|★★☆☆☆}}}}</big> | |||
|} | |||
|style="display:inline-block;background:peru;max-width:306px"width=100%| | |||
{|class="wikitable dk"border=0 cellspacing=0 cellpadding=4 margin=0 padding=0 style="border:1px solid black;border-collapse:collapse;padding:0px;margin:0px;height:100%"width=100% | |||
|- | |- | ||
| | !colspan=2 style="background:burlywood;height:32px"align="center"|[[File:DKRDS icon Dixie.png]]<br><big>{{text outline|{{color link|magenta|Dixie Kong}}}}</big> | ||
|- | |- | ||
| | !colspan=2 style="background:white;height:250px"align="center"|[[File:DKRDS Dixie art.jpg|294x250px]] | ||
|- | |- | ||
| | !width=50% style="background:burlywood"|Acceleration: | ||
|<big>{{text outline|{{color|gold|★★★☆☆}}}}</big> | |||
|- | |- | ||
| | !style="background:burlywood"|Turning: | ||
|<big>{{text outline|{{color|gold|★★★☆☆}}}}</big> | |||
|- | |- | ||
! | !style="background:burlywood"|Top speed: | ||
| | |<big>{{text outline|{{color|darkorange|★★☆☆☆}}}}</big> | ||
|} | |||
|style="display:inline-block;background:peru;max-width:306px"width=100%| | |||
{|class="wikitable dk"border=0 cellspacing=0 cellpadding=4 margin=0 padding=0 style="border:1px solid black;border-collapse:collapse;padding:0px;margin:0px;height:100%"width=100% | |||
|- | |- | ||
!colspan=2 style="background:burlywood;height:32px"align="center"|[[File:DKRDS icon Tiny.png]]<br><big>{{text outline|{{color link|cyan|Tiny Kong}}}}</big> | |||
|- | |- | ||
!colspan=2 style="background:white;height:250px"align="center"|[[File:Tiny Kong DKRDS.jpg|294x250px]] | |||
|- | |- | ||
| | !width=50% style="background:burlywood"|Acceleration: | ||
|<big>{{text outline|{{color|gold|★★★☆☆}}}}</big> | |||
|- | |- | ||
| | !style="background:burlywood"|Turning: | ||
|<big>{{text outline|{{color|gold|★★★☆☆}}}}</big> | |||
|- | |- | ||
| | !style="background:burlywood"|Top speed: | ||
|- | |<big>{{text outline|{{color|darkorange|★★☆☆☆}}}}</big> | ||
|} | |||
|style="display:inline-block;background:peru;max-width:306px"width=100%| | |||
| | {|class="wikitable dk"border=0 cellspacing=0 cellpadding=4 margin=0 padding=0 style="border:1px solid black;border-collapse:collapse;padding:0px;margin:0px;height:100%"width=100% | ||
|- | |||
|- | |- | ||
| | !colspan=2 style="background:burlywood;height:32px"align="center"|[[File:DKRDS icon Timber.png]]<br><big>{{text outline|{{color link|goldenrod|Timber}}}}</big> | ||
|- | |- | ||
| | !colspan=2 style="background:white;height:250px"align="center"|[[File:Timber in Plane DKRDS.jpg|294x250px]] | ||
|- | |- | ||
| | !width=50% style="background:burlywood"|Acceleration: | ||
|<big>{{text outline|{{color|gold|★★★☆☆}}}}</big> | |||
|- | |- | ||
| | !style="background:burlywood"|Turning: | ||
|<big>{{text outline|{{color|gold|★★★☆☆}}}}</big> | |||
|- | |- | ||
!style="background:burlywood"|Top speed: | |||
|<big>{{text outline|{{color|gold|★★★☆☆}}}}</big> | |||
|} | |} | ||
|style="display:inline-block;background:peru;max-width:306px"width=100%| | |||
== | {|class="wikitable dk"border=0 cellspacing=0 cellpadding=4 margin=0 padding=0 style="border:1px solid black;border-collapse:collapse;padding:0px;margin:0px;height:100%"width=100% | ||
{| | |||
|- | |- | ||
! colspan= | !colspan=2 style="background:burlywood;height:32px"align="center"|[[File:DKRDS icon Bumper.png]]<br><big>{{text outline|{{color link|darkgray|Bumper (character)|Bumper}}}}</big> | ||
|- | |- | ||
| | !colspan=2 style="background:white;height:250px"align="center"|[[File:Bumper DKRDS art.jpg|294x250px]] | ||
|- | |- | ||
! | !width=50% style="background:burlywood"|Acceleration: | ||
| | |<big>{{text outline|{{color|darkorange|★★☆☆☆}}}}</big> | ||
|- | |- | ||
| | !style="background:burlywood"|Turning: | ||
|<big>{{text outline|{{color|gold|★★★☆☆}}}}</big> | |||
|- | |- | ||
! | !style="background:burlywood"|Top speed: | ||
| | |<big>{{text outline|{{color|gold|★★★☆☆}}}}</big> | ||
|} | |||
|style="display:inline-block;background:peru;max-width:306px"width=100%| | |||
{|class="wikitable dk"border=0 cellspacing=0 cellpadding=4 margin=0 padding=0 style="border:1px solid black;border-collapse:collapse;padding:0px;margin:0px;height:100%"width=100% | |||
|- | |- | ||
| | !colspan=2 style="background:burlywood;height:32px"align="center"|[[File:DKRDS icon Krunch.png]]<br><big>{{text outline|{{color link|greenyellow|Krunch}}}}</big> | ||
|- | |- | ||
! colspan= | !colspan=2 style="background:white;height:250px"align="center"|[[File:Krunch DKRDS art.png|294x250px]] | ||
|- | |- | ||
| | !width=50% style="background:burlywood"|Acceleration: | ||
|<big>{{text outline|{{color|darkorange|★★☆☆☆}}}}</big> | |||
|- | |- | ||
! | !style="background:burlywood"|Turning: | ||
| | |<big>{{text outline|{{color|darkorange|★★☆☆☆}}}}</big> | ||
| | |||
|- | |- | ||
!style="background:burlywood"|Top speed: | |||
|<big>{{text outline|{{color|green|★★★★☆}}}}</big> | |||
|} | |} | ||
|- | |- | ||
! | !style="background:saddlebrown;color:white"|Unlockable characters | ||
|- | |- | ||
|style="display:inline-block;background:peru;max-width:306px"width=100%| | |||
{|class="wikitable dk"border=0 cellspacing=0 cellpadding=4 margin=0 padding=0 style="border:1px solid black;border-collapse:collapse;padding:0px;margin:0px;height:100%"width=100% | |||
|- | |- | ||
!colspan=2 style="background:burlywood;height:32px"align="center"|[[File:DKRDS icon Drumstick.png]]<br><big>{{text outline|{{color link|white|Drumstick (character)|Drumstick}}}}</big> | |||
|[[ | |||
| | |||
| | |||
|- | |- | ||
!colspan=2 style="background:white;height:250px"align="center"|[[File:DrumstickDKRDS.png|294x250px]] | |||
|[[ | |||
|- | |- | ||
!width=50% style="background:burlywood"|Acceleration: | |||
|<big>{{text outline|{{color|dodgerblue|★★★★★}}}}</big> | |||
| | |||
| | |||
|- | |- | ||
!style="background:burlywood"|Turning: | |||
| | |<big>{{text outline|{{color|darkorange|★★☆☆☆}}}}</big> | ||
| | |||
| | |||
|- | |- | ||
! | !style="background:burlywood"|Top speed: | ||
|<big>{{text outline|{{color|green|★★★★☆}}}}</big> | |||
|- | |- | ||
!colspan=2 style="background:burlywood"|To unlock: | |||
|- | |- | ||
| | |colspan=2 height=88px|Collect all four Grand Prix trophies, which reveals a [[frog]] with a rooster comb in Timber's Island hub. Then, flick the frog onto the cliff with the frog face on it, then run over it to return Drumstick to normal. | ||
| | |} | ||
| | |style="display:inline-block;background:peru;max-width:306px"width=100%| | ||
| | {|class="wikitable dk"border=0 cellspacing=0 cellpadding=4 margin=0 padding=0 style="border:1px solid black;border-collapse:collapse;padding:0px;margin:0px;height:100%"width=100% | ||
|- | |- | ||
!colspan=2 style="background:burlywood;height:32px"align="center"|[[File:DKRDS icon Taj.png]]<br><big>{{text outline|{{color link|royalblue|Taj}}}}</big> <sup><small>(new)</small></sup> | |||
|[[ | |||
| | |||
|- | |- | ||
!colspan=2 style="background:white;height:250px"align="center"|[[File:Taj DKRDS art.png|294x250px]] | |||
|[[ | |||
|- | |- | ||
! | !width=50% style="background:burlywood"|Acceleration: | ||
|<big>{{text outline|{{color|red|★☆☆☆☆}}}}</big> | |||
|- | |- | ||
!style="background:burlywood"|Turning: | |||
| | |<big>{{text outline|{{color|red|★☆☆☆☆}}}}</big> | ||
| | |||
| | |||
|- | |- | ||
!style="background:burlywood"|Top speed: | |||
| | |<big>{{text outline|{{color|dodgerblue|★★★★★}}}}</big> | ||
| | |||
| | |||
|- | |- | ||
!colspan=2 style="background:burlywood"|To unlock: | |||
|- | |- | ||
| | |colspan=2 height=88px|Complete Adventure Mode. | ||
| | |} | ||
| | |style="display:inline-block;background:peru;max-width:306px"width=100%| | ||
| | {|class="wikitable dk"border=0 cellspacing=0 cellpadding=4 margin=0 padding=0 style="border:1px solid black;border-collapse:collapse;padding:0px;margin:0px;height:100%"width=100% | ||
|- | |- | ||
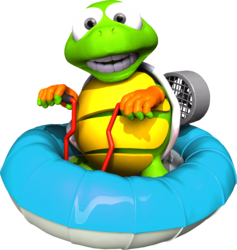
!colspan=2|[[ | !colspan=2 style="background:burlywood;height:32px"align="center"|[[File:DKRDS icon TT.png]]<br><big>{{text outline|{{color link|gold|T.T.}}}}</big> | ||
|- | |- | ||
!colspan=2 style="background:white;height:250px"align="center"|[[File:TT DKRDS artwork.jpg|294x250px]] | |||
|[[ | |||
|- | |- | ||
!width=50% style="background:burlywood"|Acceleration: | |||
|<big>{{text outline|{{color|dodgerblue|★★★★★}}}}</big> | |||
| | |||
| | |||
|- | |- | ||
!style="background:burlywood"|Turning: | |||
| | |<big>{{text outline|{{color|green|★★★★☆}}}}</big> | ||
| | |||
| | |||
|- | |- | ||
!style="background:burlywood"|Top speed: | |||
| | |<big>{{text outline|{{color|dodgerblue|★★★★★}}}}</big> | ||
| | |||
| | |||
|- | |- | ||
!colspan=2| | !colspan=2 style="background:burlywood"|To unlock: | ||
|- | |- | ||
| | |colspan=2 height=88px|Complete each course in time trials within a certain time, then race on them again to beat T.T.'s ghost for each. | ||
| | |} | ||
| | |style="display:inline-block;background:peru;max-width:306px"width=100%| | ||
| | {|class="wikitable dk"border=0 cellspacing=0 cellpadding=4 margin=0 padding=0 style="border:1px solid black;border-collapse:collapse;padding:0px;margin:0px;height:100%"width=100% | ||
|- | |- | ||
!colspan=2 style="background:burlywood;height:32px"align="center"|[[File:DKRDS icon Wizpig.png]]<br><big>{{text outline|{{color link|tan|Wizpig}}}}</big> <sup><small>(new)</small></sup> | |||
|[[ | |||
| | |||
|- | |- | ||
!colspan=2 style="background:white;height:250px"align="center"|[[File:DKRDS Wizpig art shadow.jpg|294x250px]] | |||
|[[ | |||
|- | |- | ||
!width=50% style="background:burlywood"|Acceleration: | |||
|<big>{{text outline|{{color|red|★☆☆☆☆}}}}</big> | |||
| | |||
| | |||
|- | |- | ||
! | !style="background:burlywood"|Turning: | ||
|<big>{{text outline|{{color|red|★☆☆☆☆}}}}</big> | |||
|- | |- | ||
!style="background:burlywood"|Top speed: | |||
| | |<big>{{text outline|{{color|dodgerblue|★★★★★}}}}</big> | ||
| | |||
| | |||
|- | |- | ||
!colspan=2 style="background:burlywood"|To unlock: | |||
|- | |- | ||
| | |colspan=2 height=88px|Complete Adventure 2. | ||
|[[ | |} | ||
|} | |||
| | |||
==Taj's Wishes Menu== | |||
[[File:TajWishesMenu.png|thumb|upright=0.5|Taj's Wishes Menu main screen]] | |||
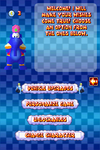
Taj is the caretaker of the island and provides assistance to Diddy and his friends. Taj appears every time the player gains ten [[Golden Balloon]]s and challenges them. He also takes care of rewards and unlockables. Taj allows the player to paint their vehicle for free, but he has a few items in his tent on the center courtyard. He calls it his "Wishes Menu": | |||
{|border="1"cellspacing=0 cellpadding=2 align="center"style="background:#fdfffd"width=100% class="wikitable" | |||
!colspan=4 style="background:#9C6936;color:white"align=center|<big>Wishes Menu costs</big> | |||
|- | |- | ||
|align= | !colspan=5 style="background:#BE9966"align=center|Vehicle upgrades | ||
| | |-style=background:#CFBB88 align=center | ||
| | !width=1% style=background:#CFBB88| # | ||
| | !width=23% style=background:#CFBB88|Item | ||
!width=12% style=background:#CFBB88|Coin cost | |||
!width=63% style=background:#CFBB88|Effect | |||
|-style="background:wheat" | |||
|1||Basic Downforce||50||Minor help in handling and corning of one's vehicle of choice | |||
|-style="background:#FFF8DC" | |||
|2||Downforce A & Downforce B||Both are 100||Major improvement in handling and cornering of one's vehicle of choice | |||
|-style="background:wheat" | |||
|3||Basic Sprint||50||Minor help in acceleration of one's vehicle of choice | |||
|-style="background:#FFF8DC" | |||
|4||Sprint A & Sprint B||Both are 100||Major improvement in acceleration of one's vehicle of choice | |||
|- style="background:wheat" | |||
|5||Basic Air||50||Minor help in speed of one's vehicle of choice | |||
|- style="background:#FFF8DC" | |||
|6||Air A & Air B||Both are 100||Major improvement in speed of one's vehicle of choice | |||
|-style="background:wheat" | |||
|7||Standard Custom||50||Minor handling sacrifice for top speed and a custom look | |||
|-style="background:#FFF8DC" | |||
|8||Custom A & Custom B||Both are 100||Major speed improvement and a great custom look. Handling is sacrificed and is shrunk down to poor stats. | |||
|- | |- | ||
!colspan=2| | !colspan=5 style="background:#BE9966"align=center|Unlockables | ||
|-style=background:#CFBB88 align=center | |||
!width=1% style=background:#CFBB88| # | |||
!width=23% style=background:#CFBB88|Item | |||
!width=12% style=background:#CFBB88|Coin cost | |||
!width=63% style=background:#CFBB88|Effect | |||
|-style="background:wheat" | |||
|1||[[Thunder Cove]]||80||A new track | |||
|-style="background:#FFF8DC" | |||
|2||[[Meandering Mount]]||80||A new track | |||
|-style="background:wheat" | |||
|3||[[Splashdown Pass]]||80||A new track | |||
|-style="background:#FFF8DC" | |||
|4||[[Strangled Shrine]]||80||A new track | |||
|-style="background:wheat" | |||
|5||Coin Challenge & Coin Challenge Mirror||20||Major part of the [[Nintendo 64]] version, racers race through all the tracks, having to collect eight Silver Coins, and it is required to come in first place to win the challenge. | |||
|-style="background:#FFF8DC" | |||
|6||SP Wish Race (single player) & Multi Wish Race (multiplayer)||50||Race on the player's custom tracks with T.T. as the guide. | |||
|-style="background:wheat" | |||
|7||Battle Track 1 ([[Fire Mountain (battle course)|Fire Mountain]])||30||One of the original Battle areas in the Nintendo 64 classic, the racer tries to gather three eggs and hatch them from atop a volcano first. (Multiplayer only) | |||
|-style="background:#FFF8DC" | |||
|8||Battle Track 2 ([[Icicle Pyramid]])||30||One of the original Battle areas in the Nintendo 64 version, racers tries to strike down their rivals in a huge ice temple. If the racer loses all their bananas they lose. | |||
|-style="background:wheat" | |||
|9||Battle Track 3 ([[Darkwater Beach]])||30|| | |||
One of the original Battle areas in the Nintendo 64 version, racers try to strike down their rivals in a big dark water lake with small sand island-like platforms. The objective to win is similar to Icicle Pyramid. If the racer loses all their bananas, they lose. | |||
|-style="background:#FFF8DC" | |||
|10||Battle Track 4 ([[Smokey Castle]])||30||One of the original Battle areas in the Nintendo 64 version. The objective to win is similar to Fire Mountain. The racer has to fill their chest with Taj Tokens. First gaining ten tokens wins. | |||
|-style="background:wheat" | |||
|11||Billboard Editor||50||The player can fill the racetracks and courses with their own artwork. | |||
|-style="background:#FFF8DC" | |||
|12||Sound Recorder||50||The player can record their own sound effects through the touch screen. | |||
|} | |||
==Balloons== | |||
Colored [[Weapon Balloon|balloons]] await the racers in normal racing levels. They consist of weapons. Once a player gets up to three, they increase in strength. | |||
[[Power-Up Token]]s are also scattered in every single race track. The player must collect one and can upgrade their balloon strength with just one balloon and set it to maximum power. | |||
{|class="wikitable"style="vertical-align:center;width:85%;margin:auto" | |||
|- | |||
!rowspan="2"style="background:#BE9966;width:16%"|Type of balloon | |||
!colspan="3"style="background:#BE9966"|Number of balloons | |||
!rowspan="2"style="background:#BE9966;width:21%"|+ [[Power-Up Token]] | |||
|-style="background:#BE9966" | |||
!style="background:#BE9966;width:21%"|1 | |||
!style="background:#BE9966;width:21%"|2 | |||
!style="background:#BE9966;width:21%"|3 | |||
|-style="background:wheat" | |||
!style="background:wheat"|Red Balloon<br>[[File:DDRDS - Balloon Red.png|120px]] | |||
|align="center"|Missile | |||
|align="center"|5 Semi-Homing Missiles | |||
|align="center"|Homing Missile | |||
|align="center"|Three Circling Rocket Missiles | |||
|-style="background:#FFF8DC" | |||
!style="background:#FFF8DC"|Blue Balloon<br>[[File:DDRDS - Balloon Blue.png|120px]] | |||
|align="center"|Standard Turbo Boost (Orange Engine Blast) | |||
|align="center"|Powerful Turbo Boost (Light Green Engine Blast) | |||
|align="center"|Extremely Powerful Turbo Blast (Purple Engine Blast) | |||
|align="center"|Autopilot that allows the player three engine boosts and a long lasting shield | |||
|-style="background:wheat" | |||
!style="background:wheat"|Green Balloon<br>[[File:DDRDS - Balloon Green.png|120px]] | |||
|align="center"|Slippery Black Sludge | |||
|align="center"|Spike Bomb | |||
|align="center"|Bubble | |||
|align="center"|5 Fake Explosive Rareware Coins | |||
|-style="background:#FFF8DC" | |||
!style="background:#FFF8DC"|Yellow Balloon<br>[[File:DDRDS - Balloon Yellow.png|120px]] | |||
|align="center"|Standard Energy Shield | |||
|align="center"|Better Lasting Energy Shield | |||
|align="center"|Longest Lasting Energy Shield | |||
|align="center"|Makes the racer invisible with a long lasting shield | |||
|-style="background:wheat" | |||
!style="background:wheat"|Rainbow Balloon<br>[[File:DDRDS - Balloon Rainbow.png|120px]] | |||
|align="center"|Standard Red Magnet | |||
|align="center"|Strong Yellow Magnet | |||
|align="center"|Strong Green Magnet that pulls the racer towards their rival | |||
|align="center"|A missile that the player can hit anyone the player chooses via the touch screen | |||
|} | |||
==Vehicles== | |||
===[[Car]]=== | |||
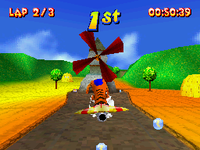
The car is the most basic vehicle with four wheels and a driver's seat. It has simplest handling, but it can only stay on the ground, being slowed down slightly when driving off road, and goes extremely slow when used in the water. It is limited to only use zippers on the ground. The car is a beginners vehicle. It can be used in eighteen out of twenty four race tracks. In Adventure Mode, it is used the most, being used on twelve of the tracks. It is used against Tricky and Wizpig, during their first matches. | |||
===[[Plane]]=== | |||
The plane is slightly trickier to control than the car. However, the plane is not restricted to having to use the road, which enables it to cut corners inaccessible to cars such as the pathway to [[Snowflake Mountain]]. There are also many tracks which have paths only usable by the plane, many of which are slightly harder to access with some sort of reward, such as a balloon or a Power-up Token. The plane is not restricted to any zipper, being the only vehicle able to use all three types, and the only vehicle which can use airborne zippers. It can be used in fifteen out of twenty four race tracks. In Adventure Mode, it is used in five races, and against Smokey and Wizpig in his second race. | |||
===[[Hovercraft]]=== | |||
The hovercraft is possibly the trickiest to control. However, it is not hindered by driving off road or in water, although it can skid on roads. Its ability to drive over water enables it to use shortcuts on some tracks. The boat can use zippers on the ground, or in the water, making it more versatile than the car, but less versatile than the plane. It can be used in all twenty-four race tracks. Despite this, in Adventure Mode it is only used on the three tracks being [[Whale Bay]], [[Pirate Lagoon]], and [[Boulder Canyon]]. It is used against Bluey and Bubbler when raced against. | |||
<gallery> | |||
Ancient Lake DKRDS shot 2.png|Car | |||
Hot-Top Volcano DKRDS shot 2.png|Plane | |||
DKRDSHovercraft.png|Hovercraft | |||
</gallery> | |||
===Zippers=== | |||
{{main|Dash Panel#Diddy Kong Racing}} | |||
{{multiframe|[[File:Zipper Ground DKRDS.png|50px]][[File:Zipper Water DKRDS.png|50px]][[File:Zipper Air DKRDS.png|50px]]|The three Zippers variants, for Car, Plane, and Hovercraft.|align=left|size=150}} | |||
Zippers help vehicles Turbo Boost around corners on race tracks. They have red and yellow stripes and stand out from whatever track the racer is playing. By letting go of the gas while driving over/through a zipper, the racer can get an even larger boost. | |||
====Types of Zippers==== | |||
*'''The Car Zipper''' is flat on the ground and is fairly simple to get a good boost from and is chevron-shaped. | |||
*'''The Plane Zipper''' is found in the air and is a circle shape. The plane is the only vehicle that can access it. If racers attempts to get the boost at an angle, the boost lags and becomes a big time consumer. | |||
*'''The Hovercraft Zipper''' is found in water and is a triangle shape vertex that allows easy boosting and weapon advantage strategy making. Planes can also use it. | |||
==Tracks== | |||
===Race tracks=== | |||
''Diddy Kong Racing DS'' contains twenty-four race tracks split between six cups. In most races (marked with a check mark), racers are able to choose what type of vehicle to bring into the race, which can effect the paths in the course they are able to take. For some races, there are vehicles that are not able to be taken into it (marked with a red X). | |||
{|align=center class="wikitable"style="text-align:center;margin:0 auto 1em auto" | |||
|- | |- | ||
!colspan="12"style="font-size:125%;text-align:left;background:#9C6936"|{{color link|white|Dino Domain}} | |||
| | |||
|- | |- | ||
| | |colspan="3"style="background:wheat"|[[File:DKRDS Icon Ancient Lake.png]]{{br}}[[Ancient Lake]] | ||
|[[ | |colspan="3"style="background:#FFF8DC"|[[File:DKRDS Icon Fossil Canyon.png]]{{br}}[[Fossil Canyon]] | ||
|[[ | |colspan="3"style="background:wheat"|[[File:DKRDS Icon Jungle Falls.png]]{{br}}[[Jungle Falls (Diddy Kong Racing)|Jungle Falls]] | ||
|[[ | |colspan="3"style="background:#FFF8DC"|[[File:DKRDS Icon Hot Top Volcano.png]]{{br}}[[Hot Top Volcano]] | ||
|- | |- | ||
| | {{DKR vehicle|intable=y|car=y|hover=y|plane=y|bg=wheat}}{{DKR vehicle|intable=y|car=y|hover=y|plane=y|bg=#FFF8DC}}{{DKR vehicle|intable=y|car=y|hover=y|plane=y|bg=wheat}}{{DKR vehicle|intable=y|car=n|hover=y|plane=y|bg=#FFF8DC}} | ||
| | |} | ||
| | {|align=center class="wikitable"style="text-align:center;margin:0 auto 1em auto" | ||
| | |||
|- | |- | ||
!colspan="12"style="font-size:125%;text-align:left;background:#9C6936"|{{color link|white|Snowflake Mountain}} | |||
| | |||
|- | |- | ||
| | |colspan="3"style="background:wheat"|[[File:DKRDS Icon Everfrost Peak.png]]{{br}}[[Everfrost Peak]] | ||
|[[ | |colspan="3"style="background:#FFF8DC"|[[File:DKRDS Icon Walrus Cove.png]]{{br}}[[Walrus Cove]] | ||
|[[ | |colspan="3"style="background:wheat"|[[File:DKRDS Icon Snowball Valley.png]]{{br}}[[Snowball Valley]] | ||
|[[ | |colspan="3"style="background:#FFF8DC"|[[File:DKRDS Icon Frosty Village.png]]{{br}}[[Frosty Village]] | ||
|- | |- | ||
| | {{DKR vehicle|intable=y|car=n|hover=y|plane=y|bg=wheat}}{{DKR vehicle|intable=y|car=y|hover=y|plane=n|bg=#FFF8DC}}{{DKR vehicle|intable=y|car=y|hover=y|plane=n|bg=wheat}}{{DKR vehicle|intable=y|car=y|hover=y|plane=y|bg=#FFF8DC}} | ||
| | |} | ||
| | {|align=center class="wikitable" style="text-align:center;margin:0 auto 1em auto" | ||
| | |||
|- | |- | ||
!colspan="12"style="font-size:125%;text-align:left;background:#9C6936"|{{color link|white|Sherbet Island}} | |||
|- | |- | ||
|colspan="3"style="background:wheat"|[[File:DKRDS Icon Whale Bay.png]]{{br}}[[Whale Bay]] | |||
|colspan="3"style="background:#FFF8DC"|[[File:DKRDS Icon Crescent Island.png]]{{br}}[[Crescent Island]] | |||
|colspan="3"style="background:wheat"|[[File:DKRDS Icon Pirate Lagoon.png]]{{br}}[[Pirate Lagoon]] | |||
|colspan="3"style="background:#FFF8DC"|[[File:DKRDS Icon Treasure Caves.png]]{{br}}[[Treasure Caves]] | |||
|- | |- | ||
{{DKR vehicle|intable=y|car=n|hover=y|plane=n|bg=wheat}}{{DKR vehicle|intable=y|car=y|hover=y|plane=n|bg=#FFF8DC}}{{DKR vehicle|intable=y|car=n|hover=y|plane=n|bg=wheat}}{{DKR vehicle|intable=y|car=y|hover=y|plane=y|bg=#FFF8DC}} | |||
|} | |} | ||
{|align=center class="wikitable"style="text-align:center;margin:0 auto 1em auto" | |||
{| | |- | ||
! colspan= | !colspan="12"style="font-size:125%;text-align:left;background:#9C6936"|{{color link|white|Dragon Forest}} | ||
|- | |- | ||
|colspan="3"style="background:wheat"|[[File:DKRDS Icon Windmill Plains.png]]{{br}}[[Windmill Plains]] | |||
| | |colspan="3"style="background:#FFF8DC"|[[File:DKRDS Icon Greenwood Village.png]]{{br}}[[Greenwood Village]] | ||
|colspan="3"style="background:wheat"|[[File:DKRDS Icon Boulder Canyon.png]]{{br}}[[Boulder Canyon]] | |||
|colspan="3"style="background:#FFF8DC"|[[File:DKRDS Icon Haunted Woods.png]]{{br}}[[Haunted Woods]] | |||
|- | |- | ||
| | {{DKR vehicle|intable=y|car=y|hover=y|plane=y|bg=wheat}}{{DKR vehicle|intable=y|car=y|hover=y|plane=n|bg=#FFF8DC}}{{DKR vehicle|intable=y|car=n|hover=y|plane=n|bg=wheat}}{{DKR vehicle|intable=y|car=y|hover=y|plane=n|bg=#FFF8DC}} | ||
|} | |||
{|align=center class="wikitable"style="text-align:center;margin:0 auto 1em auto" | |||
|- | |- | ||
| | !colspan="12"style="font-size:125%;text-align:left;background:#9C6936"|{{color link|white|Future Fun Land}} | ||
|- | |- | ||
|3 || [[ | |colspan="3"style="background:wheat"|[[File:DKRDS Icon Spacedust Alley.png]]{{br}}[[Spacedust Alley]] | ||
|colspan="3"style="background:#FFF8DC"|[[File:DKRDS Icon Darkmoon Caverns.png]]{{br}}[[Darkmoon Caverns]] | |||
|colspan="3"style="background:wheat"|[[File:DKRDS Icon Spaceport Alpha.png]]{{br}}[[Spaceport Alpha]] | |||
|colspan="3"style="background:#FFF8DC"|[[File:DKRDS Icon Star City.png]]{{br}}[[Star City]] | |||
|- | |- | ||
| | {{DKR vehicle|intable=y|car=y|hover=y|plane=y|bg=wheat}}{{DKR vehicle|intable=y|car=y|hover=y|plane=n|bg=#FFF8DC}}{{DKR vehicle|intable=y|car=y|hover=y|plane=y|bg=wheat}}{{DKR vehicle|intable=y|car=y|hover=y|plane=y|bg=#FFF8DC}} | ||
|} | |||
{|align=center class="wikitable"style="text-align:center;margin:0 auto 1em auto" | |||
|- | |- | ||
!colspan="12"style="font-size:125%;text-align:left;background:#9C6936"|{{color link|white|Donkey Kong Island|DK Island}} | |||
|- | |- | ||
|colspan="3"style="background:wheat"|[[File:DKRDS Icon Thunder Cove.png]]{{br}}[[Thunder Cove]] | |||
| | |colspan="3"style="background:#FFF8DC"|[[File:DKRDS Icon Meandering Mount.png]]{{br}}[[Meandering Mount]] | ||
|colspan="3"style="background:wheat"|[[File:DKRDS Icon Splashdown Pass.png]]{{br}}[[Splashdown Pass]] | |||
|colspan="3"style="background:#FFF8DC"|[[File:DKRDS Icon Strangled Shrine.png]]{{br}}[[Strangled Shrine]] | |||
|- | |- | ||
| | {{DKR vehicle|intable=y|car=y|hover=y|plane=y|bg=wheat}}{{DKR vehicle|intable=y|car=y|hover=y|plane=y|bg=#FFF8DC}}{{DKR vehicle|intable=y|car=y|hover=y|plane=y|bg=wheat}}{{DKR vehicle|intable=y|car=n|hover=y|plane=y|bg=#FFF8DC}} | ||
|} | |||
===Battle tracks <small>(multiplayer only)</small>=== | |||
{|align=center class="wikitable"style="text-align:center;margin:0 auto 1em auto" | |||
|- | |- | ||
| | |colspan="3"style="background:wheat"|[[File:DKRDS Icon Fire Mountain.png]]{{br}}[[Fire Mountain (battle course)|Fire Mountain]] | ||
|colspan="3"style="background:#FFF8DC"|[[File:DKRDS Icon Icicle Pyramid.png]]{{br}}[[Icicle Pyramid]] | |||
|colspan="3"style="background:wheat"|[[File:DKRDS Icon Darkwater Beach.png]]{{br}}[[Darkwater Beach]] | |||
|colspan="3"style="background:#FFF8DC"|[[File:DKRDS Icon Smokey Castle.png]]{{br}}[[Smokey Castle]] | |||
|- | |- | ||
| | {{DKR vehicle|intable=y|car=n|hover=n|plane=y|bg=wheat}}{{DKR vehicle|intable=y|car=y|hover=n|plane=n|bg=#FFF8DC}}{{DKR vehicle|intable=y|car=n|hover=y|plane=n|bg=wheat}}{{DKR vehicle|intable=y|car=y|hover=n|plane=n|bg=#FFF8DC}} | ||
|} | |||
===Adventure Mode tracks=== | |||
''Key'': | |||
*C = Car | |||
*P = Plane | |||
*H = Hovercraft | |||
Abbreviations in bold denote the vehicle required to be used when racing in Adventure Mode. | |||
{|border="1"cellspacing=0 cellpadding=2 align="center"style="background:wheat" width=100% class="wikitable" | |||
!colspan=5 style="background:#9C6936;color:white"align=center|<big>{{color link|#FFF8DC|Timber's Island}} areas</big> | |||
|- | |- | ||
| | !colspan=5 style="background:#BE9966"align=center|{{color link|navy|Dino Domain}} | ||
|-align=center | |||
!width=1% style=background:#CFBB88|# | |||
!style=background:#CFBB88|Track | |||
!style=background:#CFBB88|Balloon count | |||
!style=background:#CFBB88|Silver Coin Challenge balloon count | |||
!style=background:#CFBB88|Types of transportation available | |||
|- | |- | ||
| | |1||[[Ancient Lake]]||1||6||'''C''', H , P | ||
|-style="background:#FFF8DC" | |||
|2||[[Fossil Canyon]]||2||7||'''C''' , H , P | |||
|- | |- | ||
|3||[[Jungle Falls (Diddy Kong Racing)|Jungle Falls]]||3||8||'''C''' , H , P | |||
|- style=background:# | |-style="background:#FFF8DC" | ||
|4||[[Hot Top Volcano]]||5||10||H , '''P''' | |||
|- | |- | ||
| | |5||'''[[Tricky Challenge]]'''||5 or more once all 4 are beaten||10 or more once all 4 are beaten||'''C''' | ||
|- | |- | ||
| | !colspan=5 style="background:#BE9966"align=center|{{color link|navy|Snowflake Mountain}} | ||
|-style=background:#fafffa align=center | |||
|-align=center | |||
!width=1% style=background:#CFBB88|# | |||
!style=background:#CFBB88|Track | |||
!style=background:#CFBB88|Balloon count | |||
!style=background:#CFBB88|Silver Coin Challenge balloon count | |||
!style=background:#CFBB88|Types of transportation available | |||
|- | |- | ||
| | |1||[[Everfrost Peak]]||2||10||H , '''P''' | ||
|-style="background:#FFF8DC" | |||
|2||[[Walrus Cove]]||3||11||'''C''' , H | |||
|- | |- | ||
|4 || [[ | |3||[[Snowball Valley]]||6||14||'''C''' , H | ||
|-style="background:#FFF8DC" | |||
|4||[[Frosty Village]]||9||16||'''C''' , H, P | |||
|- | |- | ||
|5 || ''' | |5||'''[[Bluey Challenge]]'''||9 or more once all 4 are beaten||16 or more once all 4 are beaten||'''H''' | ||
|- | |- | ||
! colspan=5 style="background:# | !colspan=5 style="background:#BE9966"align=center|{{color link|navy|Sherbet Island}} | ||
|- style=background:#fafffa align=center | |-style=background:#fafffa align=center | ||
! width=1% | # ! | |-align=center | ||
!width=1% style=background:#CFBB88|# | |||
!style=background:#CFBB88|Track | |||
!style=background:#CFBB88|Balloon count | |||
!style=background:#CFBB88|Silver Coin Challenge balloon count | |||
!style=background:#CFBB88|Types of transportation available | |||
|- | |- | ||
|1 || [[ | |1||[[Whale Bay]]||10||17||'''H''' | ||
|-style="background:#FFF8DC" | |||
|2||[[Crescent Island]]||11||18||'''C''' , H | |||
|- | |- | ||
| | |3||[[Pirate Lagoon]]||13||20||'''H''' | ||
|-style="background:#FFF8DC" | |||
|4||[[Treasure Caves]]||16||22||'''C''' , H , P | |||
|- | |- | ||
| | |5||'''[[Bubbler Challenge]]'''||16 or more once all 4 are beaten||22 or more once all 4 are beaten||H | ||
|- | |- | ||
| | !colspan=5 style="background:#BE9966"align=center|{{color link|navy|Dragon Forest}} | ||
|-style=background:#fafffa align=center | |||
|-align=center | |||
!width=1% style=background:#CFBB88|# | |||
!style=background:#CFBB88|Track | |||
!style=background:#CFBB88|Balloon count | |||
!style=background:#CFBB88|Silver Coin Challenge balloon count | |||
!style=background:#CFBB88|Types of transportation available | |||
|- | |- | ||
| | |1||[[Windmill Plains]]||16||23||C , H , '''P''' | ||
|-style="background:#FFF8DC" | |||
|2||[[Greenwood Village]]||17||24||'''C''' , H | |||
|- | |- | ||
|3||[[Boulder Canyon]]||20||30||'''H''' | |||
|-style="background:#FFF8DC" | |||
|4||[[Haunted Woods]]||22||37||'''C''' , H | |||
|- | |- | ||
|5||'''[[Smokey Challenge]]'''||22 or more once all 4 are beaten||37 or more once all 4 are beaten||P | |||
|- | |- | ||
|1 || [[ | !colspan=5 style="background:#BE9966"align=center|Wizpig Head | ||
|-align=center | |||
!width=5% style=background:#CFBB88|# | |||
!width=39% style=background:#CFBB88|Track | |||
!width=28% style=background:#CFBB88|Balloon Amount | |||
!width=28% style=background:#CFBB88|Silver Coin Challenge Balloon Amount | |||
!style=background:#CFBB88|Types of Transportation Available | |||
|-style="background:wheat" | |||
|1||'''[[Wizpig's First Strike]]'''|| colspan=2 align=center | N/A (Unlocked by collecting all four pieces of the Wizpig amulet) ||'''C''' | |||
|- | |- | ||
| | !colspan=5 style="background:#BE9966"align=center|{{color link|navy|Future Fun Land}} | ||
|- | |- | ||
| | |-align=center | ||
!width=1% style=background:#CFBB88|# | |||
!style=background:#CFBB88|Track | |||
!style=background:#CFBB88|Balloon count | |||
!style=background:#CFBB88|Silver Coin Challenge balloon count | |||
!style=background:#CFBB88|Types of transportation available | |||
|- | |- | ||
| | |1||[[Spacedust Alley]]||39||43||C , H , '''P''' | ||
|-style="background:#FFF8DC" | |||
|2||[[Darkmoon Cavern]]||40||44||'''C''' , H | |||
|- | |- | ||
| | |3||[[Spaceport Alpha]]||41||45||C, H , '''P''' | ||
|-style="background:#FFF8DC" | |||
|4||[[Star City]]||42||46||'''C''' , H , P | |||
|- | |- | ||
|5||'''[[Wizpig Strikes Back]]'''||N/A||47||'''P''' | |||
|} | |} | ||
==Other | ==Other balloons== | ||
===Taj's races and challenges=== | ===Taj's races and challenges=== | ||
[[File: | [[File:Taj Car Challenge DKRDS win.png|thumb|Taj, after his respectable defeat.]] | ||
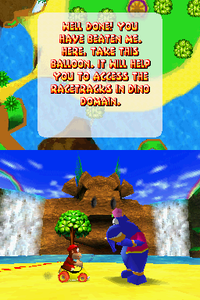
Taj races and trains the racer in many areas aside from selling the player unlockables and helping them customize their car. He usually rides his [[ | Taj races and trains the racer in many areas aside from selling the player unlockables and helping them customize their car. He usually rides his [[magic carpet]] or stands in awe as the racer fulfills Taj's own wish. In return for the racers success in the challenge he gives them a Golden Balloon. | ||
====Taj Challenges==== | ====Taj Challenges==== | ||
*'''Car Race''' - Once the racer starts their game, they race Taj around in a circle with the car, following the black and white tokens. This is an act of training and racers receive their first Golden Balloon. | *'''Car Race''' - Once the racer starts their game, they race Taj around in a circle with the car, following the black and white tokens. This is an act of training and racers receive their first Golden Balloon. | ||
| Line 477: | Line 588: | ||
*'''Taj Token Tussle''' - The racer races Taj around the island for ten [[Taj Token]]s by following the arrows to their temporary locations. The first to ten tokens wins. | *'''Taj Token Tussle''' - The racer races Taj around the island for ten [[Taj Token]]s by following the arrows to their temporary locations. The first to ten tokens wins. | ||
===Balloon | ===Balloon Touch Challenge=== | ||
[[File: | [[File:Balloon Touch Challenge DKRDS results.png|thumb|The results screen after completing a Balloon Touch Challenge.]] | ||
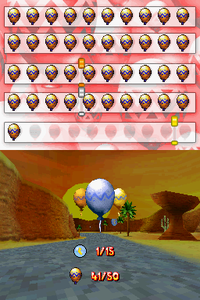
After the area's major boss is defeated (except Future Fun Land's), the boss orders the racer to get at least a Bronze Balloon in each of their four tracks. By using the Stylus, racers can pop the Golden Balloons scattered over each track. Fifty Gold Balloons are in each, and after popping them can gain the rank Bronze, Silver, or Gold | After the area's major boss is defeated (except Future Fun Land's), the boss orders the racer to get at least a Bronze Balloon in each of their four tracks. By using the Stylus, racers can pop the Golden Balloons scattered over each track. Fifty Gold Balloons are in each, and after popping them can gain the rank Bronze, Silver, or Gold. | ||
Once the racer gets the bronze ranking or higher, the racer receives a Golden Balloon for their first win at the challenge and unlocked the Silver Coin Challenge for that world. The Coin Challenge was replaced by the Balloon Touch Challenge in the actual game, though it is still available in single-player mode once completed successfully. | |||
====Rank amounts==== | ====Rank amounts==== | ||
*'''Dino Domain''' | *'''Dino Domain''' | ||
| Line 488: | Line 598: | ||
:Silver - 35 balloons | :Silver - 35 balloons | ||
:Gold - 50 balloons | :Gold - 50 balloons | ||
*'''Snowflake Mountain''' | *'''Snowflake Mountain''' | ||
:Bronze - 35 balloons | :Bronze - 35 balloons | ||
:Silver - 40 balloons | :Silver - 40 balloons | ||
:Gold - 50 balloons | :Gold - 50 balloons | ||
*'''Sherbet Island'''/'''Dragon Forest'''/'''Future Fun Land''' | *'''Sherbet Island'''/'''Dragon Forest'''/'''Future Fun Land''' | ||
:Bronze - 40 balloons | :Bronze - 40 balloons | ||
:Silver - 45 balloons | :Silver - 45 balloons | ||
:Gold - 50 balloons | :Gold - 50 balloons | ||
{{br}} | |||
==Trophy Race== | ==Trophy Race== | ||
[[File: | [[File:Windmill Plains DKRDS.png|thumb|Timber races in a Trophy Race in Windmill Plains.]] | ||
Trophy Races are Grand-Prix races where racers race each other in the area's four tracks in order, in an attempt to win the most amount of points. The racer must jostle with the computer racers' places in the races, which vary in each track, so winning one or two races secures the racer a gold trophy. | Trophy Races are Grand-Prix races where racers race each other in the area's four tracks in order, in an attempt to win the most amount of points. The racer must jostle with the computer racers' places in the races, which vary in each track, so winning one or two races secures the racer a gold trophy. | ||
Each Trophy varies in appearance to the area it | Each Trophy varies in appearance to the area it is associated to. By winning trophies the sign by the lighthouse near Sherbet Island fills up Wizpig's face. Once all four Wizpig amulets are accounted for, the racer can blast to Future Fun Land after they defeat Wizpig in his first race. The fifth and final trophy race must be completed before Wizpig can be defeated, this is the only time a trophy race must be completed before the boss is defeated. | ||
==Multiplayer== | ==Multiplayer== | ||
===Nintendo Wi-Fi Connection Mode=== | ===Nintendo Wi-Fi Connection Mode=== | ||
Diddy Kong Racing DS has six player maximum online racing challenges. If the racer unlocked the various online options from Taj, they have the ability to do as follows: | ''Diddy Kong Racing DS'' has six player maximum online racing challenges. If the racer unlocked the various online options from Taj, they have the ability to do as follows: | ||
====Single Race==== | ====Single Race==== | ||
Single race allows two, four, or six racers to compete in one track at a time. A track is selected by each racer, and a randomizer randomizes the vehicle and track the racers use and play on. Then to the left of their usernames is a colored circle, which indicates their mark on the track. Their character icon is kept hidden from online activity. | Single race allows two, four, or six racers to compete in one track at a time. A track is selected by each racer, and a randomizer randomizes the vehicle and track the racers use and play on. Then to the left of their usernames is a colored circle, which indicates their mark on the track. Their character icon is kept hidden from online activity. | ||
| Line 514: | Line 622: | ||
====Trophy Race==== | ====Trophy Race==== | ||
Trophy Races of the four main areas are available and a trophy Race of Jungle Japes with the four new tracks. In a Grand Prix styled event, the racers race through the four tracks in sequence, and whoever gains most points wins. | Trophy Races of the four main areas are available and a trophy Race of Jungle Japes with the four new tracks. In a Grand Prix styled event, the racers race through the four tracks in sequence, and whoever gains most points wins. | ||
{|style="background:wheat;text-align:center;width:30em" | |||
{| | |||
|- | |- | ||
!colspan=7 style="background:#9C6936;text-align:center"|<span style="color:white;">Trophy Race multiplayer points</span> | |||
|- | |- | ||
| | !style="background:#BE9966; text-align:center; width:6em"|Number of players!!style="background:#BE9966; text-align:center; width:3em"|1st!!style="background:#BE9966; text-align:center; width:3em"|2nd!!style="background:#BE9966; text-align:center; width:3em"|3rd!!style="background:#BE9966; text-align:center; width:3em"|4th!!style="background:#BE9966; text-align:center; width:3em"|5th!!style="background:#BE9966; text-align:center; width:3em"|6th | ||
|- | |- | ||
| | |6 Players||9||7||5||3||1||0 | ||
|-style="background:##FFF8DC;" | |||
|5 Players||9||7||5||3||1||'''---''' | |||
|- | |- | ||
| | |4 Players||9||7||5||3||'''---'''||'''---''' | ||
|-style="background:##FFF8DC;" | |||
|3 Players||9||7||5||'''---'''||'''---'''||'''---''' | |||
|- | |- | ||
|2 Players||9||3||'''---'''||'''---'''||'''---'''||'''---''' | |||
|} | |} | ||
| Line 537: | Line 643: | ||
===Multi-Game Racing=== | ===Multi-Game Racing=== | ||
If at least two ''Diddy Kong Racing DS'' games are owned, the racers can race with every Multiplayer option available. Their icons are also visible. | If at least two ''Diddy Kong Racing DS'' games are owned, the racers can race with every Multiplayer option available. Their icons are also visible. Eight players can play. | ||
===Download Play=== | ===Download Play=== | ||
The entire basis is based on the racer who owns the game and the other racers who do not own the game must do whatever the one with the game wants. Options | The entire basis is based on the racer who owns the game and the other racers who do not own the game must do whatever the one with the game wants. Options are not limited, but the paint of the racer's vehicle is set to the default color of yellow and so are the gameless racers. Also, the icons are not visible. Eight players can play. | ||
==Differences between versions== | ==Differences between versions== | ||
Along with its several new features ''Diddy Kong Racing DS'' has several notable differences between it and the original Nintendo 64 version. These differences include: | Along with its several new features ''Diddy Kong Racing DS'' has several notable differences between it and the original Nintendo 64 version. These differences include: | ||
{|border="1"cellspacing=0 cellpadding=2 align="center"style="background:#fdfffd"width=100% class="wikitable" | |||
!colspan=3 style="background:#9C6936;color:white"align=center|<big>''Diddy Kong Racing'' - ''Diddy Kong Racing DS''</big><br> | |||
|- | |||
!colspan=3 style="background:#BE9966"align=center|Differences | |||
|-style=background:#CFBB88 align=center | |||
!width=2% style=background:#CFBB88|# | |||
!!width=49% style=background:#CFBB88|N64 version | |||
!!width=49% style=background:#CFBB88|DS version | |||
|-style="background:wheat" | |||
|1||Banjo and Conker are among the selectable characters.||Due to [[Nintendo]] losing the licensing for these characters (and also that Conker would no longer fit in with the game's theme), Dixie and Tiny replaced them. | |||
|-style="background:#FFF8DC" | |||
|2||Taj has a face plate in the center grove of the island where a racer can honk a horn and summon him.||Taj now owns a tent and is summoned by honking or tapping it with the stylus. | |||
|-style="background:wheat" | |||
|3||Bananas are a source of speed. Collecting ten total achieves maximum speed, and getting hit by a weapon makes the racer lose two bananas.||Rare Coins replace the bananas and they can be collected to purchase unlockable content from Taj's tent. | |||
|-style="background:#FFF8DC" | |||
|4||Wizpig and Taj are non-playable major characters.||Wizpig and Taj are playable once unlocked. | |||
|-style="background:wheat" | |||
|5||Tricky's track is a spiraled mountain with a shortcut near the middle. It's easy to fail the race by falling off.||Tricky's Track is shorter and falling off is not as easy. | |||
|-style="background:#FFF8DC" | |||
|6||Tricky's second boss round has falling trees.||Tricky's second boss round has no falling trees. | |||
|-style="background:wheat" | |||
|7||Cutscenes are elaborate and each character has unique voices and music.||The cutscenes are less impressive and simpler, and the characters have changed voices so that they sound almost alike (except for T.T.'s which sounds identical to the Nintendo 64's release). | |||
|-style="background:#FFF8DC" | |||
|8||After a boss is defeated two times, Taj's face replaces Wizpig's on the boss door.||Once the boss is beaten, the door does not change. There is also a third challenge that uses the Touch Screen. | |||
|- style="background:wheat" | |||
|9||T.T. has great speed and acceleration, and an average handling.||T.T. has great speed and acceleration, and an above average handling. | |||
|-style="background:#FFF8DC" | |||
|10||Four random prize balloons float in certain parts of the island for the racer to fly into and collect easily.||The four balloons are now at a price: each has a little touch challenge for the racer to fulfill to get the balloons. | |||
|-style="background:wheat" | |||
|11||There are four battle stations after the player gets a hidden key in one of the four tracks in the world and if the racer wins the battle stages, they get a balloon from Taj and a piece of the T.T. amulet.||The player may receive a part of the T.T. amulet by racing in a Wish Race, three of which have preset designs. The battle stations are now only available in multiplayer mode. | |||
|-style="background:#FFF8DC" | |||
|12||Planes can barrel roll and flip.||Barrel rolls and flips are absent. | |||
|-style="background:wheat" | |||
|13||Krunch has a skull on the back on his jacket.||Due to the limited graphical resolution, the skull is no longer drawn. | |||
|- style="background:#FFF8DC" | |||
|14||Magic Codes are a part of the game.||There are no longer any Magic Codes. | |||
|-style="background:wheat" | |||
|15||Walrus Cove has ice that makes a racer bounce back on the track.||Ice is replaced with water. | |||
|-style="background:#FFF8DC" | |||
|16||Everfrost Peak can have the racers in cars.||Cars are a removed choice on this track as the ice has changed to water. | |||
|-style="background:wheat" | |||
|17||If the player loses a race, a frame encloses the camera and gives them an option to retry, return to the lobby, or quit.||If the player loses a race, Wizpig appears and laughs at them, and they are immediately sent to the world's lobby. The skybox also has Wizpig with both hands up, and this scene will not be shown if the player already beat the level. | |||
|-style="background:#FFF8DC" | |||
|18||Sometimes a boss gives players a head start.||Only Bluey in both races and his extra challenge, Tricky in his first race, and Smokey in his extra challenge, give head starts. | |||
|-style="background:wheat" | |||
|19||Bubbler shoots bubbles in his second race.||Bubbler shoots bubbles and spike bombs in his second race, making it more challenging for a racer. | |||
|-style="background:#FFF8DC" | |||
|20||Smokey leaves few fireballs in his first race and many in his second.||Smokey has an easier second race with fewer fireballs. The first race has none at all. | |||
|-style="background:wheat" | |||
|21||Two Red Balloons make a homing missile and three make ten missiles.||Two Red Balloons make five Semi-Homing Missiles while three make a Homing Missile. | |||
|-style="background:#FFF8DC" | |||
|22||Yellow balloons with purple stars have three icons that indicate their power shield in this order : a red and yellow circle, a star, and a lightning bolt.||The first and last icons are reversed. | |||
|-style="background:wheat" | |||
|23||A voice says "Diddy Kong Racing! Press start." on the title screen.||The voice is not heard on the title screen. | |||
|-style="background:#FFF8DC" | |||
|24||Taj has a stereotypical East Indian accent.||Taj now has a softer British accent. | |||
|-style="background:wheat" | |||
|25||After beating the boss the first time, the player has to complete the Silver Coin Challenge.||After beating the boss for the first time, the player has to complete the touchscreen Balloon Popping Challenge. Once done, the Silver Coin Challenge is unlocked for Time Trial Mode for each track completed. | |||
|-style="background:#FFF8DC" | |||
|26||Diddy Kong has no eyelids.||Diddy Kong has brown eyelids (like in ''[[Donkey Kong 64]]''). | |||
|-style="background:#FFF8DC" | |||
|27||Star City features a curved bridge, and two moving giant rings.||There is now a tunnel under the curved bridge, and the giant rings are replaced by a water fountain. However, the giant rings are still seen during the Balloon Popping Challenge, replacing the fountain. | |||
|-style="background:#FFF8DC" | |||
|28||Tracing was not available in the N64 version.||In the DS version, with the stylus, the player is able to trace a secret balloon in the sand and a Wizpig image. | |||
|-style="background:#FFF8DC" | |||
|} | |||
==T.T.'s Wish Races== | |||
{{main|Wish Race}} | |||
[[File:Wish Race DKRDS designer.png|thumb|T.T. instructs the player to create a Wish Race.]] | |||
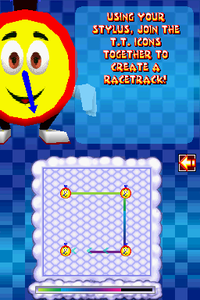
T.T. has a slightly more notable role, and is the other host aside from Taj. T.T. hosts a Wish Race challenge from behind a Wish Door in each world, which he is locked behind. The player must collect a [[Wish Key]], hidden in a course of each world, to access this challenge. In it, T.T. instructs them to draw a racetrack with their stylus, known as a Wish Race. These replace the Battle Stages from the original ''Diddy Kong Racing'', which were redone as multiplayer battle stages. The player must win against T.T. to free him and recover a piece of the [[T.T. amulet]]. He also walks around the lobby after being freed. | |||
==Music== | |||
Multiple levels have different musical themes than their Nintendo 64 counterparts: | |||
*'''Jungle Falls''' - A new theme featuring kalimba and lyrics that sound like "gida-idia / gida-idia baah". The music from the N64 Jungle Falls is now used for the credits. | |||
*'''Snowball Valley''' - Instead of sharing its music with Everfrost Peak, the DS version has more cheerful music. | |||
*'''Pirate Lagoon''' - A more tropical background tone than the hip pirate-like music in the original. Its original theme is not featured in this game. | |||
*'''Treasure Caves''' - Less pounding than the original's music, and a more tropical feel. | |||
*'''Windmill Plains''' - Instead of sharing its music with Greenwood Village, the DS version has more country-style music. | |||
*'''Spaceport Alpha''' - More space-type music quality. Its original theme is now used for Spacedust Alley. | |||
*'''Spacedust Alley''' - Uses the original Spaceport Alpha theme. In the N64 verison, it shared its music with [[Star City]]. | |||
{| | ==Reception== | ||
{|class="wikitable reviews" | |||
|- | !colspan="4"style="font-size:120%; text-align:center; background-color:silver;"|Reviews | ||
|-style="background-color:#E6E6E6" | |||
| | |Release | ||
|Reviewer, Publication | |||
| | |Score | ||
| | |Verdict | ||
|- | |- | ||
| | |[[Nintendo DS]] | ||
|Aaron Thomas, [https://www.gamespot.com/reviews/diddy-kong-racing-ds-review/1900-6165306/ GameSpot] | |||
|6.7/10 | |||
|"''At its core, Diddy Kong Racing DS isn't a bad kart-racing game, but its best feature, the racing, is buried underneath so much unnecessary garbage that some people will find it nearly impossible to enjoy. Had Rare stripped the island setting, toned down the tedious collecting, and tweaked some other minor issues, the game would have been better with less. Instead, it chose to add more and more content, and the game suffers for it. Some of the new additions, such as online multiplayer and the various customization features, make the game more enjoyable, but many of them, particularly the touch-screen controls, make it worse. If you don't mind that the game sometimes feels more like [[Donkey Kong 64]] than a racing game, then you'll probably enjoy all that Diddy Kong Racing DS has to offer. But if you just want to race, there are better options.''" | |||
|- | |- | ||
| | |Nintendo DS | ||
|Keza MacDonald, [https://www.eurogamer.net/articles/diddy-kong-racing-review Eurogamer] | |||
|5/10 | |||
|"''Despite remaining, after ten years, the only 'adventure racer' that I can remember appearing on a Nintendo console, Diddy Kong Racing still manages to feel unoriginal. Insipid character and course design married with inherently repetitive gameplay, obsessive collecting and an array of horrible touchscreen features make this feel like a waste of time. It's got plenty of content, and is a perfectly serviceable, occasionally competitive kart racer, but there's not much distinguishing about it. Ten years ago, I rather enjoyed this, but in retrospect, it probably belongs back in 1997.''" | |||
|- | |- | ||
| | |Nintendo DS | ||
|Craig Harris, [https://www.ign.com/articles/2007/02/06/diddy-kong-racing-ds-review IGN] | |||
|7.1/10 | |||
|"''Diddy Kong Racing had huge competition back when the original game hit the Nintendo 64 as [[Mario Kart 64]] was the king of the track on that platform. Ten years later, history repeats itself: [[Mario Kart DS]] is a tough nut to crack, but Diddy Kong Racing manages to offer up a significantly different product that, admittedly, doesn't come close to the same satisfying experience as Nintendo's own racer. The racing's fun and challenging, no question. The ability to zoom around in cars, planes, and watercraft is reason enough to give this one a go on the Nintendo DS. But unfortunately the development team focused a bit too much on "DS-izing" the product with completely unnecessary and frustrating touch-screen and microphone challenges that disrupt the racing design. Some DS elements are better than others, but the ones that are bad are huge problems that should have been axed to make room for the elements that actually worked. Overall, Diddy Kong Racing's a good product with some first-generation blues dragging it down. The fantastic online and customization focus offset some of the clunky items that made it into the design...but don't think we're going to turn a blind eye to the stupid stuff.''" | |||
|- | |- | ||
| | !colspan="4"style="font-size:120%; text-align:center; background-color:silver;"|Aggregators | ||
|-style="background-color:#E6E6E6" | |||
|colspan=2|Compiler | |||
|colspan=2|{{nw|Platform / Score}} | |||
|- | |- | ||
| | |colspan=2|Metacritic | ||
|- | |colspan=2 style="background-color:Gold"|[https://www.metacritic.com/game/ds/diddy-kong-racing-ds 63] | ||
|- | |- | ||
|colspan=2|GameRankings | |||
|colspan=2|[https://www.gamerankings.com/ds/933008-diddy-kong-racing-ds/index.html 66.76%] | |||
|} | |} | ||
{{br}} | |||
== | ==Staff== | ||
{{main|List of Diddy Kong Racing DS staff}} | |||
=== | ==Gallery== | ||
{{main-gallery}} | |||
== | ==Quotes== | ||
{{main|List of Diddy Kong Racing quotes}} | |||
*'' | ==References to other games== | ||
*''[[Donkey Kong Country]]'' - The tracks [[Thunder Cove]], [[Meandering Mount]], [[Splashdown Pass]], and [[Strangled Shrine]] seem to be based off the jungle levels in this game, with "[[DK Island Swing]]" even being remixed twice for these tracks. | |||
*'' | *''[[Donkey Kong 64]]'' - The game's title logo is similar to ''Donkey Kong 64''{{'}}s. [[Tiny Kong]] makes a reappearance. | ||
== | ==Trivia== | ||
*A promotional browser game starring [[Timber]] was released in 2007 called ''[[Timber's Balloon Pop|Diddy Kong Racing DS -- Timber's Balloon Pop]]''. | |||
== | ==References== | ||
<references /> | |||
== | ==External links== | ||
{{ | {{NIWA|StrategyWiki=1}} | ||
{{TCRF}} | |||
*[https://www.nintendo.com/games/detail/b_Gxwc_bfwdr8D8jQdmjizCEBh8PnJUN North American website]{{dead link}} | |||
*[https://www.nintendo.co.uk/Games/Nintendo-DS/Diddy-Kong-Racing-DS-270440.html European (UK) website] | |||
*[http://microsite.nintendo-europe.com/diddykongracing/enGB/ European (UK) microsite]{{dead link}} | |||
*[https://csassets.nintendo.com/noaext/image/private/t_KA_PDF/DS_Diddy_Kong_Racing?_a=DATC1RAAZAA0 North American manual] | |||
{{DKR}} | |||
{{Donkey Kong games}} | |||
{{ | |||
{{ | |||
{{DS}} | {{DS}} | ||
[[Category:Nintendo DS games]] | |||
[[Category:Nintendo DS | [[Category:Racing games]] | ||
[[Category:Racing | |||
[[Category:Games]] | [[Category:Games]] | ||
[[Category:Diddy Kong Racing]] | [[Category:Diddy Kong Racing|*]] | ||
[[Category:2007 games]] | [[Category:2007 games]] | ||
[[Category:Remakes]] | [[Category:Remakes]] | ||
[[Category:Games with Wi-Fi Connection]] | [[Category:Games with Nintendo Wi-Fi Connection]] | ||
[[Category:Games unreleased in Japan]] | |||
[[Category:Rare Ltd. games]] | |||
[[de:Diddy Kong Racing DS]] | |||
[[it:Diddy Kong Racing DS]] | |||
Latest revision as of 17:35, December 31, 2024
| Diddy Kong Racing DS | |||||||||
|---|---|---|---|---|---|---|---|---|---|
 North American box cover For alternate box art, see the game's gallery. | |||||||||
| Developer | Rare | ||||||||
| Publisher | Nintendo | ||||||||
| Platform(s) | Nintendo DS | ||||||||
| Release date | |||||||||
| Language(s) | English (United States) French (France) German Spanish (Spain) Italian | ||||||||
| Genre | Racing, Adventure | ||||||||
| Rating(s) |
| ||||||||
| Mode(s) | Single-player, multiplayer, online multiplayer | ||||||||
| Format | Nintendo DS:
Game Card
| ||||||||
| Input | Nintendo DS:
| ||||||||
| Serial code(s) | |||||||||
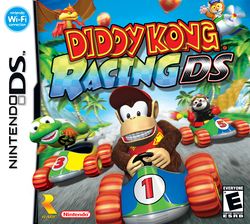
Diddy Kong Racing DS, also referred to as Diddy Kong Racing,[2] is a racing game for the Nintendo DS. It is a remake of the Nintendo 64 game Diddy Kong Racing. Diddy Kong Racing DS is Rare's first Nintendo DS game. This game adds online multiplayer via Nintendo Wi-Fi Connection.
Due to Rare's acquisition by Microsoft, Banjo and Conker were replaced by Tiny Kong and Dixie Kong respectively, although Tiptup was kept in the game, despite his appearances in several Banjo-Kazooie games. Nintendo owns the copyright to the original Diddy Kong Racing game code and Microsoft had never entered the handheld gaming market, therefore allowing Rare to work on the game with Nintendo for the DS. This is the final game created by Rare to feature a character from a Nintendo franchise.
Story[edit]
When his parents go on vacation, Timber is left to care for the family island, Timber's Island. Unfortunately, an evil pig wizard, named Wizpig, invades the island and brainwashes Tricky, Bluey, Bubbler, and Smokey to be his lieutenants. One of the island's fastest racers, Drumstick, challenges Wizpig to a race, only to disappear without a trace after doing so. In desperation, Timber, along with his friends Tiptup, Pipsy, and Bumper, sends a letter to his friend Diddy Kong via Squawks, asking for help. Accepting Timber's plea, Diddy calls Dixie Kong and Tiny Kong to assist him. Krunch, a Kremling Krew spy, sets off to Timber's Island following the Kongs, attempting to figure out what they are up to and to bring that information to King K. Rool.
With help from Taj and T.T., Diddy, Timber, and co. manage to beat Tricky, Bluey, Bubbler, and Smokey in races and snap them out of Wizpig's brainwashing. Drumstick, who had been turned into a frog by Wizpig, is also returned to normal.
After Wizpig's brainwashed minions are defeated, Wizpig is next challenged by Diddy Kong and his friends. After a race, Wizpig is seemingly defeated and a victory celebration is held. Unfortunately, Wizpig crashes the party.
Following Wizpig to his home planet, Future Fun Land, Diddy Kong and his friends manage to get past all of Wizpig's challenges and get a rematch with the rocket-riding Wizpig. After another race, Wizpig is beaten and his rocket malfunctions, causing it to crash into a deserted planet. Wizpig is stranded, but he mentions that he shall return sometime.
Returning to Timber's Island, another celebration is held, with Wizpig having been beaten for good and his hold on the island gone.
Drivers[edit]
Diddy Kong Racing DS features a total of twelve racers, four of which are unlockable. The racers' stats vary in three major categories: speed, acceleration, and handling. Eight of the racers, Diddy Kong, Tiptup, Pipsy, Bumper, Timber, Krunch, T.T., and Drumstick, are all available as racers in Diddy Kong Racing. Taj and Wizpig are in the original Diddy Kong Racing, but are not playable characters. Banjo and Conker were replaced with Tiny and Dixie Kong respectively.
Many of the stats listed on the menu do not match up up with the character's actual hidden stats within the game. For example, T.T. is listed as having max speed when he is actually slower than Krunch, while Drumstick is listed having 5/5 acceleration when he actually has some of the lowest acceleration.[3]
| Default characters | |||||||||||||||||||||||||||||||||||||||||||||||||||||||||||||||||||||||||||||||||||||||
|---|---|---|---|---|---|---|---|---|---|---|---|---|---|---|---|---|---|---|---|---|---|---|---|---|---|---|---|---|---|---|---|---|---|---|---|---|---|---|---|---|---|---|---|---|---|---|---|---|---|---|---|---|---|---|---|---|---|---|---|---|---|---|---|---|---|---|---|---|---|---|---|---|---|---|---|---|---|---|---|---|---|---|---|---|---|---|---|
|
|
|
|
|
|
|
| ||||||||||||||||||||||||||||||||||||||||||||||||||||||||||||||||||||||||||||||||
| Unlockable characters | |||||||||||||||||||||||||||||||||||||||||||||||||||||||||||||||||||||||||||||||||||||||
|
|
|
| ||||||||||||||||||||||||||||||||||||||||||||||||||||||||||||||||||||||||||||||||||||
Taj's Wishes Menu[edit]
Taj is the caretaker of the island and provides assistance to Diddy and his friends. Taj appears every time the player gains ten Golden Balloons and challenges them. He also takes care of rewards and unlockables. Taj allows the player to paint their vehicle for free, but he has a few items in his tent on the center courtyard. He calls it his "Wishes Menu":
| Wishes Menu costs | ||||
|---|---|---|---|---|
| Vehicle upgrades | ||||
| # | Item | Coin cost | Effect | |
| 1 | Basic Downforce | 50 | Minor help in handling and corning of one's vehicle of choice | |
| 2 | Downforce A & Downforce B | Both are 100 | Major improvement in handling and cornering of one's vehicle of choice | |
| 3 | Basic Sprint | 50 | Minor help in acceleration of one's vehicle of choice | |
| 4 | Sprint A & Sprint B | Both are 100 | Major improvement in acceleration of one's vehicle of choice | |
| 5 | Basic Air | 50 | Minor help in speed of one's vehicle of choice | |
| 6 | Air A & Air B | Both are 100 | Major improvement in speed of one's vehicle of choice | |
| 7 | Standard Custom | 50 | Minor handling sacrifice for top speed and a custom look | |
| 8 | Custom A & Custom B | Both are 100 | Major speed improvement and a great custom look. Handling is sacrificed and is shrunk down to poor stats. | |
| Unlockables | ||||
| # | Item | Coin cost | Effect | |
| 1 | Thunder Cove | 80 | A new track | |
| 2 | Meandering Mount | 80 | A new track | |
| 3 | Splashdown Pass | 80 | A new track | |
| 4 | Strangled Shrine | 80 | A new track | |
| 5 | Coin Challenge & Coin Challenge Mirror | 20 | Major part of the Nintendo 64 version, racers race through all the tracks, having to collect eight Silver Coins, and it is required to come in first place to win the challenge. | |
| 6 | SP Wish Race (single player) & Multi Wish Race (multiplayer) | 50 | Race on the player's custom tracks with T.T. as the guide. | |
| 7 | Battle Track 1 (Fire Mountain) | 30 | One of the original Battle areas in the Nintendo 64 classic, the racer tries to gather three eggs and hatch them from atop a volcano first. (Multiplayer only) | |
| 8 | Battle Track 2 (Icicle Pyramid) | 30 | One of the original Battle areas in the Nintendo 64 version, racers tries to strike down their rivals in a huge ice temple. If the racer loses all their bananas they lose. | |
| 9 | Battle Track 3 (Darkwater Beach) | 30 |
One of the original Battle areas in the Nintendo 64 version, racers try to strike down their rivals in a big dark water lake with small sand island-like platforms. The objective to win is similar to Icicle Pyramid. If the racer loses all their bananas, they lose. | |
| 10 | Battle Track 4 (Smokey Castle) | 30 | One of the original Battle areas in the Nintendo 64 version. The objective to win is similar to Fire Mountain. The racer has to fill their chest with Taj Tokens. First gaining ten tokens wins. | |
| 11 | Billboard Editor | 50 | The player can fill the racetracks and courses with their own artwork. | |
| 12 | Sound Recorder | 50 | The player can record their own sound effects through the touch screen. | |
Balloons[edit]
Colored balloons await the racers in normal racing levels. They consist of weapons. Once a player gets up to three, they increase in strength.
Power-Up Tokens are also scattered in every single race track. The player must collect one and can upgrade their balloon strength with just one balloon and set it to maximum power.
| Type of balloon | Number of balloons | + Power-Up Token | ||
|---|---|---|---|---|
| 1 | 2 | 3 | ||
Red Balloon
|
Missile | 5 Semi-Homing Missiles | Homing Missile | Three Circling Rocket Missiles |
Blue Balloon
|
Standard Turbo Boost (Orange Engine Blast) | Powerful Turbo Boost (Light Green Engine Blast) | Extremely Powerful Turbo Blast (Purple Engine Blast) | Autopilot that allows the player three engine boosts and a long lasting shield |
Green Balloon
|
Slippery Black Sludge | Spike Bomb | Bubble | 5 Fake Explosive Rareware Coins |
Yellow Balloon
|
Standard Energy Shield | Better Lasting Energy Shield | Longest Lasting Energy Shield | Makes the racer invisible with a long lasting shield |
Rainbow Balloon
|
Standard Red Magnet | Strong Yellow Magnet | Strong Green Magnet that pulls the racer towards their rival | A missile that the player can hit anyone the player chooses via the touch screen |
Vehicles[edit]
Car[edit]
The car is the most basic vehicle with four wheels and a driver's seat. It has simplest handling, but it can only stay on the ground, being slowed down slightly when driving off road, and goes extremely slow when used in the water. It is limited to only use zippers on the ground. The car is a beginners vehicle. It can be used in eighteen out of twenty four race tracks. In Adventure Mode, it is used the most, being used on twelve of the tracks. It is used against Tricky and Wizpig, during their first matches.
Plane[edit]
The plane is slightly trickier to control than the car. However, the plane is not restricted to having to use the road, which enables it to cut corners inaccessible to cars such as the pathway to Snowflake Mountain. There are also many tracks which have paths only usable by the plane, many of which are slightly harder to access with some sort of reward, such as a balloon or a Power-up Token. The plane is not restricted to any zipper, being the only vehicle able to use all three types, and the only vehicle which can use airborne zippers. It can be used in fifteen out of twenty four race tracks. In Adventure Mode, it is used in five races, and against Smokey and Wizpig in his second race.
Hovercraft[edit]
The hovercraft is possibly the trickiest to control. However, it is not hindered by driving off road or in water, although it can skid on roads. Its ability to drive over water enables it to use shortcuts on some tracks. The boat can use zippers on the ground, or in the water, making it more versatile than the car, but less versatile than the plane. It can be used in all twenty-four race tracks. Despite this, in Adventure Mode it is only used on the three tracks being Whale Bay, Pirate Lagoon, and Boulder Canyon. It is used against Bluey and Bubbler when raced against.
Zippers[edit]
- Main article: Dash Panel § Diddy Kong Racing
Zippers help vehicles Turbo Boost around corners on race tracks. They have red and yellow stripes and stand out from whatever track the racer is playing. By letting go of the gas while driving over/through a zipper, the racer can get an even larger boost.
Types of Zippers[edit]
- The Car Zipper is flat on the ground and is fairly simple to get a good boost from and is chevron-shaped.
- The Plane Zipper is found in the air and is a circle shape. The plane is the only vehicle that can access it. If racers attempts to get the boost at an angle, the boost lags and becomes a big time consumer.
- The Hovercraft Zipper is found in water and is a triangle shape vertex that allows easy boosting and weapon advantage strategy making. Planes can also use it.
Tracks[edit]
Race tracks[edit]
Diddy Kong Racing DS contains twenty-four race tracks split between six cups. In most races (marked with a check mark), racers are able to choose what type of vehicle to bring into the race, which can effect the paths in the course they are able to take. For some races, there are vehicles that are not able to be taken into it (marked with a red X).
| Dino Domain | |||||||||||
|---|---|---|---|---|---|---|---|---|---|---|---|
| Snowflake Mountain | |||||||||||
|---|---|---|---|---|---|---|---|---|---|---|---|
| Sherbet Island | |||||||||||
|---|---|---|---|---|---|---|---|---|---|---|---|
| Dragon Forest | |||||||||||
|---|---|---|---|---|---|---|---|---|---|---|---|
| Future Fun Land | |||||||||||
|---|---|---|---|---|---|---|---|---|---|---|---|
| DK Island | |||||||||||
|---|---|---|---|---|---|---|---|---|---|---|---|
Battle tracks (multiplayer only)[edit]
Adventure Mode tracks[edit]
Key:
- C = Car
- P = Plane
- H = Hovercraft
Abbreviations in bold denote the vehicle required to be used when racing in Adventure Mode.
| Timber's Island areas | ||||
|---|---|---|---|---|
| Dino Domain | ||||
| # | Track | Balloon count | Silver Coin Challenge balloon count | Types of transportation available |
| 1 | Ancient Lake | 1 | 6 | C, H , P |
| 2 | Fossil Canyon | 2 | 7 | C , H , P |
| 3 | Jungle Falls | 3 | 8 | C , H , P |
| 4 | Hot Top Volcano | 5 | 10 | H , P |
| 5 | Tricky Challenge | 5 or more once all 4 are beaten | 10 or more once all 4 are beaten | C |
| Snowflake Mountain | ||||
| # | Track | Balloon count | Silver Coin Challenge balloon count | Types of transportation available |
| 1 | Everfrost Peak | 2 | 10 | H , P |
| 2 | Walrus Cove | 3 | 11 | C , H |
| 3 | Snowball Valley | 6 | 14 | C , H |
| 4 | Frosty Village | 9 | 16 | C , H, P |
| 5 | Bluey Challenge | 9 or more once all 4 are beaten | 16 or more once all 4 are beaten | H |
| Sherbet Island | ||||
| # | Track | Balloon count | Silver Coin Challenge balloon count | Types of transportation available |
| 1 | Whale Bay | 10 | 17 | H |
| 2 | Crescent Island | 11 | 18 | C , H |
| 3 | Pirate Lagoon | 13 | 20 | H |
| 4 | Treasure Caves | 16 | 22 | C , H , P |
| 5 | Bubbler Challenge | 16 or more once all 4 are beaten | 22 or more once all 4 are beaten | H |
| Dragon Forest | ||||
| # | Track | Balloon count | Silver Coin Challenge balloon count | Types of transportation available |
| 1 | Windmill Plains | 16 | 23 | C , H , P |
| 2 | Greenwood Village | 17 | 24 | C , H |
| 3 | Boulder Canyon | 20 | 30 | H |
| 4 | Haunted Woods | 22 | 37 | C , H |
| 5 | Smokey Challenge | 22 or more once all 4 are beaten | 37 or more once all 4 are beaten | P |
| Wizpig Head | ||||
| # | Track | Balloon Amount | Silver Coin Challenge Balloon Amount | Types of Transportation Available |
| 1 | Wizpig's First Strike | N/A (Unlocked by collecting all four pieces of the Wizpig amulet) | C | |
| Future Fun Land | ||||
| # | Track | Balloon count | Silver Coin Challenge balloon count | Types of transportation available |
| 1 | Spacedust Alley | 39 | 43 | C , H , P |
| 2 | Darkmoon Cavern | 40 | 44 | C , H |
| 3 | Spaceport Alpha | 41 | 45 | C, H , P |
| 4 | Star City | 42 | 46 | C , H , P |
| 5 | Wizpig Strikes Back | N/A | 47 | P |
Other balloons[edit]
Taj's races and challenges[edit]
Taj races and trains the racer in many areas aside from selling the player unlockables and helping them customize their car. He usually rides his magic carpet or stands in awe as the racer fulfills Taj's own wish. In return for the racers success in the challenge he gives them a Golden Balloon.
Taj Challenges[edit]
- Car Race - Once the racer starts their game, they race Taj around in a circle with the car, following the black and white tokens. This is an act of training and racers receive their first Golden Balloon.
- Hovercraft Race - Before the racer goes to beat Tricky again, Taj races the racer with the hovercraft around the island while following the tokens.
- Plane Race - After Dino Domain is completed, the racer races Taj in planes around the island following the tokens in a similar pattern to the Hovercraft race.
- Blowing out the Torches challenge - After Bubbler is defeated, Taj orders the racer to blow out nine torches on the island in sixty seconds or a single minute.
- Taj Token Tussle - The racer races Taj around the island for ten Taj Tokens by following the arrows to their temporary locations. The first to ten tokens wins.
Balloon Touch Challenge[edit]
After the area's major boss is defeated (except Future Fun Land's), the boss orders the racer to get at least a Bronze Balloon in each of their four tracks. By using the Stylus, racers can pop the Golden Balloons scattered over each track. Fifty Gold Balloons are in each, and after popping them can gain the rank Bronze, Silver, or Gold.
Once the racer gets the bronze ranking or higher, the racer receives a Golden Balloon for their first win at the challenge and unlocked the Silver Coin Challenge for that world. The Coin Challenge was replaced by the Balloon Touch Challenge in the actual game, though it is still available in single-player mode once completed successfully.
Rank amounts[edit]
- Dino Domain
- Bronze - 25 balloons
- Silver - 35 balloons
- Gold - 50 balloons
- Snowflake Mountain
- Bronze - 35 balloons
- Silver - 40 balloons
- Gold - 50 balloons
- Sherbet Island/Dragon Forest/Future Fun Land
- Bronze - 40 balloons
- Silver - 45 balloons
- Gold - 50 balloons
Trophy Race[edit]
Trophy Races are Grand-Prix races where racers race each other in the area's four tracks in order, in an attempt to win the most amount of points. The racer must jostle with the computer racers' places in the races, which vary in each track, so winning one or two races secures the racer a gold trophy.
Each Trophy varies in appearance to the area it is associated to. By winning trophies the sign by the lighthouse near Sherbet Island fills up Wizpig's face. Once all four Wizpig amulets are accounted for, the racer can blast to Future Fun Land after they defeat Wizpig in his first race. The fifth and final trophy race must be completed before Wizpig can be defeated, this is the only time a trophy race must be completed before the boss is defeated.
Multiplayer[edit]
Nintendo Wi-Fi Connection Mode[edit]
Diddy Kong Racing DS has six player maximum online racing challenges. If the racer unlocked the various online options from Taj, they have the ability to do as follows:
Single Race[edit]
Single race allows two, four, or six racers to compete in one track at a time. A track is selected by each racer, and a randomizer randomizes the vehicle and track the racers use and play on. Then to the left of their usernames is a colored circle, which indicates their mark on the track. Their character icon is kept hidden from online activity.
Trophy Race[edit]
Trophy Races of the four main areas are available and a trophy Race of Jungle Japes with the four new tracks. In a Grand Prix styled event, the racers race through the four tracks in sequence, and whoever gains most points wins.
| Trophy Race multiplayer points | ||||||
|---|---|---|---|---|---|---|
| Number of players | 1st | 2nd | 3rd | 4th | 5th | 6th |
| 6 Players | 9 | 7 | 5 | 3 | 1 | 0 |
| 5 Players | 9 | 7 | 5 | 3 | 1 | --- |
| 4 Players | 9 | 7 | 5 | 3 | --- | --- |
| 3 Players | 9 | 7 | 5 | --- | --- | --- |
| 2 Players | 9 | 3 | --- | --- | --- | --- |
Battle Tracks[edit]
When battled at least once, a Battle Track is unlocked, two-four racers can battle on the four tracks of the original Nintendo 64 version.
Multi-Game Racing[edit]
If at least two Diddy Kong Racing DS games are owned, the racers can race with every Multiplayer option available. Their icons are also visible. Eight players can play.
Download Play[edit]
The entire basis is based on the racer who owns the game and the other racers who do not own the game must do whatever the one with the game wants. Options are not limited, but the paint of the racer's vehicle is set to the default color of yellow and so are the gameless racers. Also, the icons are not visible. Eight players can play.
Differences between versions[edit]
Along with its several new features Diddy Kong Racing DS has several notable differences between it and the original Nintendo 64 version. These differences include:
| Diddy Kong Racing - Diddy Kong Racing DS | ||
|---|---|---|
| Differences | ||
| # | N64 version | DS version |
| 1 | Banjo and Conker are among the selectable characters. | Due to Nintendo losing the licensing for these characters (and also that Conker would no longer fit in with the game's theme), Dixie and Tiny replaced them. |
| 2 | Taj has a face plate in the center grove of the island where a racer can honk a horn and summon him. | Taj now owns a tent and is summoned by honking or tapping it with the stylus. |
| 3 | Bananas are a source of speed. Collecting ten total achieves maximum speed, and getting hit by a weapon makes the racer lose two bananas. | Rare Coins replace the bananas and they can be collected to purchase unlockable content from Taj's tent. |
| 4 | Wizpig and Taj are non-playable major characters. | Wizpig and Taj are playable once unlocked. |
| 5 | Tricky's track is a spiraled mountain with a shortcut near the middle. It's easy to fail the race by falling off. | Tricky's Track is shorter and falling off is not as easy. |
| 6 | Tricky's second boss round has falling trees. | Tricky's second boss round has no falling trees. |
| 7 | Cutscenes are elaborate and each character has unique voices and music. | The cutscenes are less impressive and simpler, and the characters have changed voices so that they sound almost alike (except for T.T.'s which sounds identical to the Nintendo 64's release). |
| 8 | After a boss is defeated two times, Taj's face replaces Wizpig's on the boss door. | Once the boss is beaten, the door does not change. There is also a third challenge that uses the Touch Screen. |
| 9 | T.T. has great speed and acceleration, and an average handling. | T.T. has great speed and acceleration, and an above average handling. |
| 10 | Four random prize balloons float in certain parts of the island for the racer to fly into and collect easily. | The four balloons are now at a price: each has a little touch challenge for the racer to fulfill to get the balloons. |
| 11 | There are four battle stations after the player gets a hidden key in one of the four tracks in the world and if the racer wins the battle stages, they get a balloon from Taj and a piece of the T.T. amulet. | The player may receive a part of the T.T. amulet by racing in a Wish Race, three of which have preset designs. The battle stations are now only available in multiplayer mode. |
| 12 | Planes can barrel roll and flip. | Barrel rolls and flips are absent. |
| 13 | Krunch has a skull on the back on his jacket. | Due to the limited graphical resolution, the skull is no longer drawn. |
| 14 | Magic Codes are a part of the game. | There are no longer any Magic Codes. |
| 15 | Walrus Cove has ice that makes a racer bounce back on the track. | Ice is replaced with water. |
| 16 | Everfrost Peak can have the racers in cars. | Cars are a removed choice on this track as the ice has changed to water. |
| 17 | If the player loses a race, a frame encloses the camera and gives them an option to retry, return to the lobby, or quit. | If the player loses a race, Wizpig appears and laughs at them, and they are immediately sent to the world's lobby. The skybox also has Wizpig with both hands up, and this scene will not be shown if the player already beat the level. |
| 18 | Sometimes a boss gives players a head start. | Only Bluey in both races and his extra challenge, Tricky in his first race, and Smokey in his extra challenge, give head starts. |
| 19 | Bubbler shoots bubbles in his second race. | Bubbler shoots bubbles and spike bombs in his second race, making it more challenging for a racer. |
| 20 | Smokey leaves few fireballs in his first race and many in his second. | Smokey has an easier second race with fewer fireballs. The first race has none at all. |
| 21 | Two Red Balloons make a homing missile and three make ten missiles. | Two Red Balloons make five Semi-Homing Missiles while three make a Homing Missile. |
| 22 | Yellow balloons with purple stars have three icons that indicate their power shield in this order : a red and yellow circle, a star, and a lightning bolt. | The first and last icons are reversed. |
| 23 | A voice says "Diddy Kong Racing! Press start." on the title screen. | The voice is not heard on the title screen. |
| 24 | Taj has a stereotypical East Indian accent. | Taj now has a softer British accent. |
| 25 | After beating the boss the first time, the player has to complete the Silver Coin Challenge. | After beating the boss for the first time, the player has to complete the touchscreen Balloon Popping Challenge. Once done, the Silver Coin Challenge is unlocked for Time Trial Mode for each track completed. |
| 26 | Diddy Kong has no eyelids. | Diddy Kong has brown eyelids (like in Donkey Kong 64). |
| 27 | Star City features a curved bridge, and two moving giant rings. | There is now a tunnel under the curved bridge, and the giant rings are replaced by a water fountain. However, the giant rings are still seen during the Balloon Popping Challenge, replacing the fountain. |
| 28 | Tracing was not available in the N64 version. | In the DS version, with the stylus, the player is able to trace a secret balloon in the sand and a Wizpig image. |
T.T.'s Wish Races[edit]
- Main article: Wish Race
T.T. has a slightly more notable role, and is the other host aside from Taj. T.T. hosts a Wish Race challenge from behind a Wish Door in each world, which he is locked behind. The player must collect a Wish Key, hidden in a course of each world, to access this challenge. In it, T.T. instructs them to draw a racetrack with their stylus, known as a Wish Race. These replace the Battle Stages from the original Diddy Kong Racing, which were redone as multiplayer battle stages. The player must win against T.T. to free him and recover a piece of the T.T. amulet. He also walks around the lobby after being freed.
Music[edit]
Multiple levels have different musical themes than their Nintendo 64 counterparts:
- Jungle Falls - A new theme featuring kalimba and lyrics that sound like "gida-idia / gida-idia baah". The music from the N64 Jungle Falls is now used for the credits.
- Snowball Valley - Instead of sharing its music with Everfrost Peak, the DS version has more cheerful music.
- Pirate Lagoon - A more tropical background tone than the hip pirate-like music in the original. Its original theme is not featured in this game.
- Treasure Caves - Less pounding than the original's music, and a more tropical feel.
- Windmill Plains - Instead of sharing its music with Greenwood Village, the DS version has more country-style music.
- Spaceport Alpha - More space-type music quality. Its original theme is now used for Spacedust Alley.
- Spacedust Alley - Uses the original Spaceport Alpha theme. In the N64 verison, it shared its music with Star City.
Reception[edit]
| Reviews | |||
|---|---|---|---|
| Release | Reviewer, Publication | Score | Verdict |
| Nintendo DS | Aaron Thomas, GameSpot | 6.7/10 | "At its core, Diddy Kong Racing DS isn't a bad kart-racing game, but its best feature, the racing, is buried underneath so much unnecessary garbage that some people will find it nearly impossible to enjoy. Had Rare stripped the island setting, toned down the tedious collecting, and tweaked some other minor issues, the game would have been better with less. Instead, it chose to add more and more content, and the game suffers for it. Some of the new additions, such as online multiplayer and the various customization features, make the game more enjoyable, but many of them, particularly the touch-screen controls, make it worse. If you don't mind that the game sometimes feels more like Donkey Kong 64 than a racing game, then you'll probably enjoy all that Diddy Kong Racing DS has to offer. But if you just want to race, there are better options." |
| Nintendo DS | Keza MacDonald, Eurogamer | 5/10 | "Despite remaining, after ten years, the only 'adventure racer' that I can remember appearing on a Nintendo console, Diddy Kong Racing still manages to feel unoriginal. Insipid character and course design married with inherently repetitive gameplay, obsessive collecting and an array of horrible touchscreen features make this feel like a waste of time. It's got plenty of content, and is a perfectly serviceable, occasionally competitive kart racer, but there's not much distinguishing about it. Ten years ago, I rather enjoyed this, but in retrospect, it probably belongs back in 1997." |
| Nintendo DS | Craig Harris, IGN | 7.1/10 | "Diddy Kong Racing had huge competition back when the original game hit the Nintendo 64 as Mario Kart 64 was the king of the track on that platform. Ten years later, history repeats itself: Mario Kart DS is a tough nut to crack, but Diddy Kong Racing manages to offer up a significantly different product that, admittedly, doesn't come close to the same satisfying experience as Nintendo's own racer. The racing's fun and challenging, no question. The ability to zoom around in cars, planes, and watercraft is reason enough to give this one a go on the Nintendo DS. But unfortunately the development team focused a bit too much on "DS-izing" the product with completely unnecessary and frustrating touch-screen and microphone challenges that disrupt the racing design. Some DS elements are better than others, but the ones that are bad are huge problems that should have been axed to make room for the elements that actually worked. Overall, Diddy Kong Racing's a good product with some first-generation blues dragging it down. The fantastic online and customization focus offset some of the clunky items that made it into the design...but don't think we're going to turn a blind eye to the stupid stuff." |
| Aggregators | |||
| Compiler | Platform / Score | ||
| Metacritic | 63 | ||
| GameRankings | 66.76% | ||
Staff[edit]
- Main article: List of Diddy Kong Racing DS staff
Gallery[edit]
- For this subject's image gallery, see Gallery:Diddy Kong Racing DS.
Quotes[edit]
- Main article: List of Diddy Kong Racing quotes
References to other games[edit]
- Donkey Kong Country - The tracks Thunder Cove, Meandering Mount, Splashdown Pass, and Strangled Shrine seem to be based off the jungle levels in this game, with "DK Island Swing" even being remixed twice for these tracks.
- Donkey Kong 64 - The game's title logo is similar to Donkey Kong 64's. Tiny Kong makes a reappearance.
Trivia[edit]
- A promotional browser game starring Timber was released in 2007 called Diddy Kong Racing DS -- Timber's Balloon Pop.
References[edit]
- ^ Diddy Kong Racing DS | Nintendo DS | Games | Nintendo. Nintendo UK (British English).
- ^ The name given to the game on its icon on the Nintendo DS menu.
- ^ Diddy Kong Racing DS - Upgrade/Character Guide - DS - by Drea. GameFAQs. Retrieved May 3, 2024.
External links[edit]
- North American website[dead link]
- European (UK) website
- European (UK) microsite[dead link]
- North American manual
