Gallery:Luigi's Mansion: Difference between revisions
mNo edit summary |
|||
| (283 intermediate revisions by 68 users not shown) | |||
| Line 1: | Line 1: | ||
{{italic title}} | {{italic title}} | ||
This is a gallery of images for the game ''[[Luigi's Mansion]]''. For a gallery of images released with the [[Luigi's Mansion (Nintendo 3DS)|Nintendo 3DS remake]], see [[Gallery:Luigi's Mansion (Nintendo 3DS)|Gallery:''Luigi's Mansion'' (Nintendo 3DS)]]. For the in-game gallery room, see [[Gallery (Luigi's Mansion)|Gallery (''Luigi's Mansion'')]]. | |||
==Logos== | |||
<gallery widths="250"> | |||
Luigi's Mansion logo.png|International logo | |||
Luigi's Mansion - Logo EN (alt).jpg|Alternate logo | |||
LM_logo_jp.png|Japanese logo | |||
LM in-game logo.png|In-game logo | |||
</gallery> | |||
==Artwork== | ==Artwork== | ||
<gallery> | <gallery> | ||
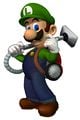
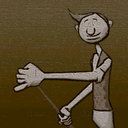
LM_Luigi_Flee.png|[[Luigi]] | |||
Luigimansionart2.png|Luigi screaming | |||
Luigis Mansion Luigi Poltergust Artwork.jpg|Luigi with the [[Poltergust 3000]] | |||
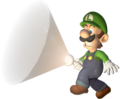
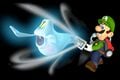
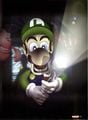
Luigi holding flashlight LM artwork.png|Luigi holding his flashlight | |||
Luigi holding flashlight LM transparent artwork.png|Transparent variant of Luigi holding the flashlight | |||
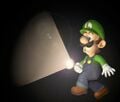
Luigi LM.png|Luigi with his flashlight | |||
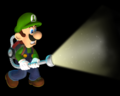
Flashlight.jpg|Variant of previous artwork, with the flashlight shining | |||
Fire Elemental Medal Luigi.jpg|Luigi using the [[element medal|Fire Element Medal]] | |||
LM Luigi Fire Element Medal Artwork.png|Luigi using the Fire Element Medal | |||
LM Luigi Sneaking Artwork.jpg|Luigi tiptoeing | |||
LM Luigi Shivering in Fear Artwork.jpg|Luigi trembling in fear | |||
LM Luigi frightened artwork.jpg|Luigi frightened | |||
LM Luigi Opening a Door Artwork.jpg|Luigi coming out of a door | |||
LM Luigi Coming Out Door Artwork.png|Luigi coming out of a door | |||
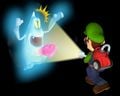
LM Blue Twirler Silhouette Artwork.jpg|Luigi frightened of an unidentified ghost | |||
LM Art Luigi and a Blue Twirler.jpg|Luigi being followed by a Blue Twirler | |||
LM Surprised Blue Twirler Artwork.jpg|Luigi finding a Blue Twirler | |||
LM Vaccuuming Blue Twirler Artwork.jpg|Luigi vacuuming a Blue Twirler | |||
LM Artwork Luigi and Blue Twirler.png|Luigi vacuuming a Blue Twirler (No background) | |||
LM Capturing Blue Twirler Artwork.jpg|Luigi after vacuuming a Blue Twirler | |||
Egadd.png|[[Professor E. Gadd]] | |||
Professor Elvin Gadd.jpg|Professor E. Gadd with the [[Poltergust 3000]] ([[List of Luigi's Mansion pre-release and unused content|pre-release]]) | |||
Luigi's Mansion (GameCube) -Professor Elvin Gadd artwork.jpg|Professor E. Gadd talking | |||
LM_Mario.jpg|[[Mario]] | |||
SM64 Toad hands raised.png|[[Toad]] | |||
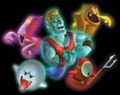
LM Group Art Original.png|Luigi being chased by Ghosts | |||
LuigiMansion.png|Luigi approaching the mansion | |||
LM Art Game Boy Horror.png|[[Game Boy Horror]] | |||
</gallery> | |||
===Ghosts=== | |||
<gallery> | |||
LM_Ghosts.jpg|Some of the different kinds of Ghosts found in the game (in the center, [[Biff Atlas]]) | |||
LMBoo.jpg|A [[Boo]] | |||
LuigisMansionBoo.jpg|A Boo (pre-release) | |||
Gold Ghost LM.png|A [[Gold Ghost]] | |||
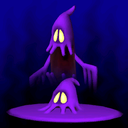
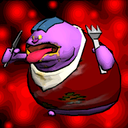
LM Art Purple Puncher.jpg|A [[Purple Puncher]] | |||
Shy Guy ghost LM.png|A [[Ghost Guy]] | |||
File | Blue Twirler.jpg|A [[Blue Twirler]] | ||
File | LM Artwork Blue Twirler.png|A Blue Twirler (No background) | ||
Chauncey.png|[[Chauncey]] | |||
Bogmire LM3DS art.png|[[Bogmire]] | |||
Biff Atlas art.jpg|[[Biff Atlas]] | |||
LM Artwork Biff Atlas.png|Biff Atlas (No background) | |||
Boolossus1.jpg|[[Boolossus]] and a few of its 15 [[Boo]]s | |||
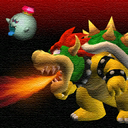
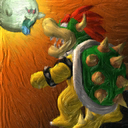
KingBoowser.jpg|[[King Boo]] coming out of his Bowser Suit | |||
</gallery> | |||
===Wallpaper=== | |||
<gallery> | |||
LM History of Luigi.jpg|Wallpaper of the history of Luigi in games prior to Luigi's Mansion | |||
LM Faces of Luigi Artwork.jpg|Wallpaper of Luigi's expressions | |||
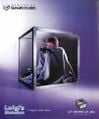
LM Luigi Cubed Artwork.jpg|Wallpaper of Luigi in a cube surrounded by ghosts | |||
</gallery> | |||
==Sprites, models, and textures== | |||
===Sprites=== | |||
====File selection screen==== | |||
<gallery> | |||
LM Daytime File.png | |||
LM Nighttime File.png | |||
Foyer LM File.png | |||
Professor E. Gadd's Lab Options File BG.png | |||
</gallery> | |||
====Pause menu==== | |||
<gallery> | |||
LM Blue Twirler Pause Menu.png|[[Blue Twirler]] | |||
Purple Puncher.png|[[Purple Puncher]] | |||
PauseScreenBooLM.png|[[Boo]] | |||
</gallery> | |||
====Dialogue icons==== | |||
<gallery widths=64px heights=32px> | |||
BooIcon.png|Boo | |||
Bowser Icon LM Beta.png|[[Bowser]] <small>(Unused)</small> | |||
ChaunceyIcon.png|[[Chauncey]] | |||
E. GaddLM.png|[[Professor Elvin Gadd|E. Gadd]] | |||
GoldGhost Icon LM Beta.png|[[Gold Ghost]] <small>(Unused)</small> | |||
TwinIcon.png|[[Henry and Orville]] | |||
JarvisIcon.png|[[Jarvis]] | |||
Luigi LM Icon.png|[[Luigi]] | |||
LydiaIcon.png|[[Lydia]] | |||
MadameClairvoyaIcon.png|[[Madam Clairvoya]] | |||
Mario Icon LM Beta.png|[[Mario]] <small>(Unused)</small> | |||
MelodyIcon.png|[[Melody Pianissima]] | |||
ShiversIcon.png|[[Shivers]] | |||
SirWestonIcon.png|[[Sir Weston]] | |||
SueIcon.png|[[Sue Pea]] | |||
Toad speech icon LM.png|[[Toad]] | |||
GreenToad Icon LM Beta.png|Toad <small>(Unused)</small> | |||
VincentIcon.png|[[Vincent Van Gore]] | |||
</gallery> | |||
====Game Boy Horror Portrait Ghost Icons==== | |||
<gallery widths=96px heights=96px> | |||
Neville Game Boy Horror Portrait.png|Neville | |||
Lydia Game Boy Horror Portrait.png|Lydia | |||
Chauncey Game Boy Horror Portrait.png|Chauncey | |||
The Floating Whirlindas Game Boy Horror Portrait.png|The Floating Whirlindas | |||
Shivers Game Boy Horror Portrait.png|Shivers | |||
Melody Pianissima Game Boy Horror Portrait.png|Melody Pianissima | |||
Madame Clairvoya Game Boy Horror Portrait.png|Madame Clairvoya | |||
Mr. Luggs Game Boy Horror Portrait.png|Mr. Luggs | |||
Spooky Game Boy Horror Portrait.png|Spooky (character)|Spooky | |||
Bogmire Game Boy Horror Portrait.png|Bogmire | |||
Biff Atlas Game Boy Horror Portrait.png|Biff Atlas | |||
Miss Petunia Game Boy Horror Portrait.png|Miss Petunia | |||
Nana Game Boy Horror Portrait.png|Nana | |||
Slim Bankshot Game Boy Horror Portrait.png|Slim Bankshot | |||
Henry and Orville Game Boy Horror Portrait.png|Henry and Orville | |||
Boolossus Game Boy Horror Portrait.png|Boolossus | |||
Jarvis Game Boy Horror Portrait.png|Jarvis | |||
Sue Pea Game Boy Horror Portrait.png|Sue Pea | |||
Vincent Van Gore Game Boy Horror Portrait.png|Vincent Van Gore | |||
Uncle Grimmly Game Boy Horror Portrait.png|Uncle Grimmly | |||
Clockwork Soldiers Game Boy Horror Portrait.png|Clockwork Soldiers | |||
Sir Weston Game Boy Horror Portrait.png|Sir Weston | |||
</gallery> | |||
====Treasure/item icons==== | |||
<gallery widths=64px heights=32px> | |||
LM Gold Coin Sprite.png|[[Coin]] | |||
Bill.png|[[Bill]] | |||
GoldBar.png|[[Gold Bar]] | |||
</gallery> | |||
<gallery widths=64px heights=32px> | |||
SmallPearl.png|[[Pearl]] (small) | |||
MediumPearl.png|Pearl (medium) | |||
BigPearl.png|Pearl (large) | |||
</gallery> | |||
<gallery widths=64px heights=32px> | |||
RedJewel.png|[[Stone (Luigi's Mansion)|Red Stone]] | |||
GreenJewel.png|[[Stone (Luigi's Mansion)|Green Stone]] | |||
LM Blue Jewel Sprite.png|[[Stone (Luigi's Mansion)|Blue Stone]] | |||
LM Red Diamond Sprite.png|[[Red Diamond (Luigi's Mansion)|Red Diamond]] | |||
LM Blue Diamond Sprite.png|[[Blue Diamond]] | |||
GoldDiamond.png|[[Gold Diamond]] | |||
</gallery> | |||
<gallery widths=64px heights=32px> | |||
Fire Medal LM Icon.png|[[Element medal|Fire Element Medal]] | |||
Water Medal LM Icon.png|Water Element Medal | |||
Ice Medal LM Icon.png|Ice Element Medal | |||
</gallery> | |||
<gallery widths=64px heights=32px> | |||
Mario's Cap.png|[[Mario's Cap]] | |||
Mario's Glove.png|[[Mario's Glove]] | |||
Mario's Letter LM.png|[[Mario's Letter]] | |||
Mario's Shoe.png|[[Mario's Shoe]] | |||
Mario's Star LM.png|[[Mario's Star (item)|Mario's Star]] | |||
</gallery> | |||
<gallery widths=64px heights=64px> | |||
LM Heart Sprite.png|Luigi's [[HP]] indicator | |||
</gallery> | |||
====Ending pictures==== | |||
<gallery> | |||
LM Staff Credits 1.png | |||
LM Staff Credits 2.png | |||
LM Staff Credits 3.png | |||
LM Staff Credits 4.png | |||
LM Staff Credits 5.png | |||
LM Staff Credits 6.png | |||
LM Staff Credits 7.png | |||
LM Staff Credits 8.png | |||
LM Staff Credits 9.png | |||
LM Staff Credits 10.png | |||
LM Staff Credits 11.png | |||
</gallery> | |||
===Data model renders=== | |||
<gallery> | |||
LuigisMansionLuigiModel.png|Luigi | |||
LuigisMansionMarioModel.png|Mario | |||
LuigisMansionProfEGaddModel.png|Professor E. Gadd | |||
LuigisMansionToadModel.png|[[Toad]] | |||
LuigisMansionKingBooModel.png|King Boo | |||
LuigisMansionBowserModel.png|[[Bowser]] | |||
</gallery> | |||
===Textures=== | |||
====Bronze-frame portraits==== | |||
<gallery widths=128px heights=128px> | |||
NevilleBronze.png|[[Neville]] | |||
LydiaBronze.png|[[Lydia]] | |||
ChaunceyBronze.png|[[Chauncey]] | |||
WhirlindasBronze.png|[[The Floating Whirlindas]] | |||
ShiversBronze.png|[[Shivers]] | |||
MelodyBronze.png|[[Melody Pianissima]] | |||
MrLuggsBronze.png|[[Mr. Luggs]] | |||
SpookyBronze.png|[[Spooky (character)|Spooky]] | |||
BogmireBronze.png|[[Bogmire]] | |||
BiffAtlasBronze.png|[[Biff Atlas]] | |||
MissPetuniaBronze.png|[[Miss Petunia]] | |||
LM Bronze Nana Portrait.png|[[Nana]] | |||
SlimBankshotBronze.png|[[Slim Bankshot]] | |||
HenryandOrvilleBronze.png|[[Henry and Orville]] | |||
ClairvoyaBronze.png|[[Madame Clairvoya]] | |||
BoolossusBronze.png|[[Boolossus]] | |||
UncleGrimmlyBronze.png|[[Uncle Grimmly]] | |||
ClockworkSoldiersBronze.png|[[Clockwork Soldiers]] | |||
SuePeaBronze.png|[[Sue Pea]] | |||
JarvisBronze.png|[[Jarvis]] | |||
SirWestonBronze.png|[[Sir Weston]] | |||
VincentVanGoreBronze.png|[[Vincent Van Gore]] | |||
KingBooBronze.png|[[King Boo]] | |||
</gallery> | |||
====Silver-frame portraits==== | |||
<gallery widths=128px heights=128px> | |||
NevilleSilver.png|Neville | |||
LydiaSilver.png|Lydia | |||
ChaunceySilver.png|Chauncey | |||
WhirlindasSilver.png|The Floating Whirlindas | |||
ShiversSilver.png|Shivers | |||
MelodySilver.png|Melody Pianissima | |||
MrLuggsSilver.png|Mr. Luggs | |||
SpookySilver.png|Spooky (character)|Spooky | |||
BogmireSilver.png|Bogmire | |||
BiffAtlasSilver.png|Biff Atlas | |||
MissPetuniaSilver.png|Miss Petunia | |||
NanaSilver.png|Nana | |||
SlimBankshotSilver.png|Slim Bankshot | |||
HenryandOrvilleSilver.png|Henry and Orville | |||
ClairvoyaSilver.png|Madame Clairvoya | |||
BoolossusSilver.png|Boolossus | |||
UncleGrimmlySilver.png|Uncle Grimmly | |||
ClockworkSoldiersSilver.png|Clockwork Soldiers | |||
SuePeaSilver.png|Sue Pea | |||
JarvisSilver.png|Jarvis | |||
SirWestonSilver.png|Sir Weston | |||
VincentVanGoreSilver.png|Vincent Van Gore | |||
KingBooSilver.png|King Boo | |||
</gallery> | |||
====Gold-frame portraits==== | |||
<gallery widths=128px heights=128px> | |||
NevilleGold.png|Neville | |||
LydiaGold.png|Lydia | |||
ChaunceyGold.png|Chauncey | |||
WhirlindasGold.png|The Floating Whirlindas | |||
ShiversGold.png|Shivers | |||
MelodyGold.png|Melody Pianissima | |||
MrLuggs.png|Mr. Luggs | |||
SpookyGold.png|Spooky | |||
Bogmire.png|Bogmire | |||
BiffAtlasGold.png|Biff Atlas | |||
MissPetuniaGold.png|Miss Petunia | |||
NanaGold.png|Nana | |||
SlimBankshotGold.png|Slim Bankshot | |||
HenryandOrvilleGold.png|Henry and Orville | |||
Clairvoya.png|Madame Clairvoya | |||
BoolossusGold.png|Boolossus | |||
UncleGrimmlyGold.png|Uncle Grimmly | |||
ClockworkSoldiersGold.png|Clockwork Soldiers | |||
SuePeaGold.png|Sue Pea | |||
JarvisGold.png|Jarvis | |||
LM Sir Weston Gold Frame Artwork.png|Sir Weston | |||
VincentVanGoreGold.png|Vincent Van Gore | |||
KingBooGold.png|King Boo | |||
</gallery> | |||
====Miscellaneous portraits==== | |||
<gallery widths=64px heights=128px> | |||
NevillePortrait.png|Figure resembling Neville | |||
LydiaPortrait.png|Figure resembling Lydia | |||
ChaunceyPhoto.png|Figure resembling Chauncey | |||
MaleWhirlindaPortrait.png|Figure resembling Mr. Whirlinda | |||
SpookyPortrait.png|Figure resembling Spooky | |||
NanaPortrait.png|Figure resembling Nana | |||
SlimPortrait.png|Figure resembling Slim Bankshot | |||
TwinsPortrait.png|Figure resembling Henry and Orville | |||
Sue PeaPortrait.png|Figure resembling Sue Pea | |||
VanGorePortrait.png|Figure resembling Vincent Van Gore | |||
</gallery> | |||
<gallery> | |||
Rank A Portrait.png|Rank A Mansion Portrait | |||
Rank B Portrait.png|Rank B Mansion Portrait | |||
Rank C Portrait.png|Rank C Mansion Portrait | |||
Rank D Portrait.png|Rank D Mansion Portrait | |||
Rank E Portrait.png|Rank E Mansion Portrait | |||
Rank F Portrait.png|Rank F Mansion Portrait | |||
Rank G Portrait.png|Rank G Mansion Portrait | |||
Rank H Portrait.png|Rank H Mansion Portrait | |||
</gallery> | </gallery> | ||
==Screenshots== | ==Screenshots== | ||
<gallery widths="160"> | |||
LM Title Screen.png|The title screen of ''[[Luigi's Mansion]]'' | |||
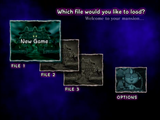
File Screen LM.png | |||
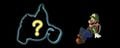
LM Luigi's Map.png|Luigi's map to the mansion | |||
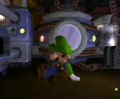
LM Luigi Enters the Parlor.png|Luigi first enters the [[Parlor (Luigi's Mansion)|Parlor]] | |||
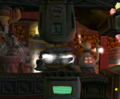
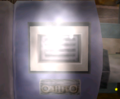
LM Control Setting.png|The controller setting in the [[Training Room (Luigi's Mansion)|Training Room]] | |||
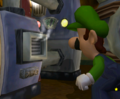
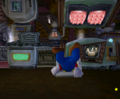
E Gadd Outside Lab LM.png|Professor E. Gadd outside his lab | |||
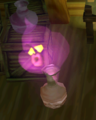
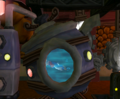
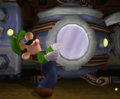
LM Blue Jewel Screenshot.png|Luigi finds a [[Stone (Luigi's Mansion)|Stone]] | |||
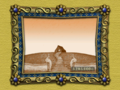
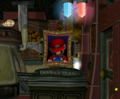
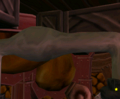
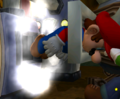
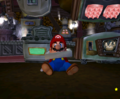
Mario's Painting LM.png|Mario screaming for help | |||
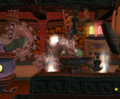
LM Clothes 2.png|Clothes on the back wall in the [[Wardrobe Room]] | |||
</gallery> | |||
===Portrait Ghosts=== | |||
<gallery> | <gallery> | ||
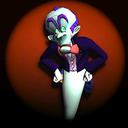
LM Neville Screenshot.png|Neville | |||
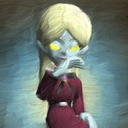
LydiaLM.png|Lydia | |||
LM Chauncey Screenshot.png|Chauncey | |||
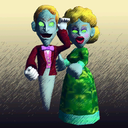
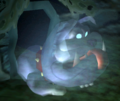
LM Floating Whirlindas Screenshot.png|The Floating Whirlindas | |||
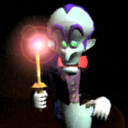
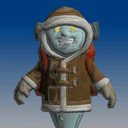
LM Shivers Screenshot.png|Shivers | |||
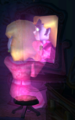
LM Melody Pianissima Screenshot.png|Melody Pianissima | |||
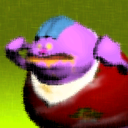
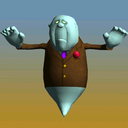
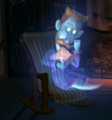
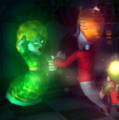
LM Mr Luggs Screenshot.png|Mr. Luggs | |||
LM Spooky Screenshot.png|Spooky | |||
LM Bogmire Screenshot.png|Bogmire | |||
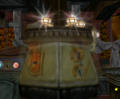
LM Biff Atlas Screenshot.png|Biff Atlas | |||
LM Miss Petunia Screenshot.png|Miss Petunia | |||
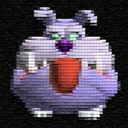
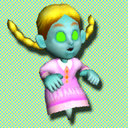
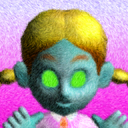
LM Nana Screenshot.png|Nana | |||
LM Slim Bankshot Screenshot.png|Slim Bankshot | |||
LM Henry and Orville Screenshot.png|Henry and Orville | |||
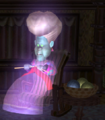
MadameClairvoya.png|Madame Clairvoya | |||
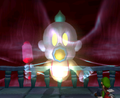
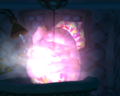
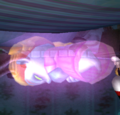
LM Boolossus Screenshot.png|Boolossus | |||
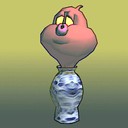
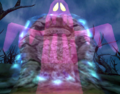
LM Uncle Grimmly.png|Uncle Grimmly | |||
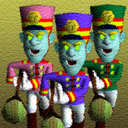
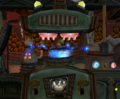
LM Clockwork Soldiers Screenshot.png|Clockwork Soldiers | |||
SuePea.png|Sue Pea | |||
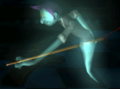
Jarvis.png|Jarvis | |||
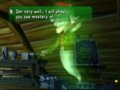
LM Sir Weston Screenshot.png|Sir Weston | |||
Vincent Van Gore LM.png|Vincent Van Gore | |||
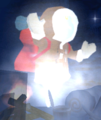
LM King Boo Released Screenshot.png|King Boo | |||
</gallery> | </gallery> | ||
== | ===Ending=== | ||
<gallery> | <gallery> | ||
LM ending 1.png | |||
LM ending 2.png | |||
LM ending 3.png | |||
LM ending 4.png | |||
LM ending 5.png | |||
LM ending 6.png | |||
LM ending 7.png | |||
LM ending 8.png | |||
LM ending 9.png | |||
LM ending 10.png | |||
LM ending 11.png | |||
LM ending 12.png | |||
LM ending 13.png | |||
LM ending 14.png | |||
LM ending 15.png | |||
LM1 End Text and Mansion.png|The epilogue | |||
LM Rank A Mansion.png|Rank A Mansion | |||
LM Rank B Mansion.png|Rank B Mansion | |||
LM Rank C Mansion.png|Rank C Mansion | |||
LM Rank D Mansion.png|Rank D Mansion | |||
LM Rank E Mansion.png|Rank E Mansion | |||
LM Rank F Mansion.png|Rank F Mansion | |||
LM Rank G Mansion.png|Rank G Mansion | |||
LM Rank H Mansion.png|Rank H Mansion | |||
</gallery> | |||
==Box art== | |||
<gallery heights="175"> | |||
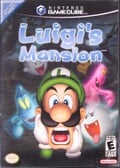
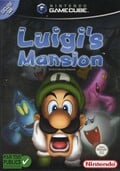
Luigi's Mansion Box.png|North American box art | |||
Luigi's Mansion GameCube Back Cover.png|North American box art (back) | |||
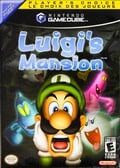
LM PC Cover.jpg|North American box art ([[Player's Choice]]) | |||
Luigi's Mansion box prerelease.png|North American box art (Pre-release) | |||
LM Box CAN.jpg|Canadian box art | |||
Player's Choice LM Box CAN.jpg|Canadian box art (Player's Choice) | |||
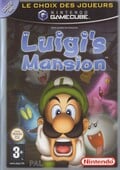
LM EU Cover.jpg|European box art | |||
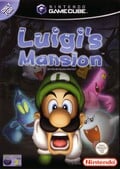
LM PC EU Cover.jpg|European box art (Player's Choice) | |||
LM Box EU PC Re-release.jpg|European box art (Player's Choice re-release) | |||
LM Box DE.jpg|German box art | |||
LM PC Germany Cover.jpg|German box art (Player's Choice) | |||
LM Box FR.jpg|French box art | |||
LM Box FR (back).jpg|French box art (back) | |||
LM Box FRA Players Choice.jpg|French box art (Player's Choice) | |||
LM Box AU.jpg|Australasian box art | |||
Luigi's Mansion box JP.png|Japanese box art | |||
LM Box JP (back).jpg|Japanese box art (back) | |||
</gallery> | </gallery> | ||
== | ==Miscellaneous== | ||
<gallery> | <gallery widths=96px heights=32px style="display:inline-block"> | ||
Luigi's Mansion GC Memory Card Icon.gif|Memory card icon | |||
</gallery> | |||
<gallery style="display:inline-block"> | |||
LM Disc North America.png|North American game disc | |||
LM NPGuide.jpg|''[[Nintendo Power]]'' Player's Guide | |||
Prima Guide LM.jpg|''[[Prima Games]]'' official guide | |||
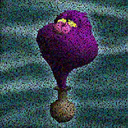
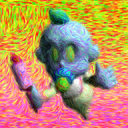
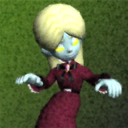
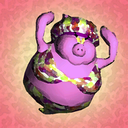
LM NOMUK art.jpg|Artwork from Nintendo Official Magazine #107, with an [[List of Luigi's Mansion pre-release and unused content|early pink ghost]] | |||
LM Collage.jpg|A collage of artwork and screenshots of the game | |||
LM website Ask Madame Clairvoya.png|The "Ask Madame Clairvoya" activity from the official website | |||
LM website lab title.png|Title screen of the lab activity from the official website | |||
LM print ad FRA.jpg|French print ad | |||
</gallery> | </gallery> | ||
{{Galleries}} | {{Galleries}} | ||
[[Category:Galleries| | {{LM}} | ||
[[Category:Galleries]] | |||
[[Category:Luigi's Mansion|*]] | |||
[[de:Luigi's Mansion/Galerie]] | |||
Latest revision as of 12:47, April 8, 2025
This is a gallery of images for the game Luigi's Mansion. For a gallery of images released with the Nintendo 3DS remake, see Gallery:Luigi's Mansion (Nintendo 3DS). For the in-game gallery room, see Gallery (Luigi's Mansion).
Logos

International logo

Alternate logo

Japanese logo

In-game logo
Artwork

Luigi screaming
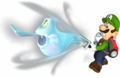
Luigi with the Poltergust 3000
Luigi holding his flashlight

Transparent variant of Luigi holding the flashlight
Luigi with his flashlight
Variant of previous artwork, with the flashlight shining
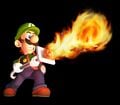
Luigi using the Fire Element Medal
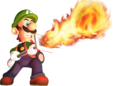
Luigi using the Fire Element Medal

Luigi tiptoeing
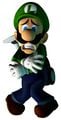
Luigi trembling in fear

Luigi frightened
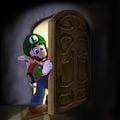
Luigi coming out of a door
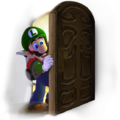
Luigi coming out of a door
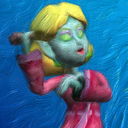
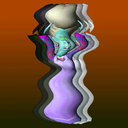
Luigi frightened of an unidentified ghost

Luigi being followed by a Blue Twirler
Luigi finding a Blue Twirler
Luigi vacuuming a Blue Twirler
Luigi vacuuming a Blue Twirler (No background)

Luigi after vacuuming a Blue Twirler

Professor E. Gadd with the Poltergust 3000 (pre-release)
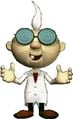
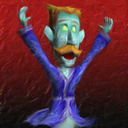
Professor E. Gadd talking
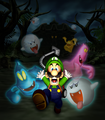
Luigi being chased by Ghosts
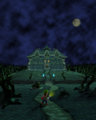
Luigi approaching the mansion


_-Professor_Elvin_Gadd_artwork.jpg)


Ghosts
Some of the different kinds of Ghosts found in the game (in the center, Biff Atlas)

A Boo

A Boo (pre-release)

A Blue Twirler (No background)

Biff Atlas (No background)
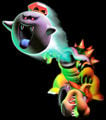
King Boo coming out of his Bowser Suit


Wallpaper

Wallpaper of the history of Luigi in games prior to Luigi's Mansion
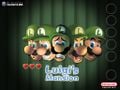
Wallpaper of Luigi's expressions
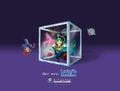
Wallpaper of Luigi in a cube surrounded by ghosts


Sprites, models, and textures
Sprites
File selection screen


Dialogue icons

Boo

Bowser (Unused)

Gold Ghost (Unused)

Mario (Unused)

Toad (Unused)
Game Boy Horror Portrait Ghost Icons

Neville

Lydia

Chauncey

The Floating Whirlindas

Shivers

Melody Pianissima

Madame Clairvoya

Mr. Luggs

Spooky

Bogmire

Biff Atlas

Miss Petunia

Nana

Slim Bankshot

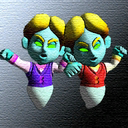
Henry and Orville

Boolossus

Jarvis

Sue Pea

Vincent Van Gore

Uncle Grimmly

Clockwork Soldiers

Sir Weston


Treasure/item icons

Pearl (small)

Pearl (medium)

Pearl (large)

Water Element Medal

Ice Element Medal

Luigi's HP indicator
Ending pictures


Data model renders

Luigi

Mario

Professor E. Gadd

King Boo


Textures
Bronze-frame portraits


Silver-frame portraits
Neville
Lydia
Chauncey
The Floating Whirlindas
Shivers
Melody Pianissima
Mr. Luggs
Spooky
Bogmire

Biff Atlas
Miss Petunia

Nana
Slim Bankshot
Henry and Orville
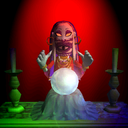
Madame Clairvoya

Boolossus
Uncle Grimmly
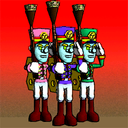
Clockwork Soldiers
Sue Pea
Jarvis

Sir Weston
Vincent Van Gore
King Boo


Gold-frame portraits
Neville
Lydia
Chauncey
The Floating Whirlindas
Shivers
Melody Pianissima
Mr. Luggs
Spooky

Bogmire

Biff Atlas
Miss Petunia
Nana

Slim Bankshot
Henry and Orville
Madame Clairvoya

Boolossus
Uncle Grimmly
Clockwork Soldiers
Sue Pea
Jarvis
Sir Weston

Vincent Van Gore
King Boo


Miscellaneous portraits
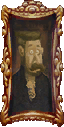
Figure resembling Neville
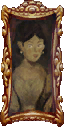
Figure resembling Lydia

Figure resembling Chauncey
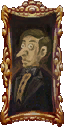
Figure resembling Mr. Whirlinda

Figure resembling Spooky

Figure resembling Nana
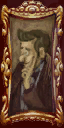
Figure resembling Slim Bankshot

Figure resembling Henry and Orville

Figure resembling Sue Pea
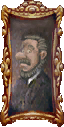
Figure resembling Vincent Van Gore


Rank A Mansion Portrait
Rank B Mansion Portrait
Rank C Mansion Portrait
Rank D Mansion Portrait
Rank E Mansion Portrait
Rank F Mansion Portrait

Rank G Mansion Portrait
Rank H Mansion Portrait


Screenshots
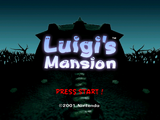
The title screen of Luigi's Mansion
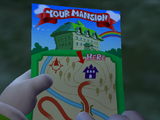
Luigi's map to the mansion
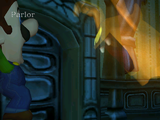
Luigi first enters the Parlor
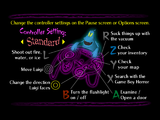
The controller setting in the Training Room
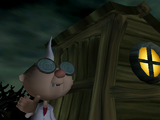
Professor E. Gadd outside his lab
Luigi finds a Stone
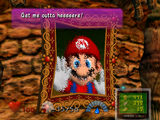
Mario screaming for help
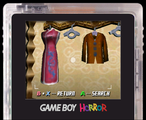
Clothes on the back wall in the Wardrobe Room


Portrait Ghosts
Neville
Lydia
Chauncey
The Floating Whirlindas
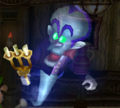
Shivers
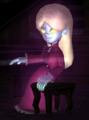
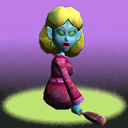
Melody Pianissima
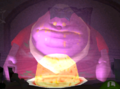
Mr. Luggs
Spooky
Bogmire

Biff Atlas
Miss Petunia
Nana
Slim Bankshot
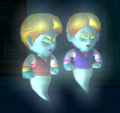
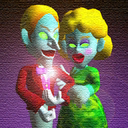
Henry and Orville

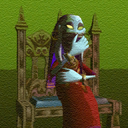
Madame Clairvoya

Boolossus

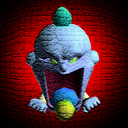
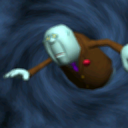
Uncle Grimmly
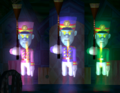
Clockwork Soldiers
Sue Pea
Jarvis
Sir Weston
Vincent Van Gore
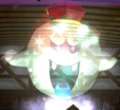
King Boo


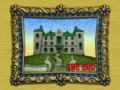
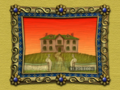
Ending

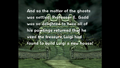
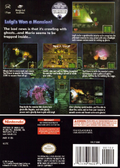
The epilogue
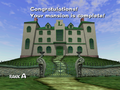
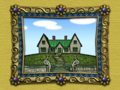
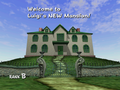
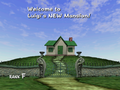
Rank A Mansion
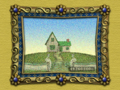
Rank B Mansion

Rank C Mansion
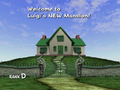
Rank D Mansion
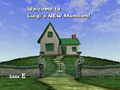
Rank E Mansion
Rank F Mansion
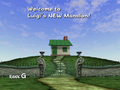
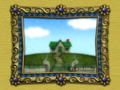
Rank G Mansion
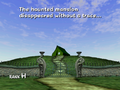
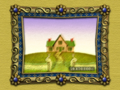
Rank H Mansion


Box art

North American box art
North American box art (back)

North American box art (Player's Choice)

North American box art (Pre-release)
Canadian box art
Canadian box art (Player's Choice)
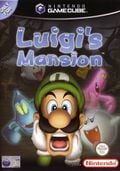
European box art

European box art (Player's Choice)

European box art (Player's Choice re-release)
German box art

German box art (Player's Choice)
French box art

French box art (back)
French box art (Player's Choice)

Australasian box art

Japanese box art
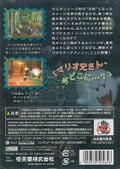
Japanese box art (back)


.jpg)


.jpg)
Miscellaneous

Memory card icon
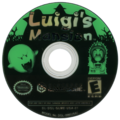
North American game disc

Nintendo Power Player's Guide
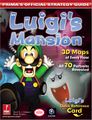
Prima Games official guide
Artwork from Nintendo Official Magazine #107, with an early pink ghost
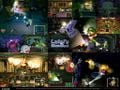
A collage of artwork and screenshots of the game
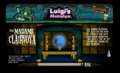
The "Ask Madame Clairvoya" activity from the official website
Title screen of the lab activity from the official website
French print ad


| Luigi's Mansion (Nintendo GameCube) / Luigi's Mansion (Nintendo 3DS) | ||
|---|---|---|
| Characters | Luigi • Gooigia • Mario • Professor E. Gadd • Toad • King Boo | |
| Tools and equipment | Boo Radar • Flashlight • Game Boy Horror • Poltergust 3000 • Strobulba | |
| Items and objects | Bill • Blue Diamond • Blue Stone • Bomb • Boo Ball • Cheese • Circular tile • Coin • Crown • Gold Bar • Gold Bonea • Gold Diamond • Green Stone • Mario's Glove • Mario's Hat • Mario's Letter • Mario's Shoe • Mario's Star • Mirror • Pearl • Red Diamond • Red Stone | |
| Ghosts | Normal ghosts | 35 Boos • Bat • Black Bogmire • Blue Blaze • Blue Twirler • Bowling Ghost • Ceiling Surprise • Elemental Ghosts • Flash • Flying Fish • Garbage Can Ghost • Ghost Guy • Gold Ghost • Gold Mouse • Grabbing Ghost • Mouse • Mr. Bones • Purple Bomber • Purple Puncher • Shining Ghost • Spark • Speedy Spirit • Temper Terror • Waiter |
| Portrait ghosts | Biff Atlas • Bogmire • Boolossus • Chauncey • Clockwork Soldiers • Floating Whirlindas • Henry and Orville • Jarvis • King Boo • Lydia • Madame Clairvoya • Melody Pianissima • Miss Petunia • Mr. Luggs • Nana • Neville • Shivers • Sir Weston • Slim Bankshot • Spooky • Sue Pea • Uncle Grimmly • Vincent Van Gore | |
| Rooms | Lab | Gallery • Portrificationizer Chamber • Lab • Training Room |
| Area one | Anteroom • Balcony • Foyer • Master Bedroom • Nursery • Parlor • Study • Wardrobe Room | |
| Area two | Ball Room • Bathroom • Boneyard • Butler's Room • Conservatory • Dining Room • Graveyard • Hidden Room • Kitchen • Laundry Room • Mirror Room • Storage Room • Washroom | |
| Area three | Astral Hall • Balcony • Bathroom • Billiards Room • Bottom of the Well • Courtyard • Fortune-teller's Room • Nana's Room • Observatory • Projection Room • Rec Room • Safari Room • Tea Room • The Twins' Room • Washroom | |
| Area four | Armory • Artist's Studio • Breaker Room • Cellar • Ceramics Studio • Clockwork Room • Cold Storage • Guest Room • Pipe Room • Roof • Sealed Room • Secret Altar • Sitting Room • Telephone Room | |
| Miscellaneous | Blackout • Ghost Portrificationizer • Ghost's heart • Luigi's Mansion • Luigi's NEW Mansion • Mario's Painting • Polterpupa | |
| Further info | Gallery (GCN · 3DS) • The Lab (Ask Madame Clairvoya · The Bookshelf · The Drafting Table · PolterCue) • "Main Theme" • Nintendo Music • Pre-release and unused content • Professor E. Gadd's Research Journala • Quotes • Staff (GCN · 3DS) | |