Jungle Japes: Difference between revisions
No edit summary |
m (Text replacement - "(\| *)Jap([RMCN\d]* *=)" to "$1Jpn$2") |
||
| (95 intermediate revisions by 45 users not shown) | |||
| Line 1: | Line 1: | ||
{{ | {{about|the first area in Donkey Kong 64|the stage in the [[Super Smash Bros. (series)|Super Smash Bros. series]]|[[Jungle Japes (stage)]]}} | ||
[[ | {{DK64 level infobox | ||
'''Jungle Japes''' is the first level in | |image=[[File:Jungle Japes center.png|250px]] | ||
|entry=1 Golden Banana | |||
|boss=[[Army Dillo]] | |||
|boss_requirement=60 bananas | |||
|trapped_kong=[[Diddy Kong|Diddy]] | |||
|before=<< | |||
|after=[[Angry Aztec|>>]] | |||
}} | |||
'''Jungle Japes''' is the first level in ''[[Donkey Kong 64]]''. Since this is the first adventure stage of the game, it is the introduction of many aspects of the game, including collecting bananas and transforming into [[Rambi]]. It is located in [[Donkey Kong Island]] and requires one [[Golden Banana]] (found near the entrance itself) to enter. [[Diddy Kong]] is held captive here in a mountain prison. | |||
Jungle Japes, as the name suggests, has many jungle areas, filled with climbable trees and collectibles. There are many cliffs that the Kongs climb, one of which has a mine area. The jungle also has many gloomy tunnels full of swinging light bulbs and [[Gnawty|Gnawties]]. The Kasplats are found in the tunnels, except the one carrying Chunky Kong's Blueprint is located in the underground cave. The boss of this stage is [[Army Dillo]], which requires 60 regular Bananas both from Donkey Kong and Diddy Kong to enter, and Army Dillo is fought by Donkey Kong. | |||
==Areas== | |||
===Starting Area=== | |||
The starting point of the level. This area features a thin palm tree, a few thick palm trees, [[swinging vine|hanging vines]] that will take Donkey Kong to his Kong Switch to open the gate to the tunnel, and a Gnawty. Bananaport Pad 1 is the only Bananaport Pad located in that area, which will take the Kongs to the Central Area, but inside the tunnel a few feet from the tunnel exit. | |||
===Starting Cave=== | |||
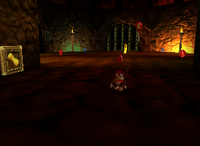
This cave connects the Starting Area to the Central Area. It has a few Gnawties. A notable area is a room that Diddy Kong has to open with his Peanut Popguns leading to a Golden Banana and two Bonus Barrels that Tiny Kong and Lanky Kong have to do for Golden Bananas behind cages. The 1 pad is near the end of the tunnel. | |||
===Central Area=== | |||
[[File:Jjapes.jpg|thumb|left|Donkey Kong in the Central Area]] | |||
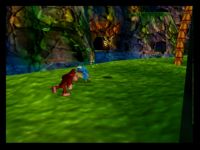
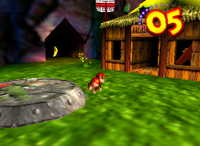
The main area of the level, also the largest. It has thin palm trees, cliffs, a large pond, Diddy Kong's mine cave, Lanky Kong's secret cave (although Tiny Kong can also access it from climbing up a tree nearby and using her Ponytail Whirl to reach it), an underground cave blocked by an "X" and a boulder that Chunky Kong must throw and then [[Simian Slam]] three times to break it open, and is filled with Gnawties and Zingers. [[Snide's H.Q.]] is located on the highest cliff slightly down the hill from the mine cave, and [[Funky's Store]] is located on the cliff below Snide's H.Q. Donkey Kong's Kong Pad is located on a platform above the hole to the underground cave and behind the hanging vines after climbing up the thin palm tree. There is also a cannon on the mid-point on the opposite cliff of Funky's Store, which will shoot the Kongs up to the highest point. Bananaport Pad 1 sends the Kongs back to the Starting Area, Bananaport Pad 2 sends the Kongs from the bottom area to the highest cliff of the same area and vice-versa, Bananaport Pad 3 sends the Kongs to the opposite side of the same area, Bananporter 4 sends the Kongs to the Storm Area, and Bananaport Pad 5 (only reachable by Diddy Kong) sends the Kongs to the Secret Area. | |||
===Storm Cave=== | |||
The largest cave in the level, with two entrances from the main area. One entrance near the 3 pad and Lanky Kong's cave leads to Diddy Kong's Kasplat and vines leading to the other area of the cave. The other entrance is behind the river with a 4 pad and going straight will lead to the storm area. Near the storm area, there are two side paths. The left one leads to Lanky Kong's Bonus Barrel and his Kasplat while the right leads to a Banana Fairy, and a Chunky boulder on top of a Chunky Switch. The right side must be opened with Donkey Kong (as Rambi from the storm area). | |||
==Names in | ===Storm Area=== | ||
{{ | The stormy area of the level with heavy rain, lightning, and thunderclaps. It has three thin palm trees, a small ??? where the [[Animal crate|Rambi Crate]] is located in where only Donkey Kong can transform into Rambi, four Kong switches (excluding Chunky Kong) hidden under small circular buildings that Rambi must break to reveal them, and three Gnawties. [[Cranky's Lab]] is located in the middle of this area of the level. Bananaport Pad 4 in this area sends the Kongs back to the Central Area, but in a tunnel entrance behind the pond. | ||
===Side Cave=== | |||
The entrance is near the X and a 3 pad. Near the beginning is Donkey Kong's Kasplat. Further down is Tiny Kong's Kasplat. At the end is the Secret Area that Tiny Kong has to open. | |||
===Secret Area=== | |||
The smallest area of the level. It has four thick palm trees, one Hunky Chunky Barrel, two Mini Monkey Barrels, two hollow logs used as tunnels while Tiny Kong is in her Mini Monkey form, a tree stump which holds a Golden Banana for Tiny Kong to collect while she falls into the hole of it in her Mini Monkey form, a small Mushroom Trampoline for Tiny Kong in her Mini Monkey form, and a small crystalline cave for Tiny Kong to enter while in Mini Monkey form. Enemies in this area contain two Kritters (only one revives itself after being defeated), and three Grenade-throwing Zingers. This is also the only area of the level where Kritters can be found. Bananaport Pad 5 in this area sends the Kongs to the roof of the mine cave in the Central Area. Tiny Kong must shoot both switches using her Feather Bow to open the gate to this area. This area also plays the same background music as the Starting Area. | |||
==Enemies== | |||
*[[Gnawty]] | |||
*[[Kasplat]] | |||
*[[Klaptrap]] (purple only, located inside Tiny's crystalline cave in the secret area) | |||
*[[Klump]] (inside Diddy's mine cave) | |||
*[[Kritter]] | |||
*[[Zinger]] | |||
==Golden Bananas== | |||
===Donkey Kong=== | |||
{|class=wikitable style=width:100%" | |||
!style="background:#f3f777;width:16%"|Images!!style="background:#f3f777"|Description!!style="background:#f3f777;width:10%"|Type | |||
|- | |||
|align=center|[[File:DK64_Jungle_Japes_Donkey_Golden_1.png|200px]] | |||
|In front of Diddy Kong's cage atop the mountain in the Central Area. | |||
|align=center|[[File:DK64_Animated_Golden_Banana.gif|30px]] | |||
|- | |||
|align=center|[[File:DK64_Jungle_Japes_Donkey_Golden_2.png|200px]] | |||
|After collecting the previous Golden Banana three coconut switches will appear above various cave entrances. Hit all three to rescue Diddy Kong and collect the Golden Banana in his cage. | |||
|align=center|[[File:DK64_Animated_Golden_Banana.gif|30px]] | |||
|- | |||
|align=center|[[File:DK64_Jungle_Japes_Donkey_Banana_12.png|200px]] [[File:DK64_Jungle_Japes_Donkey_Golden_3.png|200px]] | |||
|Hit the coconut switch behind Cranky's Lab to gain access to [[Rambi]]'s crate. Use Rambi to destroy one of the four huts around Cranky's Lab to reveal a Donkey Kong switch. After [[Simian Slam]]ming said switch a Golden Banana will be revealed in the Central Area near the Bananaporter #1 & #2. | |||
|align=center|[[File:DK64_Animated_Golden_Banana.gif|30px]] | |||
|- | |||
|align=center|[[File:DK64_Jungle_Japes_Donkey_Golden_4.png|200px]] | |||
|In the Central Area, climb up the tree near the giant X on the ground and swing across a vine to reach a Donkey Pad, use the [[Baboon Blast]] ability on it. Clear the Barrel Cannon course to receive the Golden Banana. | |||
|align=center|[[File:DK64_Animated_Golden_Banana.gif|30px]] | |||
|- | |||
|align=center|[[File:DK64_Jungle_Japes_Donkey_Coin_3.png|200px]] | |||
|Inside the Side Cave near the giant X on the ground. Defeat the yellow Kasplat and give their blueprint to Snide. | |||
|align=center|[[File:DK64_Yellow_Blueprint.gif|30px]] | |||
|} | |||
===Diddy Kong=== | |||
{|class=wikitable style=width:100%" | |||
!style="background:#ffb5ae;width:16%"|Images!!style="background:#ffb5ae"|Description!!style="background:#ffb5ae;width:10%"|Type | |||
|- | |||
|align=center|[[File:DK64_Jungle_Japes_Diddy_Golden_4.png|200px]] | |||
|Inside the Starting Cave, hit the two peanut switches to open up a gate. The Golden Banana can be found in the newly opened room. | |||
|align=center|[[File:DK64_Animated_Golden_Banana.gif|30px]] | |||
|- | |||
|align=center|[[File:DK64_Jungle_Japes_Diddy_Banana_4.png|200px]] [[File:DK64_Jungle_Japes_Diddy_Golden_1.png|200px]] | |||
|Climb up the mountain in the Central Area until the hill with another Bananaporter #2 in front of it. Hit the peanut switch on it, walk up the hill and enter the mine cave. Hit the peanut switch at a wall and walk over the newly created wooden bridge to reach and hit a switch with Diddy Kong's face on it. A Golden Banana will appear at the top of the hill. | |||
|align=center|[[File:DK64_Animated_Golden_Banana.gif|30px]] | |||
|- | |||
|align=center|[[File:DK64_Jungle_Japes_Diddy_Coin_3.png|200px]] [[File:DK64_Jungle_Japes_Diddy_Golden_2.png|200px]] | |||
|Inside the same mine cave as the previous Golden Banana was. Walk to the second room and lower the speed of the conveyor belts by using Chimpy Charge on a Lo switch. After climbing to the top of the conveyor belts in the same room, enter the metal structure and jump into the minecart. Collect 50 coins to earn the Golden Banana. | |||
|align=center|[[File:DK64_Animated_Golden_Banana.gif|30px]] | |||
|- | |||
|align=center|[[File:DK64_Jungle_Japes_Diddy_Banana_1.png|200px]] | |||
|In the cave to the right of the lake. Defeat the red Kasplat and give their blueprint to Snide. | |||
|align=center|[[File:DK64_Red_Blueprint.gif|30px]] | |||
|- | |||
|align=center|[[File:DK64_Jungle_Japes_Diddy_Banana_11.png|200px]] [[File:DK64_Jungle_Japes_Diddy_Golden_3.png|200px]] | |||
|In the Storm Area near Cranky's Lab, use Rambi with Donkey Kong to destroy the huts and reveal a Diddy Kong switch. After Simian Slamming said switch with Diddy Kong a Golden Banana will be revealed in the Central Area near Funky's Store. Use the Bananaporters to reach the Golden Banana within the time-limit. | |||
|align=center|[[File:DK64_Animated_Golden_Banana.gif|30px]] | |||
|} | |||
===Lanky Kong=== | |||
{|class=wikitable style=width:100%" | |||
!style="background:#c8d0ff;width:16%"|Images!!style="background:#c8d0ff"|Description!!style="background:#c8d0ff;width:10%"|Type | |||
|- | |||
|align=center|[[File:DK64_Jungle_Japes_Lanky_Golden_4.png|200px]] | |||
|Hit the two peanut switches with Diddy Kong inside the Starting Cave to open a new room. Enter said room with Lanky Kong to hit a grape switch to reveal a Bonus Barrel inside it. | |||
|align=center|[[File:Bonus_Barrel_DK64_art.png|40px]]<br>[[Mad Maze Maul!]] | |||
|- | |||
|align=center|[[File:DK64_Jungle_Japes_Rainbow_Coin_1.png|200px]] [[File:DK64_Jungle_Japes_Lanky_Golden_1.png|200px]] | |||
|Hit the peanut switch above a door atop a steep slope in the Central Area. Hit the two pegs inside with a Simian Slam and defeat all the newly spawned [[Zinger]]s. The painting will reveal a Golden Banana. | |||
|align=center|[[File:DK64_Animated_Golden_Banana.gif|30px]] | |||
|- | |||
|align=center|[[File:DK64_Jungle_Japes_Lanky_Banana_7.png|200px]] [[File:DK64_Jungle_Japes_Lanky_Golden_2.png|200px]] | |||
|In the Storm Area near Cranky's Lab, use Rambi with Donkey Kong to destroy the huts and reveal a Lanky Kong switch. After Simian Slamming said switch with Lanky Kong a Golden Banana will be revealed in the Central Area near the cannon. Use the [[Orangstand]] ability or the Bananaporters to reach the Golden Banana within the time-limit. | |||
|align=center|[[File:DK64_Animated_Golden_Banana.gif|30px]] | |||
|- | |||
|align=center|[[File:DK64_Jungle_Japes_Lanky_Banana_10.png|200px]] | |||
|Inside the Storm Cave off to the side. Defeat the blue Kasplat and give their blueprint to Snide. | |||
|align=center|[[File:DK64_Blue_Blueprint.gif|30px]] | |||
|- | |||
|align=center|[[File:DK64_Jungle_Japes_Lanky_Golden_3.png|200px]] | |||
|In the Storm Cave atop a steep cliff near the blue Kasplat. | |||
|align=center|[[File:Bonus_Barrel_DK64_art.png|40px]]<br>[[Speedy Swing Sortie!]] | |||
|} | |||
===Tiny Kong=== | |||
{|class=wikitable style="width:100%" | |||
!style="background:#f5bcfd;width:16%"|Images!!style="background:#f5bcfd"|Description!!style="background:#f5bcfd;width:10%"|Type | |||
|- | |||
|align=center|[[File:DK64_Jungle_Japes_Tiny_Golden_4.png|200px]] | |||
|Hit the two peanut switches with Diddy Kong inside the Starting Cave to open a new room. Enter said room with Tiny Kong to hit a feather switch to reveal a Bonus Barrel inside it. | |||
|align=center|[[File:Bonus_Barrel_DK64_art.png|40px]]<br>[[Splish-Splash Salvage!]] | |||
|- | |||
|align=center|[[File:DK64_Jungle_Japes_Tiny_Kasplat.png|200px]] | |||
|Near the end of the Side Cave. Defeat the purple Kasplat and give their blueprint to Snide. | |||
|align=center|[[File:DK64_Purple_Blueprint.gif|30px]] | |||
|- | |||
|align=center|[[File:DK64_Jungle_Japes_Tiny_Golden_2.png|200px]] | |||
|Inside a small trunk in the Secret Area, use the nearby [[Mini-Monkey]] barrel to enter it. | |||
|align=center|[[File:DK64_Animated_Golden_Banana.gif|30px]] | |||
|- | |||
|align=center|[[File:DK64_Jungle_Japes_Tiny_Golden_1.png|200px]] | |||
|Inside a beehive found in the Secret Area, use Mini-Tiny to enter it. Two paths are blocked, you can unlock another room by hitting the first switch. After hitting the second switch you unlock the final room with a Golden Banana on a raised platform. | |||
|align=center|[[File:DK64_Animated_Golden_Banana.gif|30px]] | |||
|- | |||
|align=center|[[File:DK64_Jungle_Japes_Tiny_Banana_6.png|200px]] [[File:DK64_Jungle_Japes_Tiny_Golden_3.png|200px]] | |||
|In the Storm Area near Cranky's Lab, use Rambi with Donkey Kong to destroy the huts and reveal a Tiny Kong switch. After Simian Slamming said switch with Tiny Kong a Golden Banana will be revealed in the Central Area above the lake. Use the Bananaporters to reach the Golden Banana within the time-limit. | |||
|align=center|[[File:DK64_Animated_Golden_Banana.gif|30px]] | |||
|} | |||
===Chunky Kong=== | |||
{|class=wikitable style=width:100%" | |||
!style="background:#a0ce99;width:16%"|Images!!style="background:#a0ce99"|Description!!style="background:#a0ce99;width:10%"|Type | |||
|- | |||
|align=center|[[File:DK64_Jungle_Japes_Chunky_Golden_1.png|200px]] | |||
|Pick up and throw the rock near Bananaporter #3 in the Central Area to reveal the Golden Banana inside. | |||
|align=center|[[File:DK64_Animated_Golden_Banana.gif|30px]] | |||
|- | |||
|align=center|[[File:DK64_Jungle_Japes_Chunky_Golden_2.png|200px]] | |||
|Destroy the giant X below the boulder of the previous Golden Banana, then enter the catacomb and walk to the end. Shoot the pineapple switches on the big skull and use the newly lowered vines to reach the Golden Banana. | |||
|align=center|[[File:DK64_Animated_Golden_Banana.gif|30px]] | |||
|- | |||
|align=center|[[File:DK64_Jungle_Japes_Chunky_Kasplat.png|200px]] | |||
|Inside the catacomb below the giant X in the Central Area. Shoot the pineapple switches on the skull to reach the Kasplat. Defeat the green Kasplat and give their blueprint to Snide. | |||
|align=center|[[File:DK64_Green_Blueprint.gif|30px]] | |||
|- | |||
|align=center|[[File:DK64_Jungle_Japes_Chunky_Golden_3.png|200px]] | |||
|In the Secret Area, use the Hunky Chunky barrel to climb up the four trees. The Bonus Barrel is near the middle of the four trees. | |||
|align=center|[[File:Bonus_Barrel_DK64_art.png|40px]]<br>[[Minecart Mayhem!]] | |||
|- | |||
|align=center|[[File:DK64_Jungle_Japes_Chunky_Golden_4b.png|200px]] [[File:DK64_Jungle_Japes_Chunky_Golden_4.png|200px]] | |||
|Inside the Storm Cave behind a wall only Rambi can destroy. Lift up a boulder and Simian Slam the Chunky Kong switch below it. A Golden Banana will be revealed in the Central Area near Snides H.Q. Use the Bananaporters to reach it within the time-limit. | |||
|align=center|[[File:DK64_Animated_Golden_Banana.gif|30px]] | |||
|} | |||
==Colored Bananas== | |||
{{main|List of Bananas in Jungle Japes}} | |||
There are a total of 500 [[Banana]]s (100 for each [[Donkey_Kong_64#Playable|Kong]]) to collect. | |||
==Banana Coins== | |||
{{main|List of Banana Coins in Jungle Japes}} | |||
There are a total of 75 [[Banana Coin]]s across all five Kongs and 1 [[5-Banana Coin]] to collect. | |||
==Banana Fairies== | |||
{|class=wikitable style="width:100%" | |||
!style="width:16%;background:#F3F777"|Image!!style="background:#F3F777"|Description | |||
|- | |||
|align=center|[[File:DK64_Jungle_Japes_Fairy_1.png|200px]] | |||
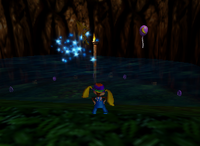
|Inside Lanky's Cave, found atop a steep slope in the Central Area. Solve the puzzle and collect the Golden Banana to spawn the fairy. | |||
|- | |||
|align=center|[[File:DK64_Jungle_Japes_Fairy_2.png|200px]] | |||
|Above a small lake inside the Storm Cave behind a wall only Rambi can destroy. | |||
|} | |||
==Battle Arena Pad== | |||
{|class=wikitable style="width:100%" | |||
!style="width:16%;background:#d8c1a3"|Image!!style="background:#d8c1a3"|Description | |||
|- | |||
|align=center|[[File:DK64 Jungle Japes Battle Arena Pad 1.png|200px]] | |||
|In front of Funky's Armory. | |||
|} | |||
==Gallery== | |||
===Exterior=== | |||
<gallery> | |||
Jungle Japes 1st part.png|1st part | |||
Jungle Japes canyon.png|Canyon | |||
Jungle_Japes storm.png|Storm | |||
Jungle Japes 2nd part.png|2nd part | |||
</gallery> | |||
===Interior=== | |||
<gallery> | |||
Jungle Japes mine.png|Mine | |||
Jungle Japes shell.png|Beehive | |||
Jungle Japes underground.png|Underground | |||
</gallery> | |||
==Names in other languages== | |||
{{foreign names | |||
|Jpn=ジャングルガーデン | |||
|JpnR=Janguru Gāden | |||
|JpnM=Jungle Garden | |||
|Spa=Jungla Jocosa | |||
|SpaM=Humorous Jungle | |||
|Fre=Jobards des Jungles | |||
|FreM=Crazies of the Jungles | |||
|Ger=Tropen Trubel | |Ger=Tropen Trubel | ||
|GerM=Tropic Trouble | |GerM=Tropic Trouble | ||
|Ita=Scherzi da Giungla | |||
|ItaM=Jungle Pranks | |||
}} | }} | ||
==Trivia== | ==Trivia== | ||
*[[Jungle Hijinxs (Donkey Kong Country)|Jungle Hijinxs]], from ''[[Donkey Kong Country]]'', was originally known as Jungle Japes in development. | *[[Jungle Hijinxs (Donkey Kong Country)|Jungle Hijinxs]], from ''[[Donkey Kong Country]]'', was originally known as Jungle Japes in development. | ||
* | *The music played is an arrangement of "[[DK Island Swing]]" from ''Donkey Kong Country''. | ||
< | *Inside the underground cave where [[Chunky Kong]]'s [[Kasplat]] is located, the [[Target Switch|Pineapple Switches]] can be hit using any weapon, not just the [[Pineapple Launcher]]. | ||
{{ | *The storm variation of the music for Jungle Japes was arranged as [[Rabbid Kong]]'s battle theme in ''[[Mario + Rabbids Kingdom Battle]]''. | ||
**The normal theme was also rearranged as "Jungle Joust", one of the battle themes for the [[Donkey Kong Adventure]] expansion. | |||
*There is a 101st banana for Diddy that can be found in the mine cave, located under the ground near the minecart minigame. It can be obtained by clipping into the stack of boxes near the entrance of the area and going [[List of Donkey Kong 64 glitches|out of bounds]].<ref>{{cite|author=ScykohPlays|date=March 3, 2021|language=en|url=youtu.be/yIvb0ep1XXY?si=NGM9SU-sK2m3TVIG&t=61|timestamp=01:01|title=''Donkey Kong 64'' - Out of Bounds... Again! {{!}} PART 16|publisher=YouTube|accessdate=April 3, 2024}}</ref> The game will not register the 101st banana in the totals unless Diddy has fed at least 1 banana to [[Scoff]]. | |||
*There is a 101st banana for Donkey that can be found deep under the ground, below the Rambi Crate. It can be obtained by performing the [[List of Donkey Kong 64 glitches#Jungle Japes mountain clip|mountain clip glitch]] to go out of bounds and then traveling to the Storm Area.<ref>{{cite|author=ScykohPlays|date=March 23, 2021|url=youtu.be/cG3SLARYRCU?si=RZJjQ2nOQv--yXNe&t=1245|title=''Donkey Kong 64'' - Out of Bounds... Again?! {{!}} PART 30|language=en|publisher=YouTube|accessdate=April 3, 2024|timestamp=20:45}}</ref> The game will not register the 101st banana in the totals unless Donkey has fed at least 1 banana to Scoff. | |||
==References== | |||
<references/> | |||
{{DK64}} | {{DK64}} | ||
[[Category:Donkey Kong Island]] | [[Category:Donkey Kong Island]] | ||
[[Category: | [[Category:Jungles]] | ||
[[Category: | [[Category:Donkey Kong 64 levels]] | ||
Latest revision as of 11:50, January 7, 2025
- This article is about the first area in Donkey Kong 64. For the stage in the Super Smash Bros. series, see Jungle Japes (stage).
| Jungle Japes | |
|---|---|
| |
| Entrance requirement | 1 Golden Banana |
| Boss | Army Dillo |
| Boss requirement | 60 bananas |
| Trapped Kongs | Diddy |
| << List of levels >> | |
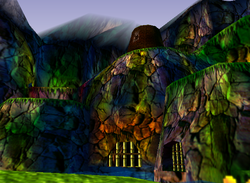
Jungle Japes is the first level in Donkey Kong 64. Since this is the first adventure stage of the game, it is the introduction of many aspects of the game, including collecting bananas and transforming into Rambi. It is located in Donkey Kong Island and requires one Golden Banana (found near the entrance itself) to enter. Diddy Kong is held captive here in a mountain prison.
Jungle Japes, as the name suggests, has many jungle areas, filled with climbable trees and collectibles. There are many cliffs that the Kongs climb, one of which has a mine area. The jungle also has many gloomy tunnels full of swinging light bulbs and Gnawties. The Kasplats are found in the tunnels, except the one carrying Chunky Kong's Blueprint is located in the underground cave. The boss of this stage is Army Dillo, which requires 60 regular Bananas both from Donkey Kong and Diddy Kong to enter, and Army Dillo is fought by Donkey Kong.
Areas[edit]
Starting Area[edit]
The starting point of the level. This area features a thin palm tree, a few thick palm trees, hanging vines that will take Donkey Kong to his Kong Switch to open the gate to the tunnel, and a Gnawty. Bananaport Pad 1 is the only Bananaport Pad located in that area, which will take the Kongs to the Central Area, but inside the tunnel a few feet from the tunnel exit.
Starting Cave[edit]
This cave connects the Starting Area to the Central Area. It has a few Gnawties. A notable area is a room that Diddy Kong has to open with his Peanut Popguns leading to a Golden Banana and two Bonus Barrels that Tiny Kong and Lanky Kong have to do for Golden Bananas behind cages. The 1 pad is near the end of the tunnel.
Central Area[edit]
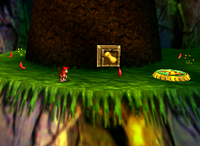
The main area of the level, also the largest. It has thin palm trees, cliffs, a large pond, Diddy Kong's mine cave, Lanky Kong's secret cave (although Tiny Kong can also access it from climbing up a tree nearby and using her Ponytail Whirl to reach it), an underground cave blocked by an "X" and a boulder that Chunky Kong must throw and then Simian Slam three times to break it open, and is filled with Gnawties and Zingers. Snide's H.Q. is located on the highest cliff slightly down the hill from the mine cave, and Funky's Store is located on the cliff below Snide's H.Q. Donkey Kong's Kong Pad is located on a platform above the hole to the underground cave and behind the hanging vines after climbing up the thin palm tree. There is also a cannon on the mid-point on the opposite cliff of Funky's Store, which will shoot the Kongs up to the highest point. Bananaport Pad 1 sends the Kongs back to the Starting Area, Bananaport Pad 2 sends the Kongs from the bottom area to the highest cliff of the same area and vice-versa, Bananaport Pad 3 sends the Kongs to the opposite side of the same area, Bananporter 4 sends the Kongs to the Storm Area, and Bananaport Pad 5 (only reachable by Diddy Kong) sends the Kongs to the Secret Area.
Storm Cave[edit]
The largest cave in the level, with two entrances from the main area. One entrance near the 3 pad and Lanky Kong's cave leads to Diddy Kong's Kasplat and vines leading to the other area of the cave. The other entrance is behind the river with a 4 pad and going straight will lead to the storm area. Near the storm area, there are two side paths. The left one leads to Lanky Kong's Bonus Barrel and his Kasplat while the right leads to a Banana Fairy, and a Chunky boulder on top of a Chunky Switch. The right side must be opened with Donkey Kong (as Rambi from the storm area).
Storm Area[edit]
The stormy area of the level with heavy rain, lightning, and thunderclaps. It has three thin palm trees, a small ??? where the Rambi Crate is located in where only Donkey Kong can transform into Rambi, four Kong switches (excluding Chunky Kong) hidden under small circular buildings that Rambi must break to reveal them, and three Gnawties. Cranky's Lab is located in the middle of this area of the level. Bananaport Pad 4 in this area sends the Kongs back to the Central Area, but in a tunnel entrance behind the pond.
Side Cave[edit]
The entrance is near the X and a 3 pad. Near the beginning is Donkey Kong's Kasplat. Further down is Tiny Kong's Kasplat. At the end is the Secret Area that Tiny Kong has to open.
Secret Area[edit]
The smallest area of the level. It has four thick palm trees, one Hunky Chunky Barrel, two Mini Monkey Barrels, two hollow logs used as tunnels while Tiny Kong is in her Mini Monkey form, a tree stump which holds a Golden Banana for Tiny Kong to collect while she falls into the hole of it in her Mini Monkey form, a small Mushroom Trampoline for Tiny Kong in her Mini Monkey form, and a small crystalline cave for Tiny Kong to enter while in Mini Monkey form. Enemies in this area contain two Kritters (only one revives itself after being defeated), and three Grenade-throwing Zingers. This is also the only area of the level where Kritters can be found. Bananaport Pad 5 in this area sends the Kongs to the roof of the mine cave in the Central Area. Tiny Kong must shoot both switches using her Feather Bow to open the gate to this area. This area also plays the same background music as the Starting Area.
Enemies[edit]
- Gnawty
- Kasplat
- Klaptrap (purple only, located inside Tiny's crystalline cave in the secret area)
- Klump (inside Diddy's mine cave)
- Kritter
- Zinger
Golden Bananas[edit]
Donkey Kong[edit]
| Images | Description | Type |
|---|---|---|
|
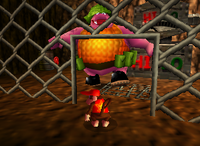
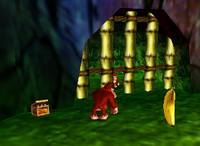
In front of Diddy Kong's cage atop the mountain in the Central Area. | |
|
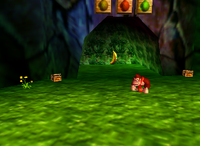
After collecting the previous Golden Banana three coconut switches will appear above various cave entrances. Hit all three to rescue Diddy Kong and collect the Golden Banana in his cage. | |
|
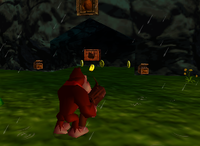
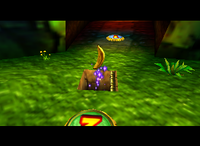
Hit the coconut switch behind Cranky's Lab to gain access to Rambi's crate. Use Rambi to destroy one of the four huts around Cranky's Lab to reveal a Donkey Kong switch. After Simian Slamming said switch a Golden Banana will be revealed in the Central Area near the Bananaporter #1 & #2. | |
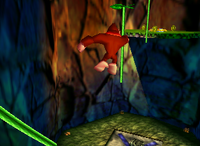
|
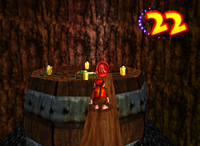
In the Central Area, climb up the tree near the giant X on the ground and swing across a vine to reach a Donkey Pad, use the Baboon Blast ability on it. Clear the Barrel Cannon course to receive the Golden Banana. | |
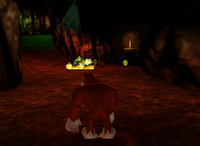
|
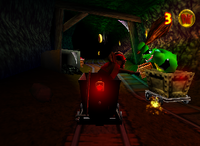
Inside the Side Cave near the giant X on the ground. Defeat the yellow Kasplat and give their blueprint to Snide. |
Diddy Kong[edit]
Lanky Kong[edit]
| Images | Description | Type |
|---|---|---|
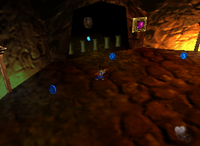
|
Hit the two peanut switches with Diddy Kong inside the Starting Cave to open a new room. Enter said room with Lanky Kong to hit a grape switch to reveal a Bonus Barrel inside it. | Mad Maze Maul! |
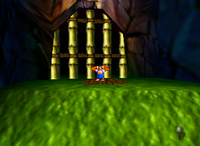 
|
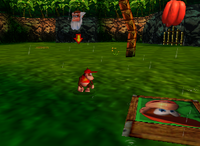
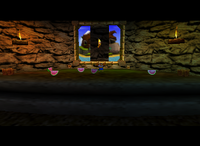
Hit the peanut switch above a door atop a steep slope in the Central Area. Hit the two pegs inside with a Simian Slam and defeat all the newly spawned Zingers. The painting will reveal a Golden Banana. | |
|
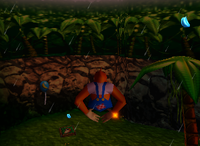
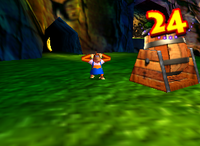
In the Storm Area near Cranky's Lab, use Rambi with Donkey Kong to destroy the huts and reveal a Lanky Kong switch. After Simian Slamming said switch with Lanky Kong a Golden Banana will be revealed in the Central Area near the cannon. Use the Orangstand ability or the Bananaporters to reach the Golden Banana within the time-limit. | |
|
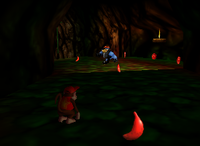
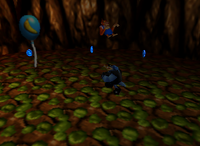
Inside the Storm Cave off to the side. Defeat the blue Kasplat and give their blueprint to Snide. | |
|
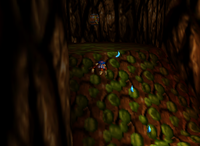
In the Storm Cave atop a steep cliff near the blue Kasplat. | Speedy Swing Sortie! |
Tiny Kong[edit]
| Images | Description | Type |
|---|---|---|
|
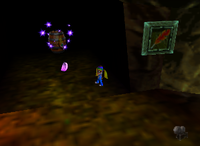
Hit the two peanut switches with Diddy Kong inside the Starting Cave to open a new room. Enter said room with Tiny Kong to hit a feather switch to reveal a Bonus Barrel inside it. | Splish-Splash Salvage! |
|
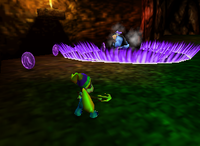
Near the end of the Side Cave. Defeat the purple Kasplat and give their blueprint to Snide. | |
|
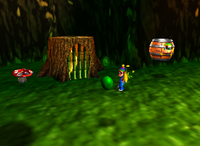
Inside a small trunk in the Secret Area, use the nearby Mini-Monkey barrel to enter it. | |
|
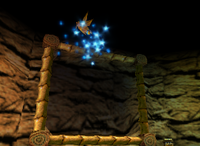
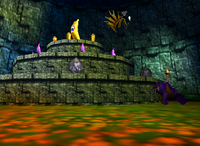
Inside a beehive found in the Secret Area, use Mini-Tiny to enter it. Two paths are blocked, you can unlock another room by hitting the first switch. After hitting the second switch you unlock the final room with a Golden Banana on a raised platform. | |
|
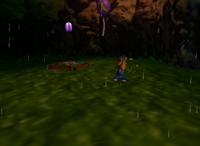
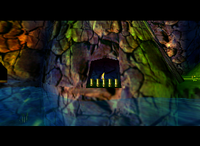
In the Storm Area near Cranky's Lab, use Rambi with Donkey Kong to destroy the huts and reveal a Tiny Kong switch. After Simian Slamming said switch with Tiny Kong a Golden Banana will be revealed in the Central Area above the lake. Use the Bananaporters to reach the Golden Banana within the time-limit. |
Chunky Kong[edit]
| Images | Description | Type |
|---|---|---|
|
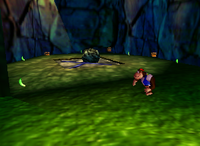
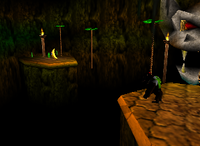
Pick up and throw the rock near Bananaporter #3 in the Central Area to reveal the Golden Banana inside. | |
|
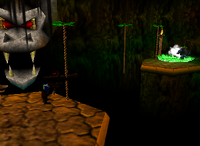
Destroy the giant X below the boulder of the previous Golden Banana, then enter the catacomb and walk to the end. Shoot the pineapple switches on the big skull and use the newly lowered vines to reach the Golden Banana. | |
|
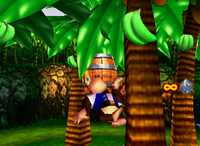
Inside the catacomb below the giant X in the Central Area. Shoot the pineapple switches on the skull to reach the Kasplat. Defeat the green Kasplat and give their blueprint to Snide. | |
|
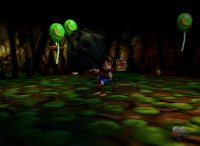
In the Secret Area, use the Hunky Chunky barrel to climb up the four trees. The Bonus Barrel is near the middle of the four trees. | Minecart Mayhem! |
|
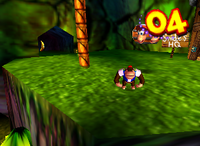
Inside the Storm Cave behind a wall only Rambi can destroy. Lift up a boulder and Simian Slam the Chunky Kong switch below it. A Golden Banana will be revealed in the Central Area near Snides H.Q. Use the Bananaporters to reach it within the time-limit. |
Colored Bananas[edit]
- Main article: List of Bananas in Jungle Japes
There are a total of 500 Bananas (100 for each Kong) to collect.
Banana Coins[edit]
- Main article: List of Banana Coins in Jungle Japes
There are a total of 75 Banana Coins across all five Kongs and 1 5-Banana Coin to collect.
Banana Fairies[edit]
Battle Arena Pad[edit]
| Image | Description |
|---|---|
|
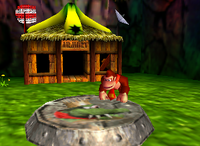
In front of Funky's Armory. |
Gallery[edit]
Exterior[edit]
Interior[edit]
Names in other languages[edit]
| Language | Name | Meaning | Notes |
|---|---|---|---|
| Japanese | ジャングルガーデン[?] Janguru Gāden |
Jungle Garden | |
| French | Jobards des Jungles[?] | Crazies of the Jungles | |
| German | Tropen Trubel[?] | Tropic Trouble | |
| Italian | Scherzi da Giungla[?] | Jungle Pranks | |
| Spanish | Jungla Jocosa[?] | Humorous Jungle |
Trivia[edit]
- Jungle Hijinxs, from Donkey Kong Country, was originally known as Jungle Japes in development.
- The music played is an arrangement of "DK Island Swing" from Donkey Kong Country.
- Inside the underground cave where Chunky Kong's Kasplat is located, the Pineapple Switches can be hit using any weapon, not just the Pineapple Launcher.
- The storm variation of the music for Jungle Japes was arranged as Rabbid Kong's battle theme in Mario + Rabbids Kingdom Battle.
- The normal theme was also rearranged as "Jungle Joust", one of the battle themes for the Donkey Kong Adventure expansion.
- There is a 101st banana for Diddy that can be found in the mine cave, located under the ground near the minecart minigame. It can be obtained by clipping into the stack of boxes near the entrance of the area and going out of bounds.[1] The game will not register the 101st banana in the totals unless Diddy has fed at least 1 banana to Scoff.
- There is a 101st banana for Donkey that can be found deep under the ground, below the Rambi Crate. It can be obtained by performing the mountain clip glitch to go out of bounds and then traveling to the Storm Area.[2] The game will not register the 101st banana in the totals unless Donkey has fed at least 1 banana to Scoff.
References[edit]
- ^ ScykohPlays (March 3, 2021). Donkey Kong 64 - Out of Bounds... Again! | PART 16 (01:01). YouTube (English). Retrieved April 3, 2024.
- ^ ScykohPlays (March 23, 2021). Donkey Kong 64 - Out of Bounds... Again?! | PART 30 (20:45). YouTube (English). Retrieved April 3, 2024.
