|
|
| (60 intermediate revisions by 28 users not shown) |
| Line 1: |
Line 1: |
| __NOTOC__
| | {{italic title|id=yes}} |
| {{italic title|Item Shop (''Wario Land 4'')}} | | {{about|the item shop from ''Wario Land 4''|the various item shops from other games|[[Item Shop]]}} |
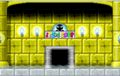
| {{articleabout|the item shop from ''Wario Land 4''|the item shops from other games|[[Item Shop|here]]}} | | [[File:Itemshop WL4.png|thumb|The shop owner welcoming Wario to his store in ''Wario Land 4'']] |
| [[File:WL4-Item Shop2.PNG|frame|The '''Item Shop''' entrance.]] | | [[File:WL4 Item Shop Logo.png|frame|left]] |
| [[File:WL4-MGW.PNG|frame|left]] | | The '''Item Shop''' in ''[[Wario Land 4]]'' is a place where [[Wario]] can spend his [[Medal (Wario Land 4)|medal]]s earned in the [[Mini-Game Shop]] in exchange for items. These assist him in defeating a [[Wario Land 4#Bosses|boss]] by dealing damage before the battle begins. The [[shop owner]] is suggested to be [[Princess Shokora]]/[[Kuro Neko]]. The [[Smile]] is the only item in the shop that is free. This is a joke item, as it simply makes the shop owner smile and plays a sound effect. |
| The '''Item Shop''' in the [[Game Boy Advance]] game ''[[Wario Land 4]]'' is a place where [[Wario]] can spend his [[Frog Medal]]s earned in the [[Mini-Game Shop]] in exchange for items to assist him in defeating a [[Wario Land 4#Bosses|boss]] by doing pre-damage at the battle's start. The shopkeeper is [[Princess Game & Watch]] (as shown on the left), who is actually [[Princess Shokora]]/[[Black Cat]]. The more effective the item has on damaging a boss, the more Frog Medals it is likely to cost. The price of the items also varies on the [[Wario Land 4#Game Modes|game mode]]. For example, an item in [[Wario Land 4#Game Modes|hard]] mode would be more expensive than the same item in [[Wario Land 4#Game Modes|normal]] mode. The [[Smile]] is the only item in the shop that is free. This is a joke item, as it simply makes Princess Game & Watch smile and plays a sound effect. | |
| | |
| ==Shop Info==
| |
| A table of all nine items is shown below, with their respective sprites, names and descriptions;
| |
| {|width=100% cellspacing=0 border=1 cellpadding=3 style="border-collapse:collapse;"
| |
| |-
| |
| !Image
| |
| !Name
| |
| !Description
| |
| |-
| |
| |align="center" |[[File:Apple Bomb.png]]
| |
| |align="center" |[[Apple Bomb]]
| |
| |The Apple Bomb is an apple with colored stripes across the bottom half. It disguises a bomb that is hidden inside. When purchased, [[Princess Game & Watch]] will drag the apple to the boss room. She then raises the apple, which will then break open to reveal a ticking [[Bomb (item)|Bomb]]. She throws the bomb at the boss to inflict a small amount of damage.
| |
| |-
| |
| |align="center" |[[File:WL4-Blast Cannon.PNG]]
| |
| |align="center" |[[Blast Cannon]]
| |
| |The Blast Cannon is a grey cannon with multicolored stripes along the barrel. When purchased, it is wheeled to the boss room by Princess Game & Watch. She will then click her fingers. A Bomb is blasted as a projectile out of the cannon and hits the boss to inflict a small amount of damage.
| |
| |-
| |
| |align="center" |[[File:Vizorman.png]]
| |
| |align="center" |[[Vizorman]]
| |
| |The Vizorman is a seemingly inanimate being that wears a vizor with a white suit with a cape. There is a ''V'' on it's chest, and the legs have multicolored stries. Princess Game & Watch will drag the Vizorman to the boss room. She will then start charging a laser, which is projected from the vizor and hits the boss, dealing a small amount of damage.
| |
| |-
| |
| |align="center" |[[File:WL4-Bugle.PNG]]
| |
| |align="center" |[[Bugle]]
| |
| |The Bugle is a golden bugle with multicolored stripes across the lower half of the tube. It is carried to the boss room by Princess Game & Watch. She will then start playing a tune on the Bugle, releasing many music notes which will fly around the room, eventually hitting the boss and inflicting an average amount of damage.
| |
| |-
| |
| |align="center" |[[File:Black Dog.PNG]]
| |
| |align="center" |[[Black Dog]]
| |
| |The Black Dog is a dog with a huge jaw and bright yellow eyes. It is one of the four items where Princess Game & Watch will transform into the actual item. When purchased, she will follow Wario to the boss room. She will then transform into the Black Dog. The dog will bite the boss several times, inflicting a large amount of damage.
| |
| |-
| |
| |align="center" |[[File:WL4-LargeLipsSprite.PNG]]
| |
| |align="center" |[[Large Lips]]
| |
| |The Large Lips is a being with enormously-sized lips, which replace the whole head of the being. Princess Game & Watch will follow Wario to the boss room. She will then transform into the Large Lips, which will violently kiss the boss and deal a large amount of damage.
| |
| |-
| |
| |align="center" |[[File:WL4-BigFistSprite.PNG]]
| |
| |align="center" |[[Big Fist]]
| |
| |The Big Fist is a large fist that wears a white glove. It resembles the [[Master Hand]] and [[Crazy Hand]] from the [[Super Smash Bros (series)|''Super Smash Bros.'']] series. Princess Game & Watch will transform into the Big Fist, which will throw a powerful punch at the boss, dealing a large amount of damage.
| |
| |-
| |
| |align="center" |[[File:WL4-BlackDragon.PNG]]
| |
| |align="center" |[[Black Dragon]]
| |
| |The Black Dragon is a large dragon with a huge jaw and bright yellow eyes, and wings on it's back that allows it to fly. When purchased, Princess Game & Watch will follow Wario to the boss room. There, she will transform into the fearsome Black Dragon, which breathes fire on the boss to deal a large amount of damage.
| |
| |-
| |
| |align="center" |[[File:WL4-Smile.PNG]]
| |
| |align="center" |[[Smile]]
| |
| |The only free item available in the shop and is also a joke item. It does nothing but make a smile from the shopkeeper.
| |
| |}
| |
|
| |
|
| | ==Cost of items== |
| All items and prices in different game modes are as follows: | | All items and prices in different game modes are as follows: |
| {|width=100% cellspacing=0 border=1 cellpadding=3 style="border-collapse:collapse;" | | {|class="wikitable sortable wario wl" width=40% style="text-align:center" |
| | !rowspan="2" class="unsortable"|Image |
| | !rowspan="2"|Name |
| | !colspan="3"|Price in [[Medal (Wario Land 4)|medal]]s |
| |- | | |- |
| !Item name | | !Normal |
| !colspan="3" |Price in [[Frog Medal]]s
| | !Hard |
| |-
| | !S-Hard |
| |
| |
| !align="center" style="background: #48D1C9;" |Normal
| |
| !align="center" style="background: #FFCC07;" |Hard | |
| !align="center" style="background: #E35148;" |S-Hard | |
| |- | | |- |
| !align="center" |[[Apple Bomb]]
| | |[[File:WL4 Item Shop Apple Bomb.png]] |
| |align="center" style="background: #48D1C9;" |2 | | |[[Apple Bomb]] |
| |align="center" style="background: #FFCC07;" |3
| | |2 |
| |align="center" style="background: #E35148;" |4
| | |3 |
| | |4 |
| |- | | |- |
| !align="center" |[[Blast Cannon]]
| | |[[File:Blast Cannon.png]] |
| |align="center" style="background: #48D1C9;" |2 | | |[[Blast Cannon]] |
| |align="center" style="background: #FFCC07;" |3
| | |2 |
| |align="center" style="background: #E35148;" |4
| | |3 |
| | |4 |
| |- | | |- |
| !align="center" |[[Vizorman]]
| | |[[File:WL4 Item Shop Vizorman.png]] |
| |align="center" style="background: #48D1C9;" |4 | | |[[Vizorman]] |
| |align="center" style="background: #FFCC07;" |6
| | |4 |
| |align="center" style="background: #E35148;" |8
| | |6 |
| | |8 |
| |- | | |- |
| !align="center" |[[Bugle]]
| | |[[File:WL4 Item Shop Bugle.png]] |
| |align="center" style="background: #48D1C9;" |6 | | |[[Bugle]] |
| |align="center" style="background: #FFCC07;" |9
| | |6 |
| |align="center" style="background: #E35148;" |12
| | |9 |
| | |12 |
| |- | | |- |
| !align="center" |[[Black Dog]]
| | |[[File:WL4 Item Shop Black Dog.png]] |
| |align="center" style="background: #48D1C9;" |10 | | |[[Black Dog]] |
| |align="center" style="background: #FFCC07;" |15
| | |10 |
| |align="center" style="background: #E35148;" |20
| | |15 |
| | |20 |
| |- | | |- |
| !align="center" |[[Large Lips]]
| | |[[File:Large Lips WL4.png]] |
| |align="center" style="background: #48D1C9;" |10 | | |[[Large Lips]] |
| |align="center" style="background: #FFCC07;" |15
| | |10 |
| |align="center" style="background: #E35148;" |20
| | |15 |
| | |20 |
| |- | | |- |
| !align="center" |[[Big Fist]]
| | |[[File:Big Fist.png]] |
| |align="center" style="background: #48D1C9;" |10 | | |[[Big Fist]] |
| |align="center" style="background: #FFCC07;" |15
| | |10 |
| |align="center" style="background: #E35148;" |20
| | |15 |
| | |20 |
| |- | | |- |
| !align="center" |[[Black Dragon]]
| | |[[File:Black Dragon.png]] |
| |align="center" style="background: #48D1C9;" |10 | | |[[Black Dragon]] |
| |align="center" style="background: #FFCC07;" |15
| | |10 |
| |align="center" style="background: #E35148;" |20
| | |15 |
| | |20 |
| |- | | |- |
| !align="center" |[[Smile]]
| | |[[File:WL4 Item Shop Smile.png]] |
| |align="center" style="background: #48D1C9;" |''N/A | | |[[Smile]] |
| |align="center" style="background: #FFCC07;" |''N/A | | |– |
| |align="center" style="background: #E35148;" |''N/A | | |– |
| | |– |
| |} | | |} |
|
| |
|
| | ==Damage dealt by items== |
| Each item deals a fixed amount of damage to each boss. All damage totals are shown below. The last four items are not available for use against the first boss, [[Spoiled Rotten]]. | | Each item deals a fixed amount of damage to each boss. All damage totals are shown below. The last four items are not available for use against the first boss, [[Spoiled Rotten]]. |
| {|width=100% cellspacing=0 border=1 cellpadding=3 style="border-collapse:collapse;" | | |
| |- | | {|class="wikitable sortable wario wl" width=50% style="text-align:center" |
| !Item
| | !rowspan="2"|Item |
| !colspan="6" |Boss / Damage taken by Item | | !colspan="6"|Boss / damage taken by item |
| |- | | |- |
| |
| | ![[Spoiled Rotten]] |
| !align="center" |[[Spoiled Rotten]] | | ![[Cractus]] |
| !align="center" |[[Cractus]] | | ![[Cuckoo Condor]] |
| !align="center" |[[Cuckoo Condor]] | | ![[Aerodent]] |
| !align="center" |[[Aerodent]] | | ![[Catbat]] |
| !align="center" |[[Catbat]] | | ![[Golden Diva]] |
| !align="center" |[[Golden Diva]] | |
| |- | | |- |
| !align="center" |[[Apple Bomb]] | | ![[Apple Bomb]] |
| |align="center" |2
| | |2 |
| |align="center" |2
| | |2 |
| |align="center" |2
| | |2 |
| |align="center" |1
| | |1 |
| |align="center" |2
| | |2 |
| |align="center" |1
| | |1 |
| |- | | |- |
| !align="center" |[[Blast Cannon]] | | ![[Blast Cannon]] |
| |align="center" |3
| | |3 |
| |align="center" |3
| | |3 |
| |align="center" |2
| | |2 |
| |align="center" |2
| | |2 |
| |align="center" |1
| | |1 |
| |align="center" |1
| | |1 |
| |- | | |- |
| !align="center" |[[Vizorman]] | | ![[Vizorman]] |
| |align="center" |6
| | |6 |
| |align="center" |4
| | |4 |
| |align="center" |3
| | |3 |
| |align="center" |3
| | |3 |
| |align="center" |3
| | |3 |
| |align="center" |2
| | |2 |
| |- | | |- |
| !align="center" |[[Bugle]] | | ![[Bugle]] |
| |align="center" |8
| | |8 |
| |align="center" |5
| | |5 |
| |align="center" |4
| | |4 |
| |align="center" |4
| | |4 |
| |align="center" |4
| | |4 |
| |align="center" |3
| | |3 |
| |- | | |- |
| !align="center" |[[Black Dog]] | | ![[Black Dog]] |
| |align="center" |''N/A'' | | |– |
| |align="center" |7
| | |7 |
| |align="center" |9
| | |9 |
| |align="center" |8
| | |8 |
| |align="center" |10
| | |10 |
| |align="center" |8
| | |8 |
| |- | | |- |
| !align="center" |[[Large Lips]] | | ![[Large Lips]] |
| |align="center" |''N/A'' | | |– |
| |align="center" |9
| | |9 |
| |align="center" |8
| | |8 |
| |align="center" |14
| | |14 |
| |align="center" |7
| | |7 |
| |align="center" |5
| | |5 |
| |- | | |- |
| !align="center" |[[Big Fist]] | | ![[Big Fist]] |
| |align="center" |''N/A'' | | |– |
| |align="center" |8
| | |8 |
| |align="center" |12
| | |12 |
| |align="center" |7
| | |7 |
| |align="center" |9
| | |9 |
| |align="center" |6
| | |6 |
| |- | | |- |
| !align="center" |[[Black Dragon]] | | ![[Black Dragon]] |
| |align="center" |''N/A'' | | |– |
| |align="center" |10
| | |10 |
| |align="center" |7
| | |7 |
| |align="center" |9
| | |9 |
| |align="center" |8
| | |8 |
| |align="center" |7
| | |7 |
| |} | | |} |
|
| |
|
| ==Media== | | ==Profiles== |
| {{Media | | {{multilang profile |
| |type1=audio | | |type=vc_3ds |
| |name1=WL4-Item Shop | | |Eng=You will be able to buy items from an Item Shop before facing a boss. You can buy these with the medals you won in the mini-games. Once you have purchased an item, you will automatically proceed to the boss chamber. The shop owner will then come and use your purchased item on the boss.{{page needed}}}} |
| |pipe1=Item Shop | | |
| | ==Multimedia== |
| | {{media table |
| | |file1=WL4-Item Shop.oga |
| | |title1=Item Shop |
| |description1=Music heard in the Item Shop | | |description1=Music heard in the Item Shop |
| |length1=1:20 | | |length1=0:30 |
| }} | | }} |
| | |
| ==Gallery== | | ==Gallery== |
| <center><gallery>
| | <gallery> |
| File:WL4 Item Shop Logo.png|The Item Shop logo
| | WL4-Item Shop Entrance.png|The Item Shop entrance |
| File:Itemshop WL4.PNG|The Item Shop, with [[Princess Game & Watch]] as shopkeeper
| | </gallery> |
| File:WL4 Item Shop Apple Bomb.png|[[Apple Bomb]]
| | |
| File:Blast Cannon.png|[[Blast Cannon]]
| | ==Names in other languages== |
| File:WL4 Item Shop Vizorman.png|[[Vizorman]]
| | {{foreign names |
| File:WL4 Item Shop Bugle.png|[[Bugle]]
| | |Jpn=アイテムショップ |
| File:WL4 Item Shop Black Dog.png|[[Black Dog]]
| | |JpnR=Aitemu Shoppu |
| File:Large Lips WL4.png|[[Large Lips]]
| | |JpnM=Item Shop |
| File:Big Fist.png|[[Big Fist]]
| | |ChiS=物品商店 |
| File:Black Dragon.png|[[Black Dragon]]
| | |ChiSR=Wùpǐn Shāngdiàn |
| File:WL4 Item Shop Smile.png|[[Smile]]
| | |ChiSM=Item Shop |
| </gallery></center>
| | |Spa=Tienda de objetos |
| {{BoxTop}}
| | |SpaM=Object store |
| | |Ita=Negozio Strumenti |
| | |ItaM=Item Shop |
| | }} |
| | |
| {{WL4}} | | {{WL4}} |
| [[Category:Wario Land 4 Locations]]
| |
| [[Category:Shops]] | | [[Category:Shops]] |
| [[Category:Places]]
| | [[Category:Wario Land 4 locations]] |
| [[Category:Wario Land 4]] | |