Rumble Volcano: Difference between revisions
m (→Enemies) |
ZanyDragon (talk | contribs) mNo edit summary |
||
| (4 intermediate revisions by 4 users not shown) | |||
| Line 11: | Line 11: | ||
|secret= | |secret= | ||
}} | }} | ||
'''Rumble Volcano''' is the final level of World 5 in ''[[Paper Mario: Sticker Star]]''. The level takes place inside a volcano, where the world's boss, [[Petey Piranha]], awaits. | '''Rumble Volcano''' is the final level of World 5 in ''[[Paper Mario: Sticker Star]]''. The level takes place inside a [[volcano]], where the world's boss, [[Petey Piranha]], awaits. | ||
==Layout== | ==Layout== | ||
| Line 38: | Line 38: | ||
*[[Petey Piranha]] (boss) | *[[Petey Piranha]] (boss) | ||
== | ==Items== | ||
Other items not included here are peelable Stickers and Stickers from the shop. | |||
===Blocks=== | |||
{|class=wikitable style="text-align:center" | |||
!Item | |||
!Icon | |||
!Location | |||
!Image | |||
|- | |||
|[[Flashy Boots#Paper Mario: Sticker Star|Flashy Jump]] | |||
|[[File:Flashyjumpsticker.png]] | |||
|In the first scene, at the top, behind the hole. | |||
|[[File:Rumble Volcano Block 1.png|250px]] | |||
|- | |||
|[[Flashy Hammer#Paper Mario: Sticker Star|Flashy Hammer]] | |||
|[[File:Flashyhammersticker.png]] | |||
|In the main volcano scene, at the top reached by the platform propelled by lava. | |||
|[[File:Rumble Volcano Block 2.png|250px]] | |||
|- | |||
|[[Baahammer]] | |||
|[[File:PMSS Baahammer sticker.png]] | |||
|Same scene, in the middle after weighing down the platform with one [[Big Chain Chomp#Paper Mario: Sticker Star|Big Chain Chomp]]. | |||
|[[File:Rumble Volcano Block 3.png|250px]] | |||
|- | |||
|[[Shiny Leaf]]<br>[[Shiny Fire Flower#Paper Mario: Sticker Star|Shiny Fire Flower]] | |||
|[[File:Shinyleaf.png]]<br>[[File:ShinyFireFlowerPMSS.png]] | |||
|In the scene with the sticker shop, in the west. | |||
|[[File:Rumble Volcano Blocks 4-5.png|250px]] | |||
|- | |||
|[[Shiny Boots#Paper Mario: Sticker Star|Shiny Jump]]<br>[[Flashy Hopslipper]] | |||
|[[File:Shinyjumpsticker.png]]<br>[[File:FlashyhopslipperPMSS.png]] | |||
|After weighing down the platform with another Big Chain Chomp and then going into the opening on the left, Mario reaches an area with platforms being propelled up and down by lava. These blocks are found on the platform after using the fourth rising platform to reach it. | |||
|[[File:Rumble Volcano Blocks 6-7.png|250px]] | |||
|- | |||
|[[Flashy Fire Flower]] | |||
|[[File:FlashyFFPMSS.png]] | |||
|Same scene, on the platform reached by the same rising platform but only halfway. | |||
|[[File:Rumble Volcano Block 8.png|250px]] | |||
|- | |||
|Shiny Leaf | |||
|[[File:Shinyleaf.png]] | |||
|Same scene, after using the fifth rising platform to drop down, found left of it. | |||
|[[File:Rumble Volcano Block 9.png|250px]] | |||
|} | |||
===Field/Given=== | |||
{|class=wikitable style="text-align:center" | |||
!Item | |||
!Icon | |||
!Location | |||
!Image | |||
|- | |||
|[[Big Shiny 1UP]], [[Line_Jump#Paper_Mario:_Sticker_Star|Line Jump]], [[Megaflash Clone Jump]], [[Shiny_Fire_Flower#Paper_Mario:_Sticker_Star|Shiny Fire Flower]] | |||
|[[File:BigShiny1UpPMSS.png]] [[File:LineJumpPMSS.png]] [[File:Megaflashclonejump.png]] [[File:ShinyFireFlowerPMSS.png]] | |||
|In the lower middle scene (after 2 Big Chain Chomps are stuck to the platform), Mario can gain these for stickers by hammering the first, third, sixth and eight posts, causing them to fall from their chains. | |||
|[[File:Rumble Volcano (Big Shiny 1UP, Line Jump, Megaflash Clone Jump and Shiny Fire Flower).png|250px]] | |||
|- | |||
|[[Guitar (Thing)|Guitar]] | |||
|[[File:PMSS Guitar Icon.png|50px]] | |||
|In the scene behind the Secret Door. | |||
|[[File:Rumble Volcano (Guitar).png|250px]] | |||
|- | |||
|[[MAX UP Heart#Paper Mario: Sticker Star|HP-Up Heart]] | |||
|[[File:PMSS-HP Up Heart Sprite.png|50px]] | |||
|In the bottom scene, on the bottom of the elevated ground with Petey Piranha on top. | |||
|[[File:Rumble Volcano (HP-Up Heart).png|250px]] | |||
|- | |||
|[[Royal Sticker]] | |||
|[[File:Greenroyalsticker.png|50px]] | |||
|In the bottom scene, dropped by Petey Piranha after defeating him. | |||
|[[File:Rumble Volcano (Royal Sticker).png|250px]] | |||
|} | |||
===Hidden Block=== | |||
{|class=wikitable style="text-align:center" | |||
!Item | |||
!Icon | |||
!Location | |||
!Image (Unrevealed) | |||
!Image (Revealed) | |||
|- | |||
|[[Shiny_Boots#Paper_Mario:_Sticker_Star|Shiny Jump]] | |||
|[[File:Shinyjumpsticker.png]] | |||
|In the scene with the sticker shop, in the southwest, left of the warp pipe and above the flower. | |||
|[[File:PMSS Hidden Block 84A.png|250px]] | |||
|[[File:PMSS Hidden Block 84B.png|250px]] | |||
|} | |||
==Paperization Spot== | |||
{|class=wikitable style="text-align:center" | |||
!Scrap/Sticker | |||
!Icon | |||
!Location | |||
!Image | |||
|- | |||
|[[Secret Door]] | |||
|[[File:SecretDoorPMSS.png]] | |||
|In the scene left of the highest point the rising platform can take. Available only after defeating [[Petey_Piranha#Paper_Mario:_Sticker_Star|Petey Piranha]] and returning here. | |||
|[[File:Rumble Volcano Paperization Spot.png|250px]] | |||
|} | |||
==Sticker Shop== | ==Sticker Shop== | ||
{ | {|class="wikitable sortable" style="text-align:center" | ||
| | !Name | ||
| | !class=unsortable|Image | ||
| | !Price | ||
| | |- | ||
| | |[[Shiny Jump]] | ||
| | |[[File:Shinyjumpsticker.png|50px]] | ||
| | |10 coins | ||
| | |- | ||
| | |[[Flashy Jump]] | ||
| | |[[File:Flashyjumpsticker.png|50px]] | ||
| | |20 coins | ||
| | |- | ||
| | |[[Shiny Hammer]] | ||
| | |[[File:Shinyhammersticker.png|50px]] | ||
| | |10 coins | ||
| | |- | ||
| | |[[Flashy Hammer]] | ||
| | |[[File:Flashyhammersticker.png|50px]] | ||
| | |20 coins | ||
| | |- | ||
| | |[[Shiny Iron Jump]] | ||
| | |[[File:ShinyIronJumpPMSS.png|50px]] | ||
| | |12 coins | ||
| | |- | ||
| | |[[Shiny Fire Flower]] | ||
| | |[[File:ShinyFireFlowerPMSS.png|50px]] | ||
| | |30 coins | ||
| | |- | ||
| | |[[Shiny POW Block]] | ||
| | |[[File:ShinyPOWblockPMSS.png|50px]] | ||
| | |45 coins | ||
| | |- | ||
| | |[[Shiny Mushroom]] | ||
| | |[[File:ShinyMushroomPMSS.png|50px]] | ||
| | |30 coins | ||
| | |- | ||
| | |[[Big Shiny Jump]] | ||
| | |[[File:Bigshinyjump.png|50px]] | ||
| | |25 coins | ||
| | |- | ||
| | |[[Big Shiny Iron Jump]] | ||
| | |[[File:Bigshinyironjump.png|50px]] | ||
|30 coins | |||
|- | |||
|[[Big Shiny Hopslipper]] | |||
|[[File:BigshinyhopslipperPMSS.png|50px]] | |||
|35 coins | |||
|- | |||
|[[Big Shiny Baahammer]] | |||
|[[File:Bigshinybaahammer.png|50px]] | |||
|20 coins | |||
|- | |||
|[[Big Shiny Burnhammer]] | |||
|[[File:PMSSBigShinyBurnhammer.png|50px]] | |||
|30 coins | |||
|- | |||
|[[Big Shiny Chillhammer]] | |||
|[[File:BigShinyChillhammer.png|50px]] | |||
|30 coins | |||
|} | |||
==Profiles== | ==Profiles== | ||
| Line 91: | Line 206: | ||
**Outside: "''We're going into the crater?! Neat!''" | **Outside: "''We're going into the crater?! Neat!''" | ||
**Inside: "''Wow, we've really gotten deep. It's the magma that's making it so hot, right? Stupid magma.''" | **Inside: "''Wow, we've really gotten deep. It's the magma that's making it so hot, right? Stupid magma.''" | ||
**After | **After defeating Petey: "''You've never been eaten by a flower before? I have. It's the WORST." | ||
==Names in other languages== | ==Names in other languages== | ||
{{foreign names | {{foreign names | ||
| | |Jpn=グラグラ火山 | ||
| | |JpnR=Gura Gura Kazan | ||
| | |JpnM=Rumbling Volcano, pronounced identically to [[Grumble Volcano]]'s Japanese name | ||
|Spa=Volcán Fragor | |Spa=Volcán Fragor | ||
|SpaM=Frantic Volcano | |SpaM=Frantic Volcano | ||
Latest revision as of 07:19, April 25, 2025
- Not to be confused with Wii Grumble Volcano.
| Level | |
|---|---|
| Rumble Volcano | |
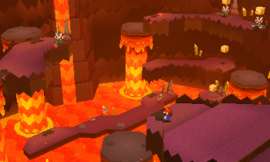 View of the platforms propelled by lava geysers | |
| Level code | 5-6 |
| World | World 5 |
| Game | Paper Mario: Sticker Star |
| Boss | Big Chain Chomp Petey Piranha |
| << Directory of levels >> | |
Rumble Volcano is the final level of World 5 in Paper Mario: Sticker Star. The level takes place inside a volcano, where the world's boss, Petey Piranha, awaits.
Layout
The level starts with Mario outside in a volcanic environment. Reaching a crater, Mario and Kersti jump down inside, landing in the volcano's interior. Just as Kersti is remarking about how amazed she is, Petey Piranha flies up and eats her; as such, Mario cannot paperize or use the Battle Spin for the remainder of the level. Additionally, by peeling off some nearby Bowser Tape on a bridge, the bridge does not gain another segment to complete it; instead, the entire platform Mario is on is sent deeper into the volcano.
Not too far away is a platform, which at first seems to send Mario to Petey Piranha, but instead rockets him further up. Here, he can see several stickers, Spear Guys and a Big Chain Chomp suspended from chains above. By heading into the nearby room, a molten Big Chain Chomp emerges from the lava, chasing Mario out of the room; in the other room, it eventually hops onto the platform, embedding itself into it, which both knocks out the Chain Chomp and lowers the platform.
On the next section, there is a sticker shop in the nearby room. Right near the shop is a Warp Pipe, which takes the player to a platform next to the one Petey Piranha is on; however, if the Mario goes there too early, he is blocked by the geyser of lava suspending the platform above. In the room after the sticker shop, Mario encounters a Big Chain Chomp, which immediately forces him into battle. Mario must put it to sleep, flee and hammer the stake, then wake it back up; the Chomp lunges at Mario, which sends it out of the battle, off the nearby ledge, and into the platform below. This allows Mario to access the next section underneath it.
In the next section below, there are eight stakes, each one with chains attached to it. By hammering the stakes, it sends down either one of the stickers or one of the Spear Guys at the top of the screen; each of the chains hammered corresponds to the object suspended from that chain (i.e. hammering the chain on the far left causes the object on the far left to fall). By hammering the stake with the Big Chain Chomp, however, nothing happens; by going into the next room, it can be seen that a piece of Bowser Tape is keeping the Chomp from falling. In this room, the player must navigate using several platforms that rise and fall with lava geysers to access the platform with the tape, and peeling it causes the Chomp to fall onto the platform below (assuming the stake has already been hammered).
Climbing on the platform lowers the player to Petey Piranha's platform. Immediately after climbing off, there is an HP-Up Heart nearby. During the battle, Petey, once damaged enough, spits out several Jump Stickers, Dry Bones, and eventually Kersti. After Petey Piranha is defeated, Mario can obtain the fifth Royal Sticker.
By returning here after defeating Petey, the entrance has been boarded up; instead, a Warp Pipe grants access to the interior. The bridge leading to the platform has also been repaired, and the platform with the three Chomps embedded in it lowers when Mario steps on it; if it is at the lowest point, it shoots back up to the top.
Enemies
- Bony Beetles
- Dry Bones (only appear during the fight with Petey Piranha)
- Fire Piranhas
- Fire Bros.
- Spear Guys (optional)
- Spike Tops
- Piranha Plants
- Shiny Buzzy Beetles
- Big Chain Chomps x3 (mini-bosses)
- Petey Piranha (boss)
Items
Other items not included here are peelable Stickers and Stickers from the shop.
Blocks
| Item | Icon | Location | Image |
|---|---|---|---|
| Flashy Jump | 
|
In the first scene, at the top, behind the hole. | 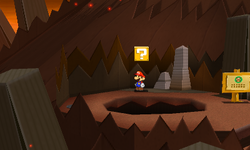
|
| Flashy Hammer | 
|
In the main volcano scene, at the top reached by the platform propelled by lava. | 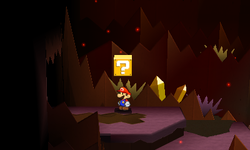
|
| Baahammer | 
|
Same scene, in the middle after weighing down the platform with one Big Chain Chomp. | 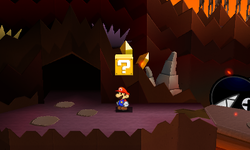
|
| Shiny Leaf Shiny Fire Flower |
 
|
In the scene with the sticker shop, in the west. | 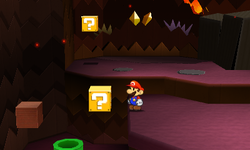
|
| Shiny Jump Flashy Hopslipper |
 
|
After weighing down the platform with another Big Chain Chomp and then going into the opening on the left, Mario reaches an area with platforms being propelled up and down by lava. These blocks are found on the platform after using the fourth rising platform to reach it. | 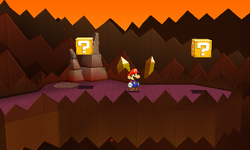
|
| Flashy Fire Flower | 
|
Same scene, on the platform reached by the same rising platform but only halfway. | 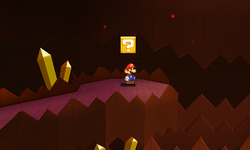
|
| Shiny Leaf | 
|
Same scene, after using the fifth rising platform to drop down, found left of it. | 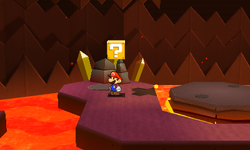
|
Field/Given
| Item | Icon | Location | Image |
|---|---|---|---|
| Big Shiny 1UP, Line Jump, Megaflash Clone Jump, Shiny Fire Flower |    
|
In the lower middle scene (after 2 Big Chain Chomps are stuck to the platform), Mario can gain these for stickers by hammering the first, third, sixth and eight posts, causing them to fall from their chains. | 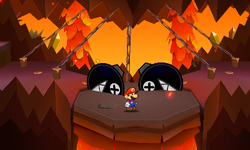
|
| Guitar | In the scene behind the Secret Door. | 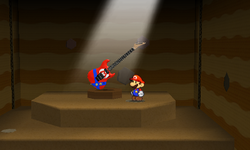
| |
| HP-Up Heart | In the bottom scene, on the bottom of the elevated ground with Petey Piranha on top. | 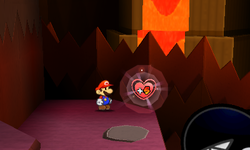
| |
| Royal Sticker | In the bottom scene, dropped by Petey Piranha after defeating him. | 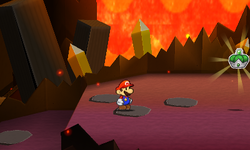
|
Hidden Block
| Item | Icon | Location | Image (Unrevealed) | Image (Revealed) |
|---|---|---|---|---|
| Shiny Jump | 
|
In the scene with the sticker shop, in the southwest, left of the warp pipe and above the flower. | 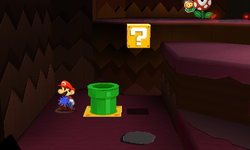
|
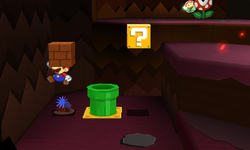
|
Paperization Spot
| Scrap/Sticker | Icon | Location | Image |
|---|---|---|---|
| Secret Door | 
|
In the scene left of the highest point the rising platform can take. Available only after defeating Petey Piranha and returning here. | 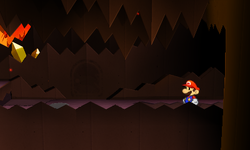
|
Sticker Shop
| Name | Image | Price |
|---|---|---|
| Shiny Jump | 
|
10 coins |
| Flashy Jump | 
|
20 coins |
| Shiny Hammer | 
|
10 coins |
| Flashy Hammer | 
|
20 coins |
| Shiny Iron Jump | 
|
12 coins |
| Shiny Fire Flower | 
|
30 coins |
| Shiny POW Block | 
|
45 coins |
| Shiny Mushroom | 
|
30 coins |
| Big Shiny Jump | 
|
25 coins |
| Big Shiny Iron Jump | 
|
30 coins |
| Big Shiny Hopslipper | 
|
35 coins |
| Big Shiny Baahammer | 
|
20 coins |
| Big Shiny Burnhammer | 
|
30 coins |
| Big Shiny Chillhammer | 
|
30 coins |
Profiles
- Tattles:
- Outside: "We're going into the crater?! Neat!"
- Inside: "Wow, we've really gotten deep. It's the magma that's making it so hot, right? Stupid magma."
- After defeating Petey: "You've never been eaten by a flower before? I have. It's the WORST."
Names in other languages
| Language | Name | Meaning | Notes |
|---|---|---|---|
| Japanese | グラグラ火山[?] Gura Gura Kazan |
Rumbling Volcano, pronounced identically to Grumble Volcano's Japanese name | |
| Chinese | 隆隆火山[?] Lónglóng Huǒshān |
Rumbling Volcano | |
| French (NOA) | Volcan grondeur[?] | Scolding volcano | |
| French (NOE) | Volcan Bourrino[?] | Bourrino Volcano; Bourrino comes from bourrin ("brutish") | |
| German | Grummelvulkan[?] | Grandad Volcano | |
| Italian | Vulcano Tonante[?] | Thundering Volcano | |
| Spanish | Volcán Fragor[?] | Frantic Volcano |