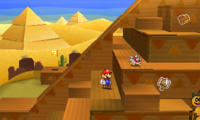
Drybake Desert: Difference between revisions
ZanyDragon (talk | contribs) mNo edit summary |
|||
| (34 intermediate revisions by 19 users not shown) | |||
| Line 1: | Line 1: | ||
{{ | {{level infobox | ||
|title=Drybake Desert | |title=Drybake Desert | ||
|image=[[File:DrybakePMSS.png|250px]] | |image=[[File:DrybakePMSS.png|250px]]<br>Mario, at the edge of sand | ||
|code=W2-1 | |code=W2-1 | ||
|world=[[World 2 (Paper Mario: Sticker Star)|World 2]] | |world=[[World 2 (Paper Mario: Sticker Star)|World 2]] | ||
|game=''[[Paper Mario: Sticker Star]]'' | |game=''[[Paper Mario: Sticker Star]]'' | ||
|boss= | |boss= | ||
| | |before_alt=[[Damp Oasis|**]] | ||
|before=[[Decalburg|<<]] | |before=[[Decalburg|<<]] | ||
|after=[[Yoshi Sphinx|>>]] | |after=[[Yoshi Sphinx|>>]] | ||
|secret= | |secret= | ||
}} | }} | ||
'''Drybake Desert''' is level 2-1 in | '''Drybake Desert''' is level 2-1 in ''[[Paper Mario: Sticker Star]]''. It comprises of a vast desert filled with quicksand and an underground area. | ||
== Layout == | == Layout == | ||
| Line 19: | Line 18: | ||
The next area is an area with a few quicksand flows and a hollow cave with coins. Pokeys are first found here. After that, there is a vast quicksand hill with Pokeys following the current. The Soda item is located | The next area is an area with a few quicksand flows and a hollow cave with coins. Pokeys are first found here. After that, there is a vast quicksand hill with Pokeys following the current. The Soda item is located | ||
at the downhill section, and south of that is a sandfall with two striped cacti, which indicate the hidden cave area is nearby. Sinking into the quicksand between the cacti will take Mario to a cave area with one of three Tablet Piece scraps. Nearby is a sand geyser that will take Mario back up to the divide of the sand flow. The flow then descends to the pyramid, where an [[HP-Up Heart]] can be found, along with the [[Comet Piece]]. | at the downhill section, and south of that is a sandfall with two striped cacti, which indicate the hidden cave area is nearby. Sinking into the quicksand between the cacti will take Mario to a cave area with one of three [[Tablet Piece]] scraps. Nearby is a sand geyser that will take Mario back up to the divide of the sand flow. The flow then descends to the pyramid, where an [[MAX UP Heart|HP-Up Heart]] can be found, along with the [[Comet Piece]]. | ||
== | ==Area Tattle== | ||
===Outside the Doorway=== | |||
* ''Where's this desert supposed to be? Think it's on the other side?'' | |||
*''It's relatively cool over here, but it's definitely hot on the other side of these doors.'' (after entering the desert for the first time) | |||
===Inside the Doorway=== | |||
*''What's on the other side of this tunnel? More desert?'' | |||
===In the Desert=== | |||
*''It's too hot! My glue's going to dry out.'' | |||
===Quicksand Areas=== | |||
*''The sand is really flowing around here. Be careful!'' | |||
===Underground Area=== | |||
*''So this is what it's like underground... Lovely. Try not to get washed away by the sand!'' | |||
===Pyramid=== | |||
* ''Nice! This is what you call a pyramid?'' | |||
== Enemies == | == Enemies == | ||
| Line 28: | Line 44: | ||
*[[Buzzy Beetle]]s | *[[Buzzy Beetle]]s | ||
*[[Paragoomba]]s | *[[Paragoomba]]s | ||
*[[Pokey]]s | *[[Pokey]]s (yellow) | ||
*[[Green Pokey|Pokey]]s (green) | |||
*[[Sombrero Guy]]s | *[[Sombrero Guy]]s | ||
*[[Spiny|Spinies]] | *[[Spiny|Spinies]] | ||
*[[ | *[[Swoop]]s | ||
==Items== | |||
Other items not included here are peelable Stickers and items from sticker upgrade spots. | |||
===Blocks=== | |||
{|class=wikitable style="text-align:center" | |||
!Item | |||
!Icon | |||
!Location | |||
!Image | |||
|- | |||
|[[Hopslipper#Paper Mario: Sticker Star|Hopslipper]] | |||
|[[File:Hopslippersticker.png]] | |||
|In the first scene, near the entrance. | |||
|[[File:Drybake Desert Block 1.png|250px]] | |||
|- | |||
|[[Spike Helmet#Paper Mario: Sticker Star|Spike Helmet]]<br>[[Worn-Out Jump#Paper Mario: Sticker Star|Worn-Out Jump]], [[Boots#Paper Mario: Sticker Star|Jump]], Hopslipper | |||
|[[File:SpikeHelmetPMSS.png]]<br>[[File:Wornoutjumpsticker.png]][[File:JumpSticker.png]][[File:Hopslippersticker.png]] | |||
|In the second scene, near the entrance. To reach the second one, Mario must jump into a hole in the east and then back through the hole in the west, blocked by a stone slab. By jumping into the slab, it lands under the second block. | |||
|[[File:Drybake Desert Blocks 2-3.png|250px]] | |||
|- | |||
|[[Hammer#Paper Mario: Sticker Star|Hammer]] | |||
|[[File:Hammersticker.png]] | |||
|In the third scene, at the start of the first slope. | |||
|[[File:Drybake Desert Block 4.png|250px]] | |||
|- | |||
|[[Hurlhammer#Paper Mario: Sticker Star|Hurlhammer]] | |||
|[[File:Hurlhammersticker.png]] | |||
|Same scene, after reaching the highest point of the scene and going into the foreground. | |||
|[[File:Drybake Desert Block 5.png|250px]] | |||
|- | |||
|Hopslipper | |||
|[[File:Hopslippersticker.png]] | |||
|Same scene, at the end of the second slope. | |||
|[[File:Drybake Desert Block 6.png|250px]] | |||
|- | |||
|[[Iron Boots#Paper Mario: Sticker Star|Iron Jump]] | |||
|[[File:Ironjumpsticker.png]] | |||
|In the fourth scene, before the second quicksand pit. | |||
|[[File:Drybake Desert Block 7.png|250px]] | |||
|- | |||
|Hammer, [[Shiny Hammer#Paper Mario: Sticker Star|Shiny Hammer]], [[Flashy Hammer#Paper Mario: Sticker Star|Flashy Hammer]] | |||
|[[File:Hammersticker.png]][[File:Shinyhammersticker.png]][[File:Flashyhammersticker.png]] | |||
|Same scene, above the second quicksand pit, in the east. | |||
|[[File:Drybake Desert Block 8.png|250px]] | |||
|- | |||
|[[Line Jump#Paper Mario: Sticker Star|Line Jump]] | |||
|[[File:LineJumpPMSS.png]] | |||
|In the fifth scene, after reaching the highest point of the scene and going into the foreground, above the highest platform of the sandfall. | |||
|[[File:Drybake Desert Block 9.png|250px]] | |||
|- | |||
|[[Shiny Hopslipper]]<br>Hurlhammer | |||
|[[File:ShinyHopslipperPMSS.png]]<br>[[File:Hurlhammersticker.png]] | |||
|Same scene, in the east of the lower part (right of the sandfall). | |||
|[[File:Drybake Desert Blocks 10-11.png|250px]] | |||
|- | |||
|[[Big 1UP]] | |||
|[[File:Big1UPPMSS.png]] | |||
|In the secret scene found in the north of the highest point of the fifth scene. | |||
|[[File:Drybake Desert Block 12.png|250px]] | |||
|- | |||
|[[Shiny Jump#Paper Mario: Sticker Star|Shiny Jump]]<br>[[Slaphammer]] | |||
|[[File:Shinyjumpsticker.png]]<br>[[File:Slaphammersticker.png]] | |||
|In the underground scene, above the lowest quicksand pit. | |||
|[[File:Drybake Desert Blocks 13-14.png|250px]] | |||
|- | |||
|Worn-Out Jump, Jump, Hopslipper | |||
|[[File:Wornoutjumpsticker.png]][[File:JumpSticker.png]][[File:Hopslippersticker.png]] | |||
|Same scene, in the northwest, near the upper sandfall. | |||
|[[File:Drybake Desert Block 15.png|250px]] | |||
|- | |||
|Iron Jump<br>Slaphammer | |||
|[[File:Ironjumpsticker.png]]<br>[[File:Slaphammersticker.png]] | |||
|In the sixth scene (the pyramid one), in the west from the entrance. | |||
|[[File:Drybake Desert Block 16-17.png|250px]] | |||
|- | |||
|Slaphammer | |||
|[[File:Slaphammersticker.png]] | |||
|Same scene, above the platform at the end of the east slope. | |||
|[[File:Drybake Desert Block 18.png|250px]] | |||
|- | |||
|Hopslipper | |||
|[[File:Hopslippersticker.png]] | |||
|Same scene, near the Comet Piece. | |||
|[[File:Drybake Desert Block 19.png|250px]] | |||
|} | |||
== | ===Field/Given/Objects=== | ||
* | {|class=wikitable style="text-align:center" | ||
*Car Battery (Secret Door | !Item | ||
!Icon | |||
!Location | |||
!Image | |||
|- | |||
|[[10-Coin#Paper_Mario:_Sticker_Star|10-Coin]] | |||
|[[File:10Coin PMSS.png|50px]] | |||
| | |||
*In the third scene, in the cactus after hitting it 3 times. | |||
*In the fourth scene, in the second cactus after hitting it 3 times | |||
*2 in the fifth scene, in the cacti found in the foreground. | |||
|[[File:Drybake Desert (10-Coin 1).png|250px]][[File:Drybake Desert (10-Coin 2).png|250px]][[File:Drybake Desert (10-Coins).png|250px]] | |||
|- | |||
|10-Coin, [[Coin#Paper Mario: Sticker Star|4 Coins]] | |||
|[[File:10Coin PMSS.png|50px]] [[File:PMSS UI Coin.png]] | |||
|In the fourth scene, in the ruins with the Bowser Tape on its opening found in the middle of the scene. | |||
|[[File:Drybake Desert (10-Coin, 4 Coins).png|250px]] | |||
|- | |||
|[[Car Battery]] | |||
|[[File:PMSS Car Battery Icon.png|50px]] | |||
|In the scene behind the Secret Door. | |||
|[[File:Drybake Desert (Car Battery).png|250px]] | |||
|- | |||
|Coin | |||
|[[File:PMSS UI Coin.png]] | |||
| | |||
*In the second scene, left of the entrance. On the first visit, there are 30 Coins (in form of 6 Five Coins). On later visits, there are 6 Coins. | |||
*6 in the second scene, in the secret corridor found down the stone pipe found near the exit. | |||
*26 in the last scene, on the back side of the pyramid. | |||
|[[File:Drybake Desert (Secret Room Coins).png|250px]][[File:Drybake Desert (6 Coins).png|250px]][[File:Drybake Desert (26 Coins).png|250px]] | |||
|- | |||
|[[Five_Coin#Paper_Mario:_Sticker_Star|8 Five Coins]] | |||
|[[File:5Coin PMSS.png|50px]] | |||
|In the secret scene found behind the rocks on the top of the fifth scene. | |||
|[[File:Drybake Desert (8 Five Coins).png|250px]] | |||
|- | |||
|[[Heart_(item)#Paper_Mario_series|Heart]] | |||
|[[File:PMSS Heart.png]] | |||
| | |||
*In the fourth scene, in the first cactus after hitting it 3 times. | |||
*In the fifth scene, in the first cactus after hitting it 3 times. | |||
*In the fifth scene, in the last cactus after hitting it 3 times. | |||
|[[File:Drybake Desert (Heart 1).png|250px]][[File:Drybake Desert (Heart 2).png|250px]][[File:Drybake Desert (Heart 3).png|250px]] | |||
|- | |||
|[[MAX UP Heart#Paper Mario: Sticker Star|HP-Up Heart]] | |||
|[[File:PMSS-HP Up Heart Sprite.png|50px]] | |||
|When Mario reaches the top of the pyramid at the end of the level, he must move up the stairs on the left and slide down the ramp, then simply hop onto the next platform to reach it. | |||
|[[File:Drybake Desert (HP-Up Heart).png|250px]] | |||
|- | |||
|[[Shiny Mushroom]] | |||
|[[File:ShinyMushroomPMSS.png]] | |||
|Given by the [[Traveling Toad|Travelling Toad]] after saving him from 5 [[Paragoomba#Paper_Mario:_Sticker_Star|Paragoomba]]s. | |||
|[[File:Shiny Mushroom obtained PMSS.png|250px]] | |||
|- | |||
|[[Soda]] | |||
|[[File:PMSS Soda Icon.png]] | |||
|In the fifth scene, near the end of the right slope, buried in the sand. | |||
|[[File:Drybake Desert (Soda).png|250px]] | |||
|- | |||
|[[Tablet Piece]] | |||
|[[File:Tablet Piece 1.png]] | |||
|In the underground scene, found at the top in the treasure chest. | |||
|[[File:Drybake Desert (Tablet Piece).png|250px]] | |||
|} | |||
===Hidden Blocks=== | |||
{|class=wikitable style="text-align:center" | |||
!Item | |||
!Icon | |||
!Location | |||
!Image (Unrevealed) | |||
!Image (Revealed) | |||
|- | |||
|[[Shiny_Boots#Paper_Mario:_Sticker_Star|Shiny Jump]] | |||
|[[File:Shinyjumpsticker.png]] | |||
|In the third scene, above the second Brick Block. | |||
|[[File:PMSS Hidden Block 17A.png|250px]] | |||
|[[File:PMSS Hidden Block 17B.png|250px]] | |||
|- | |||
|Shiny Jump | |||
|[[File:Shinyjumpsticker.png]] | |||
|In the fourth scene, above the flower in the east. | |||
|[[File:PMSS Hidden Block 18A.png|250px]] | |||
|[[File:PMSS Hidden Block 18B.png|250px]] | |||
|- | |||
|Shiny Jump | |||
|[[File:Shinyjumpsticker.png]] | |||
|In the fifth scene, near the entrance, between two Brick Blocks. | |||
|[[File:PMSS Hidden Block 19A.png|250px]] | |||
|[[File:PMSS Hidden Block 19B.png|250px]] | |||
|- | |||
|[[Coin#Paper Mario: Sticker Star|Coin]] (both) | |||
|[[File:PMSS UI Coin.png]][[File:PMSS UI Coin.png]] | |||
|In the underground scene, near the upper ? Block. Together with a block created by paperization, these 2 blocks as platforms to reach said ? Block. | |||
|[[File:PMSS Hidden Blocks 20A-21A.png|250px]] | |||
|[[File:PMSS Hidden Block 20B.png|250px]][[File:PMSS Hidden Block 21B.png|250px]] | |||
|} | |||
==Paperization Spots== | |||
{|class=wikitable style="text-align:center" | |||
!Scrap/Sticker | |||
!Icon | |||
!Location | |||
!Image | |||
|- | |||
|Jump/Iron Jump/Line Jump (any 1x1 variety)+Hammer/Hurlhammer/Slaphammer (any 1x1 variety)+any 1x1 Mushroom (but [[Poison_Mushroom#Paper_Mario:_Sticker_Star|Poison Mushroom]])+Poison Mushroom+any Spike Helmet+any Flower | |||
|N/A | |||
|In the first scene, the exit. Combination of 6 1x1 stickers is required to open the door. Required to progress. | |||
|[[File:Drybake Desert Paperization Spots 1-6.png|250px]] | |||
|- | |||
|Random 1x1 [[Sticker]] | |||
|N/A | |||
|In the third scene, after reaching the highest point of the scene. | |||
|[[File:Drybake Desert Paperization Spot 7.png|250px]] | |||
|- | |||
|Random 1x1 Sticker | |||
|N/A | |||
|Same scene, near the exit, behind some flat rocks. | |||
|[[File:Drybake Desert Paperization Spot 8.png|250px]] | |||
|- | |||
|Random 1x1 Sticker | |||
|N/A | |||
|In the fifth scene, near the exit between two Brick Blocks. | |||
|[[File:Drybake Desert Paperization Spot 9.png|250px]] | |||
|- | |||
|Random 1x1 Sticker | |||
|N/A | |||
|In the underground scene, near the upper ? Block. Together with two Hidden Blocks right of it, it acts as platforms to reach said ? Block. | |||
|[[File:Drybake Desert Paperization Spot 10.png|250px]] | |||
|- | |||
|Random 1x1 Sticker | |||
|N/A | |||
|In the sixth scene (pyramid one), near the Comet Piece, to the right. | |||
|[[File:Drybake Desert Paperization Spot 11.png|250px]] | |||
|- | |||
|[[Secret Door]] | |||
|[[File:SecretDoorPMSS.png]] | |||
|Same scene, at the back side of the pyramid. Available only after getting access to Outlook Point and getting Secret Door sticker from there. | |||
|[[File:Drybake Desert Paperization Spot 12.png|250px]] | |||
|} | |||
==Names in other languages== | ==Names in other languages== | ||
{{ | {{foreign names | ||
| | |Jpn=カラカラ{{hover|砂漠|さばく}} | ||
| | |JpnR=Kara Kara Sabaku | ||
| | |JpnM=Dry Desert, ''kara kara'' being an expression meaning "dried-up". Shares a name with both [[Dry Dry Desert (Paper Mario)|Dry Dry Desert]] and [[N64 Kalimari Desert|Kalimari Desert]]. | ||
|Spa=Desierto Lodoseco | |Spa=Desierto Lodoseco | ||
|SpaM="Drymud" Desert | |SpaM="Drymud" Desert | ||
| | |FreE=Désert Archisec | ||
| | |FreEM="Very dry" Desert | ||
| | |FreA=Désert Cuire-au-Sec | ||
| | |FreAM=Cook-to-Dry Desert | ||
|Ger=Nimmerfeuchte Wüste | |Ger=Nimmerfeuchte Wüste | ||
|GerM=Neverwet Desert}} | |GerM=Neverwet Desert | ||
|Ita=Deserto al Forno | |||
|ItaM=Baked Desert | |||
|Chi=干旱沙漠 (Simplified)<br>乾旱沙漠 (Traditional) | |||
|ChiR=Gānhàn Shāmò | |||
|ChiM=Dry Desert | |||
}} | |||
{{PMSS}} | {{PMSS}} | ||
[[Category:Deserts]] | [[Category:Deserts]] | ||
[[Category:Paper Mario: Sticker Star | [[Category:Paper Mario: Sticker Star locations]] | ||
[[it:Deserto al Forno]] | |||
Latest revision as of 07:06, April 25, 2025
| Level | |
|---|---|
| Drybake Desert | |
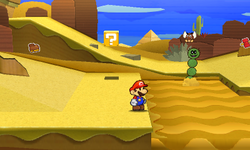 Mario, at the edge of sand | |
| Level code | W2-1 |
| World | World 2 |
| Game | Paper Mario: Sticker Star |
| ** << Directory of levels >> | |
Drybake Desert is level 2-1 in Paper Mario: Sticker Star. It comprises of a vast desert filled with quicksand and an underground area.
Layout[edit]
The level starts in a grassy area where a Goomba can be found guarding the Sticker inside the block. This is not a requirement though. When the player continues on, a huge gate blocking the way to the desert. Using Paperize, a Jump, Hammer, Mushroom, Poison Mushroom, Fire or Ice Flower and Spike Helmet stickers must be placed in the gate to open it. The gate opens to reveal a short cave area inhabited by Swoops and a single Buzzy Beetle that can make the First Strike if it sees Mario. The cave exits to the desert itself, where a Save Block and Heart Block can be found, along with a Sombrero Guy. Traversing over the hill will reveal the Traveling Toad being attacked by a gang of Paragoombas. Once saved, the grateful Toad will give a Shiny Mushroom sticker as a reward.
The next area is an area with a few quicksand flows and a hollow cave with coins. Pokeys are first found here. After that, there is a vast quicksand hill with Pokeys following the current. The Soda item is located at the downhill section, and south of that is a sandfall with two striped cacti, which indicate the hidden cave area is nearby. Sinking into the quicksand between the cacti will take Mario to a cave area with one of three Tablet Piece scraps. Nearby is a sand geyser that will take Mario back up to the divide of the sand flow. The flow then descends to the pyramid, where an HP-Up Heart can be found, along with the Comet Piece.
Area Tattle[edit]
Outside the Doorway[edit]
- Where's this desert supposed to be? Think it's on the other side?
- It's relatively cool over here, but it's definitely hot on the other side of these doors. (after entering the desert for the first time)
Inside the Doorway[edit]
- What's on the other side of this tunnel? More desert?
In the Desert[edit]
- It's too hot! My glue's going to dry out.
Quicksand Areas[edit]
- The sand is really flowing around here. Be careful!
Underground Area[edit]
- So this is what it's like underground... Lovely. Try not to get washed away by the sand!
Pyramid[edit]
- Nice! This is what you call a pyramid?
Enemies[edit]
- 5-Fold Paragoombas
- Buzzy Beetles
- Paragoombas
- Pokeys (yellow)
- Pokeys (green)
- Sombrero Guys
- Spinies
- Swoops
Items[edit]
Other items not included here are peelable Stickers and items from sticker upgrade spots.
Blocks[edit]
| Item | Icon | Location | Image |
|---|---|---|---|
| Hopslipper | 
|
In the first scene, near the entrance. | 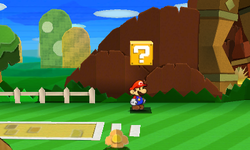
|
| Spike Helmet Worn-Out Jump, Jump, Hopslipper |
   
|
In the second scene, near the entrance. To reach the second one, Mario must jump into a hole in the east and then back through the hole in the west, blocked by a stone slab. By jumping into the slab, it lands under the second block. | 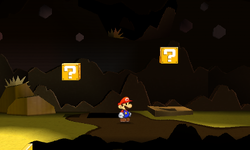
|
| Hammer | 
|
In the third scene, at the start of the first slope. | 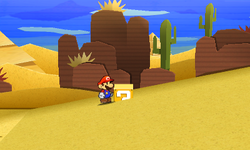
|
| Hurlhammer | 
|
Same scene, after reaching the highest point of the scene and going into the foreground. | 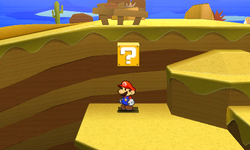
|
| Hopslipper | 
|
Same scene, at the end of the second slope. | 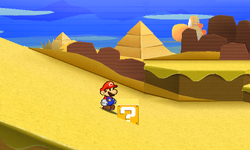
|
| Iron Jump | 
|
In the fourth scene, before the second quicksand pit. | 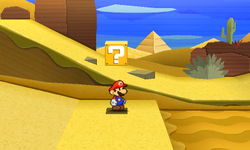
|
| Hammer, Shiny Hammer, Flashy Hammer |   
|
Same scene, above the second quicksand pit, in the east. | 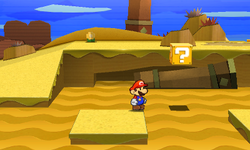
|
| Line Jump | 
|
In the fifth scene, after reaching the highest point of the scene and going into the foreground, above the highest platform of the sandfall. | 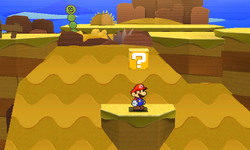
|
| Shiny Hopslipper Hurlhammer |
 
|
Same scene, in the east of the lower part (right of the sandfall). | 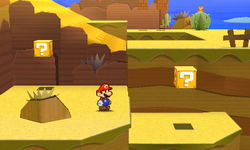
|
| Big 1UP | 
|
In the secret scene found in the north of the highest point of the fifth scene. | 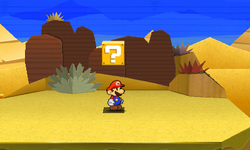
|
| Shiny Jump Slaphammer |
 
|
In the underground scene, above the lowest quicksand pit. | 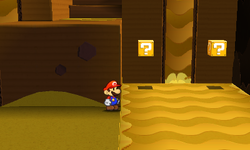
|
| Worn-Out Jump, Jump, Hopslipper |   
|
Same scene, in the northwest, near the upper sandfall. | 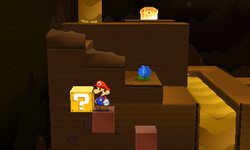
|
| Iron Jump Slaphammer |
 
|
In the sixth scene (the pyramid one), in the west from the entrance. | 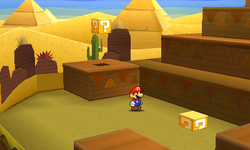
|
| Slaphammer | 
|
Same scene, above the platform at the end of the east slope. | 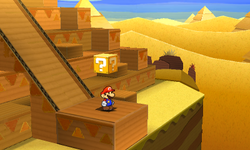
|
| Hopslipper | 
|
Same scene, near the Comet Piece. | 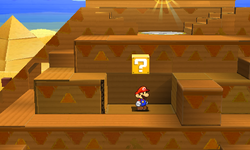
|
Field/Given/Objects[edit]
| Item | Icon | Location | Image |
|---|---|---|---|
| 10-Coin | 
|
|
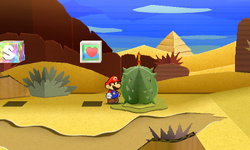 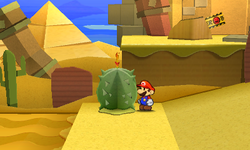 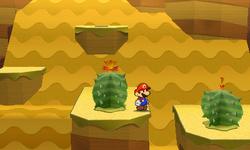
|
| 10-Coin, 4 Coins |  |
In the fourth scene, in the ruins with the Bowser Tape on its opening found in the middle of the scene. | 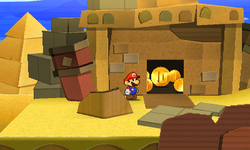
|
| Car Battery | In the scene behind the Secret Door. | 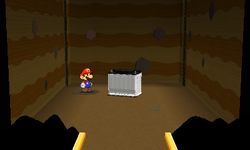
| |
| Coin |
|
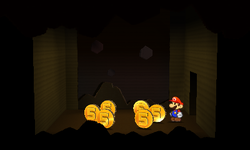 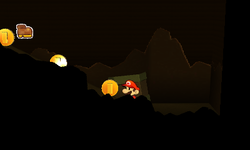 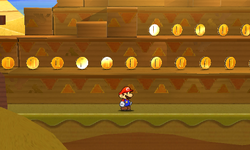
| |
| 8 Five Coins | 
|
In the secret scene found behind the rocks on the top of the fifth scene. | 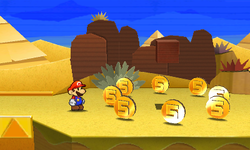
|
| Heart |
|
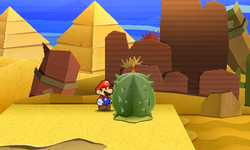 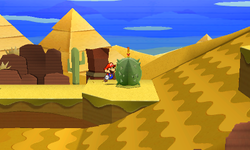 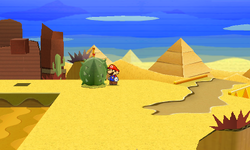
| |
| HP-Up Heart | When Mario reaches the top of the pyramid at the end of the level, he must move up the stairs on the left and slide down the ramp, then simply hop onto the next platform to reach it. | 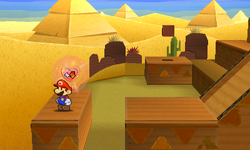
| |
| Shiny Mushroom | 
|
Given by the Travelling Toad after saving him from 5 Paragoombas. | 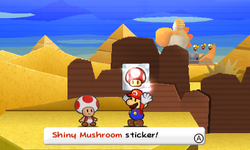
|
| Soda | In the fifth scene, near the end of the right slope, buried in the sand. | 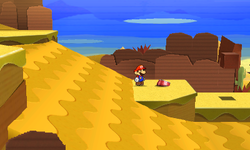
| |
| Tablet Piece | 
|
In the underground scene, found at the top in the treasure chest. | 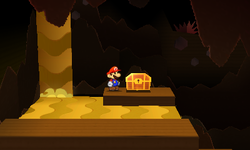
|
Hidden Blocks[edit]
| Item | Icon | Location | Image (Unrevealed) | Image (Revealed) |
|---|---|---|---|---|
| Shiny Jump | 
|
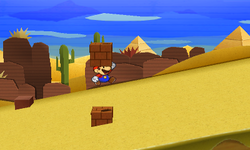
In the third scene, above the second Brick Block. | 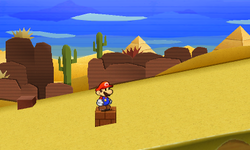
|
|
| Shiny Jump | 
|
In the fourth scene, above the flower in the east. | 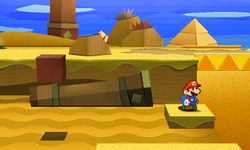
|
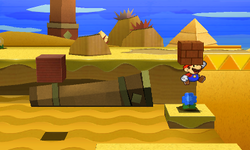
|
| Shiny Jump | 
|
In the fifth scene, near the entrance, between two Brick Blocks. | 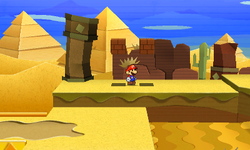
|
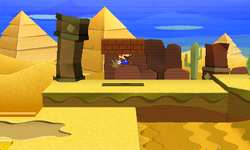
|
| Coin (both) | In the underground scene, near the upper ? Block. Together with a block created by paperization, these 2 blocks as platforms to reach said ? Block. | 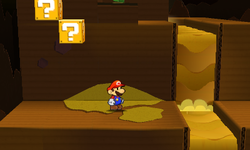
|
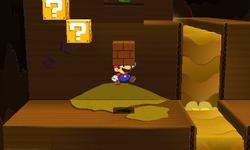 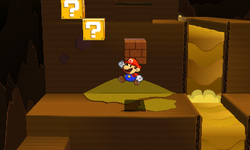
|
Paperization Spots[edit]
| Scrap/Sticker | Icon | Location | Image |
|---|---|---|---|
| Jump/Iron Jump/Line Jump (any 1x1 variety)+Hammer/Hurlhammer/Slaphammer (any 1x1 variety)+any 1x1 Mushroom (but Poison Mushroom)+Poison Mushroom+any Spike Helmet+any Flower | N/A | In the first scene, the exit. Combination of 6 1x1 stickers is required to open the door. Required to progress. | 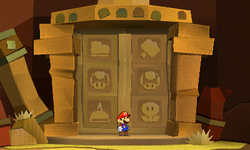
|
| Random 1x1 Sticker | N/A | In the third scene, after reaching the highest point of the scene. | 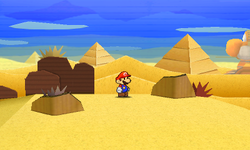
|
| Random 1x1 Sticker | N/A | Same scene, near the exit, behind some flat rocks. | 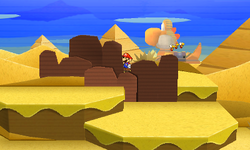
|
| Random 1x1 Sticker | N/A | In the fifth scene, near the exit between two Brick Blocks. | 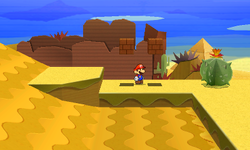
|
| Random 1x1 Sticker | N/A | In the underground scene, near the upper ? Block. Together with two Hidden Blocks right of it, it acts as platforms to reach said ? Block. | 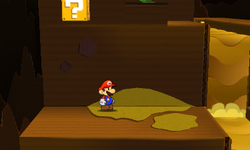
|
| Random 1x1 Sticker | N/A | In the sixth scene (pyramid one), near the Comet Piece, to the right. | 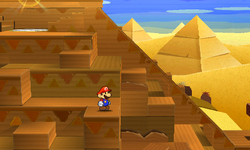
|
| Secret Door | 
|
Same scene, at the back side of the pyramid. Available only after getting access to Outlook Point and getting Secret Door sticker from there. | 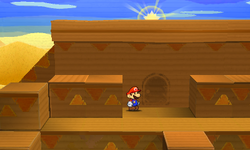
|
Names in other languages[edit]
| Language | Name | Meaning | Notes |
|---|---|---|---|
| Japanese | カラカラ砂漠[?] Kara Kara Sabaku |
Dry Desert, kara kara being an expression meaning "dried-up". Shares a name with both Dry Dry Desert and Kalimari Desert. | |
| Chinese | 干旱沙漠 (Simplified) 乾旱沙漠 (Traditional)[?] Gānhàn Shāmò |
Dry Desert | |
| French (NOA) | Désert Cuire-au-Sec[?] | Cook-to-Dry Desert | |
| French (NOE) | Désert Archisec[?] | "Very dry" Desert | |
| German | Nimmerfeuchte Wüste[?] | Neverwet Desert | |
| Italian | Deserto al Forno[?] | Baked Desert | |
| Spanish | Desierto Lodoseco[?] | "Drymud" Desert |
