Kremlantis Kaos: Difference between revisions
mNo edit summary |
m (Text replacement - "(\| *)Jap([RMCN\d]* *=)" to "$1Jpn$2") |
||
| (44 intermediate revisions by 25 users not shown) | |||
| Line 1: | Line 1: | ||
{{level | {{level infobox | ||
|image=[[File:Kremlantis Kaos.png]] | |||
|image=[[File: | |code=2-2 | ||
|world=[[Kremlantis]] | |||
|code=2 - 2 | |||
|game=''[[Donkey Kong Land]]'' | |game=''[[Donkey Kong Land]]'' | ||
| | |before=[[Tricky Temple|<<]] | ||
|after=[[Reef Rampage|>>]] | |after=[[Reef Rampage|>>]] | ||
}} | }} | ||
'''Kremlantis Kaos''' is the eleventh level of | '''Kremlantis Kaos''',<ref>''Donkey Kong Land'' Nintendo 3DS Virtual Console digital manual, section 13</ref> originally known as just '''Kremlantis''',<ref>{{cite|language=en-us|date=1995|publisher=Nintendo of America|title=''Donkey Kong Land'' instruction booklet|page=17}}</ref><ref>{{cite|date=July 1995|publisher=Nintendo of America|language=en-us|title=''Nintendo Power'' Volume 74|page=18}}</ref> is the eleventh level of ''[[Donkey Kong Land]]'' and the second level of [[Kremlantis]]. Kremlantis Kaos is the first level to take place in an underwater ruins, let alone underwater. [[Gloop]]s and [[Fangfish]] first appear in the level, though [[Flapper]]s are the main obstacle encountered. Kremlantis Kaos has two [[end of stage]]s, both of which unlock the next level, [[Reef Rampage]]. Going past the first end of stage leads to an area with several [[banana]]s and two [[Kong Token]]s. | ||
==Layout== | |||
When they start the level, the Kongs must swim through the water, going east. They will meet the first [[Fangfish]] as they travel between the ruins, and soon encounter a [[Flapper]]. At some point, the Kongs can swim down through a small gap and grab the [[K-O-N-G Letters|letter K]], although having to watch out for a Flapper as they grab it. They need to continue swimming along and dodge a few Gloops and Flappers. At some point, they will be able to swoop down under another Flapper and grab the letter O. After that, the heroes must avoid a some more Flappers, until they find the [[Continue Point]]. | |||
Halfway through the level now, they should continue east and soon have to swim between three Flappers to grab the letter N. Once they get this, the Kongs need to keep going along the path. Eventually, they will find a small area with several Flappers. They must sneak around each foe and still travel eastward. When they are out of this tight space, the group must swim past a few more underwater enemies and later have to creep between a few Flappers to snatch away the letter G. After they dodge the villains obtain the letter, they need to continue along and soon find a portal. It will take them out of the level. However, if they swim a little farther, they will find several bananas and a [[Kong Token]], as well as a hidden portal. The heroes can take it to exit the stage. | |||
{{br}} | |||
== | ==Enemies== | ||
The following enemies appear in the following quantities: | |||
*[[Fangfish]]: 2 | |||
*[[Flapper]]: 17 | |||
*[[Gloop]]s: 6 | |||
==Items and objects== | |||
The following items and objects appear in the following quantities: | |||
*[[DK Barrel]]: 3 | |||
*[[Kong Token]]s: 3 | |||
===K-O-N-G Letters=== | |||
*K: In a pit underneath the second Flapper. | |||
*O: Underneath a different Flapper, though this Flapper is closer to the floor. | |||
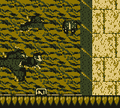
*N: Right after the checkpoint, the "N" is at the bottom of a pit with the trio of Flapper. | |||
*G: Towards the end, the "G" is in a lowered part of the floor near a group of Flappers. | |||
==Gallery== | |||
<gallery> | |||
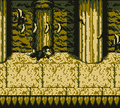
Kremlantis Kaos screenshot.png|Diddy at the start of the level | |||
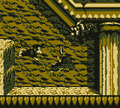
Kremlantis Kaos Fangfish.png|Diddy encounters a Fangfish | |||
Kremlantis-Level-N.png|The letter N | |||
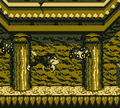
Kremlantis Kaos Two Flappers.png|Donkey Kong swimming between two Flappers | |||
Kremlantis-Level-G.png|The letter G | |||
Kremlantis-Level-Secret.png|The first exit portal; a few bananas at the top-right allude to the second exit | |||
Kremlantis Kaos DKL hidden area.png|Donkey Kong in a hidden area with two Kong Tokens, after the first exit | |||
</gallery> | |||
==Names in other languages== | |||
{{foreign names | |||
|Jpn=海底遺跡1 | |||
|JpnR=Kaitei iseki 1 | |||
|JpnM=Undersea ruins 1 | |||
|Spa=Caos en las ruinas | |||
|SpaM=Chaos in the ruins | |||
|Ita=Kremlantis<ref>{{cite|title=''[[Donkey Kong Land]]'' Italian booklet|page=17}}</ref> | |||
}} | |||
==References== | |||
<references/> | |||
{{DKL}} | {{DKL}} | ||
[[Category: | [[Category:Aquatic areas]] | ||
[[Category:Temples]] | |||
[[Category: | [[Category:Donkey Kong Land levels]] | ||
[[Category:Donkey Kong Land]] | |||
Latest revision as of 13:35, January 7, 2025
| Level | |
|---|---|
| Kremlantis Kaos | |
| |
| Level code | 2-2 |
| World | Kremlantis |
| Game | Donkey Kong Land |
| << Directory of levels >> | |
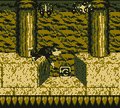
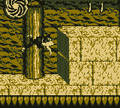
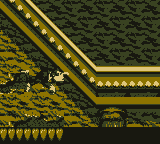
Kremlantis Kaos,[1] originally known as just Kremlantis,[2][3] is the eleventh level of Donkey Kong Land and the second level of Kremlantis. Kremlantis Kaos is the first level to take place in an underwater ruins, let alone underwater. Gloops and Fangfish first appear in the level, though Flappers are the main obstacle encountered. Kremlantis Kaos has two end of stages, both of which unlock the next level, Reef Rampage. Going past the first end of stage leads to an area with several bananas and two Kong Tokens.
Layout[edit]
When they start the level, the Kongs must swim through the water, going east. They will meet the first Fangfish as they travel between the ruins, and soon encounter a Flapper. At some point, the Kongs can swim down through a small gap and grab the letter K, although having to watch out for a Flapper as they grab it. They need to continue swimming along and dodge a few Gloops and Flappers. At some point, they will be able to swoop down under another Flapper and grab the letter O. After that, the heroes must avoid a some more Flappers, until they find the Continue Point.
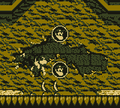
Halfway through the level now, they should continue east and soon have to swim between three Flappers to grab the letter N. Once they get this, the Kongs need to keep going along the path. Eventually, they will find a small area with several Flappers. They must sneak around each foe and still travel eastward. When they are out of this tight space, the group must swim past a few more underwater enemies and later have to creep between a few Flappers to snatch away the letter G. After they dodge the villains obtain the letter, they need to continue along and soon find a portal. It will take them out of the level. However, if they swim a little farther, they will find several bananas and a Kong Token, as well as a hidden portal. The heroes can take it to exit the stage.
Enemies[edit]
The following enemies appear in the following quantities:
Items and objects[edit]
The following items and objects appear in the following quantities:
- DK Barrel: 3
- Kong Tokens: 3
K-O-N-G Letters[edit]
- K: In a pit underneath the second Flapper.
- O: Underneath a different Flapper, though this Flapper is closer to the floor.
- N: Right after the checkpoint, the "N" is at the bottom of a pit with the trio of Flapper.
- G: Towards the end, the "G" is in a lowered part of the floor near a group of Flappers.
Gallery[edit]
Names in other languages[edit]
| Language | Name | Meaning | Notes |
|---|---|---|---|
| Japanese | 海底遺跡1[?] Kaitei iseki 1 |
Undersea ruins 1 | |
| Italian | Kremlantis[4] | - | |
| Spanish | Caos en las ruinas[?] | Chaos in the ruins |
References[edit]
- ^ Donkey Kong Land Nintendo 3DS Virtual Console digital manual, section 13
- ^ 1995. Donkey Kong Land instruction booklet. Nintendo of America (American English). Page 17.
- ^ July 1995. Nintendo Power Volume 74. Nintendo of America (American English). Page 18.
- ^ Donkey Kong Land Italian booklet. Page 17.
