List of Bananas in Jungle Japes: Difference between revisions
From the Super Mario Wiki, the Mario encyclopedia
Jump to navigationJump to search
Blueyoshisrc (talk | contribs) (Created page with "There are a total of 500 Bananas (100 for each Kong) in Jungle Japes. ==Donkey Kong== {|border=1 cellpadding=3 style=border-collapse:collapse;width:100%;background:#f3f777 |-style="background:#ffe40a;" !width=30%|Image !width=60%|Description !width=10%|Amount |- |align=center|400px |Above the palm trees right after entering the world. |align=center|5 30px |...") |
m (misspellings) Tag: Mobile edit |
||
| (3 intermediate revisions by 2 users not shown) | |||
| Line 1: | Line 1: | ||
There are a total of 500 [[Banana]]s (100 for each [[Donkey_Kong_64#Playable|Kong]]) in [[Jungle Japes]]. | There are a total of 500 [[Banana]]s (100 for each [[Donkey_Kong_64#Playable|Kong]]) in [[Jungle Japes]]. 60 Bananas are required by [[Troff 'n' Scoff]]. | ||
==Donkey Kong== | ==Donkey Kong== | ||
{|border=1 cellpadding=3 style=border-collapse:collapse;width:100%;background:#f3f777 | {|border=1 cellpadding=3 style=border-collapse:collapse;width:100%;background:#f3f777 | ||
|-style="background:#ffe40a;" | |-style="background:#ffe40a;" | ||
!width= | !width=16%|Image | ||
! | !Description | ||
!width=10%|Amount | !width=10%|Amount | ||
|- | |- | ||
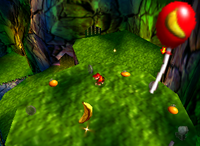
|align=center|[[File:DK64_Jungle_Japes_Donkey_Banana_1.png| | |align=center|[[File:DK64_Jungle_Japes_Donkey_Banana_1.png|200px]] | ||
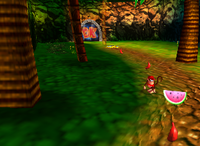
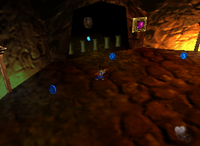
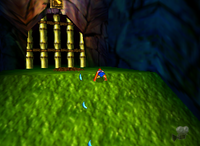
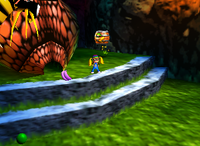
|Above the palm trees right after entering the world. | |Above the palm trees right after entering the world. | ||
|align=center|5 [[File:DK64_Yellow_Banana.gif|30px]] | |align=center|5 [[File:DK64_Yellow_Banana.gif|30px]] | ||
|- | |- | ||
|align=center|[[File:DK64_Jungle_Japes_Donkey_Banana_11.png| | |align=center|[[File:DK64_Jungle_Japes_Donkey_Banana_11.png|200px]] | ||
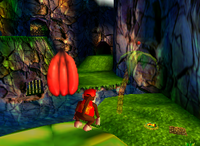
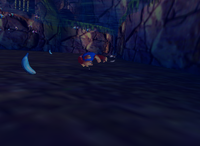
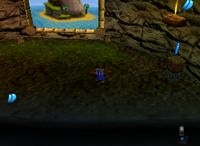
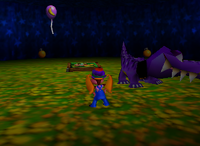
| Atop three different palm trees on the mountain in the Central Area. | | Atop three different palm trees on the mountain in the Central Area. | ||
|align=center|3 [[File:DK64_Yellow_Banana Bunch.gif|30px]] | |align=center|3 [[File:DK64_Yellow_Banana Bunch.gif|30px]] | ||
|- | |- | ||
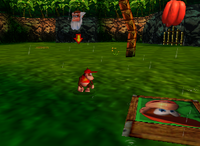
|align=center|[[File:DK64_Jungle_Japes_Donkey_Banana_2.png| | |align=center|[[File:DK64_Jungle_Japes_Donkey_Banana_2.png|200px]] | ||
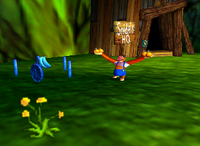
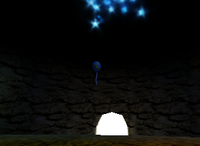
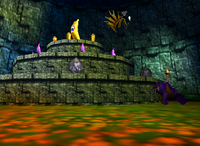
|In front of Snipes H.Q. in the Central Area. | |In front of Snipes H.Q. in the Central Area. | ||
|align=center|1 [[File:DK64_Yellow_Banana Balloon.gif|30px]] | |align=center|1 [[File:DK64_Yellow_Banana Balloon.gif|30px]] | ||
|- | |- | ||
|align=center|[[File:DK64_Jungle_Japes_Donkey_Banana_4.png| | |align=center|[[File:DK64_Jungle_Japes_Donkey_Banana_4.png|200px]] | ||
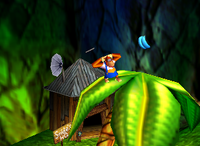
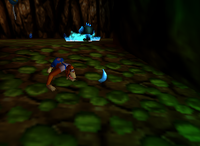
|On two | |On two separate slopes (3 on each) from Snipes H.Q. to Diddy Kong's cage. | ||
|align=center|6 [[File:DK64_Yellow_Banana.gif|30px]] | |align=center|6 [[File:DK64_Yellow_Banana.gif|30px]] | ||
|- | |- | ||
|align=center|[[File:DK64_Jungle_Japes_Donkey_Banana_10.png| | |align=center|[[File:DK64_Jungle_Japes_Donkey_Banana_10.png|200px]] | ||
|In the empty alcove with a Troff 'n' Scoff portal in it. Above the Storm Cave entrance with Diddy Kong's Kasplat in it, use the vines to reach it. | |In the empty alcove with a Troff 'n' Scoff portal in it. Above the Storm Cave entrance with Diddy Kong's Kasplat in it, use the vines to reach it. | ||
|align=center|1 [[File:DK64_Yellow_Banana Bunch.gif|30px]] | |align=center|1 [[File:DK64_Yellow_Banana Bunch.gif|30px]] | ||
|- | |- | ||
|align=center|[[File:DK64_Jungle_Japes_Donkey_Banana_5.png| | |align=center|[[File:DK64_Jungle_Japes_Donkey_Banana_5.png|200px]] | ||
|On top of the Bananaporter #3 in the Central Area near Diddy Kong's [[Kasplat]]. | |On top of the Bananaporter #3 in the Central Area near Diddy Kong's [[Kasplat]]. | ||
|align=center|1 [[File:DK64_Yellow_Banana Bunch.gif|30px]] | |align=center|1 [[File:DK64_Yellow_Banana Bunch.gif|30px]] | ||
|- | |- | ||
|align=center|[[File:DK64_Jungle_Japes_Donkey_Banana_6.png| | |align=center|[[File:DK64_Jungle_Japes_Donkey_Banana_6.png|200px]] | ||
|On top of the Bananaporter #3 near the giant X on the ground in the Central Area. | |On top of the Bananaporter #3 near the giant X on the ground in the Central Area. | ||
|align=center|1 [[File:DK64_Yellow_Banana Bunch.gif|30px]] | |align=center|1 [[File:DK64_Yellow_Banana Bunch.gif|30px]] | ||
|- | |- | ||
|align=center|[[File:DK64_Jungle_Japes_Donkey_Banana_6.png| | |align=center|[[File:DK64_Jungle_Japes_Donkey_Banana_6.png|200px]] | ||
|Above the giant X on the ground in the Central Area. | |Above the giant X on the ground in the Central Area. | ||
|align=center|1 [[File:DK64_Yellow_Banana Balloon.gif|30px]] | |align=center|1 [[File:DK64_Yellow_Banana Balloon.gif|30px]] | ||
|- | |- | ||
|align=center|[[File:DK64_Jungle_Japes_Donkey_Banana_8.png| | |align=center|[[File:DK64_Jungle_Japes_Donkey_Banana_8.png|200px]] | ||
|Trail of bananas in the Storm Cave between the two Bananaporter #4. | |Trail of bananas in the Storm Cave between the two Bananaporter #4. | ||
|align=center|9 [[File:DK64_Yellow_Banana.gif|30px]] | |align=center|9 [[File:DK64_Yellow_Banana.gif|30px]] | ||
|- | |- | ||
|align=center|[[File:DK64_Jungle_Japes_Donkey_Banana_9.png| | |align=center|[[File:DK64_Jungle_Japes_Donkey_Banana_9.png|200px]] | ||
|In front of Cranky's Lab in the Storm Area. | |In front of Cranky's Lab in the Storm Area. | ||
|align=center|1 [[File:DK64_Yellow_Banana Balloon.gif|30px]] | |align=center|1 [[File:DK64_Yellow_Banana Balloon.gif|30px]] | ||
|- | |- | ||
|align=center|[[File:DK64_Jungle_Japes_Donkey_Banana_12.png| | |align=center|[[File:DK64_Jungle_Japes_Donkey_Banana_12.png|200px]] | ||
|Below Rambi's crate in the Storm Area. | |Below Rambi's crate in the Storm Area. | ||
|align=center|1 [[File:DK64_Yellow_Banana Bunch.gif|30px]] | |align=center|1 [[File:DK64_Yellow_Banana Bunch.gif|30px]] | ||
|- | |- | ||
|align=center|[[File:DK64_Jungle_Japes_Donkey_Banana_13.png| | |align=center|[[File:DK64_Jungle_Japes_Donkey_Banana_13.png|200px]] | ||
|Above a Donkey Kong switch in the Storm Area. Use Rambi to destroy the hut covering the switch. | |Above a Donkey Kong switch in the Storm Area. Use Rambi to destroy the hut covering the switch. | ||
|align=center|1 [[File:DK64_Yellow_Banana Bunch.gif|30px]] | |align=center|1 [[File:DK64_Yellow_Banana Bunch.gif|30px]] | ||
|- | |- | ||
|align=center|[[File:DK64_Jungle_Japes_Donkey_Golden_4.png| | |align=center|[[File:DK64_Jungle_Japes_Donkey_Golden_4.png|200px]] | ||
|Inside the Barrel Cannon course. Use [[Baboon Blast]] on the Donkey Pad above the giant X to get there. | |Inside the Barrel Cannon course. Use [[Baboon Blast]] on the Donkey Pad above the giant X to get there. | ||
|align=center|2 [[File:DK64_Yellow_Banana Bunch.gif|30px]] | |align=center|2 [[File:DK64_Yellow_Banana Bunch.gif|30px]] | ||
| Line 65: | Line 65: | ||
{|border=1 cellpadding=3 style=border-collapse:collapse;width:100%;background:#ff7061 | {|border=1 cellpadding=3 style=border-collapse:collapse;width:100%;background:#ff7061 | ||
|-style="background:#e80404;color:#fff;" | |-style="background:#e80404;color:#fff;" | ||
!width= | !width=16%|Image | ||
! | !Description | ||
!width=10%|Amount | !width=10%|Amount | ||
|- | |- | ||
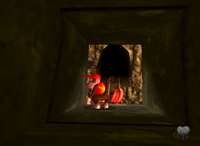
|align=center|[[File:DK64_Jungle_Japes_Diddy_Banana_2.png| | |align=center|[[File:DK64_Jungle_Japes_Diddy_Banana_2.png|200px]] | ||
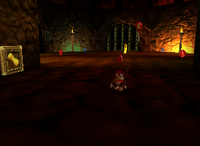
|At the entrance to the level leading to the Starting Cave. | |At the entrance to the level leading to the Starting Cave. | ||
|align=center|5 [[File:DK64_Red_Banana.gif|30px]] | |align=center|5 [[File:DK64_Red_Banana.gif|30px]] | ||
|- | |- | ||
|align=center|[[File:DK64_Jungle_Japes_Diddy_Golden_4.png| | |align=center|[[File:DK64_Jungle_Japes_Diddy_Golden_4.png|200px]] | ||
|In the room opened by hitting the peanut switches inside the Starting Cave. | |In the room opened by hitting the peanut switches inside the Starting Cave. | ||
|align=center|1 [[File:DK64_Red_Banana_Balloon.gif|30px]] | |align=center|1 [[File:DK64_Red_Banana_Balloon.gif|30px]] | ||
|- | |- | ||
|align=center|[[File:DK64_Jungle_Japes_Diddy_Banana_3.png| | |align=center|[[File:DK64_Jungle_Japes_Diddy_Banana_3.png|200px]] | ||
|On top of palm trees surrounding the mountain in the Central Area. | |On top of palm trees surrounding the mountain in the Central Area. | ||
|align=center|4 [[File:DK64_Red_Banana_Bunch.gif|30px]] | |align=center|4 [[File:DK64_Red_Banana_Bunch.gif|30px]] | ||
|- | |- | ||
|align=center|[[File:DK64_Jungle_Japes_Diddy_Banana_12.png| | |align=center|[[File:DK64_Jungle_Japes_Diddy_Banana_12.png|200px]] | ||
|Hidden behind some seagrass underwater below the middle cave entrance. | |Hidden behind some seagrass underwater below the middle cave entrance. | ||
|align=center|2 [[File:DK64_Red_Banana_Bunch.gif|30px]] | |align=center|2 [[File:DK64_Red_Banana_Bunch.gif|30px]] | ||
|- | |- | ||
|align=center|[[File:DK64_Jungle_Japes_Diddy_Banana_4.png| | |align=center|[[File:DK64_Jungle_Japes_Diddy_Banana_4.png|200px]] | ||
|Surrounding the small hill next to a Bananaporter #2. | |Surrounding the small hill next to a Bananaporter #2. | ||
|align=center|7 [[File:DK64_Red_Banana.gif|30px]] | |align=center|7 [[File:DK64_Red_Banana.gif|30px]] | ||
|- | |- | ||
|align=center|[[File:DK64_Jungle_Japes_Diddy_Banana_5.png| | |align=center|[[File:DK64_Jungle_Japes_Diddy_Banana_5.png|200px]] | ||
|Along the small river in Diddy Kong's mine cave in the Central Area. | |Along the small river in Diddy Kong's mine cave in the Central Area. | ||
|align=center|5 [[File:DK64_Red_Banana.gif|30px]] | |align=center|5 [[File:DK64_Red_Banana.gif|30px]] | ||
|- | |- | ||
|align=center|[[File:DK64_Jungle_Japes_Diddy_Banana_6.png| | |align=center|[[File:DK64_Jungle_Japes_Diddy_Banana_6.png|200px]] | ||
|On a metallic platform in the first room of the mine cave. | |On a metallic platform in the first room of the mine cave. | ||
|align=center|1 [[File:DK64_Red_Banana_Bunch.gif|30px]] | |align=center|1 [[File:DK64_Red_Banana_Bunch.gif|30px]] | ||
|- | |- | ||
|align=center|[[File:DK64_Jungle_Japes_Diddy_Banana_8.png| | |align=center|[[File:DK64_Jungle_Japes_Diddy_Banana_8.png|200px]] | ||
|Inside Diddy Kong's mine cave behind a chain-wire fence opened by Simian Slamming a switch. | |Inside Diddy Kong's mine cave behind a chain-wire fence opened by Simian Slamming a switch. | ||
|align=center|1 [[File:DK64_Red_Banana_Bunch.gif|30px]], 1 [[File:DK64_Red_Banana_Balloon.gif|30px]] | |align=center|1 [[File:DK64_Red_Banana_Bunch.gif|30px]], 1 [[File:DK64_Red_Banana_Balloon.gif|30px]] | ||
|- | |- | ||
|align=center|[[File:DK64_Jungle_Japes_Diddy_Banana_9.png| | |align=center|[[File:DK64_Jungle_Japes_Diddy_Banana_9.png|200px]] | ||
|Inside Diddy Kong's mine cave. Lower the speed of the conveyor belts by using Chimpy Charge on a | |Inside Diddy Kong's mine cave. Lower the speed of the conveyor belts by using Chimpy Charge on a LO switch in the same room. After climbing to the top of the conveyor belts, enter the metal structure. The Banana Bunch is above the minecart. | ||
|align=center|1 [[File:DK64_Red_Banana_Bunch.gif|30px]] | |align=center|1 [[File:DK64_Red_Banana_Bunch.gif|30px]] | ||
|- | |- | ||
|align=center|[[File:DK64_Jungle_Japes_Diddy_Banana_10.png| | |align=center|[[File:DK64_Jungle_Japes_Diddy_Banana_10.png|200px]] | ||
|Above the hill with Diddy Kong's mine cave. | |Above the hill with Diddy Kong's mine cave. | ||
|align=center|1 [[File:DK64_Red_Banana_Balloon.gif|30px]] | |align=center|1 [[File:DK64_Red_Banana_Balloon.gif|30px]] | ||
|- | |- | ||
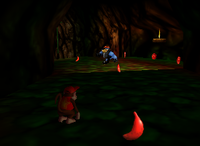
|align=center|[[File:DK64_Jungle_Japes_Diddy_Banana_1.png| | |align=center|[[File:DK64_Jungle_Japes_Diddy_Banana_1.png|200px]] | ||
|Around Diddy Kong's Kasplat inside the Storm Cave. | |Around Diddy Kong's Kasplat inside the Storm Cave. | ||
|align=center|3 [[File:DK64_Red_Banana.gif|30px]] | |align=center|3 [[File:DK64_Red_Banana.gif|30px]] | ||
|- | |- | ||
|align=center|[[File:DK64_Jungle_Japes_Diddy_Banana_11.png| | |align=center|[[File:DK64_Jungle_Japes_Diddy_Banana_11.png|200px]] | ||
|Above a Diddy Kong switch in the Storm Area. Use Rambi with Donkey Kong to destroy the hut covering the switch. | |Above a Diddy Kong switch in the Storm Area. Use Rambi with Donkey Kong to destroy the hut covering the switch. | ||
|align=center|1 [[File:DK64_Red_Banana_Bunch.gif|30px]] | |align=center|1 [[File:DK64_Red_Banana_Bunch.gif|30px]] | ||
| Line 122: | Line 122: | ||
{|border=1 cellpadding=3 style=border-collapse:collapse;width:100%;background:#7b90ff | {|border=1 cellpadding=3 style=border-collapse:collapse;width:100%;background:#7b90ff | ||
|-style="background:#070ac6;color:#fff;" | |-style="background:#070ac6;color:#fff;" | ||
!width= | !width=16%|Image | ||
! | !Description | ||
!width=10%|Amount | !width=10%|Amount | ||
|- | |- | ||
|align=center|[[File:DK64_Jungle_Japes_Lanky_Golden_4.png| | |align=center|[[File:DK64_Jungle_Japes_Lanky_Golden_4.png|200px]] | ||
|Inside the room off to the side of the Starting Cave. Hit the peanut switches with Diddy Kong to open said room, then open another gate inside it by hitting a grape switch. | |Inside the room off to the side of the Starting Cave. Hit the peanut switches with Diddy Kong to open said room, then open another gate inside it by hitting a grape switch. | ||
|align=center|1 [[File:DK64_Blue_Banana_Bunch.gif|30px]] | |align=center|1 [[File:DK64_Blue_Banana_Bunch.gif|30px]] | ||
|- | |- | ||
|align=center|[[File:DK64_Jungle_Japes_Lanky_Banana_1.png| | |align=center|[[File:DK64_Jungle_Japes_Lanky_Banana_1.png|200px]] | ||
|Inside the lake of the Central Area. | |Inside the lake of the Central Area. | ||
|align=center|5 [[File:DK64_Blue_Banana.gif|30px]] | |align=center|5 [[File:DK64_Blue_Banana.gif|30px]] | ||
|- | |- | ||
|align=center|[[File:DK64_Jungle_Japes_Lanky_Banana_4.png| | |align=center|[[File:DK64_Jungle_Japes_Lanky_Banana_4.png|200px]] | ||
|Next to Snides H.Q. in the Central Area. | |Next to Snides H.Q. in the Central Area. | ||
|align=center|1 [[File:DK64_Blue_Banana_Bunch.gif|30px]] | |align=center|1 [[File:DK64_Blue_Banana_Bunch.gif|30px]] | ||
|- | |- | ||
|align=center|[[File:DK64_Jungle_Japes_Lanky_Banana_3.png| | |align=center|[[File:DK64_Jungle_Japes_Lanky_Banana_3.png|200px]] | ||
|On top of a palm tree next to Snides H.Q. | |On top of a palm tree next to Snides H.Q. | ||
|align=center|1 [[File:DK64_Blue_Banana_Bunch.gif|30px]] | |align=center|1 [[File:DK64_Blue_Banana_Bunch.gif|30px]] | ||
|- | |- | ||
|align=center|[[File:DK64_Jungle_Japes_Lanky_Banana_2.png| | |align=center|[[File:DK64_Jungle_Japes_Lanky_Banana_2.png|200px]] | ||
|On a steep slope in the Central Area near a Bananaporter #3. | |On a steep slope in the Central Area near a Bananaporter #3. | ||
|align=center|3 [[File:DK64_Blue_Banana.gif|30px]] | |align=center|3 [[File:DK64_Blue_Banana.gif|30px]] | ||
|- | |- | ||
|align=center|[[File:DK64_Jungle_Japes_Lanky_Banana_5.png| | |align=center|[[File:DK64_Jungle_Japes_Lanky_Banana_5.png|200px]] | ||
|Inside Lanky's Cave, found atop a steep slope in the Central Area. One Banana Bunch is above each of the two pegs, the other two are on the ground. | |Inside Lanky's Cave, found atop a steep slope in the Central Area. One Banana Bunch is above each of the two pegs, the other two are on the ground. | ||
|align=center|4 [[File:DK64_Blue_Banana_Bunch.gif|30px]] | |align=center|4 [[File:DK64_Blue_Banana_Bunch.gif|30px]] | ||
|- | |- | ||
|align=center|[[File:DK64_Jungle_Japes_Lanky_Banana_6.png| | |align=center|[[File:DK64_Jungle_Japes_Lanky_Banana_6.png|200px]] | ||
|Inside Lanky's Cave, found atop a steep slope in the Central Area. | |Inside Lanky's Cave, found atop a steep slope in the Central Area. | ||
|align=center|1 [[File:DK64_Blue_Banana_Balloon.gif|30px]] | |align=center|1 [[File:DK64_Blue_Banana_Balloon.gif|30px]] | ||
|- | |- | ||
|align=center|[[File:DK64_Jungle_Japes_Lanky_Banana_9.png| | |align=center|[[File:DK64_Jungle_Japes_Lanky_Banana_9.png|200px]] | ||
|Inside the Storm Cave on a slope leading to the blue Kasplat. | |Inside the Storm Cave on a slope leading to the blue Kasplat. | ||
|align=center|1 [[File:DK64_Blue_Banana.gif|30px]] | |align=center|1 [[File:DK64_Blue_Banana.gif|30px]] | ||
|- | |- | ||
|align=center|[[File:DK64_Jungle_Japes_Lanky_Banana_10.png| | |align=center|[[File:DK64_Jungle_Japes_Lanky_Banana_10.png|200px]] | ||
|Inside the Storm Cave off to the side, above the blue Kasplat. | |Inside the Storm Cave off to the side, above the blue Kasplat. | ||
|align=center|1 [[File:DK64_Blue_Banana_Balloon.gif|30px]] | |align=center|1 [[File:DK64_Blue_Banana_Balloon.gif|30px]] | ||
|- | |- | ||
|align=center|[[File:DK64_Jungle_Japes_Lanky_Golden_3.png| | |align=center|[[File:DK64_Jungle_Japes_Lanky_Golden_3.png|200px]] | ||
|Inside the Storm Cave on a steep slope leading to a Bonus Barrel. | |Inside the Storm Cave on a steep slope leading to a Bonus Barrel. | ||
|align=center|3 [[File:DK64_Blue_Banana.gif|30px]] | |align=center|3 [[File:DK64_Blue_Banana.gif|30px]] | ||
|- | |- | ||
|align=center|[[File:DK64_Jungle_Japes_Lanky_Banana_11.png| | |align=center|[[File:DK64_Jungle_Japes_Lanky_Banana_11.png|200px]] | ||
|Inside the Storm Cave near the blue Kasplat on a steep slope. | |Inside the Storm Cave near the blue Kasplat on a steep slope. | ||
|align=center|3 [[File:DK64_Blue_Banana.gif|30px]], 1 [[File:DK64_Blue_Banana_Bunch.gif|30px]] | |align=center|3 [[File:DK64_Blue_Banana.gif|30px]], 1 [[File:DK64_Blue_Banana_Bunch.gif|30px]] | ||
|- | |- | ||
|align=center|[[File:DK64_Jungle_Japes_Lanky_Banana_7.png| | |align=center|[[File:DK64_Jungle_Japes_Lanky_Banana_7.png|200px]] | ||
|On a palm tree in the Storm Area near Lanky Kong's switch. | |On a palm tree in the Storm Area near Lanky Kong's switch. | ||
|align=center|1 [[File:DK64_Blue_Banana_Bunch.gif|30px]] | |align=center|1 [[File:DK64_Blue_Banana_Bunch.gif|30px]] | ||
|- | |- | ||
|align=center|[[File:DK64_Jungle_Japes_Lanky_Banana_7.png| | |align=center|[[File:DK64_Jungle_Japes_Lanky_Banana_7.png|200px]] | ||
|Above a Lanky Kong switch in the Storm Area. Use Rambi with Donkey Kong to destroy the hut covering the switch. | |Above a Lanky Kong switch in the Storm Area. Use Rambi with Donkey Kong to destroy the hut covering the switch. | ||
|align=center|1 [[File:DK64_Blue_Banana_Bunch.gif|30px]], 1 [[File:DK64_Blue_Banana_Balloon.gif|30px]] | |align=center|1 [[File:DK64_Blue_Banana_Bunch.gif|30px]], 1 [[File:DK64_Blue_Banana_Balloon.gif|30px]] | ||
|- | |- | ||
|align=center|[[File:DK64_Jungle_Japes_Lanky_Banana_8.png| | |align=center|[[File:DK64_Jungle_Japes_Lanky_Banana_8.png|200px]] | ||
|Around a boulder in the Storm Cave behind a wall only Rambi can destroy. | |Around a boulder in the Storm Cave behind a wall only Rambi can destroy. | ||
|align=center|5 [[File:DK64_Blue_Banana.gif|30px]] | |align=center|5 [[File:DK64_Blue_Banana.gif|30px]] | ||
| Line 187: | Line 187: | ||
{|border=1 cellpadding=3 style=border-collapse:collapse;width:100%;background:#ea72fb | {|border=1 cellpadding=3 style=border-collapse:collapse;width:100%;background:#ea72fb | ||
|-style="background:#7603aa;color:#fff;" | |-style="background:#7603aa;color:#fff;" | ||
!width= | !width=16%|Image | ||
! | !Description | ||
!width=10%|Amount | !width=10%|Amount | ||
|- | |- | ||
|align=center|[[File:DK64_Jungle_Japes_Tiny_Banana_1.png| | |align=center|[[File:DK64_Jungle_Japes_Tiny_Banana_1.png|200px]] | ||
|In the Starting Cave between the two Bananaporter #1. | |In the Starting Cave between the two Bananaporter #1. | ||
|align=center|5 [[File:DK64_Purple_Banana.gif|30px]] | |align=center|5 [[File:DK64_Purple_Banana.gif|30px]] | ||
|- | |- | ||
|align=center|[[File:DK64_Jungle_Japes_Tiny_Golden_4.png| | |align=center|[[File:DK64_Jungle_Japes_Tiny_Golden_4.png|200px]] | ||
|Inside the room off to the side of the Starting Cave. Hit the peanut switches with Diddy Kong to open said room, then open another gate inside it by hitting a feather switch. | |Inside the room off to the side of the Starting Cave. Hit the peanut switches with Diddy Kong to open said room, then open another gate inside it by hitting a feather switch. | ||
|align=center|1 [[File:DK64_Purple_Banana_Bunch.gif|30px]] | |align=center|1 [[File:DK64_Purple_Banana_Bunch.gif|30px]] | ||
|- | |- | ||
|align=center|[[File:DK64_Jungle_Japes_Tiny_Banana_5.png| | |align=center|[[File:DK64_Jungle_Japes_Tiny_Banana_5.png|200px]] | ||
|Atop a palm tree near Cranky's Lab. | |Atop a palm tree near Cranky's Lab. | ||
|align=center|1 [[File:DK64_Purple_Banana_Bunch.gif|30px]] | |align=center|1 [[File:DK64_Purple_Banana_Bunch.gif|30px]] | ||
|- | |- | ||
|align=center|[[File:DK64_Jungle_Japes_Tiny_Banana_6.png| | |align=center|[[File:DK64_Jungle_Japes_Tiny_Banana_6.png|200px]] | ||
|Above a Tiny Kong switch in the Storm Area. Use Rambi with Donkey Kong to destroy the hut covering the switch. | |Above a Tiny Kong switch in the Storm Area. Use Rambi with Donkey Kong to destroy the hut covering the switch. | ||
|align=center|1 [[File:DK64_Purple_Banana_Bunch.gif|30px]], 1 [[File:DK64_Purple_Banana_Balloon.gif|30px]] | |align=center|1 [[File:DK64_Purple_Banana_Bunch.gif|30px]], 1 [[File:DK64_Purple_Banana_Balloon.gif|30px]] | ||
|- | |- | ||
|align=center|[[File:DK64_Jungle_Japes_Tiny_Banana_7.png| | |align=center|[[File:DK64_Jungle_Japes_Tiny_Banana_7.png|200px]] | ||
|Inside the Storm Cave behind a wall only Rambi can destroy, leading to a small lake inside the cave. | |Inside the Storm Cave behind a wall only Rambi can destroy, leading to a small lake inside the cave. | ||
|align=center|7 [[File:DK64_Purple_Banana.gif|30px]] | |align=center|7 [[File:DK64_Purple_Banana.gif|30px]] | ||
|- | |- | ||
|align=center|[[File:DK64_Jungle_Japes_Fairy_2.png| | |align=center|[[File:DK64_Jungle_Japes_Fairy_2.png|200px]] | ||
|Above a small lake inside the Storm Cave behind a wall only Rambi can destroy. | |Above a small lake inside the Storm Cave behind a wall only Rambi can destroy. | ||
|align=center|1 [[File:DK64_Purple_Banana_Balloon.gif|30px]] | |align=center|1 [[File:DK64_Purple_Banana_Balloon.gif|30px]] | ||
|- | |- | ||
|align=center|[[File:DK64_Jungle_Japes_Tiny_Banana_4.png| | |align=center|[[File:DK64_Jungle_Japes_Tiny_Banana_4.png|200px]] | ||
|Three in each of the two hollow logs found in the Secret Area, use Mini-Tiny to go through them. | |Three in each of the two hollow logs found in the Secret Area, use Mini-Tiny to go through them. | ||
|align=center|6 [[File:DK64_Purple_Banana_Bunch.gif|30px]] | |align=center|6 [[File:DK64_Purple_Banana_Bunch.gif|30px]] | ||
|- | |- | ||
|align=center|[[File:DK64_Jungle_Japes_Tiny_Banana_2.png| | |align=center|[[File:DK64_Jungle_Japes_Tiny_Banana_2.png|200px]] | ||
|In front of the beehive in the Secret Area. | |In front of the beehive in the Secret Area. | ||
|align=center|1 [[File:DK64_Purple_Banana_Bunch.gif|30px]] | |align=center|1 [[File:DK64_Purple_Banana_Bunch.gif|30px]] | ||
|- | |- | ||
|align=center|[[File:DK64_Jungle_Japes_Tiny_Banana_3.png| | |align=center|[[File:DK64_Jungle_Japes_Tiny_Banana_3.png|200px]] | ||
|In the room with a single purple Klaptrap inside the beehive, enter it by using Mini-Tiny in the Secret Area. | |In the room with a single purple Klaptrap inside the beehive, enter it by using Mini-Tiny in the Secret Area. | ||
|align=center|1 [[File:DK64_Purple_Banana_Balloon.gif|30px]] | |align=center|1 [[File:DK64_Purple_Banana_Balloon.gif|30px]] | ||
|- | |- | ||
|align=center|[[File:DK64_Jungle_Japes_Tiny_Golden_1.png| | |align=center|[[File:DK64_Jungle_Japes_Tiny_Golden_1.png|200px]] | ||
|On a raised platform in the final room of the beehive, enter it by using Mini-Tiny in the Secret Area. | |On a raised platform in the final room of the beehive, enter it by using Mini-Tiny in the Secret Area. | ||
|align=center|8 [[File:DK64_Purple_Banana.gif|30px]] | |align=center|8 [[File:DK64_Purple_Banana.gif|30px]] | ||
| Line 236: | Line 236: | ||
{|border=1 cellpadding=3 style=border-collapse:collapse;width:100%;background:#a0ce99 | {|border=1 cellpadding=3 style=border-collapse:collapse;width:100%;background:#a0ce99 | ||
|-style="background:#467d0e;color:#fff;" | |-style="background:#467d0e;color:#fff;" | ||
!width= | !width=16%|Image | ||
! | !Description | ||
!width=10%|Amount | !width=10%|Amount | ||
|- | |- | ||
|align=center|[[File:DK64_Jungle_Japes_Chunky_Banana_4.png| | |align=center|[[File:DK64_Jungle_Japes_Chunky_Banana_4.png|200px]] | ||
|On top of Funky's Store. Can be reached by backflipping precisely or by falling down from Snides H.Q. | |On top of Funky's Store. Can be reached by backflipping precisely or by falling down from Snides H.Q. | ||
|align=center|2 [[File:DK64_Green_Banana_Bunch.gif|30px]] | |align=center|2 [[File:DK64_Green_Banana_Bunch.gif|30px]] | ||
|- | |- | ||
|align=center|[[File:DK64_Jungle_Japes_Chunky_Golden_1.png| | |align=center|[[File:DK64_Jungle_Japes_Chunky_Golden_1.png|200px]] | ||
|Around the giant X on the ground in the Central Area. | |Around the giant X on the ground in the Central Area. | ||
|align=center|5 [[File:DK64_Green_Banana.gif|30px]] | |align=center|5 [[File:DK64_Green_Banana.gif|30px]] | ||
|- | |- | ||
|align=center|[[File:DK64_Jungle_Japes_Chunky_Banana_1.png| | |align=center|[[File:DK64_Jungle_Japes_Chunky_Banana_1.png|200px]] [[File:DK64_Jungle_Japes_Chunky_Banana_1b.png|200px]] | ||
|Inside the catacomb, leading from the cannon to a big skull on the wall. [[Simian Slam]] the | |Inside the catacomb, leading from the cannon to a big skull on the wall. [[Simian Slam]] the giant X on the ground in the Central Area to access the catacombs. | ||
|align=center|5 [[File:DK64_Green_Banana.gif|30px]], 2 [[File:DK64_Green_Banana_Bunch.gif|30px]] | |align=center|5 [[File:DK64_Green_Banana.gif|30px]], 2 [[File:DK64_Green_Banana_Bunch.gif|30px]] | ||
|- | |- | ||
|align=center|[[File:DK64_Jungle_Japes_Chunky_Banana_2.png| | |align=center|[[File:DK64_Jungle_Japes_Chunky_Banana_2.png|200px]] | ||
|In the Side Cave leading from the Central Area to the Secret Area, passing by Donkey Kong's and Tiny Kong's Kasplat. | |In the Side Cave leading from the Central Area to the Secret Area, passing by Donkey Kong's and Tiny Kong's Kasplat. | ||
|align=center|10 [[File:DK64_Green_Banana.gif|30px]] | |align=center|10 [[File:DK64_Green_Banana.gif|30px]] | ||
|- | |- | ||
|align=center|[[File:DK64_Jungle_Japes_Chunky_Golden_3.png| | |align=center|[[File:DK64_Jungle_Japes_Chunky_Golden_3.png|200px]] | ||
|On all four trees in the Secret Area. Use the Hunky Chunky barrel to climb them. | |On all four trees in the Secret Area. Use the Hunky Chunky barrel to climb them. | ||
|align=center|4 [[File:DK64_Green_Banana_Bunch.gif|30px]] | |align=center|4 [[File:DK64_Green_Banana_Bunch.gif|30px]] | ||
|- | |- | ||
|align=center|[[File:DK64_Jungle_Japes_Chunky_Banana_3.png| | |align=center|[[File:DK64_Jungle_Japes_Chunky_Banana_3.png|200px]] | ||
|On top of Cranky's Lab, jump off a palm tree to reach it. | |On top of Cranky's Lab, jump off a palm tree to reach it. | ||
|align=center|1 [[File:DK64_Green_Banana_Bunch.gif|30px]] | |align=center|1 [[File:DK64_Green_Banana_Bunch.gif|30px]] | ||
|- | |- | ||
|align=center|[[File:DK64_Jungle_Japes_Chunky_Banana_5.png| | |align=center|[[File:DK64_Jungle_Japes_Chunky_Banana_5.png|200px]] | ||
|Next to a boulder in the Storm Cave behind a wall only Rambi can destroy. | |Next to a boulder in the Storm Cave behind a wall only Rambi can destroy. | ||
|align=center|1 [[File:DK64_Green_Banana_Bunch.gif|30px]] | |align=center|1 [[File:DK64_Green_Banana_Bunch.gif|30px]] | ||
|- | |- | ||
|align=center|[[File:DK64_Jungle_Japes_Chunky_Golden_4b.png| | |align=center|[[File:DK64_Jungle_Japes_Chunky_Golden_4b.png|200px]] | ||
|Above a boulder in the Storm Cave behind a wall only Rambi can destroy. | |Above a boulder in the Storm Cave behind a wall only Rambi can destroy. | ||
|align=center|3 [[File:DK64_Green_Banana_Balloon.gif|30px]] | |align=center|3 [[File:DK64_Green_Banana_Balloon.gif|30px]] | ||
|- | |- | ||
|} | |} | ||
{{DK64}} | |||
[[Category:Item locations|Banana Coins in Jungle Japes]] | |||
[[Category:Donkey Kong 64]] | |||
Latest revision as of 06:09, August 25, 2024
There are a total of 500 Bananas (100 for each Kong) in Jungle Japes. 60 Bananas are required by Troff 'n' Scoff.
Donkey Kong[edit]
| Image | Description | Amount |
|---|---|---|
|
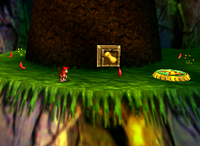
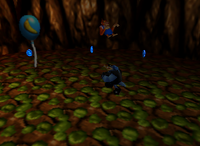
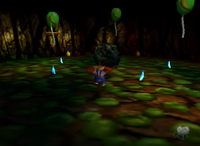
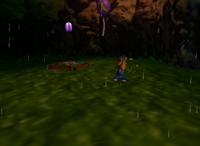
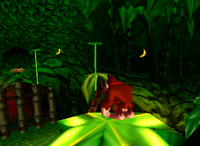
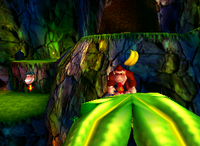
Above the palm trees right after entering the world. | 5 |
|
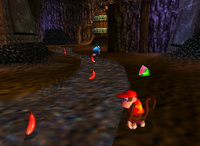
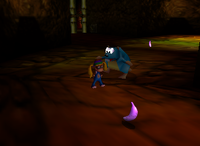
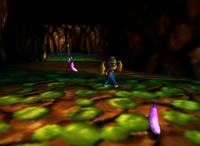
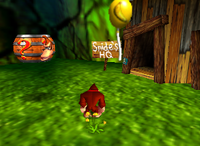
Atop three different palm trees on the mountain in the Central Area. | 3 |
|
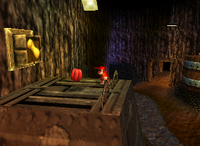
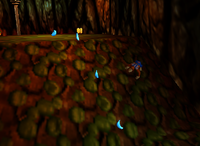
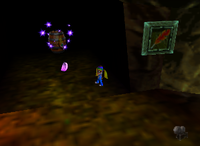
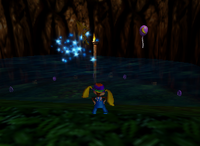
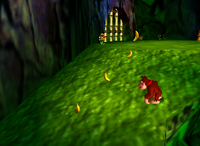
In front of Snipes H.Q. in the Central Area. | 1 |
|
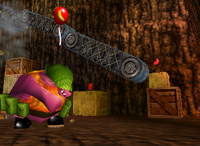
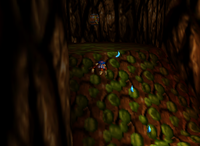
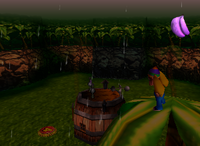
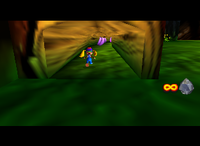
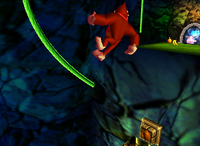
On two separate slopes (3 on each) from Snipes H.Q. to Diddy Kong's cage. | 6 |
|
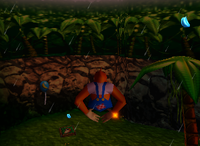
In the empty alcove with a Troff 'n' Scoff portal in it. Above the Storm Cave entrance with Diddy Kong's Kasplat in it, use the vines to reach it. | 1 |
|
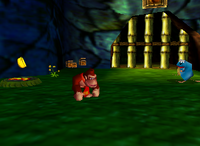
On top of the Bananaporter #3 in the Central Area near Diddy Kong's Kasplat. | 1 |
|
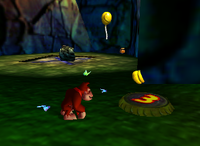
On top of the Bananaporter #3 near the giant X on the ground in the Central Area. | 1 |

|
Above the giant X on the ground in the Central Area. | 1 |
|
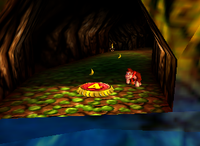
Trail of bananas in the Storm Cave between the two Bananaporter #4. | 9 |
|
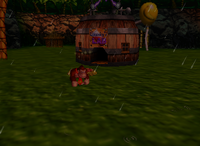
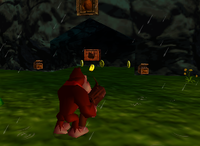
In front of Cranky's Lab in the Storm Area. | 1 |
|
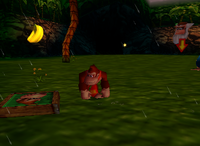
Below Rambi's crate in the Storm Area. | 1 |
|
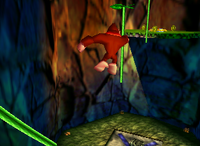
Above a Donkey Kong switch in the Storm Area. Use Rambi to destroy the hut covering the switch. | 1 |
|
Inside the Barrel Cannon course. Use Baboon Blast on the Donkey Pad above the giant X to get there. | 2 |
Diddy Kong[edit]
Lanky Kong[edit]
Tiny Kong[edit]
Chunky Kong[edit]
| Image | Description | Amount |
|---|---|---|
|
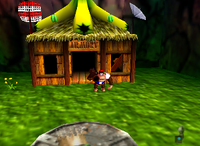
On top of Funky's Store. Can be reached by backflipping precisely or by falling down from Snides H.Q. | 2 |
|
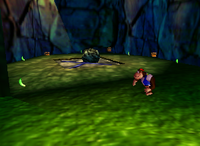
Around the giant X on the ground in the Central Area. | 5 |
|
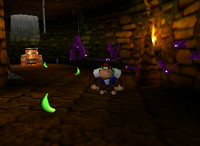
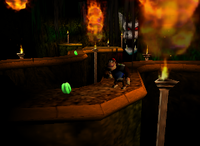
Inside the catacomb, leading from the cannon to a big skull on the wall. Simian Slam the giant X on the ground in the Central Area to access the catacombs. | 5 |
|
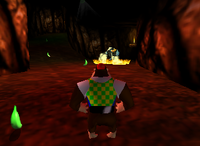
In the Side Cave leading from the Central Area to the Secret Area, passing by Donkey Kong's and Tiny Kong's Kasplat. | 10 |
|
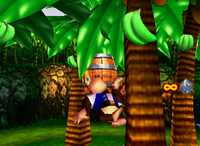
On all four trees in the Secret Area. Use the Hunky Chunky barrel to climb them. | 4 |
|
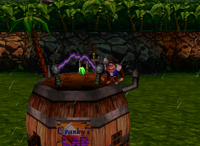
On top of Cranky's Lab, jump off a palm tree to reach it. | 1 |
|
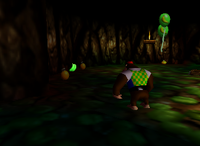
Next to a boulder in the Storm Cave behind a wall only Rambi can destroy. | 1 |
|
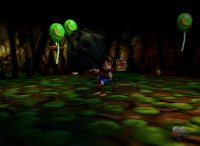
Above a boulder in the Storm Cave behind a wall only Rambi can destroy. | 3 |
