Picnic Road: Difference between revisions
(→Shop: added shop display) |
Scrooge200 (talk | contribs) No edit summary |
||
| (30 intermediate revisions by 9 users not shown) | |||
| Line 1: | Line 1: | ||
{{PMTOK location infobox | {{PMTOK location infobox | ||
|image=PMTOK Picnic Road.png | |image=PMTOK Picnic Road.png | ||
| Line 20: | Line 19: | ||
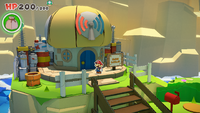
[[File:PMTOK Sensor Lab Exterior.png|thumb|left|The Sensor Lab in Picnic Road]] | [[File:PMTOK Sensor Lab Exterior.png|thumb|left|The Sensor Lab in Picnic Road]] | ||
From this point, Mario can head north and follow the trail leading out of Picnic Road and into Overlook Mountain. Just outside the entrance is a Toad disguised as an origami dog (who is revealed to be the [[Battle Lab]] | From this point, Mario can head north and follow the trail leading out of Picnic Road and into Overlook Mountain. Just outside the entrance is a Toad disguised as an origami dog (who is later revealed to be the [[Battle Lab Toad]]). There is an area nearby that appears to be a golf course. Mario can grab onto the [[Goal Pole]] and slightly lower it to reveal a set of stairs, allowing him to reach the top of the flag pole (akin to ''[[Super Mario Bros.]]''), revealing both the ball at the top and the flag as disguised Toads. At the west end of Picnic Road is a building that serves as headquarters to [[Sensor Lab]]; however, it is initially inaccessible due to a red [[streamer]] wrapped around the building. After the streamer is cleared, Mario can then enter the Sensor Lab, where he rescues the [[Toad Researcher]]; as thanks, the Toad Researcher provides Mario with his first gadget he developed, the [[Toad Radar]], which allows Mario to track down Toads, especially useful in areas with [[Autumn Mountain|tall]] [[Club Island|grass]]. Additional gadgets, such as the [[Lamination Suit]] and the [[Hidden Block Unhider]], are also developed at the Sensor Lab and become available at later points in the game. | ||
{{br}} | {{br}} | ||
| Line 48: | Line 47: | ||
|- | |- | ||
|[[File:Shellvation is Near PMTOK icon.png|50px]] | |[[File:Shellvation is Near PMTOK icon.png|50px]] | ||
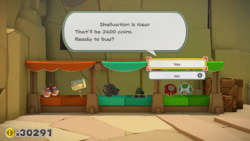
|Shellvation is Near | |[[Musée_Champignon#Treasure_Gallery|Shellvation is Near]] | ||
|2400 | |2400 | ||
|- | |- | ||
|[[File:Vellumental Idol PMTOK icon.png|50px]] | |[[File:Vellumental Idol PMTOK icon.png|50px]] | ||
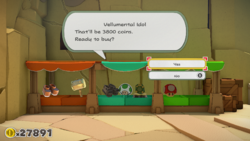
|Vellumental Idol{{footnote|main|1}} | |[[Musée_Champignon#Treasure_Gallery|Vellumental Idol]]{{footnote|main|1}} | ||
|3800 | |3800 | ||
|- | |- | ||
| Line 61: | Line 60: | ||
{{footnote|note|1|Available after buying Shellvation is Near}} | {{footnote|note|1|Available after buying Shellvation is Near}} | ||
{{footnote|note|2|Available after buying Vellumental Idol}} | {{footnote|note|2|Available after buying Vellumental Idol}} | ||
==Collectibles== | |||
'''NOTE''': Some collectibles are found in areas that are inaccessible until returning later; these entries are highlighted in beige. | |||
===Hidden Toads=== | |||
{| style="text-align: center; width: 100%; margin: 0 auto; border: #d09091; border-collapse: collapse;" border="1" cellpadding="4" cellspacing="1" | |||
|-style="background: #CB4C57;font-size:14pt;color:white" | |||
!width="5%"|Form | |||
!width="75%"|Description | |||
!width="20%"|Image | |||
|-style="background: #d09091;font-size:120%;color:#202122" | |||
!colspan=3|[[List of hidden Toads in Paper Mario: The Origami King|{{color|#202122|58 Hidden Toads}}]] | |||
|- | |||
![[File:PMTOK Green Toad Artwork.png|75px]]<br># 1 | |||
|Near the entrance to Picnic Road is a green Toad, stuck in a bush beyond a large [[Not-Bottomless Hole]]. | |||
|[[File:PMTOK Picnic Road Hidden Toad 1.jpg|250px]] | |||
|- | |||
![[File:PMTOK Toad Artwork.png|75px]]<br># 2 | |||
|Near the set of fences to the west is a Not-Bottomless Hole, which reveals an even smaller hole when repaired. Hammering near it will release a rolled up Toad. | |||
|[[File:PMTOK Picnic Road Hidden Toad 2.jpg|250px]] | |||
|- | |||
![[File:PMTOK Toads.png|75px]]<br># 3 to 6 | |||
|In a fenced off area to the west is a group of folded Toads guarded by two [[Shy Guy]]s. | |||
|[[File:PMTOK Picnic Road Hidden Toad 3.jpg|250px]] | |||
|- | |||
![[File:PMTOK Toad Artwork.png|75px]]<br># 7 | |||
|Another rolled up Toad can be found after hammering the western mountainside near a high-up hole. | |||
|[[File:PMTOK Picnic Road Hidden Toad 7.jpg|250px]] | |||
|- | |||
![[File:Musee Origami Toad 4.png|75px]]<br># 8 | |||
|A purple origami butterfly Toad flutters around a set of flowers near the western mountainside. | |||
|[[File:PMTOK Picnic Road Hidden Toad 8.jpg|250px]] | |||
|- | |||
![[File:Musee Origami Toad 5.png|75px]]<br># 9 | |||
|Further up the hill is a yellow Toad disguised as a tulip in a bed of flowers. | |||
|[[File:PMTOK Picnic Road Hidden Toad 9.jpg|250px]] | |||
|- | |||
![[File:PMTOK Toad Artwork.png|75px]]<br># 10 | |||
|A crumpled Toad is hidden behind the sign near the pond. Hammering the sign will cause the Toad to hop to a more accessible spot. | |||
|[[File:PMTOK Picnic Road Hidden Toad 10.jpg|250px]] | |||
|- | |||
![[File:PMTOK Toad Artwork.png|75px]]<br># 11 | |||
|Another crumpled Toad can be found at the western edge of the hill, behind some bushes. | |||
|[[File:PMTOK Picnic Road Hidden Toad 11.jpg|250px]] | |||
|- | |||
![[File:PMTOK Toads.png|75px]]<br># 12 to 14 | |||
|Whacking the [[Sensor Lab]] mailbox will release a set of Toads folded into the shape of envelopes. | |||
|[[File:PMTOK Picnic Road Hidden Toad 12.jpg|250px]] | |||
|- | |||
![[File:PMTOK Toad Artwork.png|75px]]<br># 15 | |||
|Just beside the Sensor Lab is a tree, which releases a crumpled Toad when hammered. | |||
|[[File:PMTOK Picnic Road Hidden Toad 15.jpg|250px]] | |||
|- | |||
![[File:PMTOK Yellow Toad Artwork.png|75px]]<br># 16 | |||
|A yellow Toad is buried in the sand near the [[Goal Pole]]. | |||
|[[File:PMTOK Picnic Road Hidden Toad 16.jpg|250px]] | |||
|- | |||
![[File:PMTOK Toads.png|75px]]<br># 17 to 23 | |||
|After hammering the ground near the Goal Pole to reveal a set of stairs, Mario can slide down the top of the pole, sending the green ball on top into the air and releasing a bundle of Toads in a display of fireworks. | |||
|[[File:PMTOK Picnic Road Hidden Toad 17.jpg|250px]] | |||
|- | |||
![[File:PMTOK Toads.png|75px]]<br># 24 to 27 | |||
|A hole can be found on the eastern mountainside near the entrance to [[Overlook Mountain]]; hammering the wall repeatedly will release four Toads. | |||
|[[File:PMTOK Picnic Road Hidden Toad 24.jpg|250px]] | |||
|- | |||
![[File:PMTOK Toad Artwork.png|75px]]<br># 28 | |||
|A tree near the eastern mountainside can be hammered to release a crumpled Toad from its branches. | |||
|[[File:PMTOK Picnic Road Hidden Toad 28.jpg|250px]] | |||
|- | |||
![[File:Musee Origami Toad 6.png|75px]]<br># 29 | |||
|An origami swan Toad can be found floating across the pond. Mario must reveal several [[Hidden Block]]s at the east edge to reach the Toad with his hammer. | |||
|[[File:PMTOK Picnic Road Hidden Toad 29.jpg|250px]] | |||
|- | |||
![[File:Musee Origami Toad 7.png|75px]]<br># 30 | |||
|A blue Toad can be found fluttering about a flower patch outside the Sensor Lab. | |||
|[[File:PMTOK Picnic Road Hidden Toad 30.jpg|250px]] | |||
|- | |||
![[File:Musee Origami Toad 8.png|75px]]<br># 31 | |||
|Further up the hill is a protruding ledge with a large Not-Bottomless Hole. Repairing the ground will allow a red Toad to descend in the form of a butterfly. | |||
|[[File:PMTOK Picnic Road Hidden Toad 31.jpg|250px]] | |||
|- | |||
![[File:Musee Origami Toad 9.png|75px]]<br># 32 | |||
|After attempting to jump onto the Goal Pole, Mario can hammer the flag to reveal a green Toad. | |||
|[[File:PMTOK Picnic Road Hidden Toad 32.jpg|250px]] | |||
|- | |||
![[File:Origami King screenshot-Red Tulip (Origami Toad 10).jpg|40px]]<br>[[File:Musee Origami Toad 10.png|40px]]<br># 33 & 34 | |||
|Near the Goal Pole is a patch of flowers surrounding two holes in the ground, one of which needs a Not-Bottomless Hole repaired. Hammering near the holes will reveal two Toads disguised as a red tulip and a yellow butterfly. | |||
|[[File:PMTOK Picnic Road Hidden Toad 33.jpg|250px]] | |||
|- | |||
![[File:Musee Origami Toad 12.png|75px]]<br># 35 | |||
|Near the eastern mountainside is a rock covering a hole in the ground. Hammering near the hole will cause an origami beetle Toad to emerge. | |||
|[[File:PMTOK Picnic Road Hidden Toad 35.jpg|250px]] | |||
|- | |||
![[File:Musee Origami Toad 13.png|75px]]<br># 36 | |||
|A yellow Toad disguised as an origami prairie dog burrows in a secluded area to the east, accessed from the ledge nearby. The prairie dog will burrow into a different hole when Mario gets close, so he should hammer all but the bottom two holes to corner the critter. | |||
|[[File:PMTOK Picnic Road Hidden Toad 36.jpg|250px]] | |||
|- | |||
![[File:Musee Origami Toad 11.png|75px]]<br># 37 | |||
|Guarding the path to Overlook Tower is an aggravated origami dog, which when hammered is revealed to be Toad Town's [[Battle Lab Toad|Battle Lab owner]]. Following this, Mario can access the [[Battle Lab]] in Toad Town. | |||
|[[File:PMTOK Battle Lab Toad rescued.jpg|250px]] | |||
|- | |||
![[File:Toad accessory red PMTOK sprite.png|75px]]<br># 38 | |||
|The [[Fun, Funky, and Functional]] Toad from Toad Town can be found folded and resting on a table outside the Earth Vellumental Temple. Following this rescue, Mario can purchase accessories in Toad Town. | |||
|[[File:PMTOK Picnic Road Hidden Toad 38.jpg|250px]] | |||
|- | |||
![[File:PMTOK Toad Artwork.png|75px]]<br># 39 | |||
|A crumpled Toad can be found stuck in an alcove below the stairs to the [[Earth Vellumental Temple]] entrance. Mario can hammer the umbrella and use its canopy to reach the Toad. | |||
|[[File:PMTOK Picnic Road Hidden Toad 39.jpg|250px]] | |||
|- | |||
![[File:PMTOK Toad Artwork.png|75px]]<br># 40 | |||
|Behind the [[Save Block]] near the Earth Vellumental Temple entrance, there is an obscured area with a crumpled Toad behind the window. | |||
|[[File:PMTOK Picnic Road Hidden Toad 40.jpg|250px]] | |||
|- | |||
![[File:PMTOK Toad Artwork.png|75px]]<br># 41 | |||
|Just south of the entrance to the Earth Vellumental Temple is a set of stairs. Entering the path below, Mario can reach a crumpled Toad guarded by a Scaredy Rat. | |||
|[[File:PMTOK Picnic Road Hidden Toad 41.jpg|250px]] | |||
|- | |||
![[File:PMTOK Toads.png|75px]]<br># 42 to 51 | |||
|A large group of Toads can be found behind a statue, above the shop stalls near the Earth Vellumental Temple. Mario must hammer a different statue in the mountainside to reveal a Magic Circle, then use the 1,000-Fold Arms to rescue the Toads. | |||
|[[File:PMTOK Picnic Road Hidden Toad 42.jpg|250px]] | |||
|-style="background:beige;"| | |||
![[File:PMTOK Toads.png|75px]]<br># 52 to 55 | |||
|''Required'': ''Rescue Toads in [[Earth Vellumental Temple]]''<br><br>Attempting to purchase popcorn from the green Toad in front of the popcorn machine will allow four crumpled Toads to escape its container. | |||
|[[File:PMTOK Picnic Road Hidden Toad 52.jpg|250px]] | |||
|-style="background:beige;"| | |||
![[File:Musee Origami Toad 14.png|75px]]<br># 56 | |||
|''Required'': ''Rescue Toads in Earth Vellumental Temple''<br><br>There is a shop set up in front of the entrance to the Earth Vellumental Temple, with a peculiar looking mushroom at the end of the stands. Mario should hammer it to reveal a Toad. | |||
|[[File:PMTOK Picnic Road Hidden Toad 56.jpg|250px]] | |||
|-style="background:beige;"| | |||
![[File:PMTOK Toad Artwork.png|75px]]<br># 57 | |||
|''Required'': ''Red streamer destroyed''<br><br>With the red streamer gone, Mario can head to the Sensor Lab and hammer the sign in front, revealing a crumpled Toad. | |||
|[[File:PMTOK Picnic Road Hidden Toad 57.jpg|250px]] | |||
|-style="background:beige;"| | |||
![[File:Musee Origami Toad 15.png|75px]]<br># 58 | |||
|''Required'': ''Red streamer destroyed''<br><br>Since the Sensor Lab in Picnic Road is no longer blocked off by the red streamer, Mario can enter it and whack the yellow origami mushroom resting on the fax machine to reveal the [[Toad Researcher]]. | |||
|[[File:PMTOK Toad Researcher rescued.png|250px]] | |||
|} | |||
===Not-Bottomless Holes=== | |||
{| style="text-align: center; width: 100%; margin: 0 auto; border: #d09091; border-collapse: collapse;" border="1" cellpadding="4" cellspacing="1" | |||
|-style="background: #CB4C57;font-size:14pt;color:white" | |||
!Description | |||
!width="20%"|Image | |||
|-style="background: #d09091;font-size:120%;color:#202122" | |||
!colspan=3|[[Not-Bottomless Hole|{{color|#202122|17 Holes}}]] | |||
|- | |||
|Immediately seen on the left after entering the Picnic Road area. | |||
|[[File:PMTOK Picnic Road Not-Bottomless Hole 1.png|250px]] | |||
|- | |||
|Also immediately seen, this time on the wall next to the path. | |||
|[[File:PMTOK Picnic Road Not-Bottomless Hole 2.png|250px]] | |||
|- | |||
|In front of the white fence | |||
|[[File:PMTOK Picnic Road Not-Bottomless Hole 3.png|250px]] | |||
|- | |||
|Above the previous one, left of of the path. | |||
|[[File:PMTOK Picnic Road Not-Bottomless Hole 4.png|250px]] | |||
|- | |||
|On the path, next to a hole with ? Block above it. | |||
|[[File:PMTOK Picnic Road Not-Bottomless Hole 5.png|250px]] | |||
|- | |||
|Right of the path and under the ? Block. | |||
|[[File:PMTOK Picnic Road Not-Bottomless Hole 6.png|250px]] | |||
|- | |||
|In front of a tree with hedge fence next to it. | |||
|[[File:PMTOK Picnic Road Not-Bottomless Hole 7.png|250px]] | |||
|- | |||
|On the path in front of the Sensor Lab. | |||
|[[File:PMTOK Picnic Road Not-Bottomless Hole 8.png|250px]] | |||
|- | |||
|Right of the previous one. | |||
|[[File:PMTOK Picnic Road Not-Bottomless Hole 9.png|250px]] | |||
|- | |||
|Under the Red Toad butterfly, seen right of the Sensor Lab. | |||
|[[File:PMTOK Picnic Road Not-Bottomless Hole 10.png|250px]] | |||
|- | |||
|South of the goal pole. | |||
|[[File:PMTOK Picnic Road Not-Bottomless Hole 11.png|250px]] | |||
|- | |||
|South of the highest ? Block in the area. | |||
|[[File:PMTOK Picnic Road Not-Bottomless Hole 12.png|250px]] | |||
|- | |||
|Under the previous one, next to a tree. | |||
|[[File:PMTOK Picnic Road Not-Bottomless Hole 13.png|250px]] | |||
|- | |||
|On the wall, right of the small lake. | |||
|[[File:PMTOK Picnic Road Not-Bottomless Hole 14.png|250px]] | |||
|- | |||
|Also on the wall, above the stairs leading to Earth Vellumental Temple entrance. | |||
|[[File:PMTOK Picnic Road Not-Bottomless Hole 15.png|250px]] | |||
|- | |||
|In the corner after going down the first set of stairs leading to Earth Vellumental Temple entrance. | |||
|[[File:PMTOK Picnic Road Not-Bottomless Hole 16.png|250px]] | |||
|- | |||
|On the stairs seen in front of the Earth Vellumental Temple entrance. | |||
|[[File:PMTOK Picnic Road Not-Bottomless Hole 17.png|250px]] | |||
|} | |||
===Collectible Treasures=== | |||
{| style="text-align: center; width: 100%; margin: 0 auto; border: #d09091; border-collapse: collapse;" border="1" cellpadding="4" cellspacing="1" | |||
|-style="background: #CB4C57;font-size:14pt;color:white" | |||
!width=10%|Treasure | |||
!Description | |||
!width=20%|Image | |||
|-style="background: #d09091;font-size:120%;color:#202122" | |||
!colspan=4|[[List of Collectible Treasures in Paper Mario: The Origami King|{{color|#202122|3 treasures}}]] | |||
|- | |||
|-style="background:beige" | |||
!style="background-color:#372500;"|[[File:PMTOK Collectible Treasure 22 (Shellvation Is Near).jpg|80px|link=Earth Vellumental Temple]]<br><br>[[Earth Vellumental Temple|{{color|white|Shellvation Is Near}}]] | |||
|''Required'': ''[[Earth Vellumental]] defeated''<br><br>Bought in the shop right of the Earth Vellumental entrance for 2400 Coins. | |||
|[[File:PMTOK Picnic Road Collectible Treasure 1.png|250px]] | |||
|- | |||
|-style="background:beige" | |||
!style="background-color:#372500;"|[[File:PMTOK Collectible Treasure 23 (Vellumental Idol).jpg|80px|link=Earth Vellumental]]<br><br>[[Earth Vellumental|{{color|white|Vellumental Idol}}]] | |||
|''Required'': ''Purchase '''Shellvation Is Near'''''<br><br>Bought in the shop right of the Earth Vellumental entrance for 3800 Coins. | |||
|[[File:PMTOK Picnic Road Collectible Treasure 2.png|250px]] | |||
|- | |||
|-style="background:beige" | |||
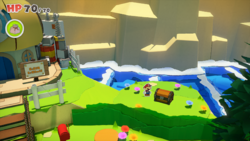
!style="background-color:#372500;"|[[File:PMTOK Collectible Treasure 24 (Sensor Lab).jpg|80px|link=Sensor Lab]]<br><br>[[Sensor Lab|{{color|white|Sensor Lab}}]] | |||
|''Required'': ''Red streamer destroyed''<br><br>Found in the chest right of the Sensor Lab. | |||
|[[File:PMTOK Picnic Road Collectible Treasure 3.png|250px]] | |||
|} | |||
===? Blocks=== | |||
{| style="text-align: center; width: 100%; margin: 0 auto; border: #d09091; border-collapse: collapse;" border="1" cellpadding="4" cellspacing="1" | |||
|-style="background: #CB4C57;font-size:14pt;color:white" | |||
!width=10%|Hidden | |||
!width=10%|Item | |||
!Description | |||
!width=20%|Image | |||
|-style="background: #d09091;font-size:120%;color:#202122" | |||
!colspan=4|[[List of ? Blocks in Paper Mario: The Origami King|{{color|#202122|7 blocks}}]] | |||
|- | |||
| | |||
|[[File:PMTOK 100-Coin leaf icon.png|48px]]<br>[[100-Coin]] | |||
|Along the path up the hillside is a large Non-Bottomless Hole with a ? Block floating above. | |||
|[[File:PMTOK Picnic Road Question Block 1.png|250px]] | |||
|- | |||
| | |||
|[[File:Fire Flower PMTOK icon.png|48px]]<br>[[Fire Flower]] | |||
|Beside the main path is a fenced area with a hidden tunnel through the mountainside behind a tree. At the end of this tunnel is a ledge with a ? Block. | |||
|[[File:PMTOK Picnic Road Question Block 2.png|250px]] | |||
|- | |||
|[[File:Hidden Block Alert PMTOK icon.png|48px]] | |||
|[[File:PMOK Coins.png|64px]]<br>[[File:PMTOK_100-Coin_leaf_icon.png|48px]]<br>'''102''' [[Coin]]s | |||
|At the edge of the pond is an empty block, indicating a line of three Hidden Blocks further towards the center of the pond. The last block contains a [[100-Coin]]. | |||
|[[File:PMTOK Picnic Road Hidden Toad 29.jpg|250px]] | |||
|- | |||
|[[File:Hidden Block Alert PMTOK icon.png|48px]] | |||
|[[File:Fire Flower PMTOK icon.png|48px]]<br>[[Fire Flower]] | |||
|Close to the trail at the top of Picnic Road, there is an arrow made of coins pointing towards a breakable bush. Jumping on this spot reveals a Hidden Block. | |||
|[[File:PMTOK Picnic Road Question Block 6.png|250px]] | |||
|- | |||
| | |||
|[[File:PMTOK 100-Coin leaf icon.png|48px]]<br>[[100-Coin]] | |||
|A ? Block floats beside the cliff face at the top of Picnic Road, where the path trails off towards [[Overlook Mountain]]. | |||
|[[File:PMTOK Picnic Road Question Block 7.png|250px]] | |||
|} | |||
{{br}} | |||
==Media== | |||
{{media table | |||
|file1=PMTOK Picnic Road.oga | |||
|title1=Picnic Road | |||
|description1=Plays at Picnic Road. | |||
|file2=PMTOK Picnic Road.oga | |||
|title2=Picnic Road Shop | |||
|description2=Plays near the shops in front of the Earth Vellumental Temple at Picnic Road. | |||
}} | |||
==Gallery== | ==Gallery== | ||
| Line 73: | Line 341: | ||
{{Foreign names | {{Foreign names | ||
|Jap=ピクニックロード | |Jap=ピクニックロード | ||
|JapR= | |JapR=Pikunikku Rōdo | ||
|JapM=Picnic Road | |JapM=Picnic Road | ||
|Spa=Camino de la Primavera | |Spa=Camino de la Primavera | ||
|SpaM=Spring Road | |SpaM=Spring Road | ||
| | |Fre=Prairie Picotin | ||
| | |FreM=Peck meadow ("peck" as in a portion of food) | ||
|Ger=Picknickpfad | |Ger=Picknickpfad | ||
|GerM=Picnic Path | |GerM=Picnic Path | ||
| Line 88: | Line 356: | ||
|ChiR=Jiāoyóu zhī Lù | |ChiR=Jiāoyóu zhī Lù | ||
|ChiM=Picnic Road | |ChiM=Picnic Road | ||
|Kor=피크닉 로드 | |||
|KorR=Pikeunik Rodeu | |||
|KorM=Picnic Road | |||
}} | }} | ||
Revision as of 23:35, June 30, 2024
| Picnic Road | |
|---|---|
| |
| Toads | 58 |
| Not-Bottomless Holes | 17 |
| Collectible Treasures | 3 |
| ? Blocks | 7 |
| Enemies | Goombas Shy Guys Scaredy Rats |
- “Wow, this place is really beautiful! Nothing like bright, blooming flowers and abundant sunshine... In fact, it's so nice, I think we should stop and have a picnic.”
- —Olivia, Paper Mario: The Origami King
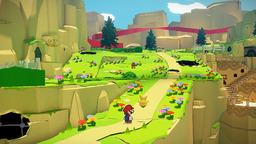
Picnic Road is a location in Paper Mario: The Origami King, a mountain road connected to the Earth Vellumental Temple. It is located in the red streamer district. Several Toads can be found here, as well as near the temple. Notably, both the Earth Vellumental Temple and the Sensor Lab Headquarters can be found in this area. Picnic Road is located directly east of Peach's Castle and Toad Town, and south of Overlook Mountain.
In his flashback, Bob-omb reveals he traveled to Picnic Road first after washing up in Toad Town.
Layout
Right at the start, there is a Not-Bottomless Hole just to the right with a pile of leaves on the other side trapping a Green Toad. Coming up north, there are a few holes in the walls and caves, as well as in the ground near the flowers and plants. There are a few enemies in the area, such as Goombas, as well as a Not-Bottomless Hole below a ? Block containing a 100-Coin. Notably, some of the nearby flowers have butterflies which can be hammered to be revealed as Toads. In fact, some of the tulips are really folded Toads. To the left is a small, fenced area with a few folded Toads and a Shy Guy as a Folded Soldier. There are a few small holes in the cave or ground Mario can hit to reveal a scroll, which is actually a Toad.
In the middle of Picnic Road is a sign next to a Koopa Troopa, who asks him if he has come seeking "shellvation", referring to the Earth Vellumental. Suddenly, another Koopa Troopa appears and tells him there is a situation at the temple. Notably, the sign here directs to the Earth Vellumental Temple, asking for worship and donations. Mario can also hammer the back of the sign to reveal a Toad in clever hiding position. Behind the sign is a small pond with an origami swan floating in the center. Mario can hammer around the right side of the pond to reveal a set of Hidden Blocks allowing him to hammer the swan, revealing it as a Toad. From here, Mario can head southeast to the temple area, where it is revealed a Folded Soldier Shy Guy is stealing the Shell Stones. Mario must hit the Shy Guy and defeat him to prevent him from stealing the last Shell Stone, then go out to find the four other stones.
From this point, Mario can head north and follow the trail leading out of Picnic Road and into Overlook Mountain. Just outside the entrance is a Toad disguised as an origami dog (who is later revealed to be the Battle Lab Toad). There is an area nearby that appears to be a golf course. Mario can grab onto the Goal Pole and slightly lower it to reveal a set of stairs, allowing him to reach the top of the flag pole (akin to Super Mario Bros.), revealing both the ball at the top and the flag as disguised Toads. At the west end of Picnic Road is a building that serves as headquarters to Sensor Lab; however, it is initially inaccessible due to a red streamer wrapped around the building. After the streamer is cleared, Mario can then enter the Sensor Lab, where he rescues the Toad Researcher; as thanks, the Toad Researcher provides Mario with his first gadget he developed, the Toad Radar, which allows Mario to track down Toads, especially useful in areas with tall grass. Additional gadgets, such as the Lamination Suit and the Hidden Block Unhider, are also developed at the Sensor Lab and become available at later points in the game.
Shop
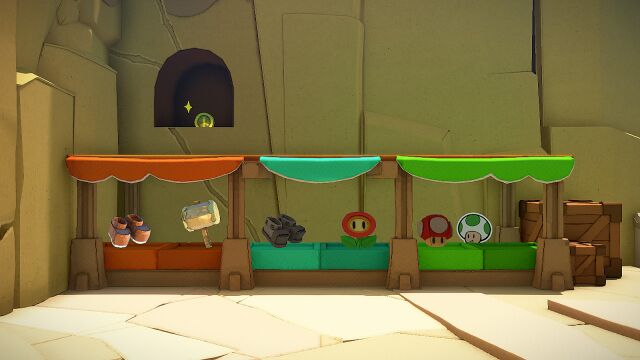
Mario can buy various items and Collectible Treasures from a stand outside the Earth Vellumental Temple.
| Image | Item | Price |
|---|---|---|
| Shiny Boots | 500 | |
| Shiny Hammer | 720 | |
| Iron Boots | 300 | |
| Fire Flower2 | 240 | |
| Shellvation is Near | 2400 | |
| Vellumental Idol1 | 3800 | |
| Mushroom | 100 |
1 - Available after buying Shellvation is Near
2 - Available after buying Vellumental Idol
Collectibles
NOTE: Some collectibles are found in areas that are inaccessible until returning later; these entries are highlighted in beige.
Hidden Toads
| Form | Description | Image |
|---|---|---|
| 58 Hidden Toads | ||
 # 1 |
Near the entrance to Picnic Road is a green Toad, stuck in a bush beyond a large Not-Bottomless Hole. | 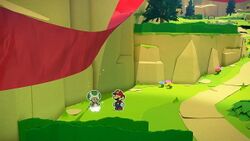
|
 # 2 |
Near the set of fences to the west is a Not-Bottomless Hole, which reveals an even smaller hole when repaired. Hammering near it will release a rolled up Toad. | 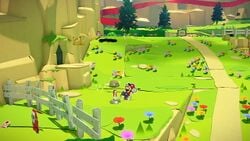
|
 # 3 to 6 |
In a fenced off area to the west is a group of folded Toads guarded by two Shy Guys. | 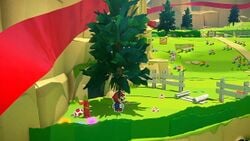
|
 # 7 |
Another rolled up Toad can be found after hammering the western mountainside near a high-up hole. | 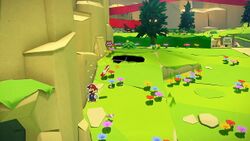
|
 # 8 |
A purple origami butterfly Toad flutters around a set of flowers near the western mountainside. | 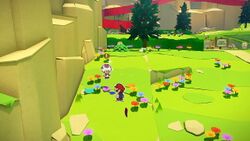
|
 # 9 |
Further up the hill is a yellow Toad disguised as a tulip in a bed of flowers. | 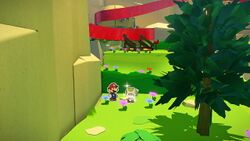
|
 # 10 |
A crumpled Toad is hidden behind the sign near the pond. Hammering the sign will cause the Toad to hop to a more accessible spot. | 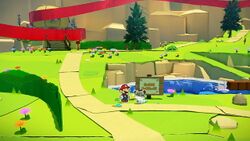
|
 # 11 |
Another crumpled Toad can be found at the western edge of the hill, behind some bushes. | 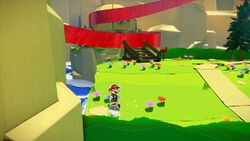
|
 # 12 to 14 |
Whacking the Sensor Lab mailbox will release a set of Toads folded into the shape of envelopes. | 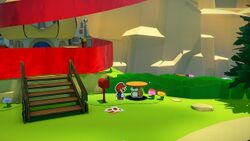
|
 # 15 |
Just beside the Sensor Lab is a tree, which releases a crumpled Toad when hammered. | 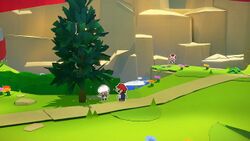
|
 # 16 |
A yellow Toad is buried in the sand near the Goal Pole. | 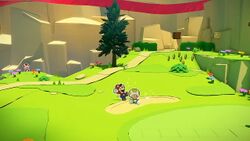
|
 # 17 to 23 |
After hammering the ground near the Goal Pole to reveal a set of stairs, Mario can slide down the top of the pole, sending the green ball on top into the air and releasing a bundle of Toads in a display of fireworks. | 
|
 # 24 to 27 |
A hole can be found on the eastern mountainside near the entrance to Overlook Mountain; hammering the wall repeatedly will release four Toads. | 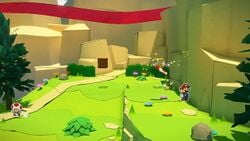
|
 # 28 |
A tree near the eastern mountainside can be hammered to release a crumpled Toad from its branches. | 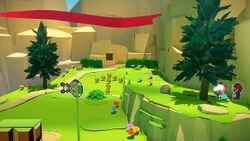
|
 # 29 |
An origami swan Toad can be found floating across the pond. Mario must reveal several Hidden Blocks at the east edge to reach the Toad with his hammer. | 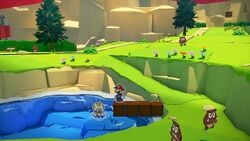
|
 # 30 |
A blue Toad can be found fluttering about a flower patch outside the Sensor Lab. | 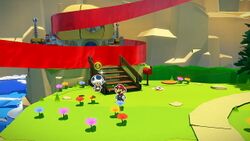
|
 # 31 |
Further up the hill is a protruding ledge with a large Not-Bottomless Hole. Repairing the ground will allow a red Toad to descend in the form of a butterfly. | 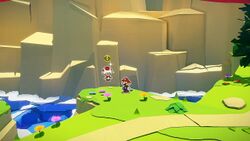
|
 # 32 |
After attempting to jump onto the Goal Pole, Mario can hammer the flag to reveal a green Toad. | 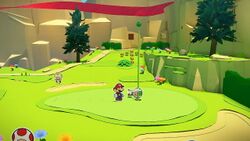
|
# 33 & 34 |
Near the Goal Pole is a patch of flowers surrounding two holes in the ground, one of which needs a Not-Bottomless Hole repaired. Hammering near the holes will reveal two Toads disguised as a red tulip and a yellow butterfly. | 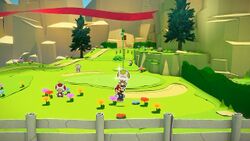
|
 # 35 |
Near the eastern mountainside is a rock covering a hole in the ground. Hammering near the hole will cause an origami beetle Toad to emerge. | 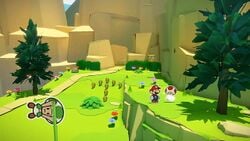
|
 # 36 |
A yellow Toad disguised as an origami prairie dog burrows in a secluded area to the east, accessed from the ledge nearby. The prairie dog will burrow into a different hole when Mario gets close, so he should hammer all but the bottom two holes to corner the critter. | 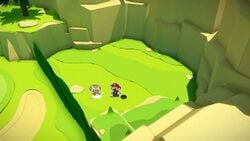
|
 # 37 |
Guarding the path to Overlook Tower is an aggravated origami dog, which when hammered is revealed to be Toad Town's Battle Lab owner. Following this, Mario can access the Battle Lab in Toad Town. | 
|
# 38 |
The Fun, Funky, and Functional Toad from Toad Town can be found folded and resting on a table outside the Earth Vellumental Temple. Following this rescue, Mario can purchase accessories in Toad Town. | 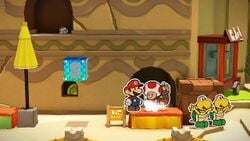
|
 # 39 |
A crumpled Toad can be found stuck in an alcove below the stairs to the Earth Vellumental Temple entrance. Mario can hammer the umbrella and use its canopy to reach the Toad. | 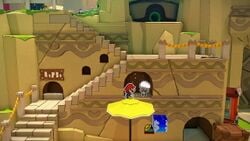
|
 # 40 |
Behind the Save Block near the Earth Vellumental Temple entrance, there is an obscured area with a crumpled Toad behind the window. | 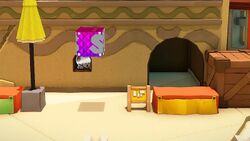
|
 # 41 |
Just south of the entrance to the Earth Vellumental Temple is a set of stairs. Entering the path below, Mario can reach a crumpled Toad guarded by a Scaredy Rat. | 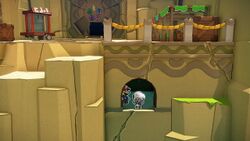
|
 # 42 to 51 |
A large group of Toads can be found behind a statue, above the shop stalls near the Earth Vellumental Temple. Mario must hammer a different statue in the mountainside to reveal a Magic Circle, then use the 1,000-Fold Arms to rescue the Toads. | 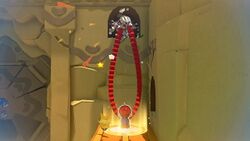
|
 # 52 to 55 |
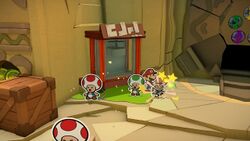
Required: Rescue Toads in Earth Vellumental Temple Attempting to purchase popcorn from the green Toad in front of the popcorn machine will allow four crumpled Toads to escape its container. |
|
 # 56 |
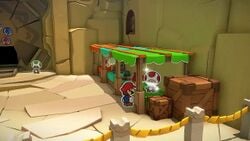
Required: Rescue Toads in Earth Vellumental Temple There is a shop set up in front of the entrance to the Earth Vellumental Temple, with a peculiar looking mushroom at the end of the stands. Mario should hammer it to reveal a Toad. |
|
 # 57 |
Required: Red streamer destroyed With the red streamer gone, Mario can head to the Sensor Lab and hammer the sign in front, revealing a crumpled Toad. |

|
 # 58 |
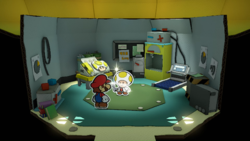
Required: Red streamer destroyed Since the Sensor Lab in Picnic Road is no longer blocked off by the red streamer, Mario can enter it and whack the yellow origami mushroom resting on the fax machine to reveal the Toad Researcher. |
|
Not-Bottomless Holes
| Description | Image | |
|---|---|---|
| 17 Holes | ||
| Immediately seen on the left after entering the Picnic Road area. | 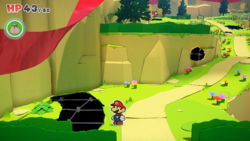
| |
| Also immediately seen, this time on the wall next to the path. | 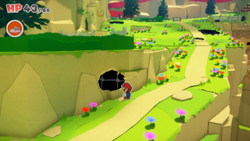
| |
| In front of the white fence | 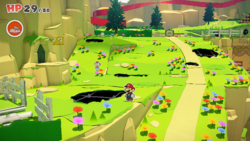
| |
| Above the previous one, left of of the path. | 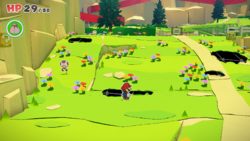
| |
| On the path, next to a hole with ? Block above it. | 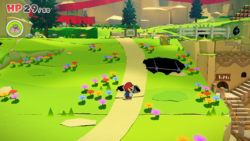
| |
| Right of the path and under the ? Block. | 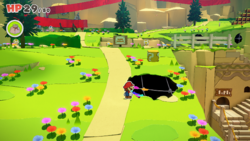
| |
| In front of a tree with hedge fence next to it. | 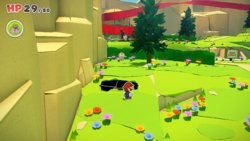
| |
| On the path in front of the Sensor Lab. | 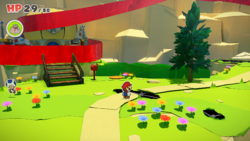
| |
| Right of the previous one. | 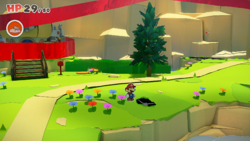
| |
| Under the Red Toad butterfly, seen right of the Sensor Lab. | 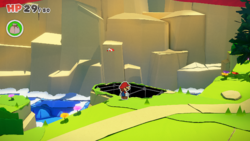
| |
| South of the goal pole. | 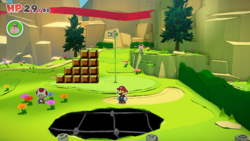
| |
| South of the highest ? Block in the area. | 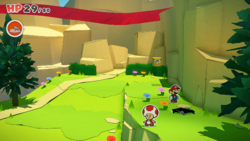
| |
| Under the previous one, next to a tree. | 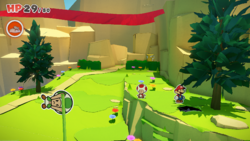
| |
| On the wall, right of the small lake. | 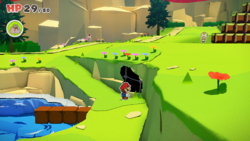
| |
| Also on the wall, above the stairs leading to Earth Vellumental Temple entrance. | 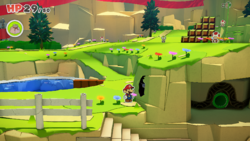
| |
| In the corner after going down the first set of stairs leading to Earth Vellumental Temple entrance. | 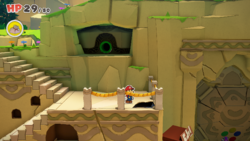
| |
| On the stairs seen in front of the Earth Vellumental Temple entrance. | 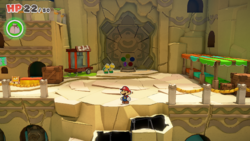
| |
Collectible Treasures
| Treasure | Description | Image | |
|---|---|---|---|
| 3 treasures | |||
 Shellvation Is Near |
Required: Earth Vellumental defeated Bought in the shop right of the Earth Vellumental entrance for 2400 Coins. |
| |
 Vellumental Idol |
Required: Purchase Shellvation Is Near Bought in the shop right of the Earth Vellumental entrance for 3800 Coins. |
| |
 Sensor Lab |
Required: Red streamer destroyed Found in the chest right of the Sensor Lab. |
| |
? Blocks
| Hidden | Item | Description | Image |
|---|---|---|---|
| 7 blocks | |||
100-Coin |
Along the path up the hillside is a large Non-Bottomless Hole with a ? Block floating above. | 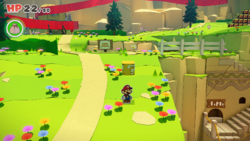
| |
Fire Flower |
Beside the main path is a fenced area with a hidden tunnel through the mountainside behind a tree. At the end of this tunnel is a ledge with a ? Block. | 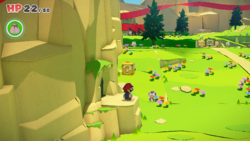
| |
102 Coins |
At the edge of the pond is an empty block, indicating a line of three Hidden Blocks further towards the center of the pond. The last block contains a 100-Coin. | 
| |
Fire Flower |
Close to the trail at the top of Picnic Road, there is an arrow made of coins pointing towards a breakable bush. Jumping on this spot reveals a Hidden Block. | 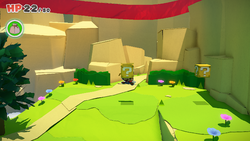
| |
100-Coin |
A ? Block floats beside the cliff face at the top of Picnic Road, where the path trails off towards Overlook Mountain. | 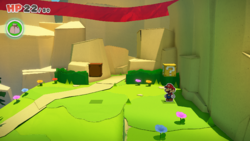
| |
Media
| File info |
| File info |
Gallery
Several Not-Bottomless Holes in Picnic Road
A ? Block over a Not-Bottomless Hole in Picnic Road
Mario gets a fortune from the fortune Toad.
Names in other languages
| Language | Name | Meaning | Notes |
|---|---|---|---|
| Chinese | 郊游之路 (Simplified) 郊遊之路 (Traditional)[?] Jiāoyóu zhī Lù |
Picnic Road | |
| Dutch | Picknickpad[?] | Picnic Path | |
| French | Prairie Picotin[?] | Peck meadow ("peck" as in a portion of food) | |
| German | Picknickpfad[?] | Picnic Path | |
| Italian | Viale Pranzalsacco[?] | Packed lunch Avenue/Road | |
| Korean | 피크닉 로드[?] Pikeunik Rodeu |
Picnic Road | |
| Spanish | Camino de la Primavera[?] | Spring Road |
