The 'Shroom:Issue 172/Strategy Wing
Director Notes
Written by: Hooded Pitohui (talk)
Hello, all of you readers of The 'Shroom! We may be past our big July special issue, but we continue to have plenty to offer to you here at Strategy Wing. What's here this month? We have the sections you've come to expect (though Mach Speed Mayhem is absent), but we also have a grand finale here this month. After three years, Shoey's (Chester Alan Arthur (talk)) section So You Want to Conquer Japan? reaches its end! Make sure you give it a read to see how the end of this conquest unfolds.
But as we say goodbye to one section, we say hello to a returning section. Koops, Your Emblem is on Fire, returns this month, bringing us back to the adventures of Eliwood, Lyn, Hector, and others!
As always, if you have any topic you'd like to write in detail about, take a look at our Sign-up page! We'd be happy to have you join us as a member of the Strategy Wing Team! Whether you want to follow the recent section Parallax's example and provide a guide on a topic you know well or you would like to make your own version of Mach Speed Mayhem or SIMulation to teach us everything about some obscure interest you have, we can find a place for you.
That's everything I have to say this month, so go on and read (and watch) the sections our writers have prepared for you this month!
Section of the Month
Chaotic racing and feudal Japan, whatever could unite the two? Well, our Section of the Month results, as it turns out! Congratulations go out to Shoey (talk) and Yoshi876 (talk) for their joint first place, earned by edging Japan towards total unity and looking at Mute City's staff kart, respectively. Thanks to all of our writers and the readers who support them with votes!
| STRATEGY WING SECTION OF THE MONTH | ||||
|---|---|---|---|---|
| Place | Section | Votes | % | Writer |
| 1st | Racing Like the Staff | 5 | 33.33% | Yoshi876 |
| 1st | So You Want to Conquer Japan? | 5 | 33.33% | Chester Alan Arthur |
| 2nd | Mach Speed Mayhem | 3 | 20.00% | Superchao |
Racing Like the Staff
Hello readers and welcome to Racing like the Staff, a section where I do 150cc on different Mario Kart games, but the twist is, I take on the Grand Prix by using the combination that a staff and expert staff member used in that Cup. If you're still a little confused, by this I mean if the track is in the Mushroom Cup, then that's the Cup that I race in. Unfortunately, I don't have copies of the Mario Kart games before Mario Kart 7, so it's only that, 8 and Deluxe that will be getting this treatment.
As summer is fully upon us, despite several days of heavy rain, one can associate bone-dry weather with the season, as temperatures soar and we all rush to drink ice-cold glasses of water or relax under the shade of nearby trees. And so you may have guessed that this month we're going to be racing through the sands of Bone-Dry Dunes, even though it is one of the worst Mario Kart 8 and Deluxe tracks, but hey, it needs to be covered at some point.
The combination for the staff for Bone-Dry Dunes is Morton with the Tri-Speeder, Monster tyres and the Super Glider, and the stats are as follows:
- Speed – Five bars
- Acceleration – Just under two bars
- Weight – Five and a half bars
- Handling – Just over one bar
- Grip – Three and a half bars
Cloudtop Cruise
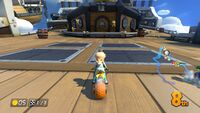
Considering the low handling here, I thought I'd have a lot to write about with how often I managed to drive this into walls or off track, but I actually got through everything find. I even barged Lakitu as I gained on everyone at the start. Cat Peach proved a little bit of difficulty with a Triple Banana that she activated right next to me, taking me out, but some Green Shells took her and Roy out, and a well placed Red Shell removed Inkling Girl for me just as we were about to hit the glide pad, and it was smooth sailing through the clouds following that.
Bone Dry Dunes
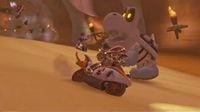
The start was fine, other than Roy getting past, but a Mushroom soon put me back into the lead, but it all fell apart on the second lap. A Blooper ink knocked me a bit off, and then a Red Shell when I was gliding put me right behind Roy, my Red Shell ended up missing the Koopaling and then Bob-ombs and Boomerangs rang all around me dropping me down to fifth. A last minute Mushroom was my only saving grace to cut the final corner, but Cat Peach had been blessed with the same thing and so she crossed the line ahead of me.
Bowser's Castle
Once again, Roy was quick off the mark and right past me, but pure speed from this Kart got me back into the lead. However, after the gliding section, an out-of-nowhere Green Shell took me out, and then Cat Peach hit me with a Bob-omb (which she apparently is invulnerable to). Inkling Girl and Daisy then got a slipstream on me, but once again pure speed soon found me past the competition before the Bowser statue. Things once again went pair shaped on the final lap as I managed driving into the lava, and a Lightning Bolt meant I missed the speed boost just before the gliding pad. I'd resigned myself to second, but Roy hit a Banana close to the end, and I managed to jet past and steal the victory.
Rainbow Road
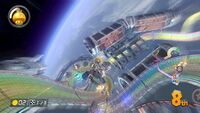
I wasn't expecting miracles, always wasn't expecting the game to literally cheat, but hey ho. Things sort of started well, although Roy completed his trifecta of getting past, and when I sailed past him, a Red Shell knocked me off the glide pad, brought me back to the start and I was down in fifth (note: when this exact thing happened to Roy on final lap, he was able to teleport to the end of the glide section), but the speed of this Kart soon found me back into first. A lot of positions shifted around throughout these laps, with a Star helping me get back up the order when I fell down again, by the third lap I was jostling for the lead with Cat Peach. Now last time, I snottily wrote that she was immune to the powers of the Bob-omb, but it turns out she actually is, as my Green Shell scored a direct hit on it behind her, and suffered no consequences (whenever I'm hit with a Shell while carrying a Bob-omb, I'm always blown up as well), but the explosion caught me and allowed Inkling Girl thorough leaving me in third.
High speed and low handling isn't really how I enjoy Mario Kart, but I was pleasantly surprised at how able I was with controlling this thing. But Cat Peach's Bob-omb invulnerability has left me with a sour taste in the mouth when it came to this run-through…
The combination for the staff for Bone-Dry Dunes is Dry Bones with the Pipe Frame, Wooden tyres and the Plane Glider, and the stats are as follows:
- Speed – Just over two bars
- Acceleration – Just over five bars
- Weight – Just over two bars
- Handling – Just over five bars
- Grip – Three bars
Cloudtop Cruise
Right out of the gate, I shot away and was up to second by the first set of Item Boxes, and navigated my way past Dry Bowser by the second set, without the use of any Items. From there on in, it was a walk in the clouds, even falling off the final glide pad twice – once from skating over the lightning and the over from a Spiny Shell, didn't bring second place anywhere close to me.
Bone-Dry Dunes
In a rarity for this section, I actually managed to hold my lead as I got out of the starting blocks, and then kept it all the way through, even when I briefly went off-road. Racers were a bit closer this time around, and I was nearly hit by a stray fireball from them.
Bowser's Castle
To prove how last time was a one-off, Dry Bowser got me on the start, but I was past him before the anti-gravity section, and then sailed off into the lava-filled sunset with another dominating performance.
Rainbow Road
While last time was an unmitigated disaster, this time the only hinderance was Shy Guy momentarily taking the lead on the first lap before a Red Shell found its tailpipe. Then I sailed through the cosmos to another win.
Combinations like this might not create the most engaging section to read, given the easy nature of winning, but it does mean that I can highly recommend you to use these combos, as they are incredible in every sense. I knew trusty Dry Bones wouldn't let me down!
SIMulation
Written by: Baby Luigi (talk)
Someone is at my doorstep knocking on my door again? Why would you want to visit my lot? There's a giant man-eating Cowplant at the front door and there are gravestones of random Sims all over the front lot. Oh well, make yourself home then...HEY what are you doing on my computer!?
Oh, hello guys. Welcome back to SIMulation. What a nasty summer this year, we already had waves of heat where I live . In The Sims 4, if you have Seasons installed, you too can enjoy a nice, hot summer, provided you don't set yourself on fire trying to light a grill while you're making hot dogs. Just remember to not set yourself on fire lighting fireworks in an enclosed, doorless house on the 4th of July and you should be safe. Last month, I've discussed in great detail what Create-a-Sim can do in The Sims 4 and how it's a vast improvement over the previous titles, being as customizable as it never has been before, and how further patches and updates have increased gender options for the LGBT+ players. I did not cover every single thing that Create-a-Sim has to offer, however, because outside of your physical appearance, now you need to set a very defined personality for your Sim to differentiate himself from the world you'll be living in!
However, in The Sims 4, personality has taken a bit of a downgrade compared to The Sims 3, all in terms of how many traits there are available, to how they impact your Sim in-game, and how many slots you have. The Sims 3 had slots for 5 personality traits, and you had 99 traits to choose from if you have everything installed. In The Sims 4, however there are only 54 personality traits if you have all expansions installed and only 3 slots total. In addition, I feel like personality doesn't make as big of an impact on how they'll react to things: I don't really see my Bookworm Sims going after books for a priority of meeting their fun needs while Mean Sims are only occasionally mean in autonomous conversations and can be just as friendly as any others. Updates DID make changes to how some of these traits work, especially Patch 109 in March 2021 that introduces improvements to several traits, such as being "Cheered to Death" by Cheerful Sims while Hot-headed Sims have a higher chance of being Angry when they get pranked by others. Here's hoping we get some more updates to the system so that Sims feel a bit more unique than a bit of the same.
List of personality traits
This is a complete list of all personality traits as of this writing in July 2021. Updates and patches do bring more personality traits, but this was written before the expansion pack, Cottage Living, was released, so it will not include Animal Enthusiast and any traits that may be introduced further down the line. Cottage Living will be released on July 22, 2021. The fun thing about personality traits is that you can either go for a nice little good angel or you can go with someone totally deviant and mean, but has a lot of perks associated with being mean too! You can also challenge yourself too by attempting to be friends with people while being innately mean or trying to start up romantic relationships even when you're Unflirty, that's how flexible the game can get!
Also, keep in mind that this list covers only the personality traits you get from selecting them in the Create-a-Sim menu. I did not include Reward or Childhood traits, those you get by gameplay, nor did I include bonus traits you get from selecting a particular aspiration, which I will cover in the next issue. In addition, toddlers and pets have their own personality traits, which I will not cover here but in a later issue. Children and teens do have access to all traits, but children can have only one personality trait while teens can have two. Some personality traits will also conflict with each other (you cannot select a Gloomy and a Cheerful trait at the same time), what traits that conflict with each other will be listed here.
Oh by the way, there are plenty of mods out there at add more personalities to the game. Like, too many to count! While they won't exhibit the same amount of polish as base games one have (always been cribbed off existing assets as is the nature of mods and maybe giving some moodlet here and there), they are something you can take into account if you find a trait that isn't there.
That about covers it for this month. Next month, I'll talk about one more Create-a-Sim feature, which is your Sim's aspirations, aka what they aspire to achieve in their lifetime. There is a bunch to sort through so keep an eye for that!
So You Want to Conquer Japan?
Written by: Chester Alan Arthur (talk)
Welcome back, 'Shroom readers, to the final edition of So you Want to Conquer Japan?. Last month, we managed to slay Oda Nobunaga and tore apart the Tokugawa empire. This month, with only five fiefs left outside of our control, we will finally finish the job and conquer all of Japan.
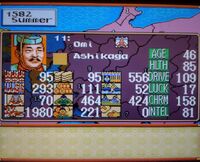
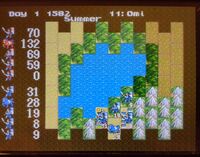
So we're going to start by targeting the independent fief Omi (11), ruled by that scoundrel Ashikaga. Scouts have reported that his army consists of only 95,000 men. In Echizen (5), we have a reserve force of 97,000 men, and we're going to divert 50,000 of those men into Mino (9). We're also gong to be sending 100,000 men from Owari (17) into Echizen, bringing the total amount of soldiers to 363,000. Because I want to invade immediately from fief Hida, we're going to send five-hundred gold coins and one thousand barrels of rice into Mino to supply the invasion. To make sure everything goes well, we'll be sending 330,000 men into Omi and invading from the right side.
The battle turned quickly into a rout because of our superior numbers, even with their superior training. We had a little bit of luck, because their infantry decided to attack our cavalry head-on, allowing us to move our cavalry and rifle units through the field with little resistance. After a quick and easy siege, Ashikaga's men are slain, his castle is taken, and Omi is ours.
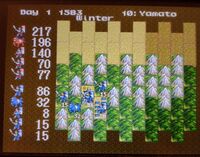
With only three fiefs left outside of our control, I've started moving all the troops we have in our fiefs westward so that they can contribute to the front. Now, you do want to leave a small amount of soldiers in each fief, just in case there is a military rebellion. I am also moving Kenshin to the front so that he can participate in the last few battles. By the end of our troop movements, our two fiefs on the front, Omi and Iseshima, have 581,000 men and 753,000 men, respectively. We're going to start by moving into Yamato (fief 10), ruled by Lord Chokei, with an army of 156,000 men.
We're going to invading from Iseshima with the full force of 700,000 men, leaving 53,000 as a reserve force just in case Chokei tries to invade us from Iga (12). We're going to be doing a two pronged attack for this battle, sending our cavalry from the south and our rifle unit from the north to surround the enemy general. Not only does our pincer attack work perfectly, but we're able to completely avoid the enemy's cavalry as we surround and take the castle, conquering Yamato and cutting Chokei's territories off from each other. We could have immediately taken over fief 15 and thus destroyed Chokei once and for all, but it is winter and the men were just at war, so, as their generous lord, I've decided to give those men the winter off.
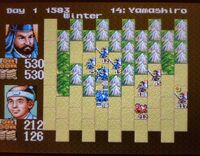
Unfortunately our gesture of goodwill towards our men proved to be a foolish decision, because Chokei's men from Iga decided to invade Iseshima. Our reserve force would fight hard, but, unfortunately, Chokei's men were just too numerous and, in the end, they would take Iseshima. But while that's happening, we're going to be launching our own invasion into the independent fief of Yamashrio (apparently, I forgot to photograph the scout report), ruled by Lord Tsutsui with an army of 126,000 men left to defend their territory.
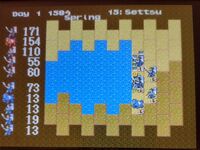
We'll be invading from Omi with a force of 530,000 men, leaving 54,000 men as a reserve force. Yamashrio is a bottleneck fief, and we managed to plug our rifle unit directly into the Daimyo. It looks like we'll have a crushing victory, but, unfortunately, Tsutsui manages to slip off the castle and into the field, preventing us from totally destroying him without completely crushing his army, and forcing us to instead slay all his troops before slaying him, thus giving ourself control of the last independent fief.
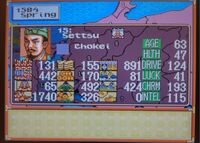
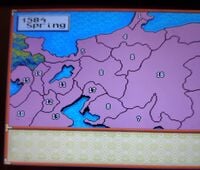
With that, only Chokei and his territory remains outside of our control, but not for very long. Because even though Chokei managed to conquer Iseshima and in theory controls three fiefs, because we took Yamoto from him, we've managed to isolate him in Settsu (15), making it impossible for him to flee from our armies. We also had a stroke of luck because a plague outbreak hit Settsu on the turn we're going to invade it, decimating his defenses. Now you might say it's dangerous for us to invade a fief that was so recently struck with the plague, and you're right, which is why Kenshin isn;t going to be doing the fighting himself and will instead be sending in the army from Yamato to take the lands.
Going up against an army of 131,000 men, we're going to be invading with 550,000 men The battle was over before it began; his forces were no match for our forces and Chokei ended up cut down by our infantry, ending the battle (we managed to take 3,000 of his men prisoner sparing their lives but leaving them without honor).
With Chokei dead, all of his territories surrender to us and come under our control.
The warring states period is over, and the long years of bloodshed are finally over. No longer will this country be plagued by violence and power struggles. No longer will there be villages put to the torch just to conquer a small hill. Japan is unified and under my sole control, and, with that, a new period of peace and prosperity. This, I swear to my people., for I am Lord Shoe, sole Emperor of Japan. It's been a long road, twenty-four in-game years and over three years in real life, but Japan is finally ours. With that, So You Want to Conquer Japan? is finished. I'd like to thank all the readers for following me on this journey, and, while this section is finished, I hope to be back in Strategy Wing soon enough with another section about an obscure SNES game none of you have ever heard of!
Status of Japan
-All of Japan belongs to us!
Koops, Your Emblem is on Fire
Part 14: We're saved!
I live! Father Koops has come back and is as ready as ever to feed you content, my children. None of you missed me, probably, but I impose myself upon you once more after what feels like a year... because it kinda has been a year. I come with two videos, too!
Do be warned, however, that uh, yeah, for some reason I can't, seemingly, record both the in-game music and my voice simultaneously anymore, which means I'm sacrificing the music for my voice to be audible. Anyway, with that out of the way, feast!
Part 14-A
Little warning here, next video has a bit of lag and some of it persisted for a while, and I was stupid enough to not pause the recording there while recording. I am not very advanced in terms of software, which means I am not able to edit these out, so uh... yeah sorry about that. It's all on me. Still, hope you somewhat enjoy.
Also these are new themes that you don't get to hear in the actual recording so... I guess play these in parallel with the main video,if you want.
New Narration Theme
New Map Theme
Part 14-B
Aaaaand that is all for this month. Next time we will keep witnessing Wil's ascension, oh and probably take back castle Celin, or something like that. Anyway, see you!
| The 'Shroom: Issue 172 | |
|---|---|
| Staff sections | Staff Notes • The 'Shroom Spotlight • 'Shroomfest Highlights |
| Features | Fake News • Fun Stuff • Palette Swap • Pipe Plaza • Critic Corner • Strategy Wing |
| Specials | Ultimate Location Battle |


