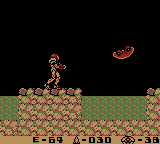
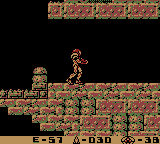
The 'Shroom:Issue 120/Strategy Wing
Director Notes
Written by: Meta Knight (talk)
Hello everyone and welcome to this month's issue of Strategy Wing. As I'm sure you are aware, this is Issue 120. Many sections throughout the 'Shroom are themed around 3D Mario games. Here in Strategy Wing some of our sections are limited in what we can reference due to the diversity in franchises, but that doesn't change the fact that there is still a lot of great content from our writers!
As always, we are willing to have more on the team. If you want to join the 'Shroom, go check out our sign up page. There aren't any announcements to make in terms of new writers for this team this month. Be sure to vote at the bottom of the poll as well for your favorite section.
Section of the Month
Thanks to everyone that voted! Congratulations to Yoshi876 (talk) for winning again! Thanks to DragonFreak (talk) and Paper Yoshi (talk) for their sections as well.
| STRATEGY WING SECTION OF THE MONTH | ||||
|---|---|---|---|---|
| Place | Section | Votes | % | Writer |
| 1st | Pokédex Power | 10 | 40% | Yoshi876 |
| 2nd | Isaac Synergies | 6 | 24% | DragonFreak |
| 3rd | Party Trick! | 4 | 16% | Meta Knight |
Meta Knight takes another request and looks at a minigame resembling Super Mario 64.
[read more]
Mario Kart: Wheel Tips Corner
Hello 'Shroom racers! And welcome to Mario Kart Wheel Tips Corner, here I plan to give you just some extra tips to help you with your racing, or just some changes in a track that might catch you off guard if you aren't prepared for them. Lights are out, let's start racing. I must start things off with an apology, however. Back in Issue 118, I talked about the Mushroom tires, I'd actually talked about them in a previous edition of Mario Kart: Wheel Tips Corner. I will make sure that I don't do this again, and make sure you always have original content to read. Thank you.
Kool Karts
You can't race if you don't have a Kart to do it in, so in this section, I'll give you some facts about a Kart, Bike, ATV or even tires and gliders that you can use hopefully for racing success.
As you read above, I once accidentally repeated myself with a Kool Part segment, so this time I've gone for a Kool Part that I haven't covered before: the Wood tires, which appeared in both Mario Kart 7 and Mario Kart 8. Things get confusing with this tire, however, as it gives different stat boosts for the games.
In Mario Kart 7 using this part improves the sea speed, air speed, acceleration, handling, sea handling, air handling, stability, and drift stats. However, this causes the speed, weight, and mini-turbo stats to drop, which makes it quite a good part to use, especially as a lot of courses employ the glider aspect in Mario Kart 7, which you can zoom ahead, and maneuver certain obstacles better. The speed stat does cause you to drop off, but hopefully the acceleration boost will have helped you get a significant enough lead.
In Mario Kart 8 the part improves the air speed, acceleration, traction, and mini-turbo stats. However, it causes the ground speed, water speed, anti-gravity speed, weight, ground handling, water handling, and anti-gravity handling stats to drop. In all honesty, although the acceleration boost will offset the speed drop, all the other stat drops in speed make this a part to avoid, as most of the courses use at least one of the gimmicks in them.
This makes the tires usage vary heavily between games, the fatter Wood tires in Mario Kart 7 are very good to use, but the slimmer ones in Mario Kart 8 are better off as firewood.
What's Changed?
Retro tracks are now a huge portion of the Mario Kart games, typically amounting to half the courses in the game. But usually these courses change some things up, so in this section I'll help you find out "What's Changed" in the retro tracks.
Wow! It's been quite a while since I've taken a look at a course that returned in Mario Kart 8, and again I can do nothing but apologize for this. However, before I turn this into Mario Kart: Wheel Tips Corner: The Apology, let's actually take a look at the course I've chosen. Moo Moo Meadows first appeared in Mario Kart Wii, as the second course in the Mushroom Cup, in Mario Kart 8 it returns as the first course of the Shell Cup. Overall, there's not a lot of changes to the track in its new guise. The graphics have obviously been overhauled, and the track now takes place during dawn, rather than daytime. More Moo Moo species, more farms, and windmills have been added to track, although these are all cosmetic, and are located off-track behind fences. Just before the final portion of the track, with all the Monty Moles is a branching path, the left one follows the layout of the original game, but the second one leads to a Glider Pad. The music has been changed, and the start / finish line has been redesigned, much like the one in Thwomp Ruins.
Ace Shortcut
In this small section I give you a way to shave a few seconds off your time, whether you know about it or not. Be warned, most of these shortcuts will require a Mushroom.
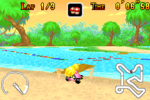
This issue I bring you a shortcut from Riverside Park.
Not long after the first corner, if the player drives slightly to the left, instead of following the track around, they can boost over the grass, and over a branch to the next portion of the track.
Isaac Synergies
Written By: DragonFreak (talk)
Hello Shroom readers! DragonFreak here for my second ever Strategy Wing section. Thanks everyone for reading last month. I had a lot of fun making making that section as I also did this month!
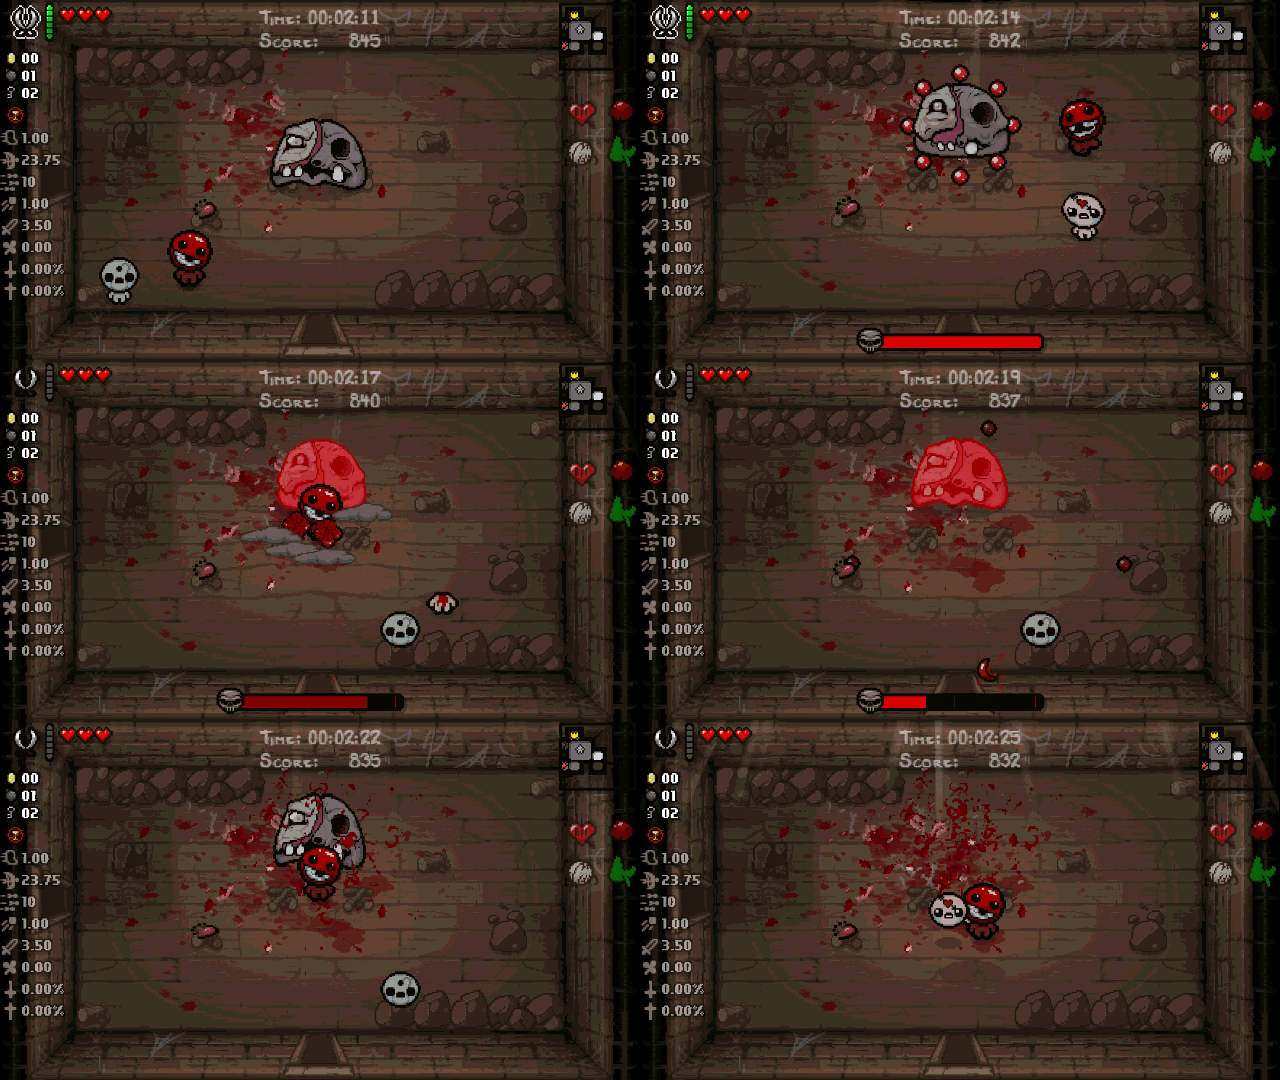
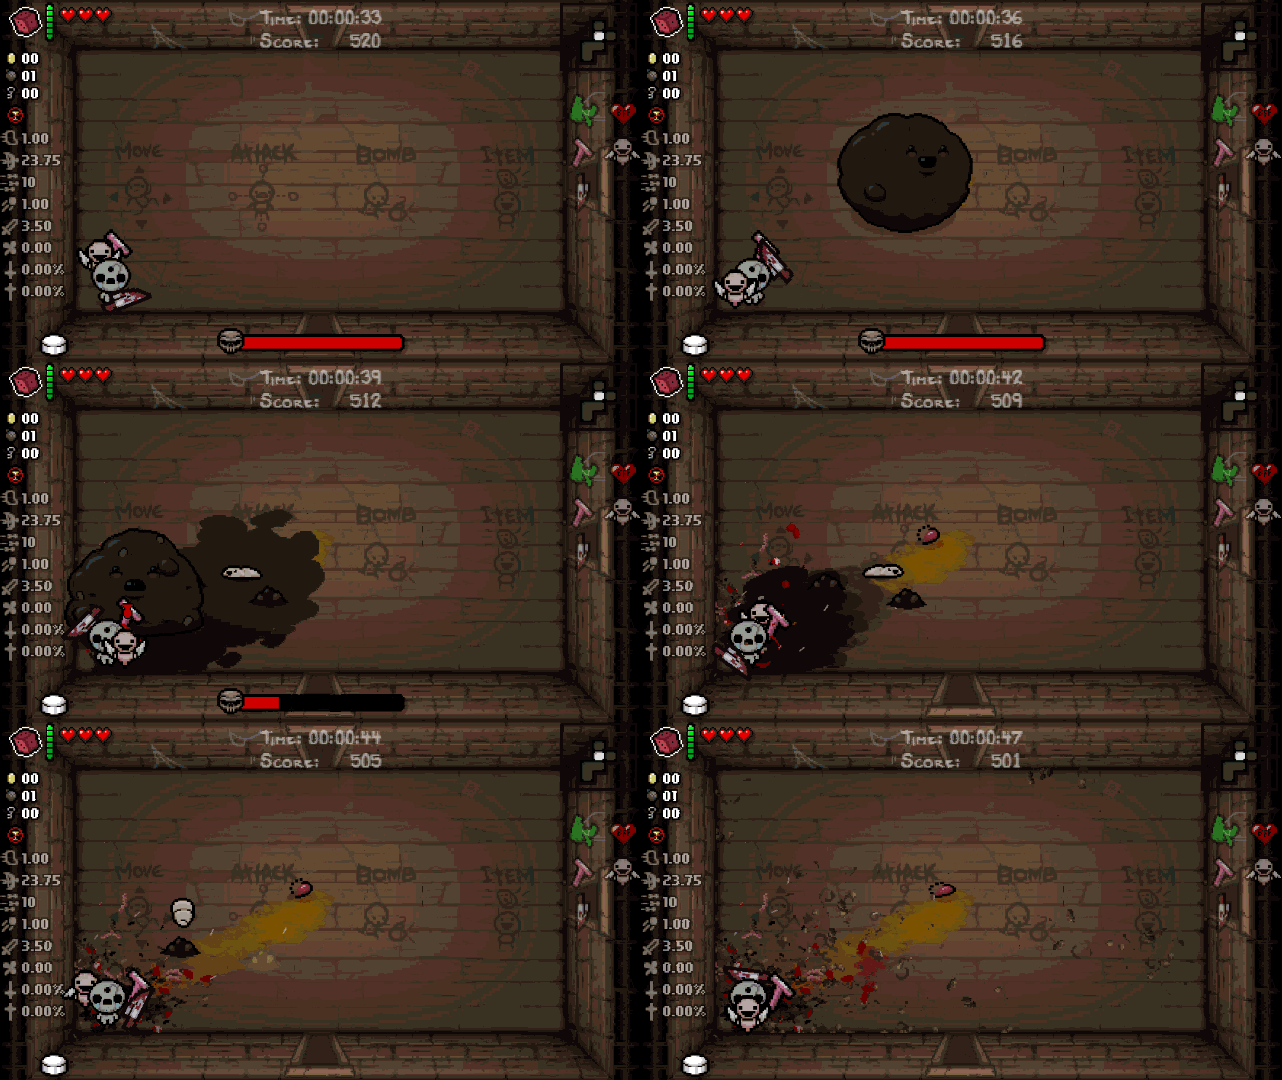
Speaking of this month, it’s Issue 120! A perfect excuse for throwing Mario into anything. Well if being on a Mario wiki wasn’t incentive enough. The Binding of Isaac is a game of references. There are dozens and dozens of references to other media, and a couple of those are Mario related as can be seen here. The only Mario-based item that has a wide arrange of synergies is Gnawed Leaf, an item based on the Super Leaf (also known as Raccoon Leaf or Tanooki Leaf). However the effect itself acts exactly like Tanooki Mario. When you don’t control Isaac in any way for one second, you will turn into a statue and be immune from all damage.
| Gnawed Leaf Example |
|---|
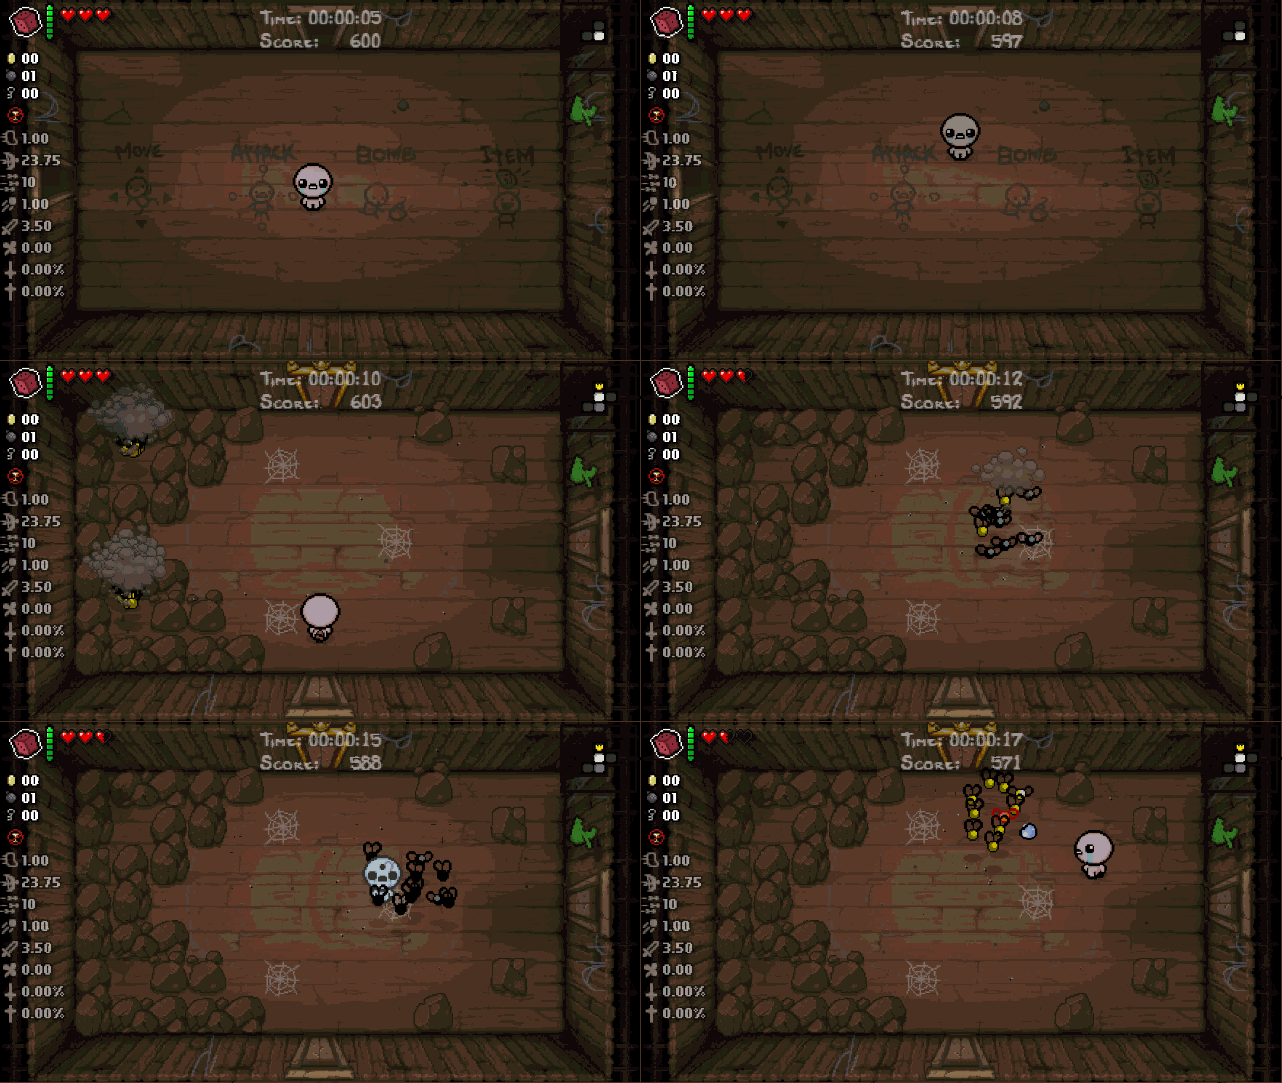
Items that prevent damage in Isaac are pretty important. Gnawed Leaf has a certain property that makes it potentially game breaking. Once you become invincible, you can stay that way for as long as you want. The potential for this is huge. There is a lot of ways to abuse gnawed leaf. One way is getting an item that activates on touching enemies. The best examples of these items are Midas Touch, which turns enemies into gold, and The Virus, that poisons enemies on touching. Even as a statue, enemies hitting you still counts as contact, so these items can work very effectively.
| Gnawed Leaf + Midas Touch + The Virus |
|---|
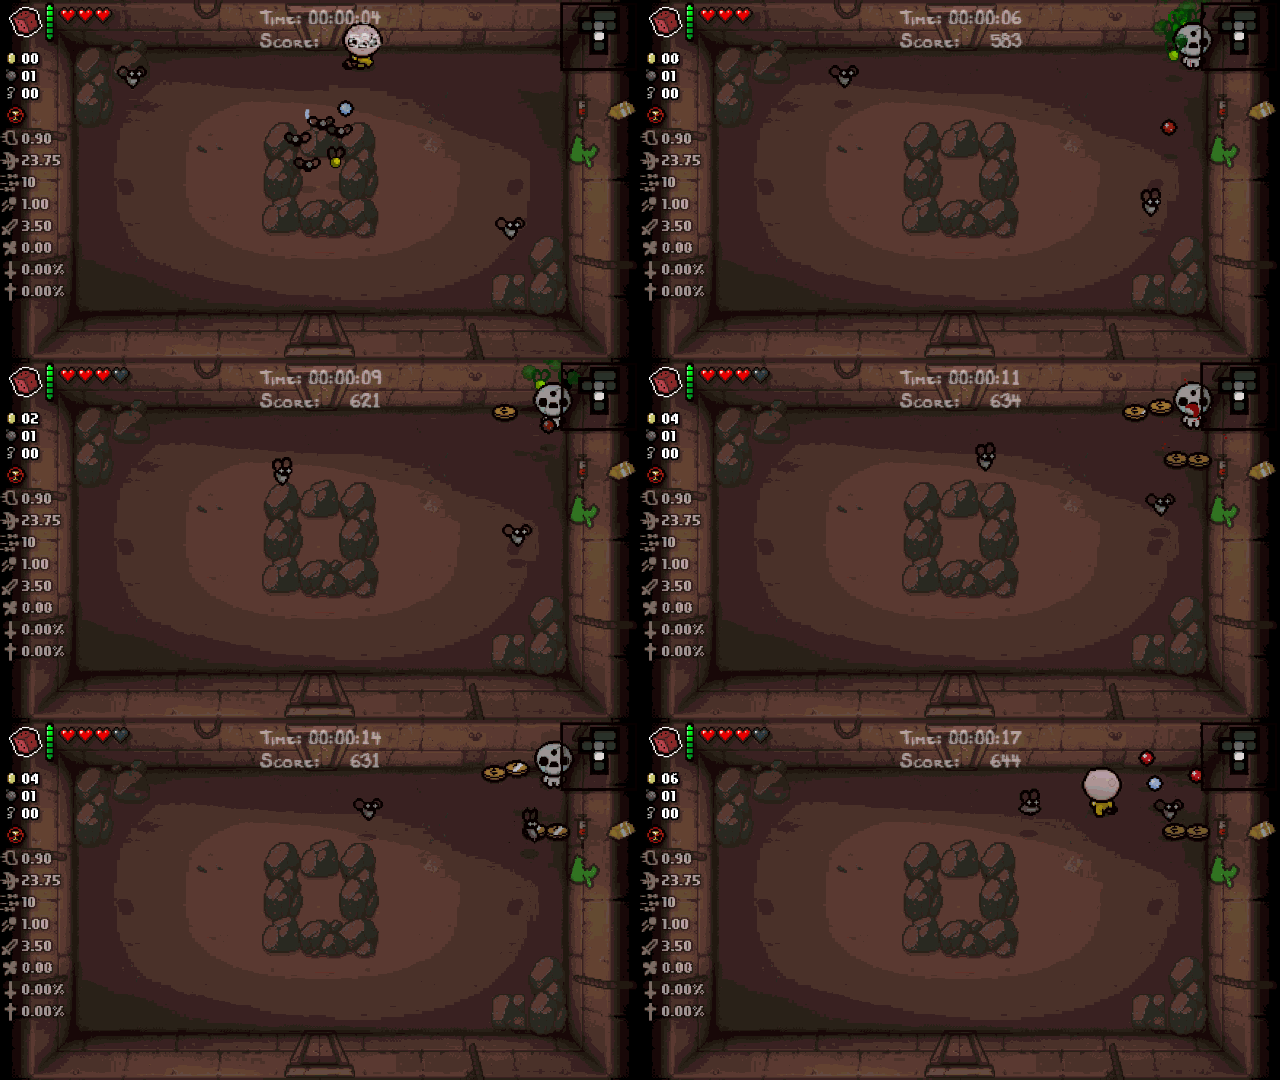
Next is how most people use Gnawed Leaf effectively: using familiars, which are small companions, to deal your damage for you while you are invincible. In the next two spoiler boxes I will show off the effectiveness of some of these familiars. Note that all of these familiars will be paired with BFFS!, an item that doubles the size and damage of all familiars, just to show off the truest power of these synergies.
First up is three chasing familiars: Pinking Shears, Level 4 Cube of Meat, and Daddy Long Legs
| Chasing familiars |
|---|
And for orbital familiars, here is the power of Sacrificial Dagger, Guardian Angel, and Mom’s Razor. Along with these familiars, I’ve added a trinket called Super Magnet, which pulls items and enemies towards you. It’s a trinket that I’m not fond of. Often times it makes runs dangerous, but with Gnawed Leaf and Orbitals, enemies will be literally pulled towards their death.
| Orbital familiars |
|---|
These examples are overpowered I have to admit, but you can see why Isaac players see Gnawed Leaf as a game breaking item. Now just for fun and celebration of the 120th Shroom Issue, I’ve made a video of an Ultimate Gnawed Leaf run, combining every synergy I mentioned above versus the Hush.
| Ultimate Gnawed Leaf run vs. The Hush |
|---|
|
|
Thanks everyone for reading and congrats to The ‘Shroom for another milestone in its legacy.
Galactic Expedition
Written By: Meta Knight (talk)
Metroid II Walkthrough
Current Inventory: 30 Missiles, Morph Ball
Metroid Counter: 0 killed, 39 left
Hello space cadets and welcome to Galactic Expedition. I know this is Issue 120, but there isn't a lot I can do to make Metroid theme around 3D Mario. That being said, man it feels so good to be able to start off on something new. This issue, we are going to start Metroid II: Return of Samus! Before we get started, let's take a look at a the story so you have an idea of how Metroid II works.
If you can recall back in Metroid 1, Samus Aran is a bounty hunter sent to Planet Zebes to stop the Space Pirates and Mother Brain from harnessing the power of the Metroids for their schemes. She put a stop to their schemes and defeated all the Metroids there. Now, in Metroid II, Samus must go to the homeworld of the Metroids on Planet SR388, with one goal. Wipe out every single Metroid to make them go extinct.
That being said, Metroid II has a counter system. There will be a large main tunnel, and there will also be lava. You will not be able to go down past the lava until all of the Metroids in that area are defeated. There is a counter in the bottom right corner telling you how many Metroids there are total, but if you pause the game, it will tell you how many are left in that area. When all the Metroids in the area are defeated, the lava will lower and you can make your way to the next area. With all that background information out of the way, lets get started.
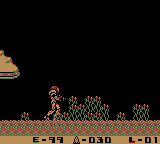
You'll start at Samus's ship. You might also have noticed that I already have put a current inventory counter at the top. That's because in Metroid II, you already start with the Morph Ball and 30 Missiles. In addition to that, Missile Tanks give you 10 missiles instead of 5. Anyway, proceed to the right. When you get to the next screen, continue through the long corridor. Jump down into the next screen.
Here there will be some blocks for you to break. You don't have bombs yet, but in Metroid II you can shoot down if you are in the air. So you can jump and shoot down through all the blocks. When you get to the ground, activate Morph Ball by tapping down and you will be able to go through the tunnel. When you get out of the tunnel, shoot the blocks up that are on the other side and climb up. You should see a pathway leading right. Take the tunnel and once again, you'll have to shoot down some blocks. Make your way down to the next screen.
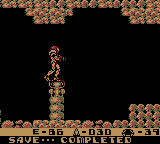
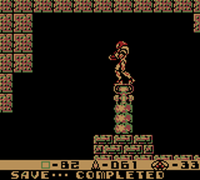
You should be on a narrow platform and you'll see that you can choose to go either left or right. Your destination is to the left, but there is a Save Station to the right extremely close to where you are that you can use real quick you can. Save Stations work similarly to how they do in the Mario RPG games if you have played one of those. When you die, your progress gets reset back to this save point.
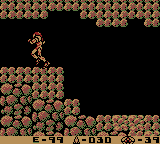
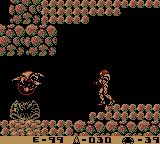
Whether or not you used the Save Station, you still have to go left. Either use the Morph Ball to roll under the large platform or you can jump over it. When you get to the next screen, head down the large chamber. When you get to the bottom go left. Keep moving left through the long corridor. When you get to the next screen, keep moving left again, but be prepared because you're going to have your first encounter!
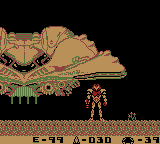
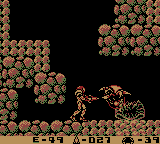
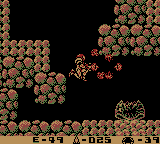
Boss Guide: Alpha Metroid
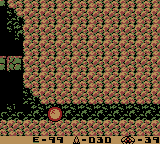
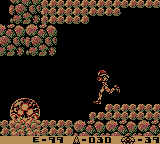
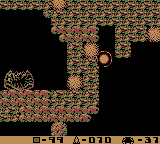
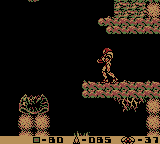
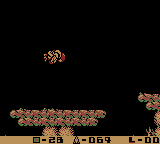
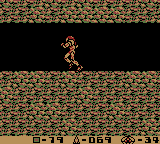
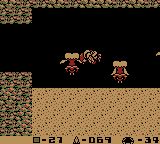
The Alpha Metroid is the first evolutionary step in Metroid growth. It doesn't have a whole lot for attacks, all it does is kind of float around. Despite how easy it is, the Alpha Metroid does technically count as a boss. All you have to do is shoot 5 missiles at it. There is no armor on it either unless you are playing the hip fan-made remake of AM2R (which I highly recommend if you can find a safe place to get it). It might be kind of silly that I'm having a boss guide for something like this, but it'll be good for when we get to more advanced forms in the Metroids. One other thing is I'll only cover each form like this once, so that it doesn't get redundant. If you've killed one Alpha Metroid, you know how to kill them all.
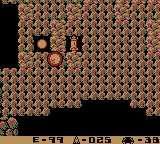
| Image Guide: Alpha Metroid |
|---|
Back to Path
Well now you've defeated your first Metroid. That's the only one in this area, so the lava will lower and you can make your way to the next area. Before we leave here, go left and climb up. You'll see a glowing ball of energy and a floating missile. Go into Morph Ball mode and you can go in the hidden tunnel, then get out of Morph Ball to touch these items. They are not pick-ups though, they are Energy and Missile recharge stations. They will replenish your health and ammunition, respectively. It'd be a good idea to stock up before you head out of this room. When you're satisfied, go left. Make your way all the way back to the large platform where there is the save station.
When you get to the save station, feel free to save but we want to continue right. Keep moving right through the long corridor and down the tunnels that come across your way. You'll soon see some more of the hazardous liquid that prevents Samus from moving deeper into the cave. For now, just keep moving right. When you go to the next screen you'll notice the music change. This means you're almost in the next area. Keep heading right and be careful not to get hit by the Chute Leeches that are throughout this area. When you reach the end, climb up the tunnel. Head right and you'll be in another tall chamber.
Climb up this tall chamber all the way to the top. When you get to the top, head right. You'll see several Gawron enemies that will try to harm you. Keep heading right and congrats you have entered Area 1. You'll be in like an area that looks like a temple. Move right and you'll see another save station.
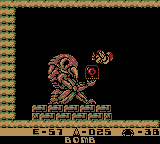
Go ahead and save, then move right. You'll be in a tall chamber. Move all the way to the bottom, and from there go left. You'll come across a red door. Use 5 missiles to open it and go inside to claim your prize! You will be able to obtain Morph Ball Bombs. Then you can use the bombs to obtain the Missile Tank that is below the blocks.
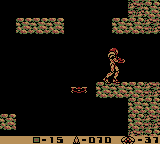
Go back to the right. Climb up the tunnel and take the first passage to the right that you see. There will be a turret that will try to shoot at you. Instead, you can shoot it to deactivate it. Then, jump on top of it and use Morph Ball. From there, you can move to the right in a hidden tunnel. Make sure you bomb when necessary so that you can get all the way through. On the other end, you will be rewarded with an Energy Tank. Like in Metroid 1, this will increase your total health capacity will increase by 100 units.
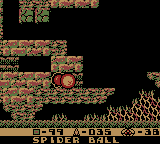
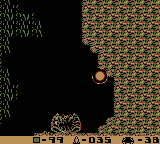
After obtaining the Energy Tank, continue heading right. You will be in a large chamber. Climb up and take the first passage you see on the right. Be careful not to get hit by the turrets. The music will change again signifying that you exited the temple. Continue to move right to the next screen. You will notice a Metroid shell signifying that one is nearby, but continue right ignoring it for now. Use Morph Ball to make your way to the end of the tunnel, and jump down in the pit. Use bombs to propel yourself through the narrow crannies, and at the end of the room you will be able to obtain the Spider Ball. This will allow you to climb any wall. To activate the Spider Ball, simply press down while already in Morph Ball. From there, you can move left and right to climb walls. Use the Spider Ball, bombs, and jumps to escape this room by moving back up.
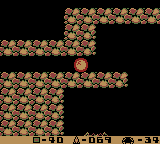
Make your way back to where the empty Metroid shell is. Now that we have the Spider Ball, we can actually climb up to where it is. Activate the Spider Ball and scale the wall to the right of the shell. You will see another passageway leading right. Enter it and be prepared for another Alpha Metroid encounter. Don't let it defeat you, and be careful of the spikes in the room as well. When the Metroid is defeated, head back out the room to the left.
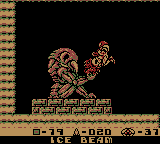
Jump down to the left, and head back in the temple. You will be back in the tall chamber. Climb all the way down to the bottom until you can't go down anymore. Then, enter the passageway to the left. Be careful not to get hit by the turrets. You will be in a long corridor. Make your way through while avoiding the turrets and you will be at another red door. Inside you will be able to obtain the Ice Beam. Like in Metroid 1, beams do not stack in this beam. If you decide to get another beam later, you will not be able to switch back to another beam until you find it again. Either way, make your way back to the tall chamber to the right.
When you're back in the tall chamber, climb up and take the first passage you see to the right. In this room, there are 3 Missile Tanks to obtain. The first one is in plain sight and you can easily shoot the blocks to get inside and get it. Continue right and you will see the other two. One of them is easy to get. Just jump up and shoot down to break the blocks and obtain it. For the last one, you will have to activate the Spider Ball and scale the right wall. Make your way to the breakable block on the ceiling below the Missile Tank on the top. Be careful to not have the bomb make you fall. Place the bomb and move left out of the way, then move back and let the Spider Ball carry you up to the Missile Tank. When you've obtained all 3 Missile Tanks, move back left to the tall chamber.
In the tall chamber, climb all the way to the top. Once again, you'll have to avoid the turrets. When you get all the way to the top, take the passageway to the left. You'll have to use the Spider Ball in order to reach the passsageway as well. In this room there are 2 Missile Tanks to obtain. The first one is in plain sight and can be grabbed by shooting the breakable blocks. Keep moving left and you will see another Missile Tank. Break the blocks and get the Missile Tank. Continue left and exit the room.
You'll have exited the temple but it looks like you're in a different area than before. Bomb the breakable block and move left. Jump off towards the left, and when you land on the ground, go right to the Save Station. We've got quite a few Metroids to hunt down now, so it'd be a good idea to save in case you die. Exit back out to the left, there's nothing left of interest here. Keep heading left, back through the long corridor with the Gawrons, so you get to the other very tall chamber. When in the tall chamber, climb all the way to the bottom, and enter the passageway to the right.
When entering this room, you'll see another Metroid shell, indicating that there are some nearby. Enter Morph Ball mode and bomb the wall at the bottom. Now a trick that is useful in Metroid II, is planting a bomb on the ground, then after the bomb goes off, push down to activate the Spider Ball. This will allow you stick to the top wall in certain situations. Use this trick to stick to the ceiling to the right of the blocks you just bombed. Scale this wall and eventually you can come across another Energy Recharge station. When you get it, make your way to the right at the end of the corridor. You will have to shoot some sand-like blocks in order to get through. Be careful to not get hit by the enemies as well.
When you head right to the next screen, jump down and you'll be on another Metroid shell. Enter the passageway to the right of this shell. At the end of this long corridor, there will be another Alpha Metroid for you to defeat. You'll have to be careful with platforming, as there is a lot of spikes and harmful weeds that will damage you. After killing the Alpha Metroid, you will have to go all the way back to the left to the Metroid shell.
From the Metroid shell, keep moving left. You'll be in a tall chamber and will fall on another Metroid shell. There's one Alpha Metroid on both the right and left sides. It doesn't really matter what order you defeat them in, but as long as you go all the way to the left and defeat the Metroid there, then do the same for the right side, you should be good. When both Metroids are defeated, another earthquake will be triggered. From there, you can go back to the Metroid shell, and navigate your way all the way back up to where the long corridors with the sandy blocks are.
From here, if you need to scale the wall for more health with the Energy Recharge station again, feel free to use it, but our destination lies to the left. Make your way through the long corridor, to where the first Metroid shell was. Go left to the next screen. You will be back in the tall chamber that was at the start of the area. Climb up the chamber, and take the first passageway back to the left. All the Metroids in this area are defeated so we are going back to the main tunnel in order to get to the next area.
Go left through the passageway and down the next chamber. Head left from here and eventually you'll hear the amazing tunnel theme again, signifying that you're in the main area. You will notice that the hazardous liquid that was in this room before no longer is there. Since you're able to, move down. It's quite a long fall, but keep going down and follow the pathways. Eventually you will get to another room where there's more of the hazardous liquid. Drop down from the platform, and move left where the lava is. There is a short tunnel that you can enter in Morph Ball mode above a Metroid shell. Take the tunnel and go left.
When you drop down in this room, move left. This is a short corridor with only a few enemies. From here you will be in a tall chamber. Climb up to the very top and head left. In this room, there are a lot of strange platforms, and several sandy blocks. However, be very careful when you enter the next screen. There is an Alpha Metroid ready to ambush you! Have your missiles ready and don't let it defeat you. When you defeat it, move left and you'll be in Area 2.
Freeze the enemies so they don't harm you, and move left. When you enter the door, you will be in a room with another Save Station. Go ahead and save, because with that marks a good place to end this first part of Metroid II! It has been a progressive start, we already have defeated 6 Alpha Metroids, and have picked up a slew of power-ups. As always, thank you so much for reading, and I wish you all happy journeys!
Party Trick!
Written By: ![]() Meta Knight (talk)
Meta Knight (talk)
![]() Welcome to this month's Party Trick! This month we have a request from Lord Bowser (talk), who suggested to do Bowser's Pinball Machine from Mario Party DS!
Welcome to this month's Party Trick! This month we have a request from Lord Bowser (talk), who suggested to do Bowser's Pinball Machine from Mario Party DS!
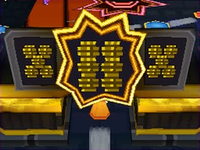
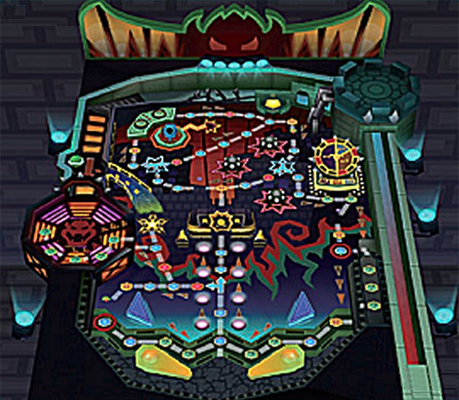
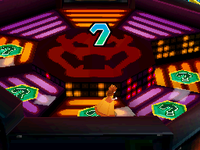
Players start in the very bottom center, in between the two yellow pinball flippers. This board is your typical get to the star and purchase for 20 coins kind of map. However, this board has several interesting features. There's plenty of Spaces scattered throughout the map, but first lets look at the slot machine. The slot machine is the large contraption in the center of the board. When a player passes by it, two panels will be stuck. You will have to press the A button to stop the third panel and match the other two. There isn't much strategy here, it's mostly just luck. However, it is a good opportunity to win big. If you do match the panel, you will win ten times the amount of circles on the board. For example, if the panels are a one, you win 10 coins. If it's six, you win 60 coins. This can be a good way to rack up money quickly if you can manipulate the wheel in your favor.
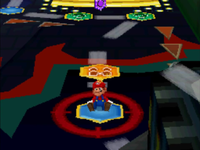
Next, let's take a look at the 4 Happening Spaces in the bottom center of the board in front of the yellow flippers. If you land on it, you will be flung across the board, and hit a yellow bumper at the top. You will also get 10 coins. This is a quick way to get back across the other side of the board. In contrast, there are 2 Happening Spaces in the top left next to a cannon. If you land on one, you will hop in the cannon and will be shot towards the bottom of the board. You will get to choose which direction you are shot. If you decide to be shot left, you will land on the Blue Space with the recticle around it near the shop in the bottom left. If you decide to shoot right, you will land on the Blue Space with the recticle around it below the roulette machine. This can be used to your advantage to get yourself closer to the Star if you're lucky enough to land on one.
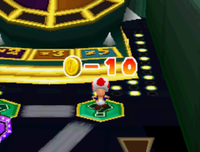
The next area of interest is the 2 Happening Spaces to the right below the large roulette wheel in the right of the board. This roulette wheel is just what it sounds like. There is a 2x, 3x, and 5x on the wheel. You have to bet a certain amount of money and guess where the wheel will land. The greater the odds, the smaller your chance of landing on it will be. However, there will be a bigger payoff if it is successful. For instance, if you bet 20 coins on the 5x, you can earn a 80 coin profit for a total of 100 coins! This is another way to rack up on coins quickly, but like real roulette there is a lot of luck. You need to play your odds right so they stack with you.
The last major feature of this board has to do with the 3 Happening Spaces to the right below the roulette wheel. These are next to a plunger of a pinball machine. If you land on this, Bowser will launch you with the plunger. Then, you will most likely land in the Bowser Zone. In the Bowser Zone there are 5 Happening Spaces. Landing on one of these activates the Zero Flame and you will lose all of your coins and stars! However, there is a possibility that you could also land in the Star Zone. If you land here, you'll pass through and gain up to 3 stars! This is a very risky way to get stars quick. If you have a double dice block you may be able to get out of the Bowser Zone untouched, so that is one possibile strategy that you can use to your advantage. All of these features on Bowser's Pinball Machine give a gambling vibe. There's a lot of risk, but also a lot of reward. You'll have to do everything you can to get the odds in your favor.
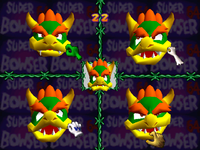
Since this is Issue 120, let's take a look at a minigame that has a strong resemblance to Super Mario 64. In Mario 64 on the title screen, you can play around with Mario's face. Well, in Mario Party 1 (and Mario Party 2 as it was brought back), there is a minigame where you can do just that. Face Lift is a game where you play around with a face, and try to match the picture. In Mario Party 1 generally it's just Bowser's face. You will need to drag parts of his snout, horns, hair, and mouth in order to match the picture. Watch the opening image carefully, and pay attention to the proportions of how the different body parts are moved around. This minigame is pretty fun, if you thought moving Mario's face was fun, now you can move Bowser's. In Mario Party 2 the face is of one of the players, and depending on who it is you might have a harder time. The same concepts apply though.
That's all for this month's Party Trick! Have a minigame or board you'd like me to do? Send me a message on my talk page or message me on the forums and you could be mentioned in next month's edition!
Mario Calendar
Written By: Paper Yoshi (talk)
Hello, and welcome to March's "Mario Calendar"!! I suppose there's no news regarding the section this time, so let's see all the Mario, Yoshi, Wario and DK games released sometime during March!
| Abb. | Console/Store |
|---|---|
| NES | Nintendo Entertainment System |
| SNES | Super Nintendo Entertainment System |
| N64 | Nintendo 64 |
| GCN | Nintendo GameCube |
| Wii | Nintendo Wii |
| Wii U | Nintendo Wii U |
| GB | Game Boy |
| GBC | Game Boy Color |
| GBA | Game Boy Advance |
| NDS | Nintendo DS |
| 3DS | Nintendo 3DS |
| WiiVC | Wii Shop - Virtual Console |
| 3DSVC | Nintendo eShop - Virtual Console |
| New3DSVC | Nintendo eShop - Virtual Console |
| WiiUVC | Nintendo eShop - Virtual Console |
| Abb. | Region |
|---|---|
| NA | North America |
| JP | Japan |
| EU | Europe |
| AU | Australia/New Zealand |
| KO | Republic of Korea |
| CN | People's Rep. of China |
| BR | Brazil |
- March 1st
- 1997 (EU/AU): Super Mario 64 (N64)
- 1998 (NA): Wario Land II (GB)
- 2012:
- (JP): Mario & Sonic at the London 2012 Olympic Games (3DS)
- (EU/AU): Super Mario Bros. (NES-3DSVC)
- March 2nd
- 2012 (EU): Mario Party 9 (Wii)
- 2016 (KO):
- Donkey Kong (NES-3DSVC)
- Super Mario Bros. 2 (NES-3DSVC)
- Wario Land II (GBC-3DSVC)
- March 3rd, 2016 (NA/EU): Super Mario World (SNES-New3DSVC)
- March 4th, 2016:
- (JP): Donkey Kong Country (SNES-New3DSVC)
- (JP/AU): Super Mario World (SNES-New3DSVC)
(As Super Mario World: Super Mario Bros. 4 in JP)
- March 5th
- 2007 (NA): Wario: Master of Disguise (NDS)
- 2015 (NA): Mario vs. Donkey Kong: Tipping Stars (Wii U & 3DS)
- March 6th
- 2007 (JP): Yoshi no Tamago (NES-WiiVC)
- 2009 (EU): New Play Control! Mario Power Tennis (Wii)
- 2014 (NA): NES Open Tournament Golf (NES-WiiUVC)
- March 7th, 2013 (NA): Wrecking Crew (NES-3DSVC)
- March 8th
- 2007:
- (JP): Yoshi's Island DS (NDS)
- (KO): New Super Mario Bros. (NDS)
- 2012 (AU): Mario Party 9 (Wii)
- 2007:
- March 9th
- 1996 (JP): Super Mario RPG (SNES)
- 1999 (EU/AU): Mario Party (N64)
- 2007 (EU): Mario vs. Donkey Kong 2: March of the Minis (NDS)
- 2008 (NA): Super Smash Bros. Brawl (Wii)
- 2009 (NA): New Play Control! Mario Power Tennis (Wii)
- March 10th
- 1998 (NA): Yoshi's Story (N64)
- 2016 (EU):
- Super Mario Advance (GBA-WiiUVC)
- Super Mario World: Super Mario Advance 2 (GBA-WiiUVC)
- Super Mario Advance 4: Super Mario Bros. 3 (GBA-WiiUVC)
- March 11th
- 2005 (EU):
- Super Mario 64 DS (NDS)
- WarioWare: Touched! (NDS)
- 2010 (CN): WarioWare: Snapped! (DSiWare)
- 2012 (NA): Mario Party 9 (Wii)
- 2016 (AU):
- Super Mario Advance (GBA-WiiUVC)
- Super Mario World: Super Mario Advance 2 (GBA-WiiUVC)
- Super Mario Advance 4: Super Mario Bros. 3 (GBA-WiiUVC)
- 2005 (EU):
- March 12th, 2015 (JP): Mario Party 10 (Wii U)
- March 14th
- 1995 (JP): Mario's Picross (GB)
- 2005 (NA):
- Donkey Kong Jungle Beat (GCN)
- Yoshi Touch & Go (NDS)
- 2014 (NA/EU): Yoshi's New Island (3DS)
- March 15th, 2014 (AU): Yoshi's New Island (3DS)
- March 16th, 2016 (JP): Game & Watch Gallery 4 (GBA-WiiUVC)
- March 17th
- 2005:
- (AU): Donkey Kong Jungle Beat (GCN)
- (JP)" Donkey Konga 3: Tabe-houdai! Haru Mogitate 50 Kyoku (GCN)
- 2016 (EU): Super Mario Kart (SNES-New3DSVC)
- 2005:
- March 18th
- 2005 (EU): Mario Party 6 (GCN)
- 2010 (KO): Mario Power Soccer (Wii)
- 2016:
- (NA/BR): Mario & Sonic at the Rio 2016 Olympic Games (3DS)
- (AU): Super Mario Kart (SNES-New3DSVC)
- March 19th (JP)
- 2014: Super Mario USA (NES-WiiUVC)
- 2015: Mario vs. Donkey Kong: Everyone in Mini-Land (Wii U & 3DS)
- March 20th
- 2013 (JP): Luigi Mansion 2 (3DS)
- 2014:
- (JP/KO): Mario Party: Island Tour (3DS)
- (BR): Donkey Kong Country: Tropical Freeze (Wii U)
- 2015:
- (NA/EU): Mario Party 10 (Wii U)
- (EU): Mario vs. Donkey Kong: Tipping Stars (Wii U & 3DS)
- March 21st:
- 2000 (JP): Wario Land 3: Fushigi na Orgel (GBC)
- 2001 (JP): Super Mario Advance (GBA)
- 2003 (JP): Made in Wario (GBA)
- 2012 (JP): Game & Watch Gallery 2 (GBC-3DSVC)
- 2015 (AU):
- Mario Party 10 (Wii U)
- Mario vs. Donkey Kong: Tipping Stars (Wii U & 3DS)
- March 24th
- 2013 (NA): Luigi's Mansion: Dark Moon (3DS)
- 2016:
- (NA/EU): Donkey Kong Country (SNES-New3DSVC)
- (EU): Donkey Kong Country 2: Diddy's Kong Quest (SNES-New3DSVC)
- (NA):
- Super Mario Kart (SNES-New3DSVC)
- Yoshi's Story (N64-WiiUVC)
- March 25th
- 2008 (JP): Dr. Mario & Saikin Bokumetsu (WiiWare)
- 2016 (AU):
- Donkey Kong Country (SNES-New3DSVC)
- Donkey Kong Country 2: Diddy's Kong Quest (SNES-New3DSVC)
- March 26th
- 1998 (EU): Wario Land II (GB)
- 2009 (AU): New Play Control! Mario Power Tennis (Wii)
- March 27th:
- 2007 (JP): Donkey Kong Jr. Math (NES-WiiVC)
- 2013 (JP): Donkey Kong 3 (NES-3DSVC)
- 2014 (NA): Dr. Mario (NES-WiiUVC)
- March 28th
- 2005 (NA): Mario Party Advance (GBA)
- 2010 (NA): WarioWare: D.I.Y. (NDS)
- 2013:
- (EU/AU): Luigi's Mansion 2 (3DS)
- (JP): Game & Wario (Wii U)
- March 29th, 2010 (NA): WarioWare D.I.Y. Showcase (WiiWare)
- March 30th
- 2006 (AU): Super Princess Peach (NDS)
- 2016 (JP): Mario Party 2 (N64-WiiUVC)
- March 31st
- 2005 (JP): Yakuman DS (NDS)
- 2009 (NA): Game & Watch Collection 2 (NDS)
- March 1995 (NA): Mario's Picross (GB)
And that's it, everyone!! See you next month!!
Pokédex Power
Hello everyone, it's me, Yoshi876 again with a new edition of Pokédex Power, a section that walks you through the Pokédex entries of all 802 Pokémon. So apparently they've decided to ditch the National Pokédex in Gen VII, so all the Pokémon without Pokédex entries will remain as such, I have therefore taken that as my cue to use any Pokémon I want for this section. I am sticking with a Pokémon that appeared in Sun and Moon though for this section, but in the next one I won't be.
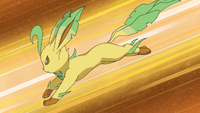
Although Spring hasn't officially started yet, I believe that's around the 20th / 21st, but I may be mistaken, I have decided to pick a nice Grass-type Pokémon. I'm not usually a Grass-type Pokémon user, a vast majority of them don't really appeal to me, although I have used Grass-type starters in the past, and when I get round to playing Pokémon Moon, Rowlet will be my choice. Anyhow, before we get off-topic, it's time to introduce you to this month's pick: Leafeon. Leafeon is one of Eevee's evolutions, and was introduced in Pokémon Diamond and Pearl, alongside Glaceon, the Ice evolution, which we will look at in a future edition.
Generation IV
| Pokémon Diamond | Just like a plant, it uses photosynthesis. As a result, it is always enveloped in clean air. |
| Pokémon Pearl | Just like a plant, it uses photosynthesis. As a result, it is always enveloped in clean air. |
| Pokémon Platinum | It basically does not fight. With cells similar to those of plants, it can perform photosynthesis. |
| Pokémon HeartGold | When you see Leafeon asleep in a patch of sunshine, you'll know it is using photosynthesis to produce clean air. |
| Pokémon SoulSilver | When you see Leafeon asleep in a patch of sunshine, you'll know it is using photosynthesis to produce clean air. |
So these are the Pokédex entries that start off Leafeon, and boy do they like to hammer in this photosynthesis point, with all of them bringing it up in some way or another, most of them also bring up the fact that Leafeon produces clean air, which is factually correct. Plants take in carbon dioxide, photosynthesis, and expel it as oxygen. Going by the HeartGold and SoulSilver entries, Leafeon photosynthesises whilst it is asleep, and because photosynthesis requires the sun, it's possible that Leafeon is a nocturnal creature. Platinum is the most interesting of the entries. The first sentence shows Leafeon off as a pacifist, always avoiding fighting, but is this only when it's in the wild? If it's someone's Pokémon, then it'd be expected to participate in Pokémon battles, but will it just refuse to do so if used? Also, the final sentence states how its cells are similar to plants, and that's one evolutionary process! Eevee is obviously an animal, with no bearing to plants, so the fact that all of its animalistic cells are replaced by plant cells shows how powerful the evolutionary process is.
Generation V
| Pokémon Black | It basically does not fight. With cells similar to those of plants, it can perform photosynthesis. |
| Pokémon White | It basically does not fight. With cells similar to those of plants, it can perform photosynthesis. |
| Pokémon Black 2 | With similar to those of plants, it performs photosynthesis inside its body and creates pure air. |
| Pokémon White 2 | With similar to those of plants, it performs photosynthesis inside its body and creates pure air. |
Nothing massively interesting came from Gen V, it stays with the photosynthesis point, and the production of clean air. All these entries do is confirm that like plants, Leafeon performs photosynthesis internally, rather than externally.
Generation VI
| Pokémon X | When you see Leafeon asleep in a patch of sunshine, you'll know it is using photosynthesis to produce clean air. |
| Pokémon Y | Just like a plant, it uses photosynthesis. As a result, it is always enveloped in clean air. |
| Pokémon Omega Ruby | When you see Leafeon asleep in a patch of sunshine, you'll know it is using photosynthesis to produce clean air. |
| Pokémon Alpha Sapphire | Just like a plant, it uses photosynthesis. As a result, it is always enveloped in clean air. |
Nothing new came from Generation VI, just rehashes of the Pokémon Diamond / Pearl, and Pokémon HeartGold / SoulSilver entries.
Generation VII
| Pokémon Sun | Its cellular composition is closer to that of a plant than an animal. It uses photosynthesis to produce its energy supply without eating food. |
| Pokémon Moon | The younger they are, the more they smell like fresh grass. With age, their fragrance takes on the odor of fallen leaves. |
Contrary to other Generation VII entries, Pokémon Sun isn't actually that interesting. It simply restates what we already know, but uses different words to convey that message, we know that Leafeon is more plant than animal, and although not directly stated, seeing as the Pokémon never fought, and used photosynthesis, it was easily inferred that that was how it got its energy instead of eating. Pokémon Moon on the other hand is more interesting. However, does it mean young Leafeon, or young Eevee that were evolved into Leafeon? This also points to the fact that Pokémon age, something never actually seen in the games.
Conclusion
Leafeon doesn't have the most interesting of Pokédex entries, as much of the information is repeated, but it has far more interesting entries than Magby did last month. It's also nice to see scientific accuracy, especially in a series where some Pokédex entries are just ludicrous. Leafeon could have some more interesting Pokédex entries that deviated from the photosynthesis spiel, just to make it more unique.
| The 'Shroom: Issue 120 | |
|---|---|
| Staff sections | Staff Notes • The 'Shroom Spotlight |
| Features | Fake News • Fun Stuff • Palette Swap • Pipe Plaza • Critic Corner • Strategy Wing |
| Specials | Counting 120 Green Stars |
